'%20d='M0%208a8%208%200%200%201%208-8h24a8%208%200%200%201%208%208v24a8%208%200%200%201-8%208H8a8%208%200%200%201-8-8V8Z'/%3e%3cpath%20fill='%23fff'%20d='M32.576%206C12.293%206%208.776%2025.887%207.424%2034H9.1c.45-2.977%203.493-14.748%2010.899-20.287%200%200-5.633%206.976-6.572%2015.051%203.426-.652%2013.845-3.372%2016.056-12.927l-3.84-.61c1.352-1.351%204.909-5.17%206.931-9.226V6Z'/%3e%3cdefs%3e%3clinearGradient%20id='reapit-lettings__a'%20x1='20.702'%20x2='20.702'%20y1='.351'%20y2='31.228'%20gradientUnits='userSpaceOnUse'%3e%3cstop%20stop-color='%235573FD'/%3e%3cstop%20offset='.575'%20stop-color='%234E56EA'/%3e%3c/linearGradient%3e%3c/defs%3e%3c/svg%3e)
How to Sync Your Calendar with Office 365/Outlook
This article will run through how to sync your calendar with Office 365/Outlook
How to Sync Your Calendar with Office 365/Outlook
This article will run through how to sync your calendar with Office 365/Outlook in Reapit Lettings.
Note: These steps must be completed by the person who has access to the inbox calendar that is being synced.
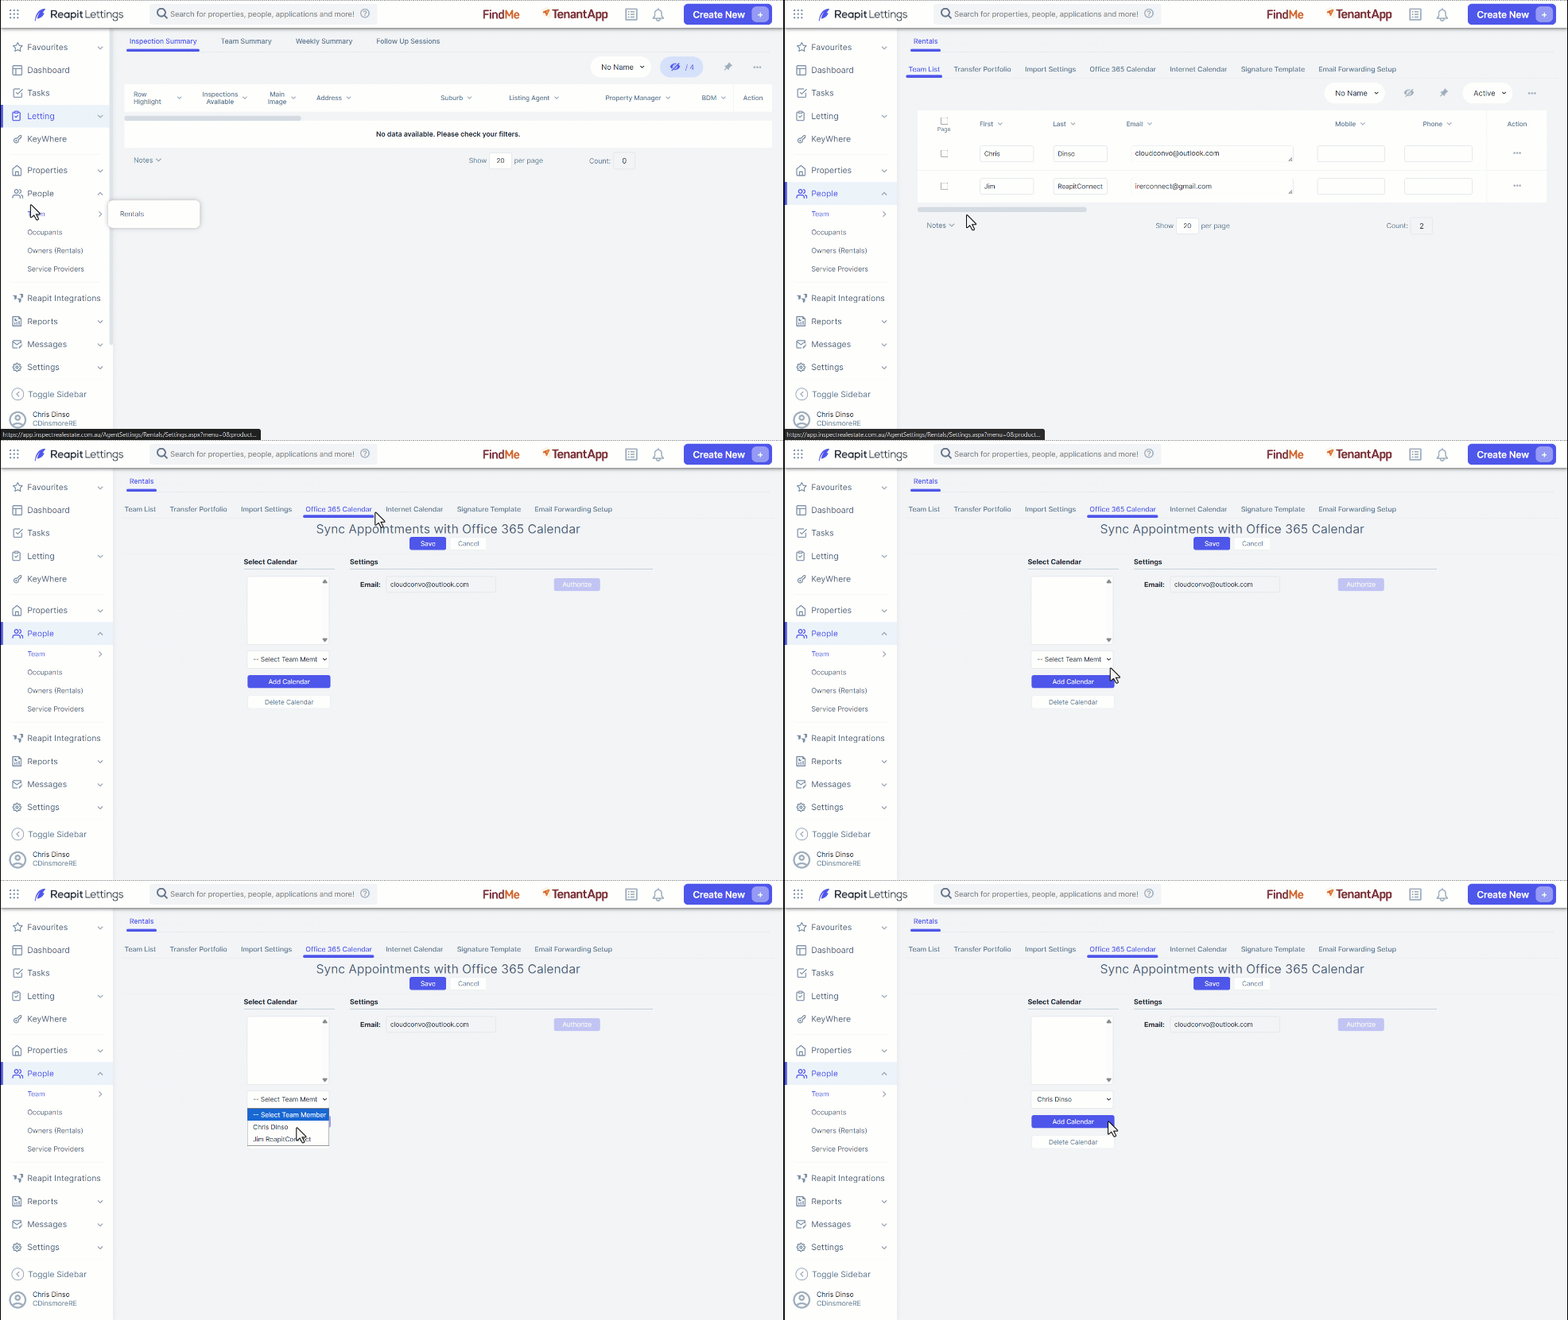
- Navigate to People
- Click on Team
- Click on Rentals.
- Navigate to the Office 365 Calendar tab.
- Select the team member from the drop down.
- Click Add Calendar.
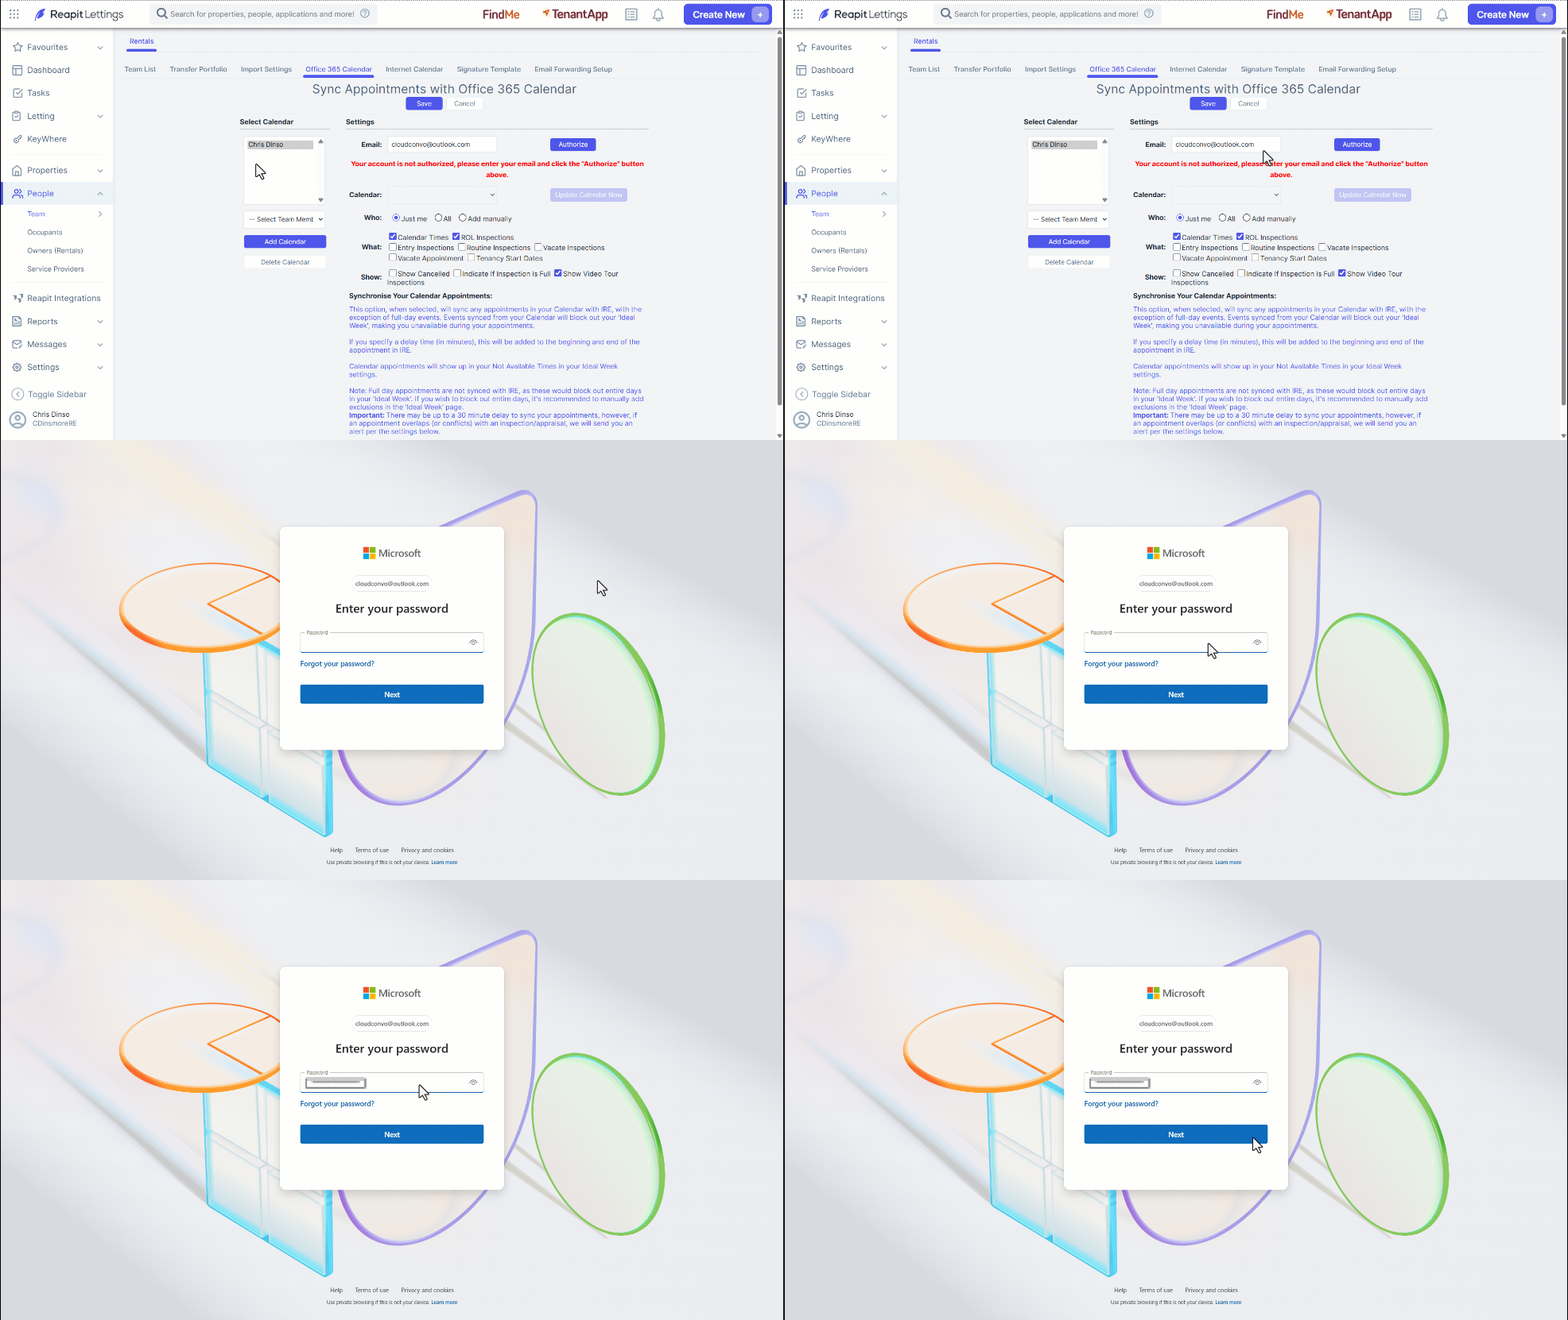
- First, verify if the correct email address is entered (update if required).
- Click Authorize.
- You will be redirected to the Microsoft login page.
- Enter your Outlook/365 password.
- Click Next.
- Click Allow. The success of the authorisation appears.
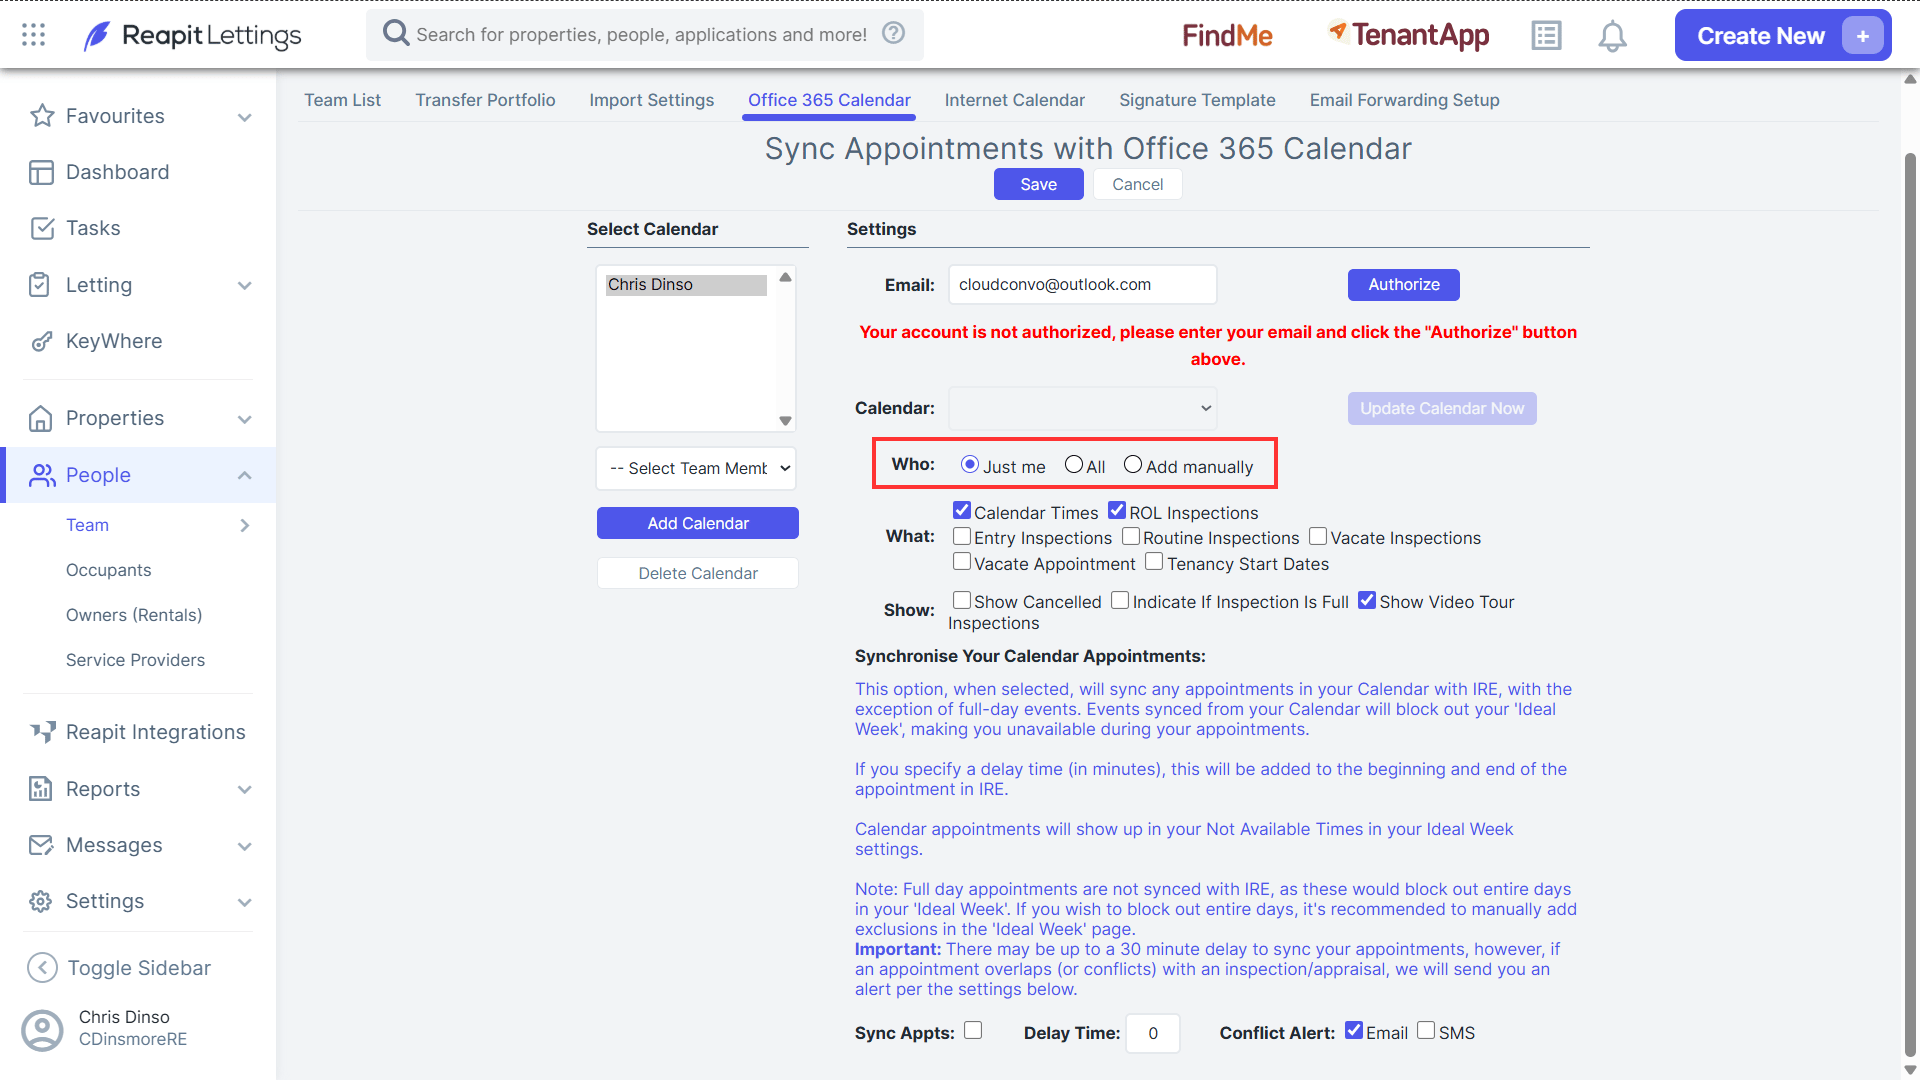
- You can now select update the settings to reflect what they require from the synchronisation. It is recommended to keep the default settings; below are details on each setting:
- Who you would like to be synced: Just you, Everyone (All) or to add each event manually.
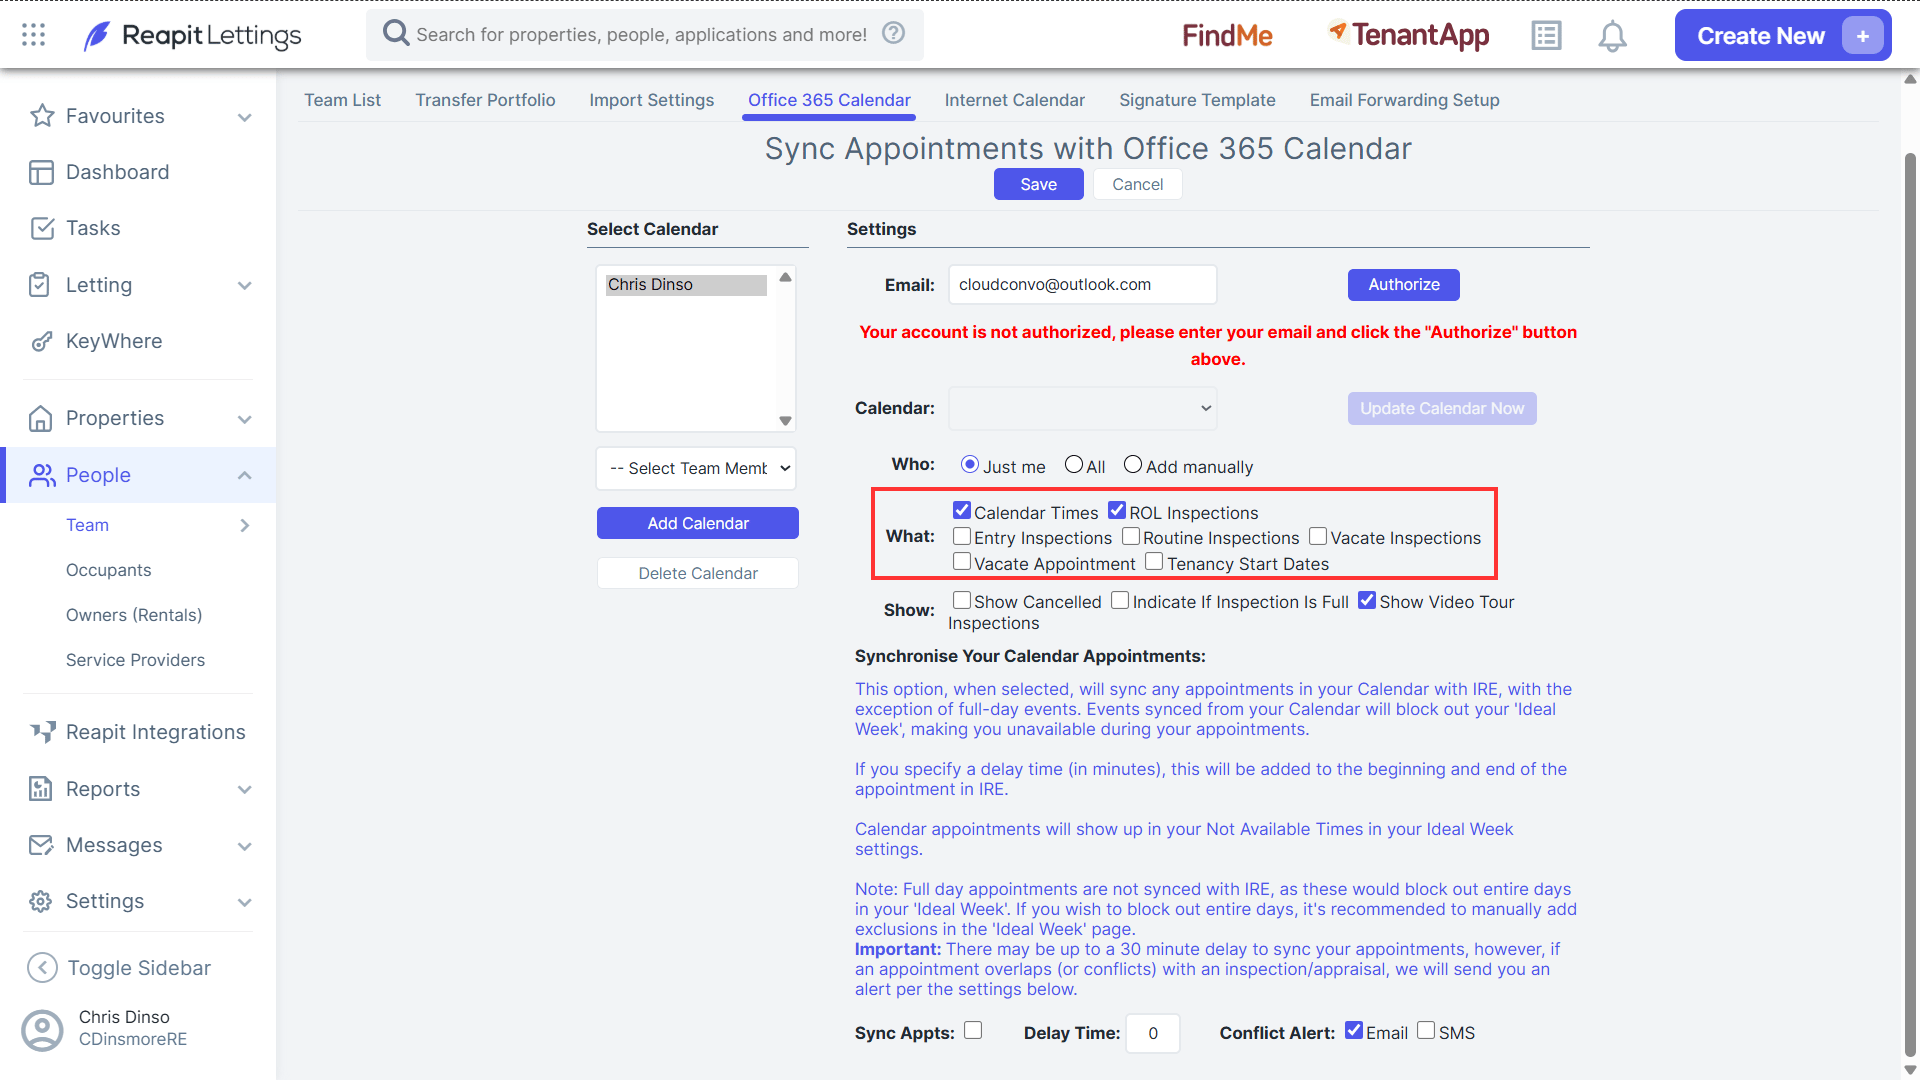
- What gets synced: Calendar Times & Inspections.
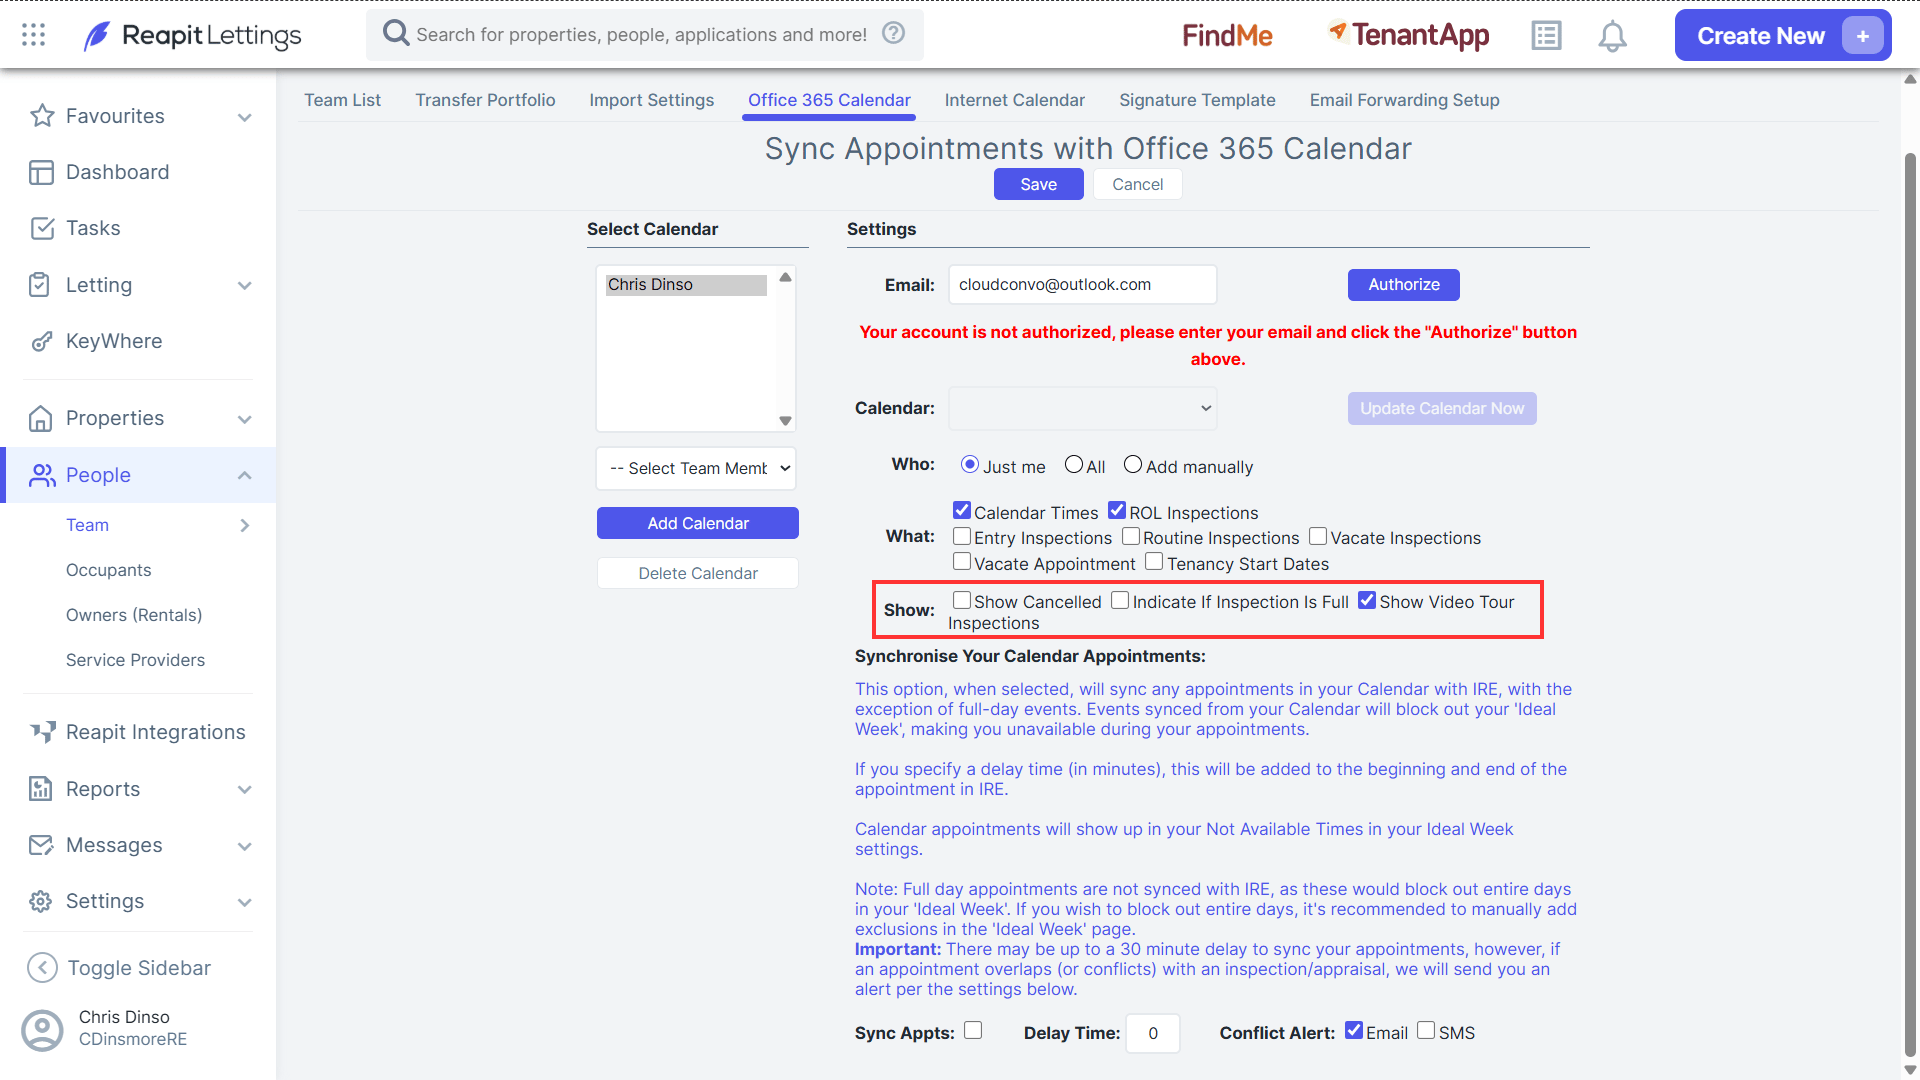
- To show cancelled inspections.
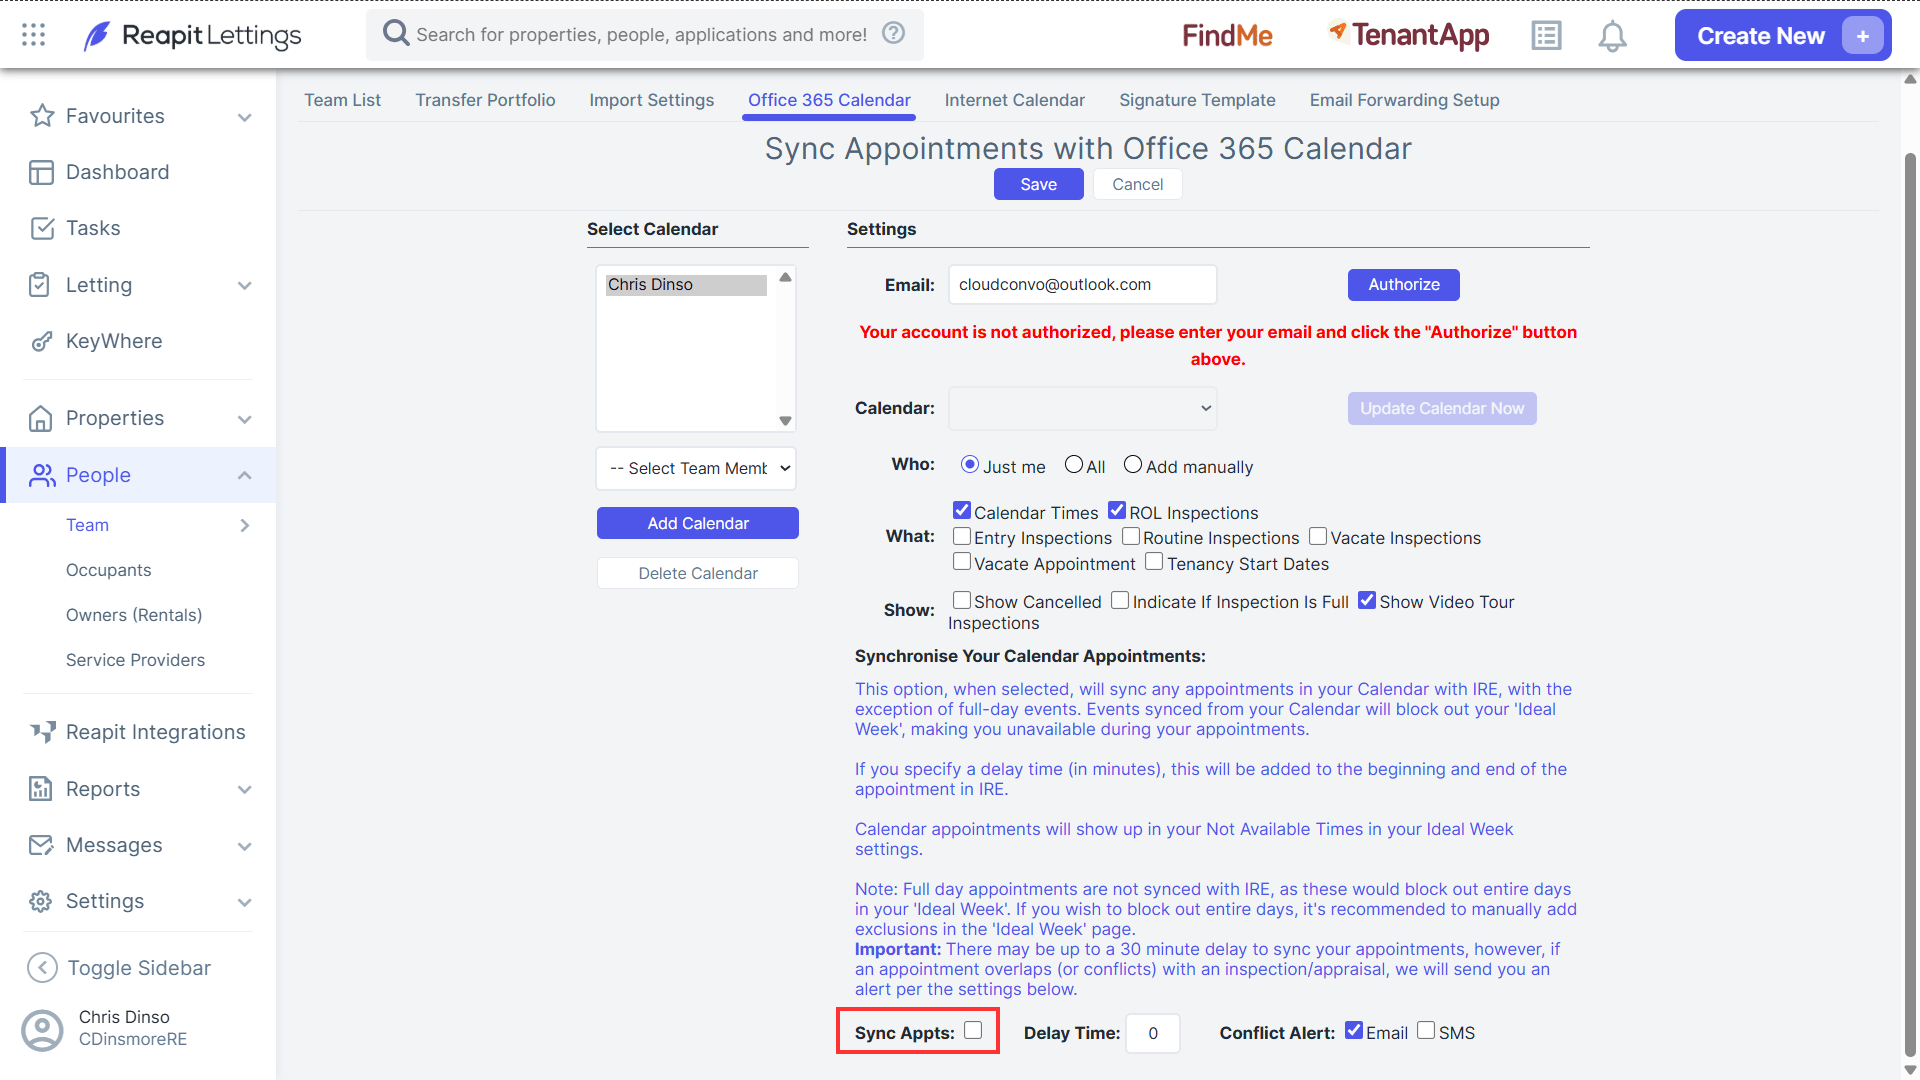
- Sync appointments in your Outlook calendar will sync with the ideal week settings to show them as not available during the duration of each appointment.
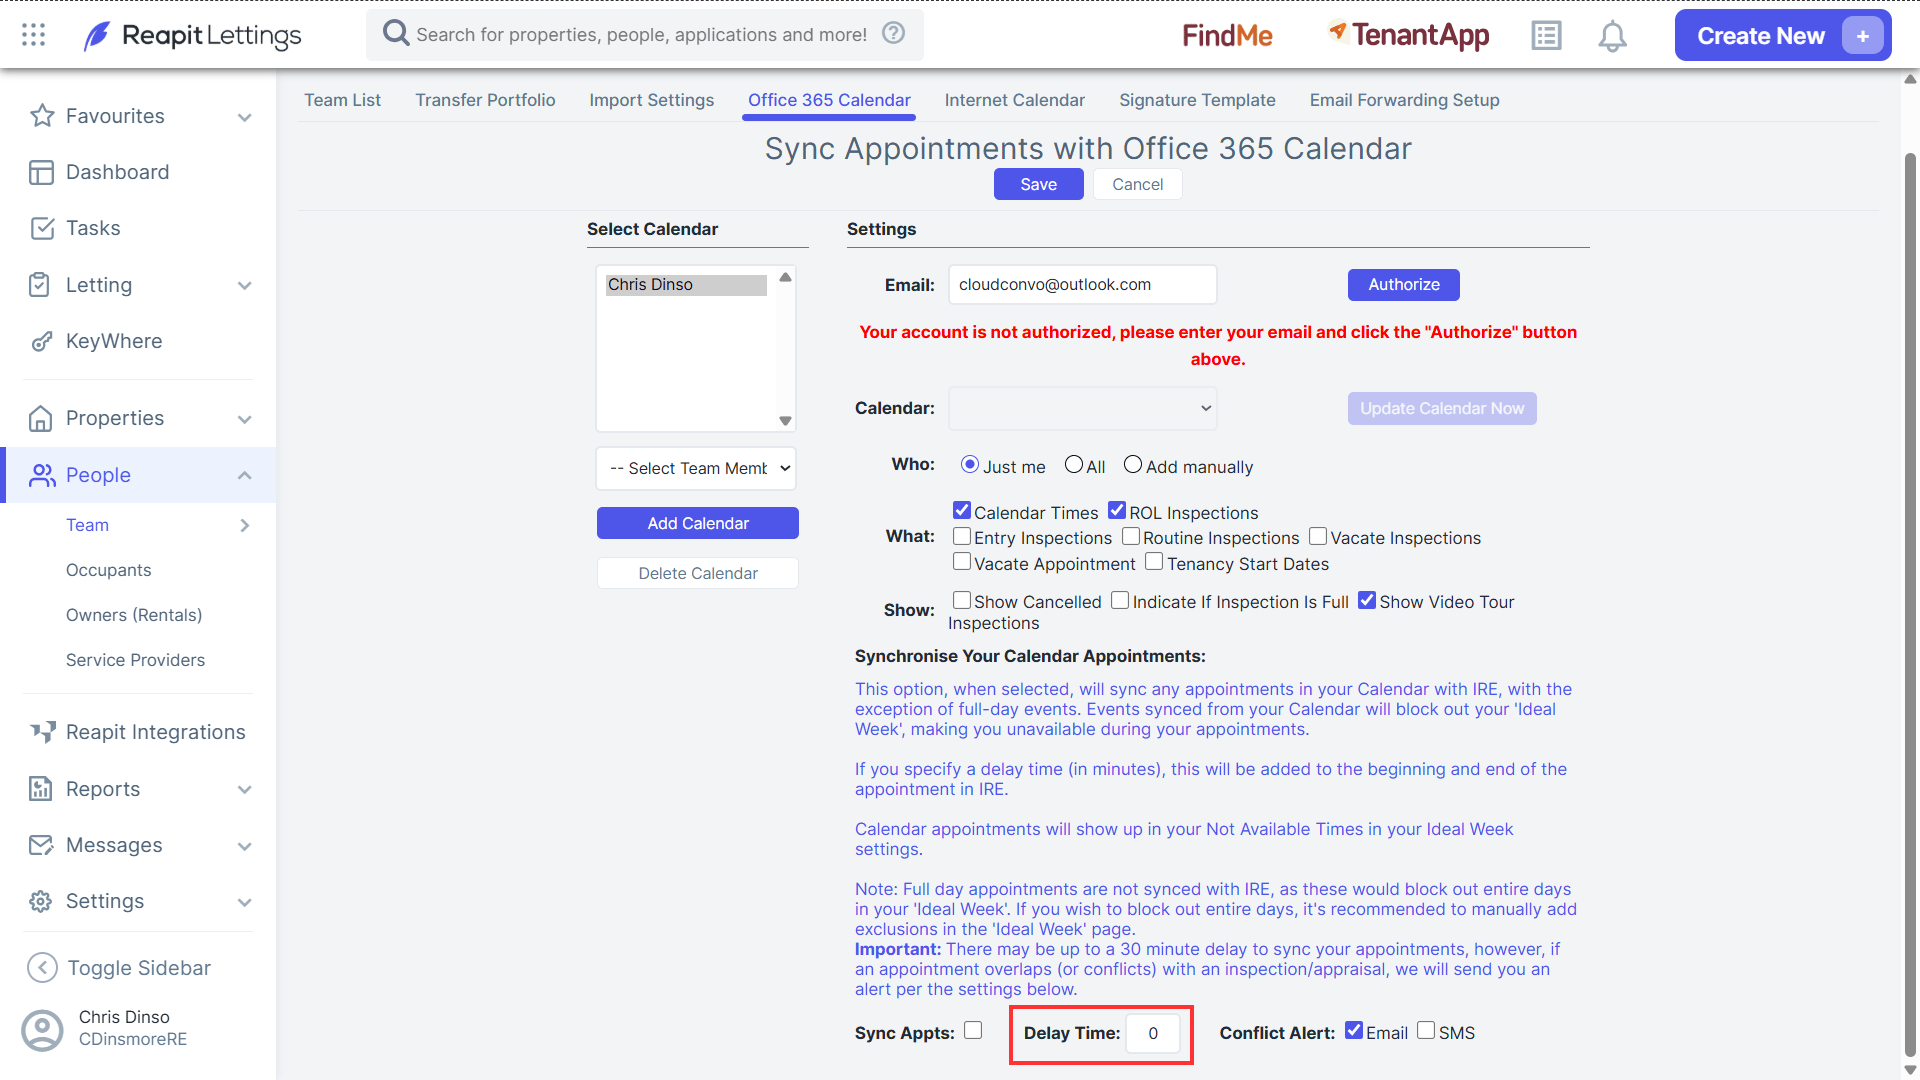
- The delay time between appointments.
- Whether you want to receive conflict alerts and by what method(s).
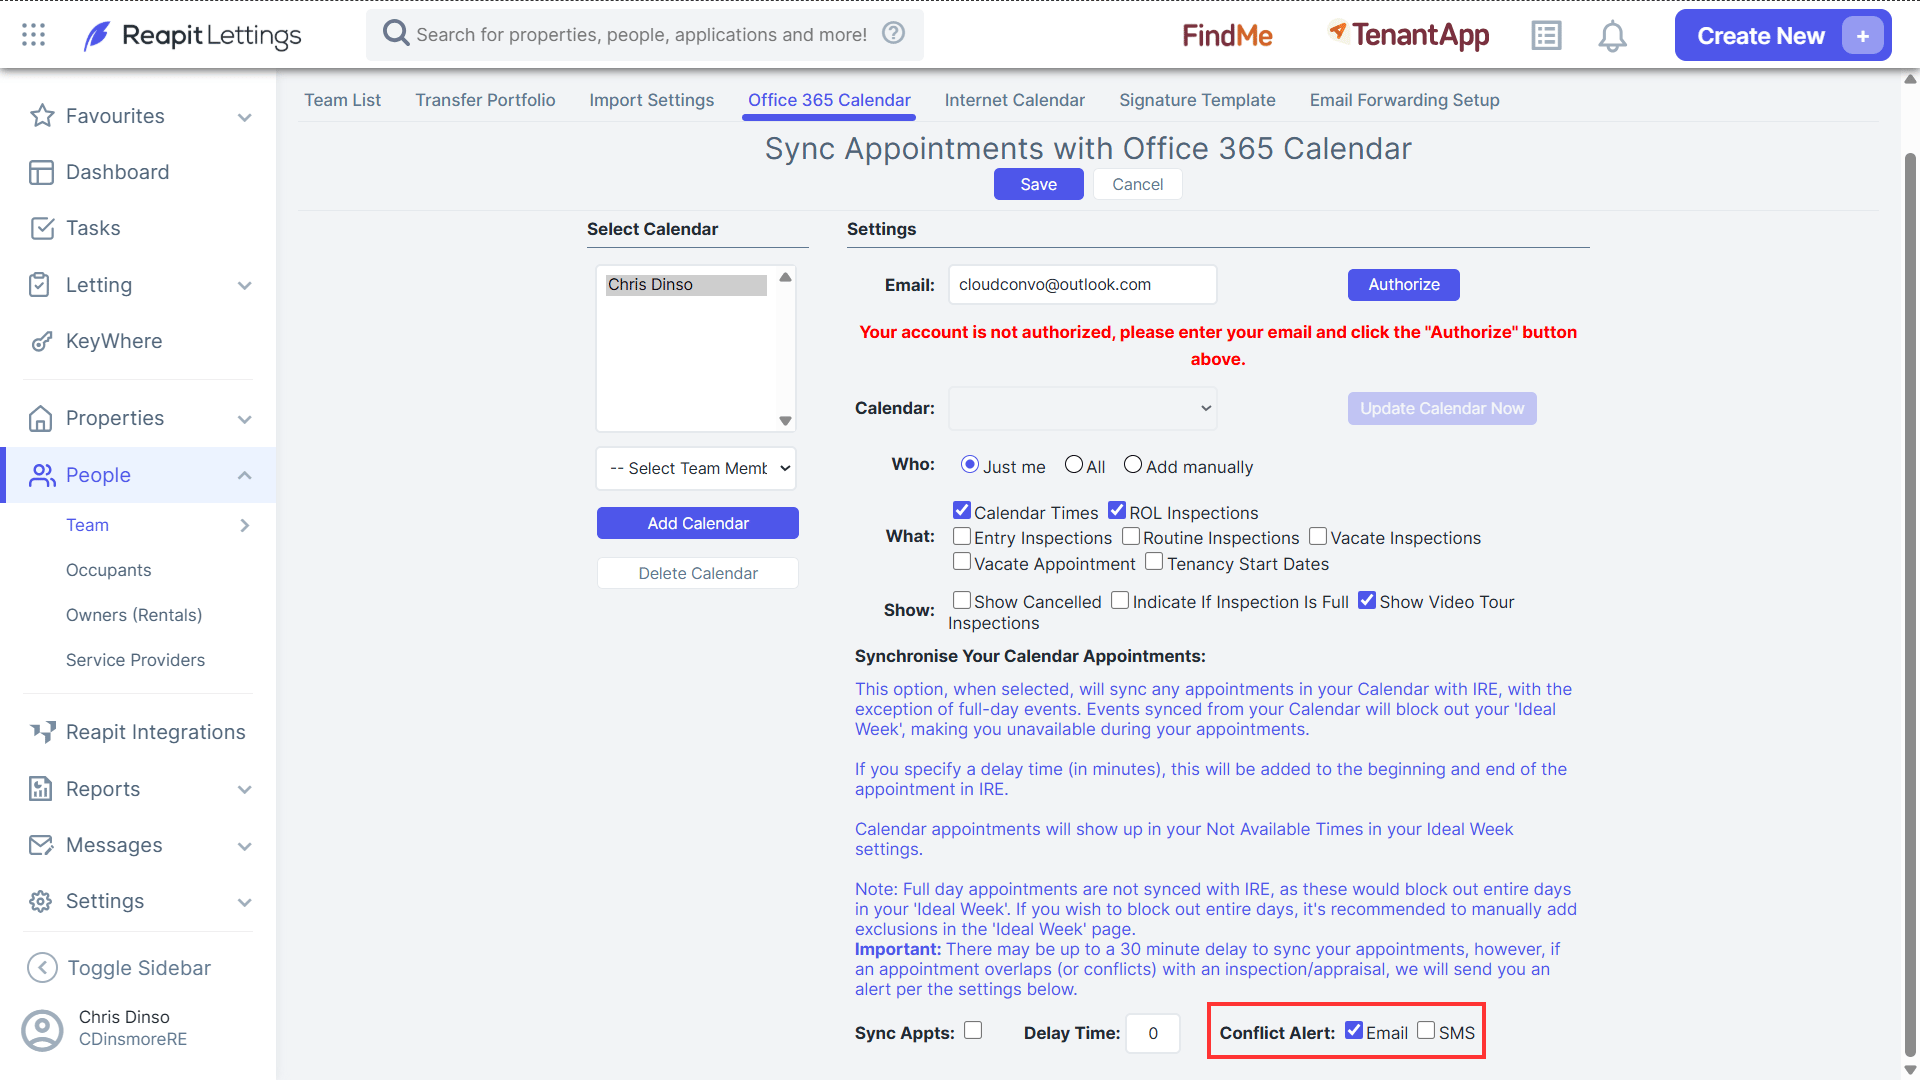
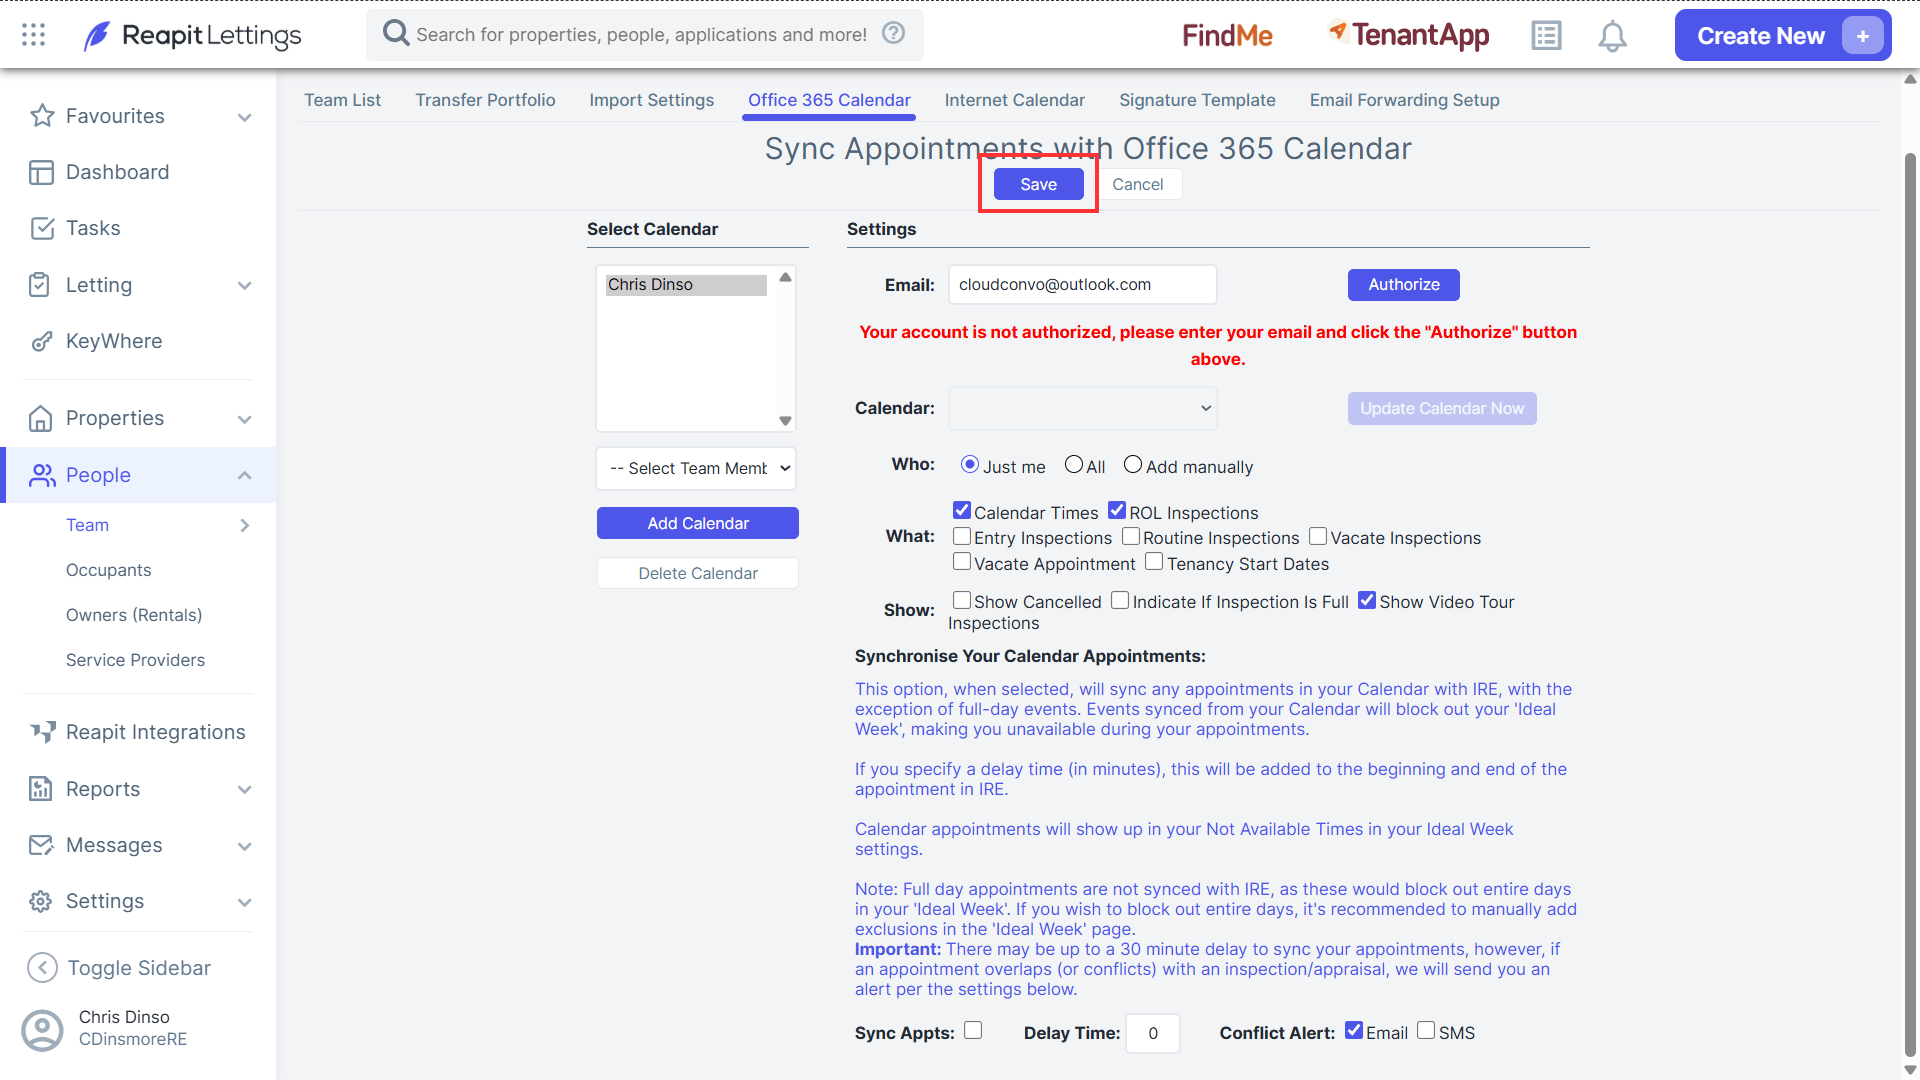
- When all the desired settings have been selected, click Save.