'%20d='M0%208a8%208%200%200%201%208-8h24a8%208%200%200%201%208%208v24a8%208%200%200%201-8%208H8a8%208%200%200%201-8-8V8Z'/%3e%3cpath%20fill='%23fff'%20d='M32.576%206C12.293%206%208.776%2025.887%207.424%2034H9.1c.45-2.977%203.493-14.748%2010.899-20.287%200%200-5.633%206.976-6.572%2015.051%203.426-.652%2013.845-3.372%2016.056-12.927l-3.84-.61c1.352-1.351%204.909-5.17%206.931-9.226V6Z'/%3e%3cdefs%3e%3clinearGradient%20id='reapit-lettings__a'%20x1='20.702'%20x2='20.702'%20y1='.351'%20y2='31.228'%20gradientUnits='userSpaceOnUse'%3e%3cstop%20stop-color='%235573FD'/%3e%3cstop%20offset='.575'%20stop-color='%234E56EA'/%3e%3c/linearGradient%3e%3c/defs%3e%3c/svg%3e)
Creating and Monitoring Campaigns
This article will run through how to create / add and monitor your Campaigns in Reapit Lettings.
Creating and Monitoring Campaigns
This article will run through how to create / add and monitor your Campaigns.
The process in this article include:
- Setting up your Templates
- Creating Campaigns
- Viewing and Monitoring campaigns
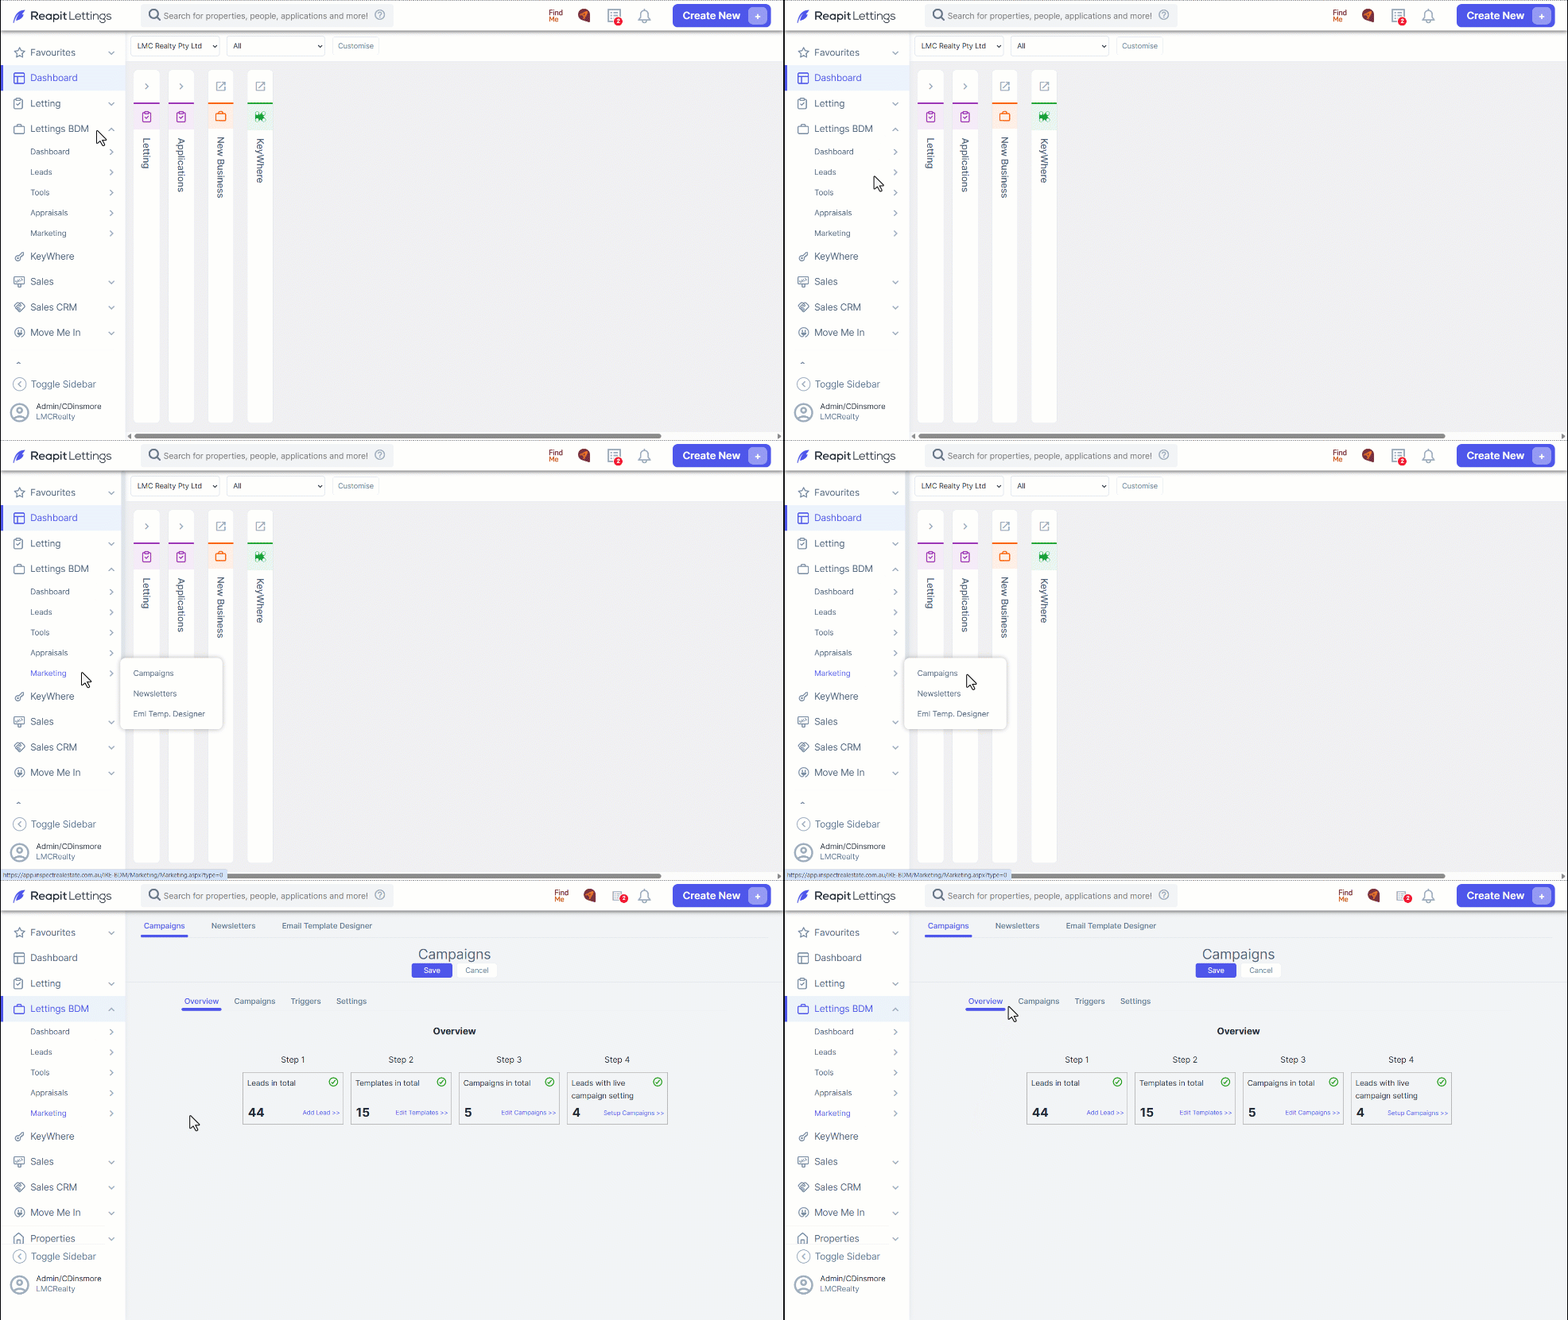
- Navigate to Lettings BDM
- Click Marketing.
- Click Campaigns
- Click Overview
Leads in Total – Refers to the total number of leads in Lettings BDM
Templates in Total – Refers to the total number of templates that can be used to setup your campaigns
Campaigns in Total – Refers to the total number of campaigns setup in Lettings BDM
Leads with Live Campaigns – Refers to the number of leads setup in the system to receive a campaign
Note: Before you can start creating campaigns, you will need to ensure you have your templates set up.
Setting up your Templates
- To create and edit your templates, either click on the Edit Templates link in Step 2 of the Campaigns Overview page or access your Campaign Templates tab within the Message Editor by navigating to Messages.
- Click Lettings BDM.
- Click Campaigns.
- Click Add New Template.
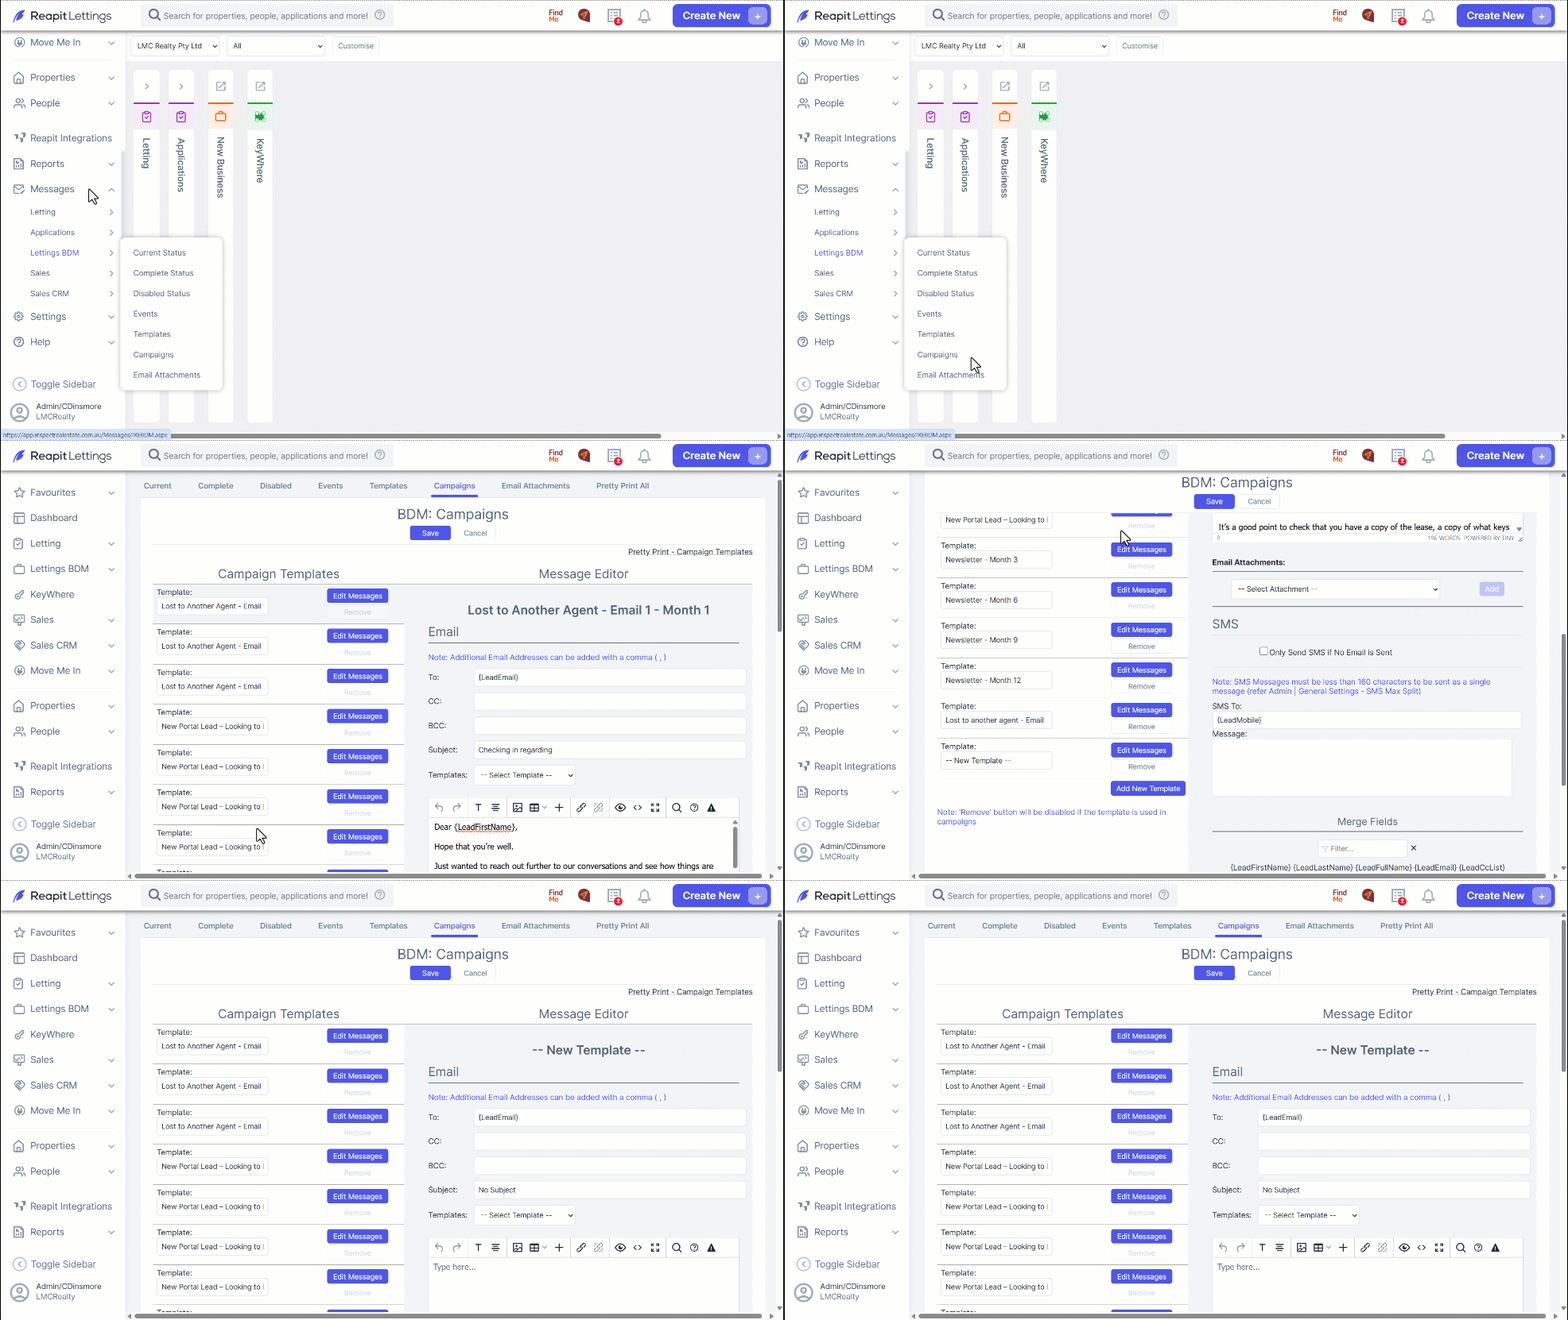
Note: Templates can of be edited and remove, however, a template cannot be removed if it is currently being used within a live campaign. Any changes made to the templates are live and will automatically update in the campaign.
Creating Campaigns
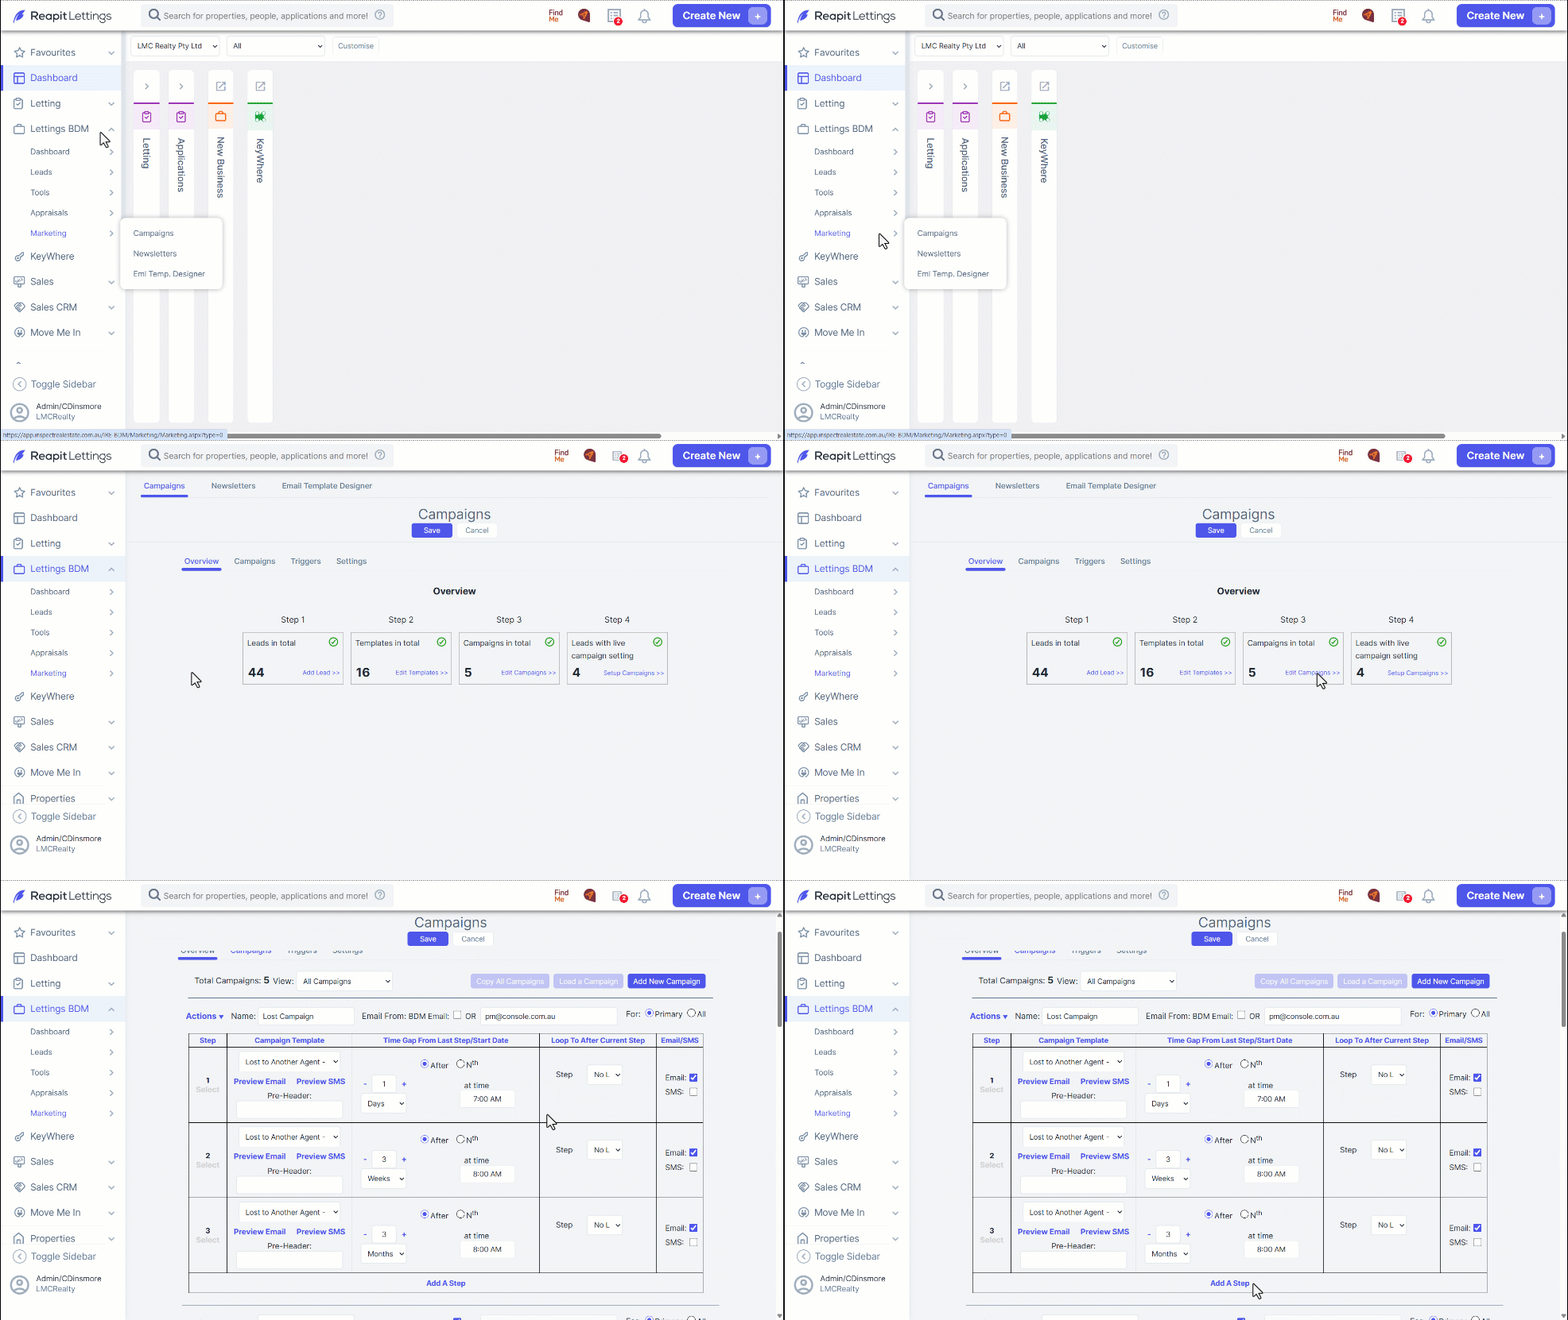
- Navigate to Lettings BDM.
- Click Marketing.
- Click Campaigns.
- Under Overview, click Edit Campaign.
- Add name, email, select primary or all contacts, add step.
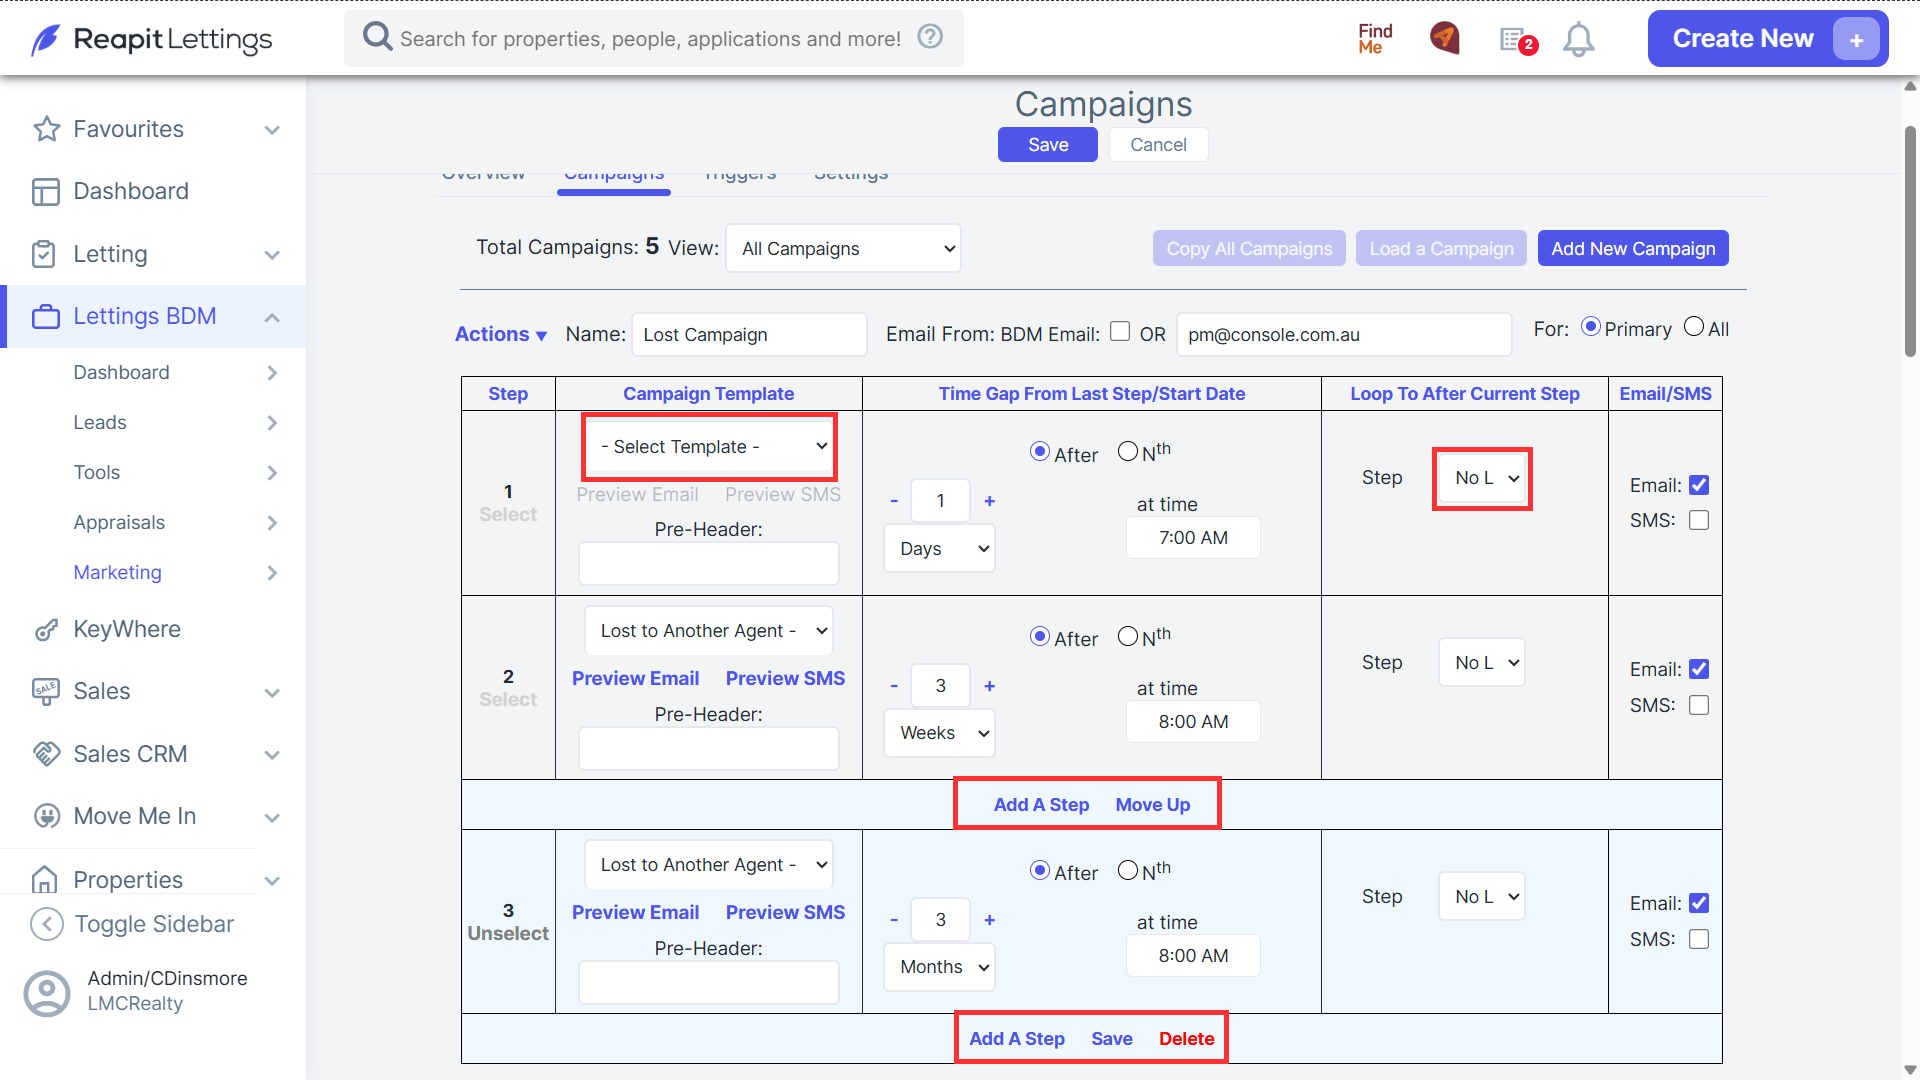
- Select Template
- Specify the timing for Step 1. You can choose a time frame, i.e. 1 day after the campaign is setup or a specific day, i.e. the Monday after the campaign is setup. You will also be able to specify what time you want the campaign togo out
- Loop – this is where you will be able to set whether you would like to back to a particular step. Please note that this option is not required to be set if your campaign only has one step.
- Select to send via Email and/or SMS.
- To remove a step hit the trash can icon.
- After you have entered all details, click Save.
- After saving your first step a plus button will appear and you can add the next step. Follow the same instructions as above to setup your new step. Again you’ll need to hit save to add the next step.
- An icon will display underneath each step allowing you to move steps up or down.
- Continue for as many steps as you would like.
Viewing and Monitoring campaigns
- Leads campaign history can be viewed by opening the lead and navigating to the Campaigns tab.
- Any sent messages from a campaign will also show within the lead history tab.
- An overview of all campaigns can be found by navigating to the Marketing > Campaigns tab. Here you can edit, disable/enable and delete campaigns.