'%20d='M0%208a8%208%200%200%201%208-8h24a8%208%200%200%201%208%208v24a8%208%200%200%201-8%208H8a8%208%200%200%201-8-8V8Z'/%3e%3cpath%20fill='%23fff'%20d='M32.576%206C12.293%206%208.776%2025.887%207.424%2034H9.1c.45-2.977%203.493-14.748%2010.899-20.287%200%200-5.633%206.976-6.572%2015.051%203.426-.652%2013.845-3.372%2016.056-12.927l-3.84-.61c1.352-1.351%204.909-5.17%206.931-9.226V6Z'/%3e%3cdefs%3e%3clinearGradient%20id='reapit-lettings__a'%20x1='20.702'%20x2='20.702'%20y1='.351'%20y2='31.228'%20gradientUnits='userSpaceOnUse'%3e%3cstop%20stop-color='%235573FD'/%3e%3cstop%20offset='.575'%20stop-color='%234E56EA'/%3e%3c/linearGradient%3e%3c/defs%3e%3c/svg%3e)
Create and Manage KeyWhere Key Cabinets
This article guides you through how to create and manage key cabinets within KeyWhere.
Create and Manage KeyWhere Key Cabinets
This article guides you through how to create and manage key cabinets within KeyWhere.
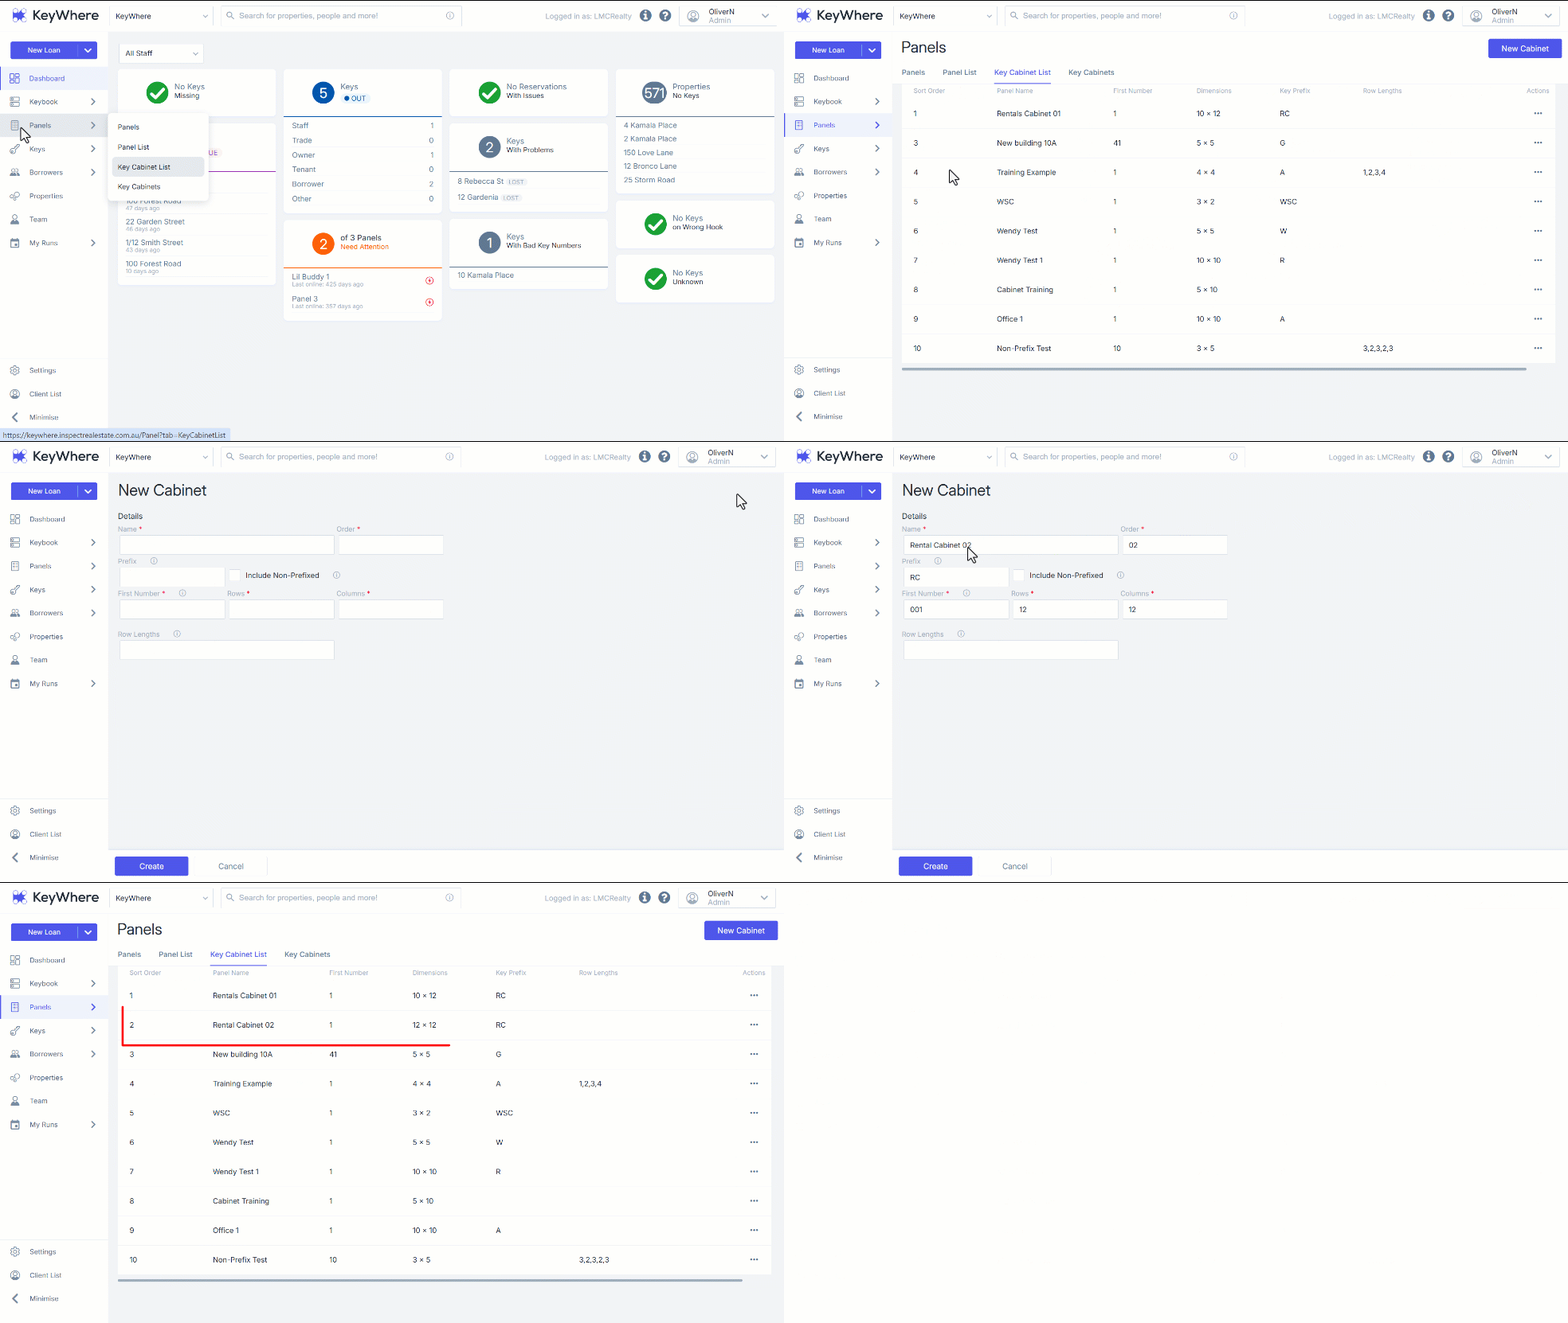
- Click on Panels,
- Select Key Cabinet List.
- Click on New Cabinet.
- Complete the Details section. (* Mandatory Fields)
- Name*
- Order*
- Prefix
- First Number*
- Rows*
- Columns*
- Row Lengths
- Click on Create.
Note: Hover your cursor over the Information Icon to learn more about each designated field.
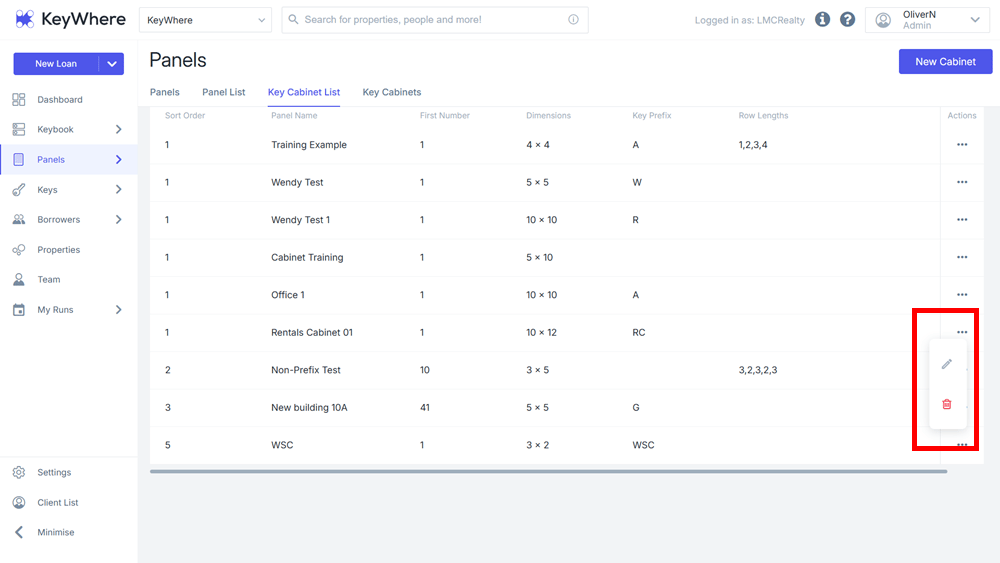
If necessary, you can modify the cabinet details or remove the cabinet from your account by clicking on the 3-dots and selecting the appropriate icon.
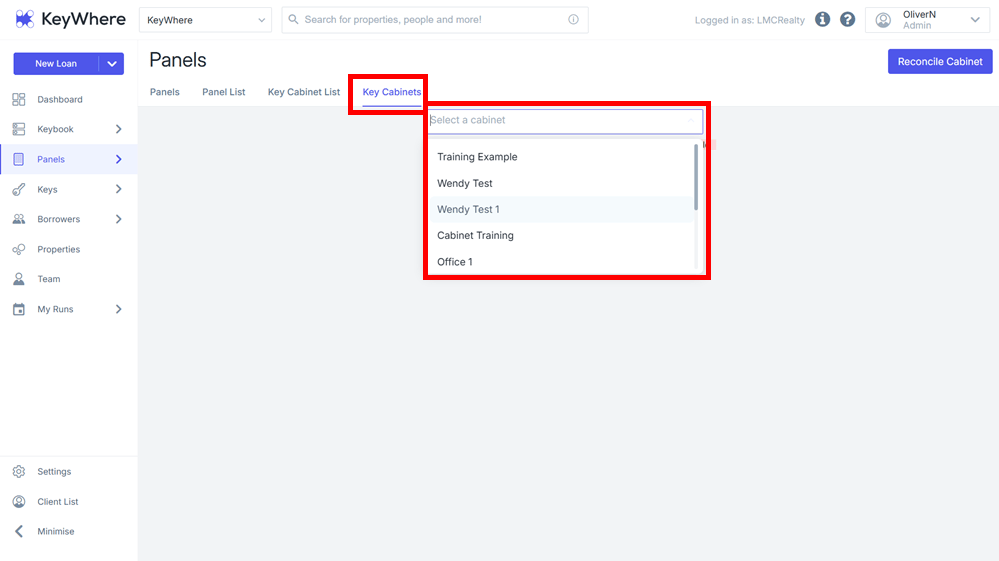
- To access the appropriate cabinet, navigate to the Key Cabinets tab and select the desired cabinet from the dropdown menu.
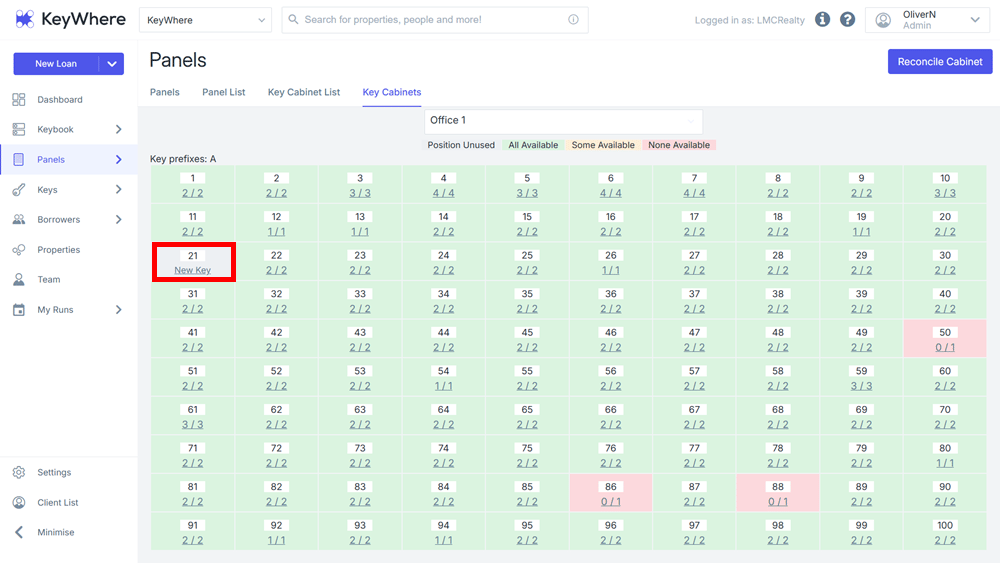
- Below is a visual representation of your key cabinet reflecting each key within your office.
Note: To add more keys, click on the tile labelled 'New Key' and follow the prompts.
Keys will automatically assign if the number attached to the system matches the number in the relevant position.