'%20d='M0%208a8%208%200%200%201%208-8h24a8%208%200%200%201%208%208v24a8%208%200%200%201-8%208H8a8%208%200%200%201-8-8V8Z'/%3e%3cpath%20fill='%23fff'%20d='M32.576%206C12.293%206%208.776%2025.887%207.424%2034H9.1c.45-2.977%203.493-14.748%2010.899-20.287%200%200-5.633%206.976-6.572%2015.051%203.426-.652%2013.845-3.372%2016.056-12.927l-3.84-.61c1.352-1.351%204.909-5.17%206.931-9.226V6Z'/%3e%3cdefs%3e%3clinearGradient%20id='reapit-lettings__a'%20x1='20.702'%20x2='20.702'%20y1='.351'%20y2='31.228'%20gradientUnits='userSpaceOnUse'%3e%3cstop%20stop-color='%235573FD'/%3e%3cstop%20offset='.575'%20stop-color='%234E56EA'/%3e%3c/linearGradient%3e%3c/defs%3e%3c/svg%3e)
Follow Up Sessions
This article will run through the process to follow to complete a Follow Up Session. The processes in this article include: Accessing Follow Up Sessions Option 1 – Properties Option 2 - Prospects
This article will run through the process to follow to complete a Follow Up Session.
The processes in this article include:
- Accessing Follow Up Sessions
- Option 1 – Properties
- Option 2 - Prospects
Accessing Follow Up Sessions
There are two Follow Up session’s options, Properties and Prospects.
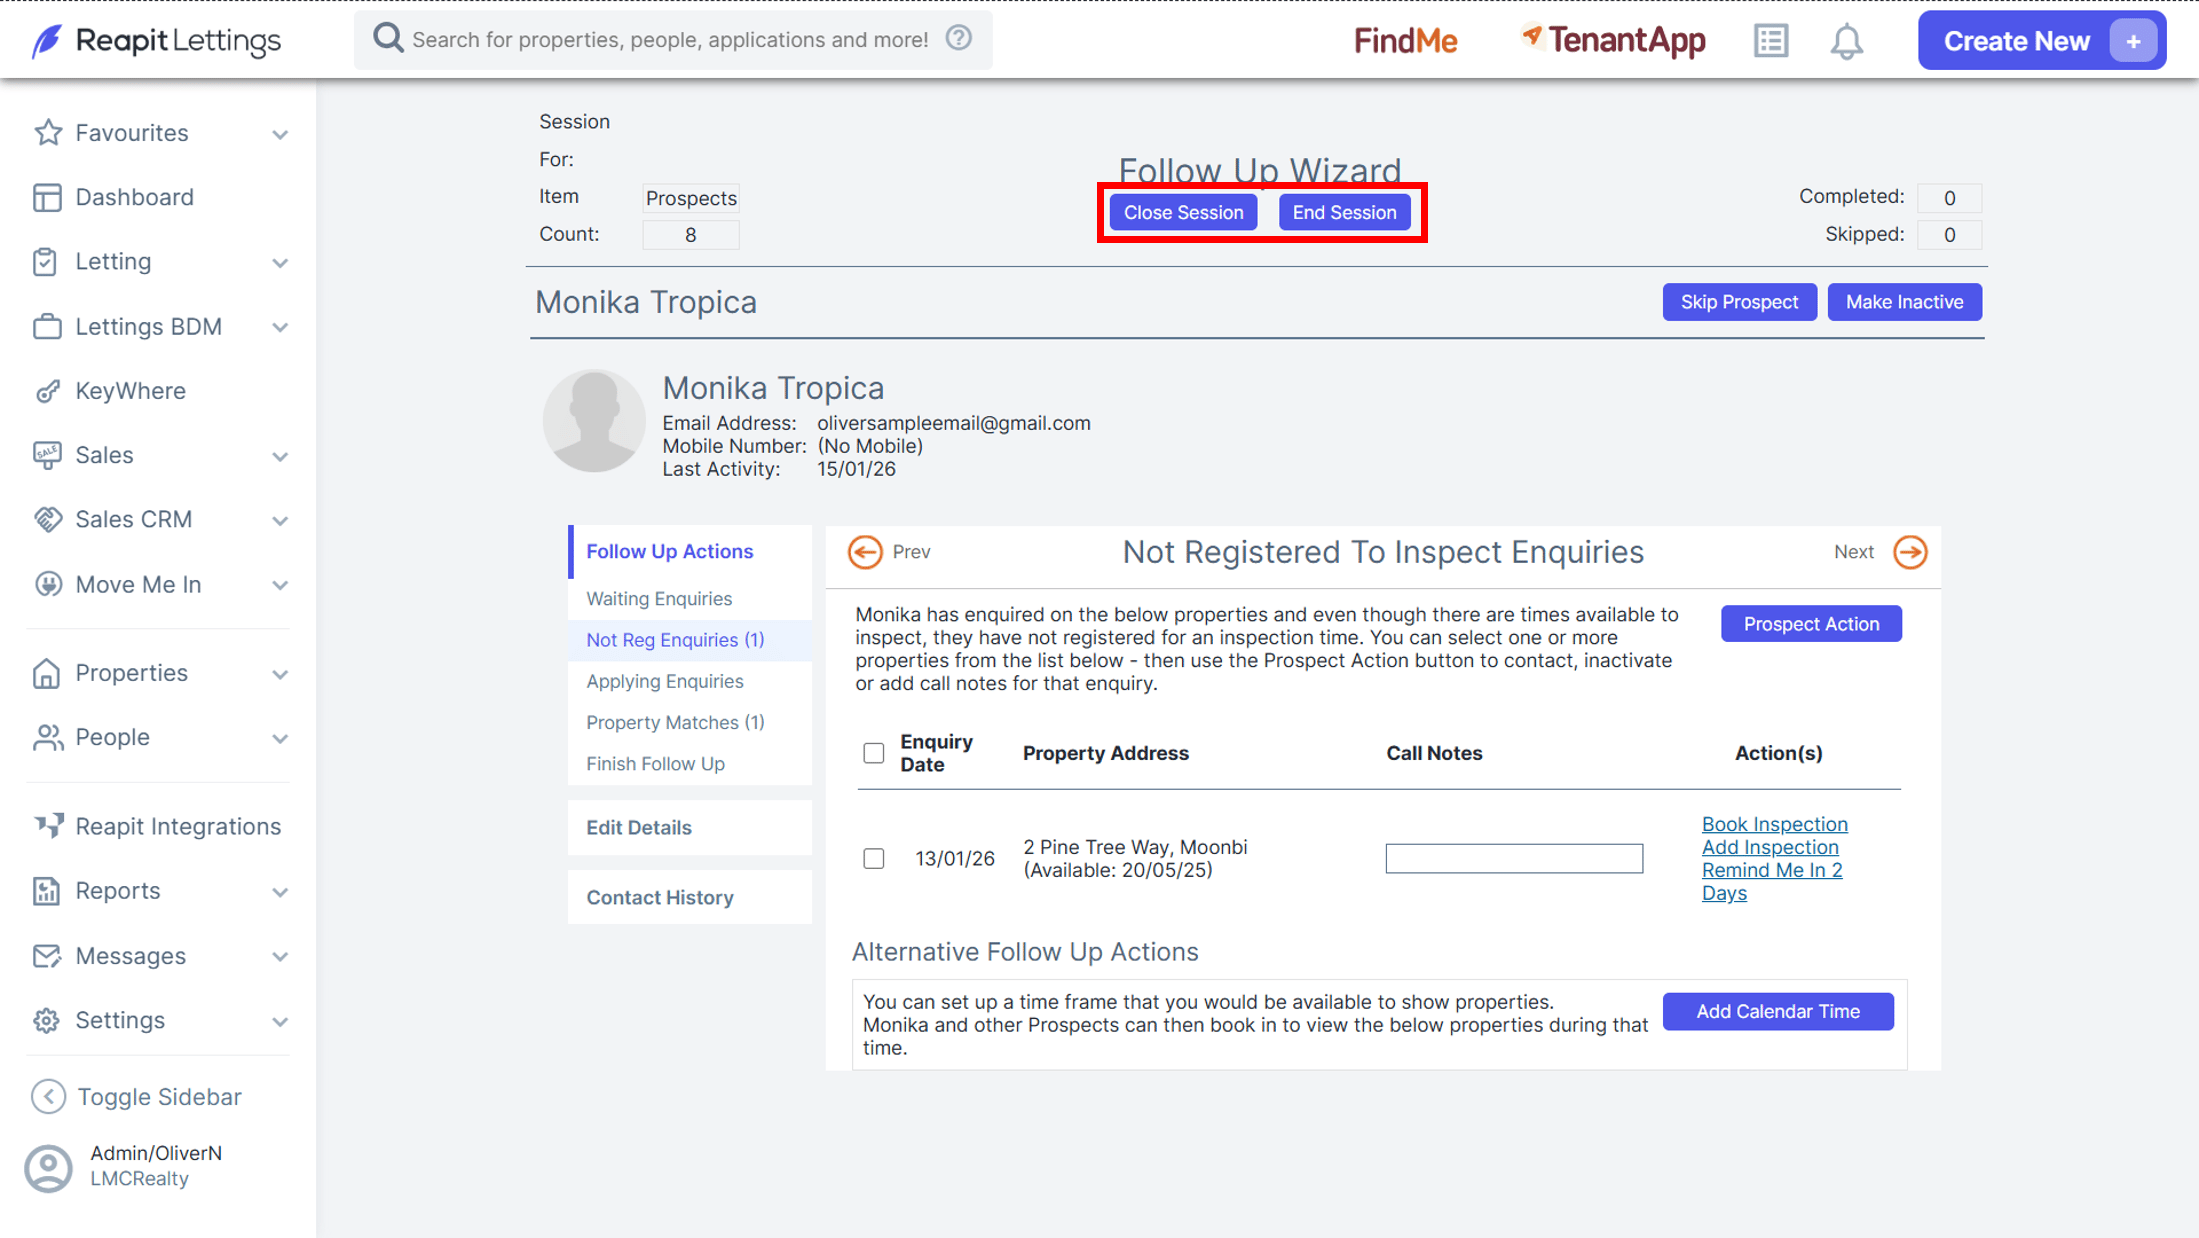
1. Click on Letting.
2. Click on Summary.
3. Click on Follow up Session.
Option 1 – Properties
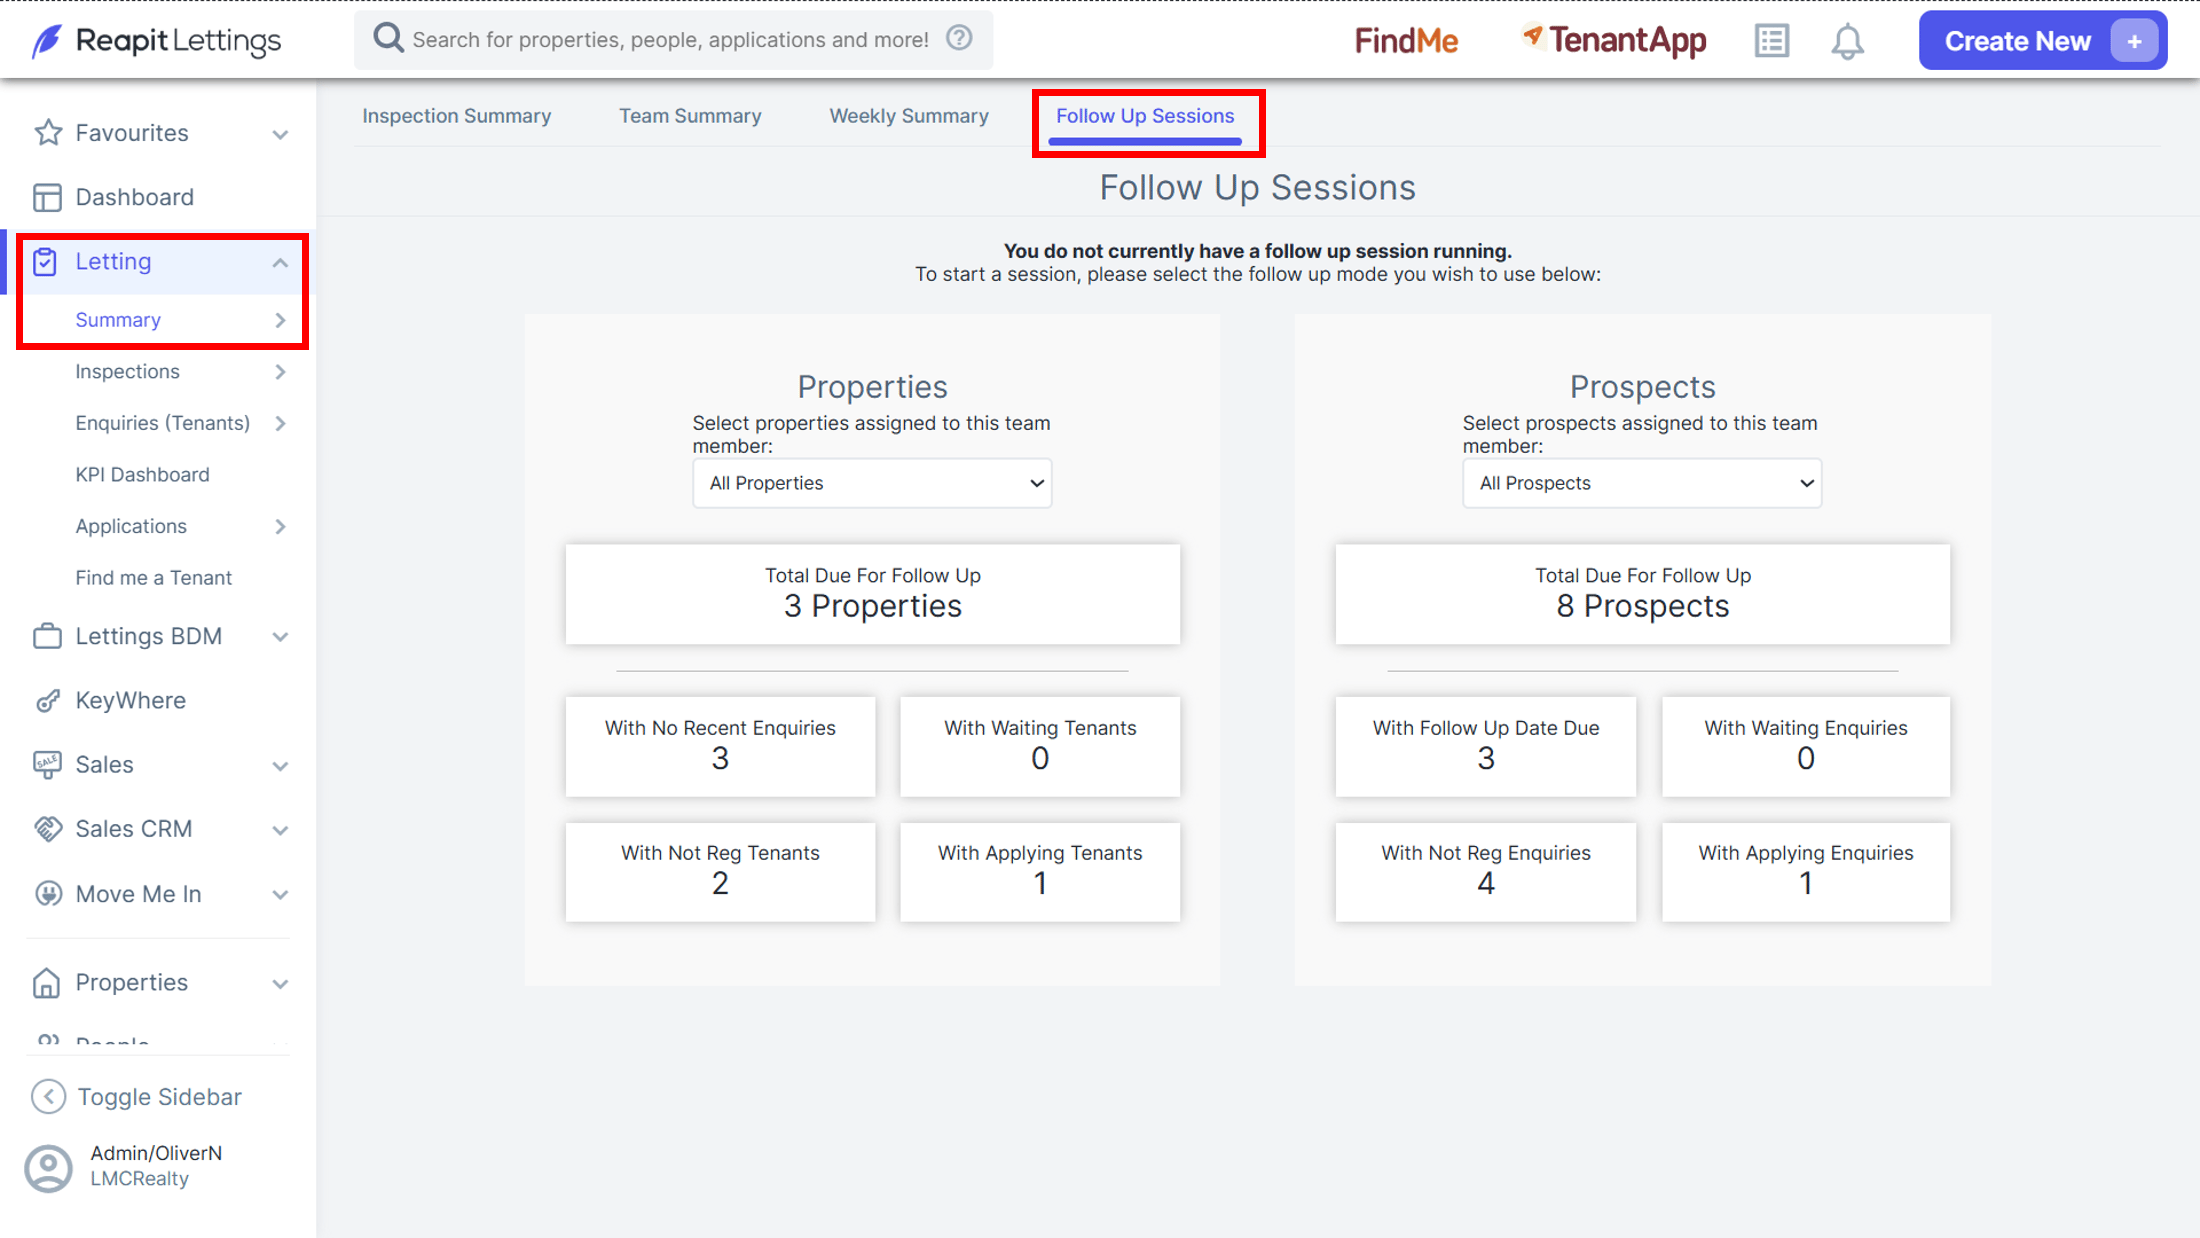
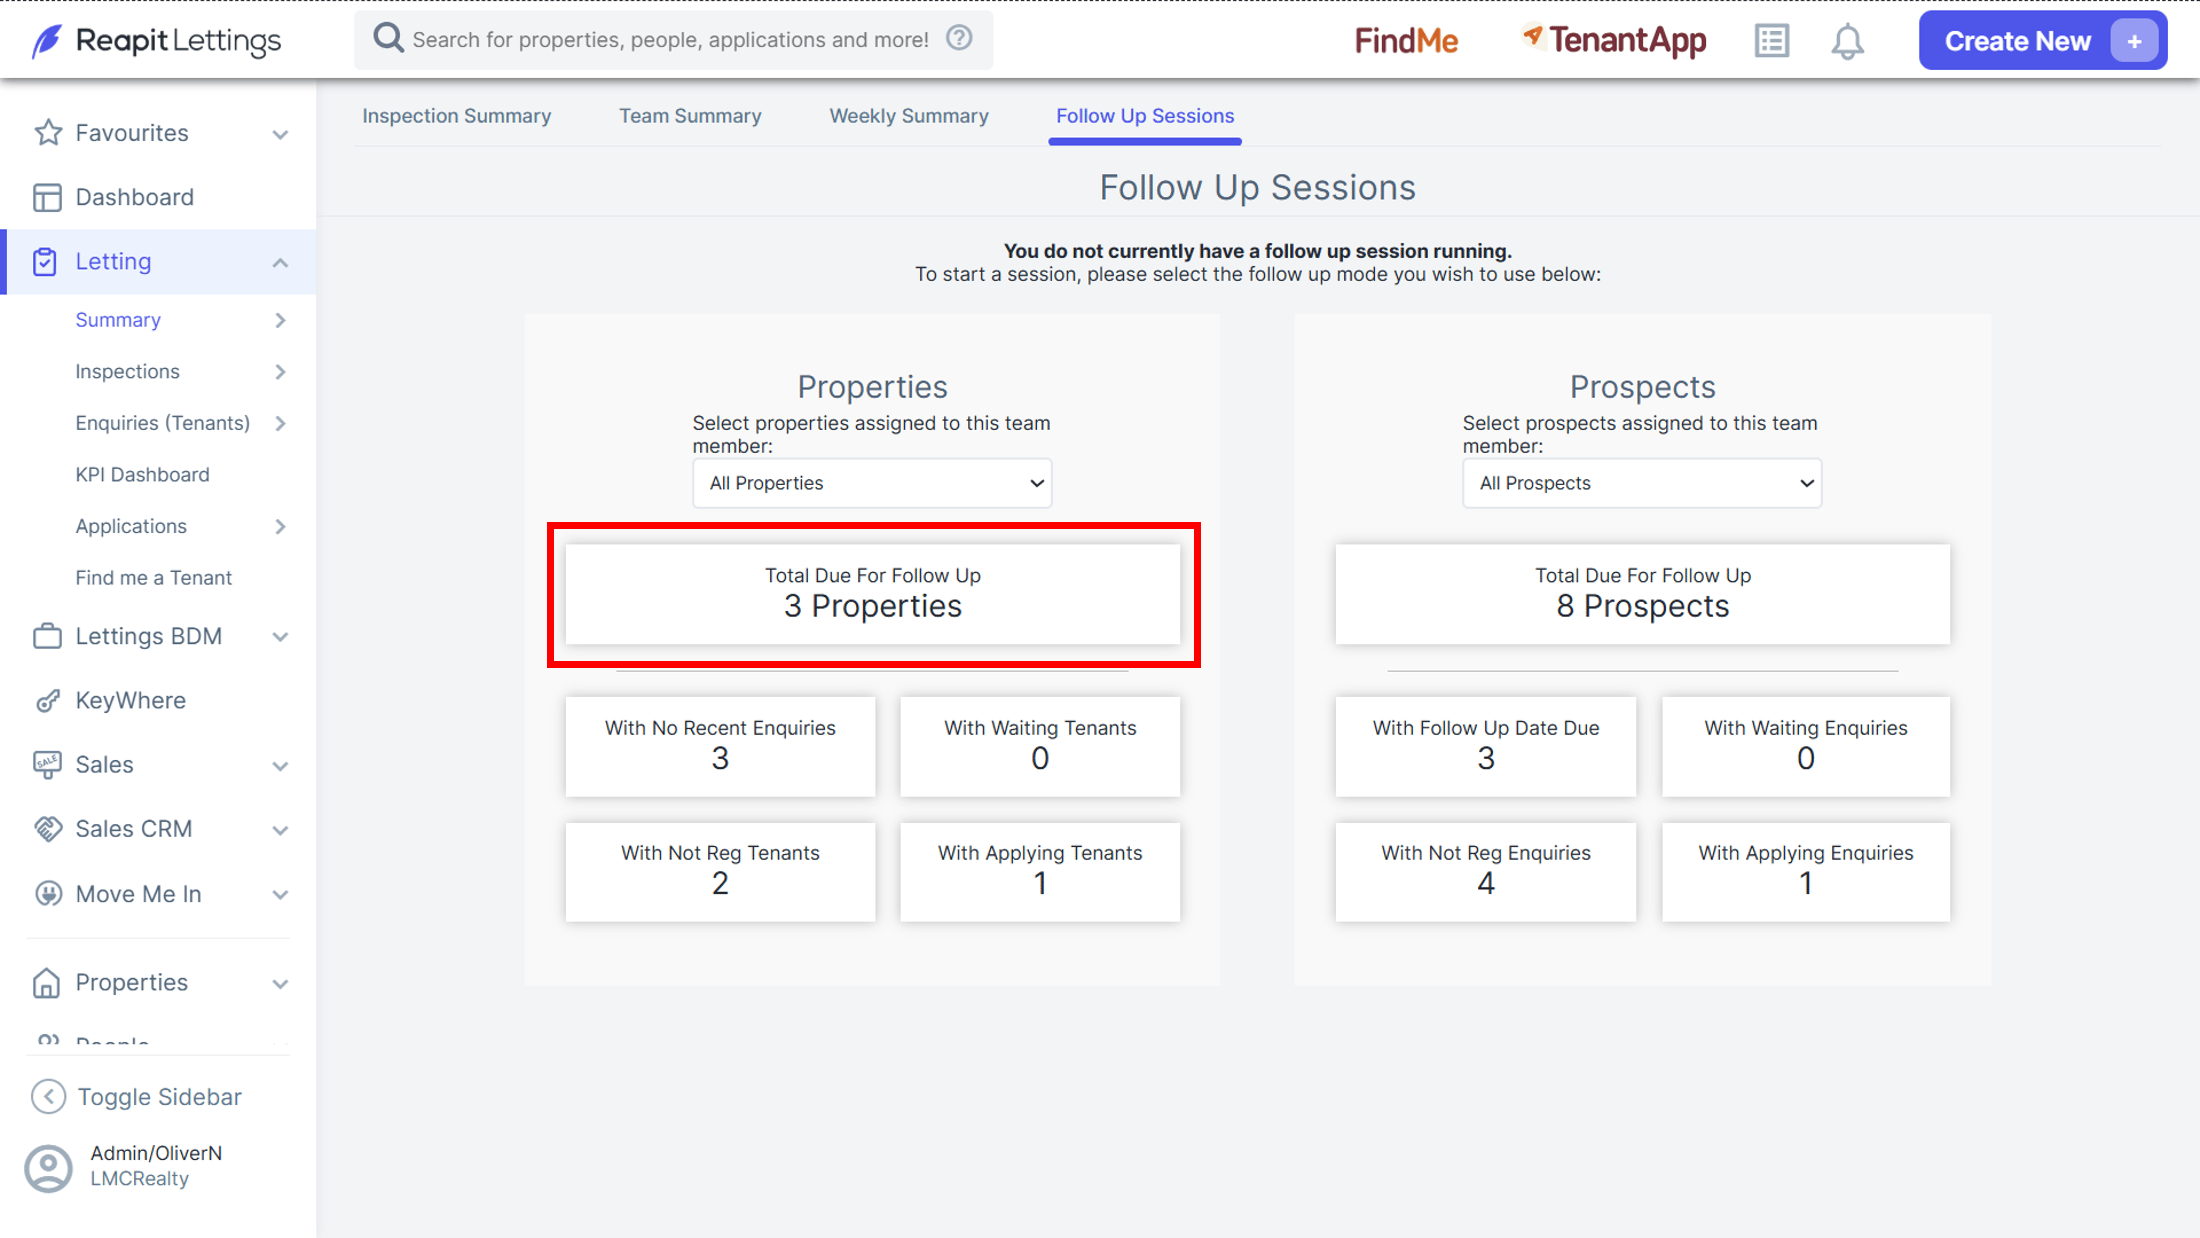
By default, the system will elect to work through all your current properties and the categories that require follow-up that day.
To change the follow-up session to only work through properties assigned to a particular team member select a name from the drop-down.
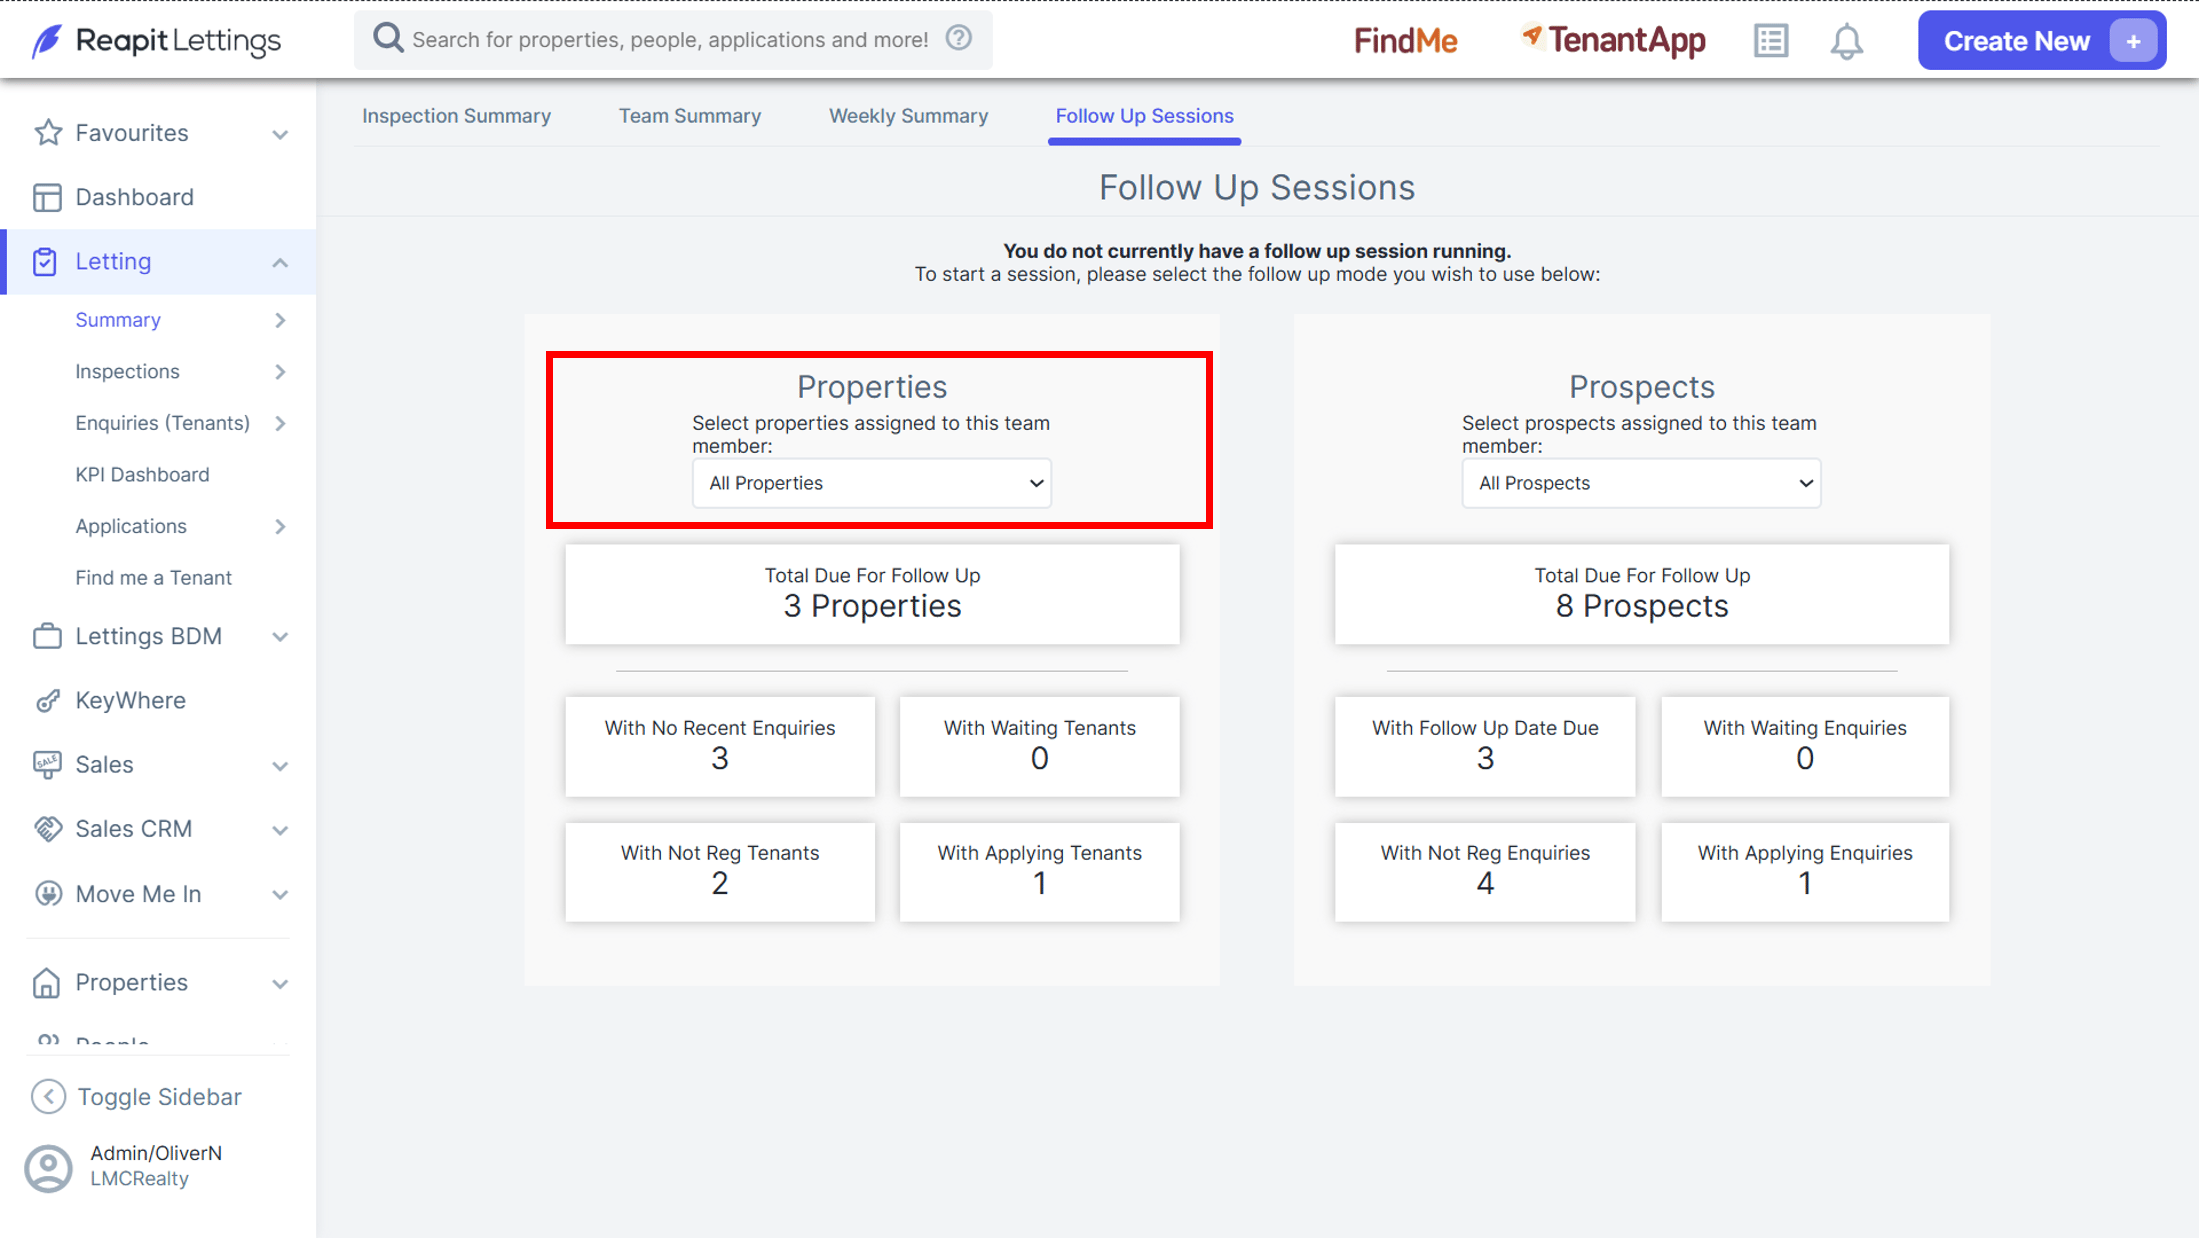
There are four different categories of items that require review against the properties and the number of the total properties in each group are indicated below the total.
These categories are Properties;
- With no recent enquiries
- With waiting tenants
- With not registered tenants
- With applying tenants
1. To start the session select the total properties that require follow up and the session will work through each of the categories with you.
2. Alternatively, you can start the sessions to only work on one of the categories at a time. This is done by clicking on the category that you would like to start to action the follow-up items for.
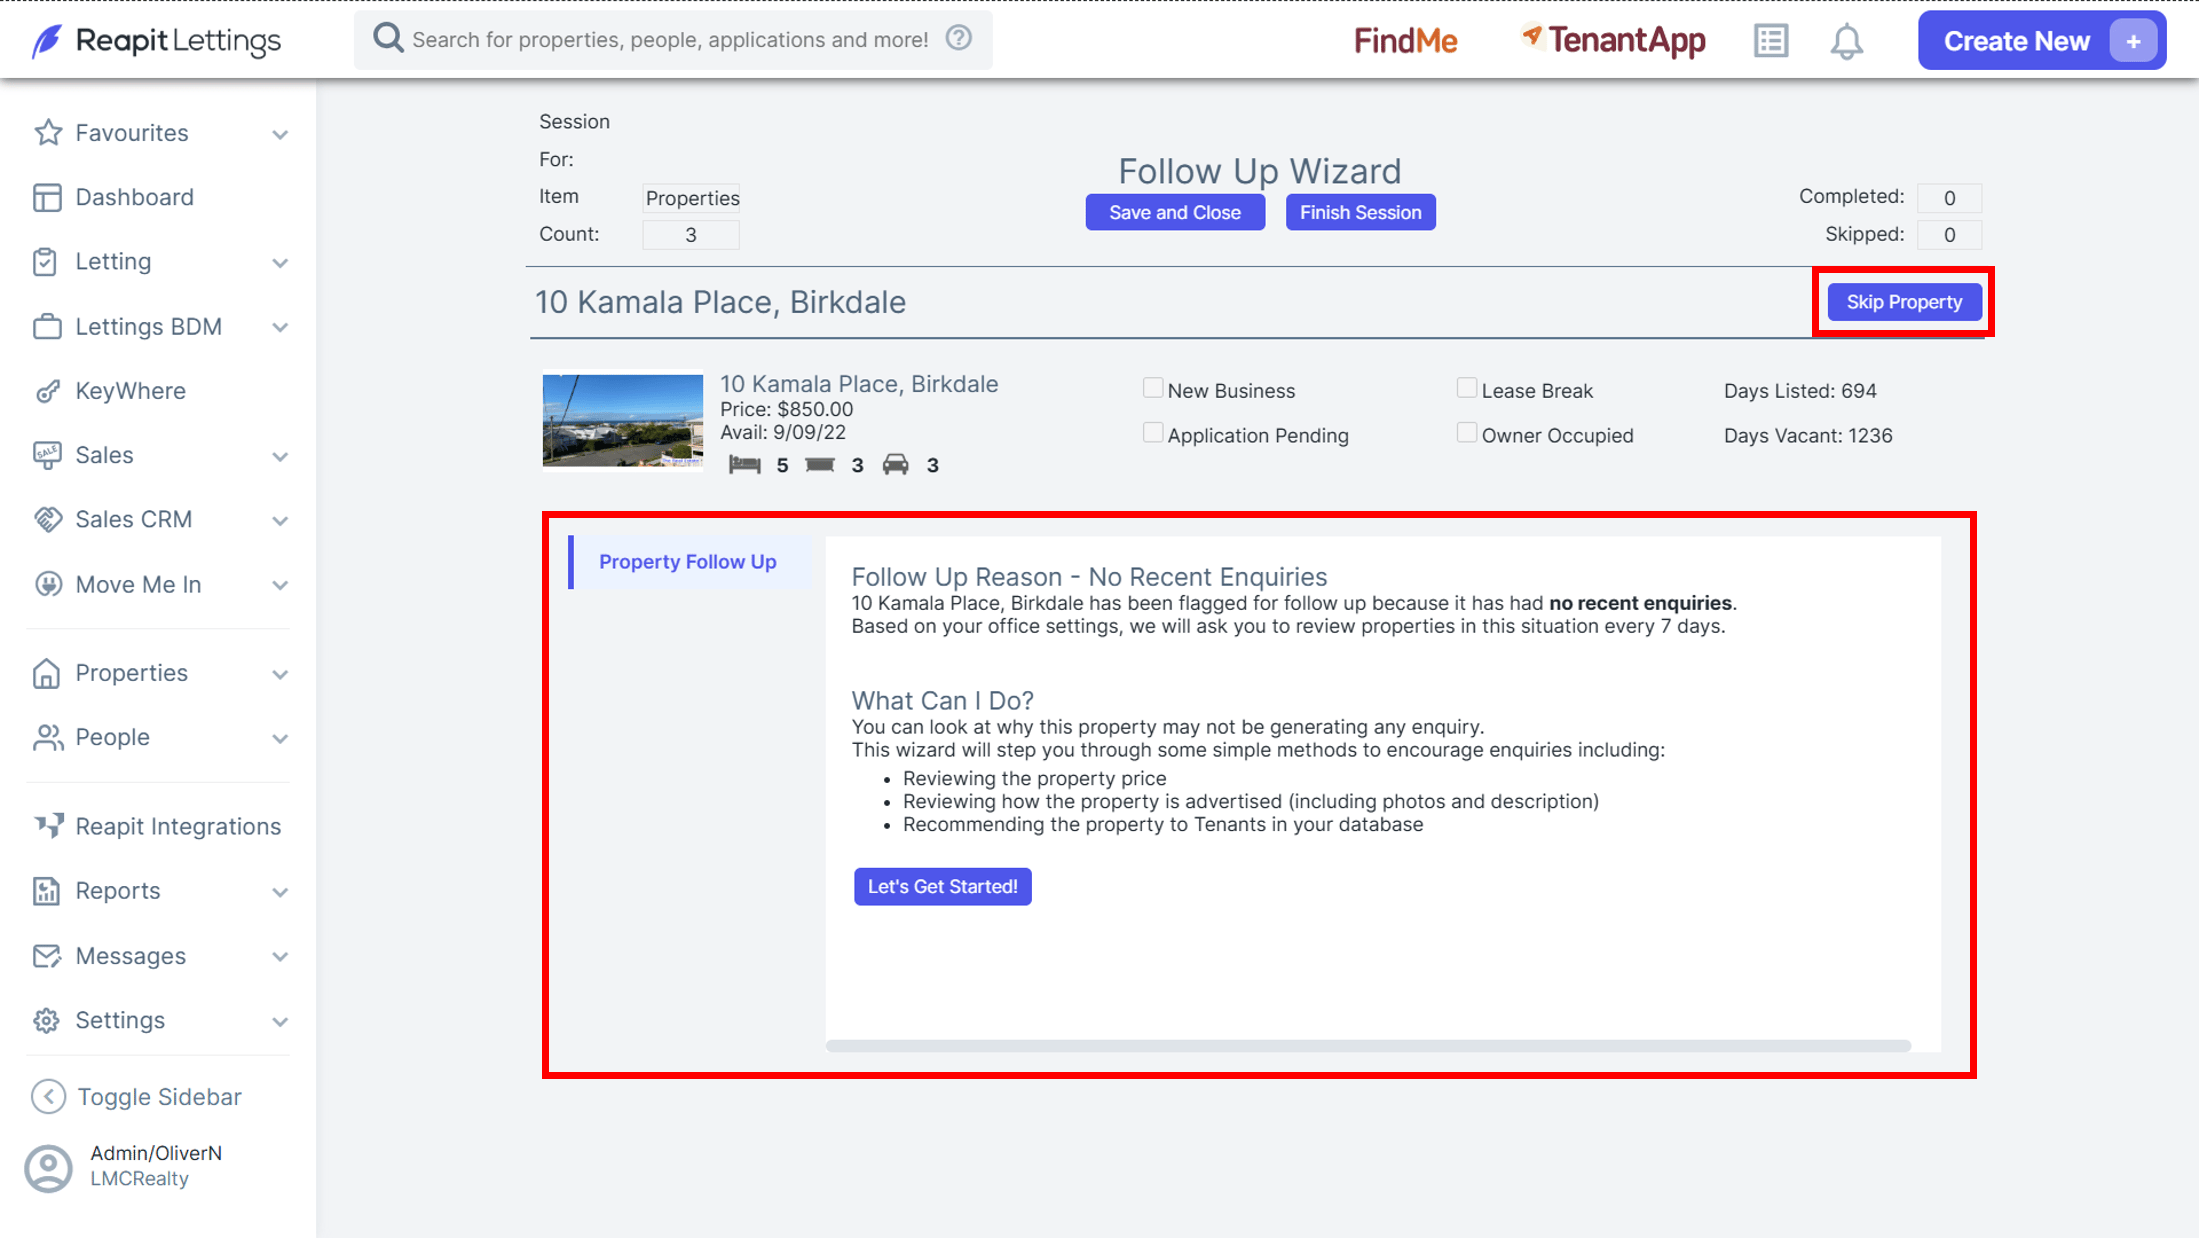
3. Once in the ‘Follow Up Wizard’ the property information is displayed and shows the days listed and vacant along with if the property has been marked as a New Business, Lease Break, Owner Occupied, or Application Pending.
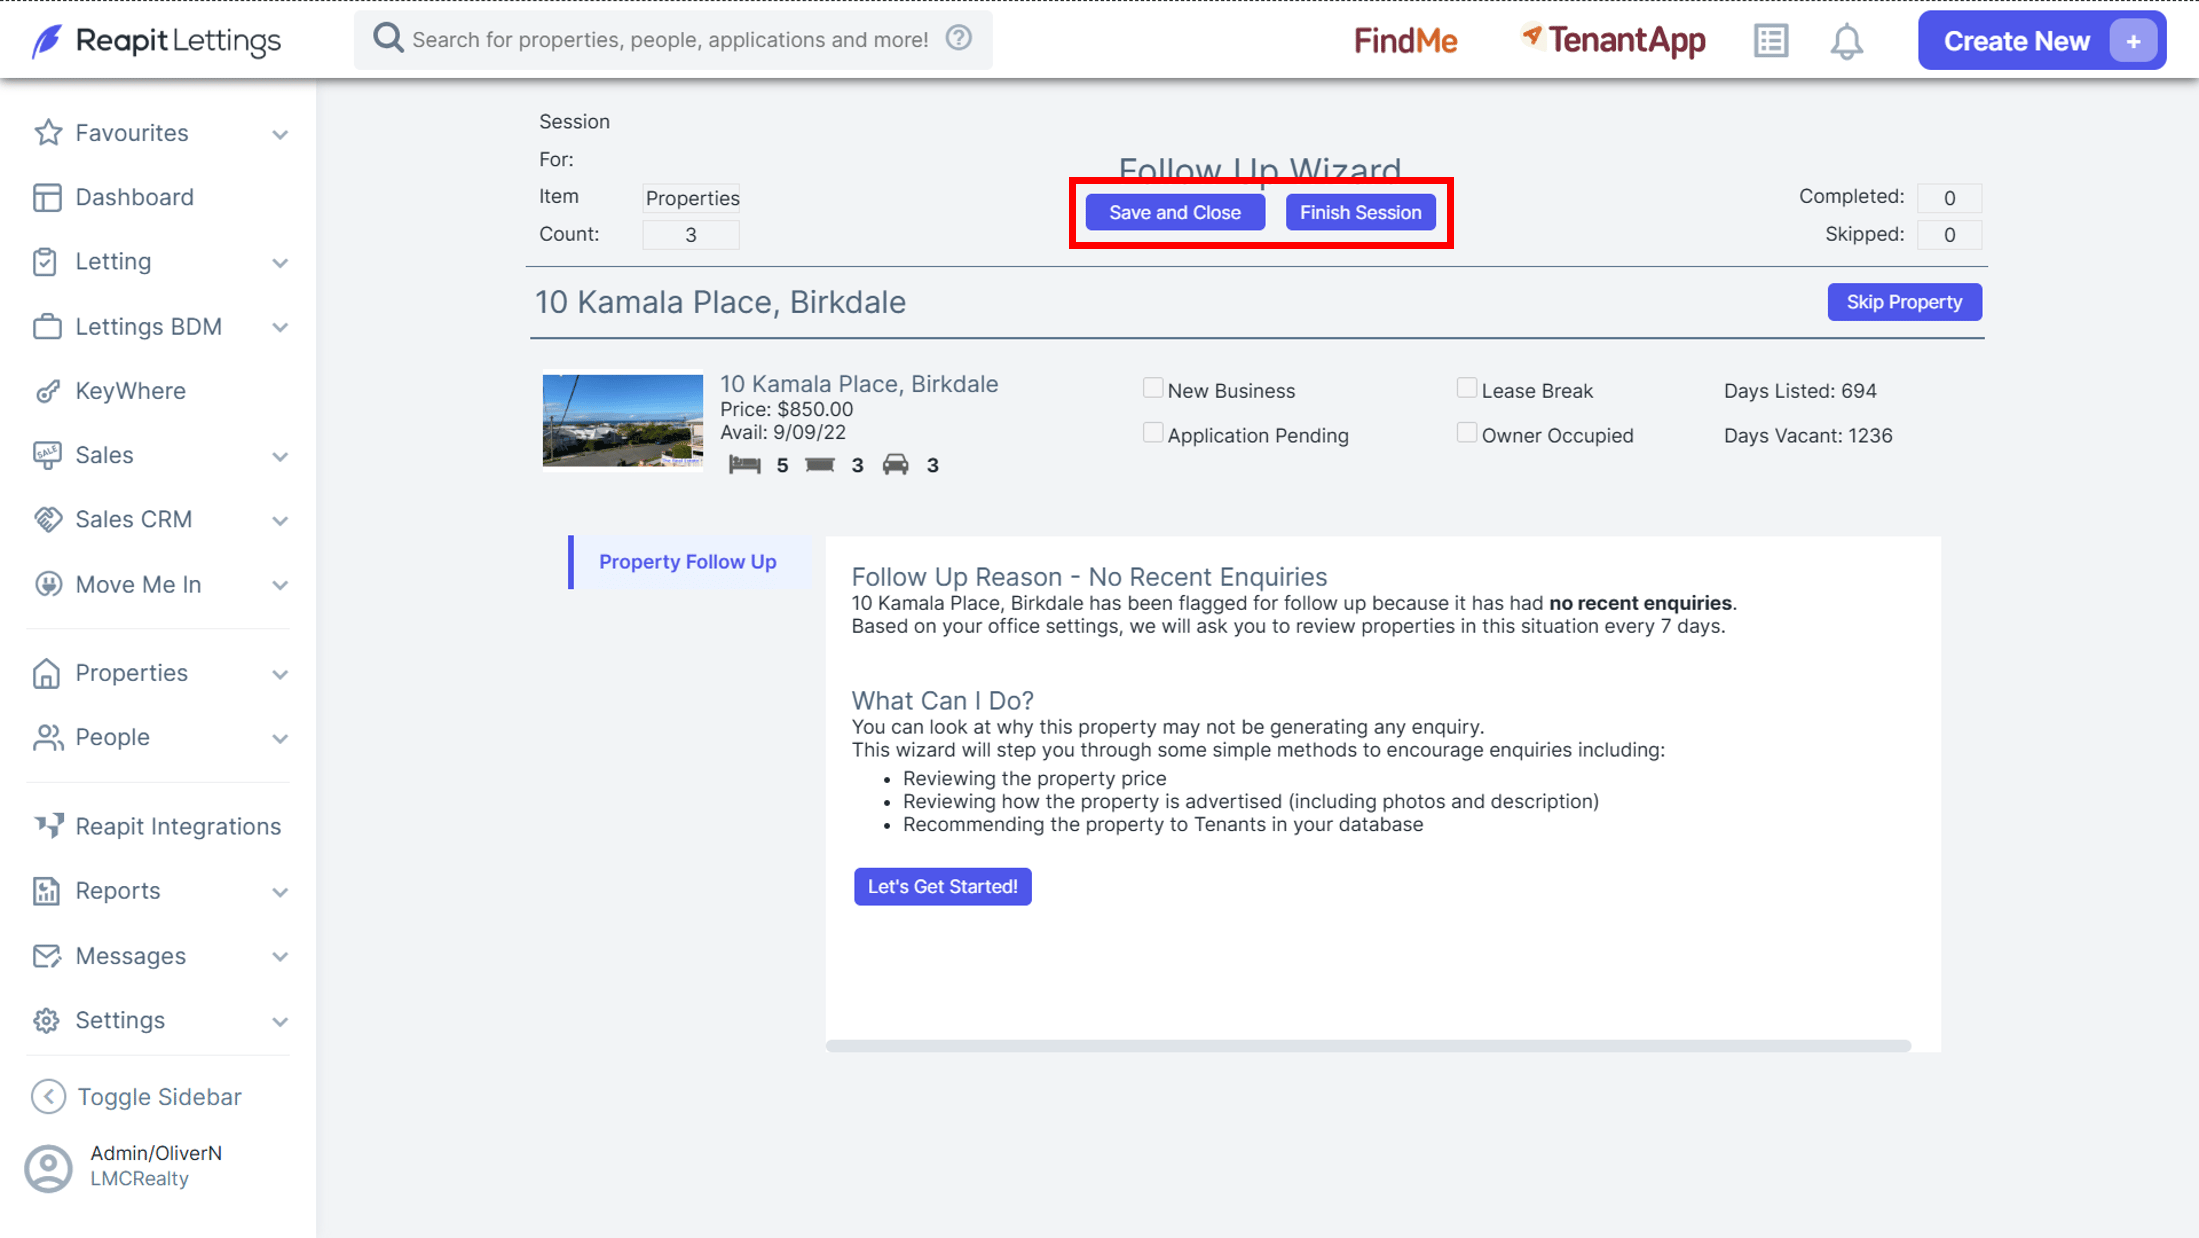
4. You can choose to finish the session at any stage by selecting the Finish Session button. To pause the sessions, select the Save & Close button. The session will then be paused and can be resumed at any stage.
5. Information about the Follow Up reason or the category you are working through is displayed on the page and suggestions on what you can do within the session.
6. To begin select Let’s Get Started!
7. Alternatively, you can skip completing the follow-up for the property and move on to the next in the list by selecting Skip Property. The number of properties that are completed and skipped is recorded towards the top right-hand side of the page.
8. Once you have selected Let’s Get Started the side menu to the left of the screen will expand and the items in the property that may require review are displayed. The menu for each of the categories are:
With no recent enquiries
- Review price
- Review images
- Review description
- Review portals
- Recommend property
- Next follow up
With waiting tenants:
- Waiting
With not yet registered:
- Not reg enquiries
With applying tenants:
- Interested prospects
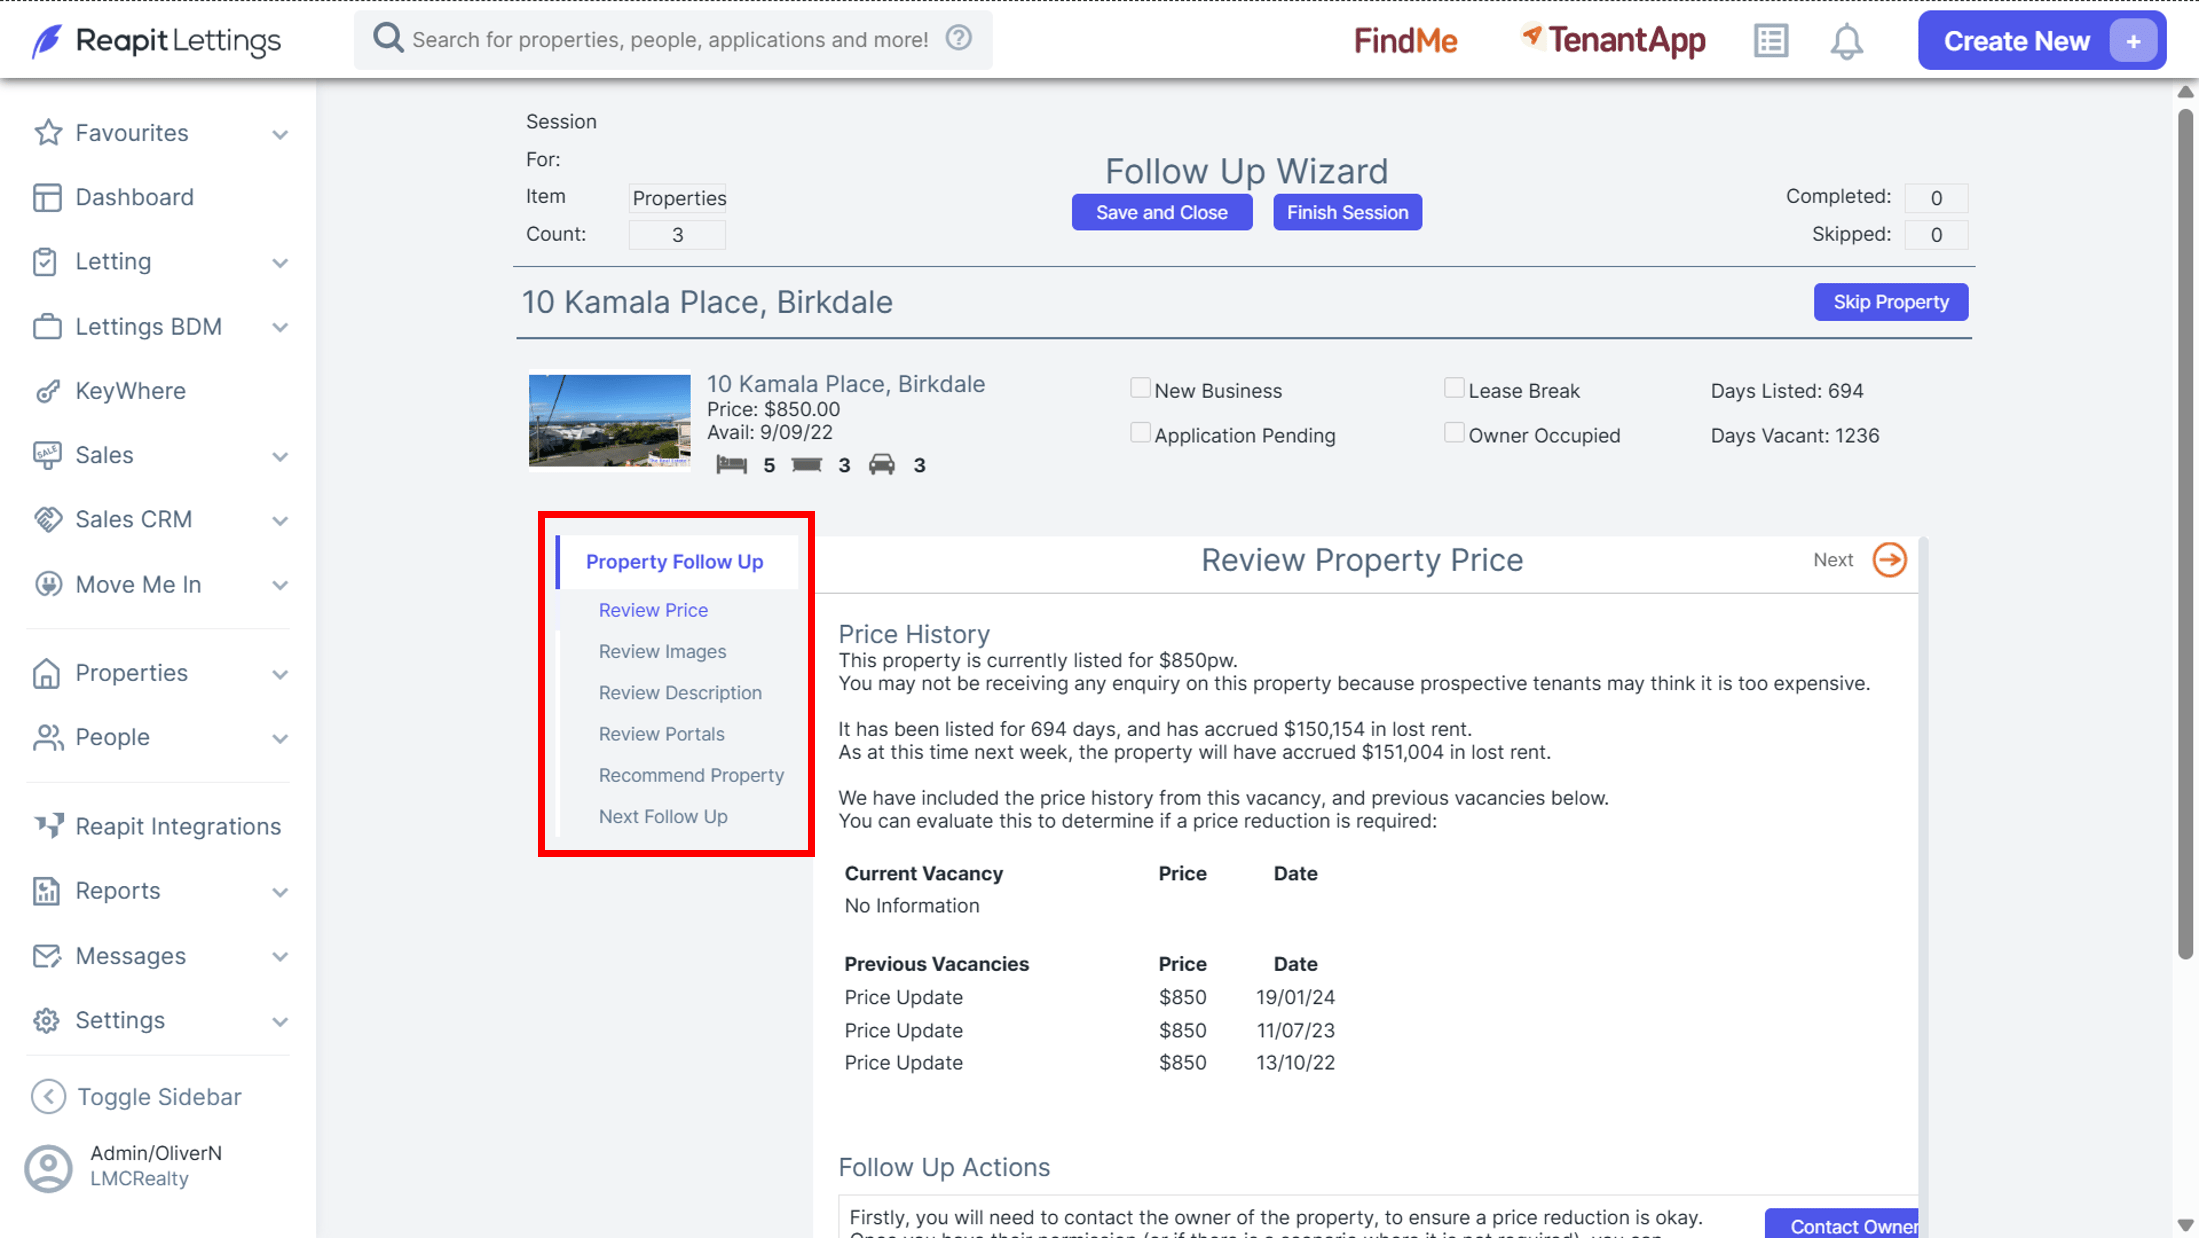
9. Information on the Follow Up Actions are displayed on the page. Each item in the menu will present different Follow-Up Actions relevant to what is being reviewed within that category in the menu and what action can be taken within the system. Some actions will suggest activities that will need to be taken in your listing software or within other parts of the system.
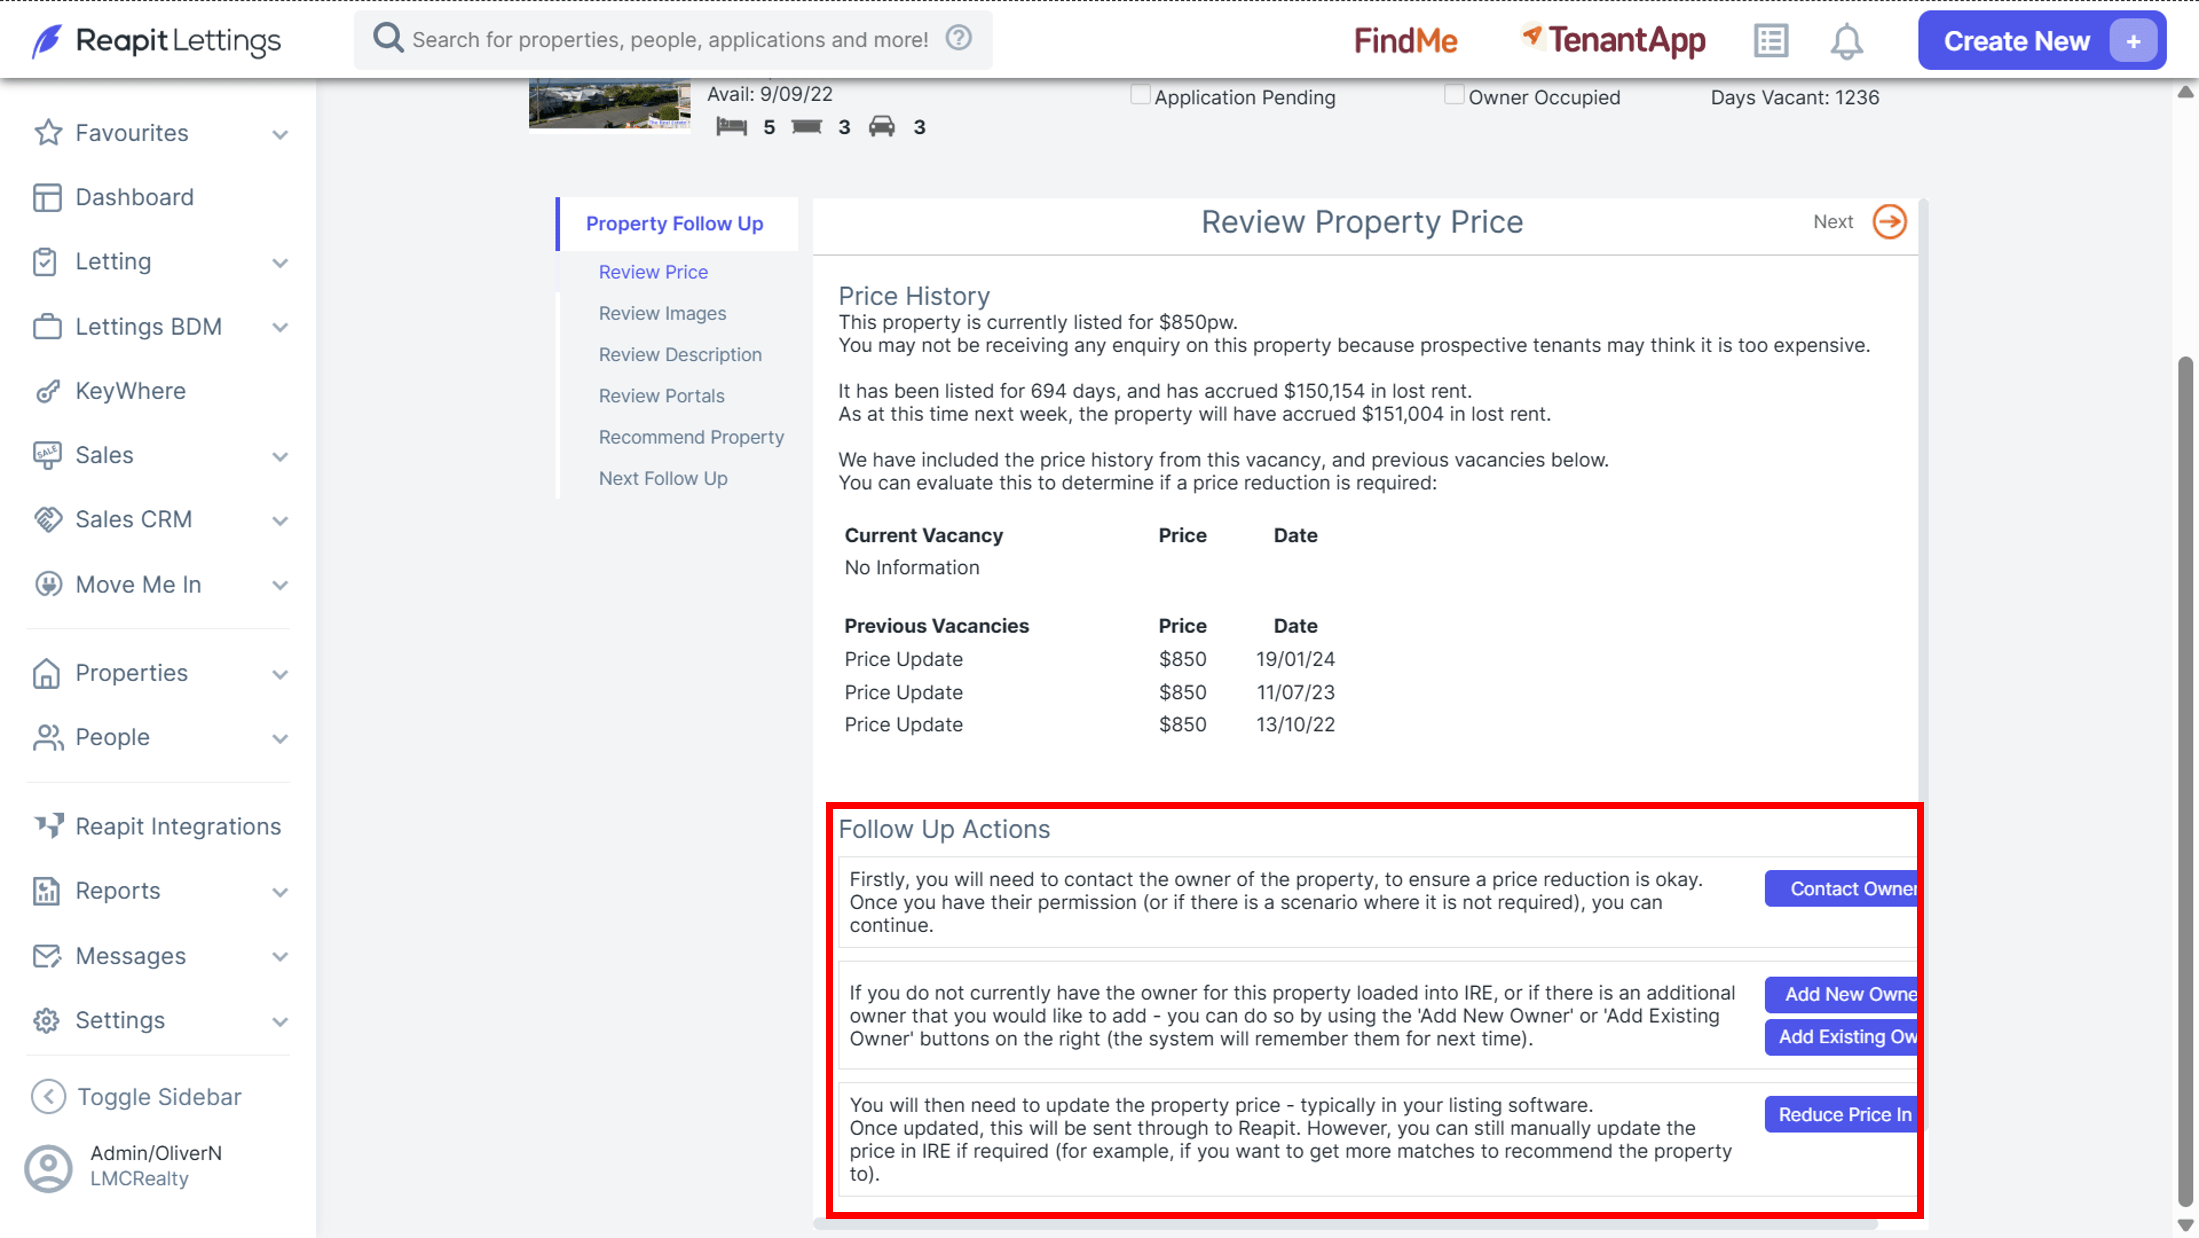
10. To move through the menu of items to be reviewed selectNext.
*Note: You cannot move through the menu of items without opting to select Next.
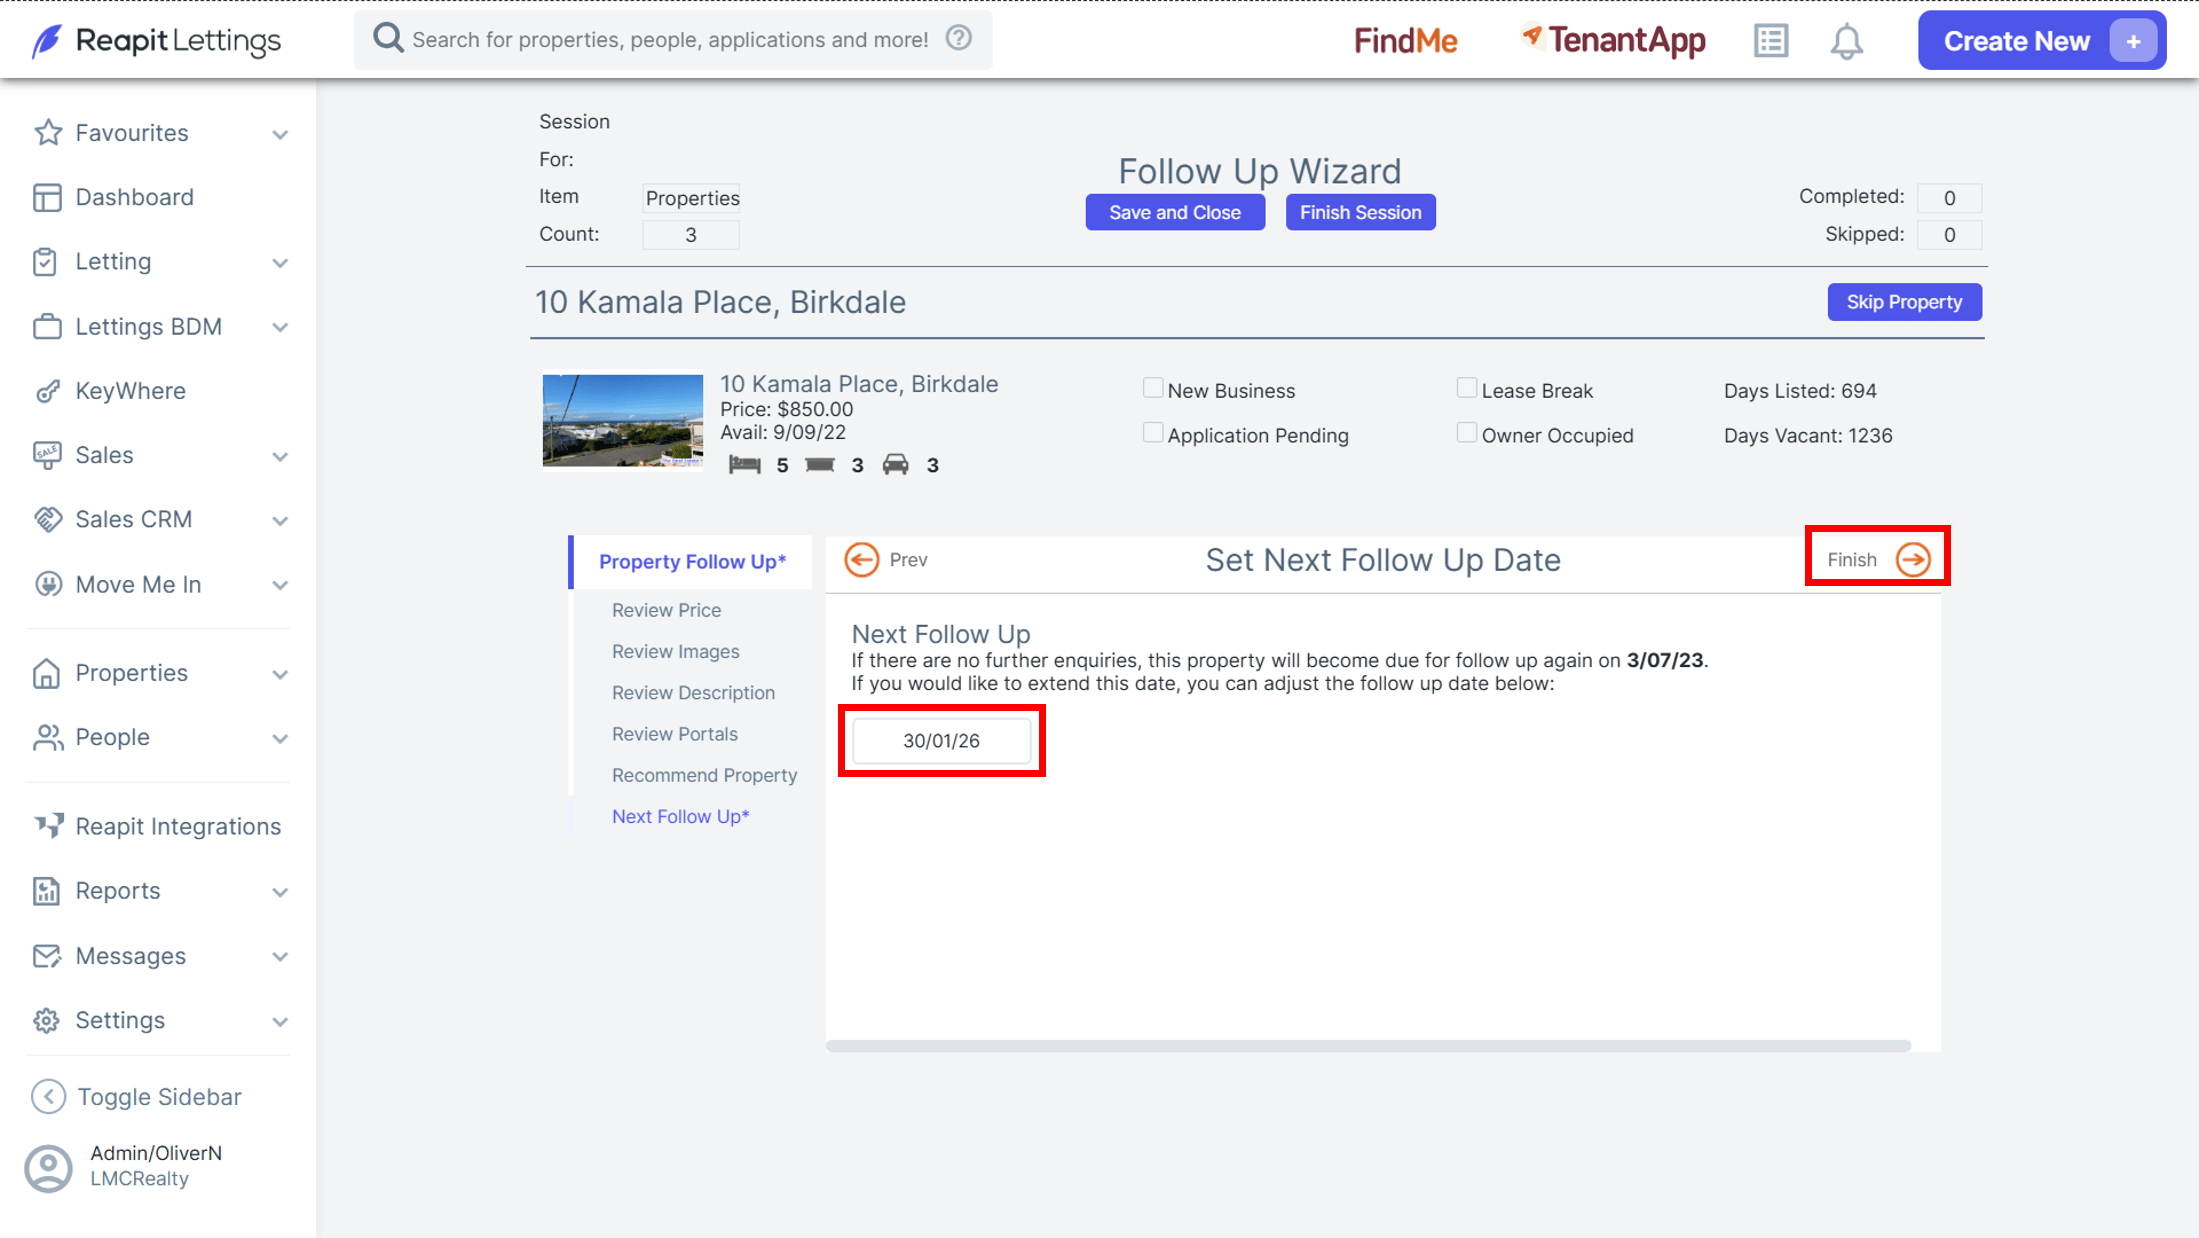
11. Once you reach the 'Next Follow Up' step of each menu you can nominate a date when the property will need another follow-up.
12. The settings for the default follow-up time frame is located under ROL Settings > General beneath the ‘Follow Up Wizard’ heading.
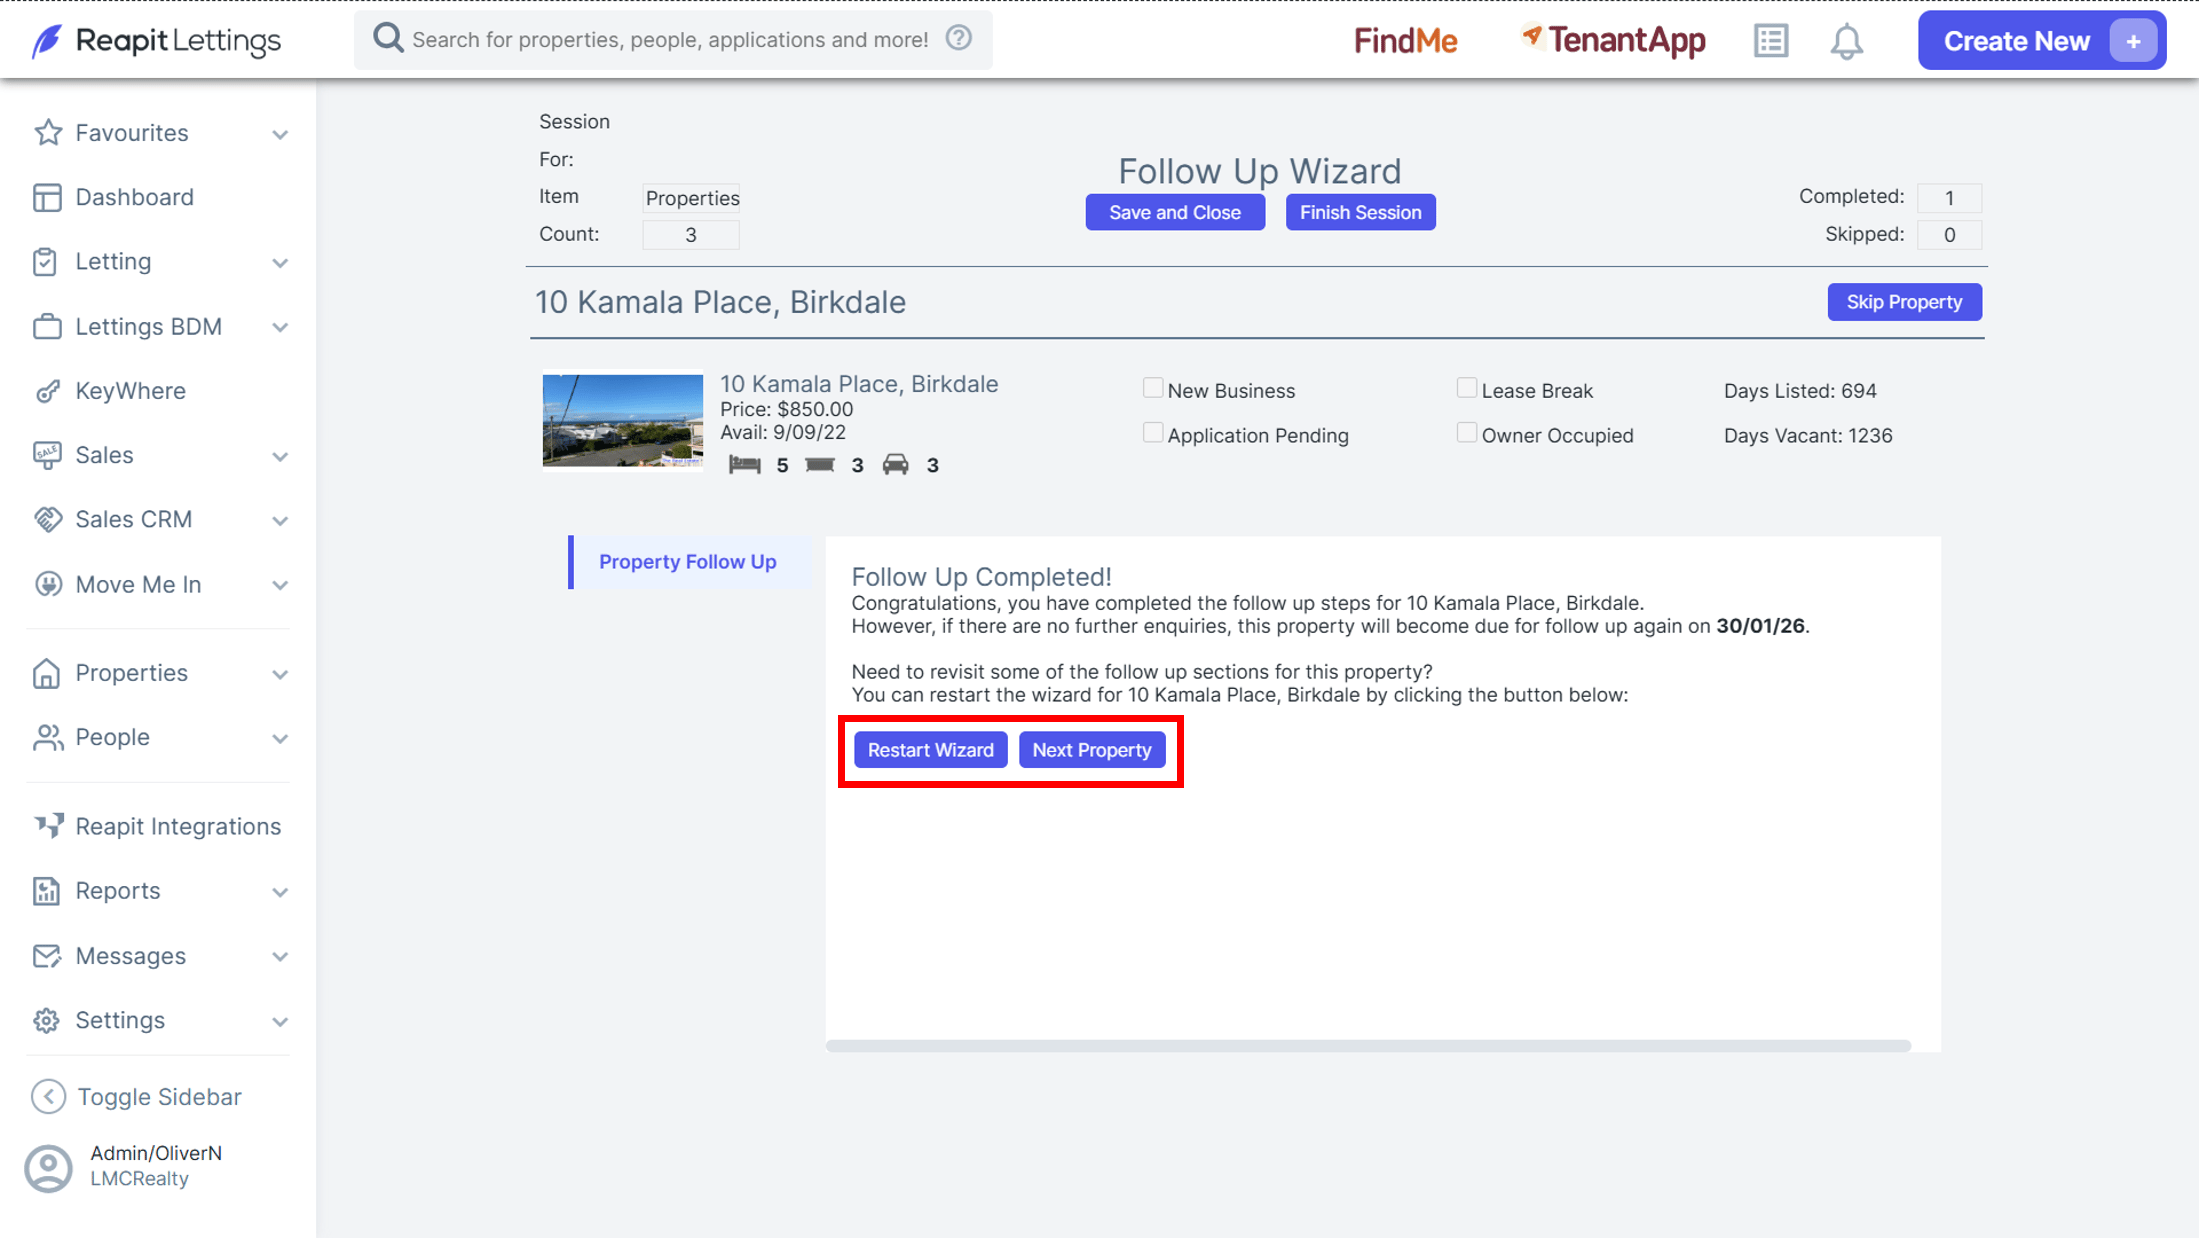
13. Once each of the items against the property has been reviewed and the next follow-up date nominated select Finish and the Follow Up for that particular property will be completed.
14. You will then be presented with the option to move on to the next property in the list for review by selecting Next Property or to restart the follow-up again by selecting Restart Wizard.
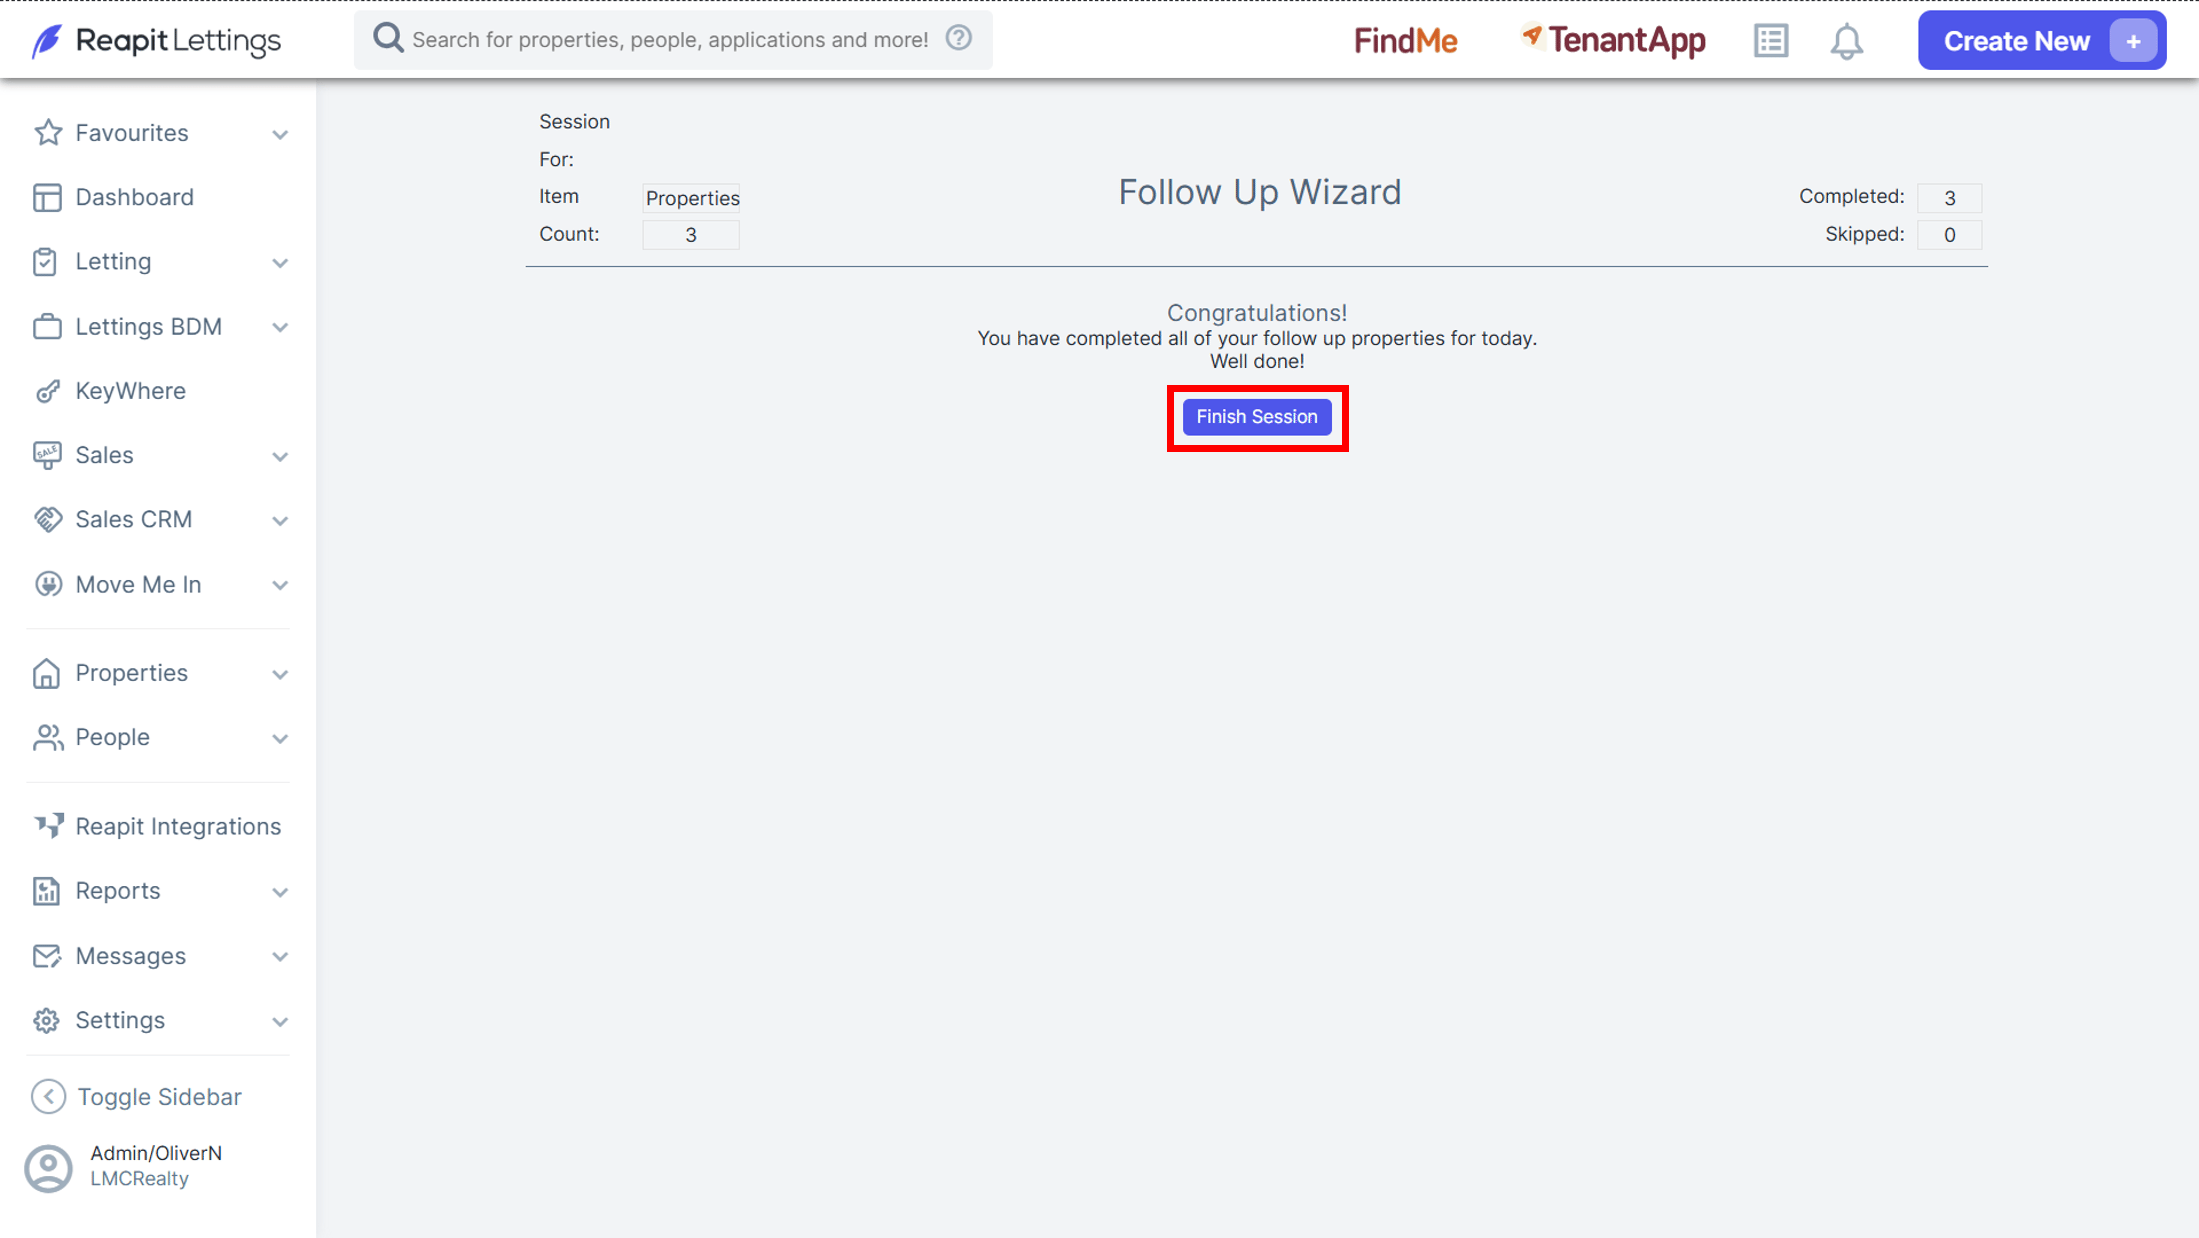
15. Once each of the properties has been reviewed the option to Finish Session will be available. Select to close the window.
Option 2 – Prospects
By default, the system will elect to work through all prospects that require follow-up that day. To change the follow-up session to only work through prospects assigned to a particular team member select a name from the drop-down.
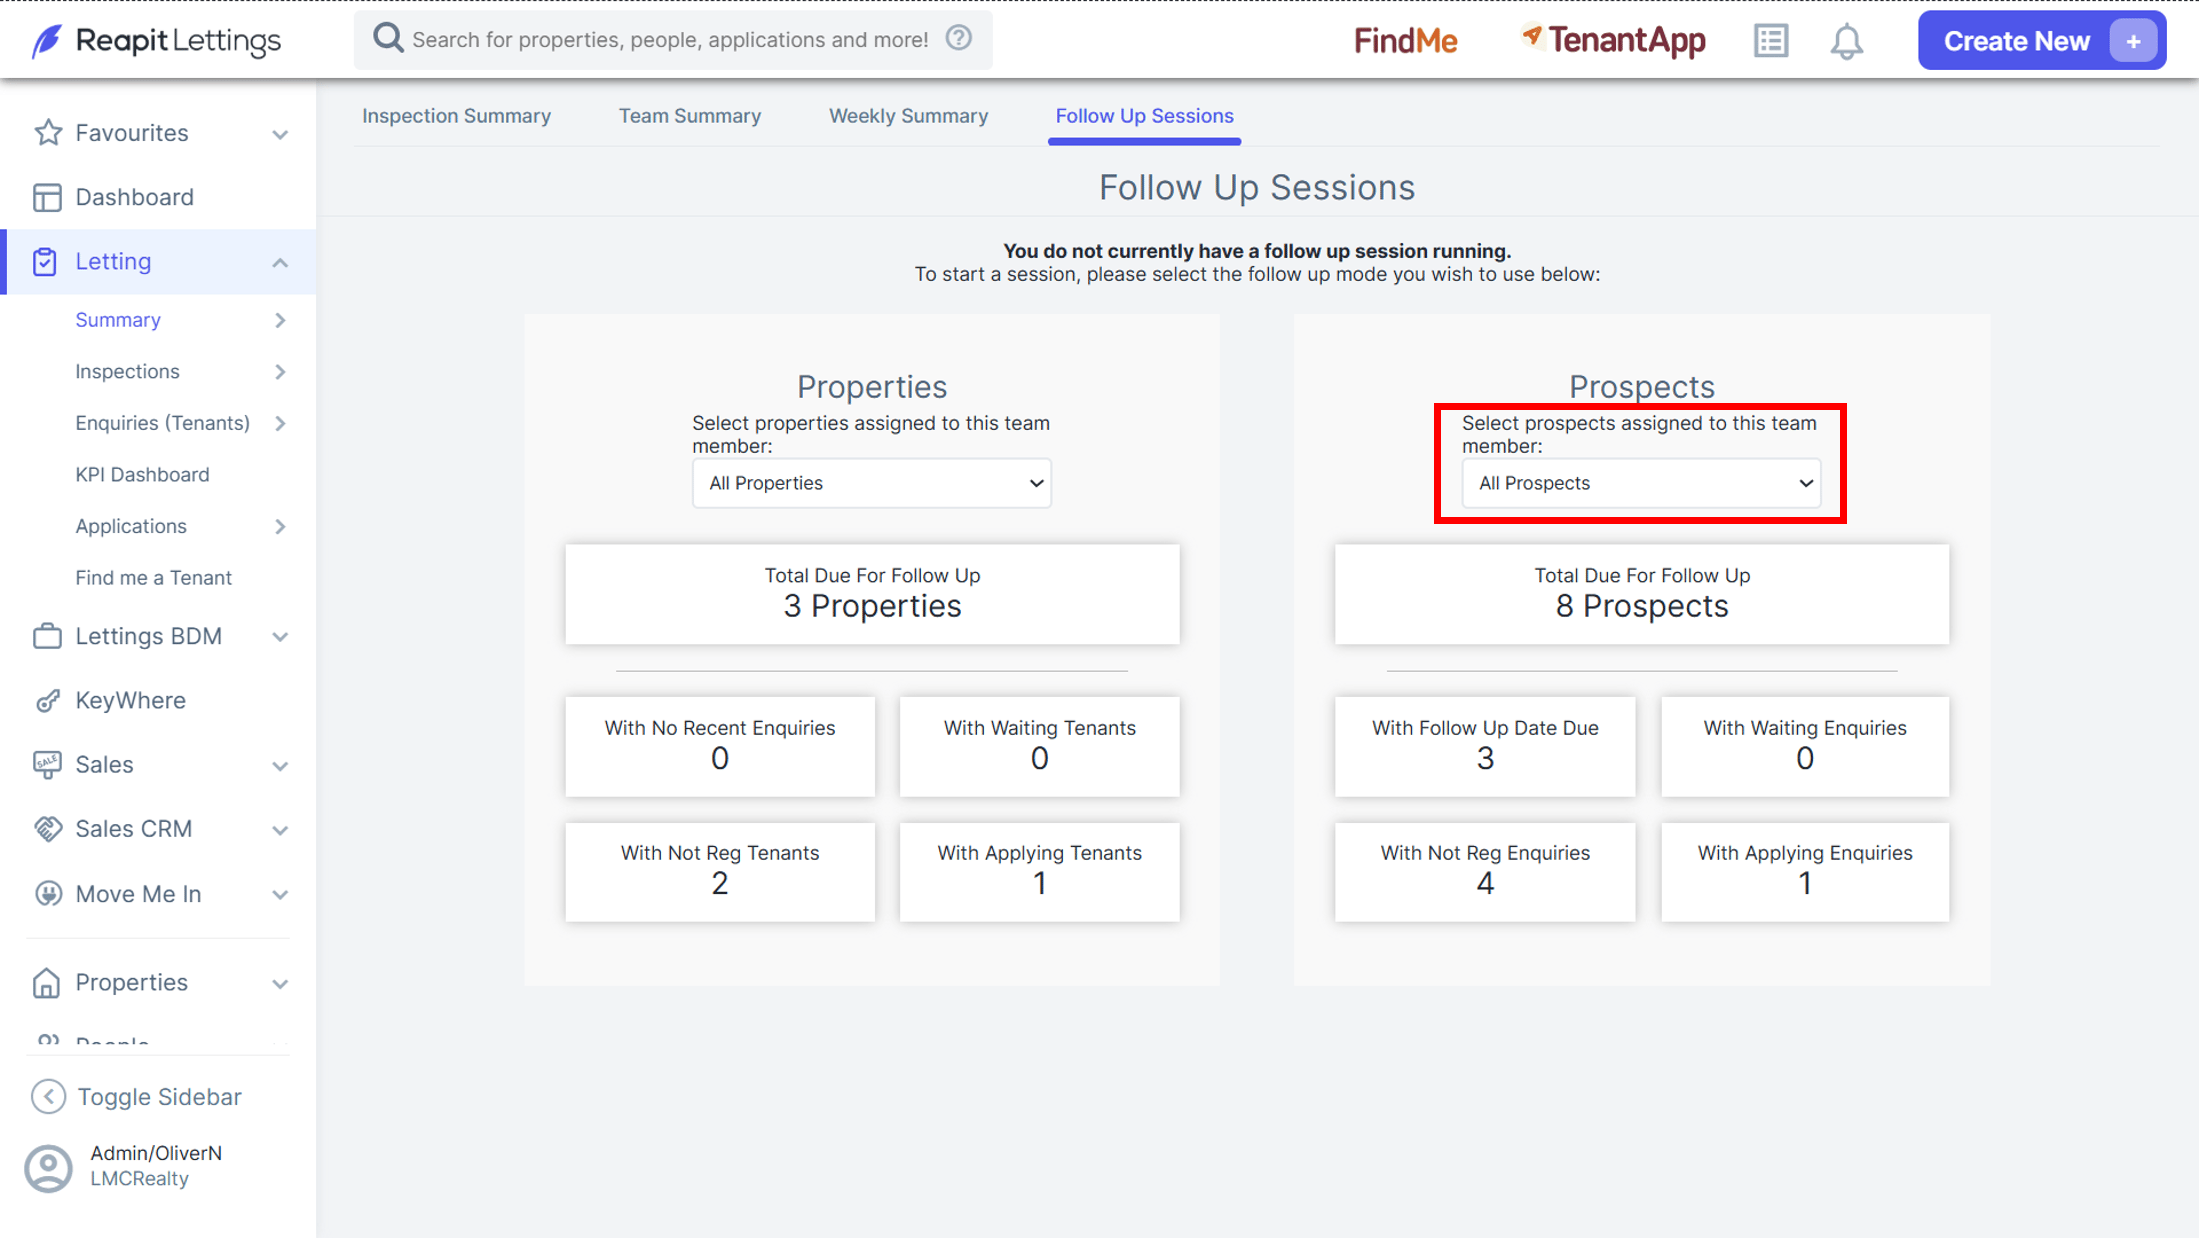
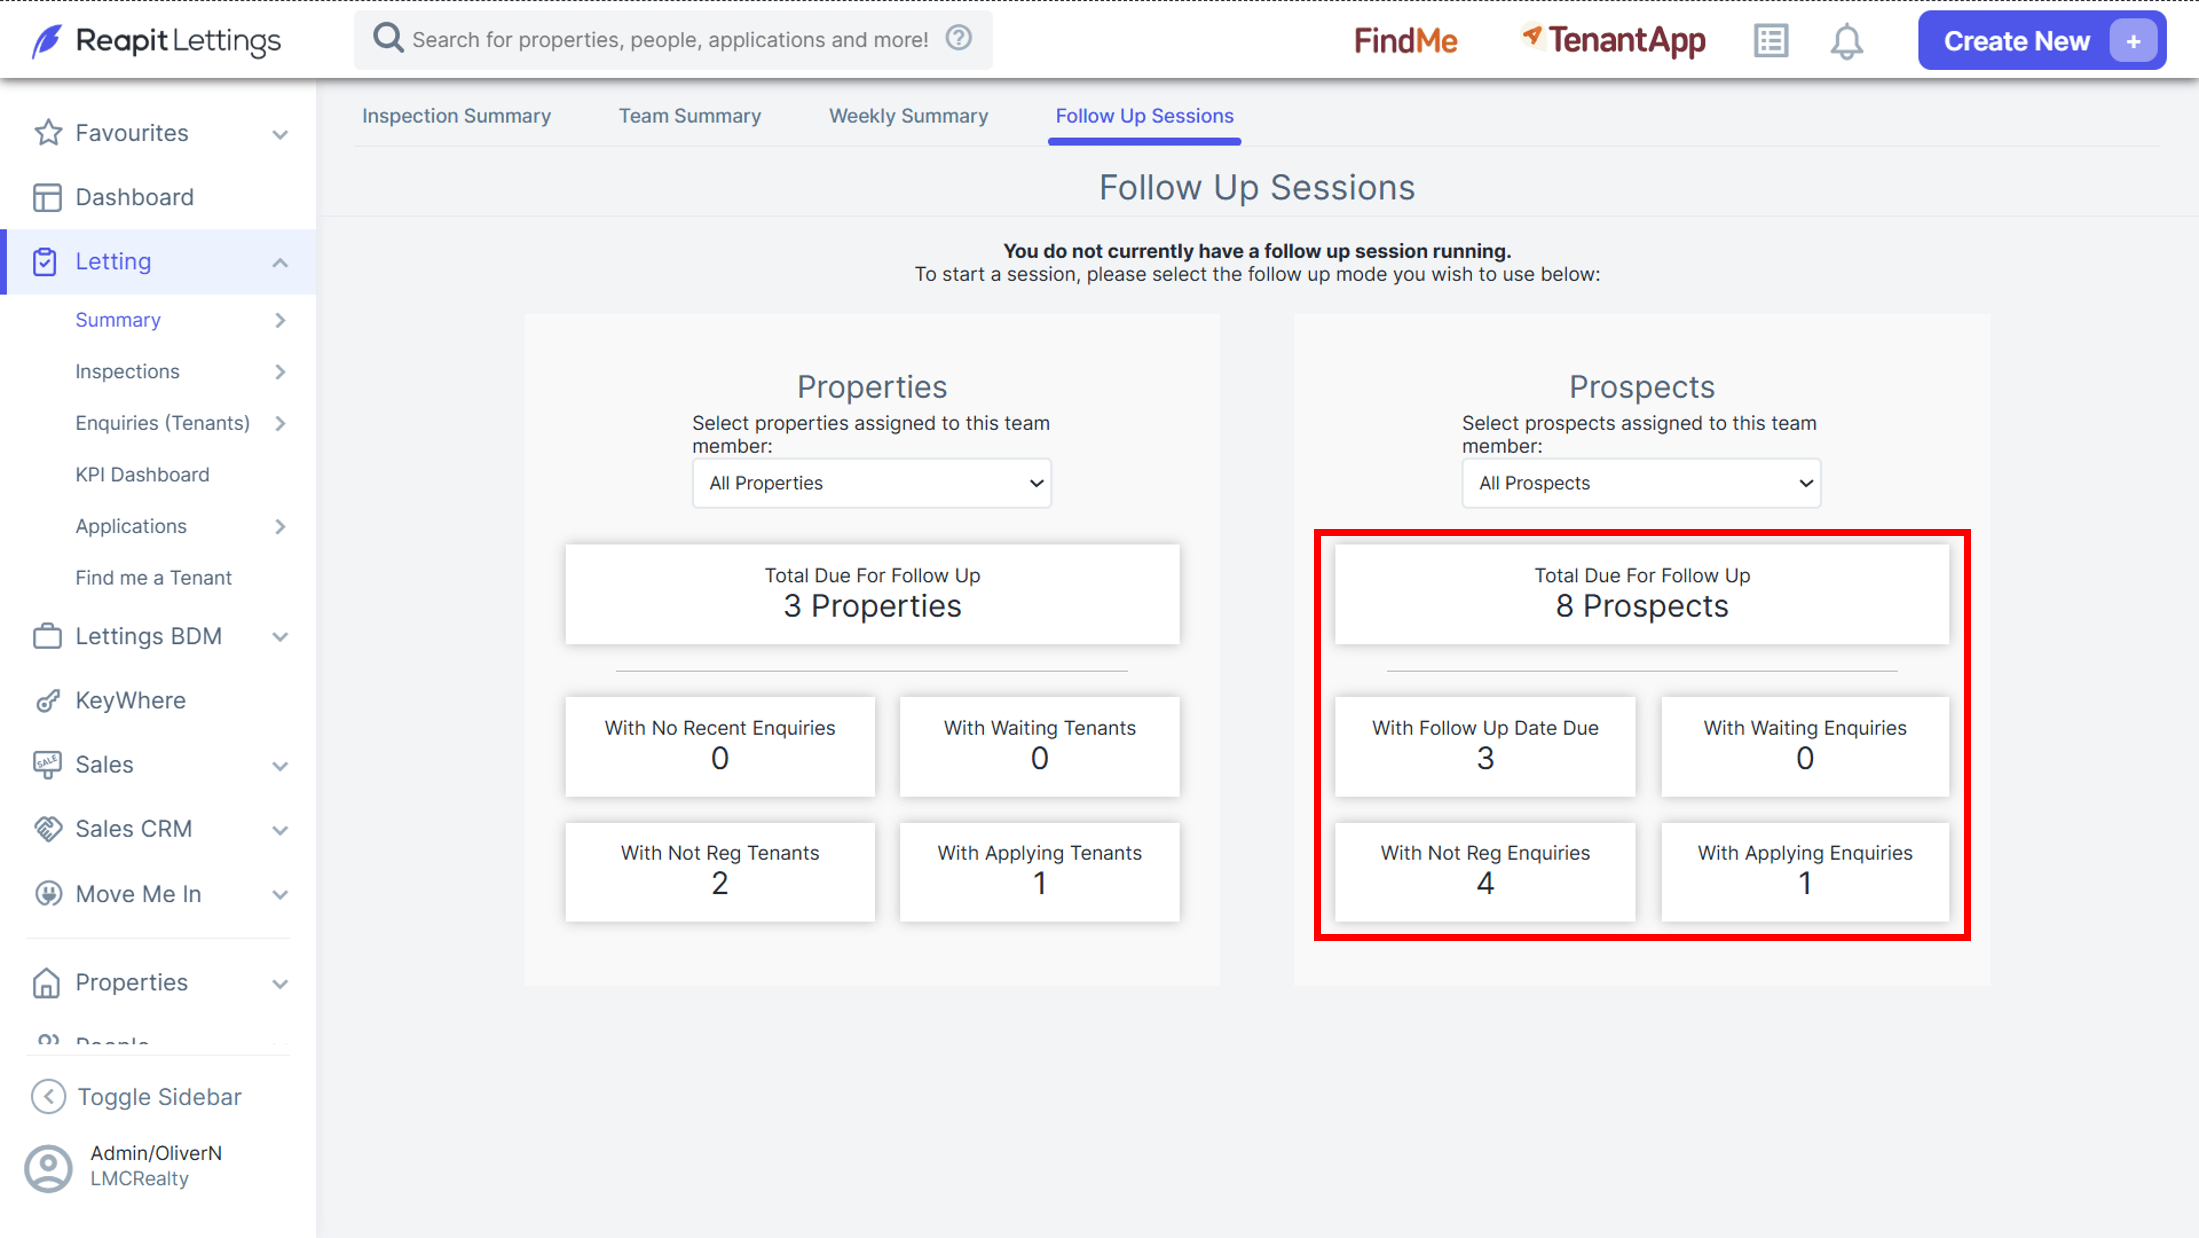
There are four different categories of items that require review against the prospects and the number of the total prospects in each group are indicated below the total.
These categories are Prospects:
- With follow up date due
- With waiting enquiries
- With not registered enquiries
- With applying enquiries
You can elect to start the follow-up session for all the Prospects and work through each of the four categories by clicking on the total number of prospects due for follow up. Alternatively, you can work through one category at a time by clicking into it.
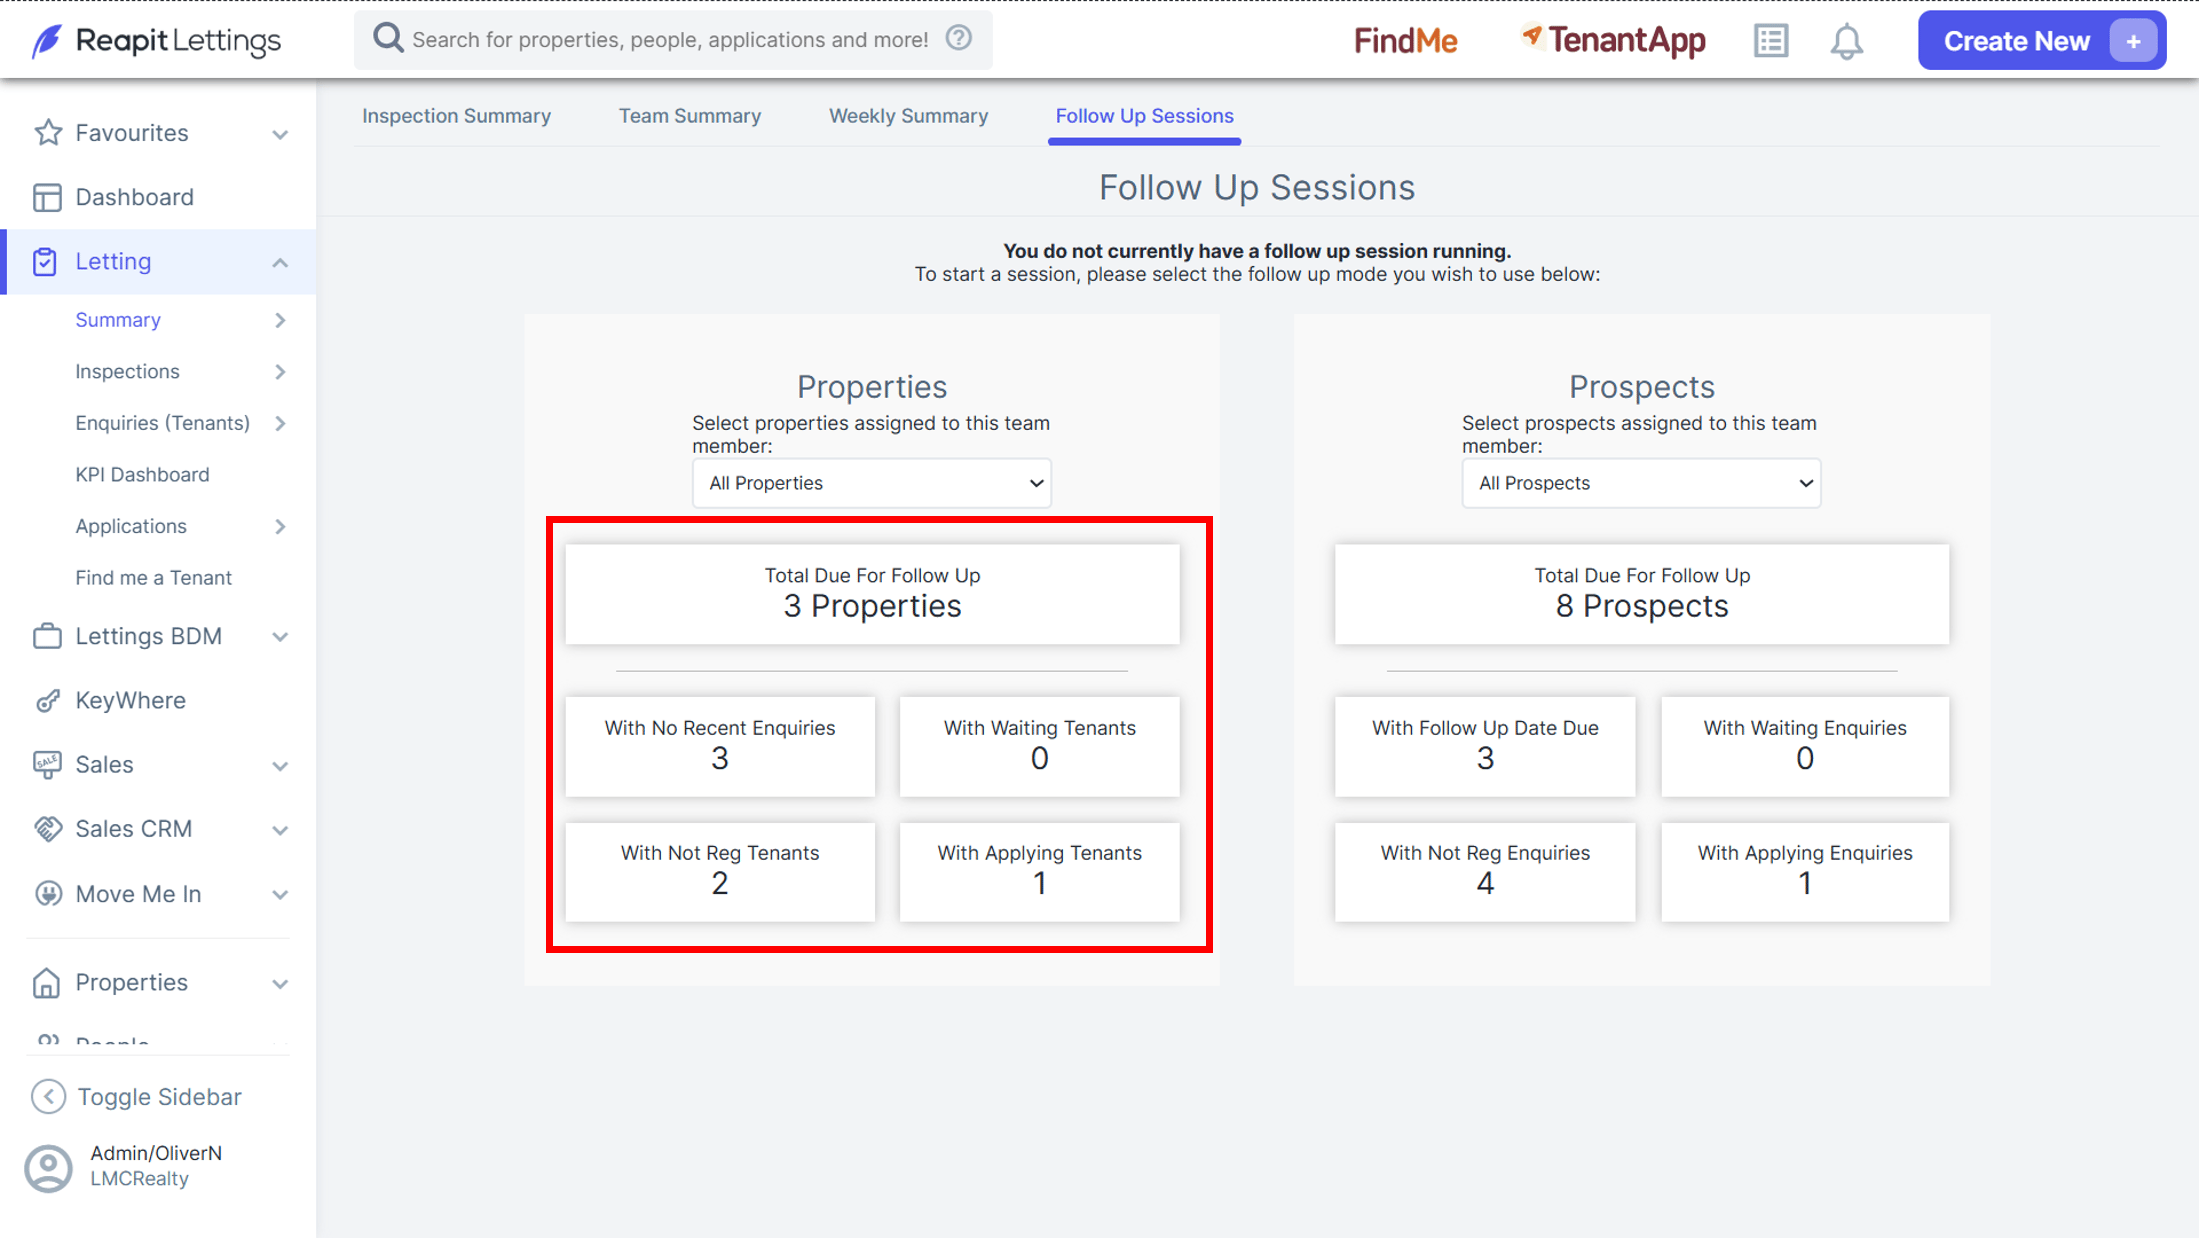
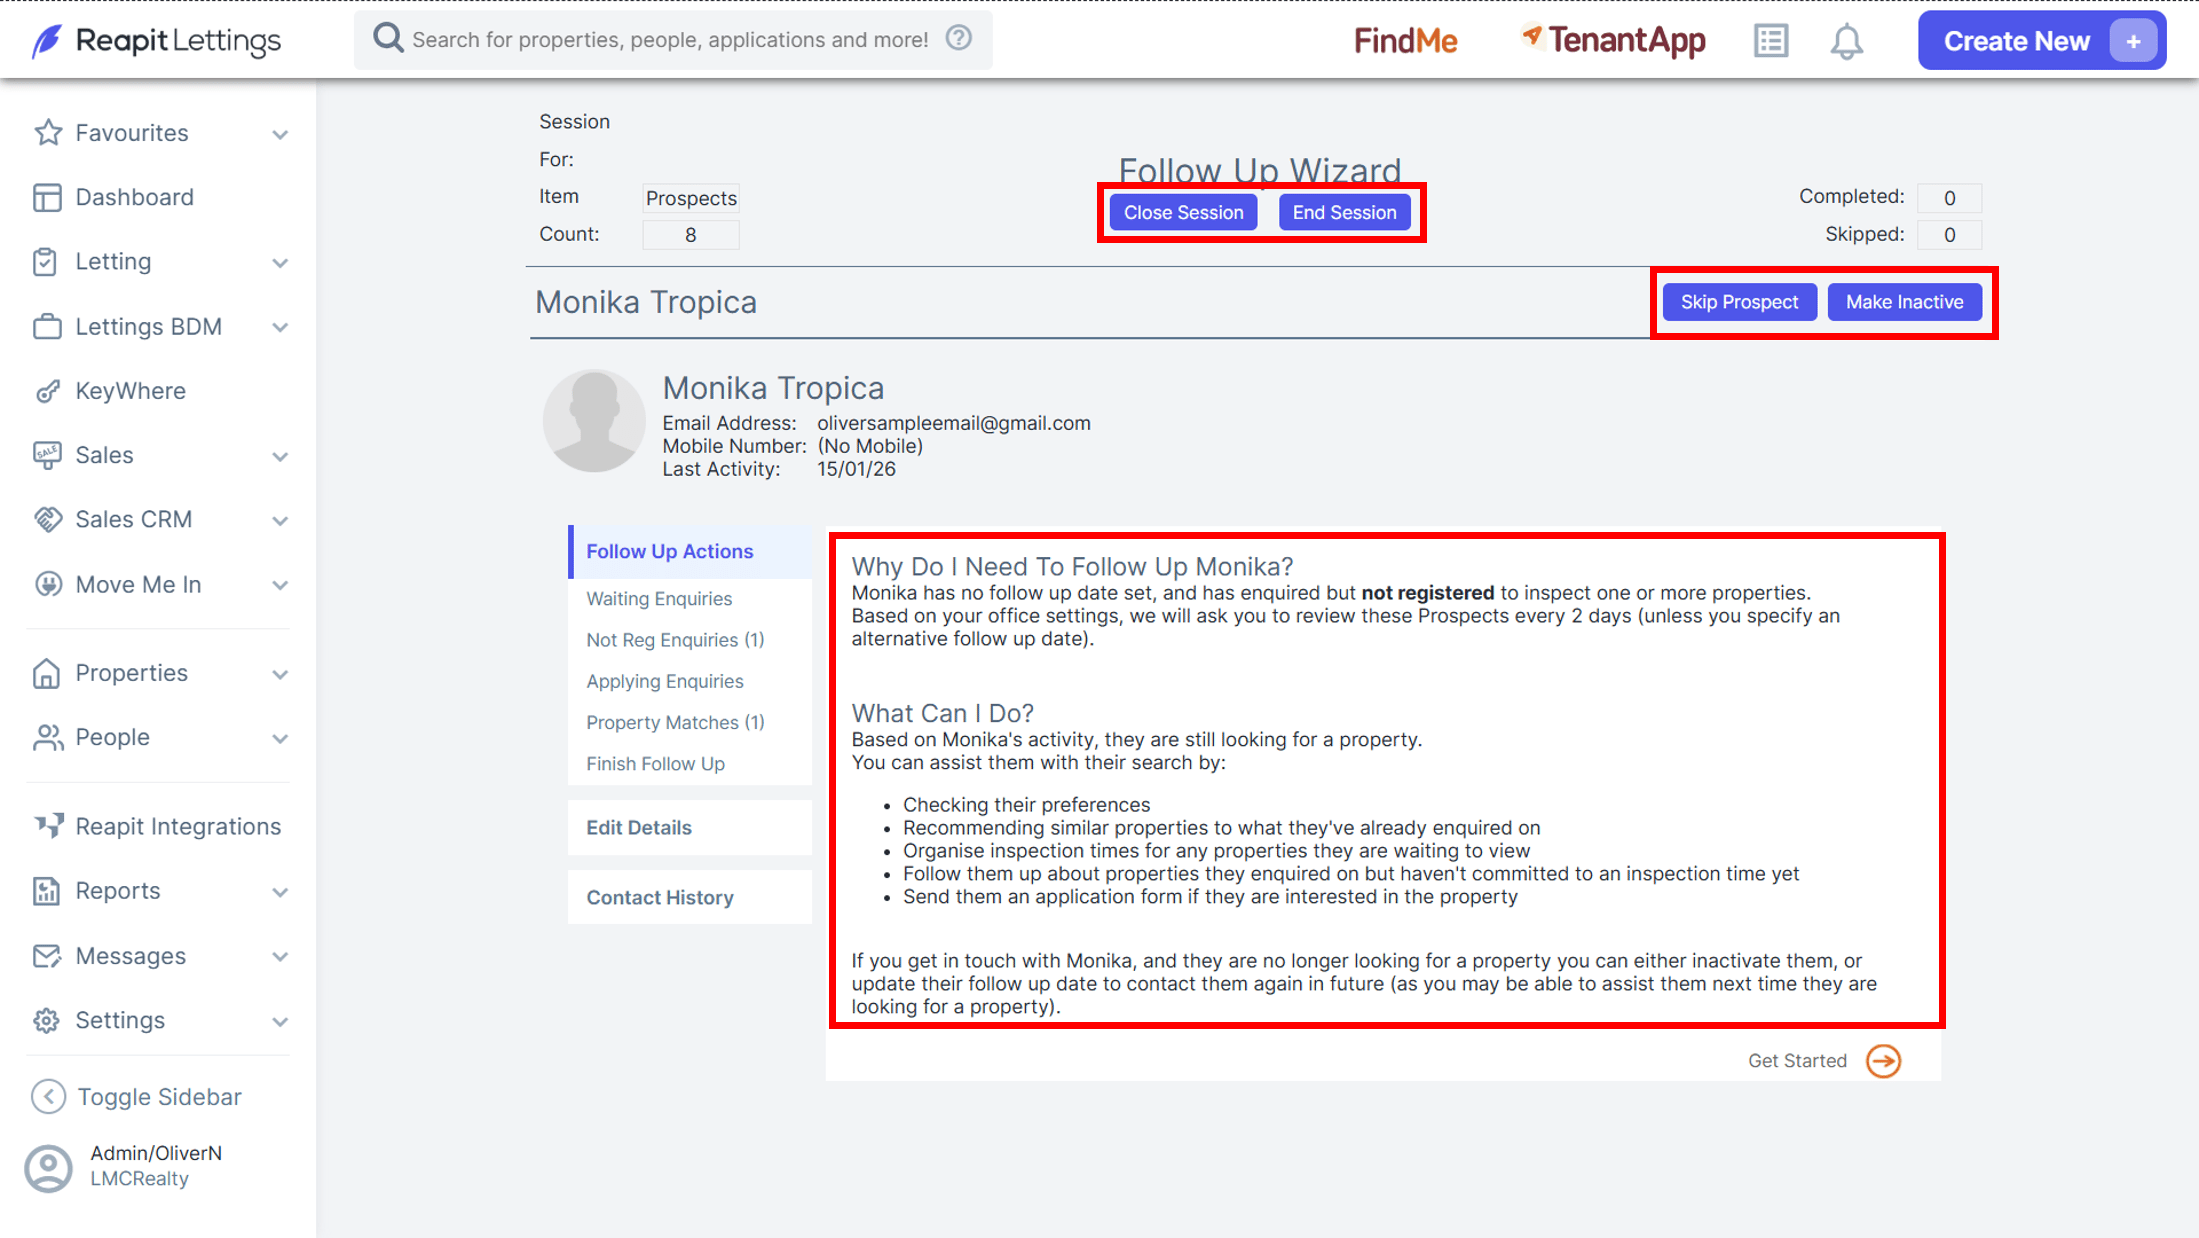
1. The Follow Up Wizard displays information about why the prospect may require a follow-up and what can be done within the system is displayed on the page.
2. You have the option to Skip Prospect or Make Inactive towards the top right-hand side of the page. The system will count the number of Prospects that have had the follow-up complete and skipped.
3. You can choose to finish the session at any stage by selecting the End Session button. To pause the sessions, select the Close session button. The session will then be paused and can be resumed at any stage.
4. To begin the follow-up for the Prospect select Get Started!
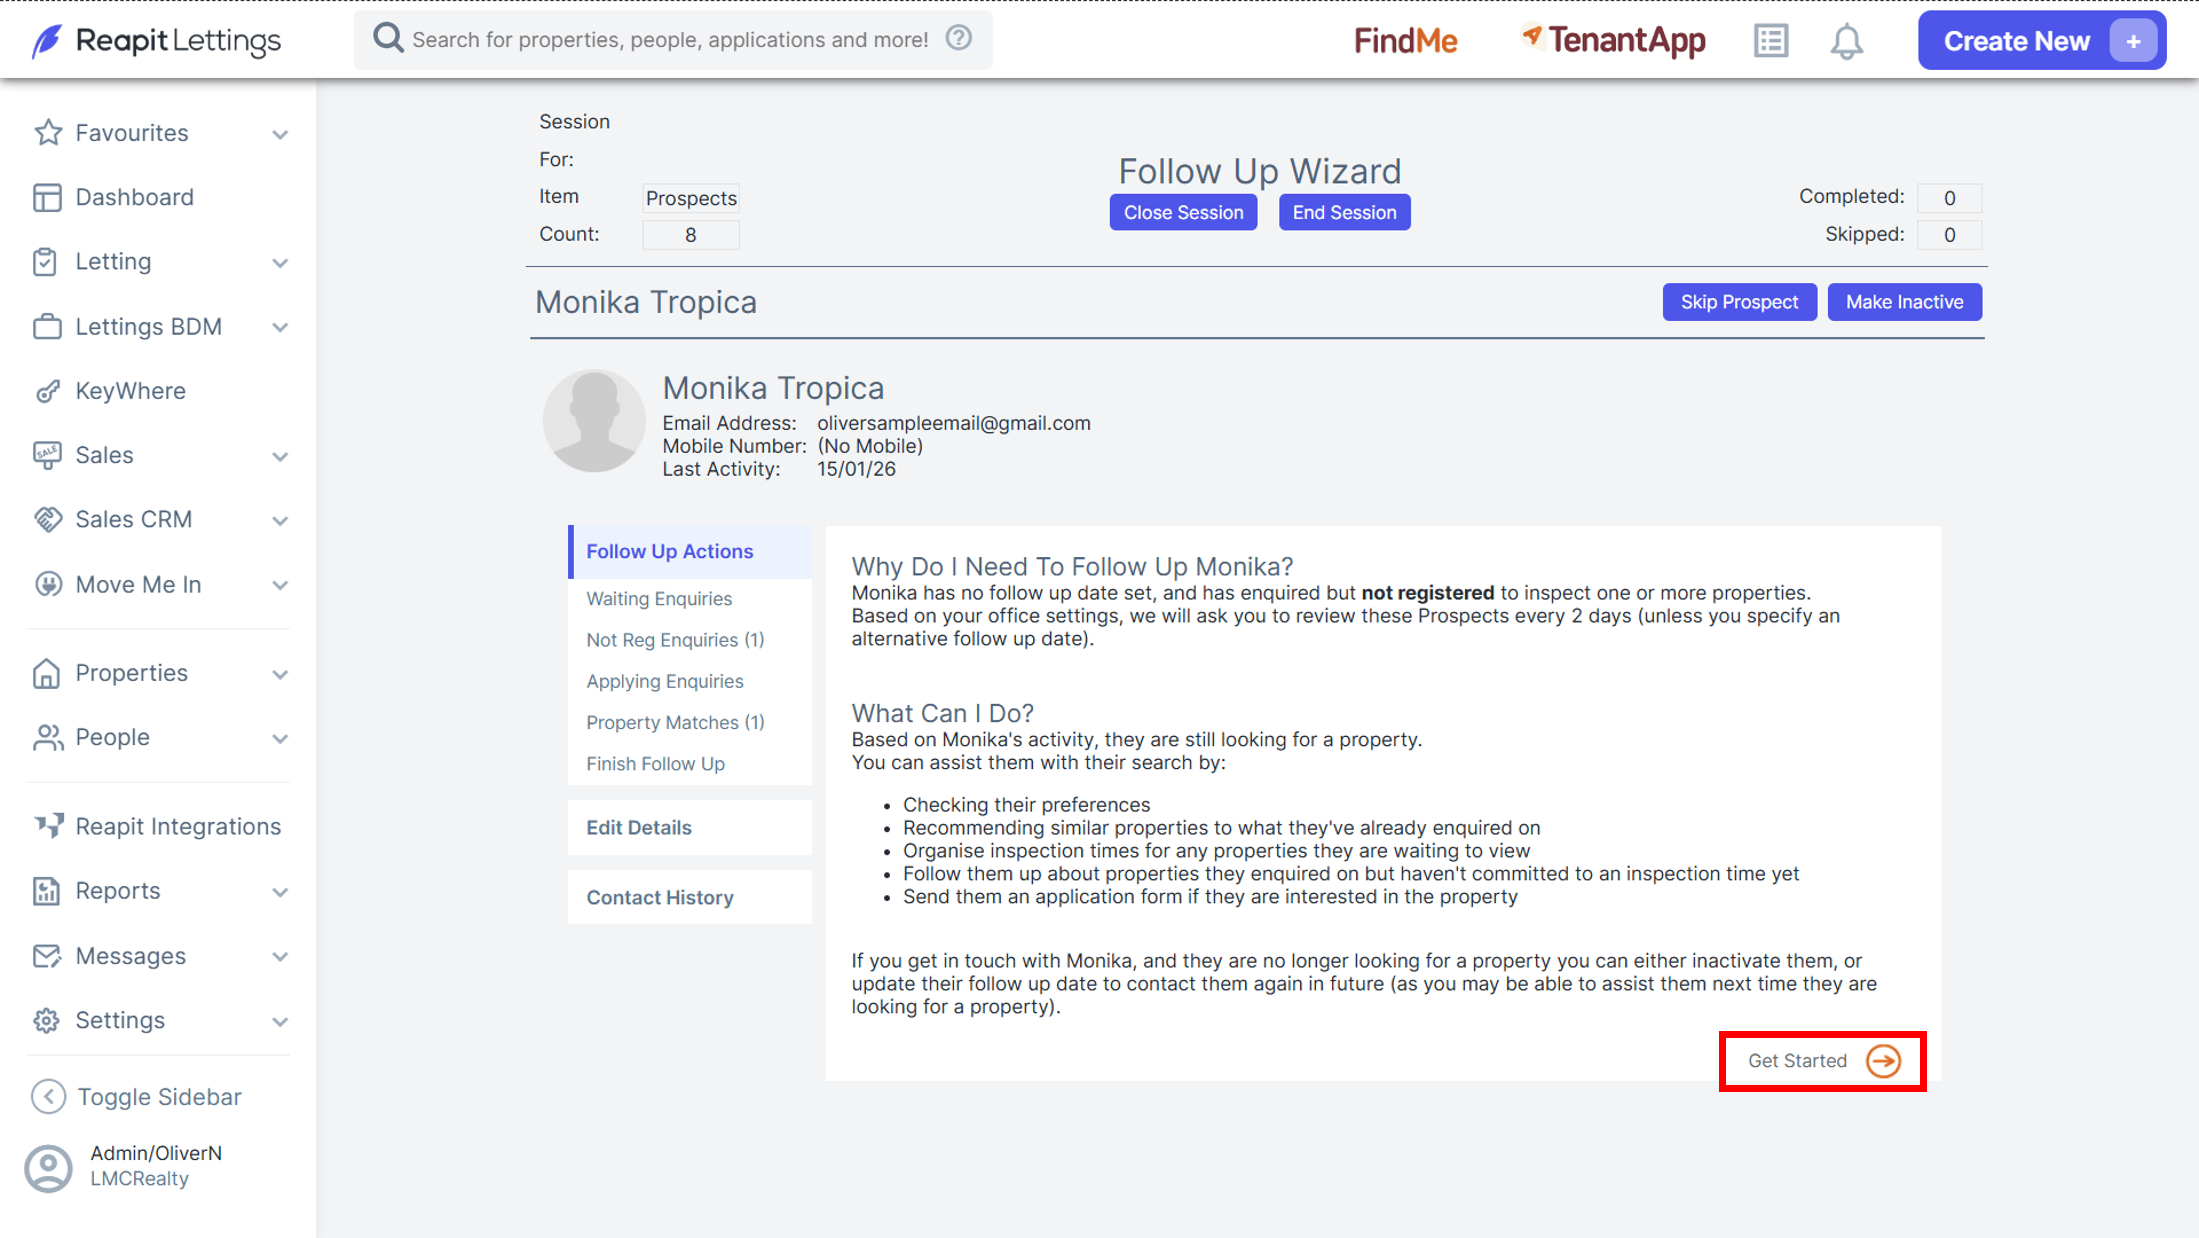
5. The side menu for the prospect will then expand for you to move through and complete the follow-up actions. The menu for all of the categories are:
- Waiting Enquiries
- Not Reg Enquiries
- Applying Enquiries
- Property Matches
- Finish Follow Up (Next Follow Up Date)
6. To move through each of the items of the menu select Next.
*Note: you cannot move through the menu of items without opting to select ‘Next’.
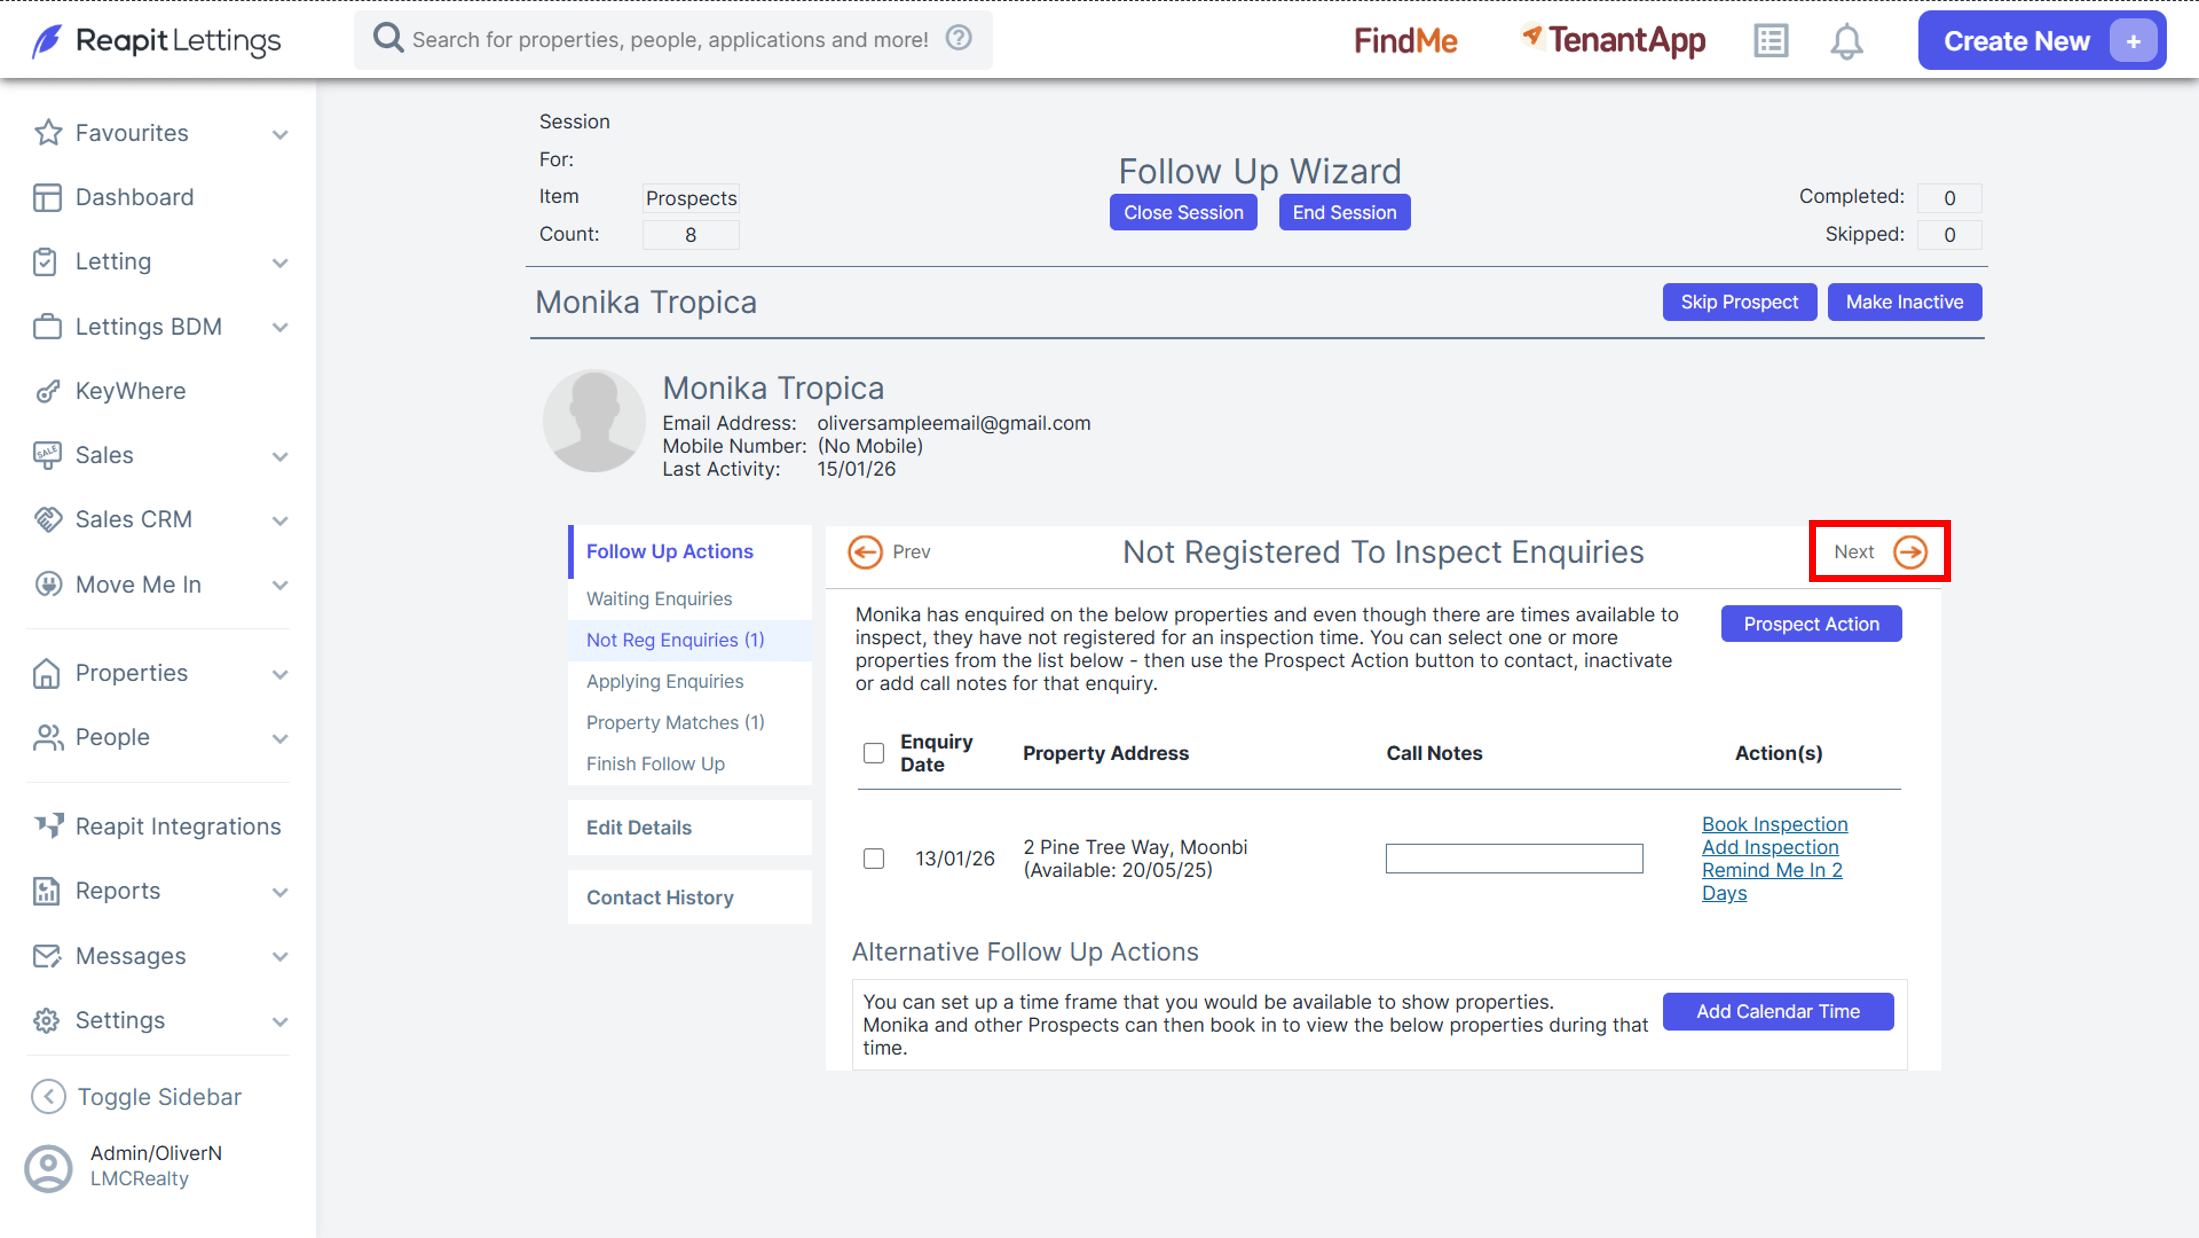
7. Once you have worked through the items of the menu and allocated a follow-up date for the prospect the follow-up will be completed for that Prospect, and you will have the option to either Close or End Session.
Note: The settings for the default follow-up time frame are located under Settings > Letting > General > Wizard > Follow Up Wizard.