'%20d='M0%208a8%208%200%200%201%208-8h24a8%208%200%200%201%208%208v24a8%208%200%200%201-8%208H8a8%208%200%200%201-8-8V8Z'/%3e%3cpath%20fill='%23fff'%20d='M32.576%206C12.293%206%208.776%2025.887%207.424%2034H9.1c.45-2.977%203.493-14.748%2010.899-20.287%200%200-5.633%206.976-6.572%2015.051%203.426-.652%2013.845-3.372%2016.056-12.927l-3.84-.61c1.352-1.351%204.909-5.17%206.931-9.226V6Z'/%3e%3cdefs%3e%3clinearGradient%20id='reapit-lettings__a'%20x1='20.702'%20x2='20.702'%20y1='.351'%20y2='31.228'%20gradientUnits='userSpaceOnUse'%3e%3cstop%20stop-color='%235573FD'/%3e%3cstop%20offset='.575'%20stop-color='%234E56EA'/%3e%3c/linearGradient%3e%3c/defs%3e%3c/svg%3e)
How To Edit An Application Status Message and Add an Attachment or the Rental List
This article will run through how to edit the status messages for applications in Reapit Lettings. The processes in this article include: How to Edit a Status Message How to Upload New Attachments How to Include Attachments in a Status Message
Editing Application Status Messages
This article will run through how to edit the status messages for applications in Reapit Lettings.
The processes in this article include:
- How to Edit a Status Message
- How to Upload New Attachments
- How to Include Attachments in a Status Message
How to Edit a Status Message
Note: To enable customisation, you can set dynamic placeholders in your templates that automatically insert personalised information for each recipient.
- Click on Messages.
- Click on Applications.
- Click on Statuses and Applications.
- Select the Template Category.
- Scroll down to the appropriate Statuses Table, and click Edit Messages.
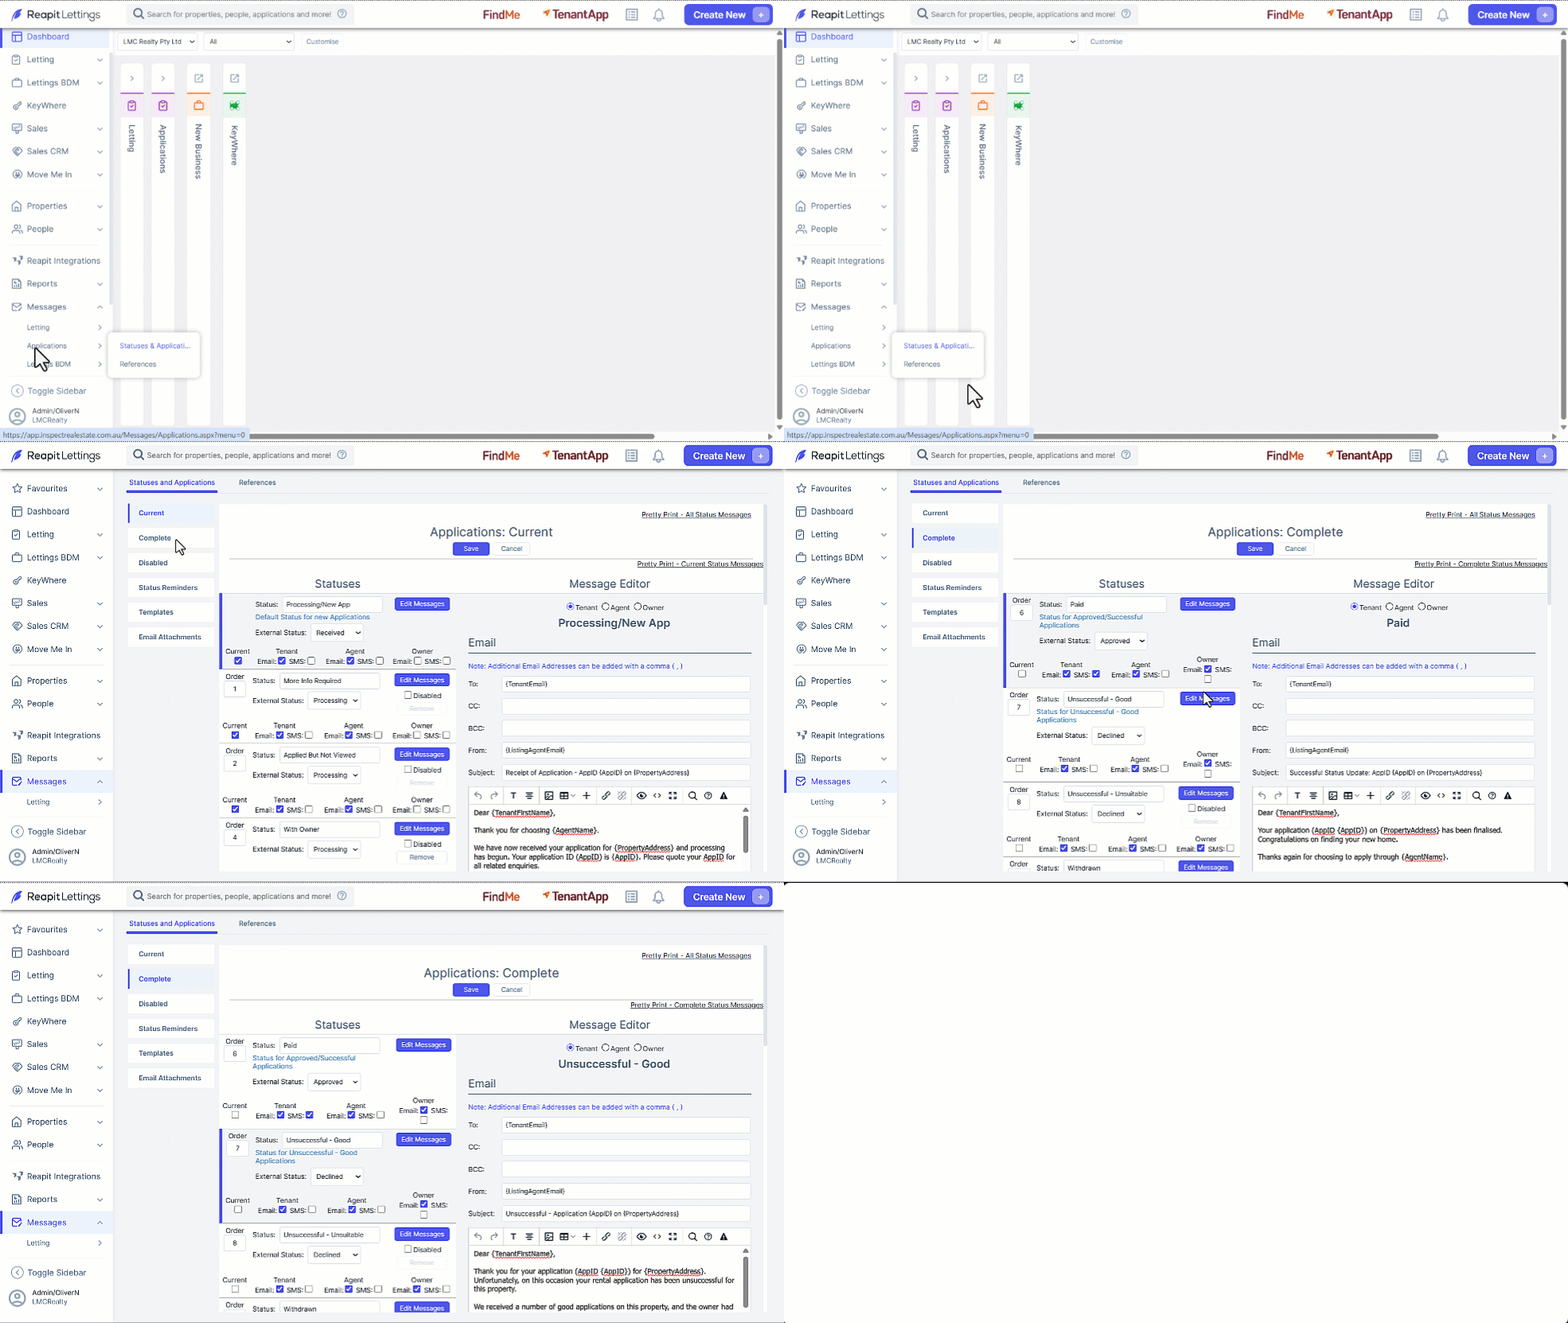
- Click the Contact Type, then edit the text within the Email and/ or SMS table.
- To revert to the original template, click Reset to Default.
- Scroll down and select a Merge Field to include.
- Click on Save.
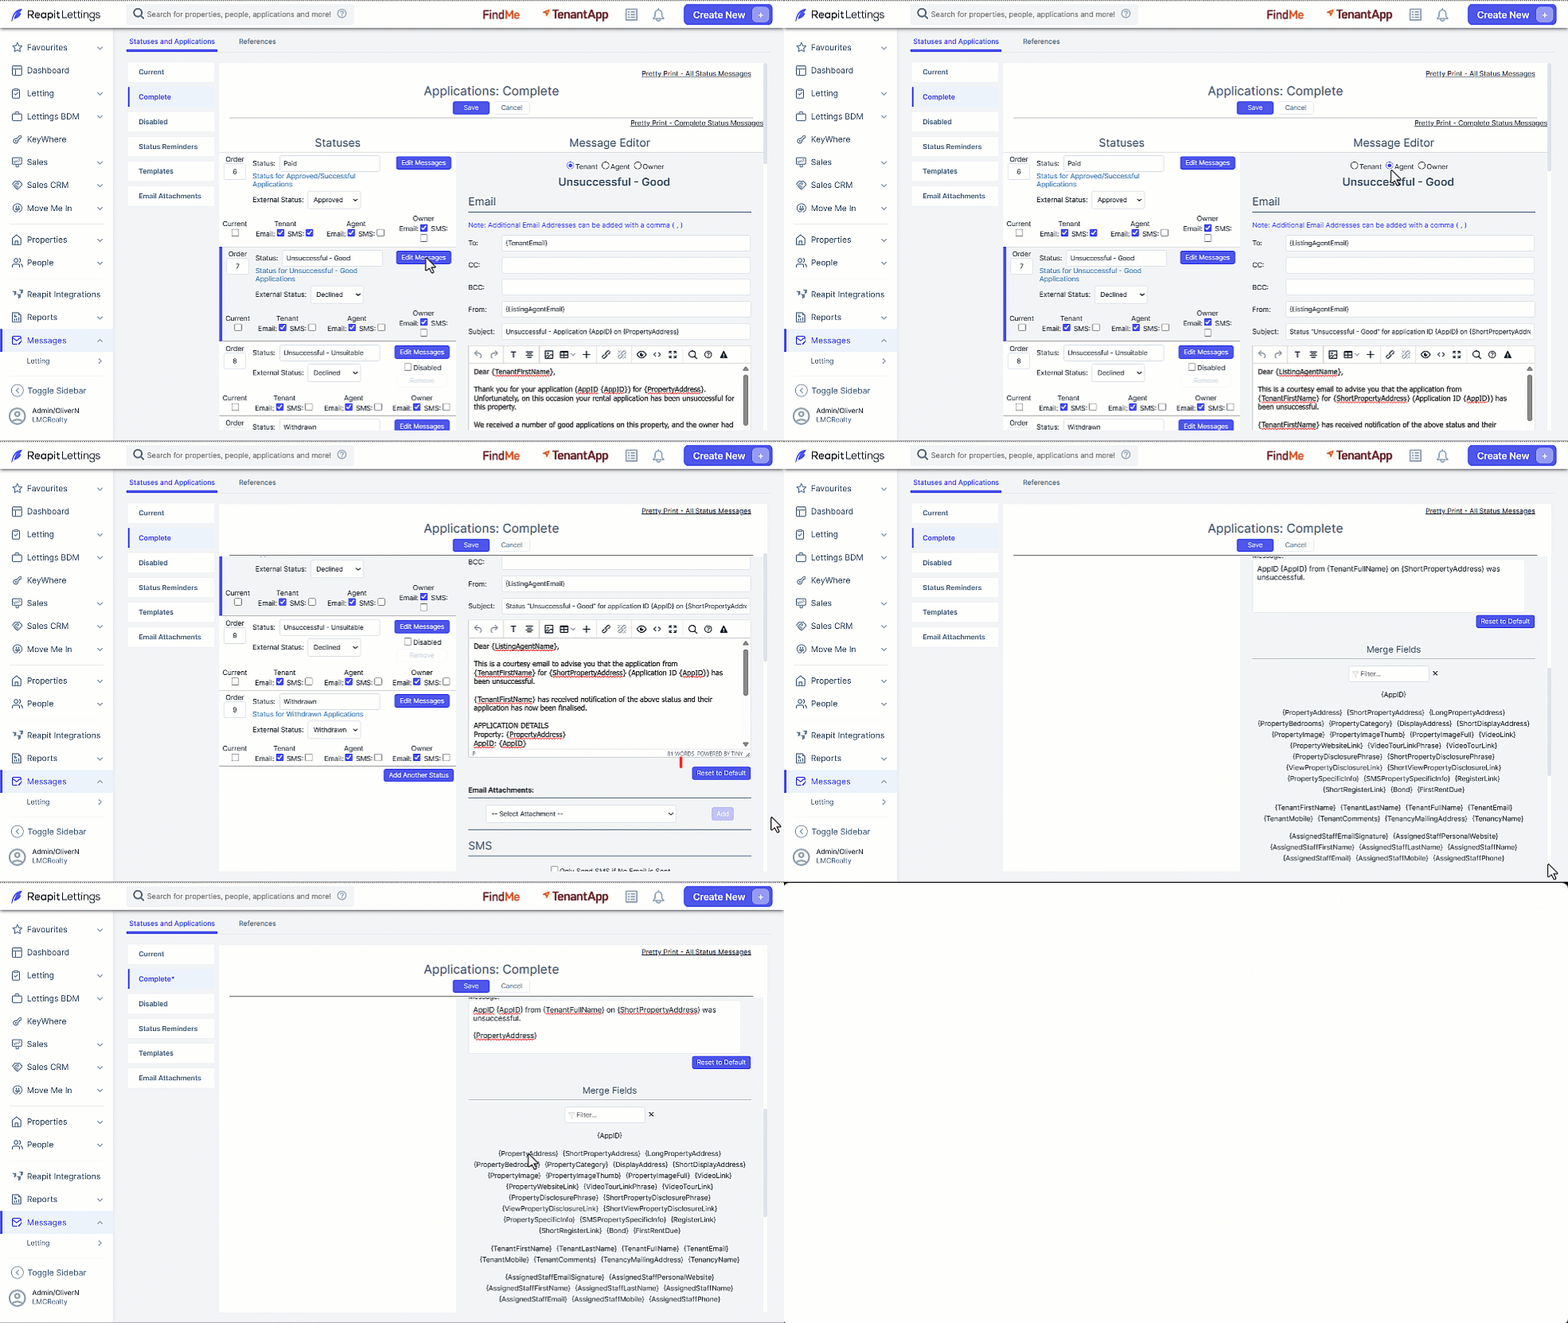
How to Upload New Attachments
- Click on Messages.
- Click on Applications.
- Click on Statuses and Applications.
- Click on Email Attachments.
- Click on Upload Attachment to upload the file.
- Click on Save.
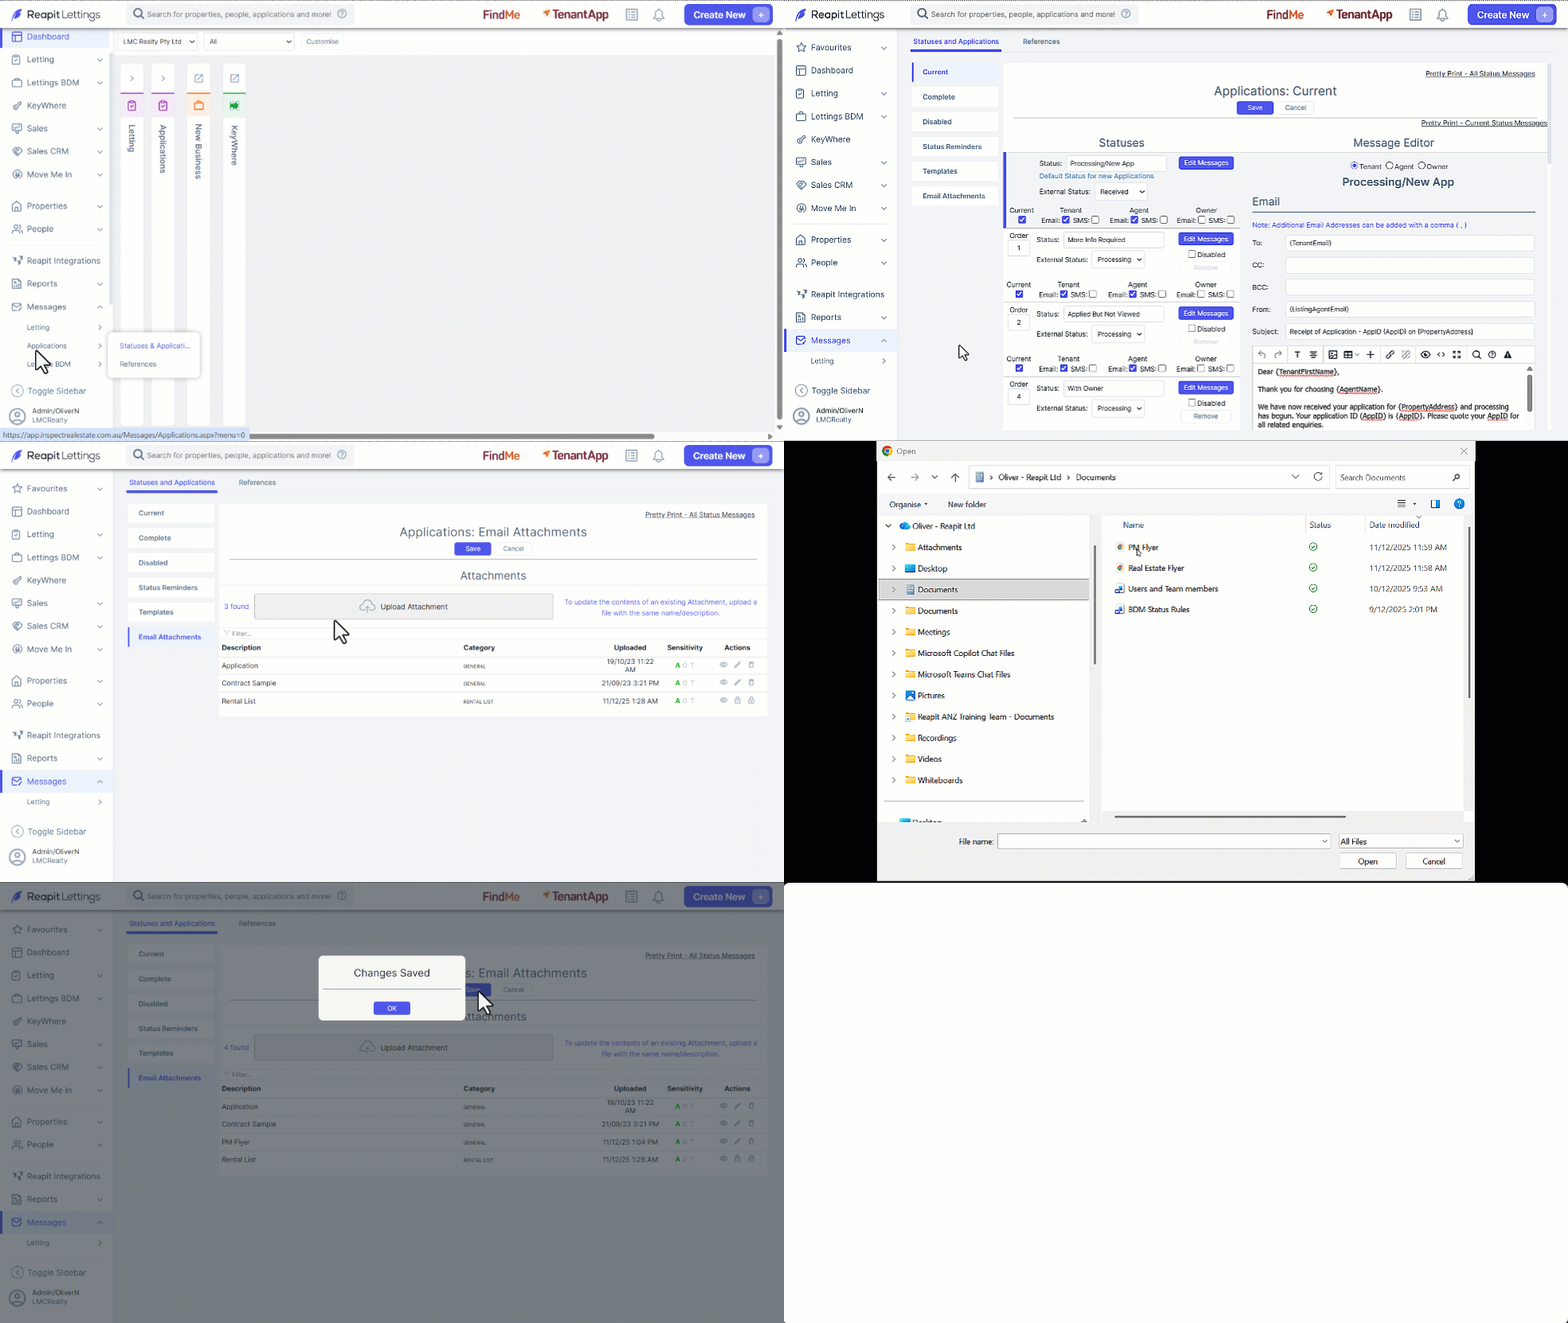
How to Include Attachments in a Status Message
Note: the Rental List is available by default, this is automatically generated and updated every day.
- From within the desired Status Category, Navigate to the required Status and Click Edit Message.
- Select the Contact Type.
- Navigate to Email Attachments.
- Select the desired attachment from the drop down list.
- Click on Add.
- Click on Save.