'%20d='M0%208a8%208%200%200%201%208-8h24a8%208%200%200%201%208%208v24a8%208%200%200%201-8%208H8a8%208%200%200%201-8-8V8Z'/%3e%3cpath%20fill='%23fff'%20d='M32.576%206C12.293%206%208.776%2025.887%207.424%2034H9.1c.45-2.977%203.493-14.748%2010.899-20.287%200%200-5.633%206.976-6.572%2015.051%203.426-.652%2013.845-3.372%2016.056-12.927l-3.84-.61c1.352-1.351%204.909-5.17%206.931-9.226V6Z'/%3e%3cdefs%3e%3clinearGradient%20id='reapit-lettings__a'%20x1='20.702'%20x2='20.702'%20y1='.351'%20y2='31.228'%20gradientUnits='userSpaceOnUse'%3e%3cstop%20stop-color='%235573FD'/%3e%3cstop%20offset='.575'%20stop-color='%234E56EA'/%3e%3c/linearGradient%3e%3c/defs%3e%3c/svg%3e)
Using The Column Chooser & How to Pin Columns
This article will run through how to use the column chooser and how to pin columns within your account
This article will run through how to use the column chooser and how to pin columns in Reapit Lettings. The Column Chooser feature, accessible in the top right-hand corner of every page containing lists of information, empowers users to customise their view by selecting and ordering the columns of information according to their preferences.
The processes in this article include:
- Using the Column Chooser & How to Pin Columns
- Setup Default Columns for all Users as Admin
Using The Column Chooser & How to Pin Columns
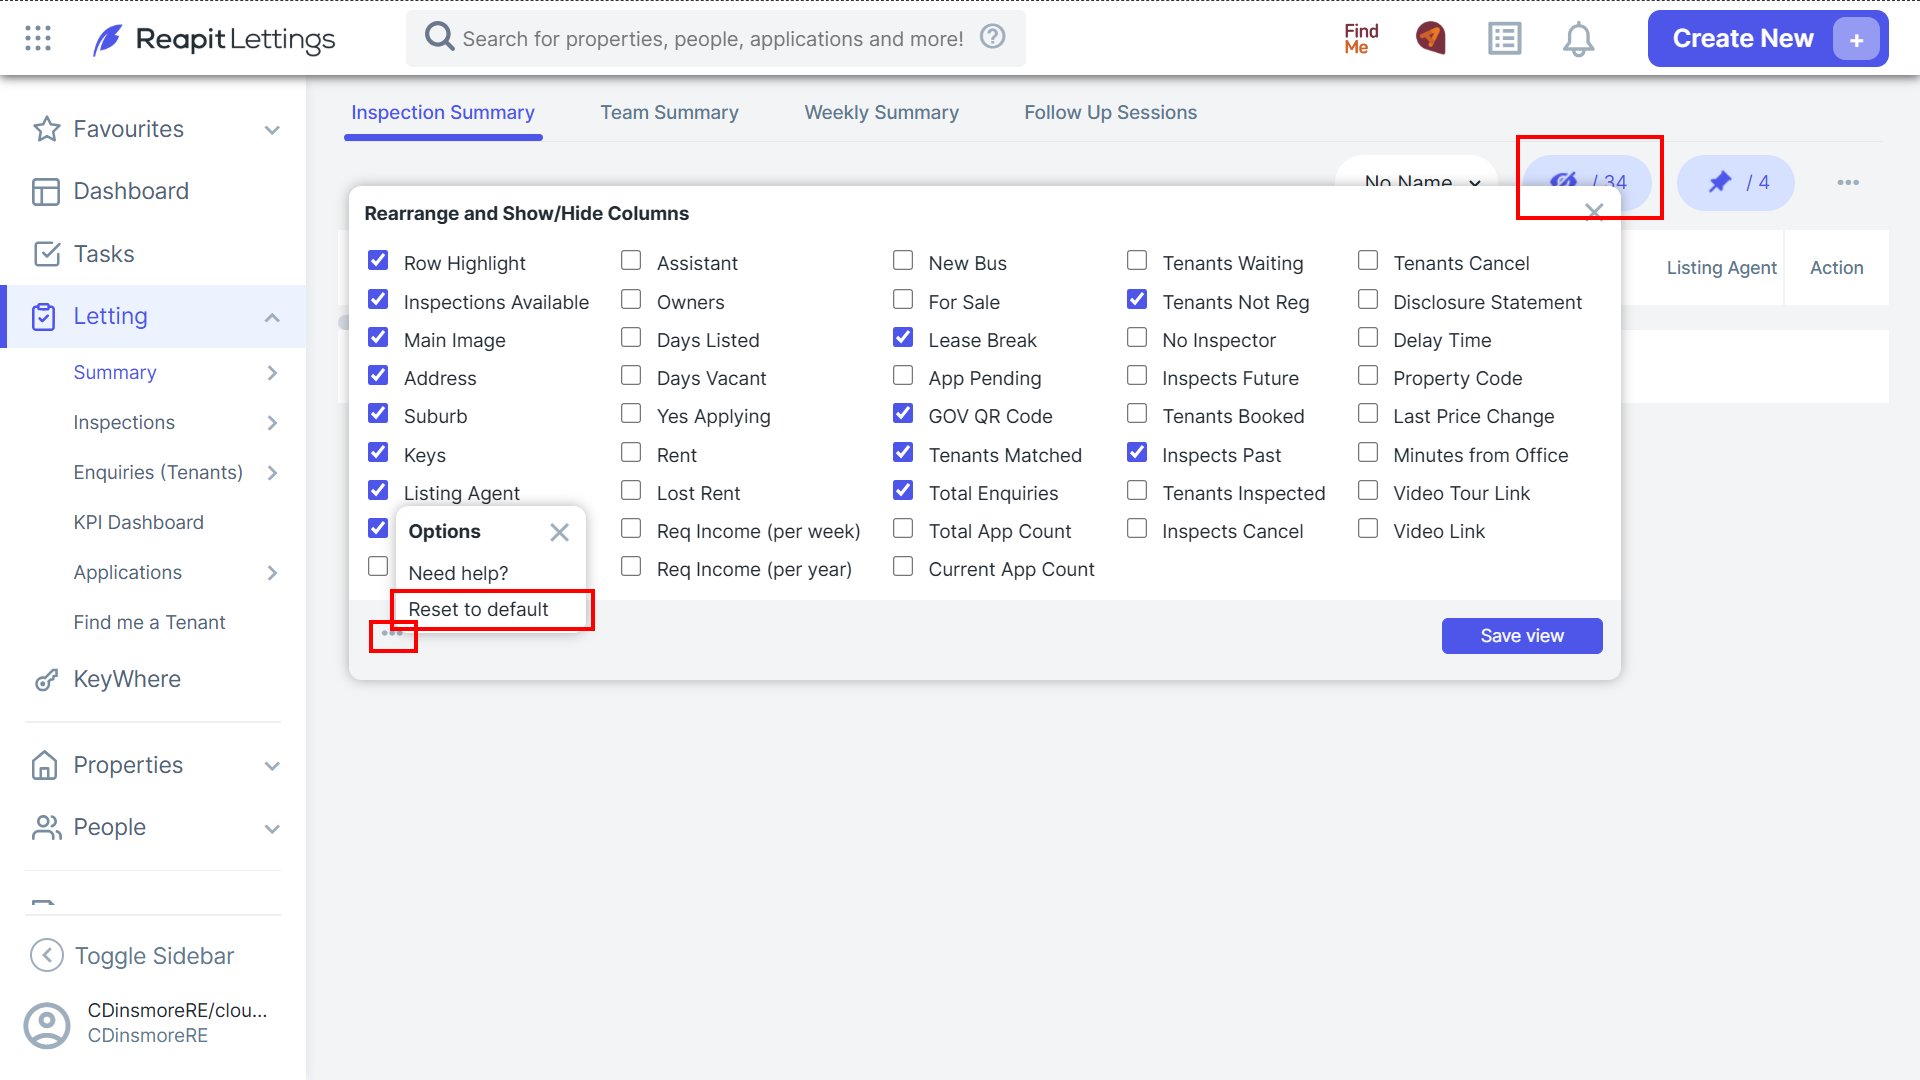
1. Upon selecting the Column Chooser icon, you can customise your account display by choosing the specific items you wish to view. A blue tick will denote the selected columns for display, and users may omit and column from view by deselecting its name. Additionally, you can personalise the arrangement of these columns by dragging and dropping the column names according to their preferences. Click Save View following a change.
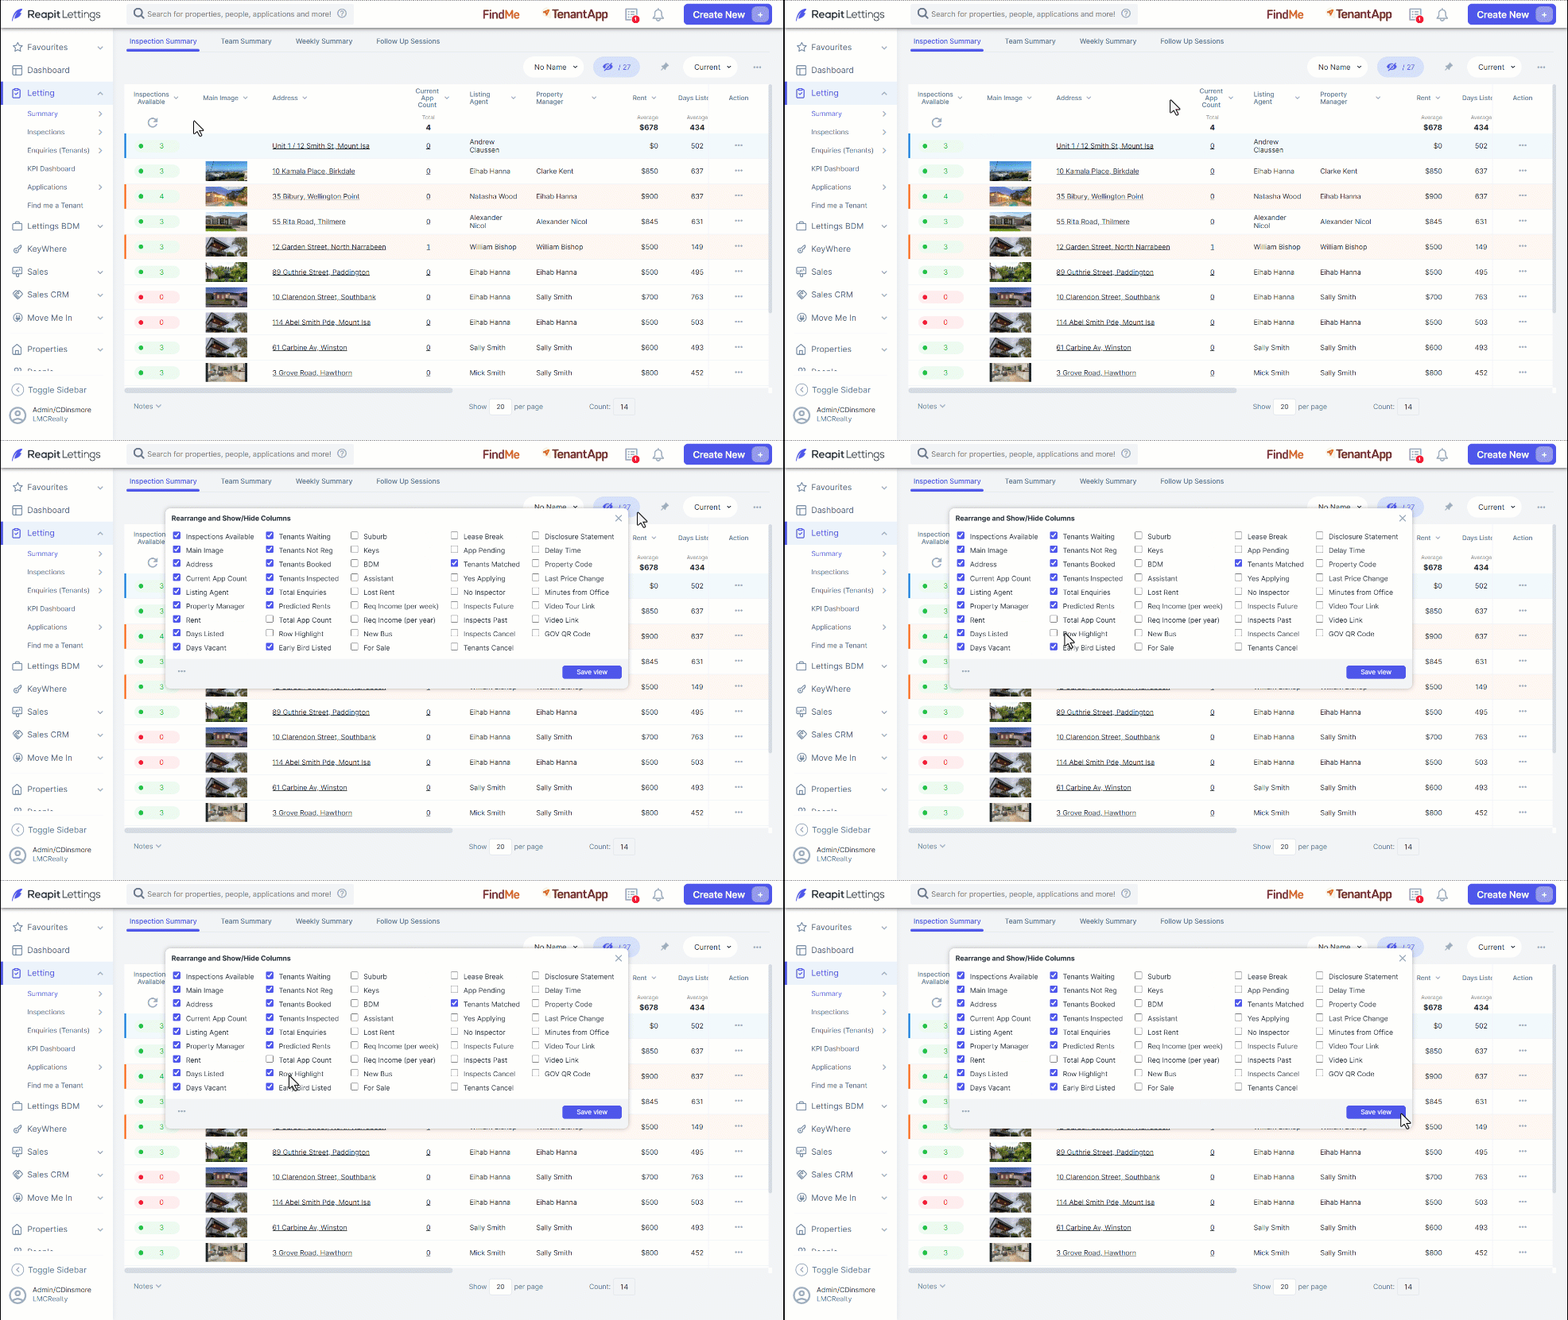
Note: The Column Chooser feature is designed to be accessible across all sections of your account, ensuring a tailored user experience. Any adjustments made will be applicable exclusively to the current section you are operating in, rather than affecting the entire CRM system.
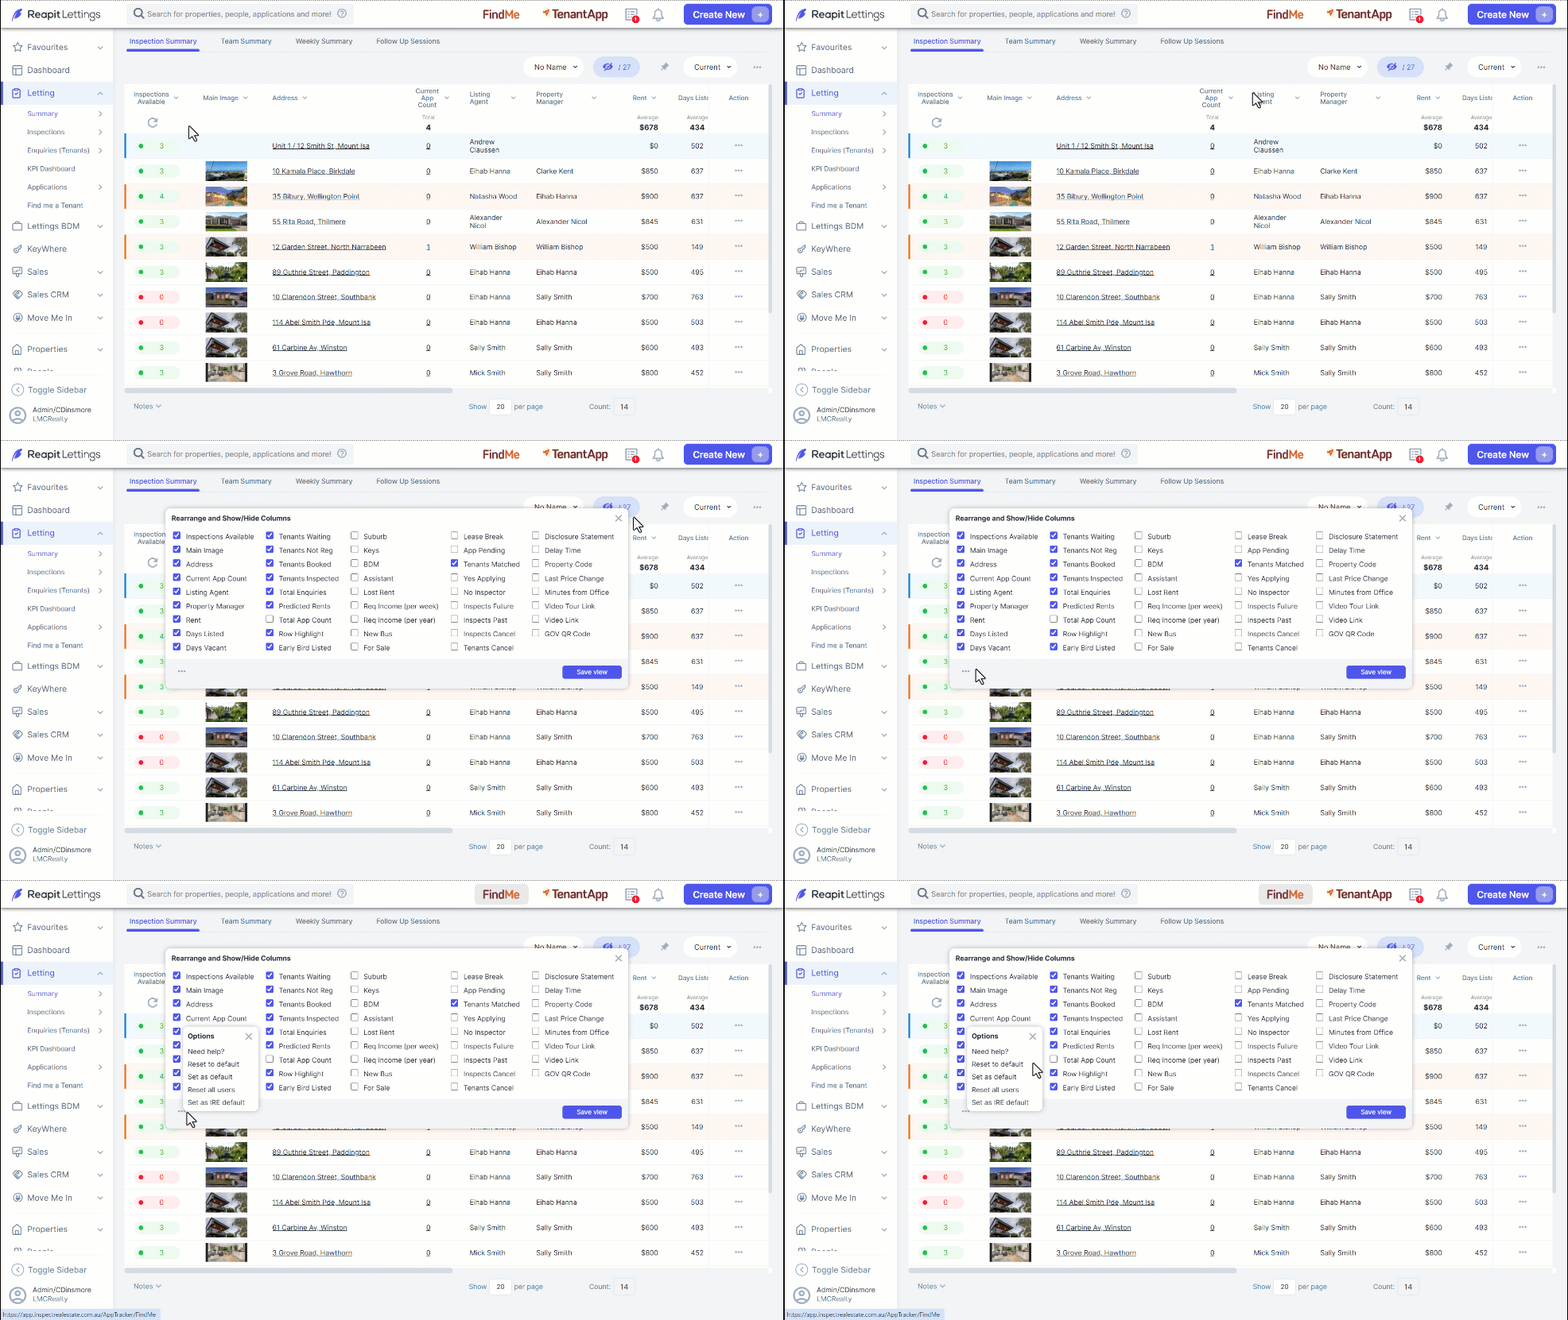
2. To restore the default layout at any time, please click the three dots located at the bottom left-hand side of the column chooser, click Reset to default.
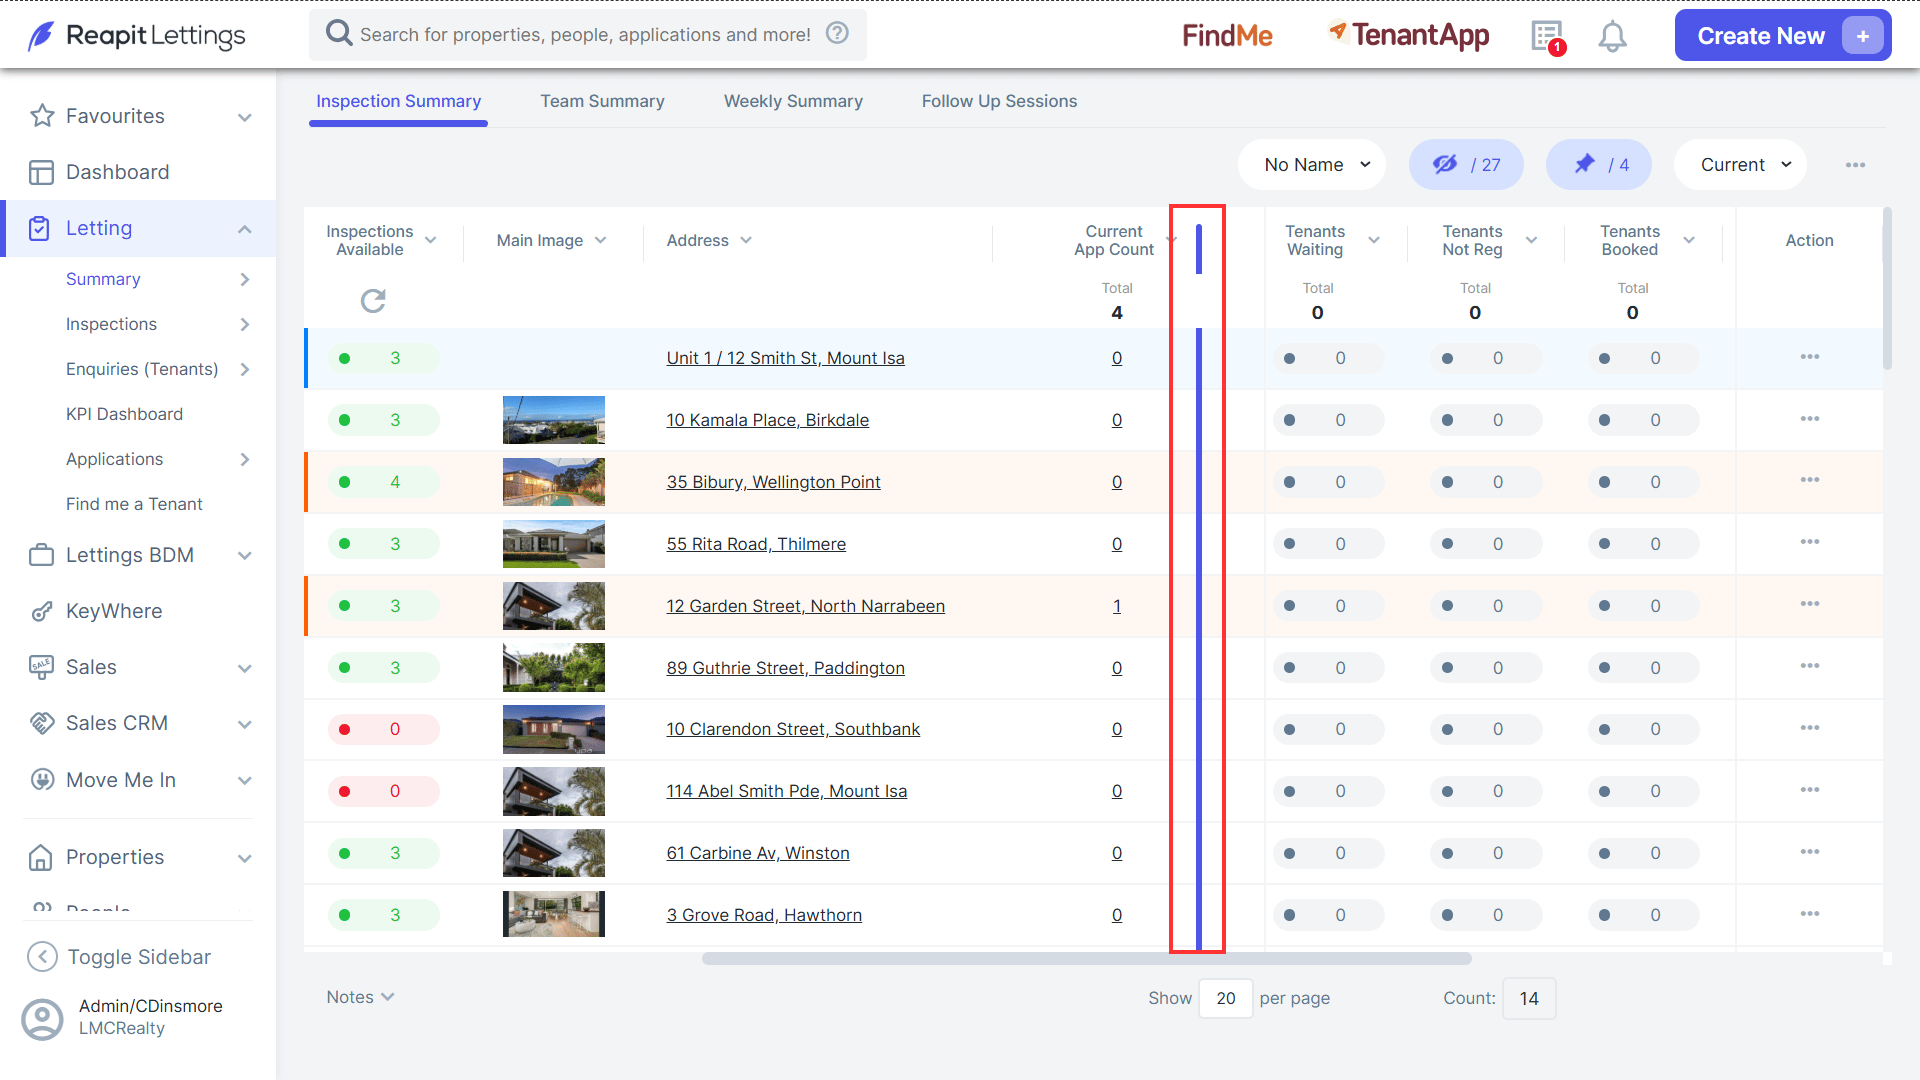
3. By clicking the Pin Columns icon, you can secure specific columns in position, ensuring their visibility as you scroll horizontally across the page.
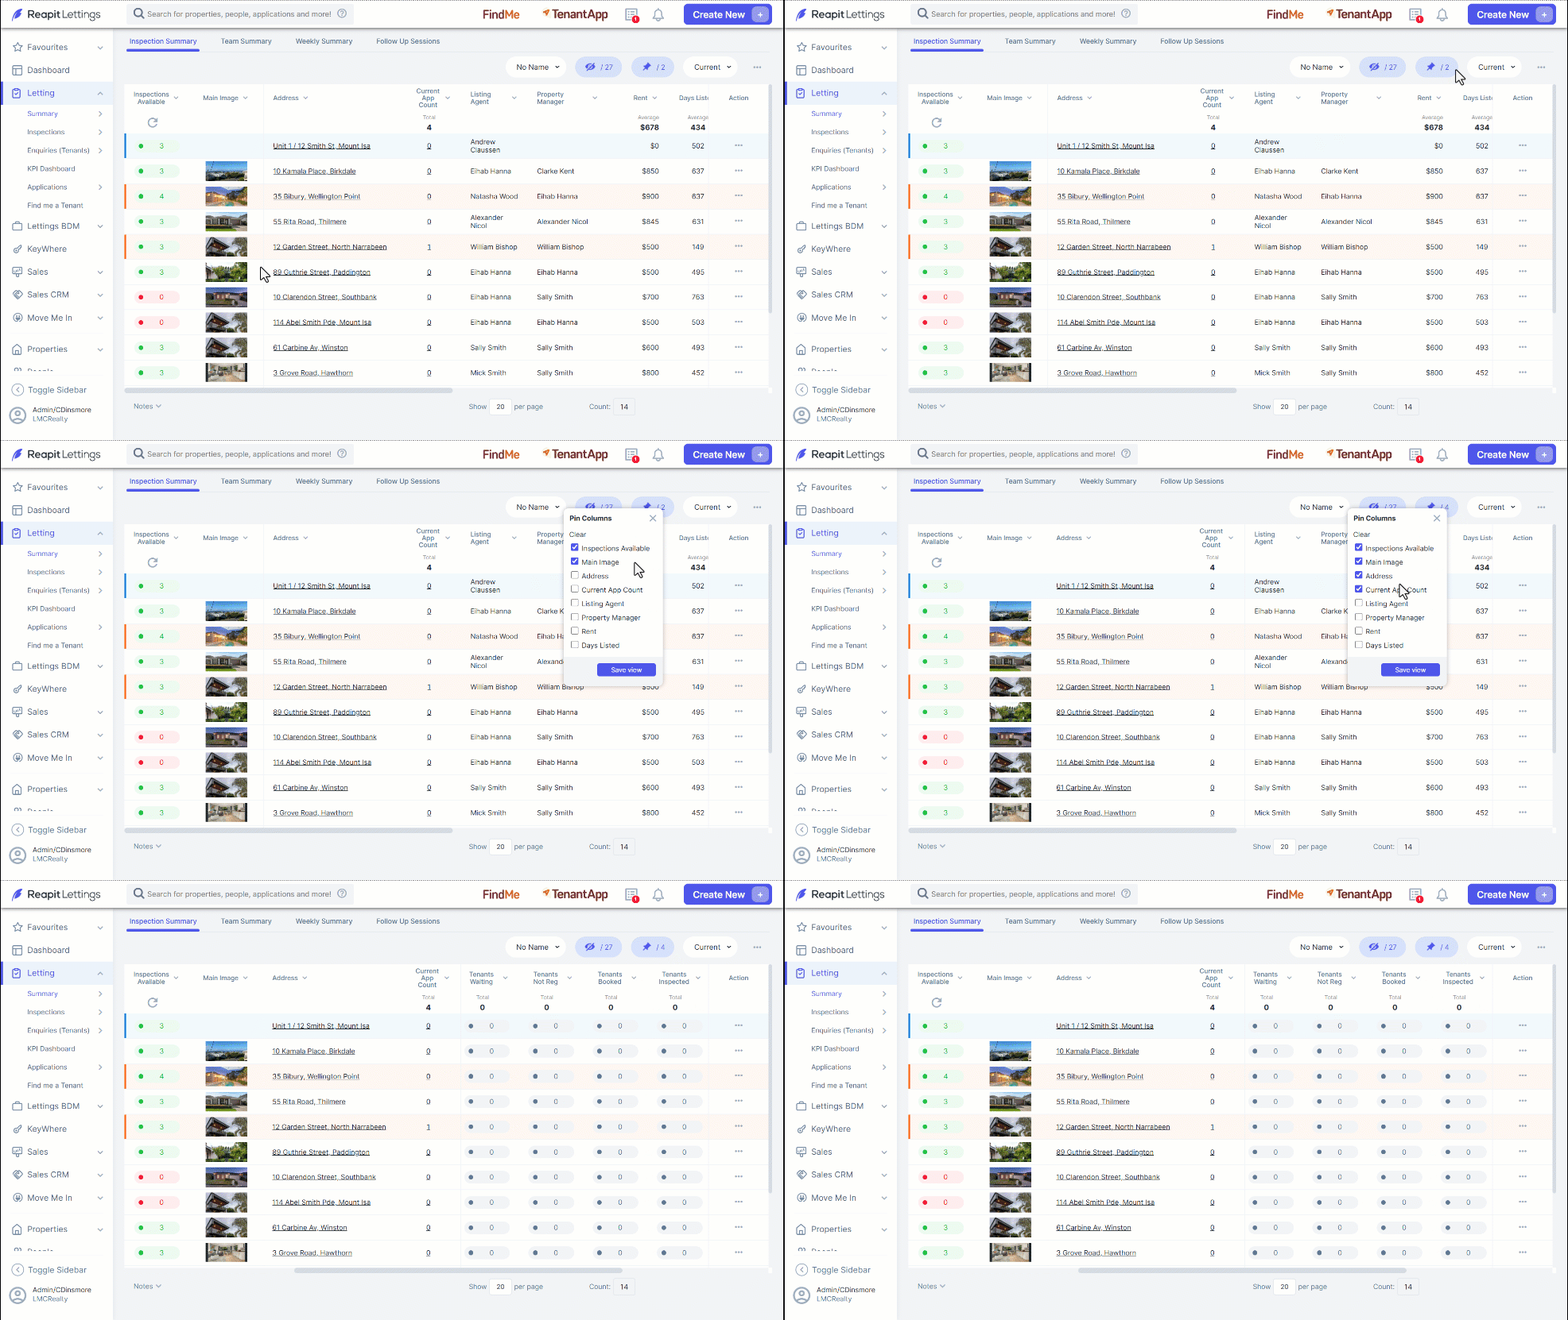
4. You can adjust the column width by clicking on the grey line located before the column name and dragging it either to the left or right.
Setup Default Columns for all Users as Admin
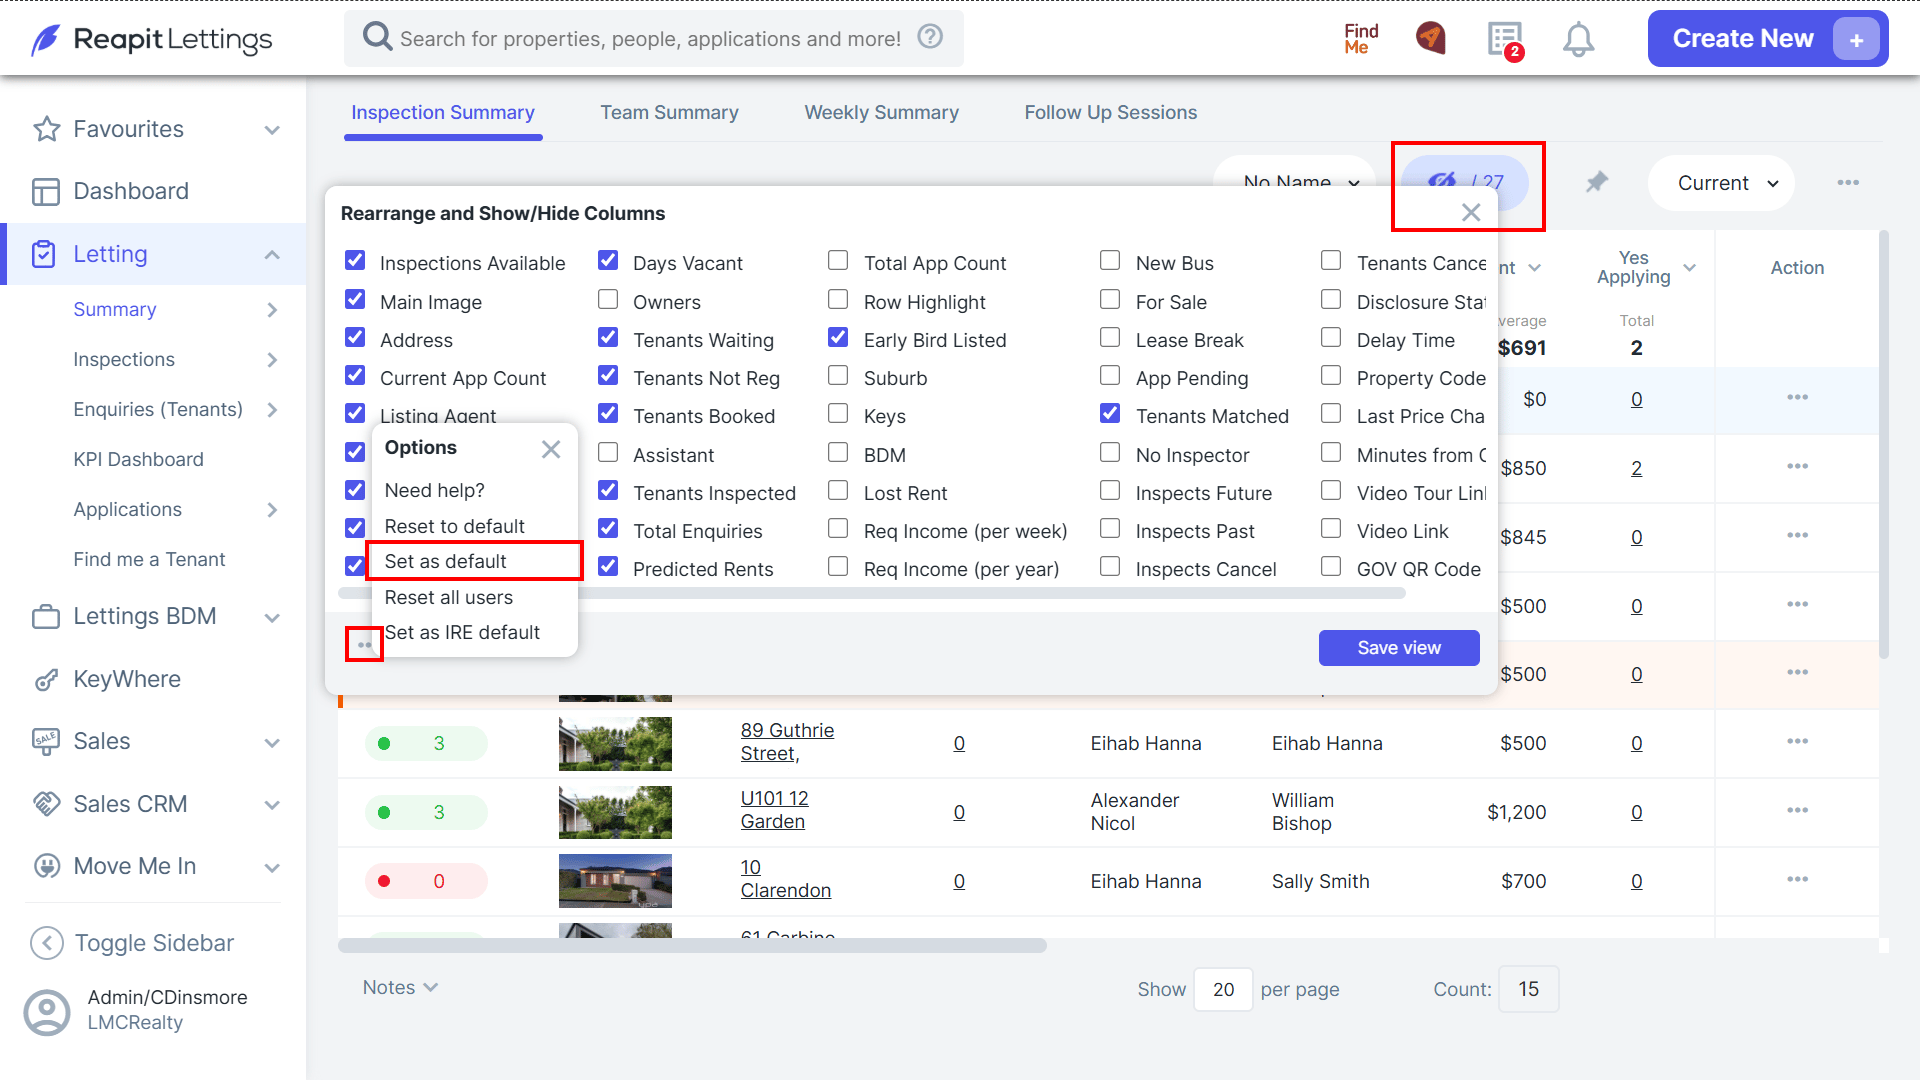
1. As the admin user, to setup a default set of items for all users, click on the column chooser.
2. Select the desired items to show/hide.
3. Click on the three dots.
4. Select Set as default
5. For users with a custom filter in place, to revert these to the new default column chooser, click on the column chooser.
6. Click the three dots.
7. Click reset to default.
8. The updated default settings will now be applied