'%20d='M0%208a8%208%200%200%201%208-8h24a8%208%200%200%201%208%208v24a8%208%200%200%201-8%208H8a8%208%200%200%201-8-8V8Z'/%3e%3cpath%20fill='%23fff'%20d='M32.576%206C12.293%206%208.776%2025.887%207.424%2034H9.1c.45-2.977%203.493-14.748%2010.899-20.287%200%200-5.633%206.976-6.572%2015.051%203.426-.652%2013.845-3.372%2016.056-12.927l-3.84-.61c1.352-1.351%204.909-5.17%206.931-9.226V6Z'/%3e%3cdefs%3e%3clinearGradient%20id='reapit-lettings__a'%20x1='20.702'%20x2='20.702'%20y1='.351'%20y2='31.228'%20gradientUnits='userSpaceOnUse'%3e%3cstop%20stop-color='%235573FD'/%3e%3cstop%20offset='.575'%20stop-color='%234E56EA'/%3e%3c/linearGradient%3e%3c/defs%3e%3c/svg%3e)
Managing On Lists Reports
This article will run through an overview of your On List Reports and how to manage them effectively in Reapit Lettings. This processes in this article includes: How to Send On List Report How to Manage and Manually send On List Report How to Disable Certain On-List Steps
Managing On Lists Reports
This article will run through an overview of your On List Reports and how to manage them effectively in Reapit Lettings.
This processes in this article includes:
- How to Send On List Report
- How to Manage and Manually send On List Report
- How to Disable Certain On-List Steps
The On List Report an essential tool for verifying and refining details pertaining to newly listed properties. It further enables the engagement with potential tenants who have expressed interest in the specified property.
For properties that are newly listed, a comprehensive checklist can be executed. This checklist ensures the confirmation of critical property details, including the identities of the listing agent, property manager, assistant, and BDM. It also encompasses the verification of inspection protocols, access to property keys, identification of owners and current occupants, as well as the integration of property merge fields.
Users with Diamond level access have the capability to make amendments.
How to Send On List Report
- Click on Reports.
- Click on Letting.
- Select On/Off List Reports.
- Within the On List Report tab, tick the Receive On Vacancy List Reports checkbox.
- Choose the appropriate stakeholder to receive the reports by ticking the checkbox in the To: section.
- Select staff member from the drop-down menu.
- If there are other recipient for the report, navigate to Other Email Address section and enter their email address in the provided field.
- Click on Save.
- Click on Send Report Now.
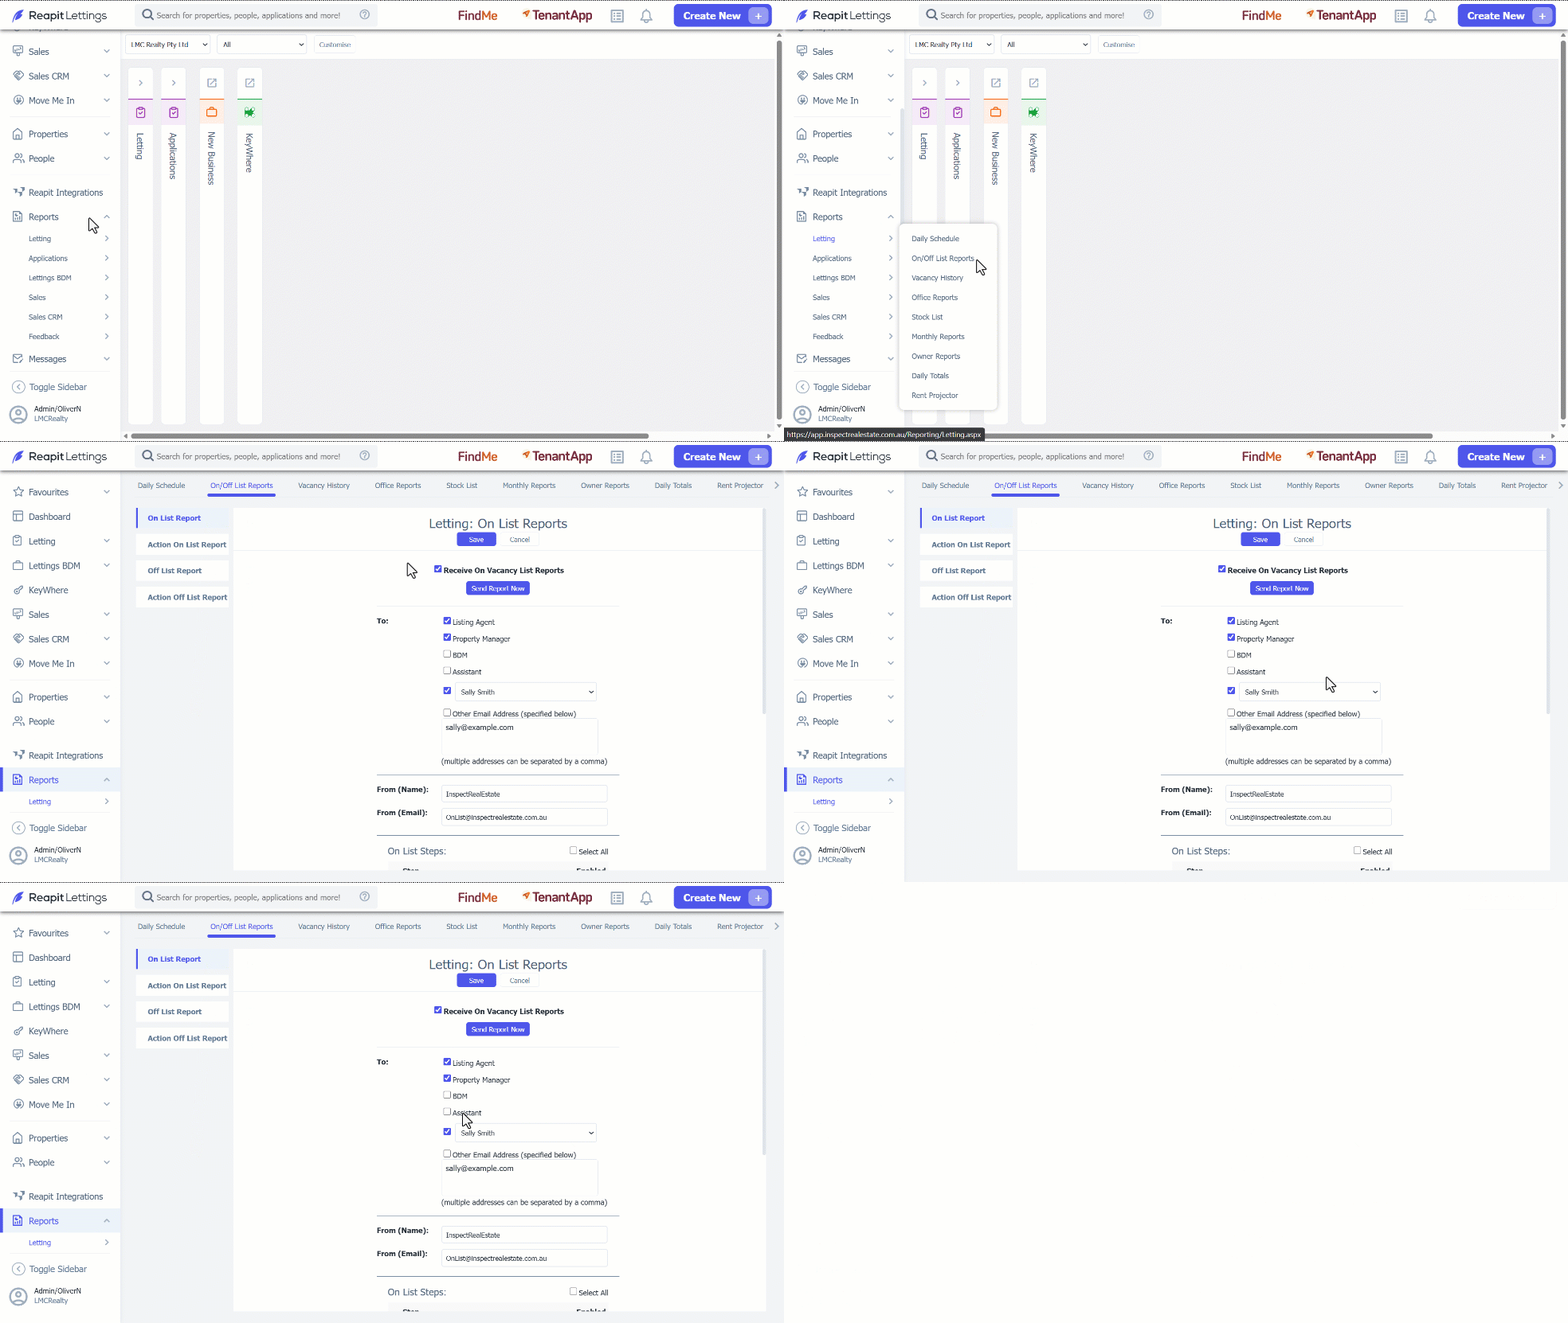
Note: Click the designated button in order to send the report immediately. Should you overlook selecting the 'Receive On Vacancy List Reports' checkbox, you will be notified via email of any reports that fail to send.
How to Manage and Manually Send On List Report
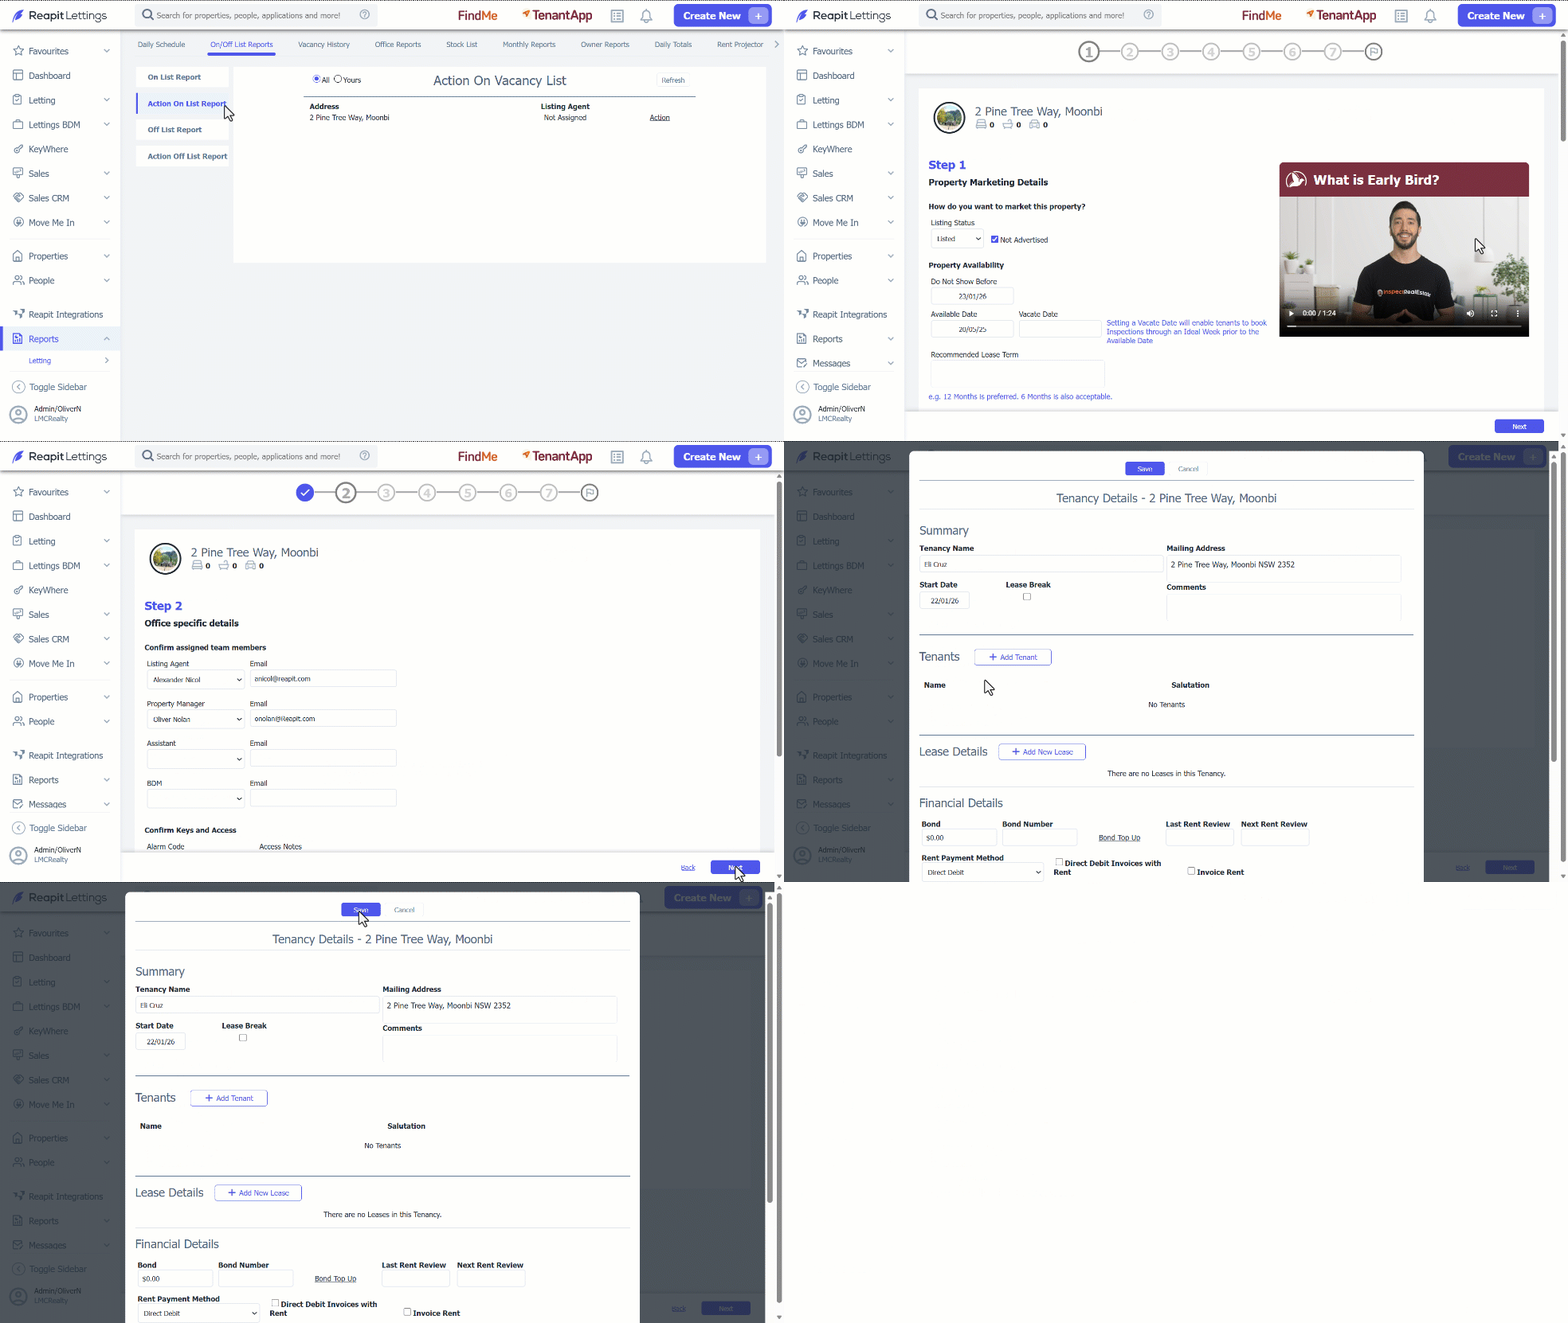
- Navigate to Action On List Report.
- Click Action for the applicable properties.
- Step1: Scroll down to review the Property Marketing Details, make any necessary modifications or completions to ensure their accuracy. Click Next.
- Step2: Scroll down to review the Office specific details, make any necessary modifications or completions to ensure their accuracy. Click Next.
- Step3: If the property is currently occupied, you would need to ensure the tenancy details are captured by clicking the designated button and following the prompts. Click Next.
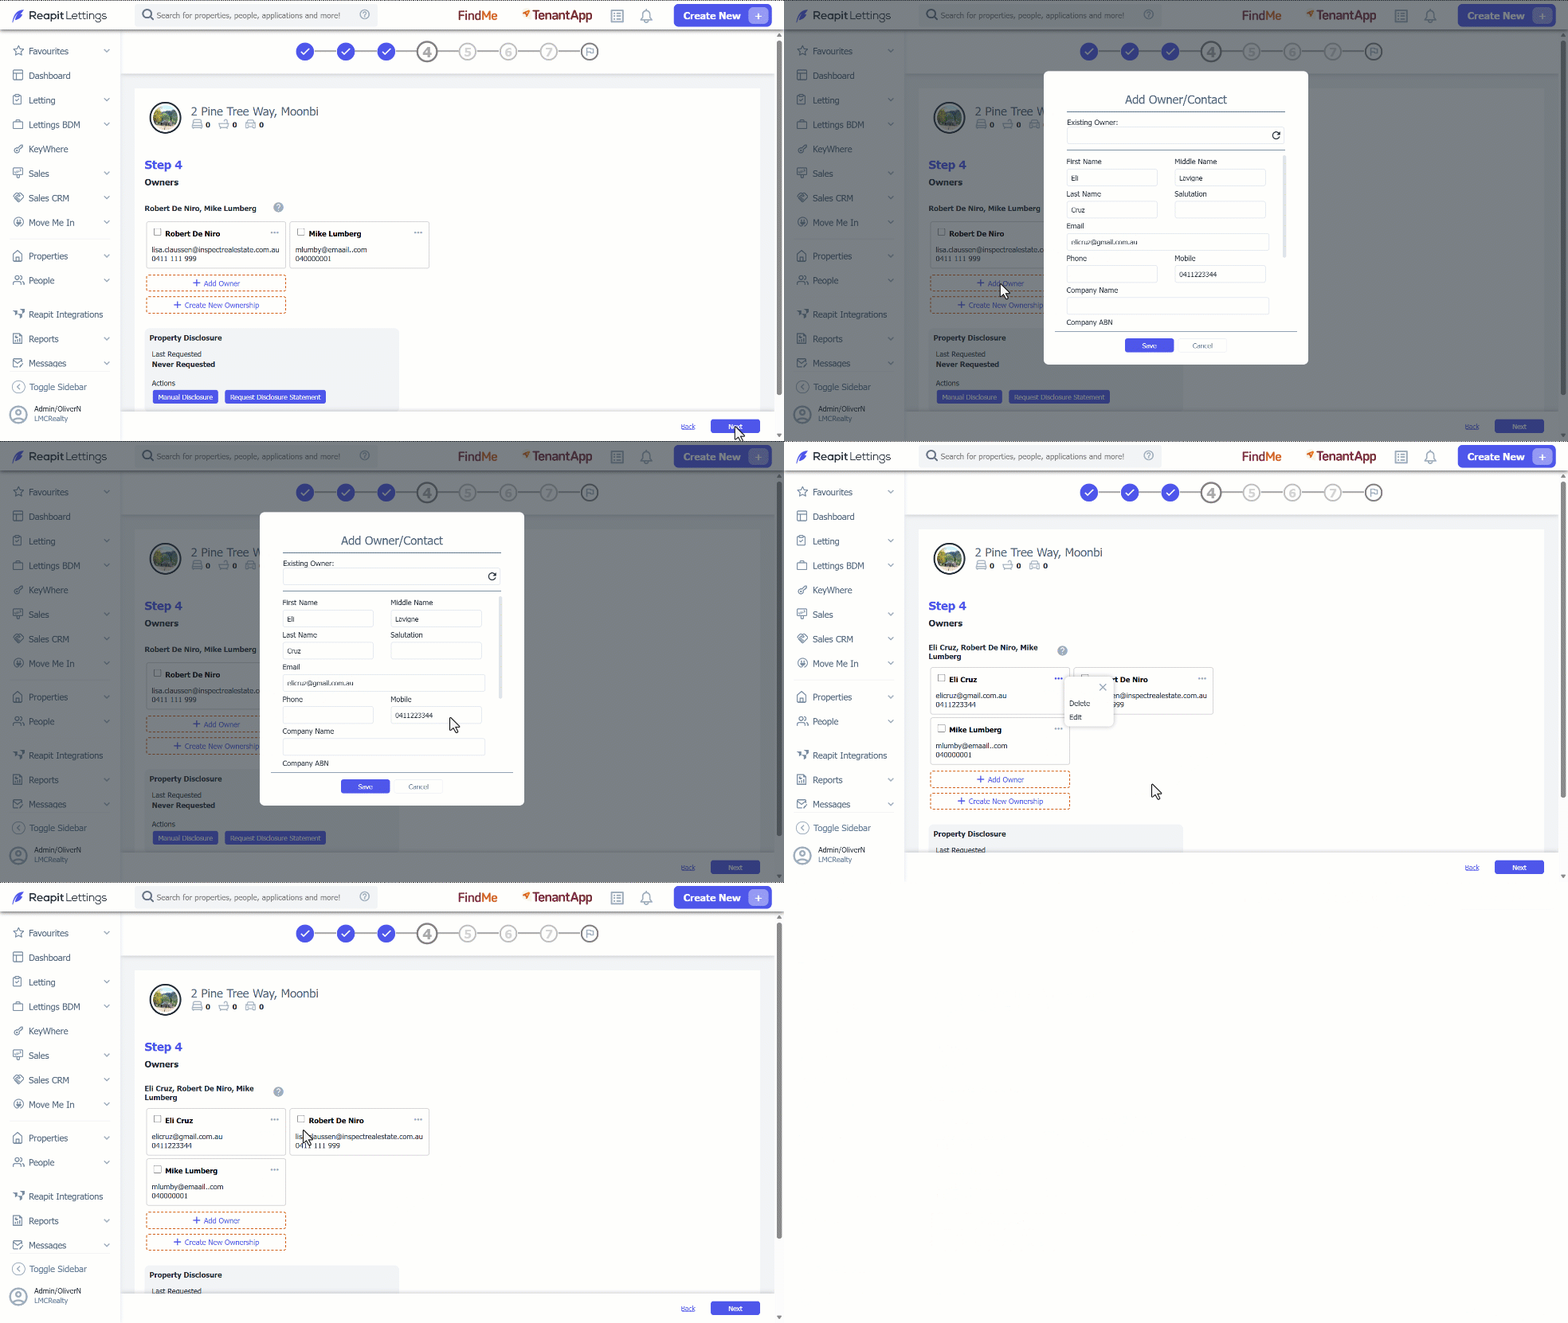
- Step4: Ensure that the owner's details are accurately recorded.
- Click + Add Owner and input all details of the new owner as designated.
- Click on Save.
- You can edit or delete the contact added by selecting the 3 Action Dots and choosing between the desired action pathways. To continue on, click Next.
- Step5: In this step, it is essential to verify that the property-specific settings, application options, merge fields, as well as events, linked properties, attachments, and pre-qualifications for all designated stakeholders have been accurately documented. Click Next.
- Step6: Ensure that the Inspection details are accurately recorded in this step by clicking on the designated button and following the prompts for the desired inspection date and time. You can edit or delete the contact added by selecting the 3 Action Dots and choosing between the desired action pathways. To continue on, click Next.
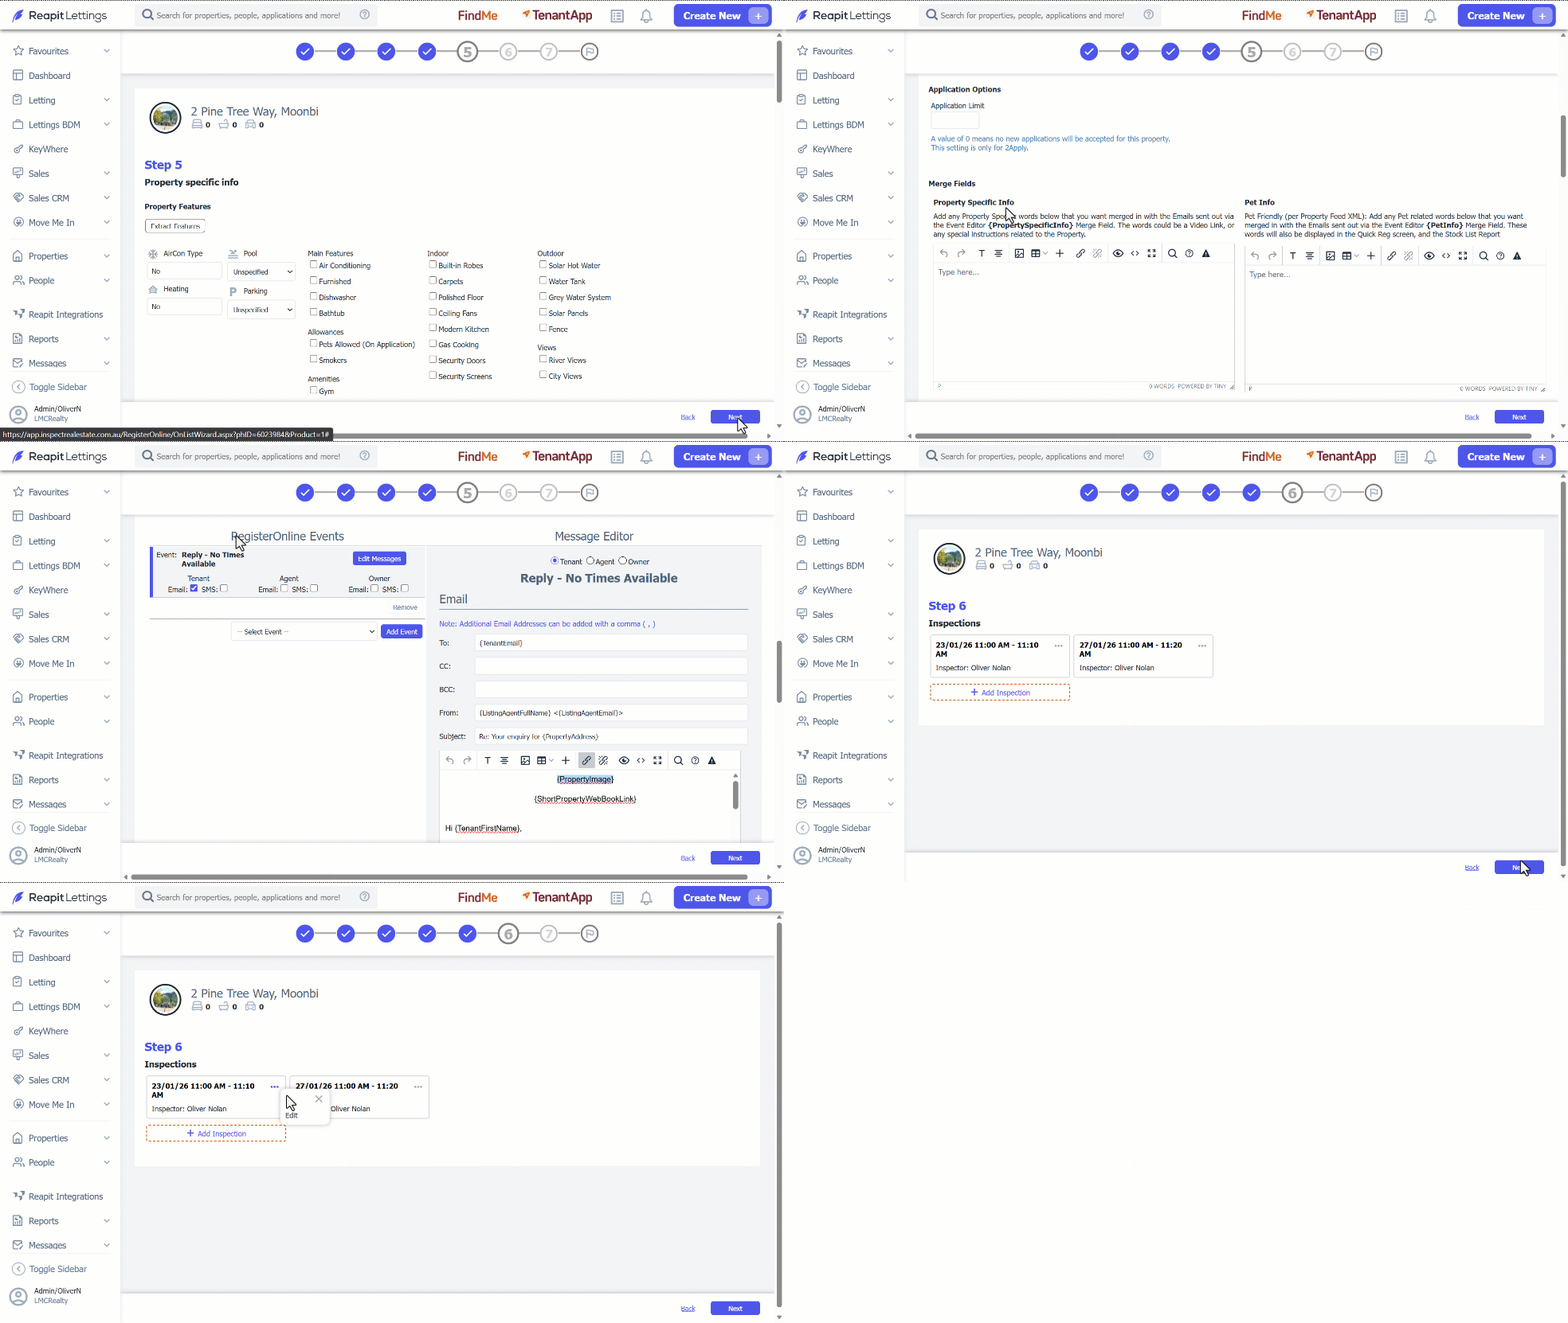
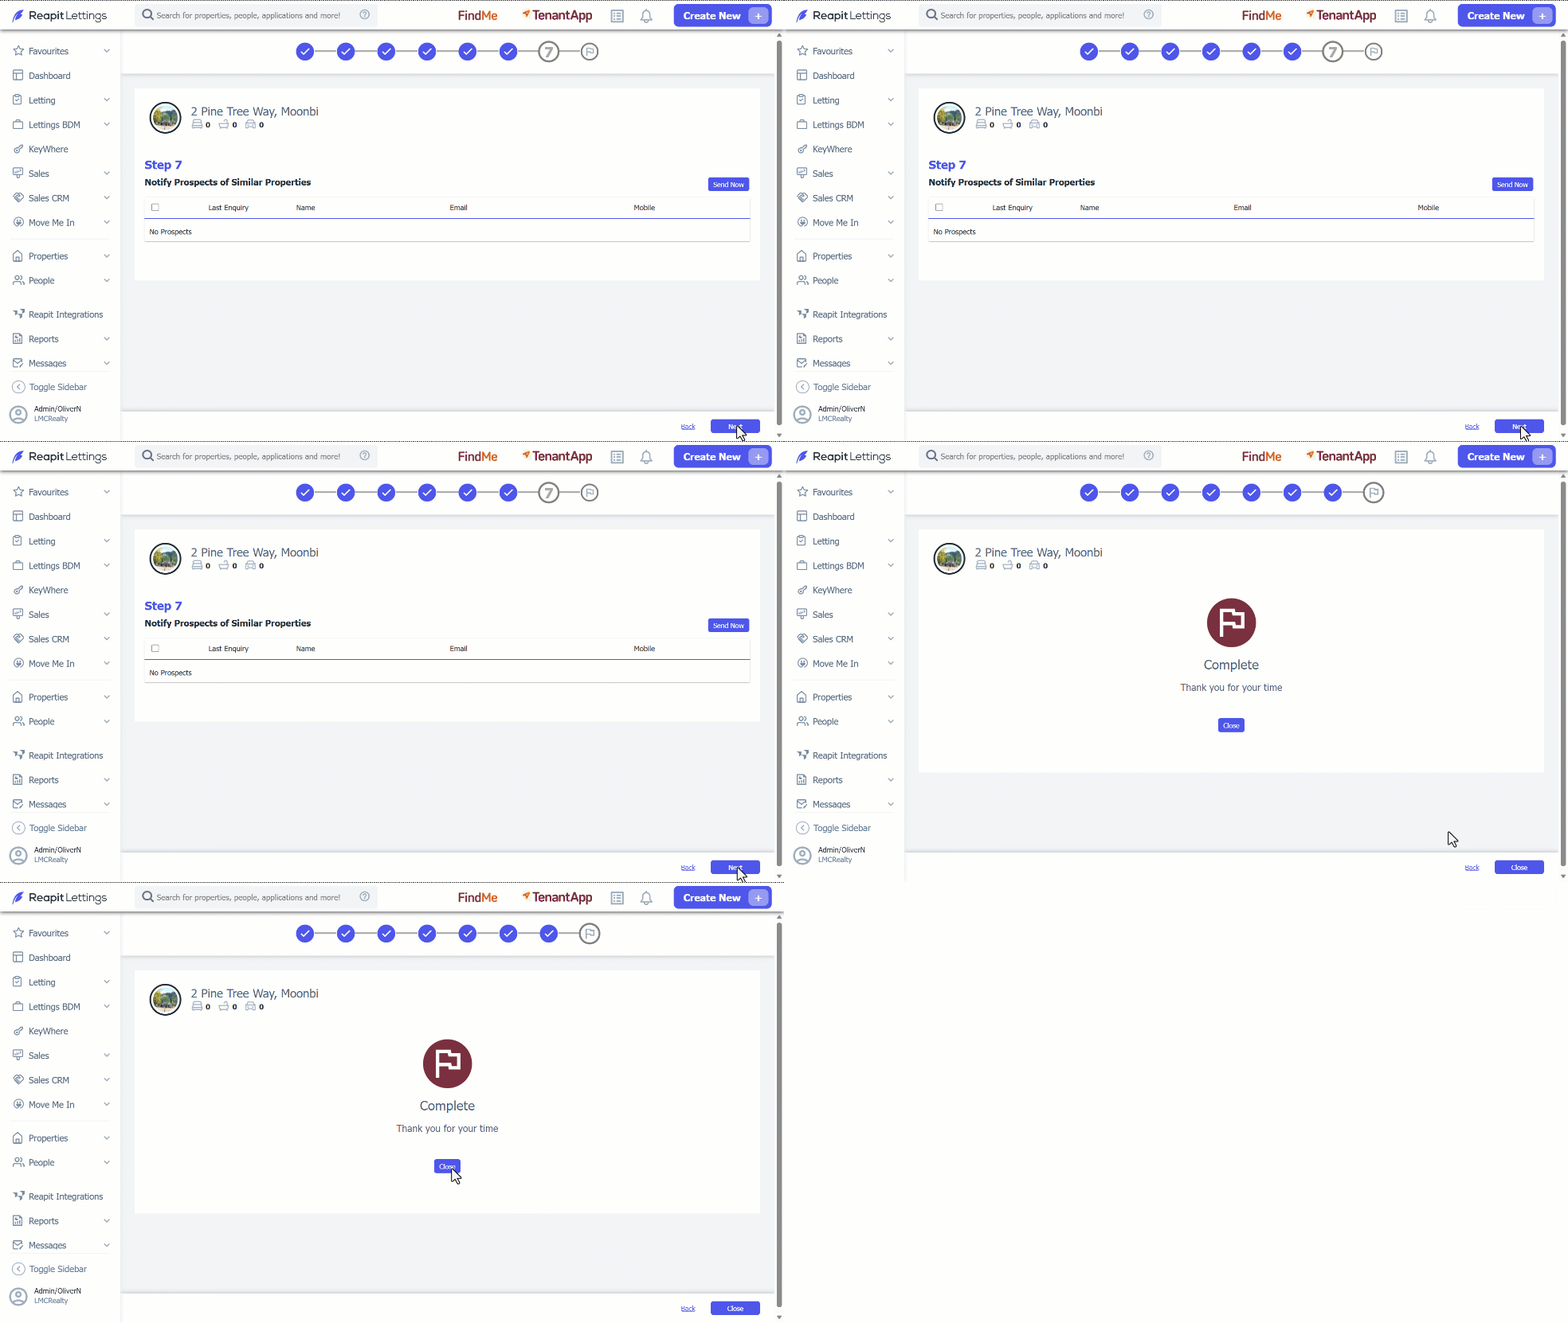
- Step7: If you wish to, notify all prospects about similar properties, this will ensure that communications and automated messaging for all available properties are connected with potential tenant profiles.
Step 7.1. If applicable, click Send Now to notify any displayed prospects immediately.
Step 7.2 If applicable, either click the value of prospect tenants or FindMe a Tenant as designated.
Step 7.3 If applicable, select the checkboxes adjacent to the prospect tenants you wish to contact, when prompted click the Envelope Icon.
Step 7.4 If applicable, click OK.
- Click Next.
- Click on Close.
How to Disable Certain On-List Steps
- Click on Reports.
- Click on Letting.
- Select On/ Off List Reports.
- Scroll down to the On List Steps and untick the steps you would not like to complete.
- Click Save.