'%20d='M0%208a8%208%200%200%201%208-8h24a8%208%200%200%201%208%208v24a8%208%200%200%201-8%208H8a8%208%200%200%201-8-8V8Z'/%3e%3cpath%20fill='%23fff'%20d='M32.576%206C12.293%206%208.776%2025.887%207.424%2034H9.1c.45-2.977%203.493-14.748%2010.899-20.287%200%200-5.633%206.976-6.572%2015.051%203.426-.652%2013.845-3.372%2016.056-12.927l-3.84-.61c1.352-1.351%204.909-5.17%206.931-9.226V6Z'/%3e%3cdefs%3e%3clinearGradient%20id='reapit-lettings__a'%20x1='20.702'%20x2='20.702'%20y1='.351'%20y2='31.228'%20gradientUnits='userSpaceOnUse'%3e%3cstop%20stop-color='%235573FD'/%3e%3cstop%20offset='.575'%20stop-color='%234E56EA'/%3e%3c/linearGradient%3e%3c/defs%3e%3c/svg%3e)
Import Keys with CSV or XLSX files
This article will run through how to import your properties with associated key numbers using the KeyWhere file importer in KeyWhere.
Import Keys with CSV or XLSX files
This article will run through how to import your properties with associated key numbers using the KeyWhere file importer in KeyWhere.
Note: **You must be an admin, diamond or gold level user to import a keyfile.
Firstly, please ensure your csv or xlsx file is in the correct format as per the example below:
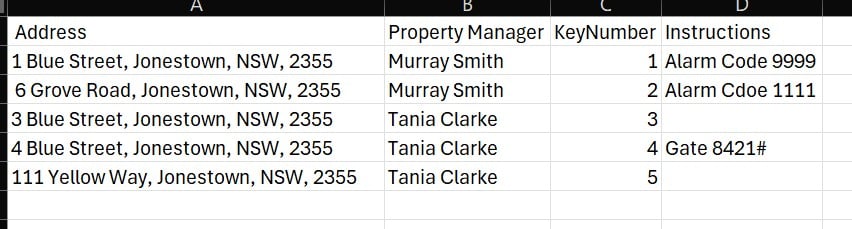
Note: KeyWhere can import any of the following fields;
Address, Property Manager Name, Property Manager Email, Property Manager Phone, Property Manager Mobile, Key number, Security Code, Instructions, Key Description, Booking Alert.
- The file must include the following columns:
Full Address in the same format as above. It is important that the commas reside in the exact spot and that the same naming conventions are used i.e if you advertise the property as Street please use the full word Street rather than St.
Property Manager Name to match what is already existing in the account under People and Team.
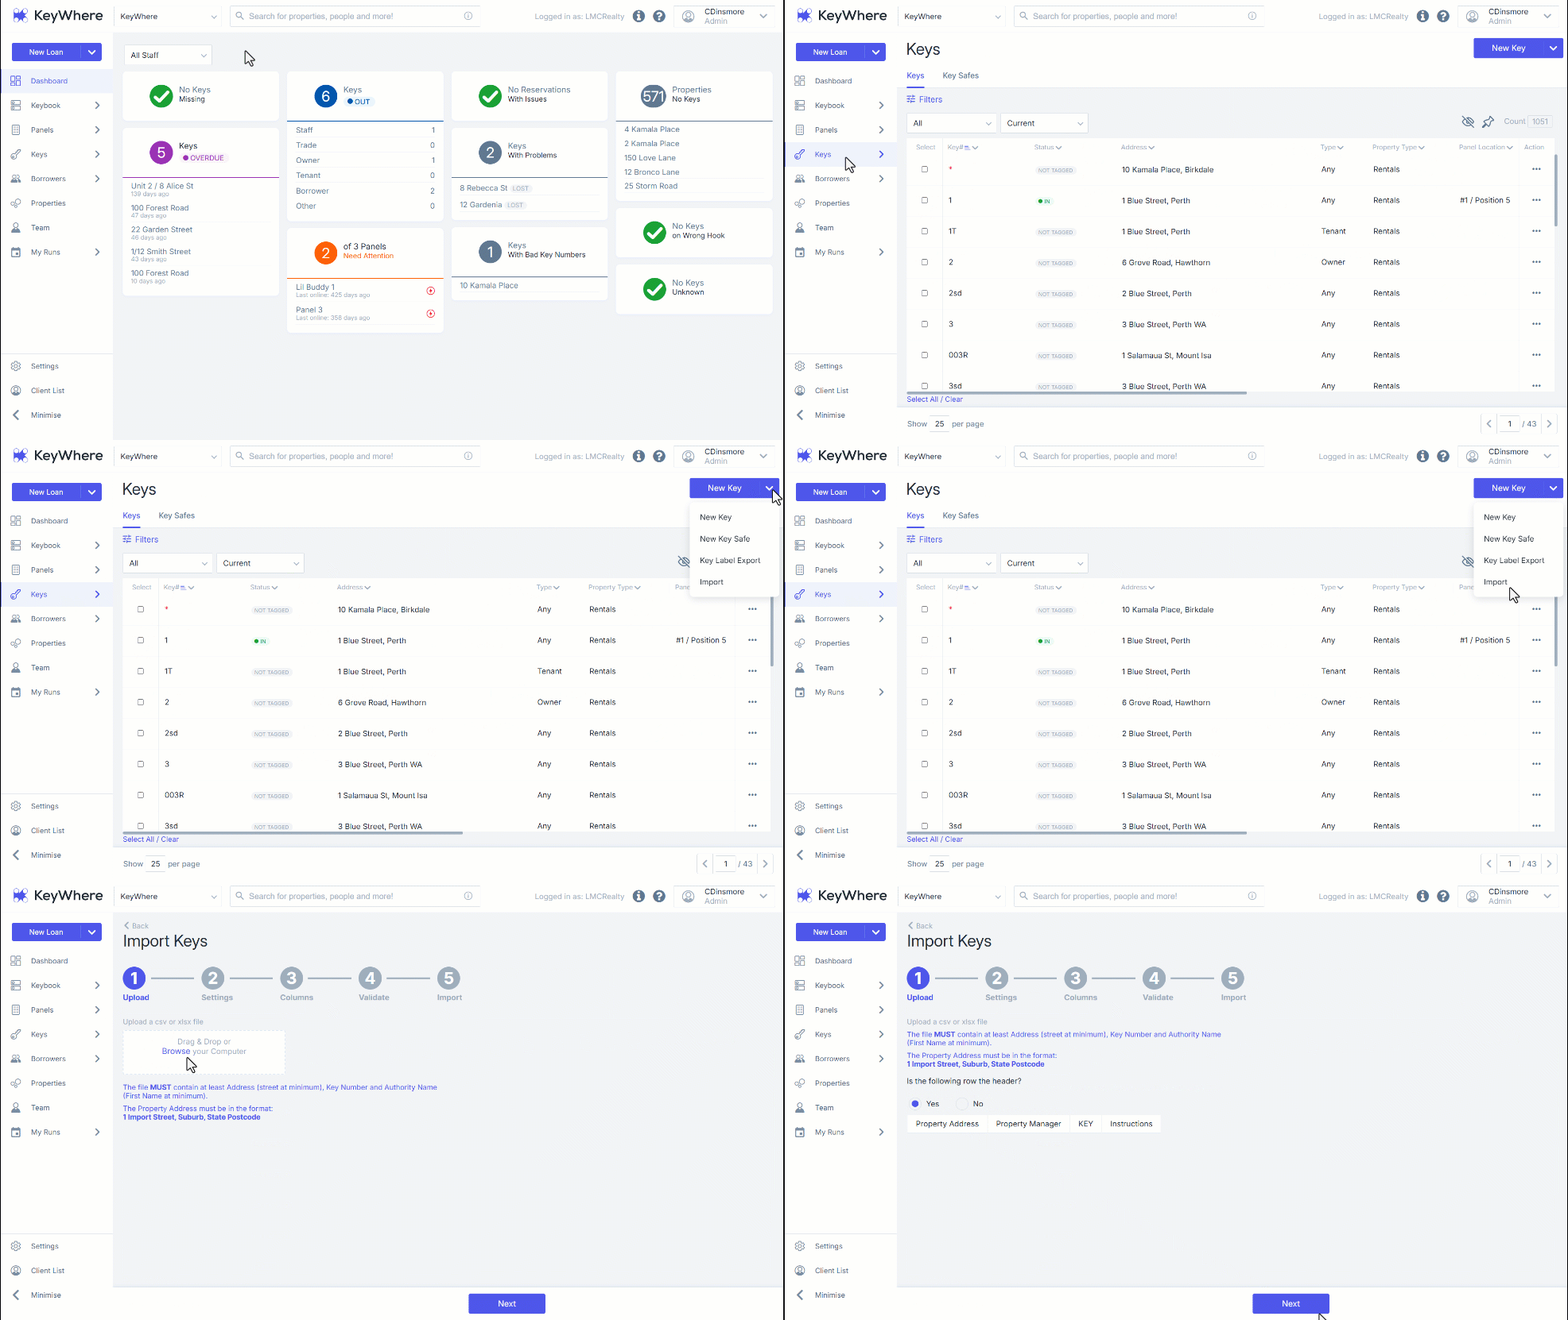
- Navigate to Keys
- Click the New Key dropdown.
- Click Import.
- Drag and drop your keyfile or click Browse your computer to find the csv or xlsx file on your computer.
- Select Yes or No if the first row displayed is a header.
- Click Next.
- Navigate through the settings Note:** If you're unsure about any of the settings, hover your mouse cursor over the small information 'i' icon. A summary will appear, explaining the purpose of each setting.
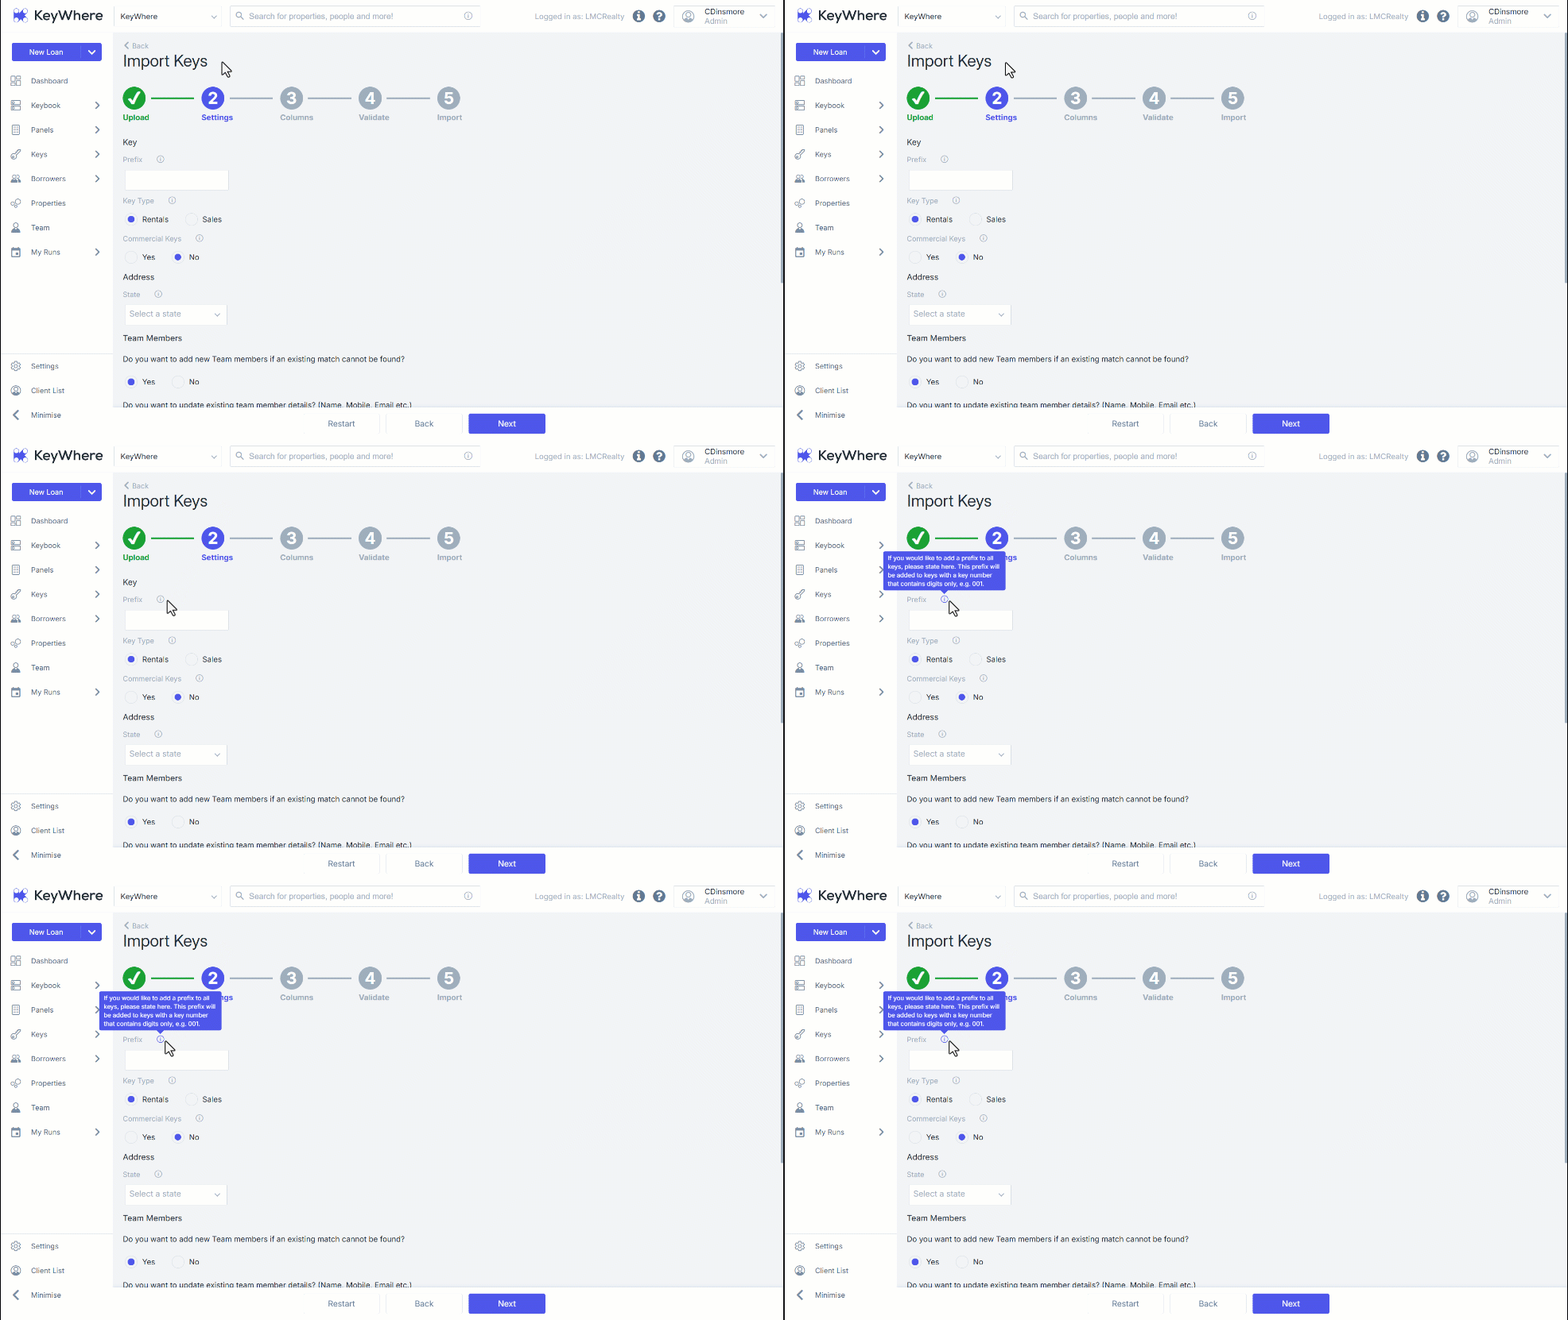
If you require multiple sets of keys for the Property, you can add a prefix i.e A302 for agent set T302 for tenant set.
Select the Key Type.
Select the Address State
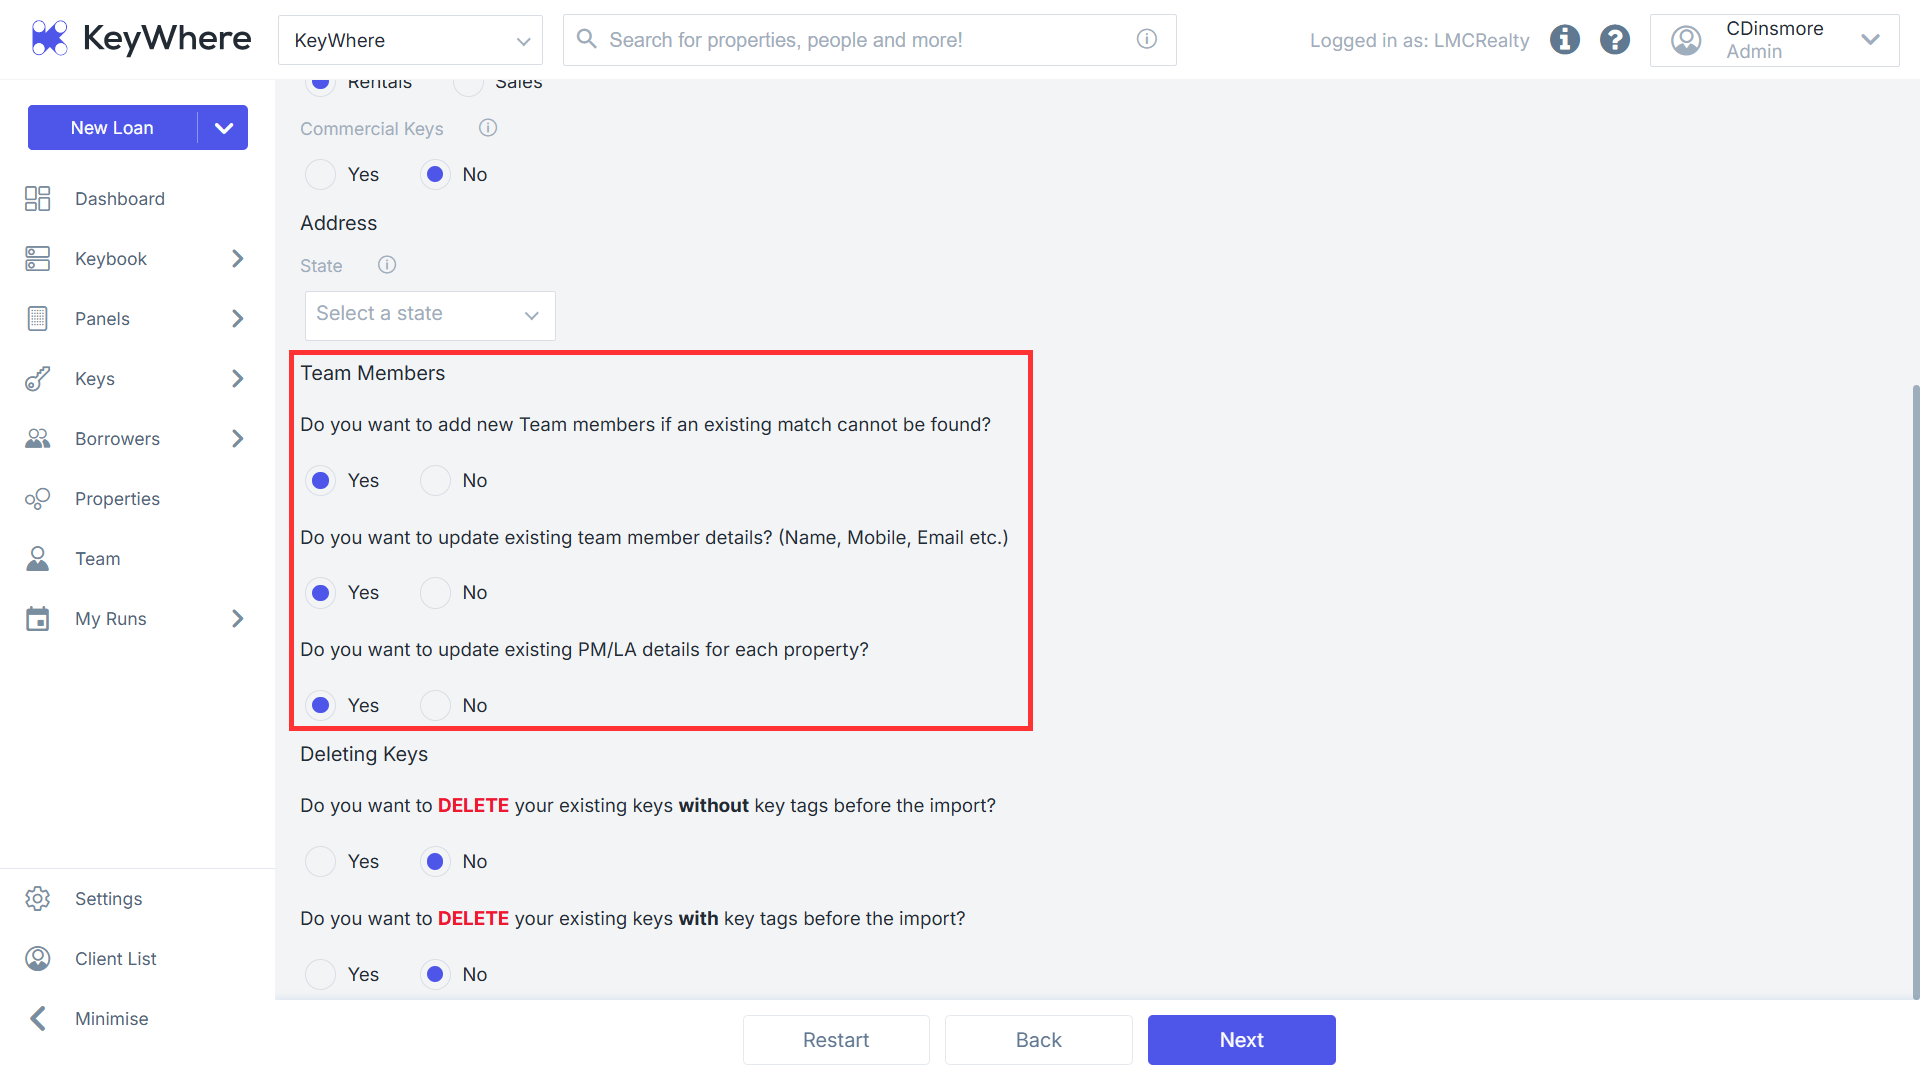
Team Members
- Select Yes or No to: Do you want to add new Team members if an existing match cannot be found? - This will create new Team members in KeyWhere if the import file contains Property Manager/Listing Agent details.
- Select Yes or No to: Do you want to update existing team member details? (Name, Mobile, Email etc.) - This will update the information for Team members in KeyWhere if the import file contains any columns relating to Name, Mobile, or Email.
- Select Yes or No to: Do you want to update existing PM/LA details for each property? - This option will update the Property Manager/Listing Agent's details on the Property file. Feeding through from the import
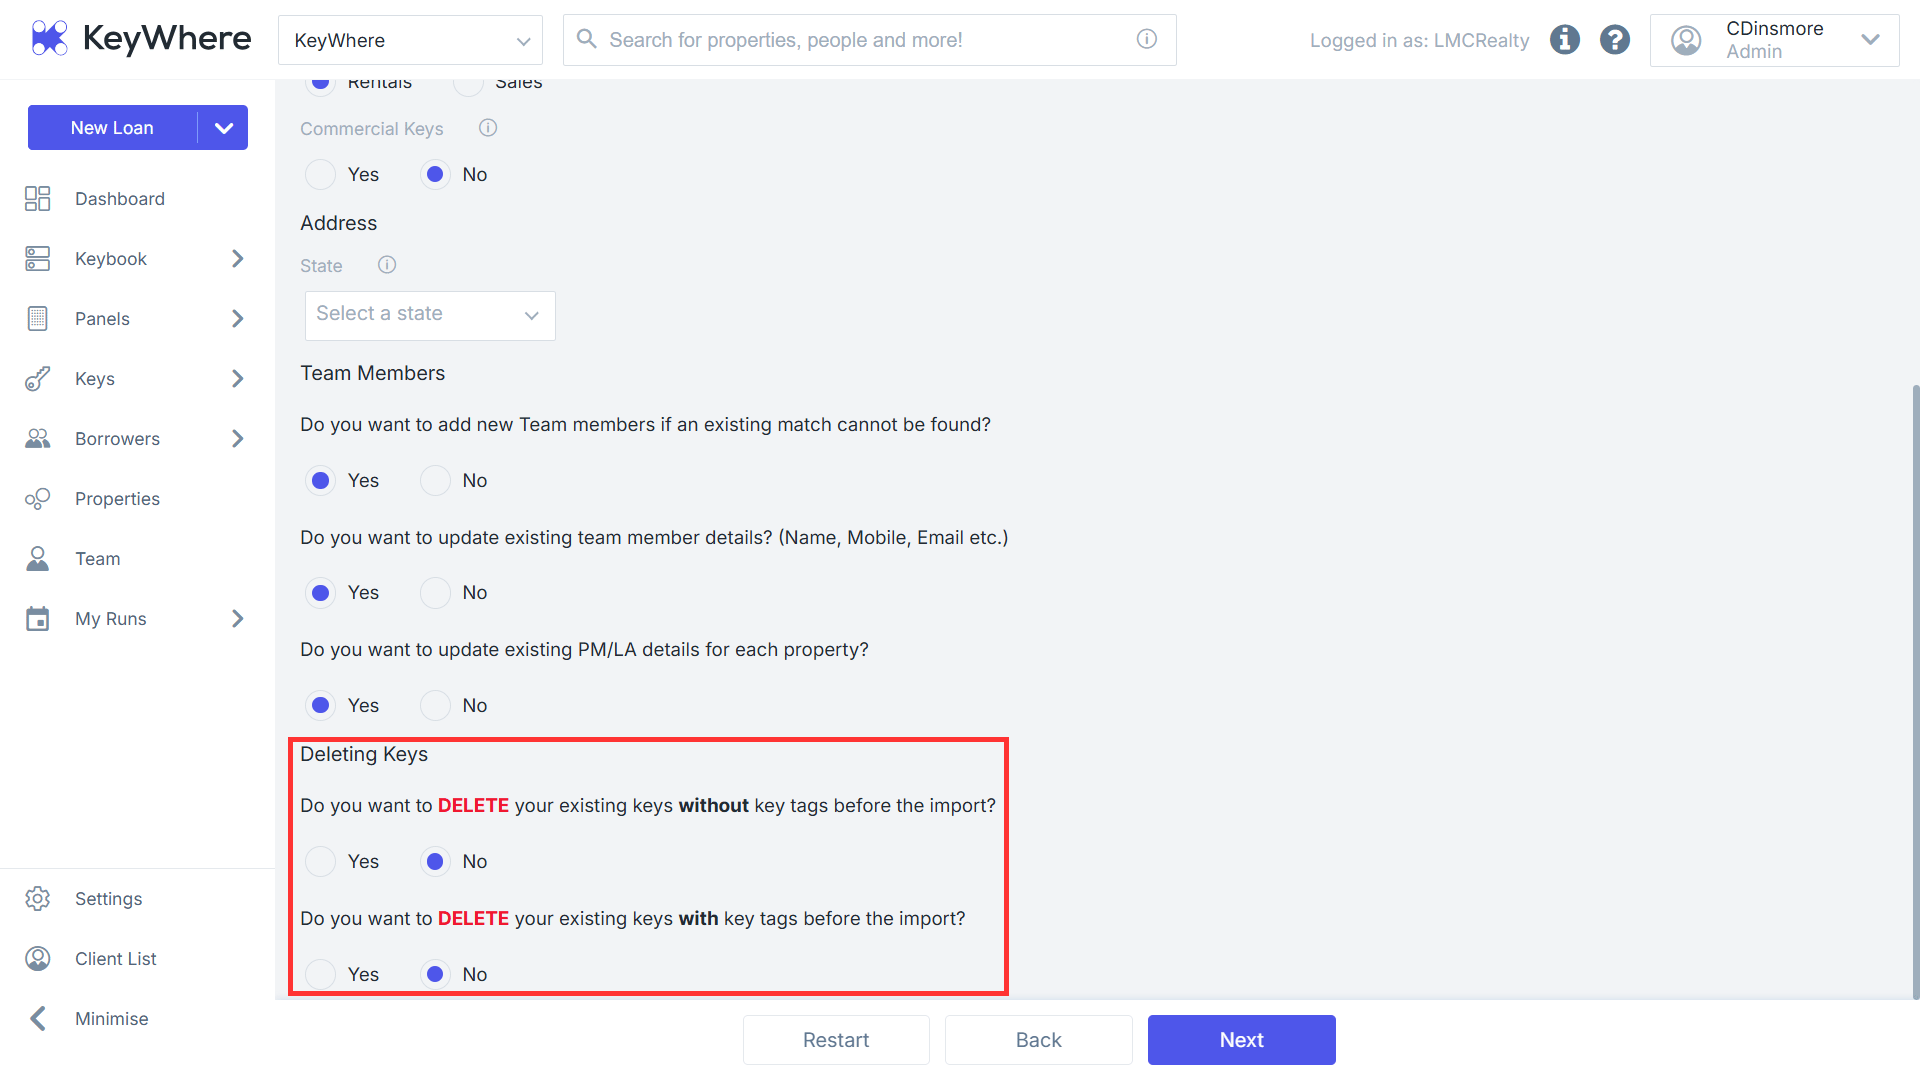
Deleting Keys
Select Yes or No if you wish to delete your keys without key tags
Select Yes or No if you want to delete your existing keys with key tags
- Once you have entered the settings, click Next.
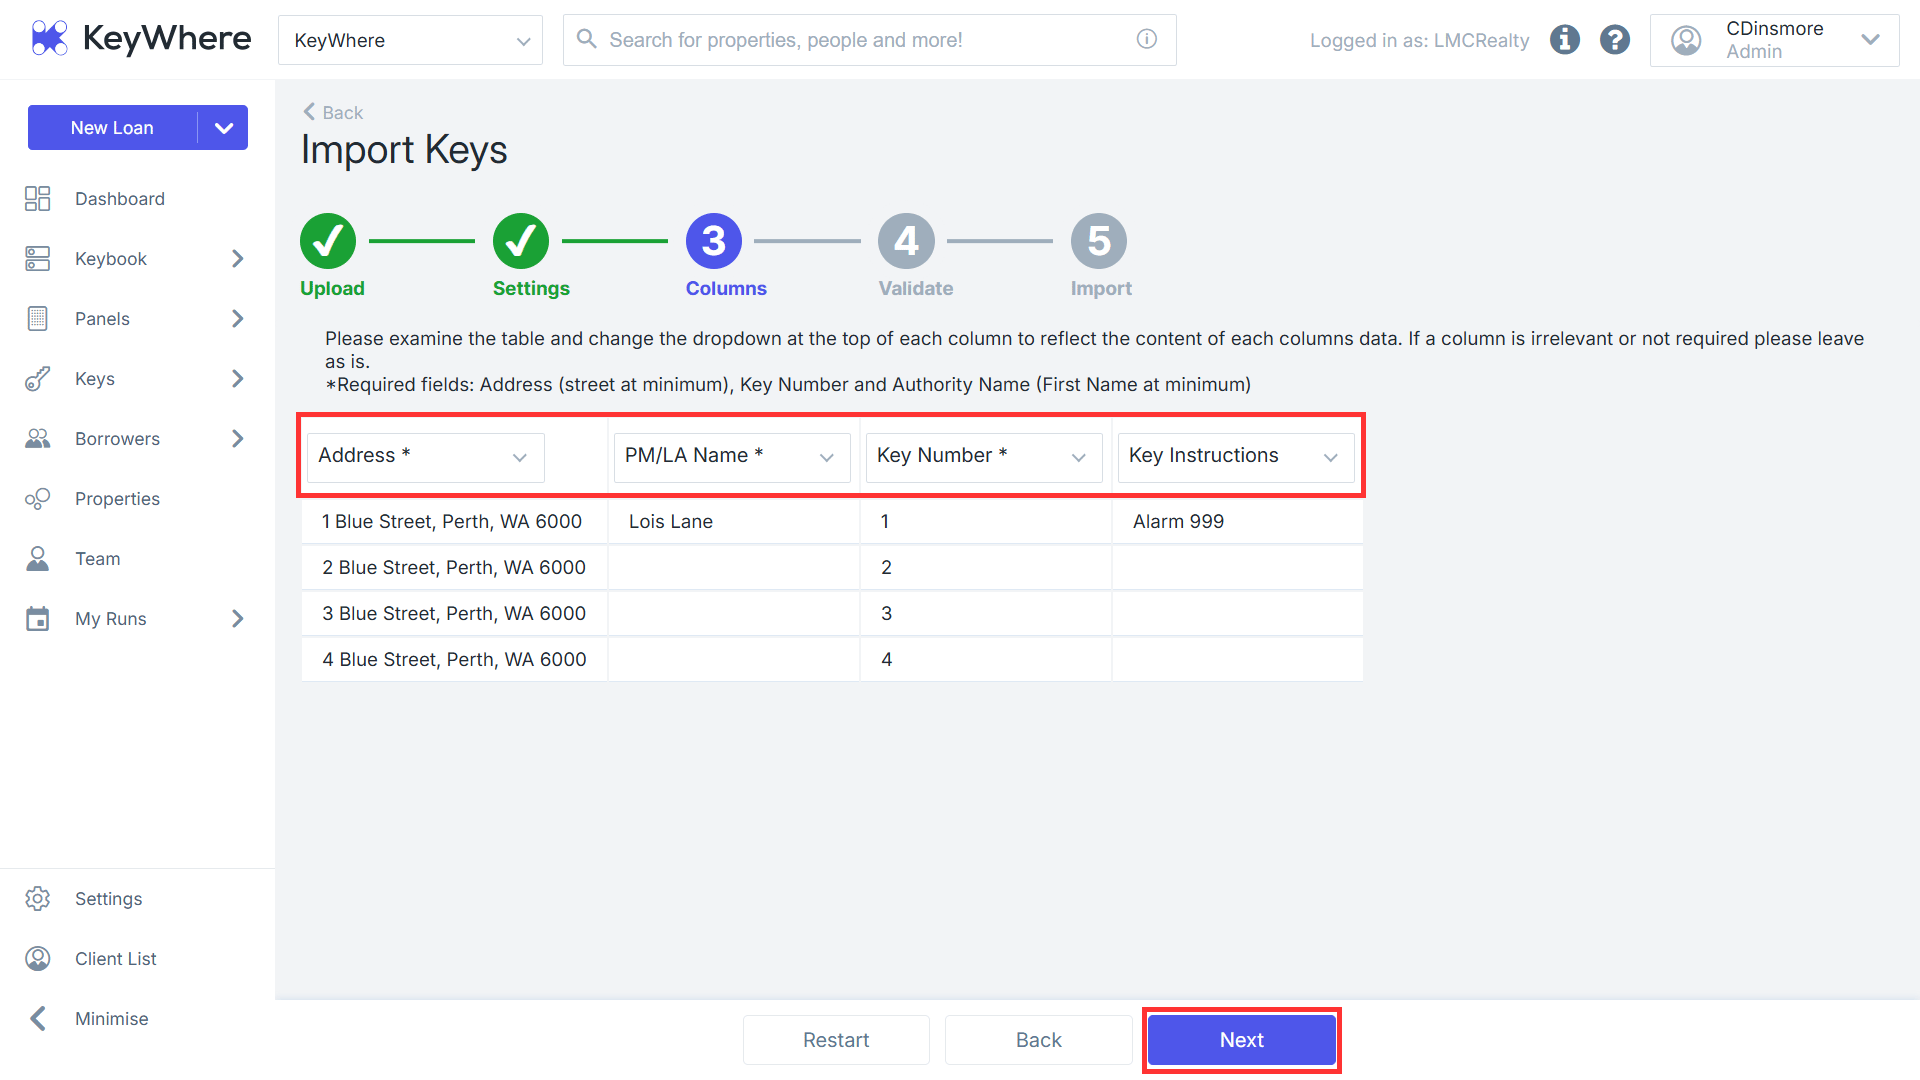
- Select the matching fields for each column using the drop-down menu to align with the headers from the imported file, and click Next.
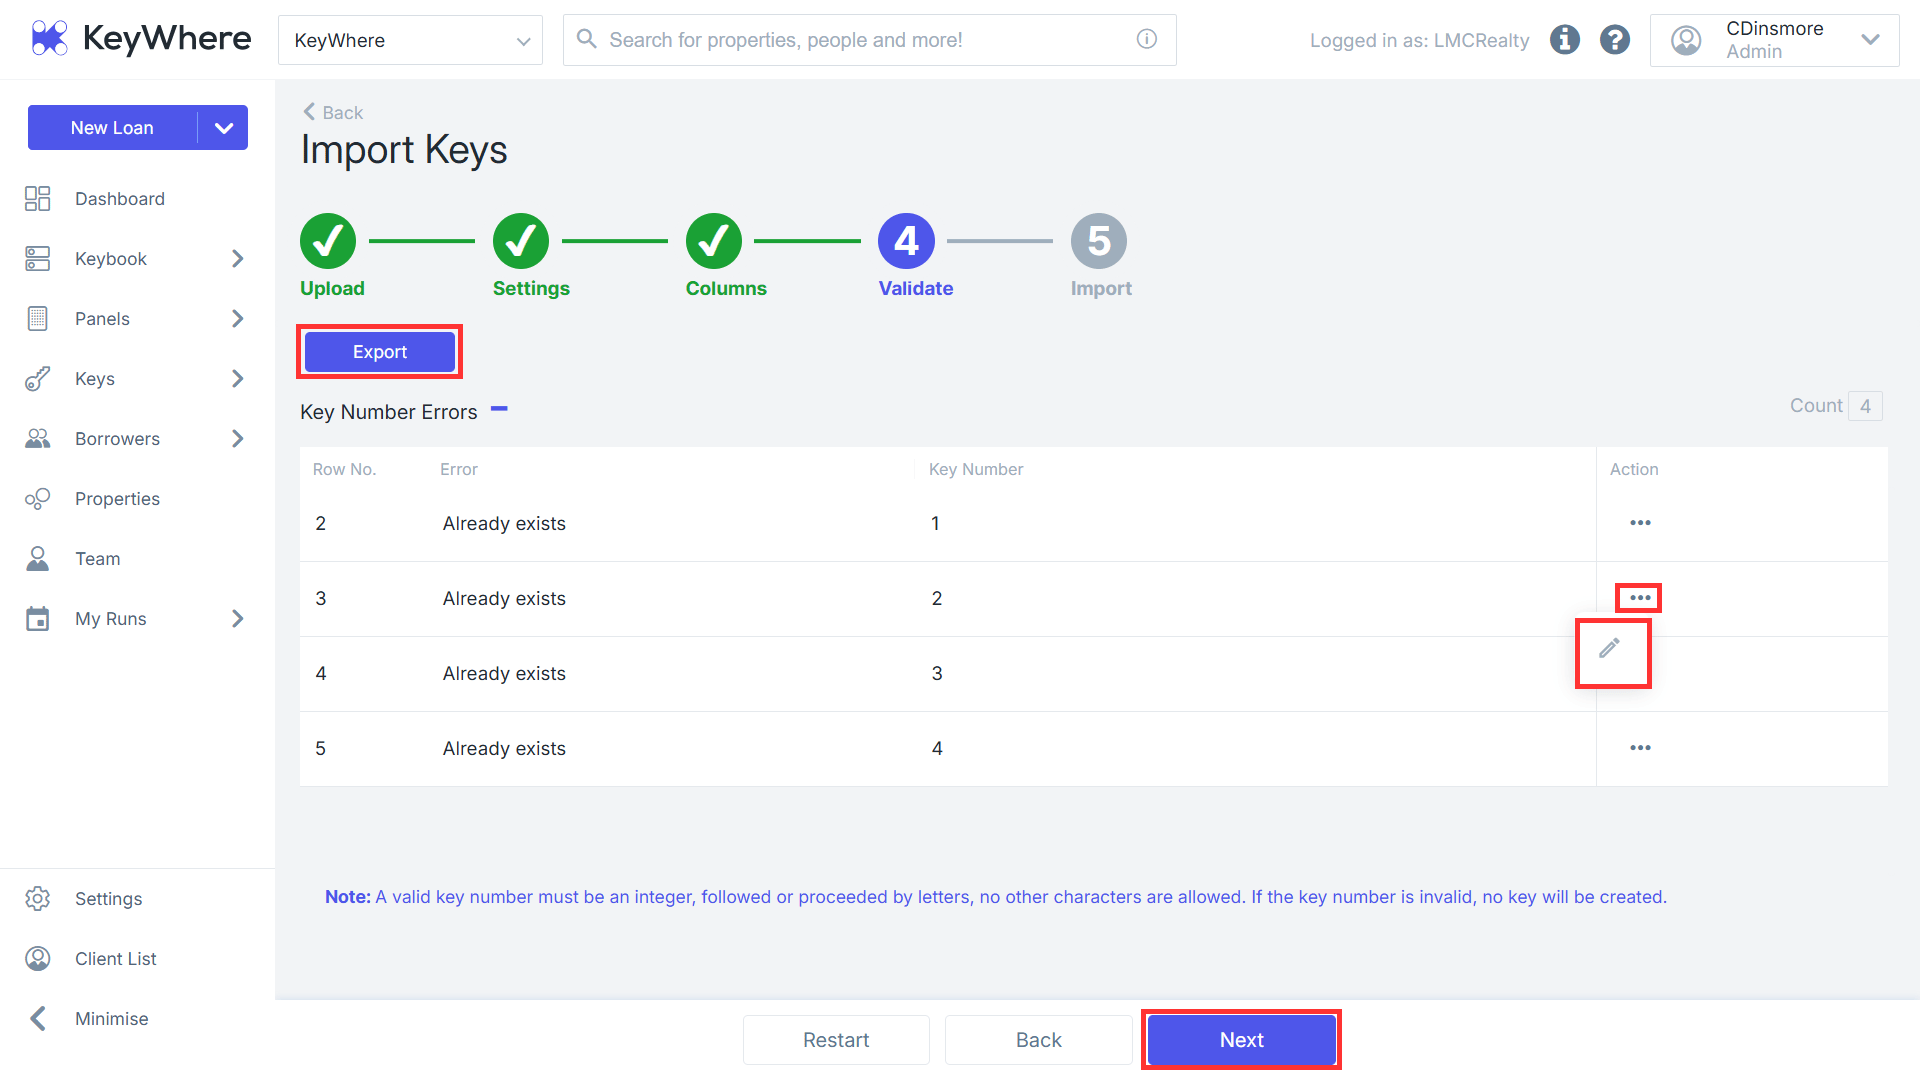
- The Validate step will alert you to any inconsistencies in the import file, including address errors, potential property duplicates, and key number errors. To edit and update any missing information, click the three action dots next to the property file and select the pencil icon.
Note: When handling errors, you can use the Export option to generate a CSV file containing the properties with errors. This allows you to resolve any issues with the data before re-importing it. Files that were already imported without issues will remain in the system.
Once any errors have been resolved, click Next.
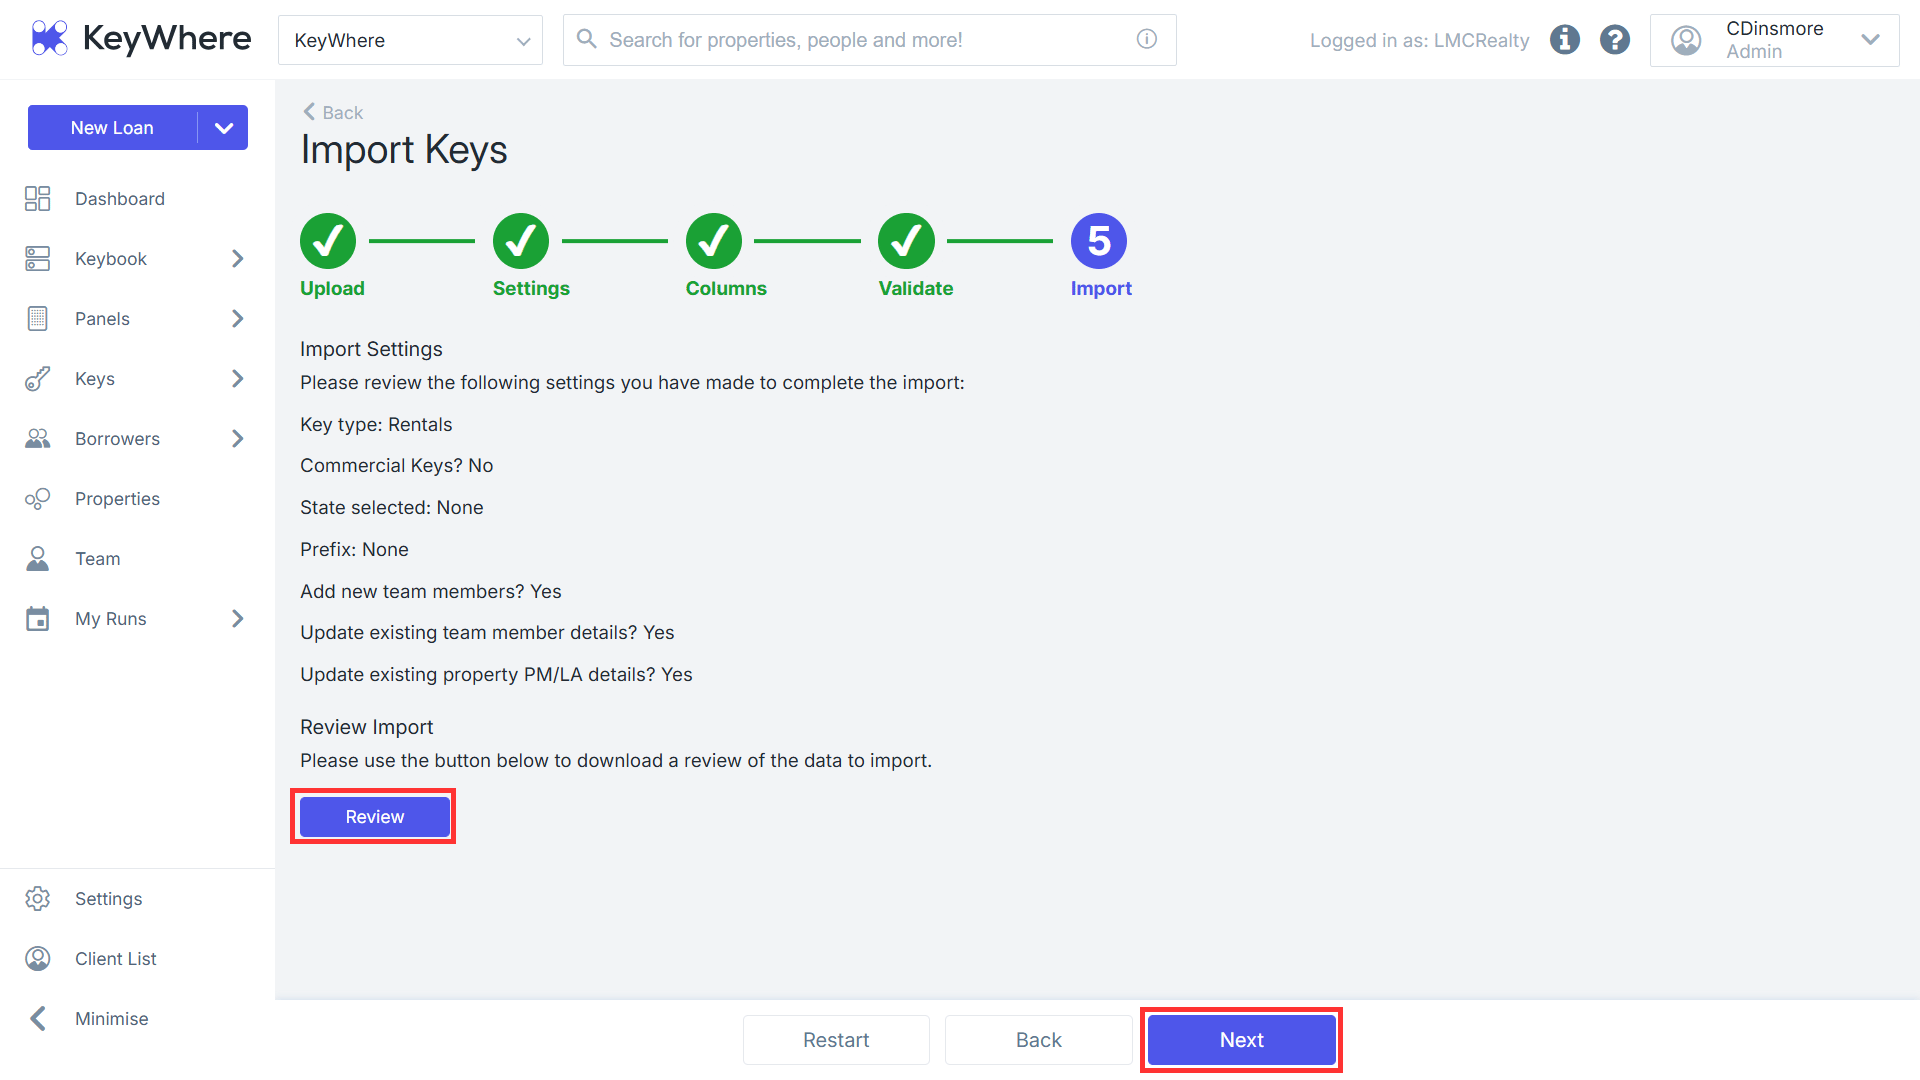
- The Import page will display a summary of your previously selected settings. Review the import settings, then click the Review button to generate a CSV file with all the valid data ready for import.
- Click Next to complete the import process.
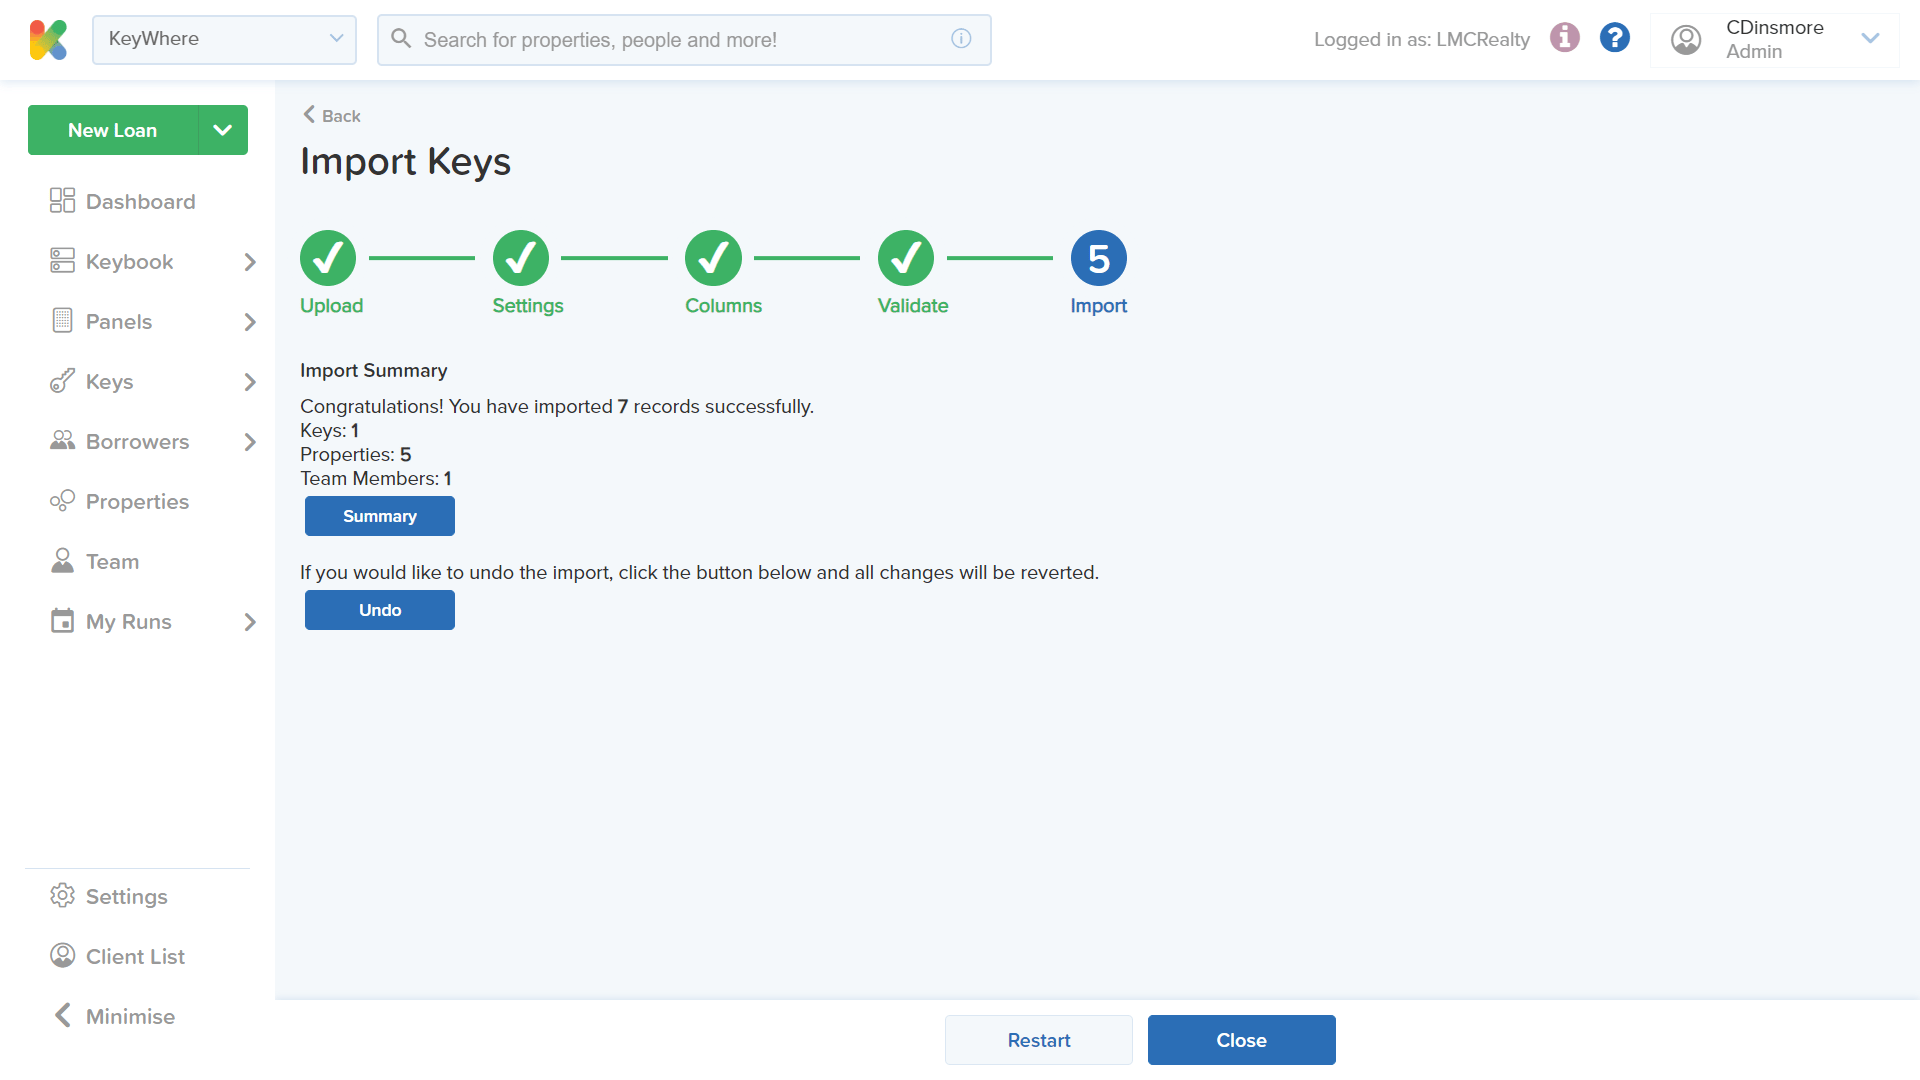
10 . The Import Summary page will confirm the completion of the import. Select the Summary button to display the records that have been successfully imported into the system. 11. You can also select the Undo button to revert the import.
Note: This option will be available for 1 hour after the import of the most recent file.
- Once you are done with the summary, click Close to exit the import page and return to the Keys screen.