'%20d='M0%208a8%208%200%200%201%208-8h24a8%208%200%200%201%208%208v24a8%208%200%200%201-8%208H8a8%208%200%200%201-8-8V8Z'/%3e%3cpath%20fill='%23fff'%20d='M32.576%206C12.293%206%208.776%2025.887%207.424%2034H9.1c.45-2.977%203.493-14.748%2010.899-20.287%200%200-5.633%206.976-6.572%2015.051%203.426-.652%2013.845-3.372%2016.056-12.927l-3.84-.61c1.352-1.351%204.909-5.17%206.931-9.226V6Z'/%3e%3cdefs%3e%3clinearGradient%20id='reapit-lettings__a'%20x1='20.702'%20x2='20.702'%20y1='.351'%20y2='31.228'%20gradientUnits='userSpaceOnUse'%3e%3cstop%20stop-color='%235573FD'/%3e%3cstop%20offset='.575'%20stop-color='%234E56EA'/%3e%3c/linearGradient%3e%3c/defs%3e%3c/svg%3e)
Managing Monthly Report
This article will run through how to manage the monthly report in Reapit Lettings. The processes in this article includes: How to manage Monthly Performance Report How to manage Cumulative Leasing Report Custom Date Monthly Report via End of Month Calendar
Managing Monthly Report
This article will run through how to manage the monthly report in Reapit Lettings.
The processes in this article includes:
- How to manage Monthly Performance Report
- How to manage Cumulative Leasing Report
- Custom Date Monthly Report via End of Month Calendar
How to Manage Monthly Performance Report
- Click on Reports. 2. Click on Letting. 3. Click on Monthly Reports. 4. Navigate to Monthly Performance Report tab. 5. To view the report, enter your email address or mobile number. 6. Click on Send Report Now.
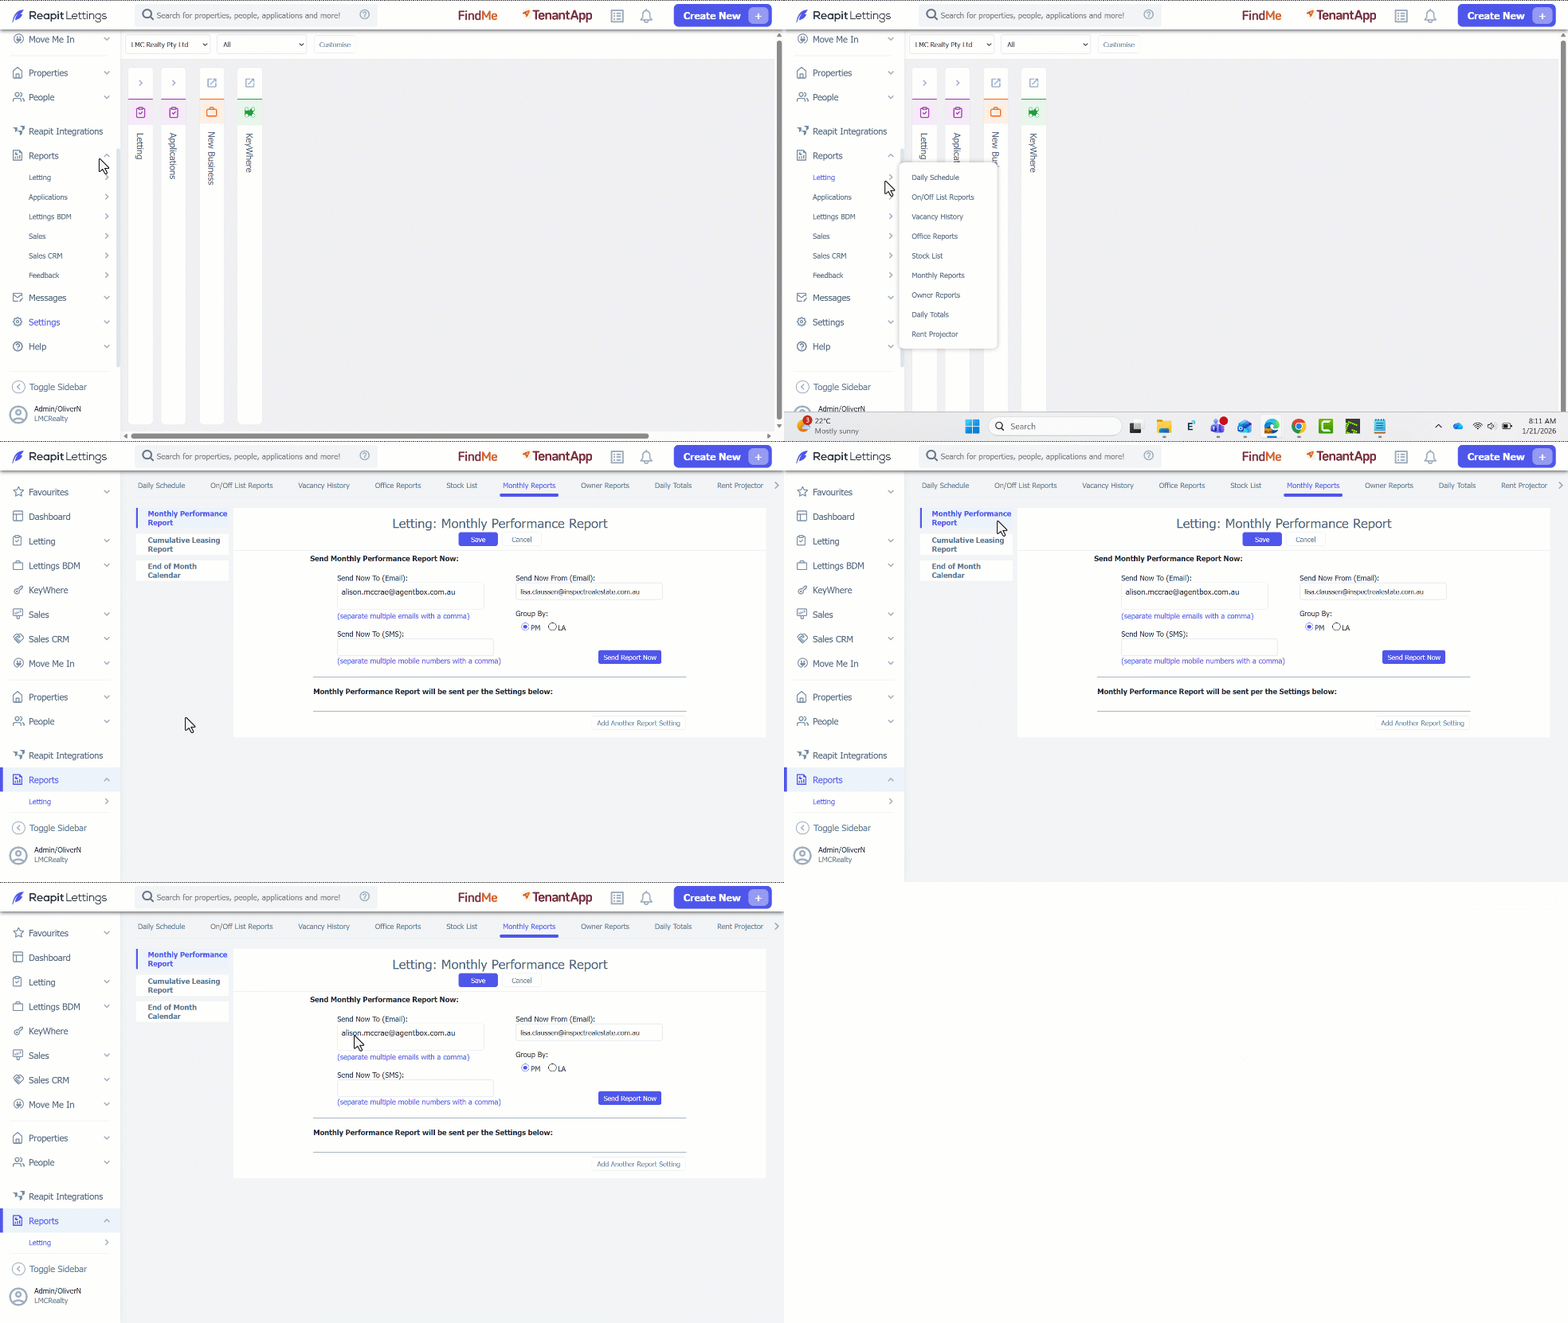
- To receive this report automatically, click on Add Another Report Setting. 8. In the Select Format section, choose how you would like the report to be sent. 9. Enter in the Email Address, Day and Time you would like the report to go to. 10. Click on Save.
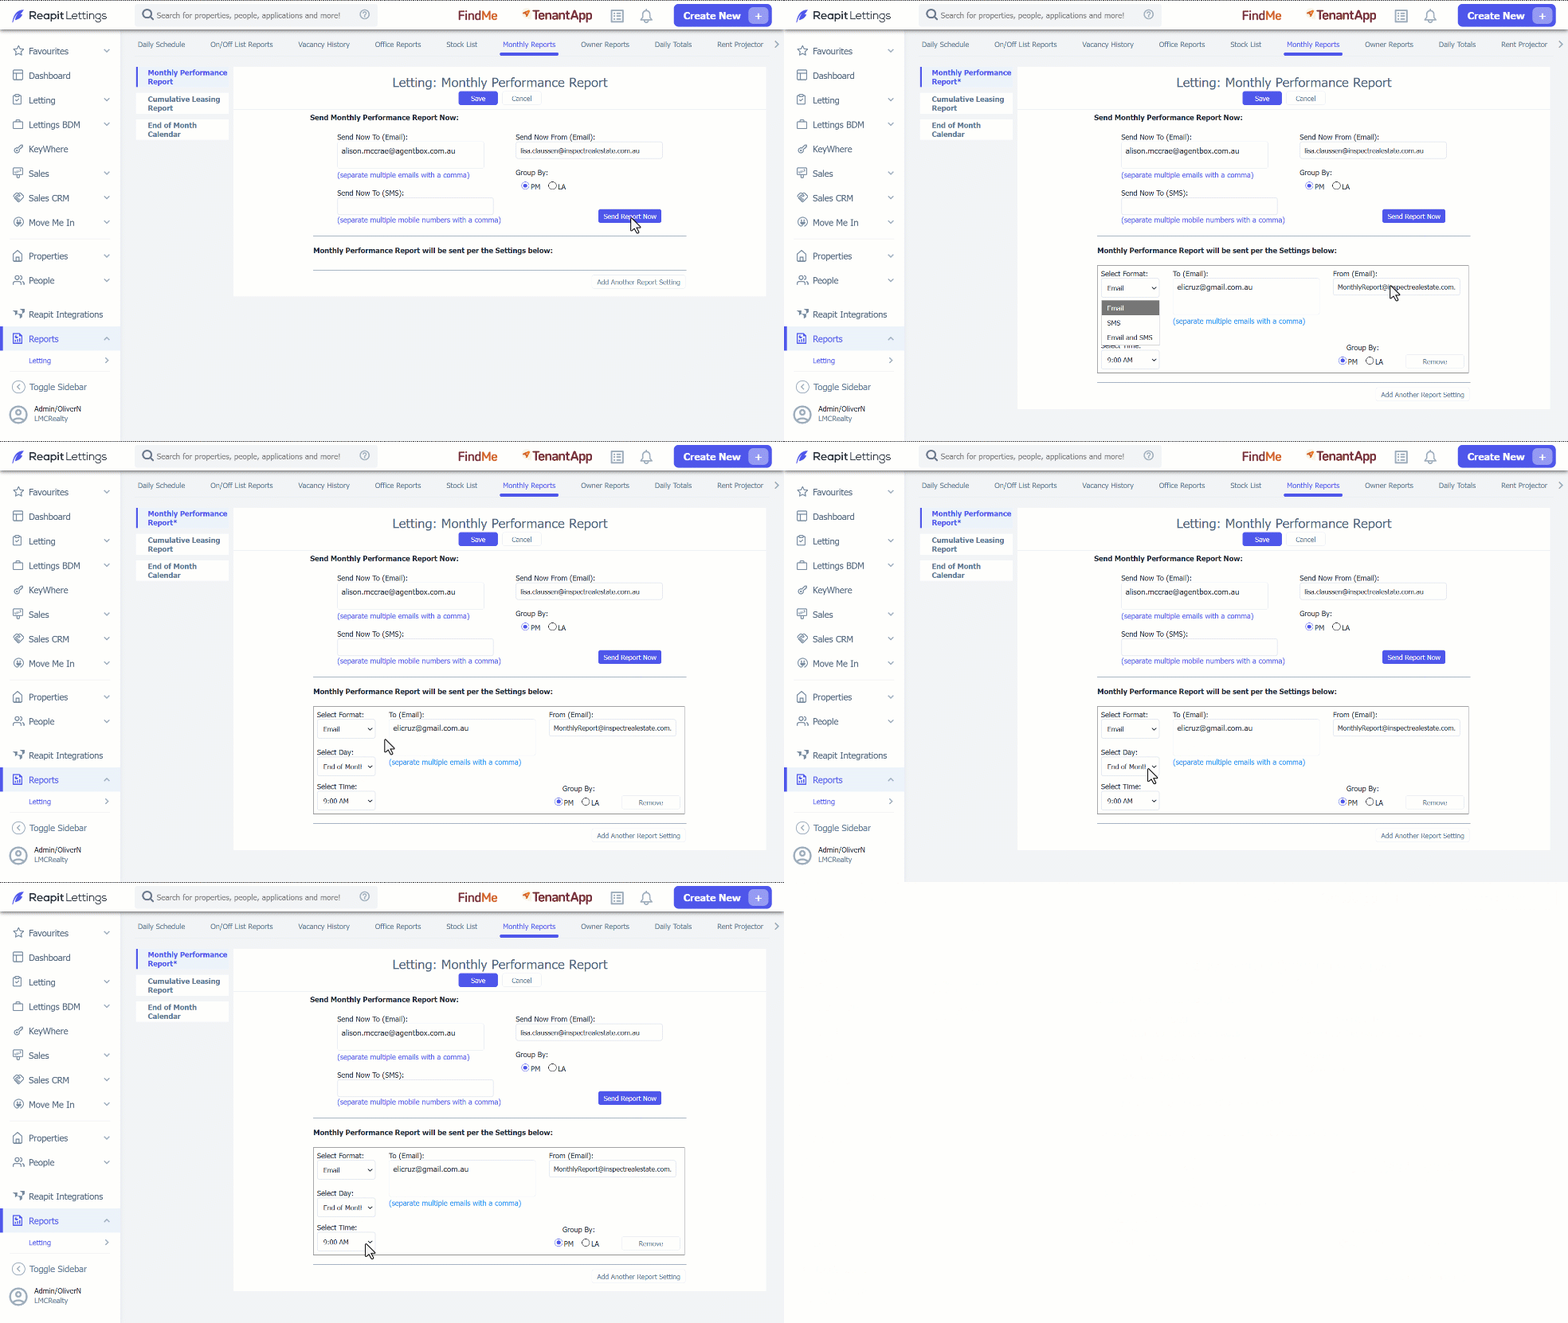
How to Manage Cumulative Leasing Report
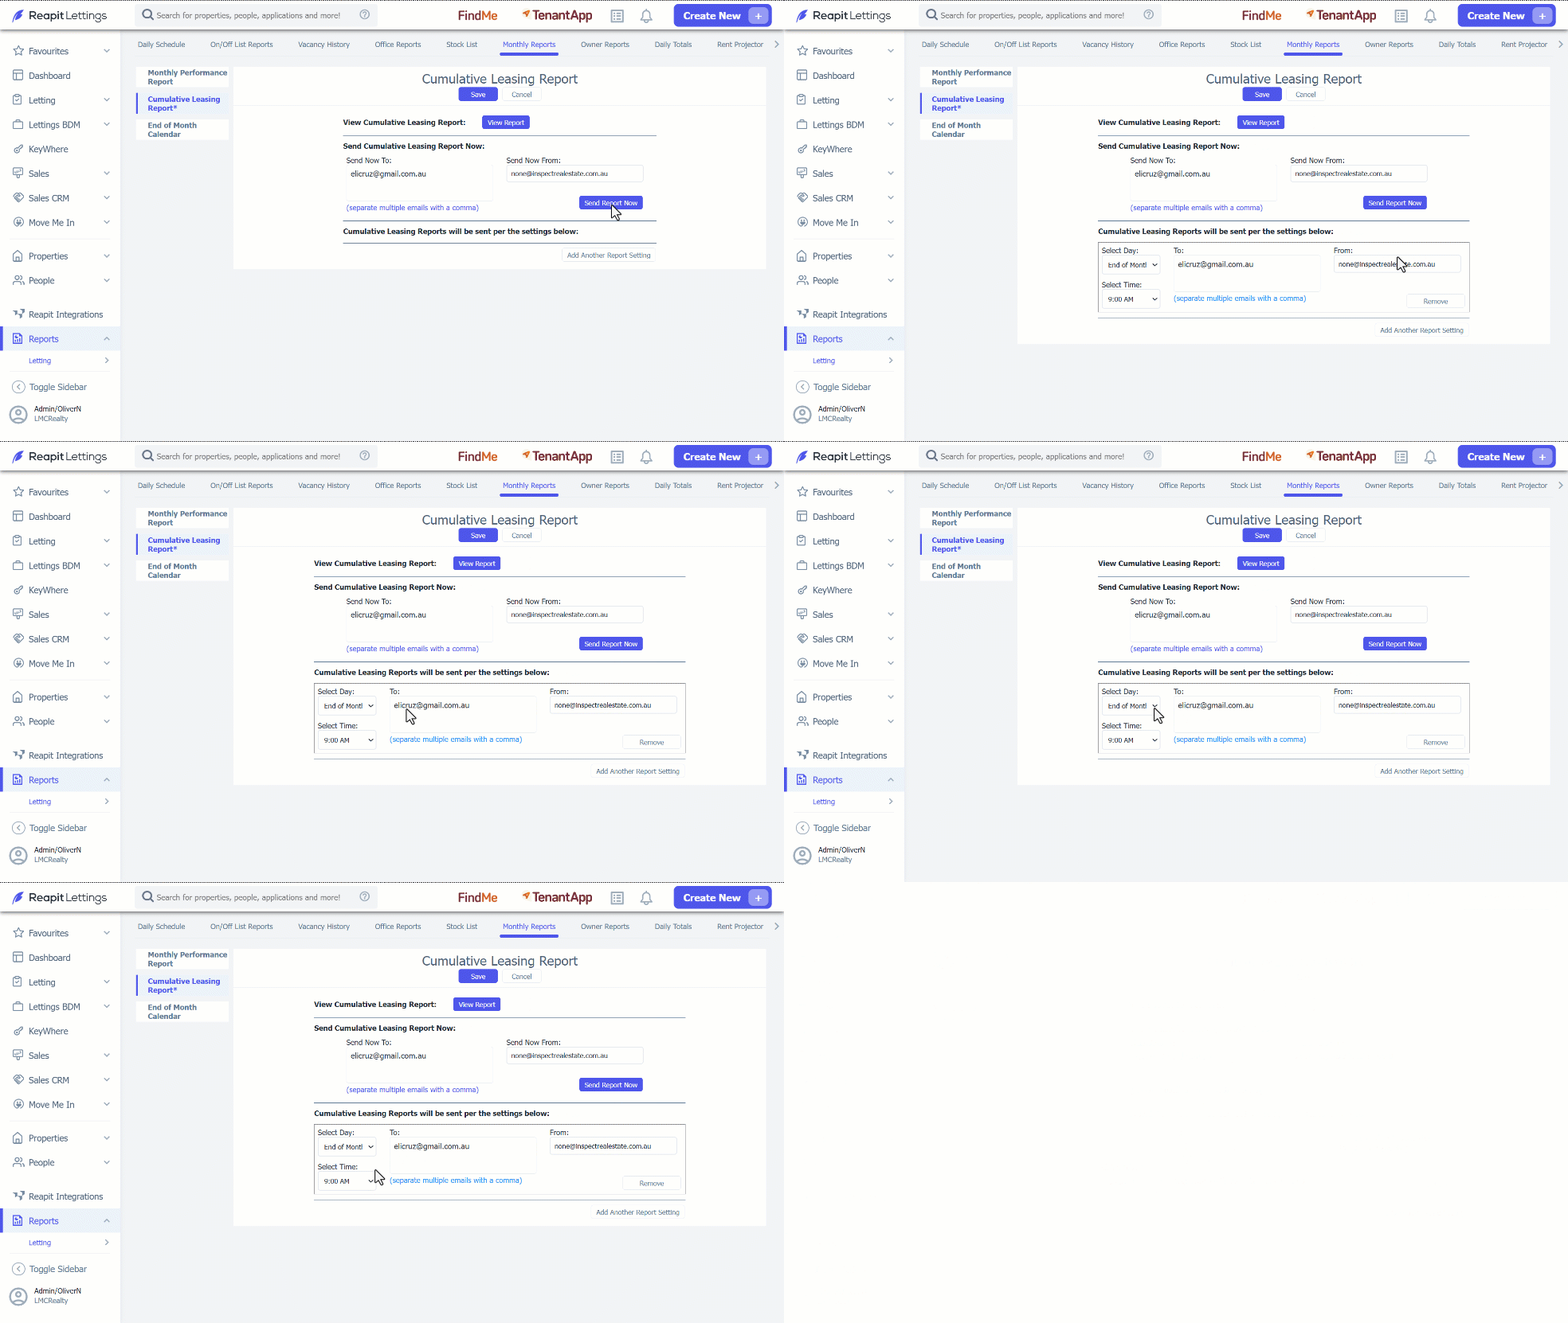
- Click on Reports. 2. Click on Letting. 3. Click on Monthly Reports. 4. Navigate to Cumulative Leasing Report tab. 5. To view the report, enter your email address or mobile number. 6. Click on Send Report Now.
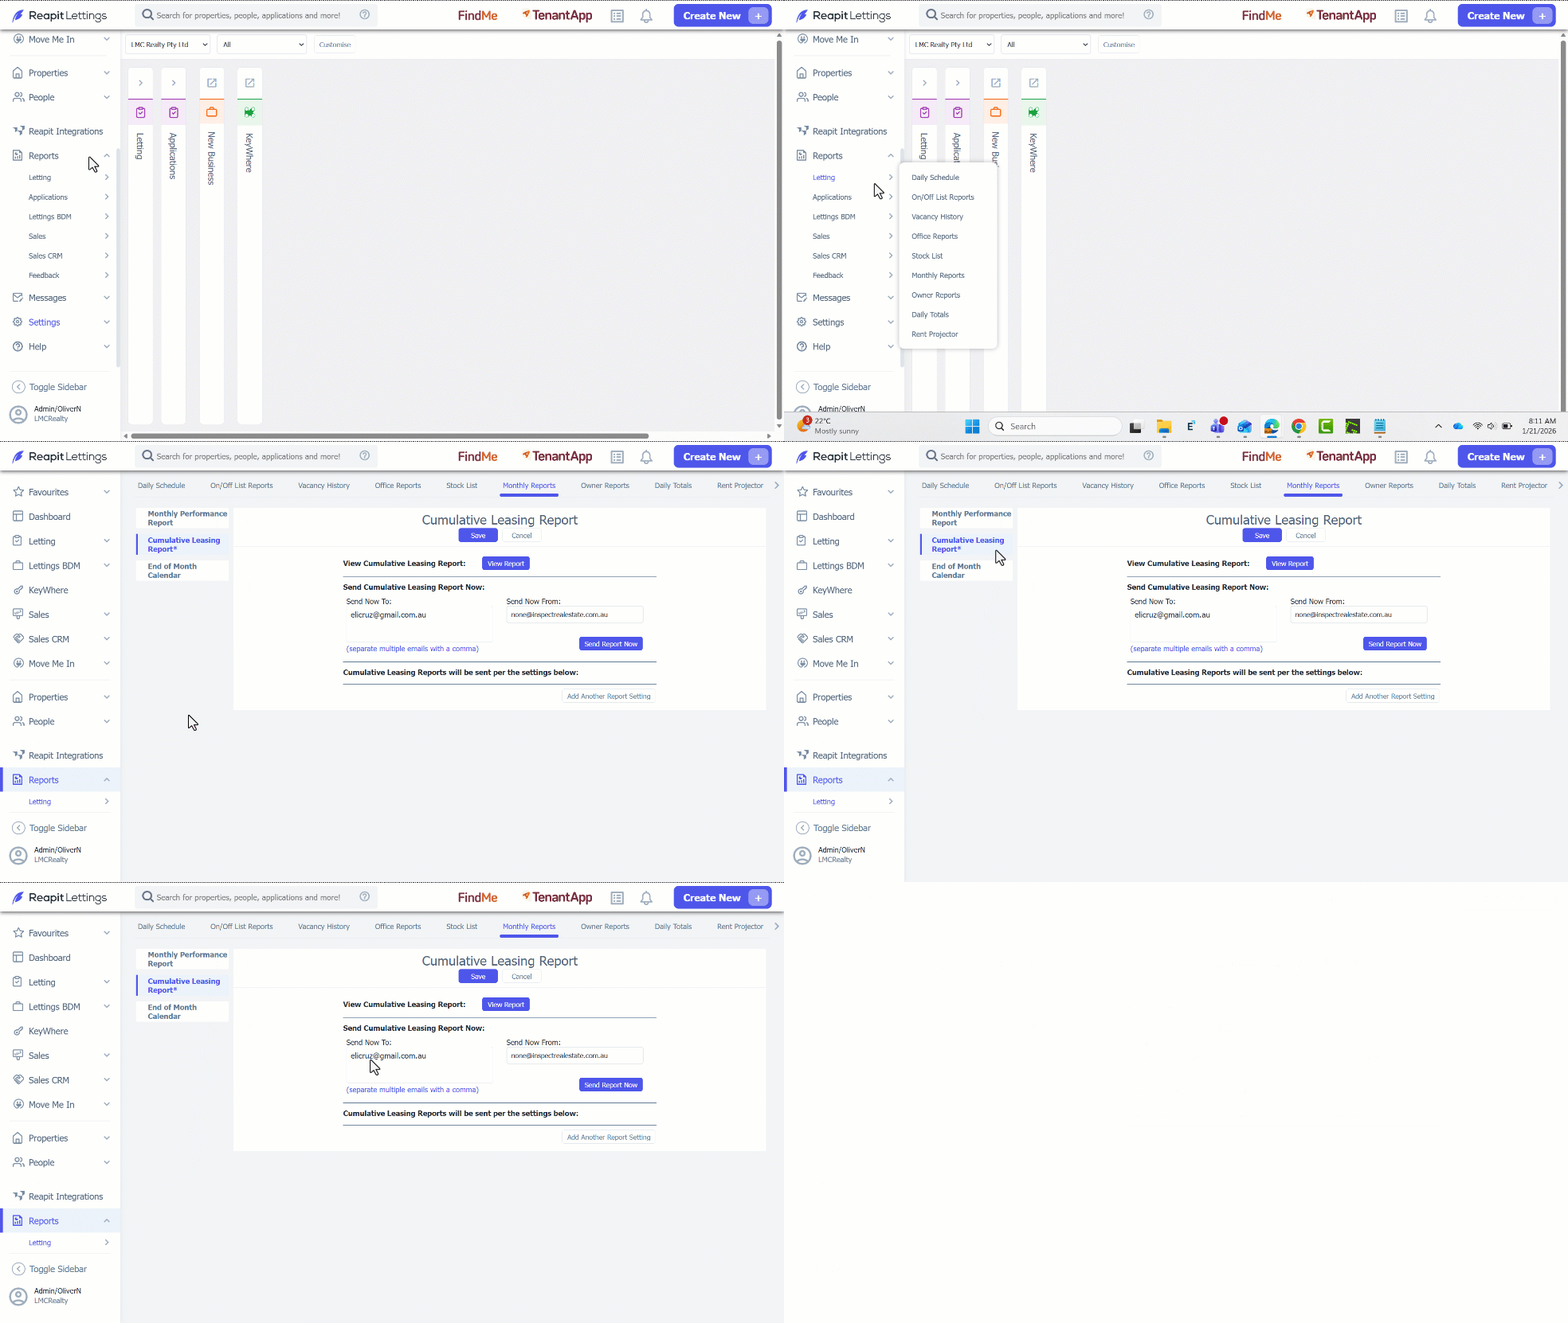
- To receive this report automatically, click on Add Another Report Setting. 8. Enter in the Email Address, Day and Time you would like the report to go to. 9. Click on Save.
Custom Date Monthly Report via End of Month Calendar
The End of Month Calendar tab lets you access the previously sent monthly reports. This feature is only available for Diamond Level users.
- Click on Reports. 2. Click on Letting. 3. Click on Monthly Reports. 4. Navigate to End of Month Calendar tab. 5. Navigate to the three dots in the top right-hand side of the page. 6. Select New Date/Time. 7. In the newly added Date and Time dropdown, select the Date and Time you want to perform an action. 8. After selecting the Date and Time, navigate to the three dots beside it, under the Action column and select View or Delete. 9. Click on Save.