'%20d='M0%208a8%208%200%200%201%208-8h24a8%208%200%200%201%208%208v24a8%208%200%200%201-8%208H8a8%208%200%200%201-8-8V8Z'/%3e%3cpath%20fill='%23fff'%20d='M32.576%206C12.293%206%208.776%2025.887%207.424%2034H9.1c.45-2.977%203.493-14.748%2010.899-20.287%200%200-5.633%206.976-6.572%2015.051%203.426-.652%2013.845-3.372%2016.056-12.927l-3.84-.61c1.352-1.351%204.909-5.17%206.931-9.226V6Z'/%3e%3cdefs%3e%3clinearGradient%20id='reapit-lettings__a'%20x1='20.702'%20x2='20.702'%20y1='.351'%20y2='31.228'%20gradientUnits='userSpaceOnUse'%3e%3cstop%20stop-color='%235573FD'/%3e%3cstop%20offset='.575'%20stop-color='%234E56EA'/%3e%3c/linearGradient%3e%3c/defs%3e%3c/svg%3e)
How to Edit Messages (Letting) Templates
This article will run through how to edit letting message templates within your account in Reapit Lettings.
How to Edit Messages (Letting) Templates
This article will run through how to edit letting message templates within your account in Reapit Lettings.
The processes in this article include:
- How to Edit Messages (Letting) Templates
- How to Add Attachments to your Messages
How to Edit Messages (Letting) Templates
- Navigate to Messages.
- Click Letting.
- You can access and edit the SMS, and/ or Email messaging templates within the Waiting/Not Registered, Registered, Inspected – Owners, Inspected – Tenants, Alerts, Cancelled and On/Off VL categories.
- To edit a message (Email or SMS), choose the message you want to edit and click on the Edit Message button.
You may select the messages to be dispatched as emails and/or SMS by clicking the designated checkboxes.
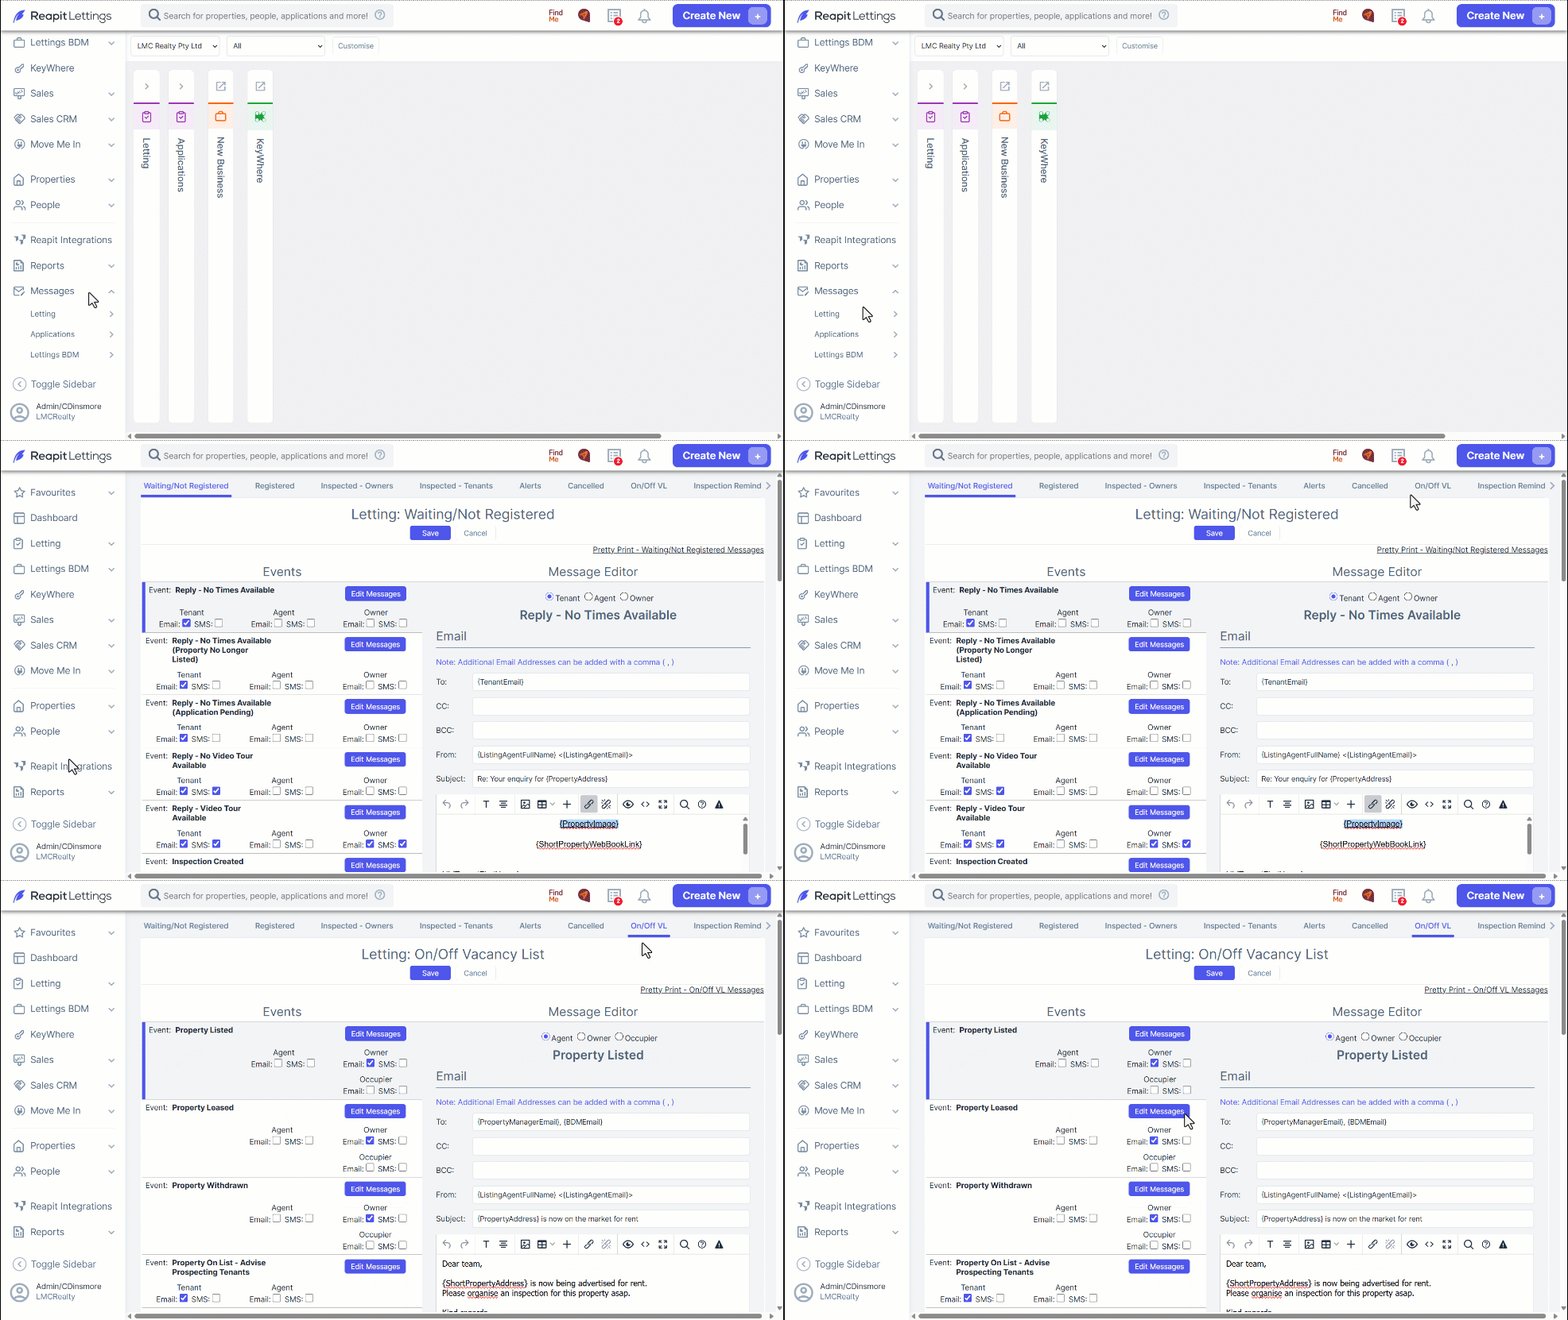
- The page will refresh, and the message you intend to edit will be highlighted. Subsequently, the email and SMS fields associated with that message will be displayed on the right-hand side within the Message Editor section.
Upon selecting an event message, you may proceed to edit the Tenant, Agent, Owner, and/or Occupier messages by choosing the respective recipient in the Message Editor.
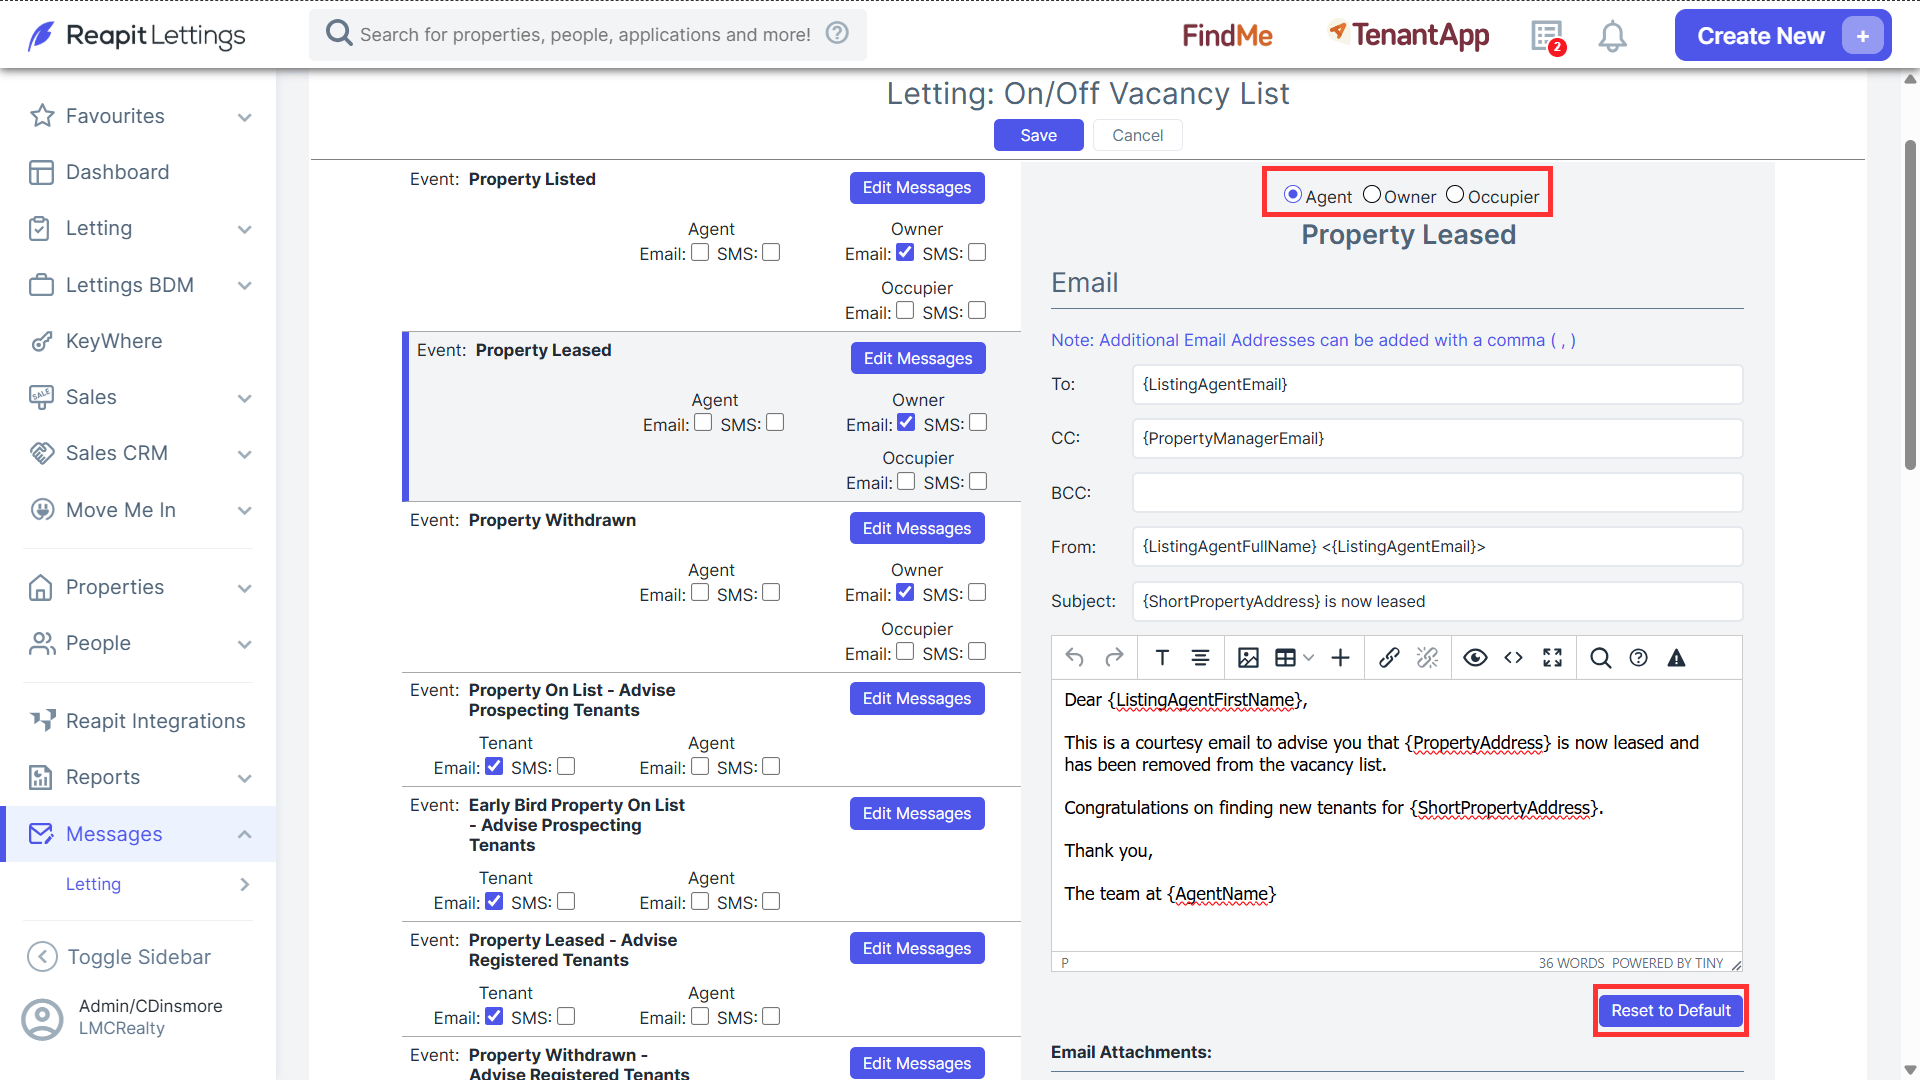
Note: Additionally, the option to revert the message to its default settings is available if required.
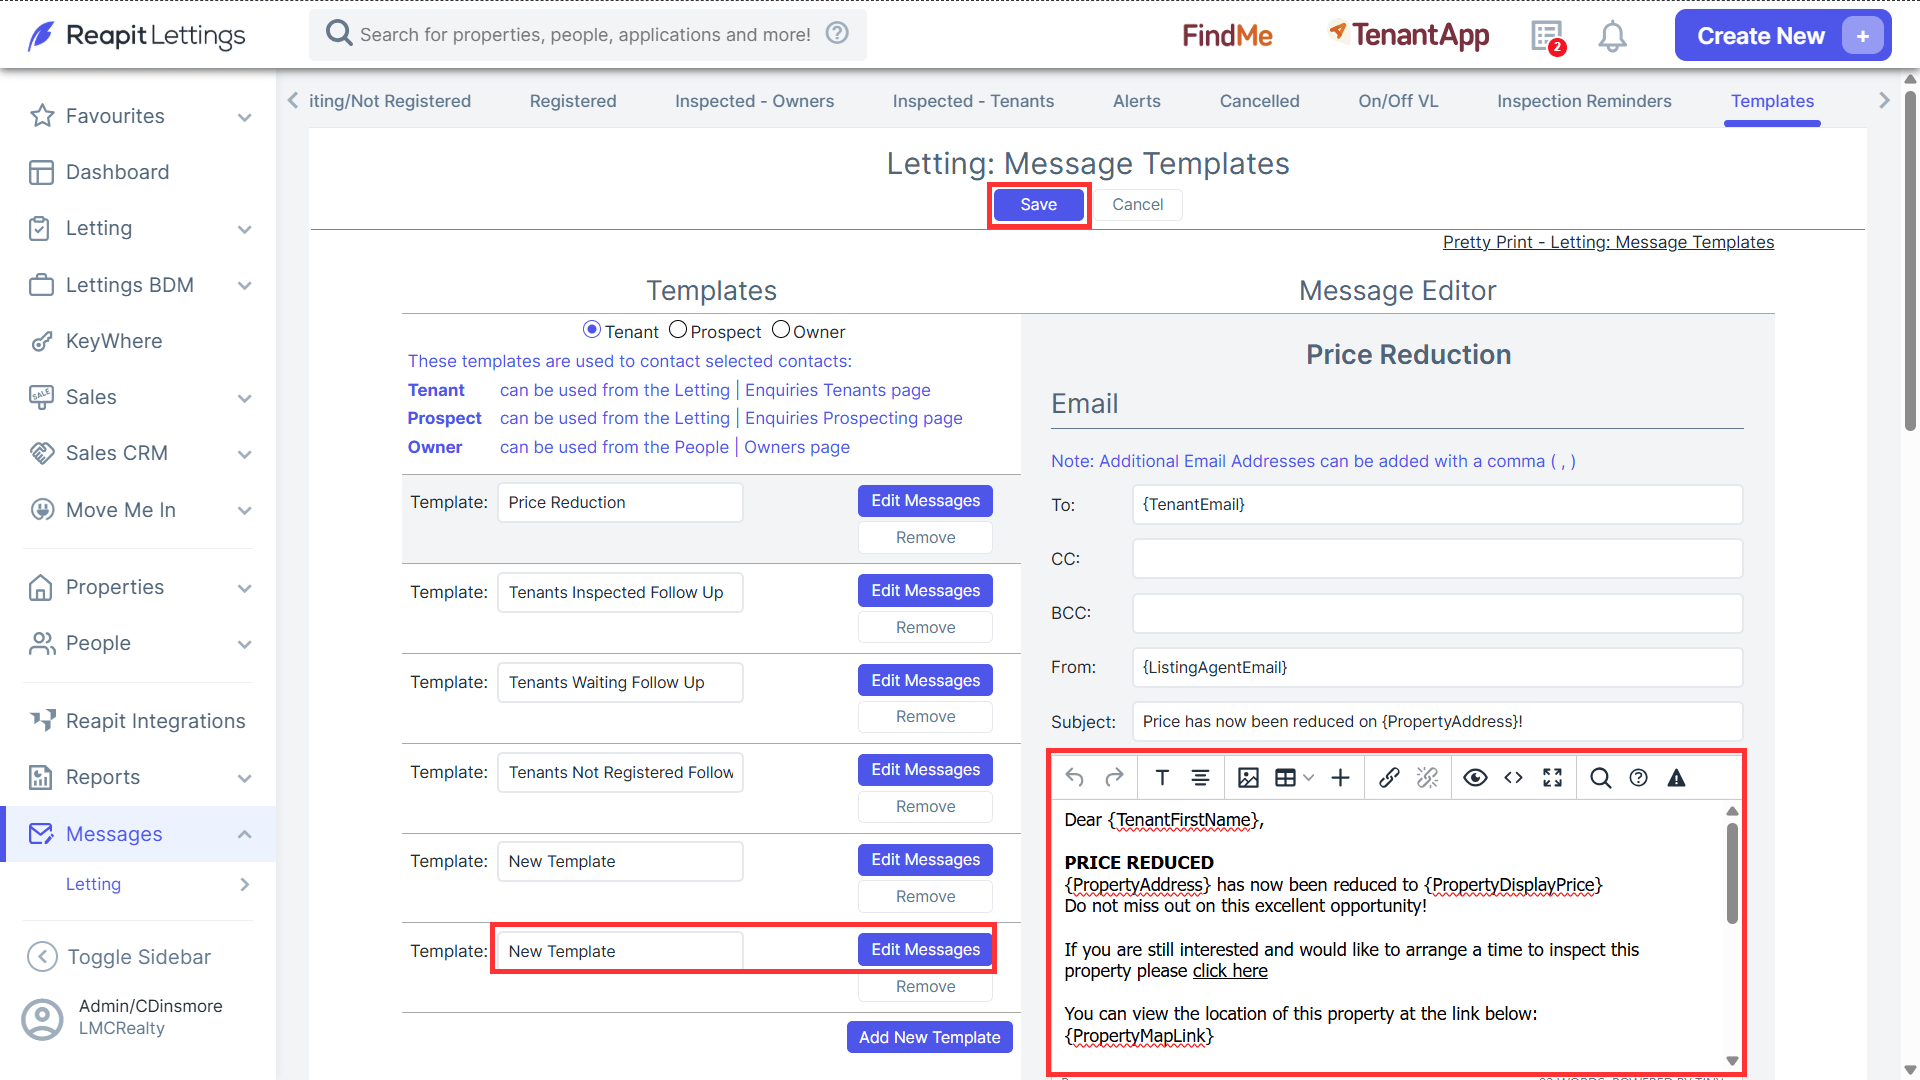
- To create a new message template, please proceed to the Templates tab where you will find the default Price Reduction Template available.
You will now be able to change the name of the status and customise the email and SMS message that you would like to send. To add a new template, simply click Add New Template.
Click the Template text field to input a template name, click Edit Message and compose the message template to suit your needs. Click Save once completed.
How to Add attachments to your Messages
- Navigate to the desired email attachment path. e.g, Messages > Lettings > Email Attachments.
- Click Upload Attachment.
- The File Browser will appear, and the document of choice can be selected to upload. To add the new file, simply double-click on a file and press the open button.
- Once the file has been selected, the name of the file will appear below the Choose File button. This means the file has been selected successfully.
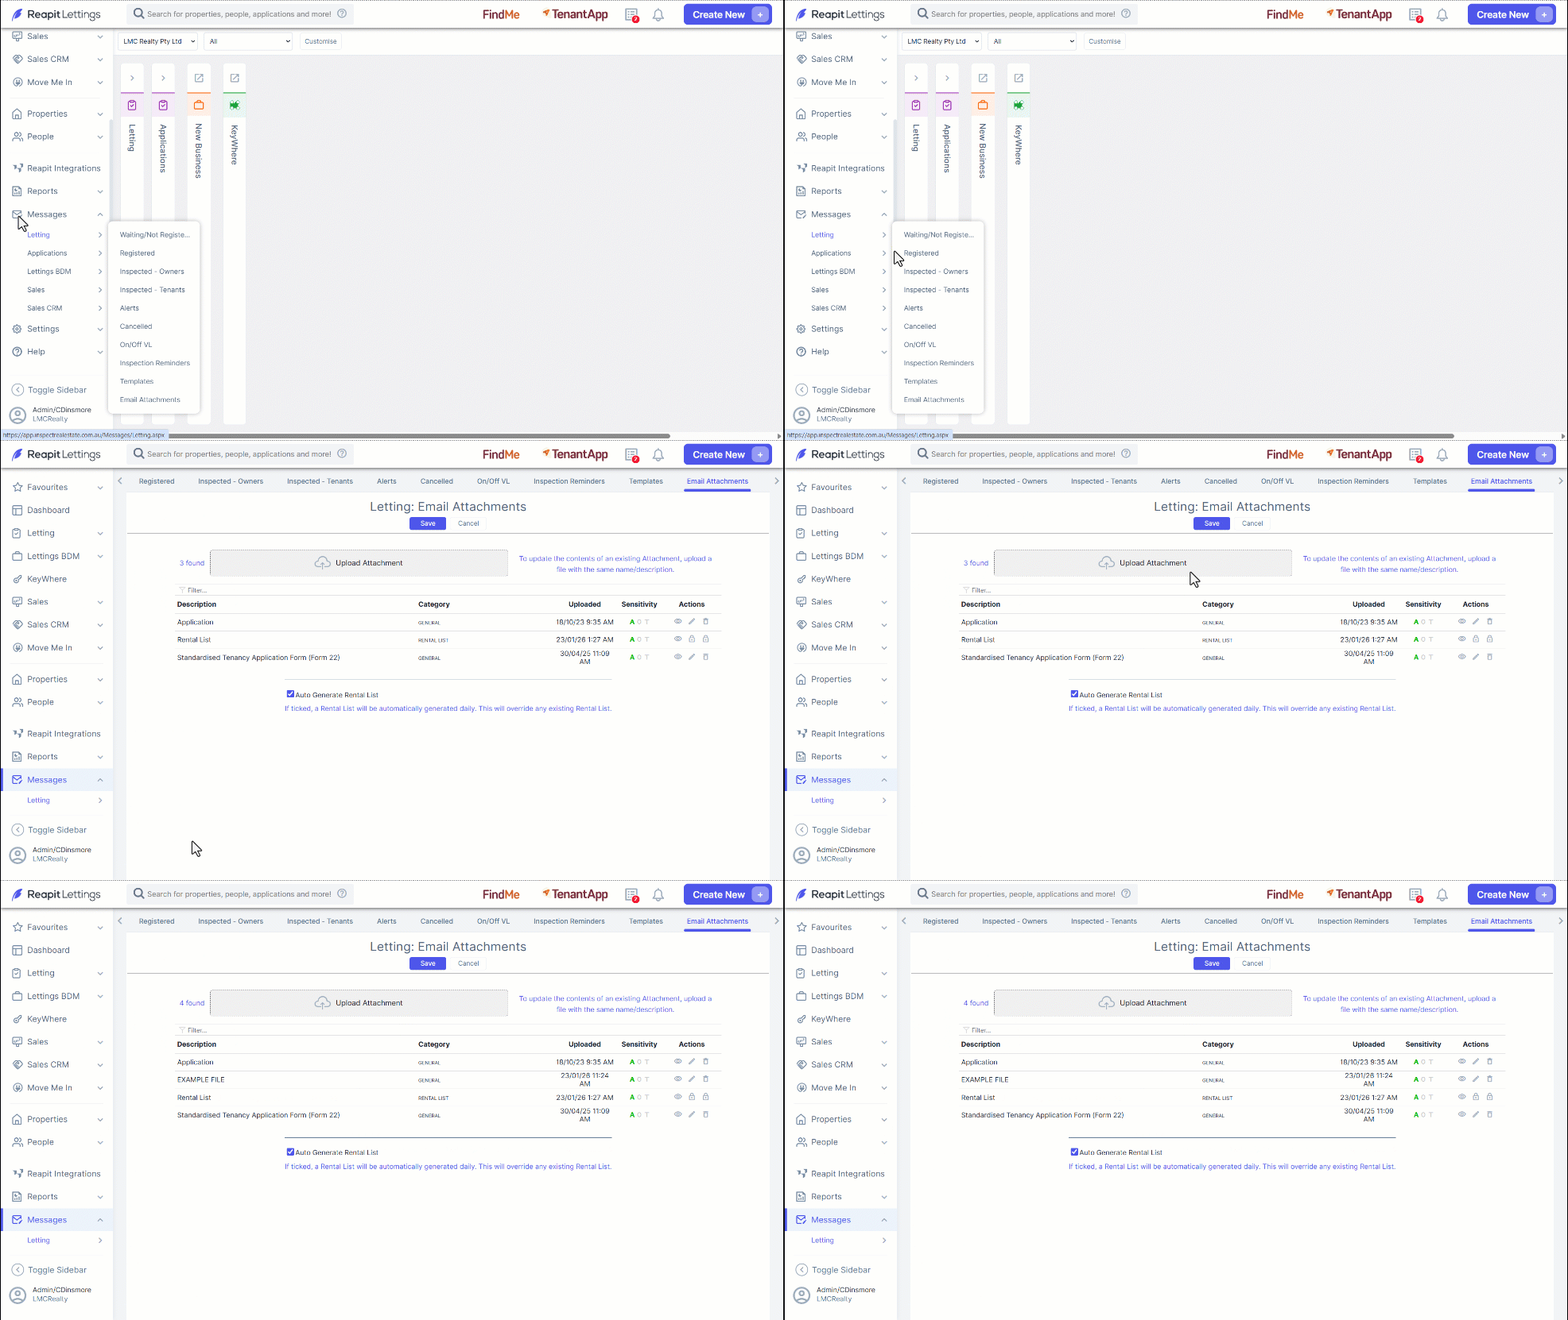
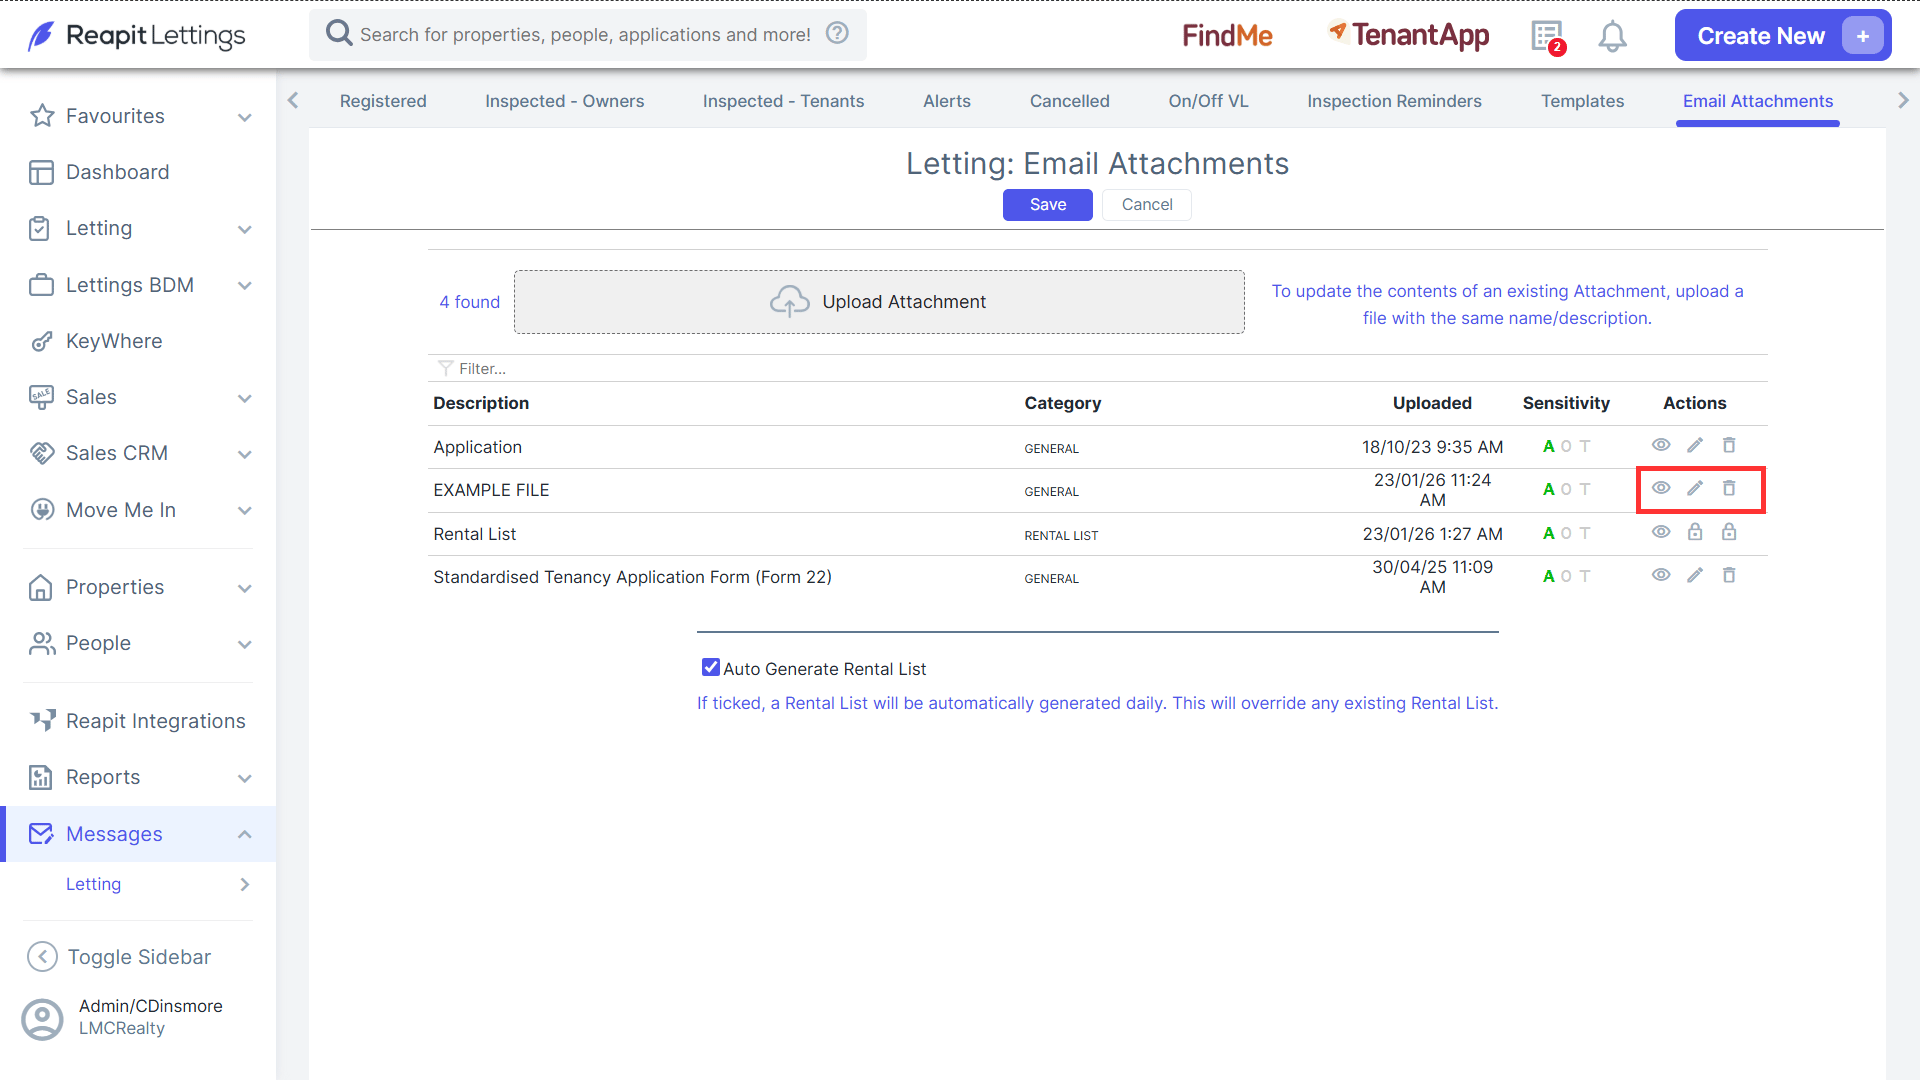
- You can use the Action Buttons to view, edit or delete the file. Note: if the description matches an existing description, the attachment will be overwritten. This attachment will then be updated where it is linked to any status.
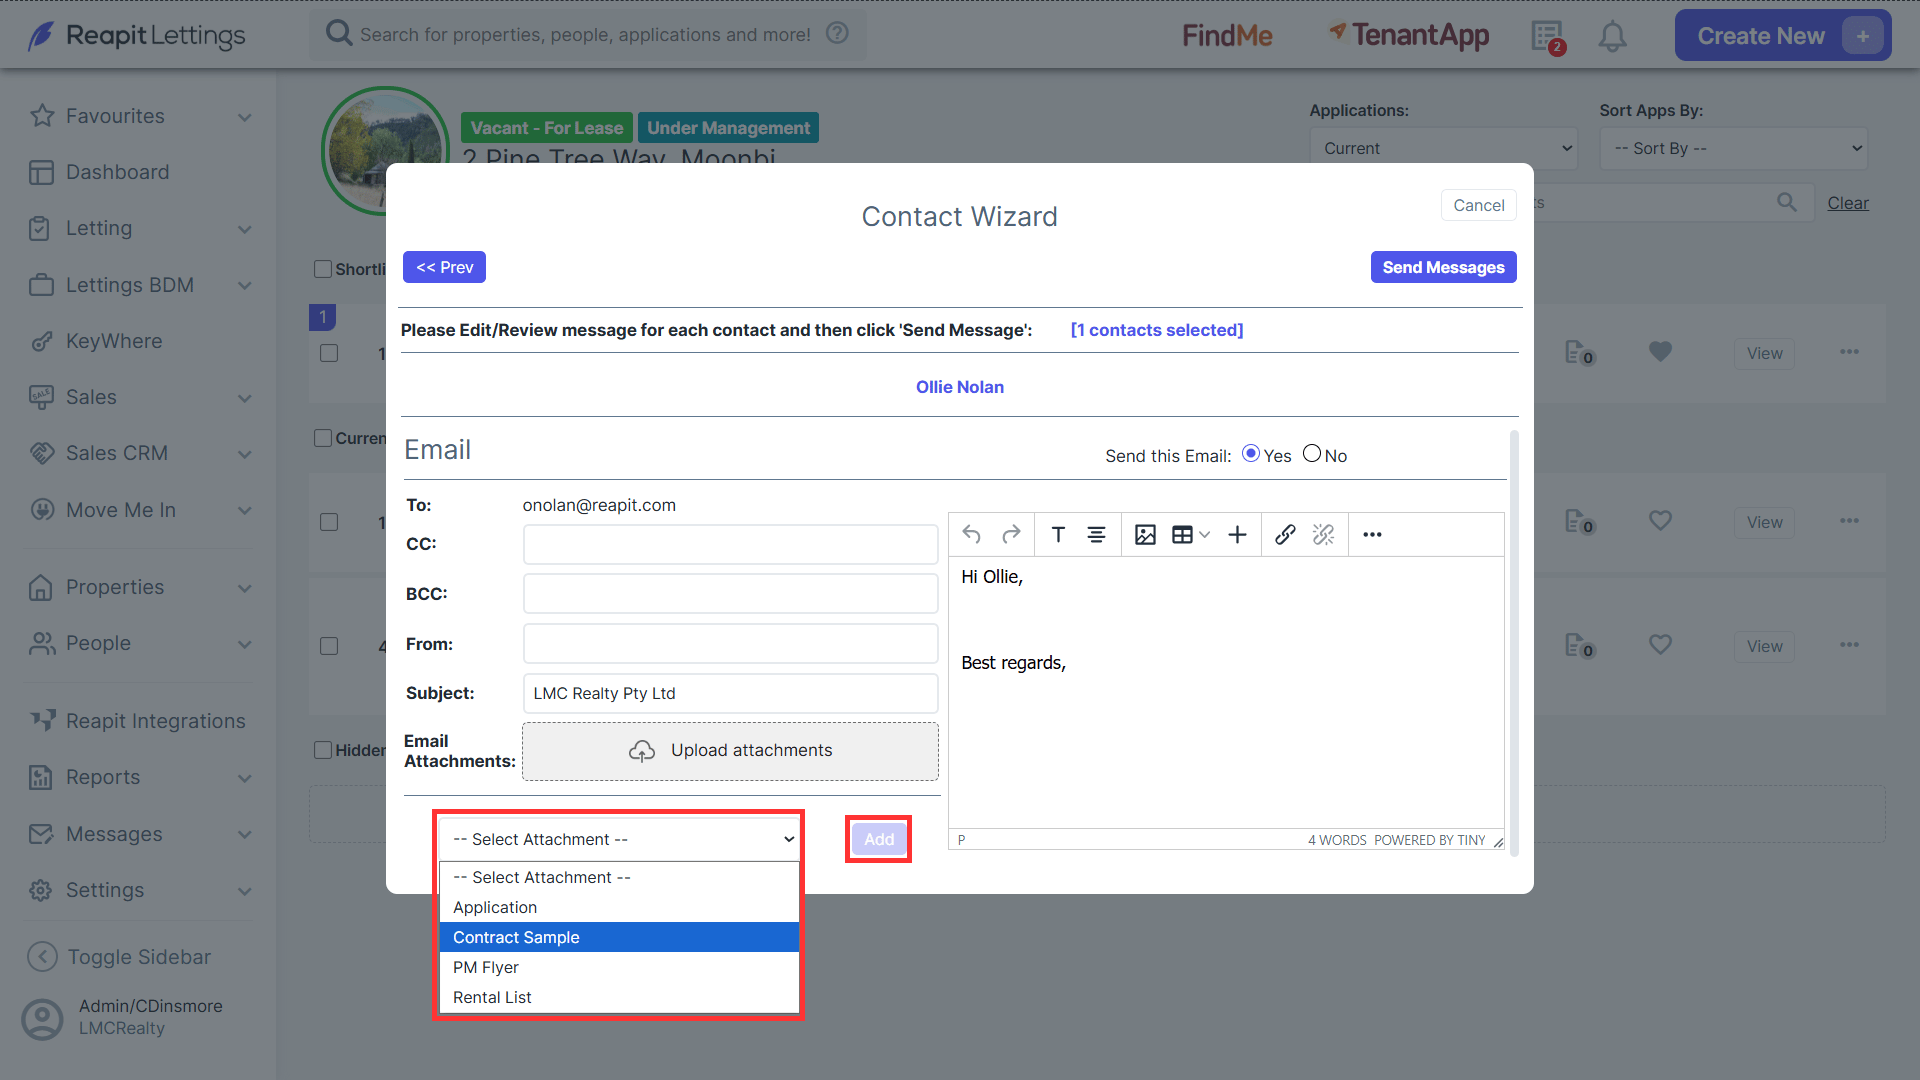
- This file can now be attached to a status; to do this, simply navigate to the particular status that you wish to add the attachment to and click on the Select Attachment under the Email Attachments heading. A dropdown list will appear of all the current attachments. Once the file has been selected, simply click the Add button to attach to this status.