'%20d='M0%208a8%208%200%200%201%208-8h24a8%208%200%200%201%208%208v24a8%208%200%200%201-8%208H8a8%208%200%200%201-8-8V8Z'/%3e%3cpath%20fill='%23fff'%20d='M32.576%206C12.293%206%208.776%2025.887%207.424%2034H9.1c.45-2.977%203.493-14.748%2010.899-20.287%200%200-5.633%206.976-6.572%2015.051%203.426-.652%2013.845-3.372%2016.056-12.927l-3.84-.61c1.352-1.351%204.909-5.17%206.931-9.226V6Z'/%3e%3cdefs%3e%3clinearGradient%20id='reapit-lettings__a'%20x1='20.702'%20x2='20.702'%20y1='.351'%20y2='31.228'%20gradientUnits='userSpaceOnUse'%3e%3cstop%20stop-color='%235573FD'/%3e%3cstop%20offset='.575'%20stop-color='%234E56EA'/%3e%3c/linearGradient%3e%3c/defs%3e%3c/svg%3e)
How to Create an Inspection with Time Slots via Reapit Viewings
This article will run through how to create an inspection with time slots via Reapit Viewings.
How to Create an Inspection with Time Slots via Reapit Viewings.
This article will run through how to create an inspection with time slots via Reapit Viewings.
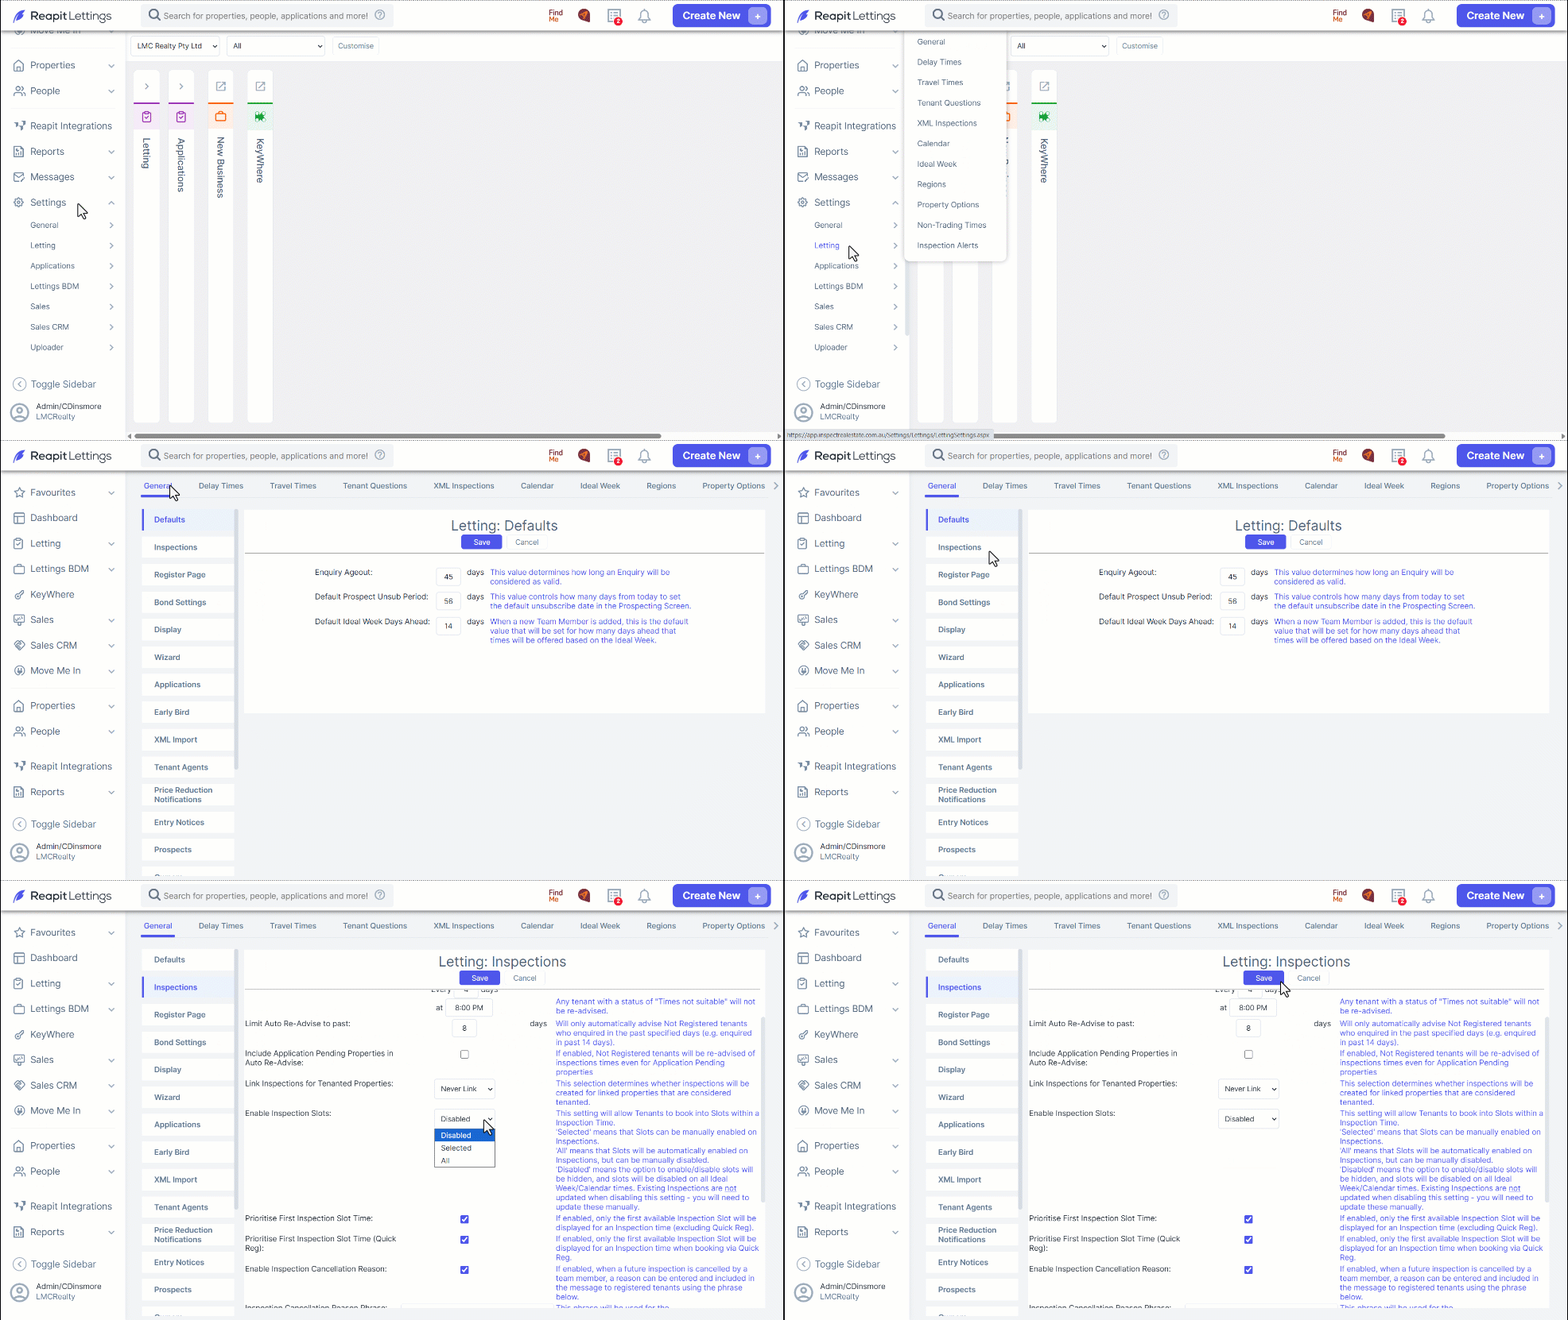
- Navigate to Settings.
- Click Letting.
- Click General.
- ****Click Inspections.
- Click Inspections.
- Navigate to the Enable Inspection Slots ****selector, choose from either All, Disabled or Selected.
- Click Save once completed.
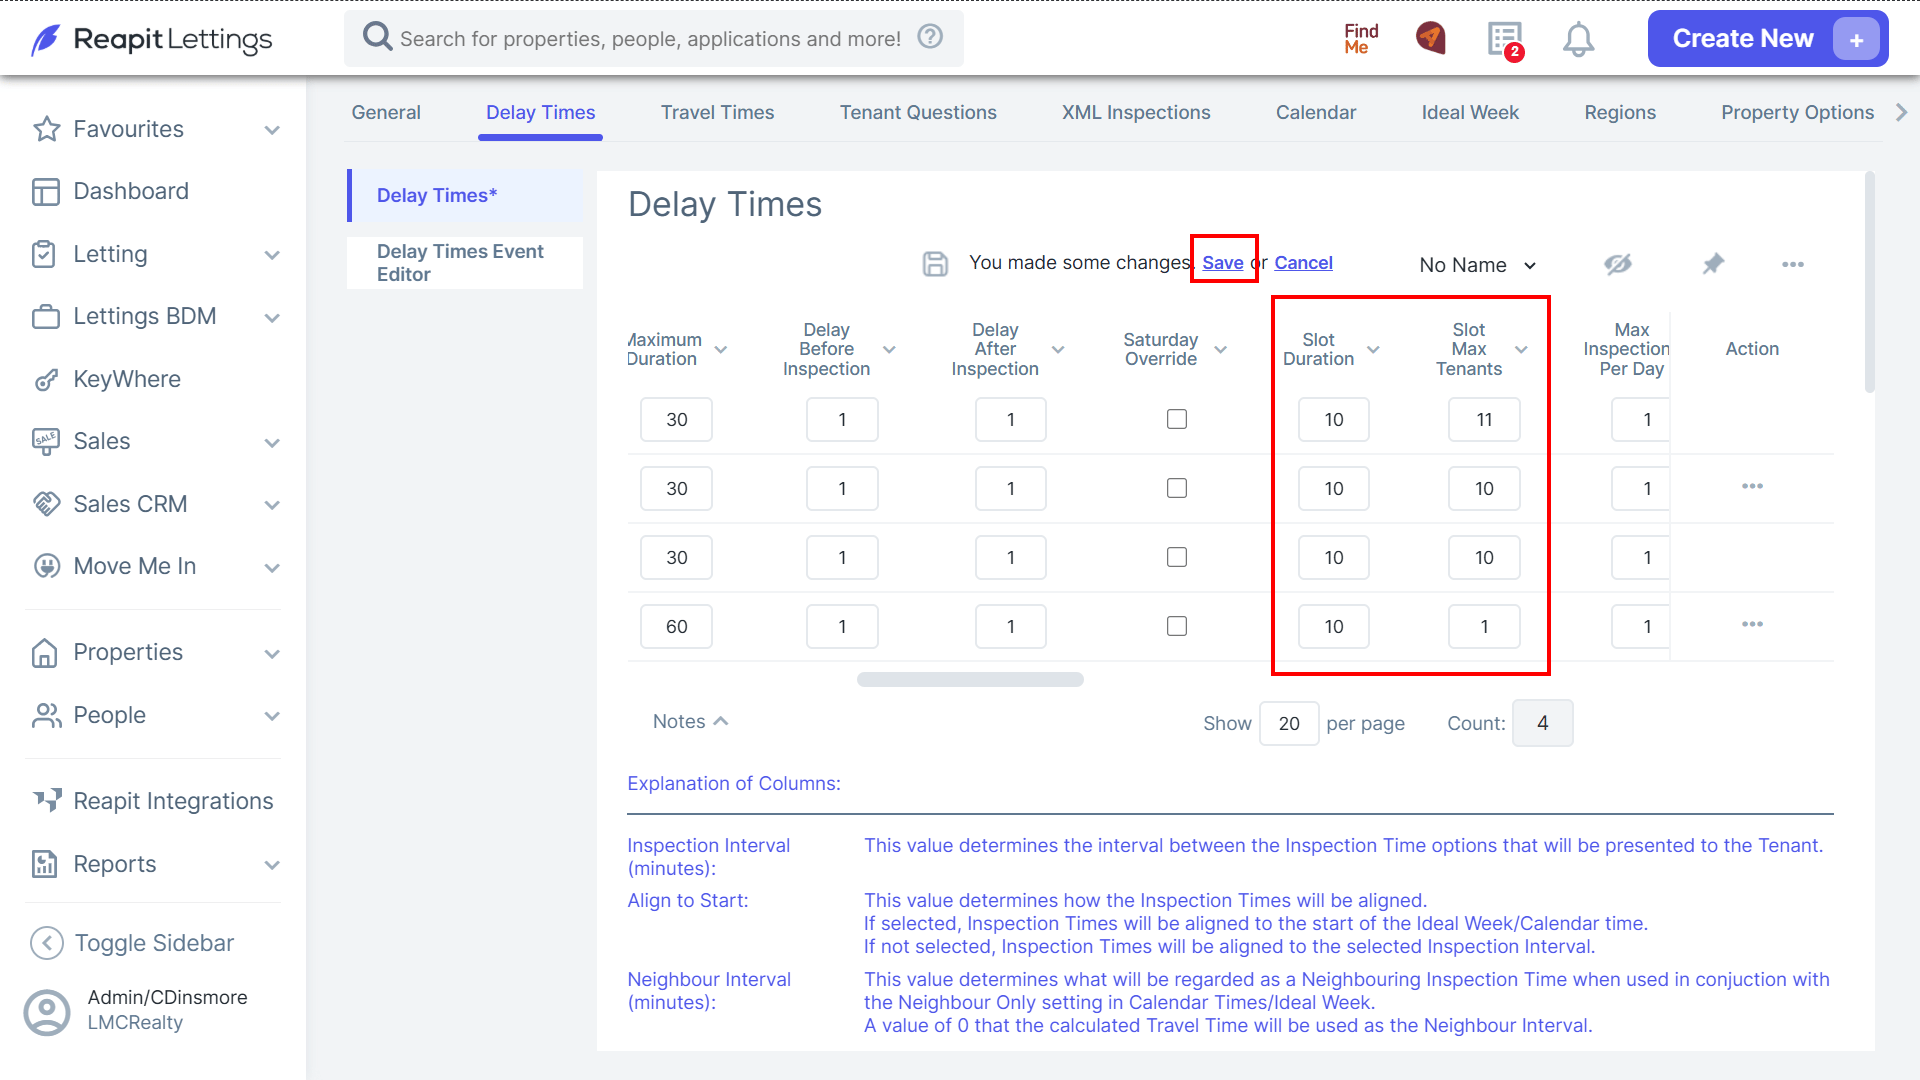
- Default inspection slots can be configured under the Delay Time settings. After making any changes to these settings, click Save.
Note: Inspection slots will only work for register only times and not open homes, as you can't control how many people may show up for a publicly displayed open home.
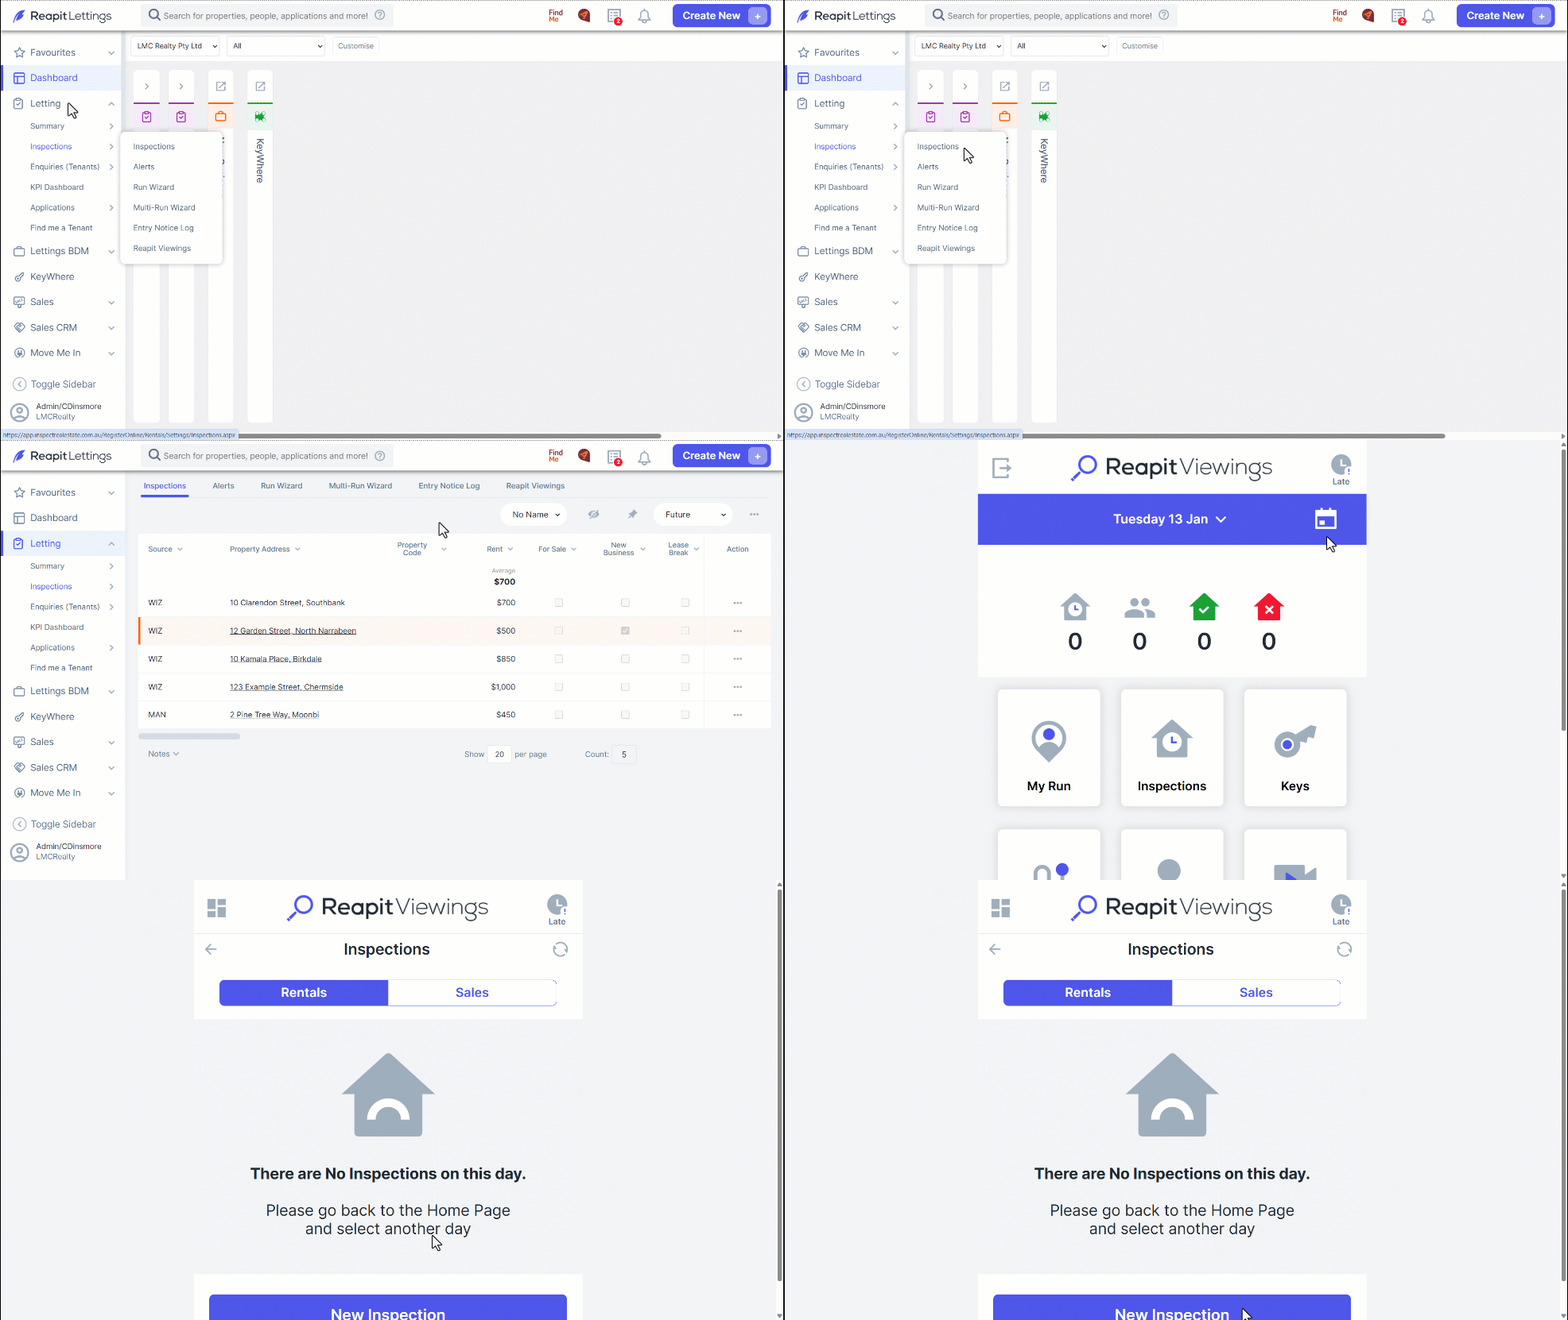
- Navigate to the Letting.
- Click Inspections.
- Click Inspections.
- Click Reapit Viewings. You will be redirected to the landing page.
- Click Inspections
- By default, Rentals will already be selected. Click New Inspection.
- Enter the Address, Inspector by clicking the dropdown selector, Start Date and Time. Once completed, click Add.
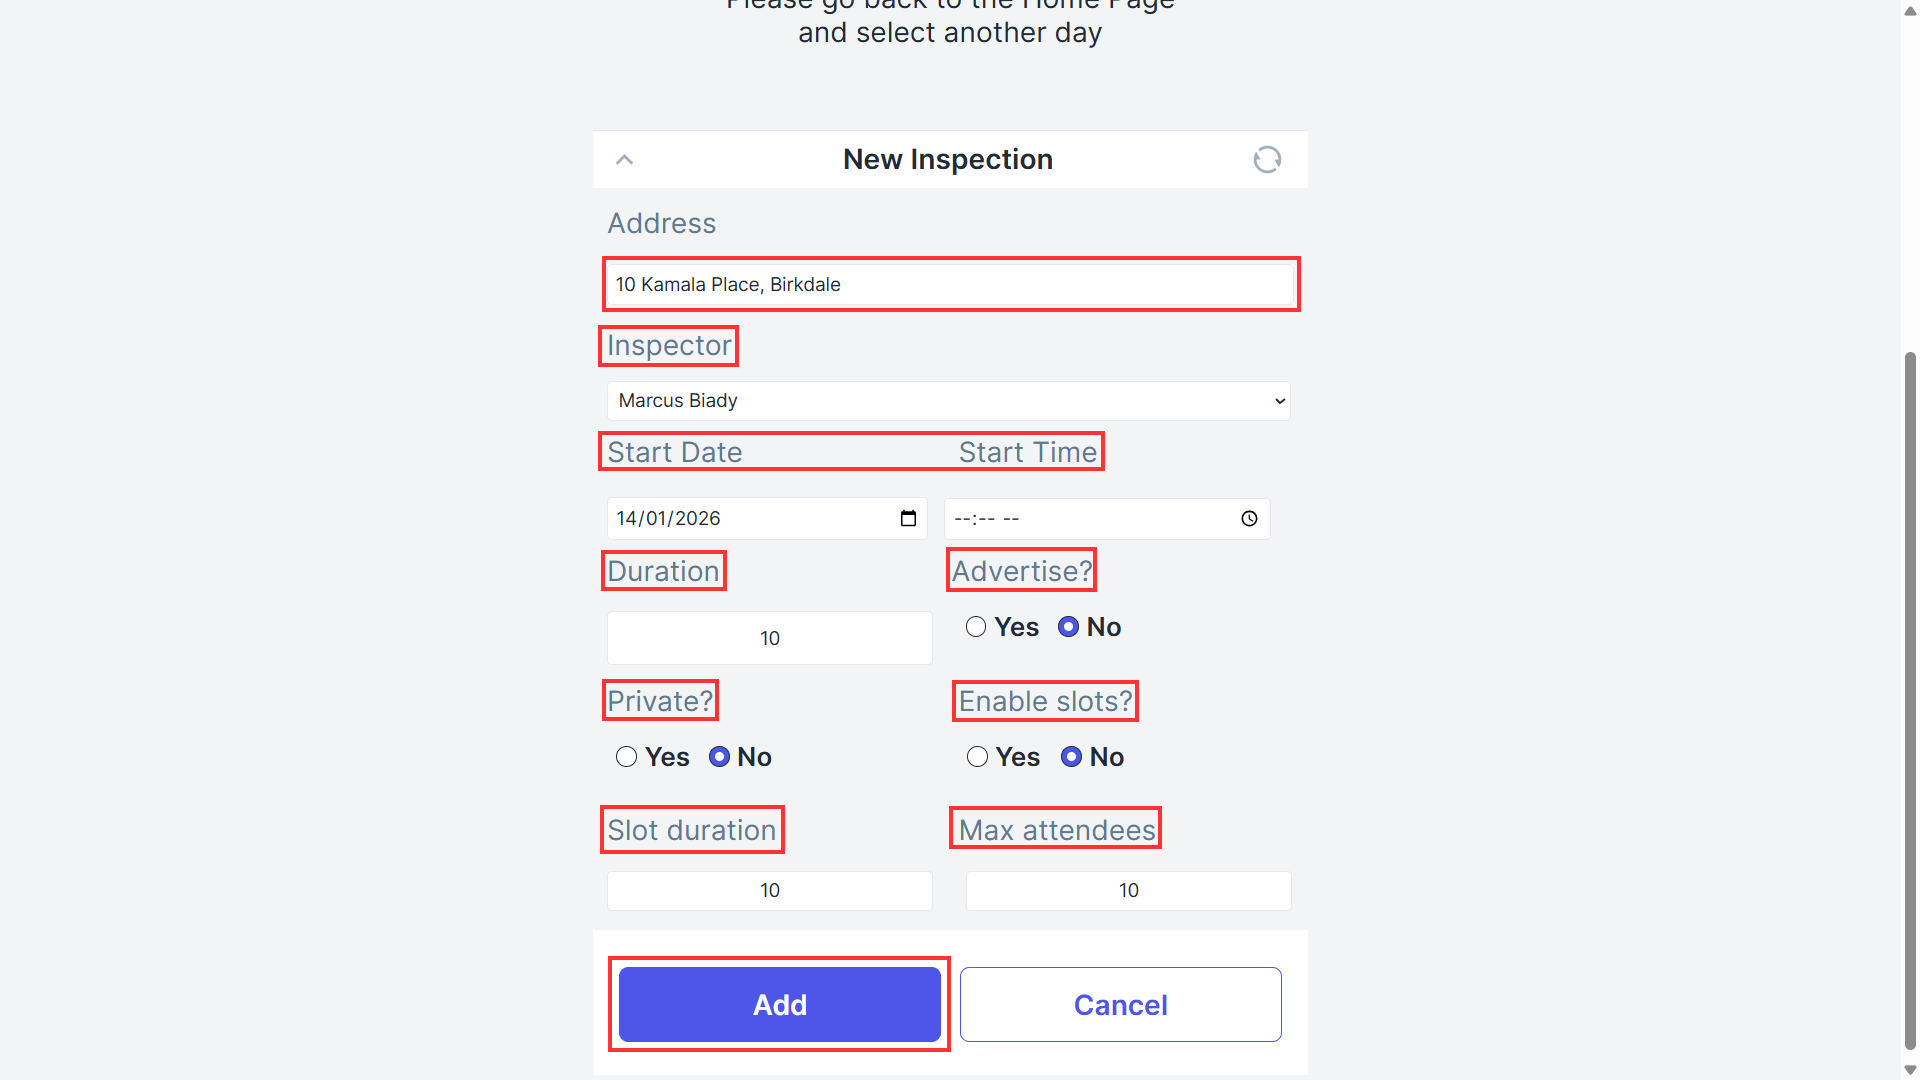
Note: The default configuration pre-sets include duration, advertise, private, enabled slots, slot duration, and maximum attendees. If adjustments to these settings are necessary to align with your specific business requirements, please modify the relevant fields before clicking Add. Simply click into the field you wish to customise to make the necessary changes.
- Click Register when on-site for the inspection to capture the details of prospects attending that have not previously registered.
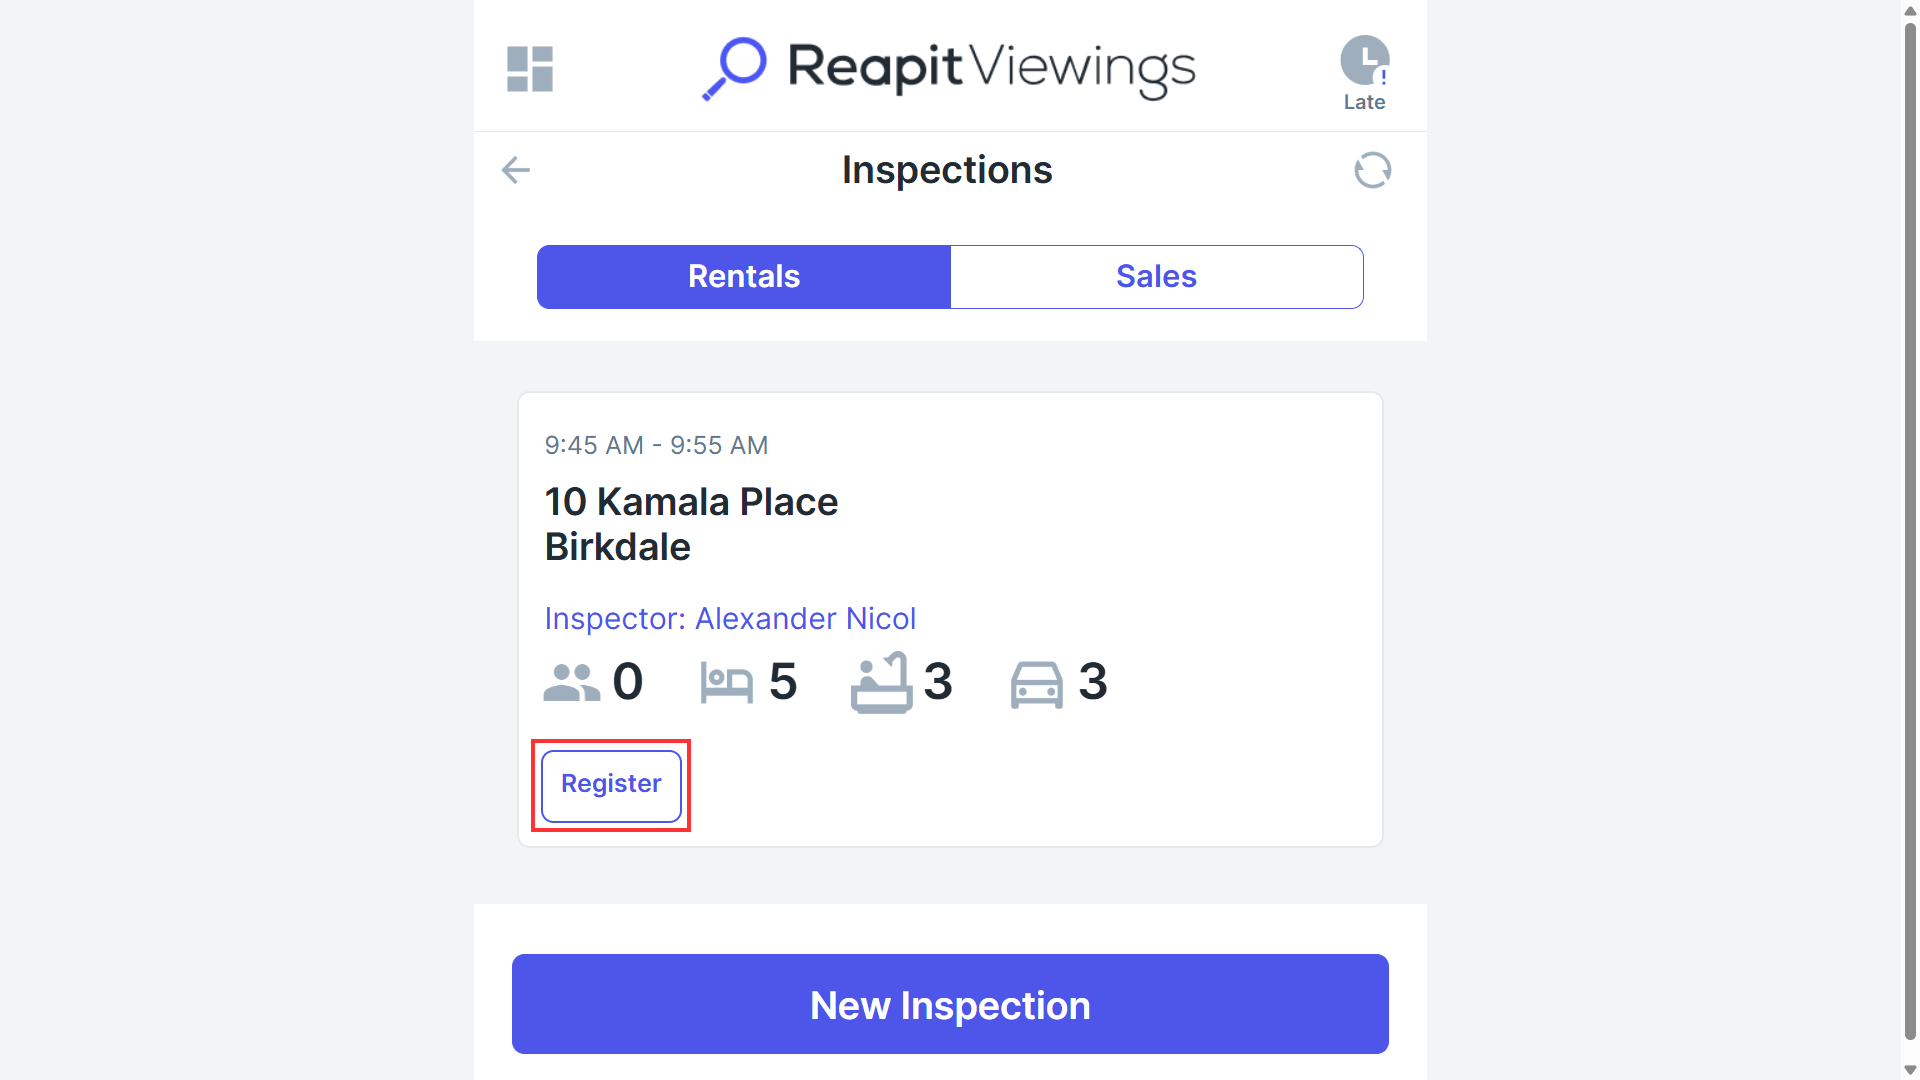
Note: If you’re accessing the Reapit Viewings landing page through your mobile device, initiate the process by clicking Inspections.