'%20d='M0%208a8%208%200%200%201%208-8h24a8%208%200%200%201%208%208v24a8%208%200%200%201-8%208H8a8%208%200%200%201-8-8V8Z'/%3e%3cpath%20fill='%23fff'%20d='M32.576%206C12.293%206%208.776%2025.887%207.424%2034H9.1c.45-2.977%203.493-14.748%2010.899-20.287%200%200-5.633%206.976-6.572%2015.051%203.426-.652%2013.845-3.372%2016.056-12.927l-3.84-.61c1.352-1.351%204.909-5.17%206.931-9.226V6Z'/%3e%3cdefs%3e%3clinearGradient%20id='reapit-lettings__a'%20x1='20.702'%20x2='20.702'%20y1='.351'%20y2='31.228'%20gradientUnits='userSpaceOnUse'%3e%3cstop%20stop-color='%235573FD'/%3e%3cstop%20offset='.575'%20stop-color='%234E56EA'/%3e%3c/linearGradient%3e%3c/defs%3e%3c/svg%3e)
How to List Commercial Properties
This article covers how to list commercial properties in Reapit Lettings.
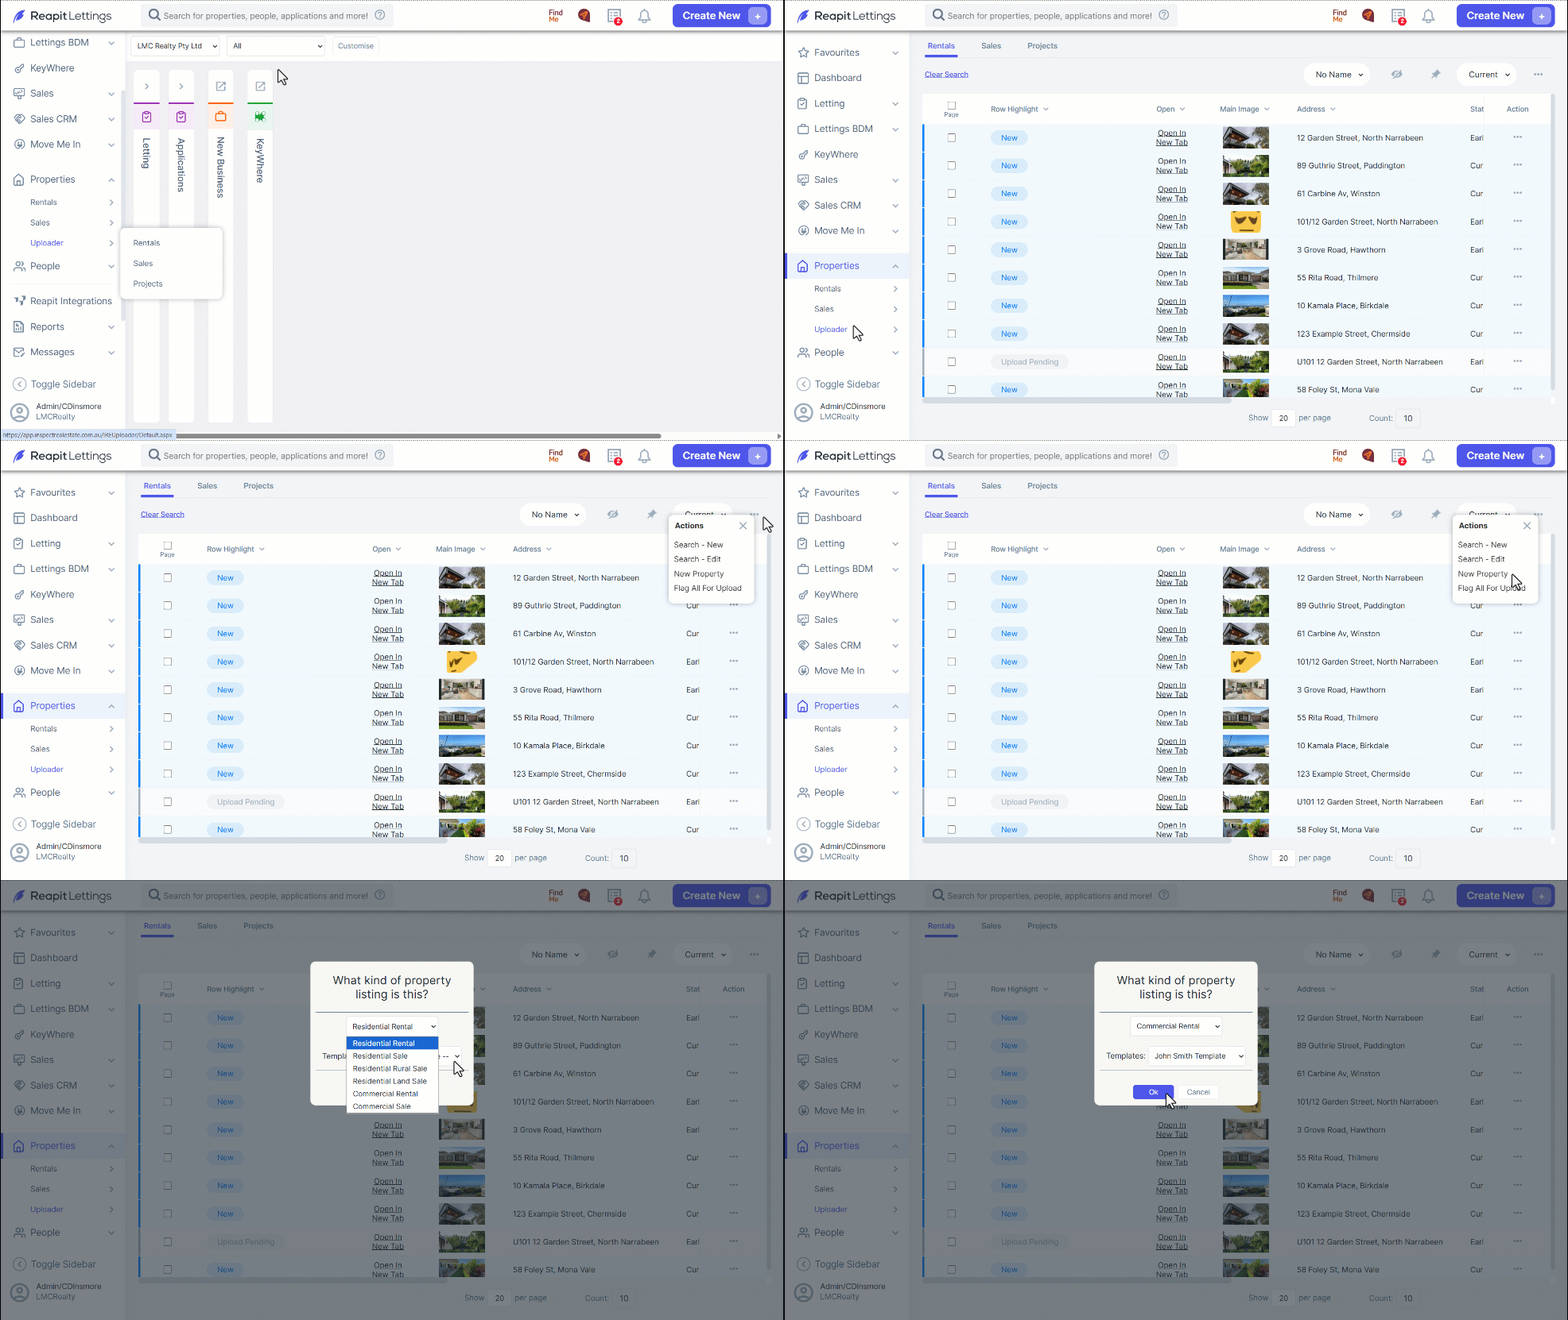
1. Navigate to Properties.
2. Click Uploader.
3. Click Rentals.
4. Click the three dots.
5. Click New Property.
6. Click the drop-down and select Commercial Rental.
7. Select a template.
8. Click Ok.
Listing Details
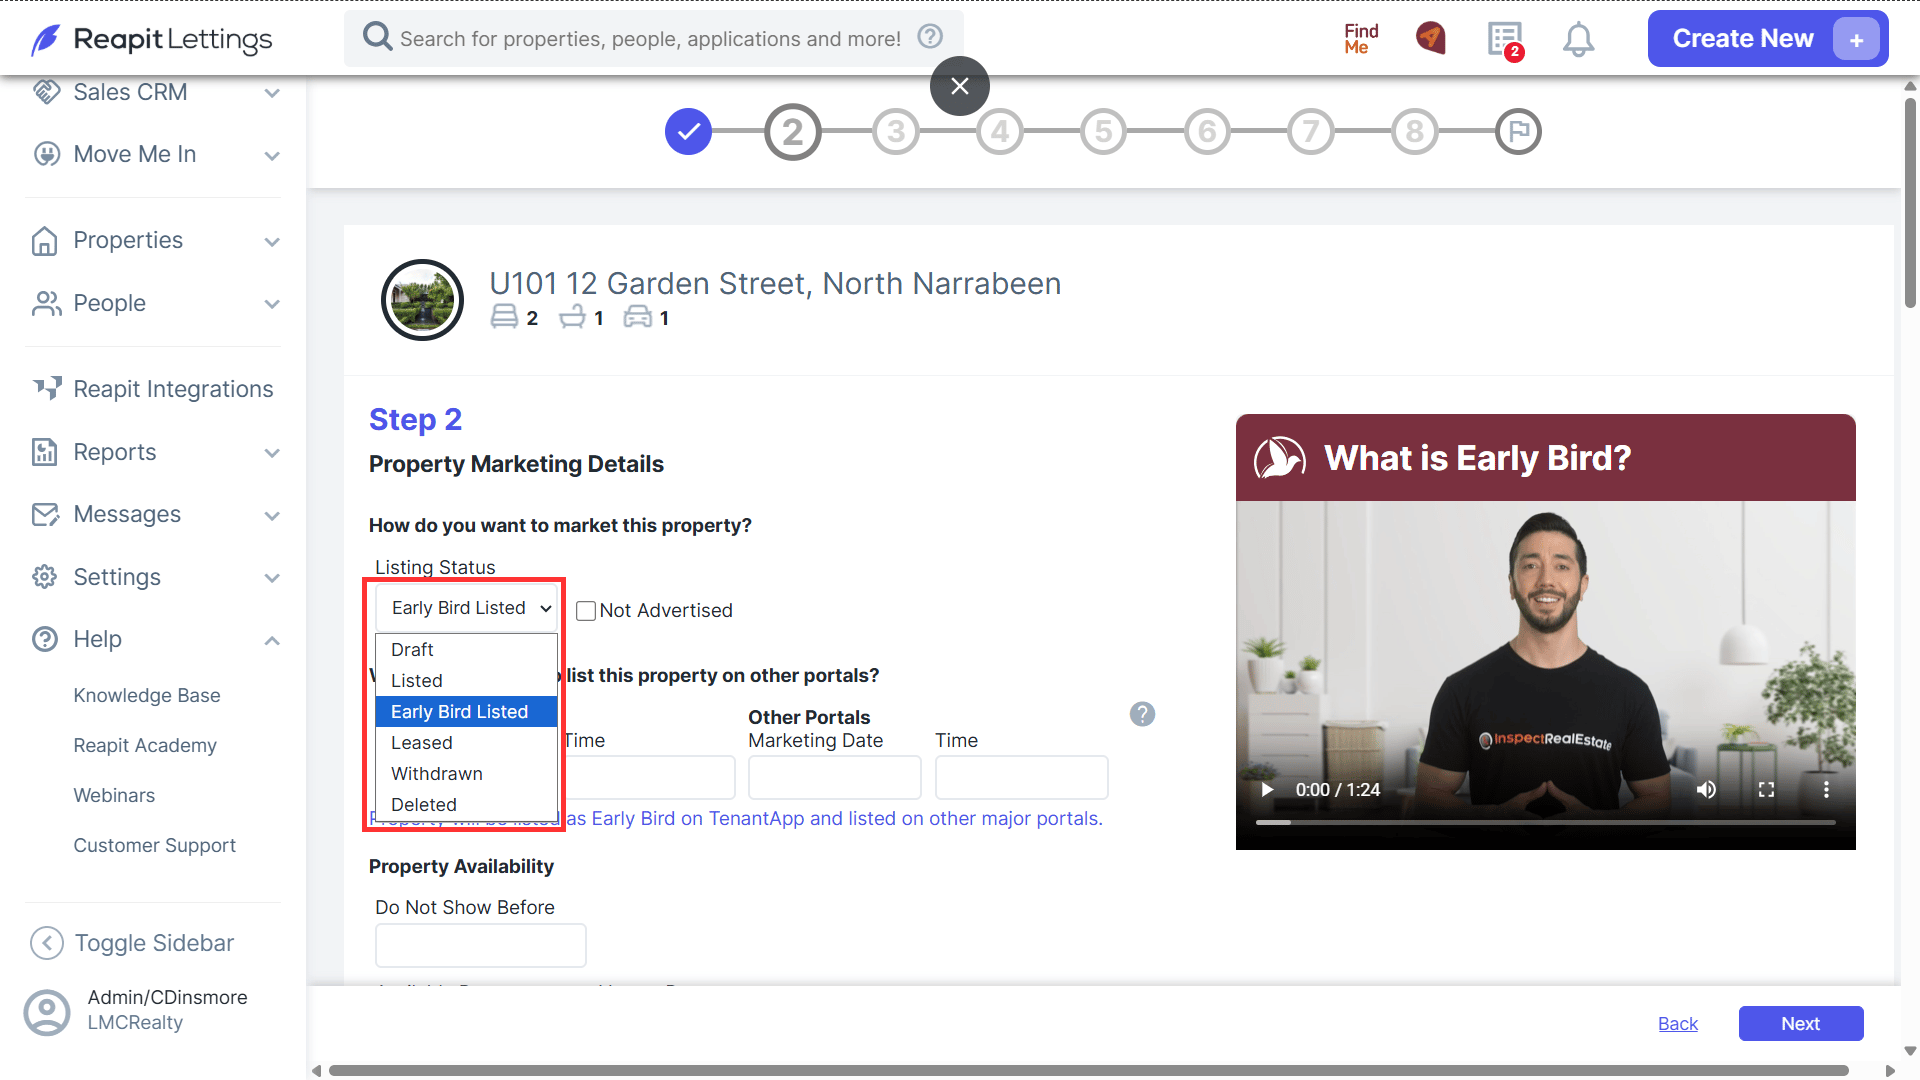
1. How you would like to market the property will determine where you will initially send your portal listing to be viewed by applicants.
Listed will automatically list your property.
If you use Lettings Uploader it will list to all enabled portals.
If you use an external uploader the property will only be listed on IRE (and TenantApp if it's enabled in your Reapit Lettings account).
Early Bird Listed will list your property exclusively on TenantApp prior to listing on all other portals if you use Reapit Lettings Uploader.
The next section will help assist with the dates involved with Early Bird Listed section and when it will change from Early Bird Listed to Listed to feed to all portals you have set up within your Reapit Lettings account.
Leased, Withdrawn, and Deleted will remove the property, and once completed, you will need to complete the Off-List Report for the property.
2. This section will allow you to determine the time difference you would like a property Early Bird Listed on TenantApp before you mark the property as listed and change the listing from Early Bird Listed to just Listed within TenantApp. If you are an Uploader client, you will need to include the Marketing date you would like to push to other portals or change the listing to listed from Early Bird Listed to Listed to automatically push it through to your other portals.
If you are not an uploader client and the other portals section is left blank, the property will automatically become Listed to all other portals within 48 hours of the first enquiry that comes through for the Early Bird Listing.
3. This section will allow you to include the specific dates for the following reasons
Do not Show Before - This date will prevent any inspections from being created for the property before the date entered in this section. If you are using Ideal Week, we would recommend ensuring that this section is entered so that people can not book in through your Portals when the listing is published.
Available Date - The Date that the property will be available to lease.
Vacate Date - The Date that any previous Tenants are vacating. Leaving this section blank will have IRE assume that there is no Tenants for this property which can cause entry notices to not be able to be sent through.
Recommended Lease Term - This setting will show the Preferred lease term for the property.
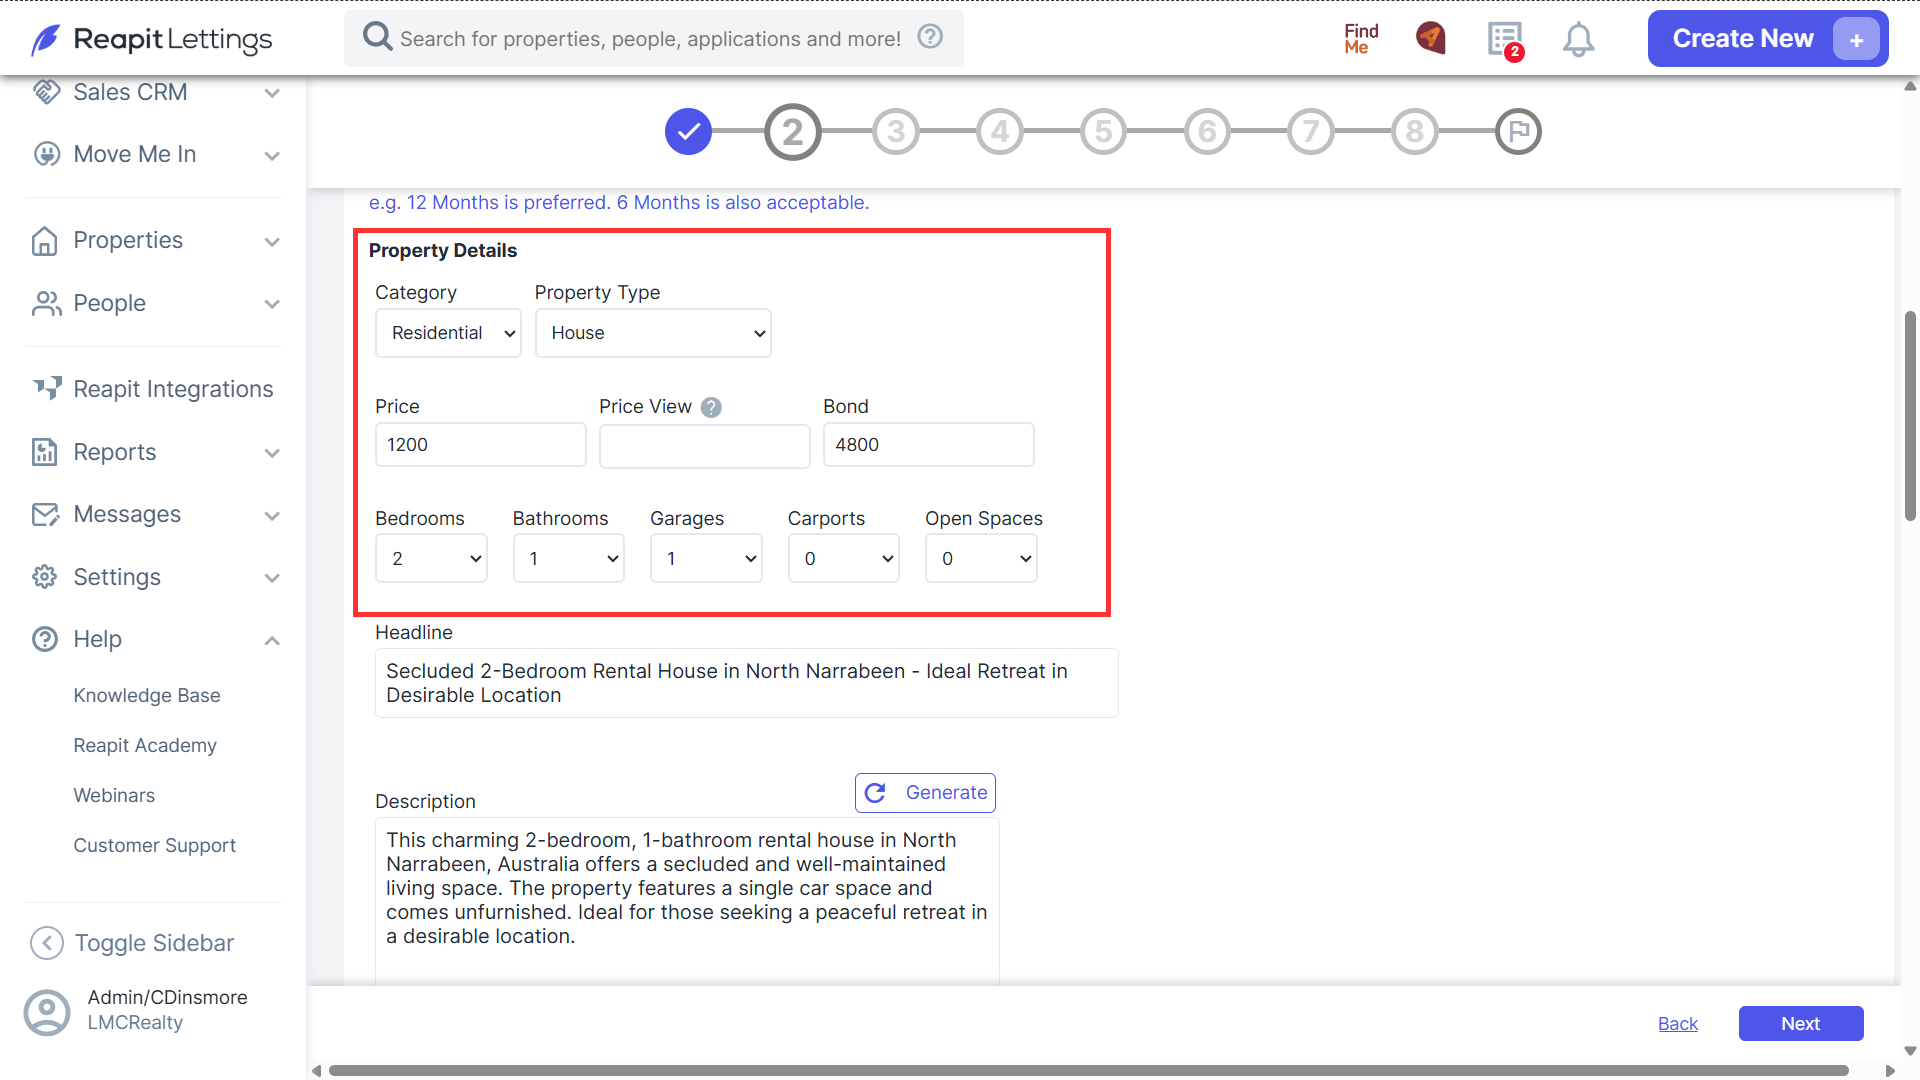
4. You can include the Price, Price View, Bedrooms, Bathrooms, Garages, Carports and Open Spaces in the top section. The Headline and Description is the marketing that will be used for your listing across all portals.
5. Include the Portal ID for your RealEstate.com.au Listing if you have decided not to make the listing as an Early Bird Listing. This will then link the Reapit Lettings property directly to your REA listing so that enquiries can automatically load into Reapit Lettings with no issues.
6. Include the links to your website listing if you have a website so that applicants can view the listing from your website as well.
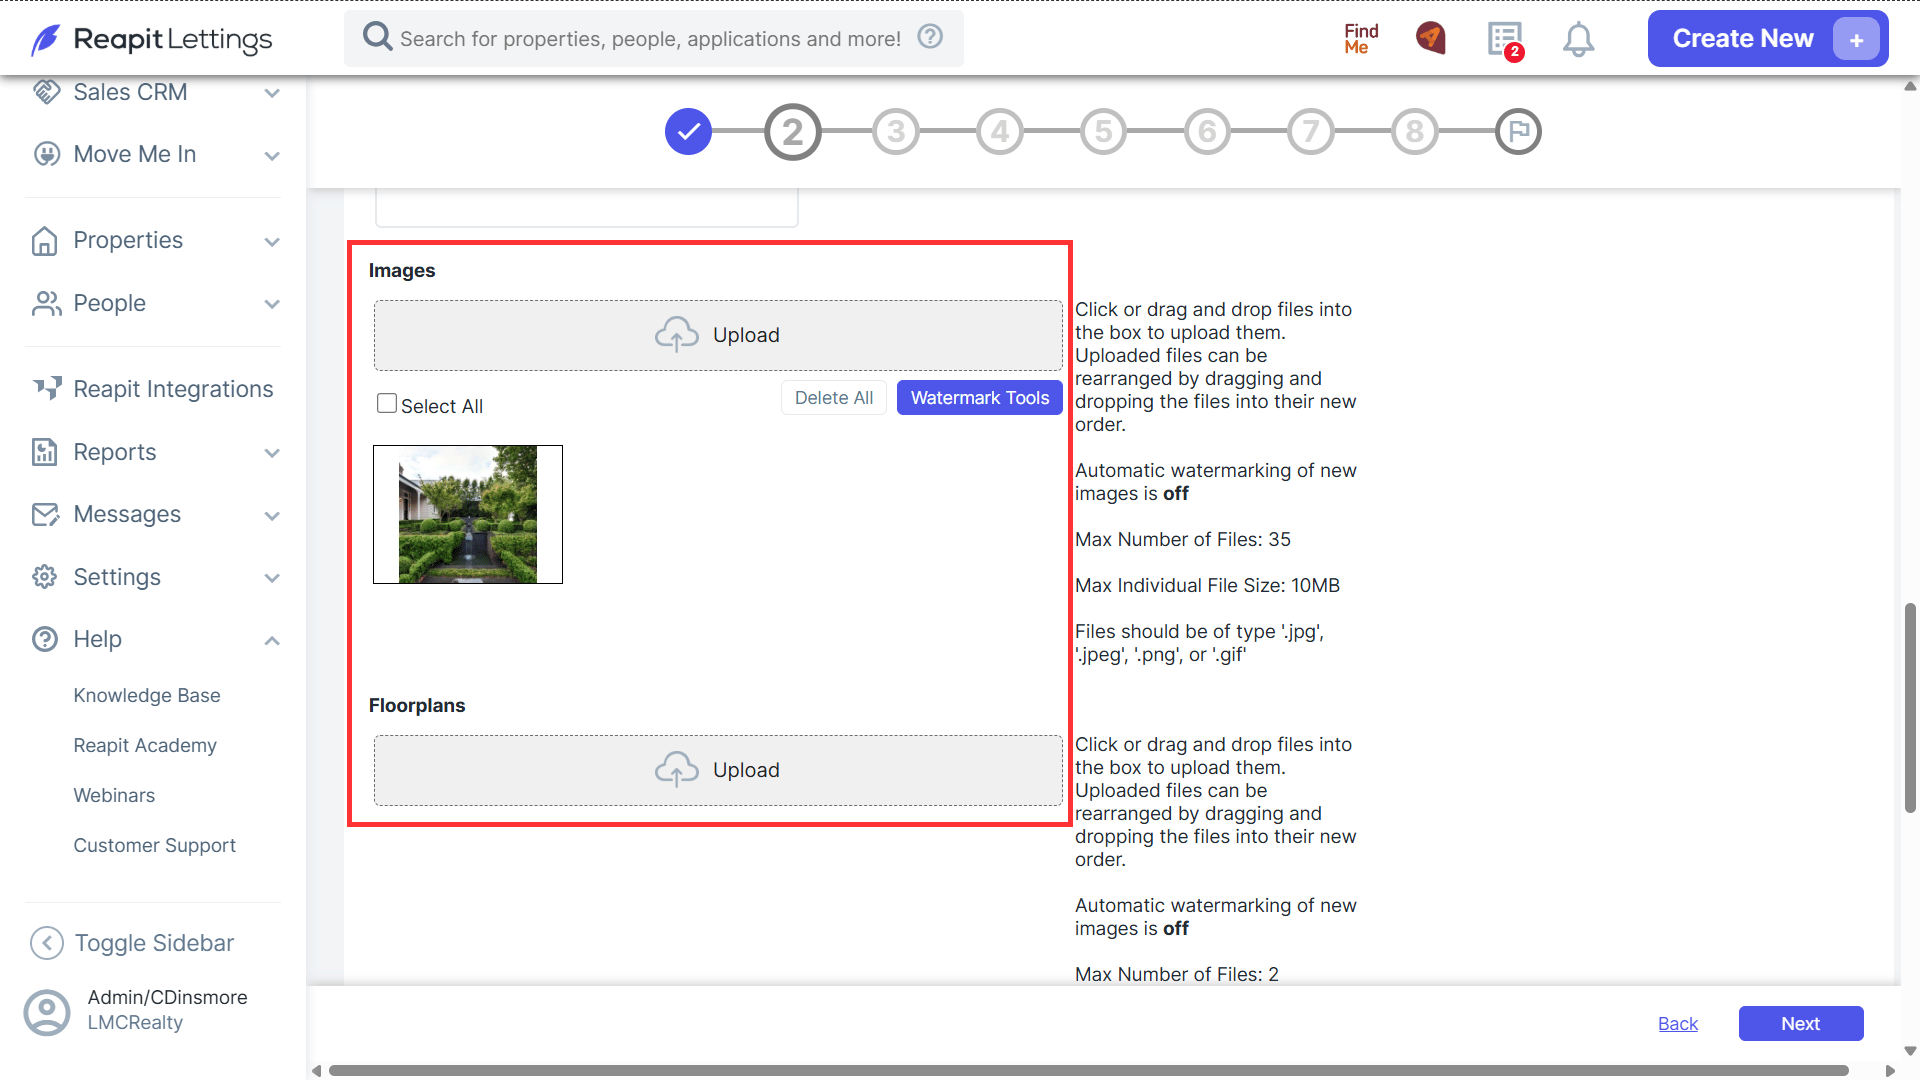
7. Include any Images and Floorplans that you would like for the property by dragging the image to the upload screen. Please note that the first picture in this section will be used as the cover photo for your listings across all portals.
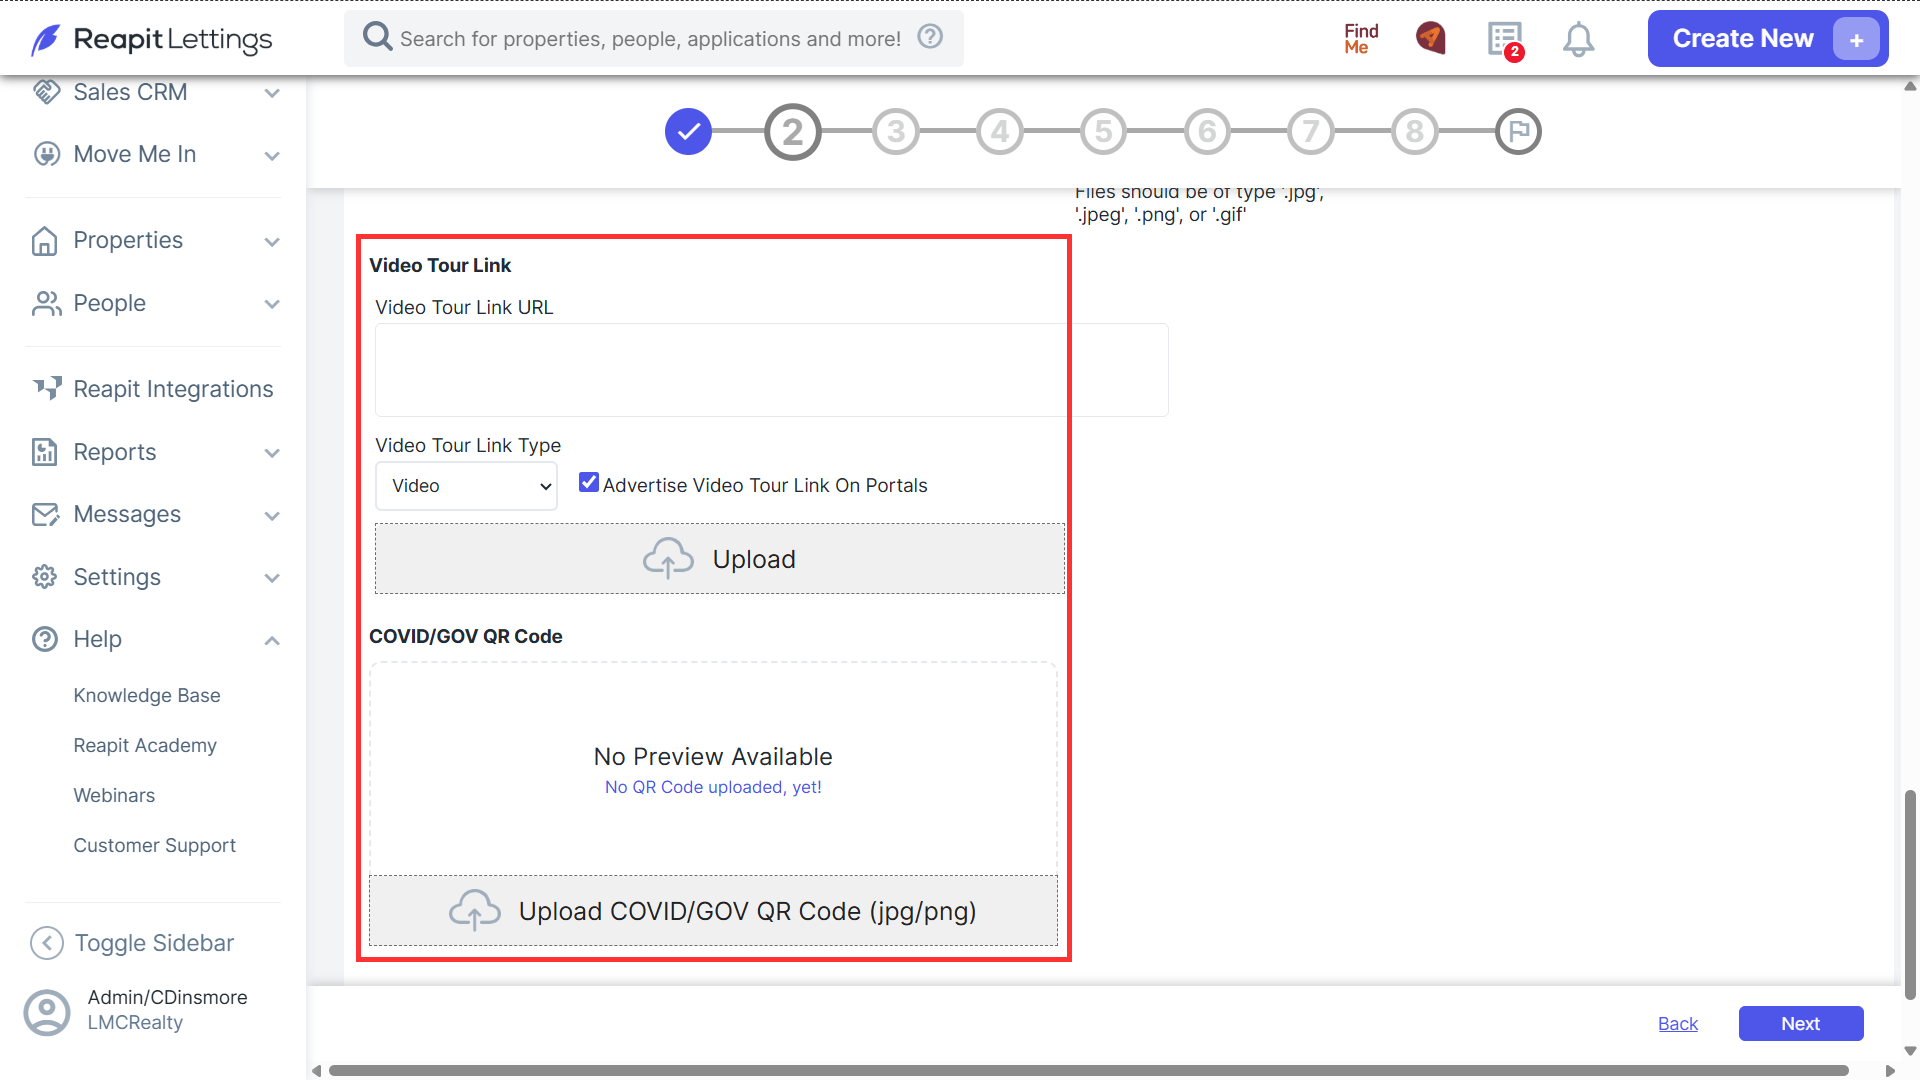
8. You can include a video tour or Video Tour URL by either uploading the video tour using the upload button or entering in the specific URL in the above section. Please note that if your agency sends Video Tour Links through the Event Editor messages, this section must be filled out otherwise the message will not include any video tour link for the applicant to view.
9. Include the Government COVID/QR code so that applicants can be sent this code when they are going to inspect the property to acknowledge prior before inspecting
Once you are happy with all of the above steps for your listing, select next in the bottom right of the screen.
Step 3: Assigning Staff and adding Key Details
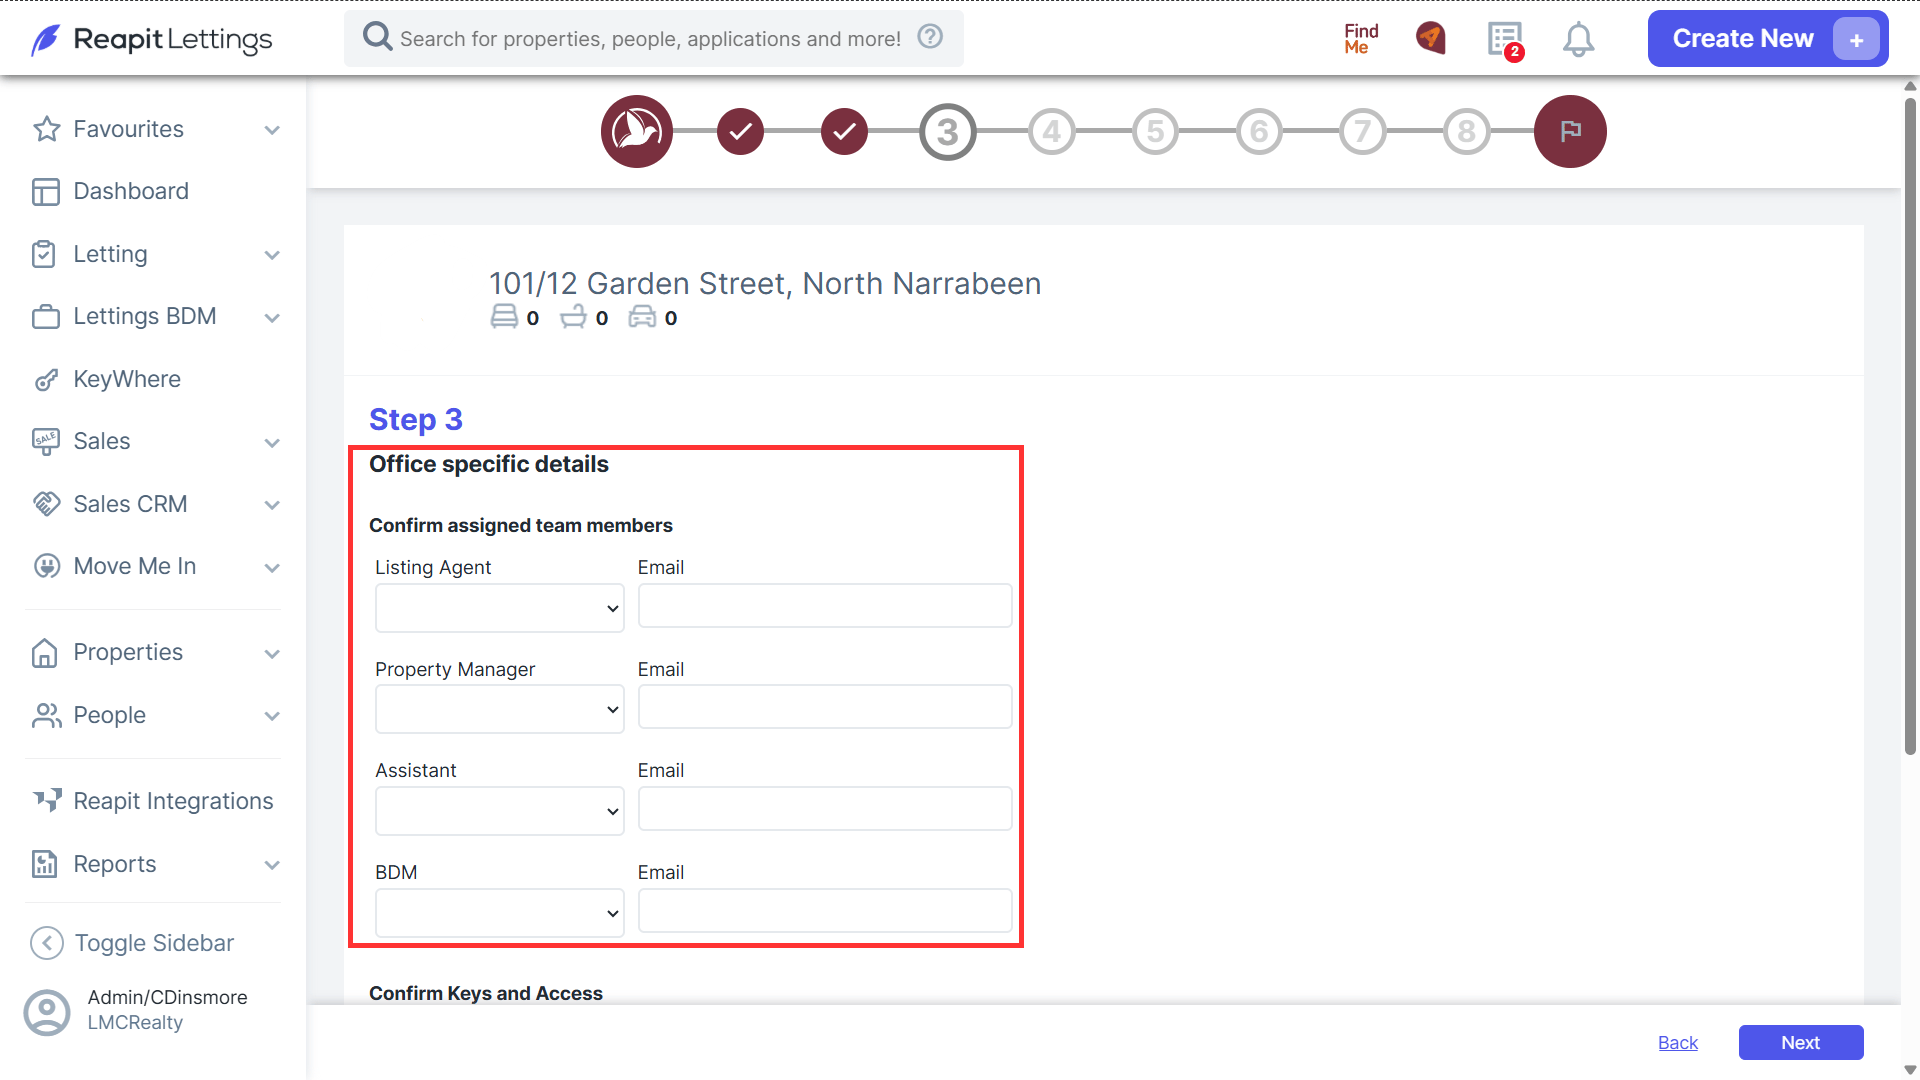
1. Assign the Listing Agent, Property Manager, Assistance and BDM for the property. Please note, selecting the Team Member will automatically input the email address linked to the agents account details found in People > Team > Rentals.
2. This section will allow you to confirm keys and access to the property. Enter in any alarm codes or access noted into the section and then select the add key button to add the key number for the key number for the property.
Step 4: Occupants
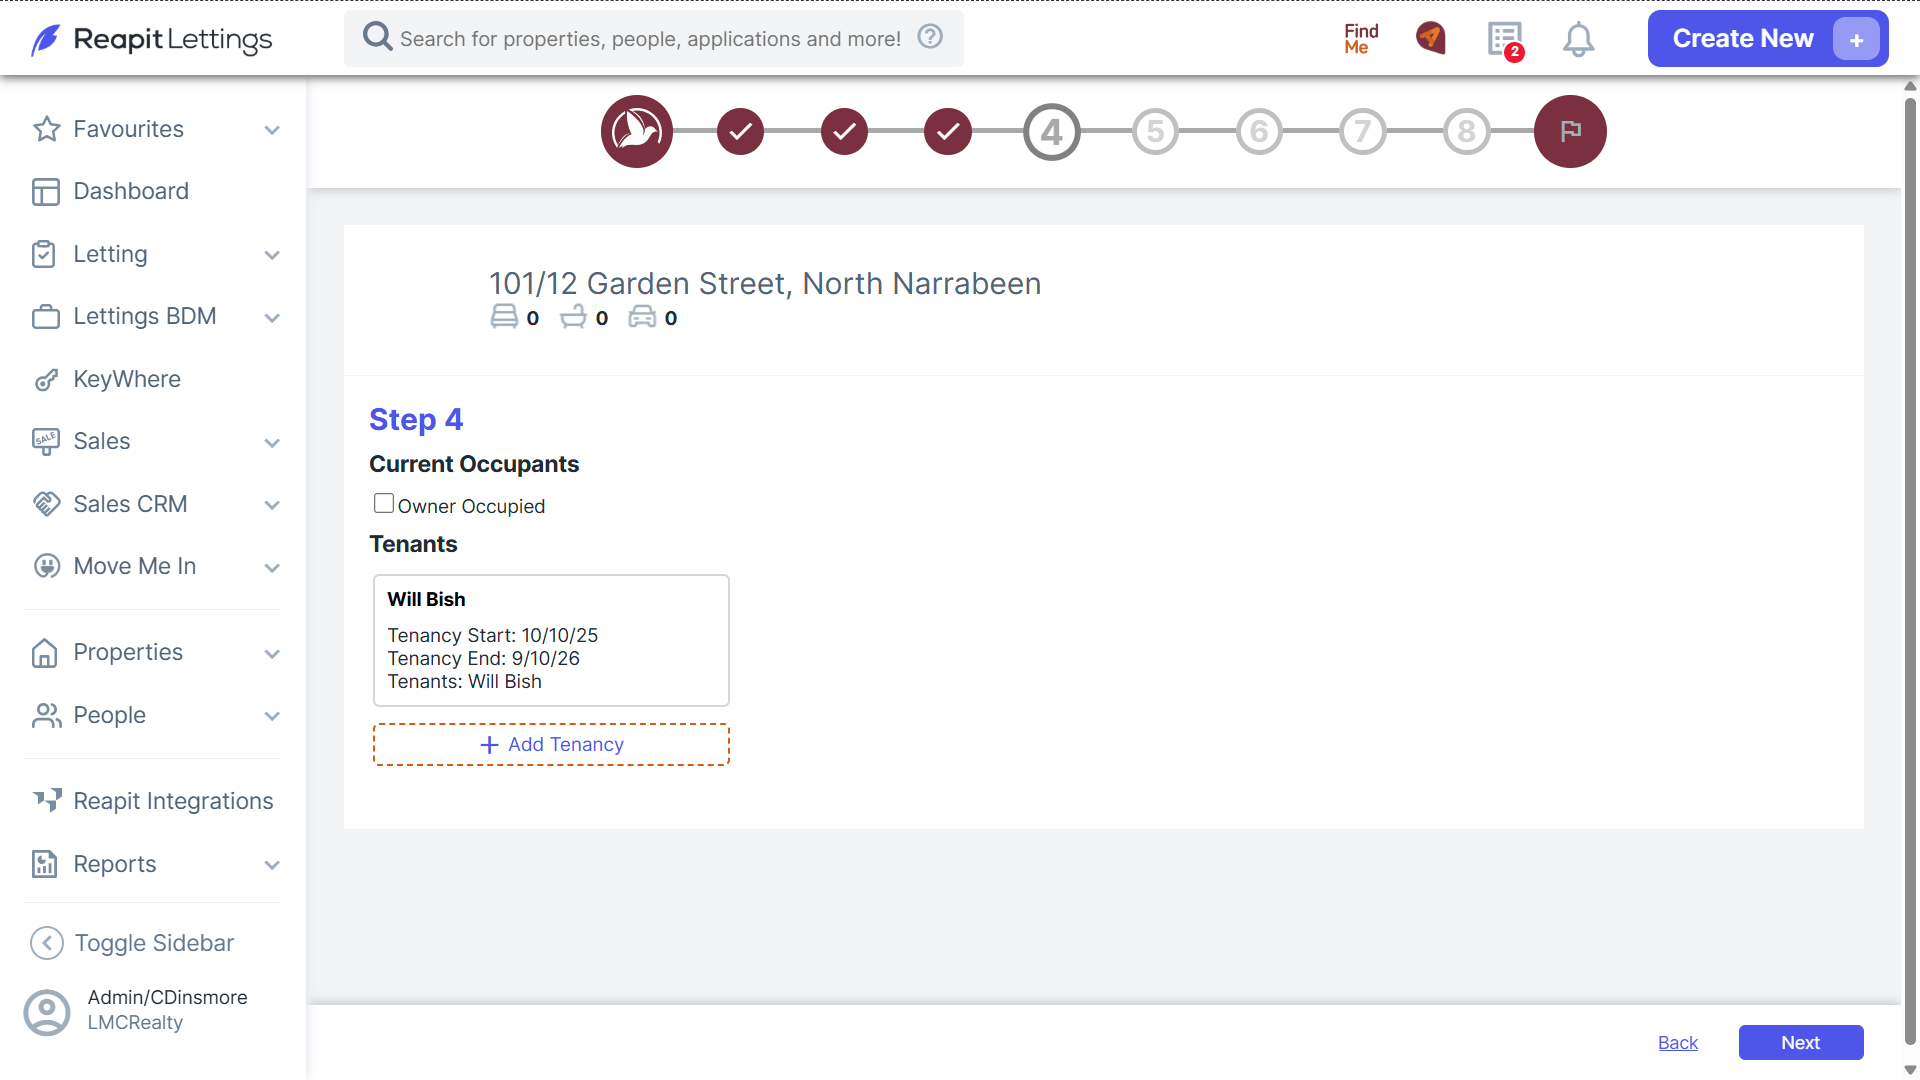
This section will allow you to include the current occupants information. Selecting owner-occupied will have the details put in the owners section of uploading and will also assign them as an occupant for the property. Select Add Tenancy to add the information for the tenancy if the property is currently occupied.
Include the details within the following screen and select; Add Tenant, Add New Lease and Add Rent Change to fill out the appropriate fields for these Tenants.
Step 5 - Owners
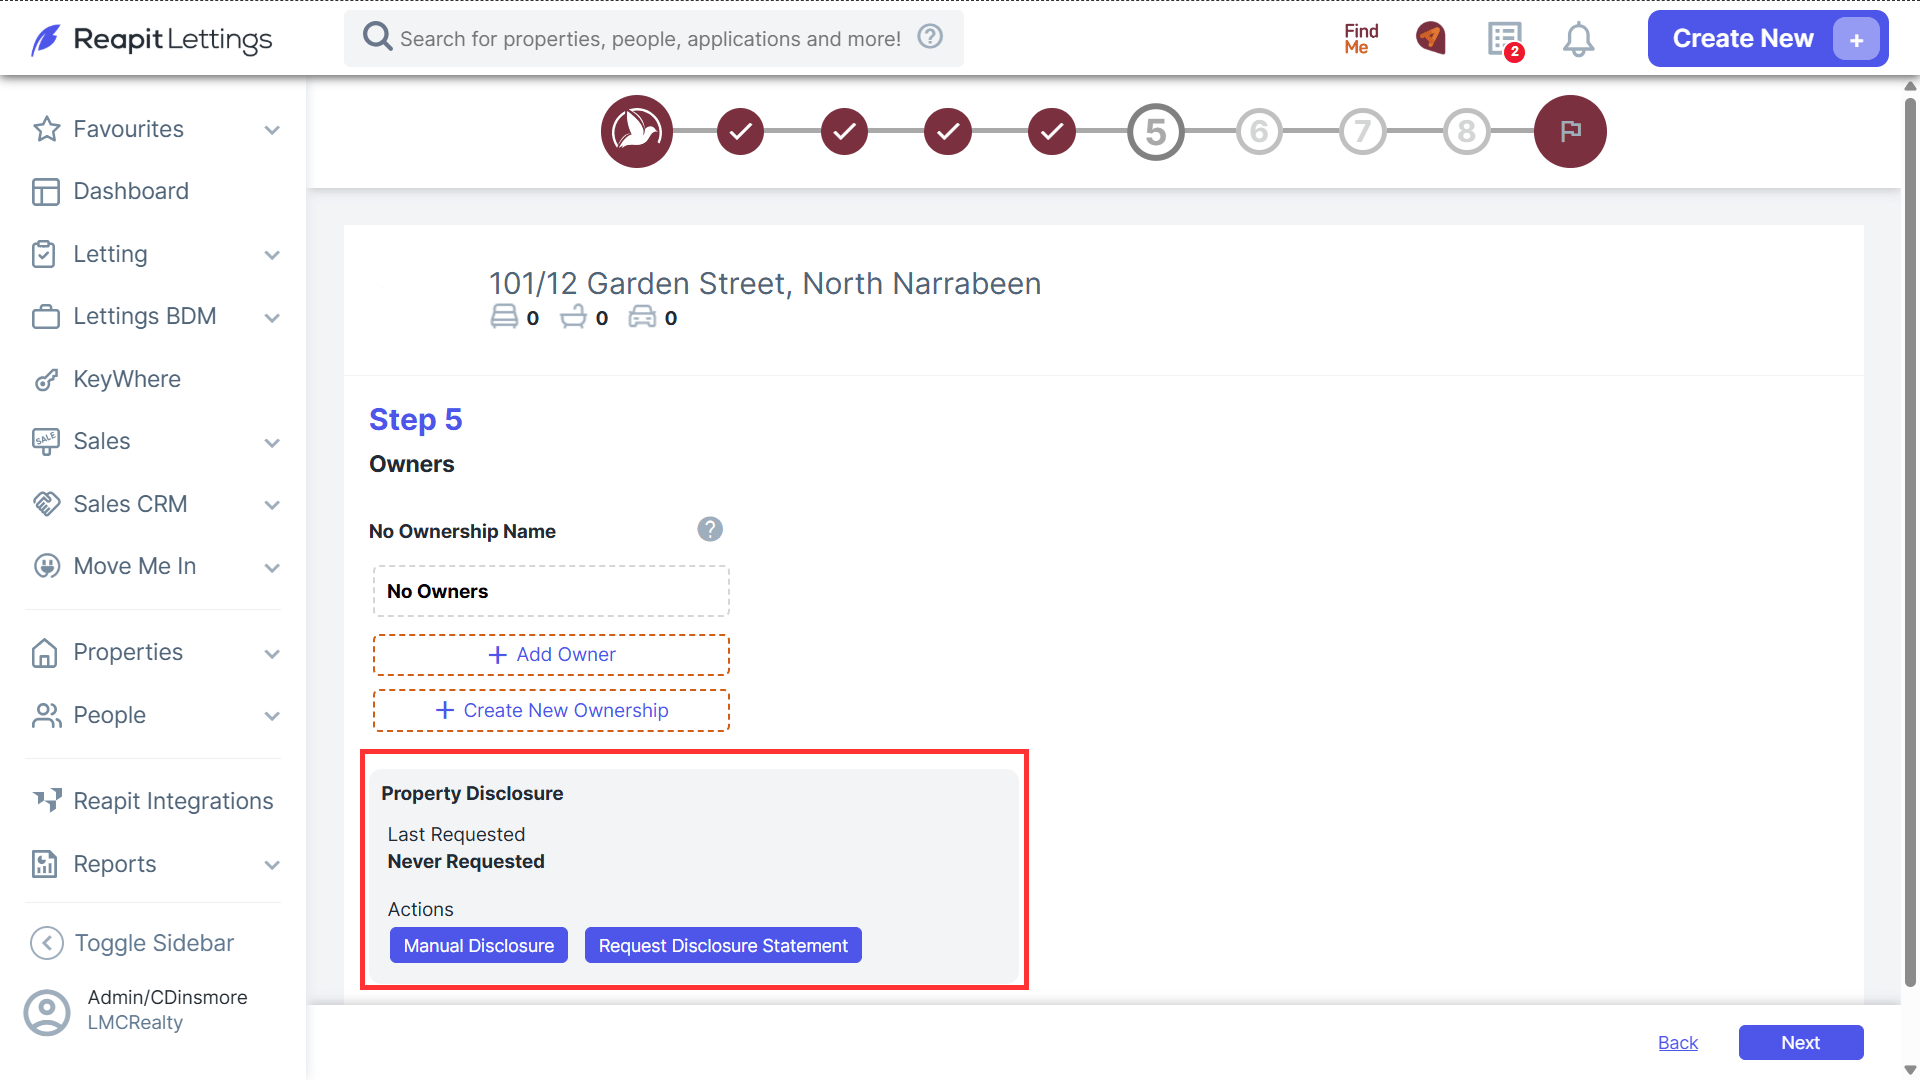
1. Select the Add Owner button and fill in the prompts to include your owner for the property.
Victorian Clients Only - You can then select the Request Disclosure Statement button to send an email to the owner once they are added to complete or select the Manual Disclosure button and fill in the details if the Owner has already provided these details to you separately.
Step 6 : Property Specific Information
1. Include the specific items that the property has that you wish to include for account keeping and advertising purposes.
2. Change the Delay Times Option if the property has specific inspection requirements like certain inspection times. You can check the current Delay Times that your agency has available to select from by going to Setting > Letting > Delay Times. You can also select if the property still requires a video tour, is new business, to be treated as vacant, a lease break, or a hot property and include notes at the right of this section under the notes tab.
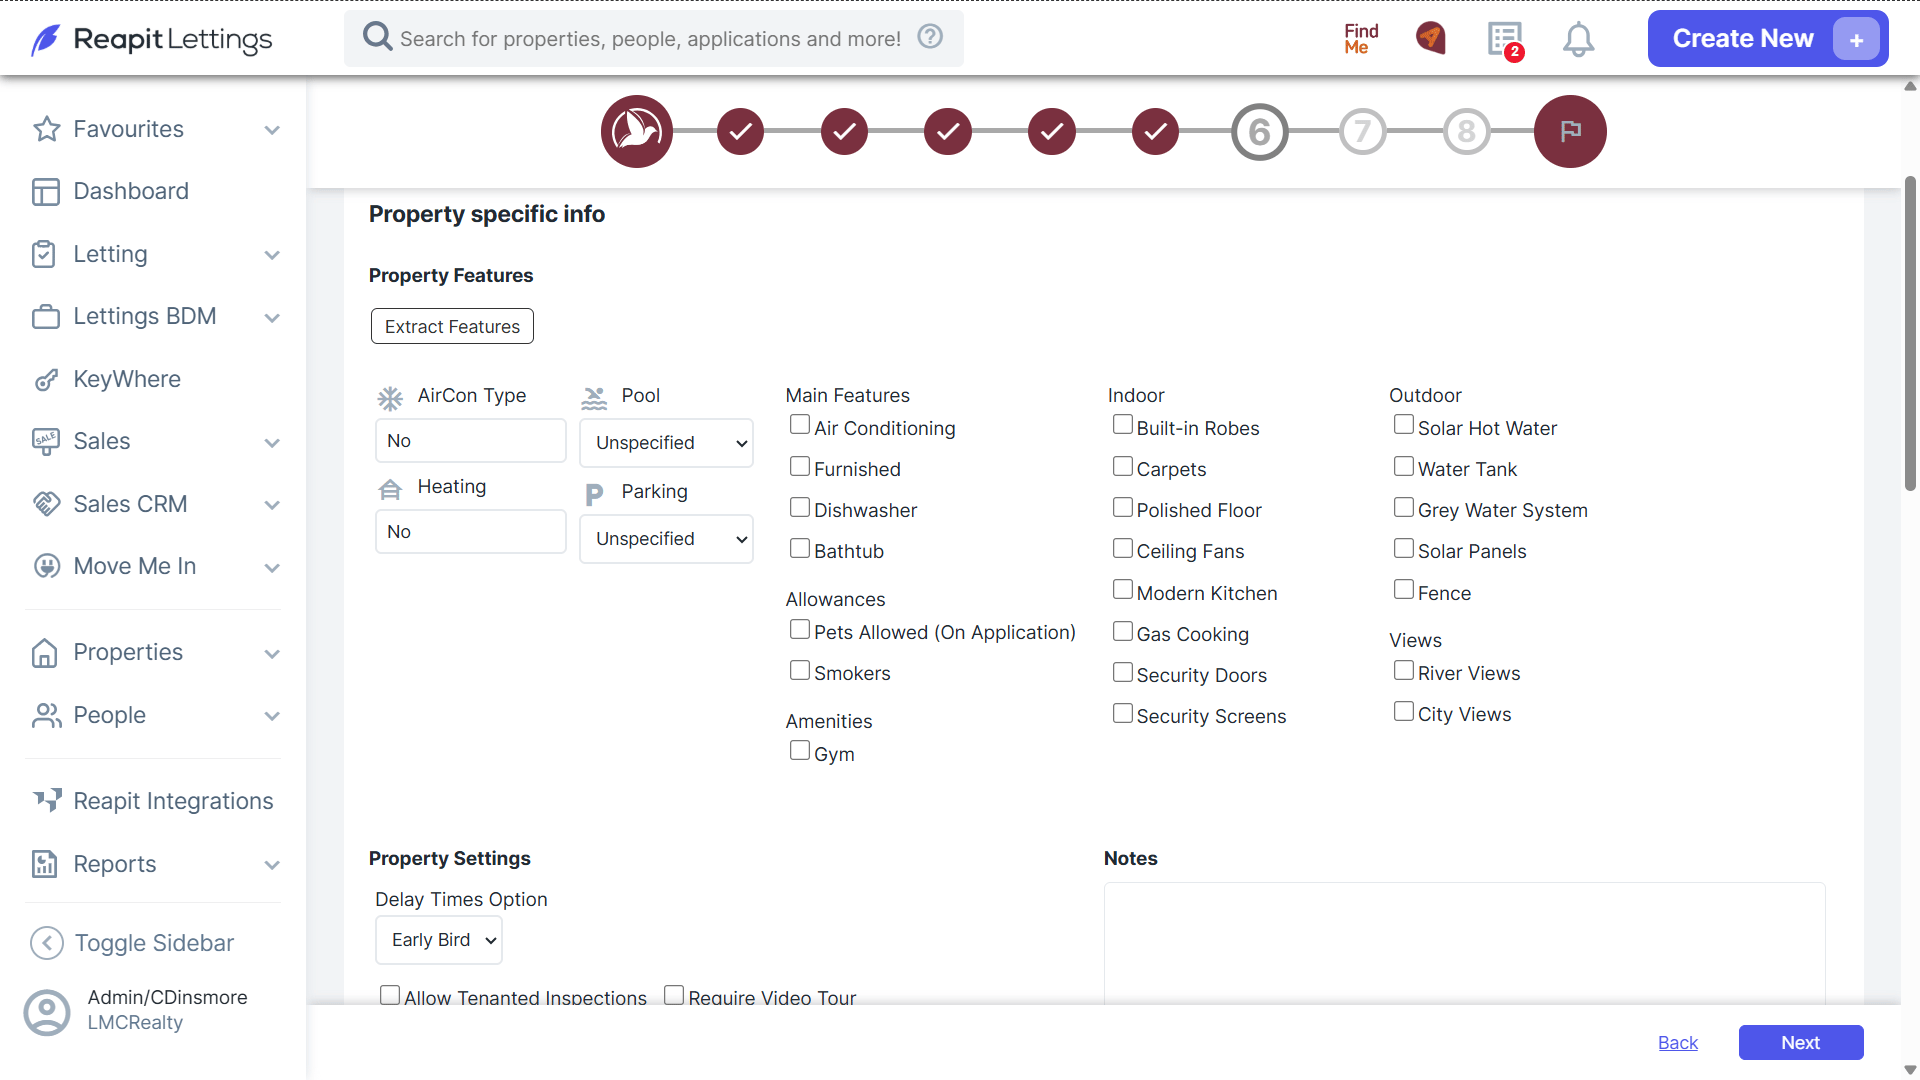
3. Include an application limit on the property if your agency would like, as soon as the application limit is reached, applicants will not be able to use the 2Apply link to log into the application. If an applicant withdraws within your system, 1 additional applicant will now be able to apply as the application limit would allow another application to be submitted.
4. Enter in the information that you would like included when sending the {PropertySpecificInfo} for this property when sending out an email.
5. Enter in the information that you would like included when sending the {PetInfo} for this property when sending out an email.
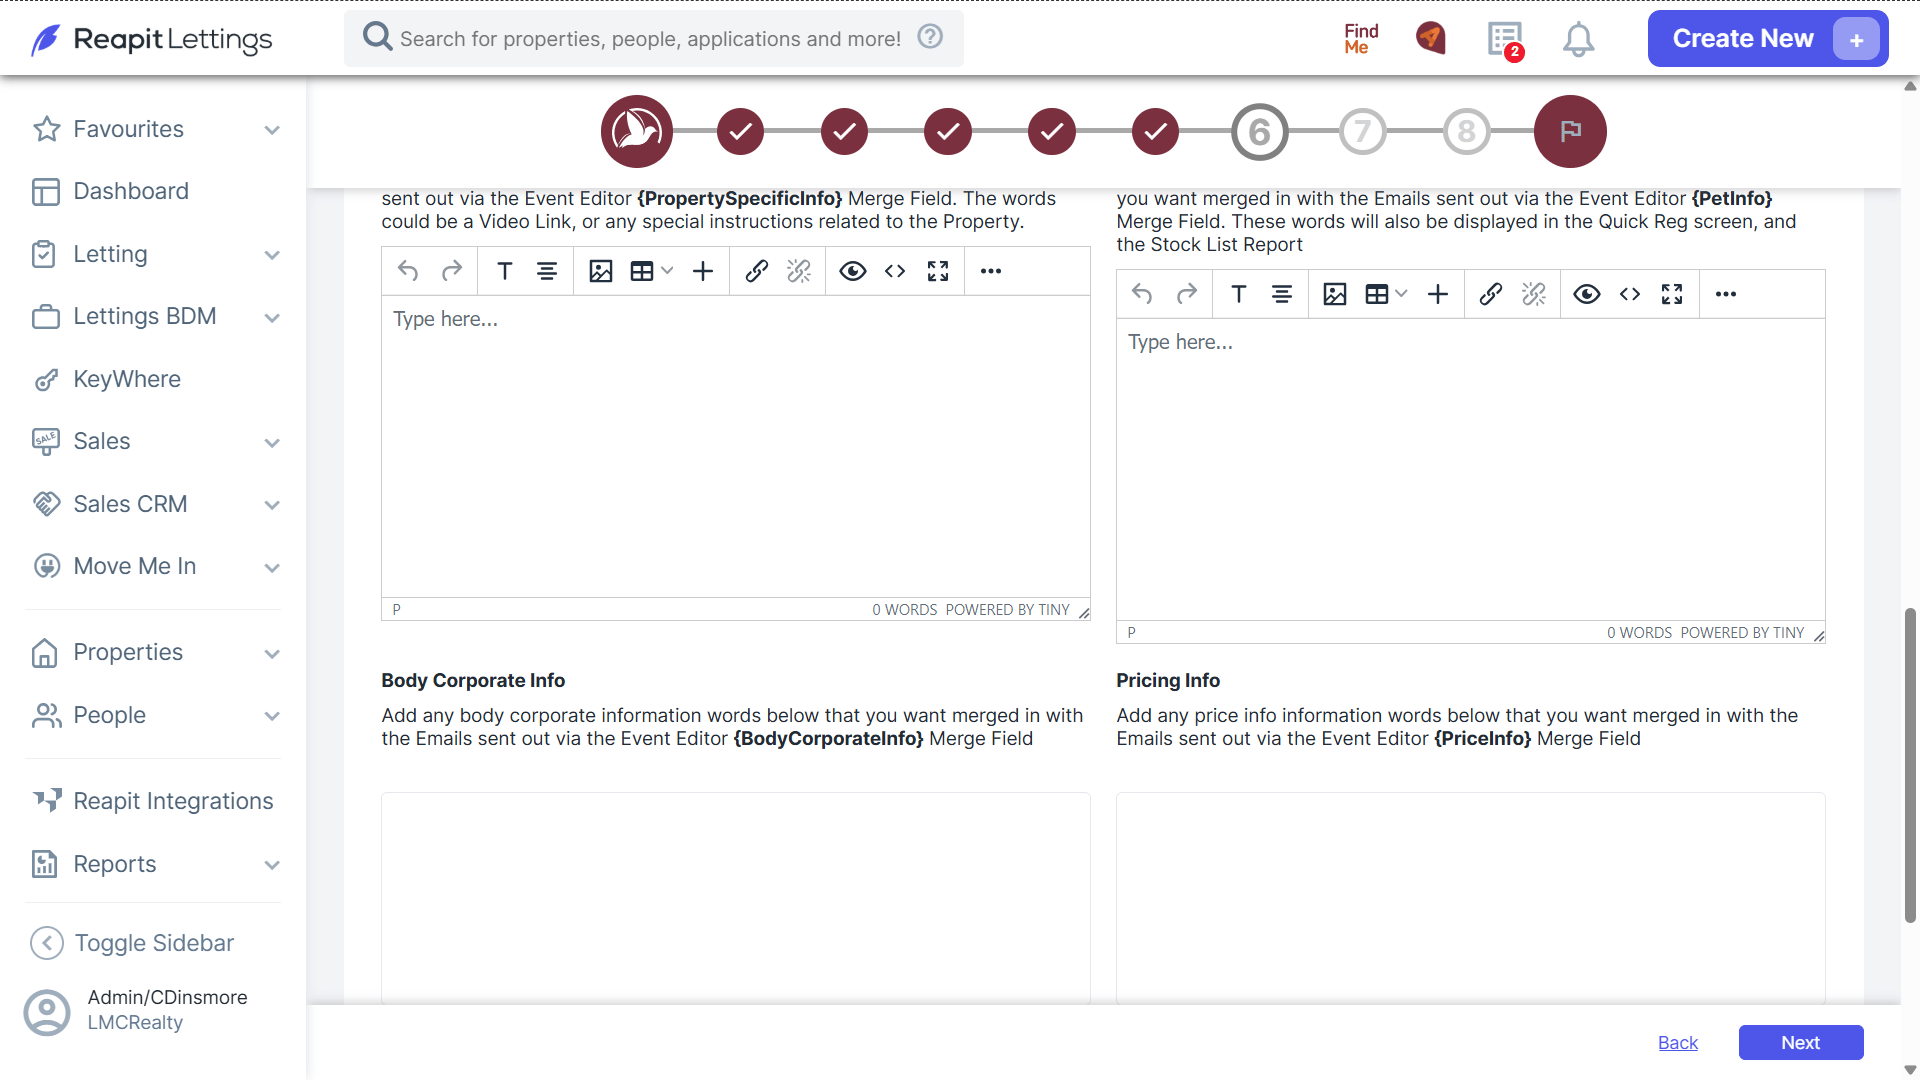
6. Enter in the information that you would like included when sending the {BodyCorporateInfo} for this property when sending out an email.
7. Enter in the information that you would like included when sending the {PriceInfo} for this property when sending out an email.
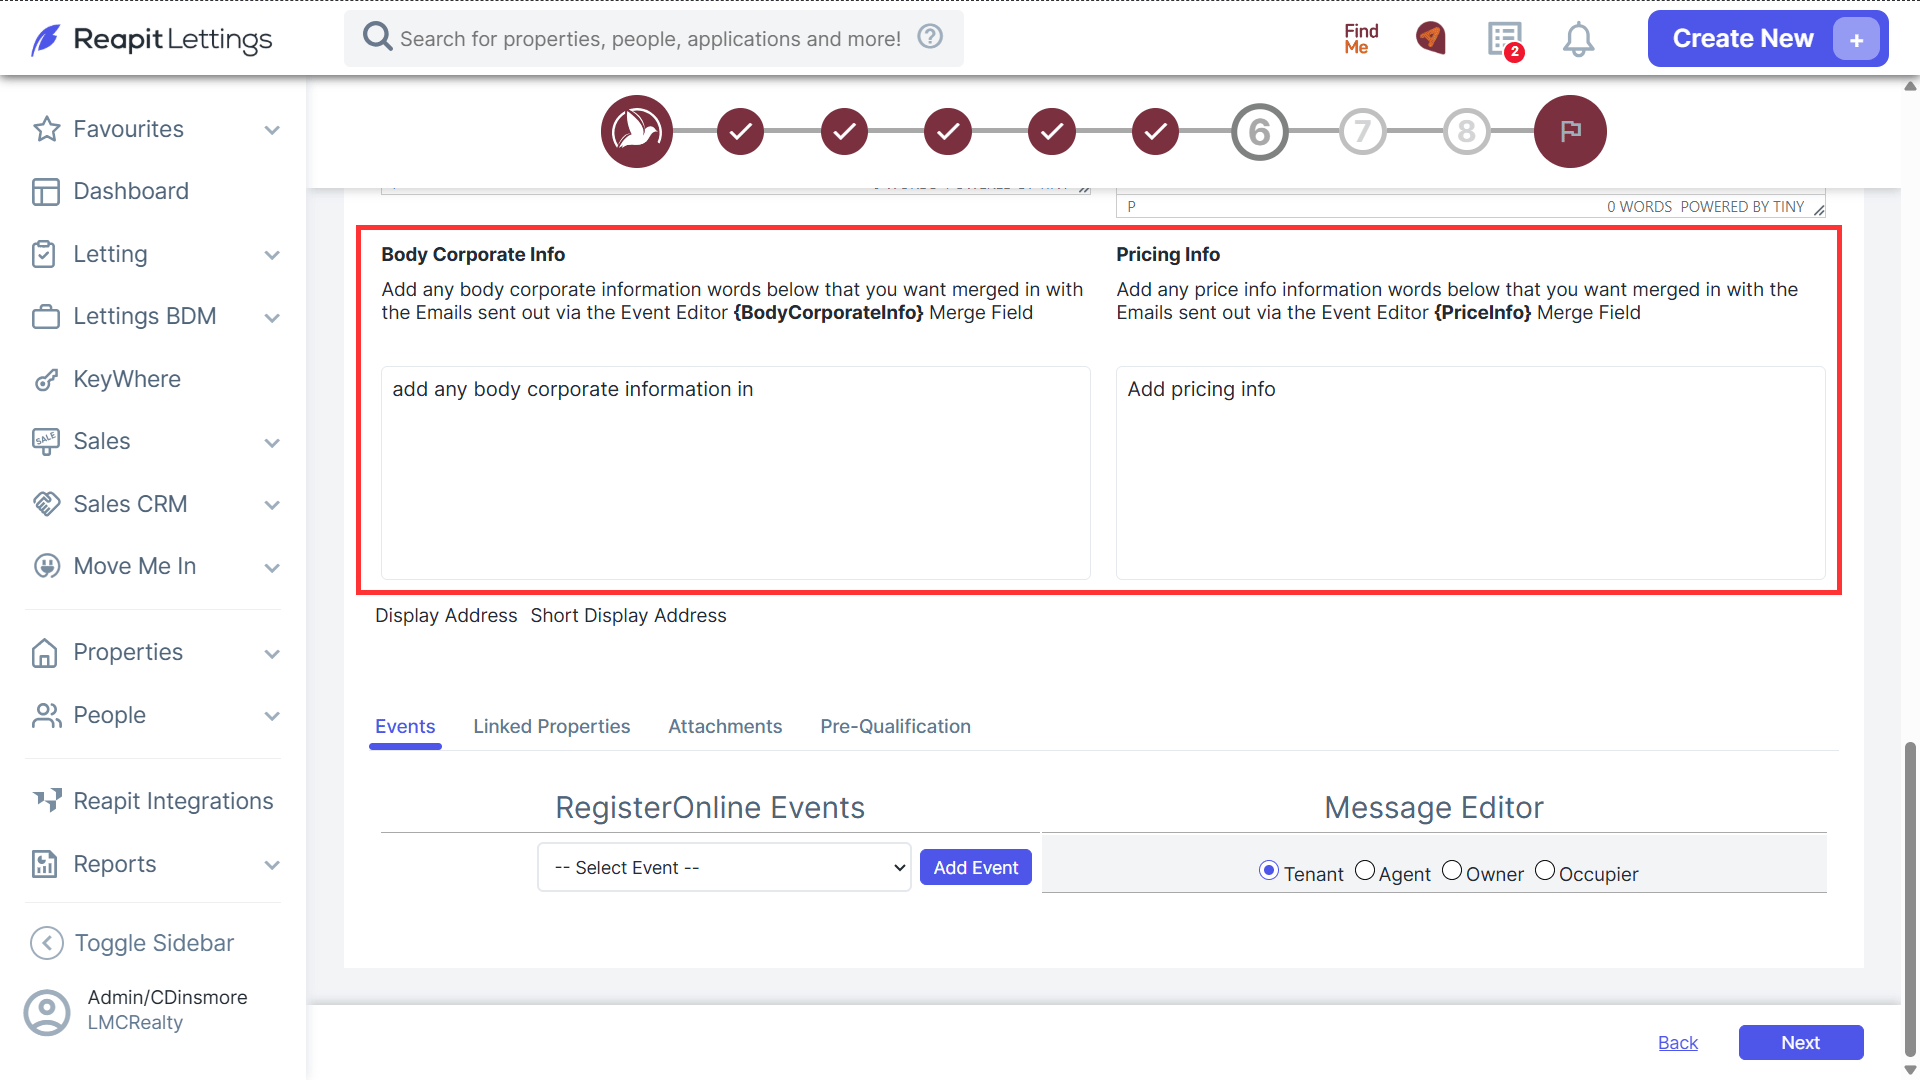
8. This section will allow you to create custom messages for the automatic messages you already use incase this property has a specific message that must be included instead of the Default message within your Reapit Lettings account. Select the message you wish to include and then select the Add Event button.
9. The Add Event button will make the message show in this section. Select Edit Messages to view the message down the right-hand side. To choose who the message is sent to, select the email/SMS button for Tenant, Agent and Owner, depending on who is receiving the message. To view each message, select the Tenant, Agent and Owner at the right above where the message title is.
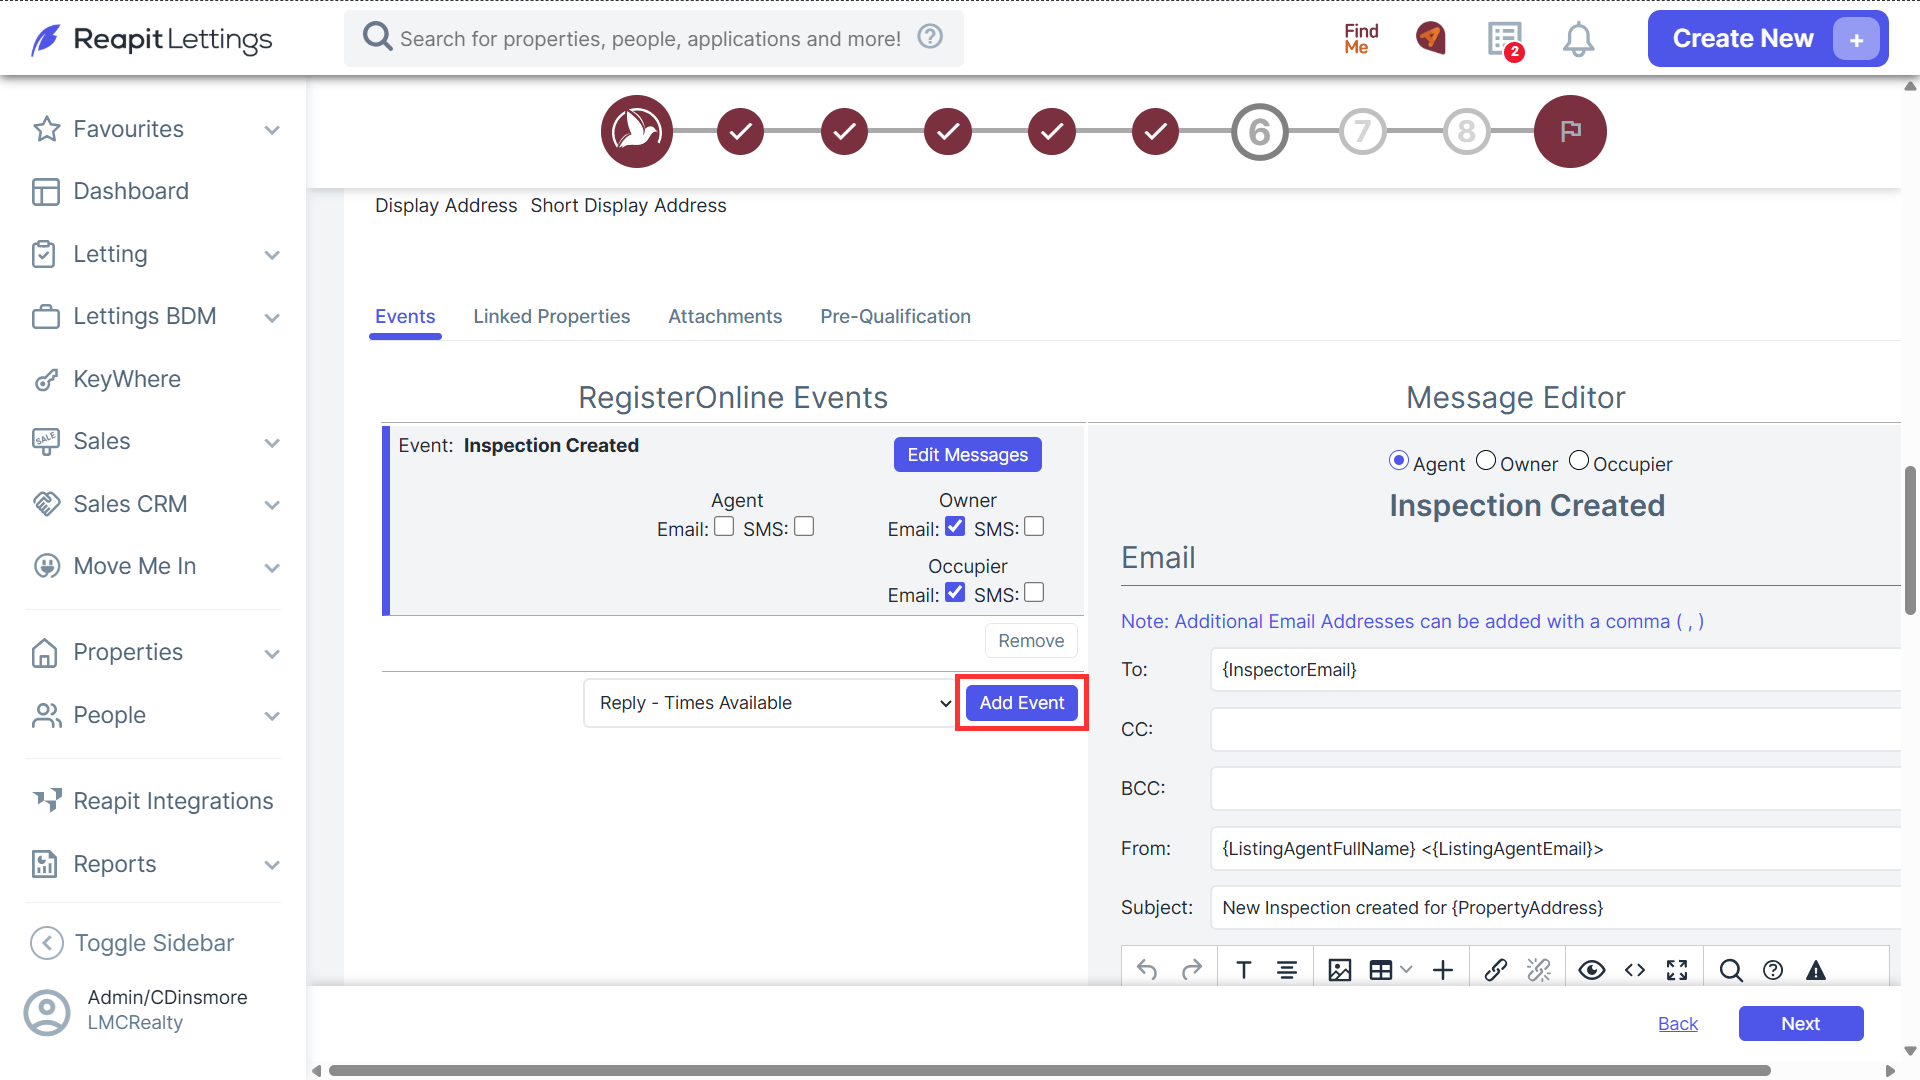
The highlighted section in the screenshot below shows the message that is currently being sent in the Event Editor section of your account. You can then amend the message and save it in this section so if this message is triggered for the property, the alternate message created will send. You can also include the above merge fields to have these custom merge fields also be included in the message.
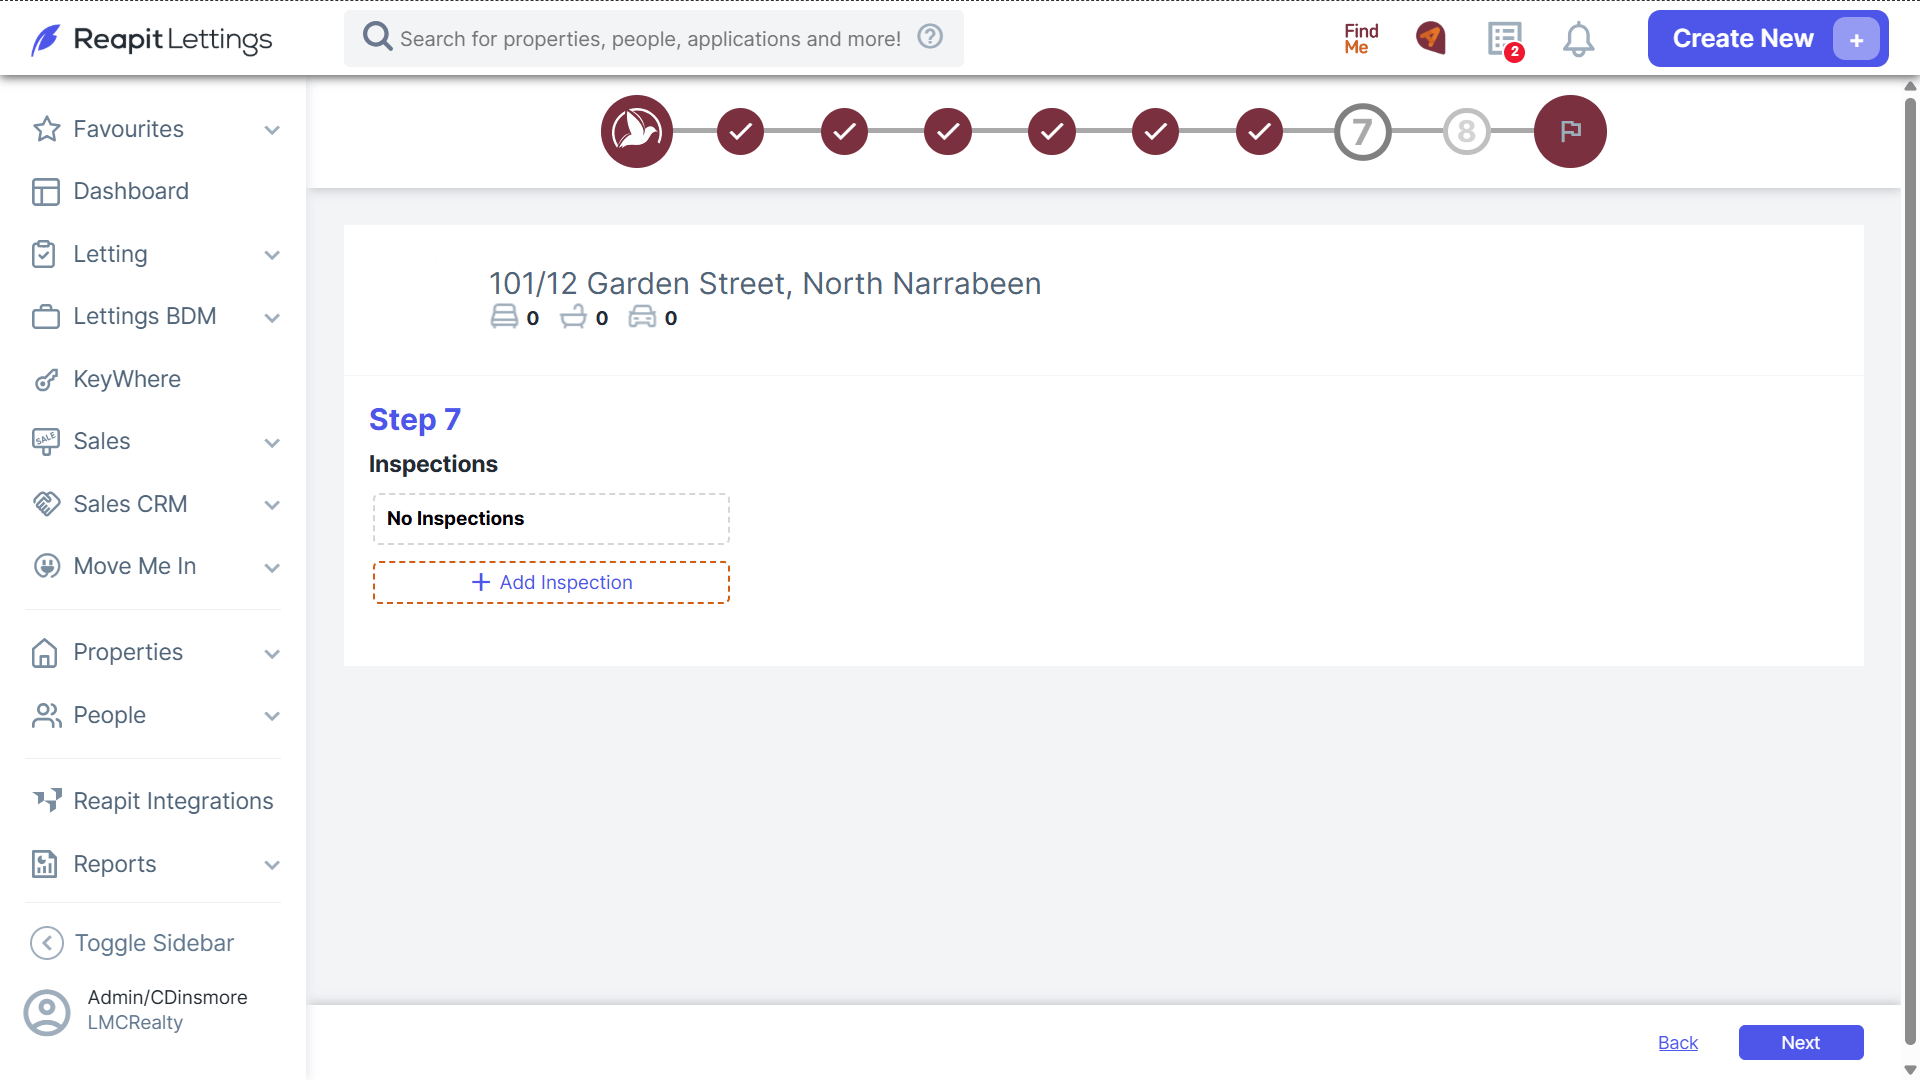
Step 7: Inspections
1. Select the Add inspection button and follow the prompts to include inspection as soon as the property is listed.
Step 8: Notify Prospects of Similar Properties
1. If there are prospects within your system and their prospect details match the criteria of the property, you can select the send now button to send out information to these prospects to see if they would like to inspect the new property as soon as it has been listed.
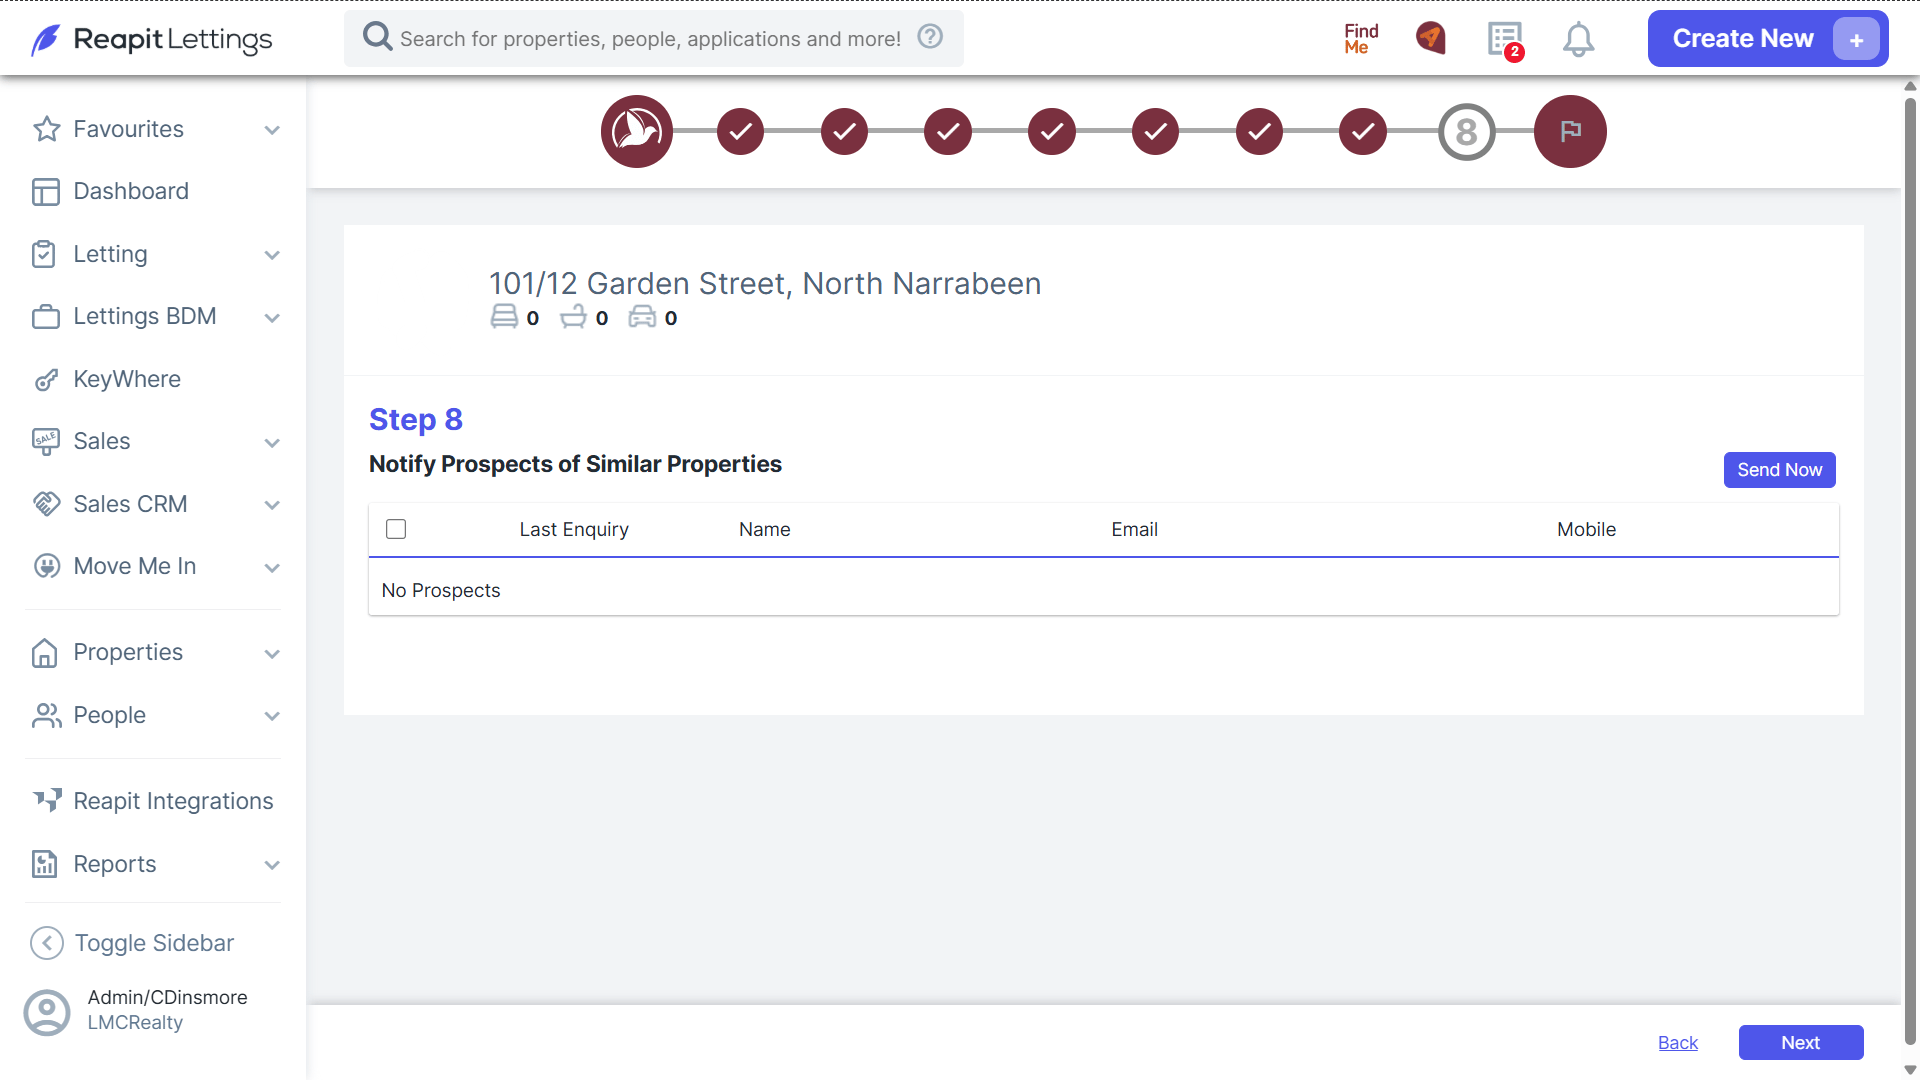
2. You have now completed the On-List for the Property, select the close button to close this section and the property will now be listed.
If you use 2Apply, then you can use the FindMe feature. Please click here to access the guide.