'%20d='M0%208a8%208%200%200%201%208-8h24a8%208%200%200%201%208%208v24a8%208%200%200%201-8%208H8a8%208%200%200%201-8-8V8Z'/%3e%3cpath%20fill='%23fff'%20d='M8.375%2013v14L20.5%2034l12.124-7v-7.737l-1.687-.975-2.806-1.62-1.082-.624v4.83l-.002%204.83H13.95V16.07l3.275-1.89%202.192-1.265%201.082-.625%203.275%201.877%202.192%201.256%201.083.62V9.782L20.5%206%208.376%2013Z'/%3e%3cdefs%3e%3clinearGradient%20id='reapit-pm__a'%20x1='20.702'%20x2='20.702'%20y1='.351'%20y2='31.228'%20gradientUnits='userSpaceOnUse'%3e%3cstop%20stop-color='%235573FD'/%3e%3cstop%20offset='.575'%20stop-color='%234E56EA'/%3e%3c/linearGradient%3e%3c/defs%3e%3c/svg%3e)
Tenant Agreement
This article will give you a guide to creating a new tenancy agreement in Reapit PM. The process in this article include: How to Create a Tenant Agreement
Overview
Tenant Agreement
This article will give you a guide to creating a new tenancy agreement in Reapit PM.
Every new tenancy means setting up a new tenant with a property and entering in the agreement details.
Note: You will need to ensure that the Property and Management Agreement is set up in Reapit PM prior to adding a Tenancy Agreement.
The process in this article include:
- How to Create a Tenant Agreement
How to Create a Tenant Agreement
- Navigate to the People > Tenants > Add New.
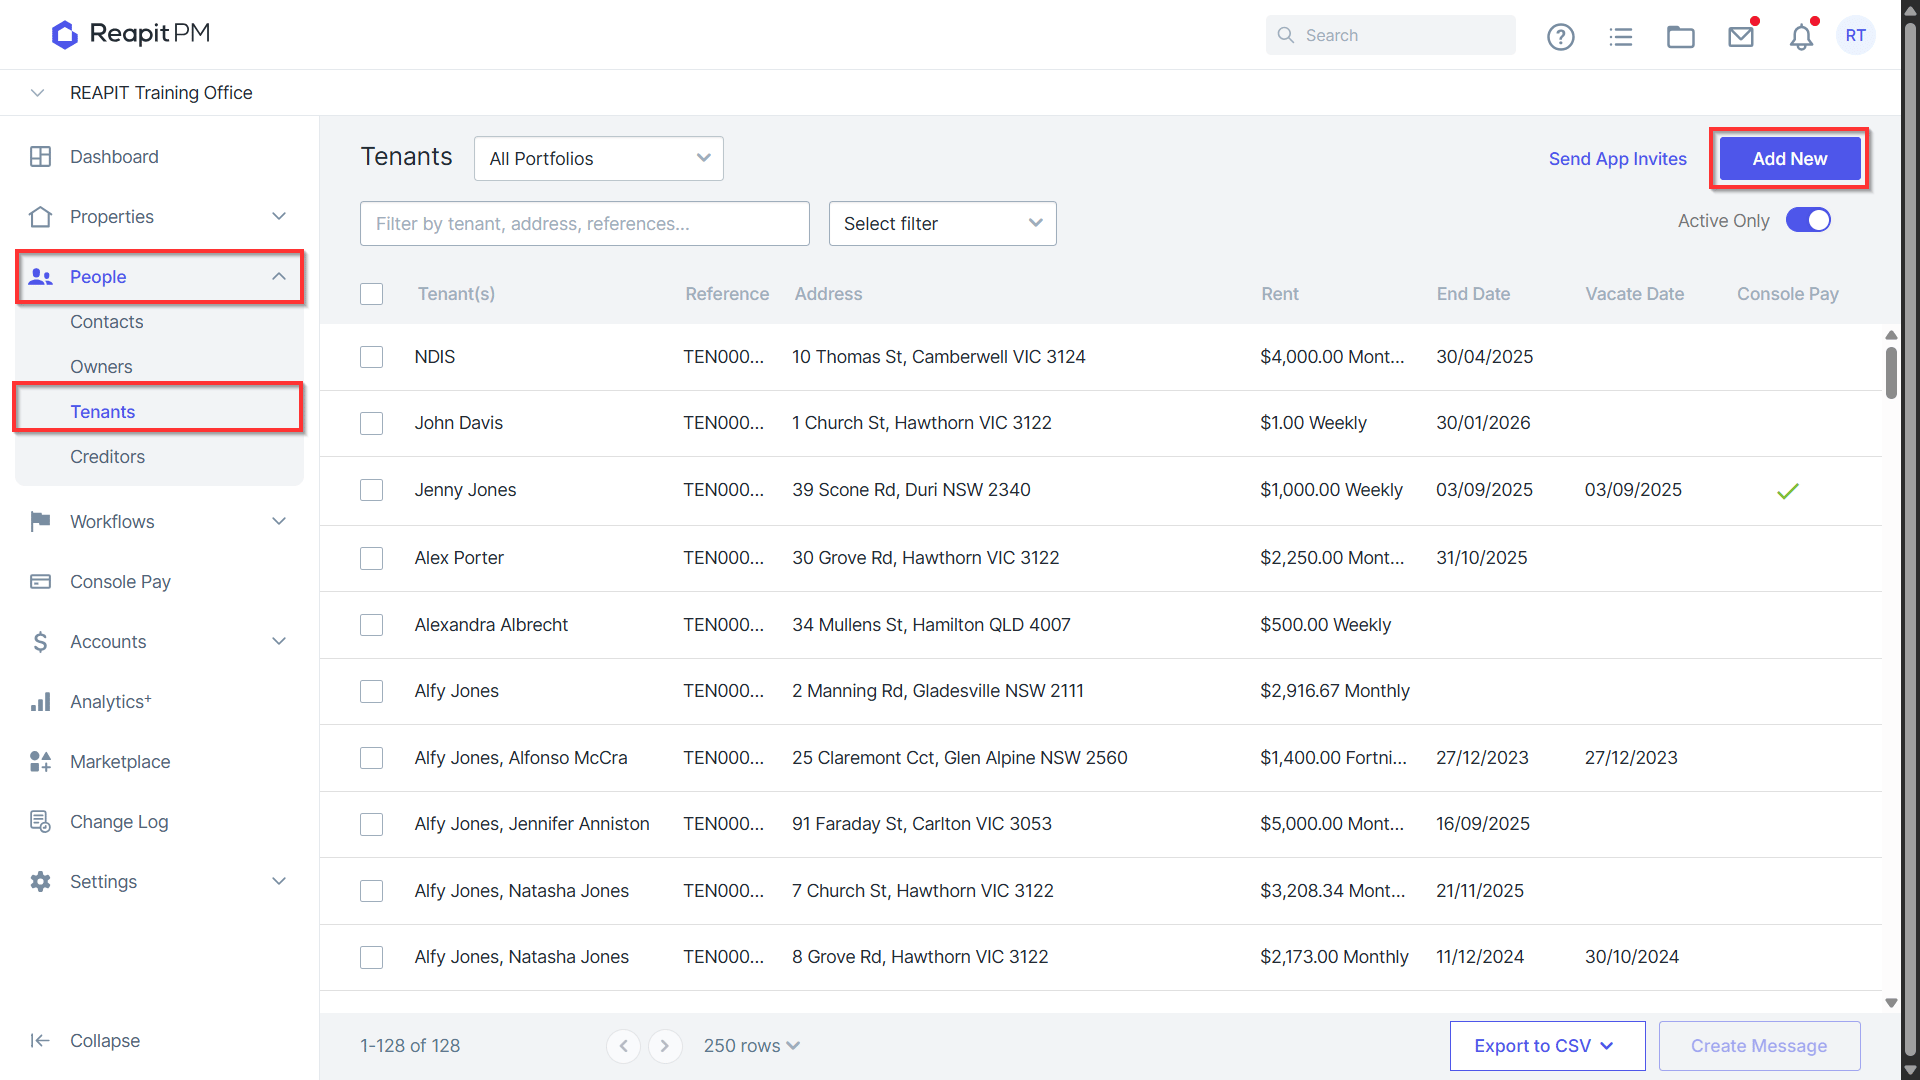
Note: If the property is already entered then you can add the tenant by selecting Properties > Residential > select the property or type the address in the search box.
- You are now on the New Tenant Agreement page. Begin typing the address for the property - the field auto-fills with matches from the database.
Note: If the property required does not show then a new Management is required and you are not able to proceed until completed.
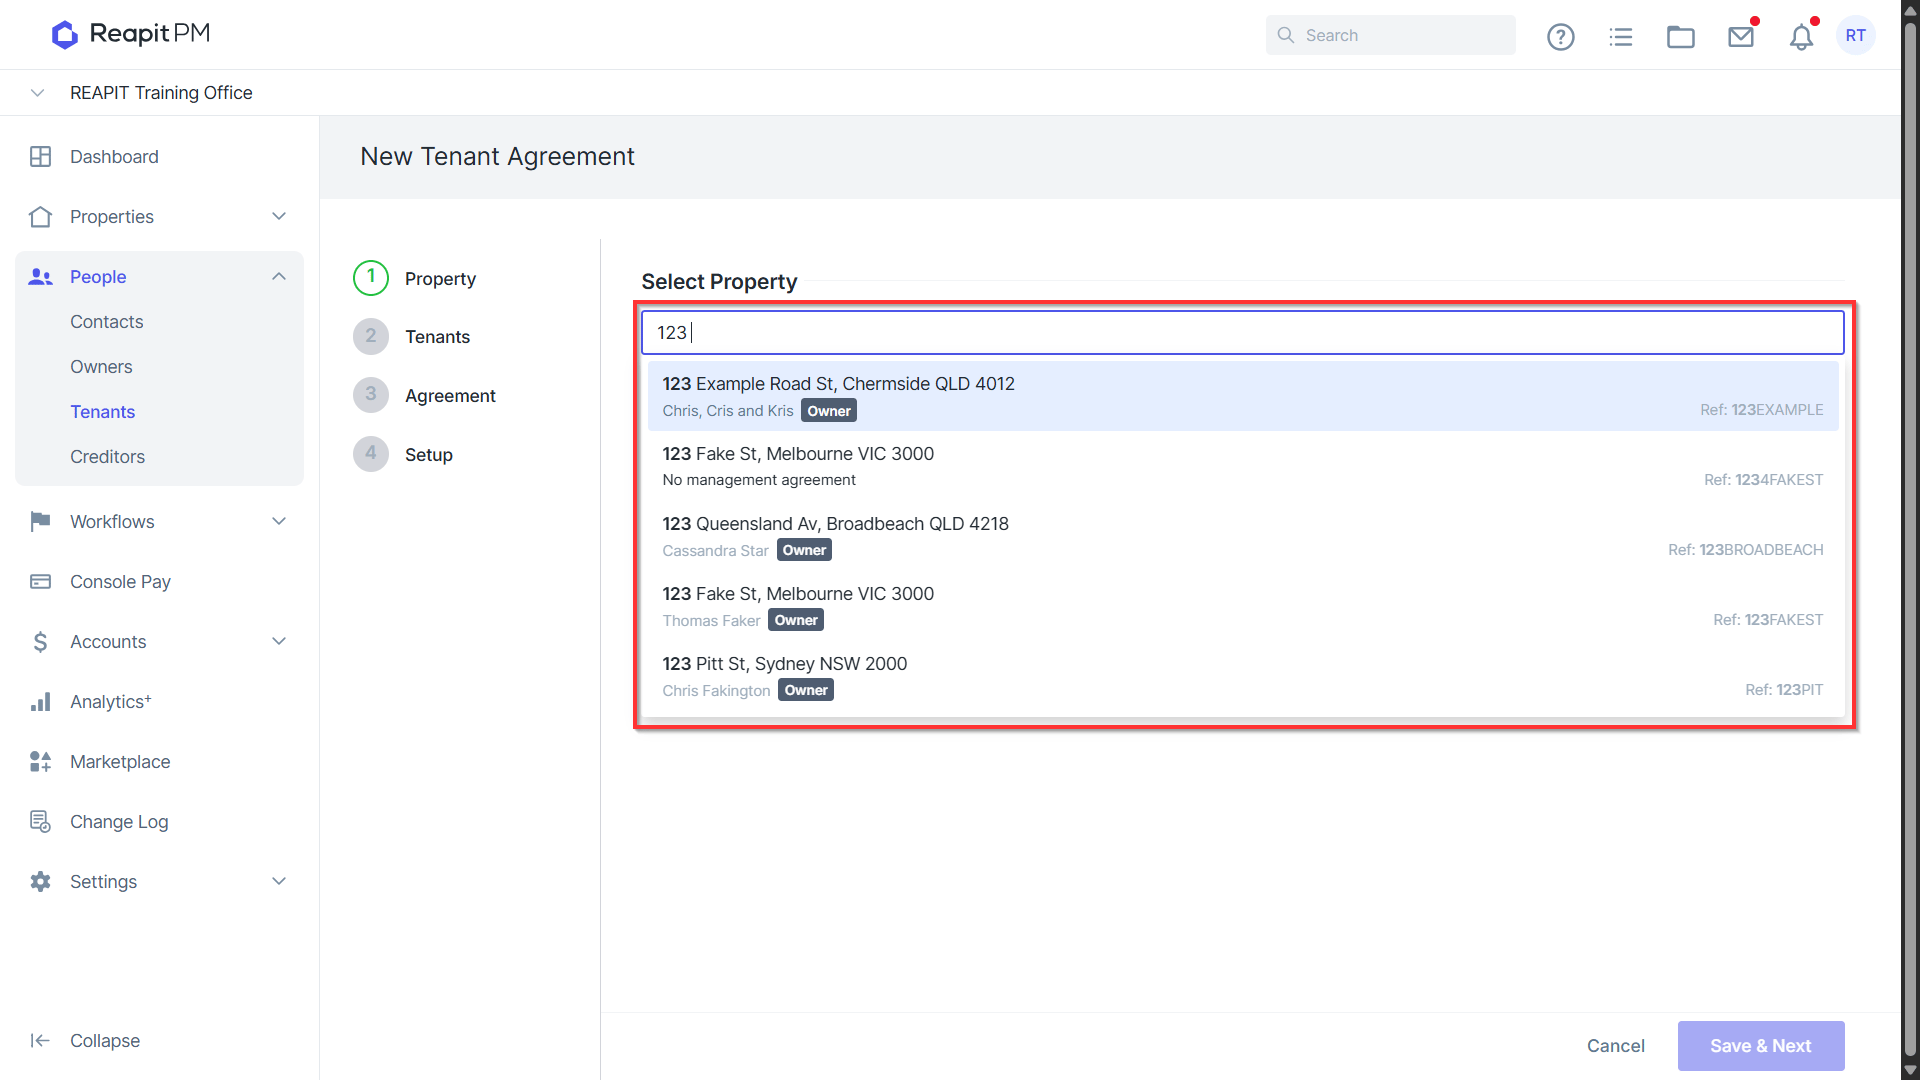
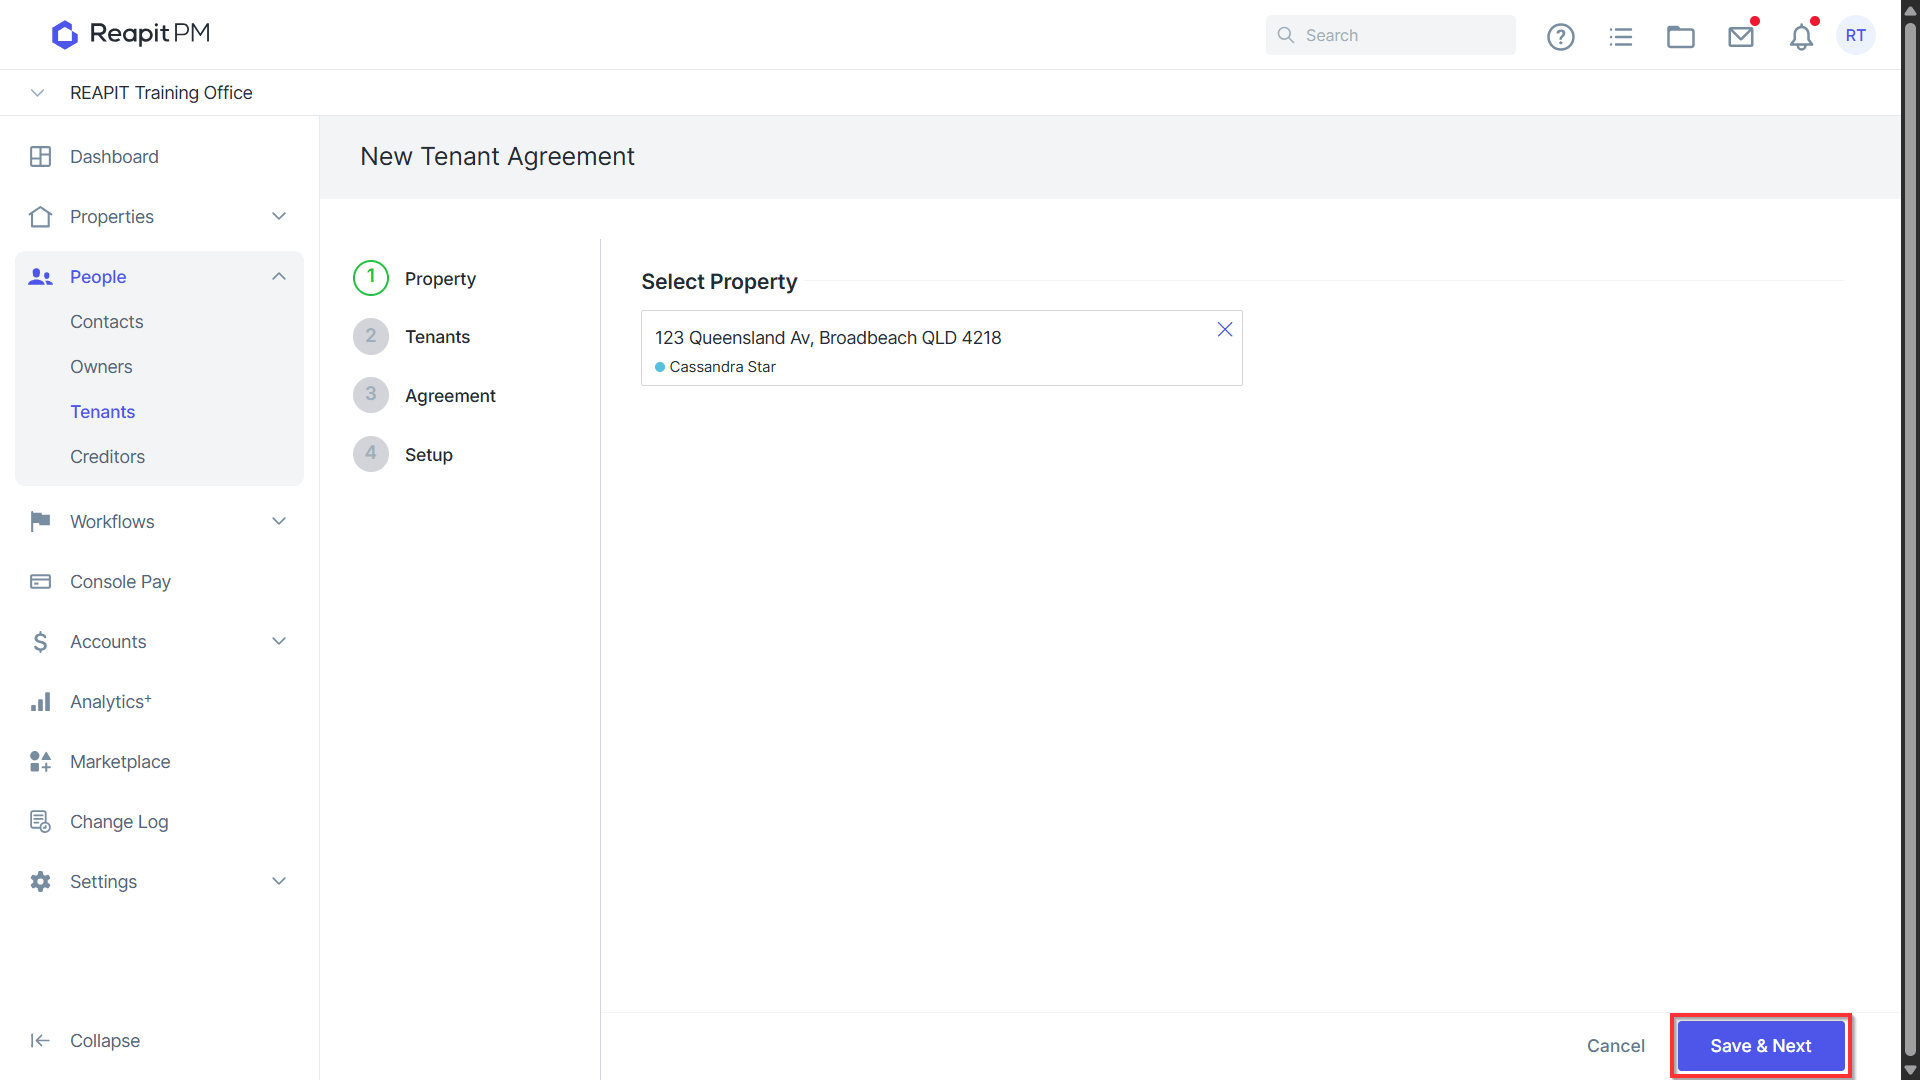
- Select the correct Property, then click Save & Next.
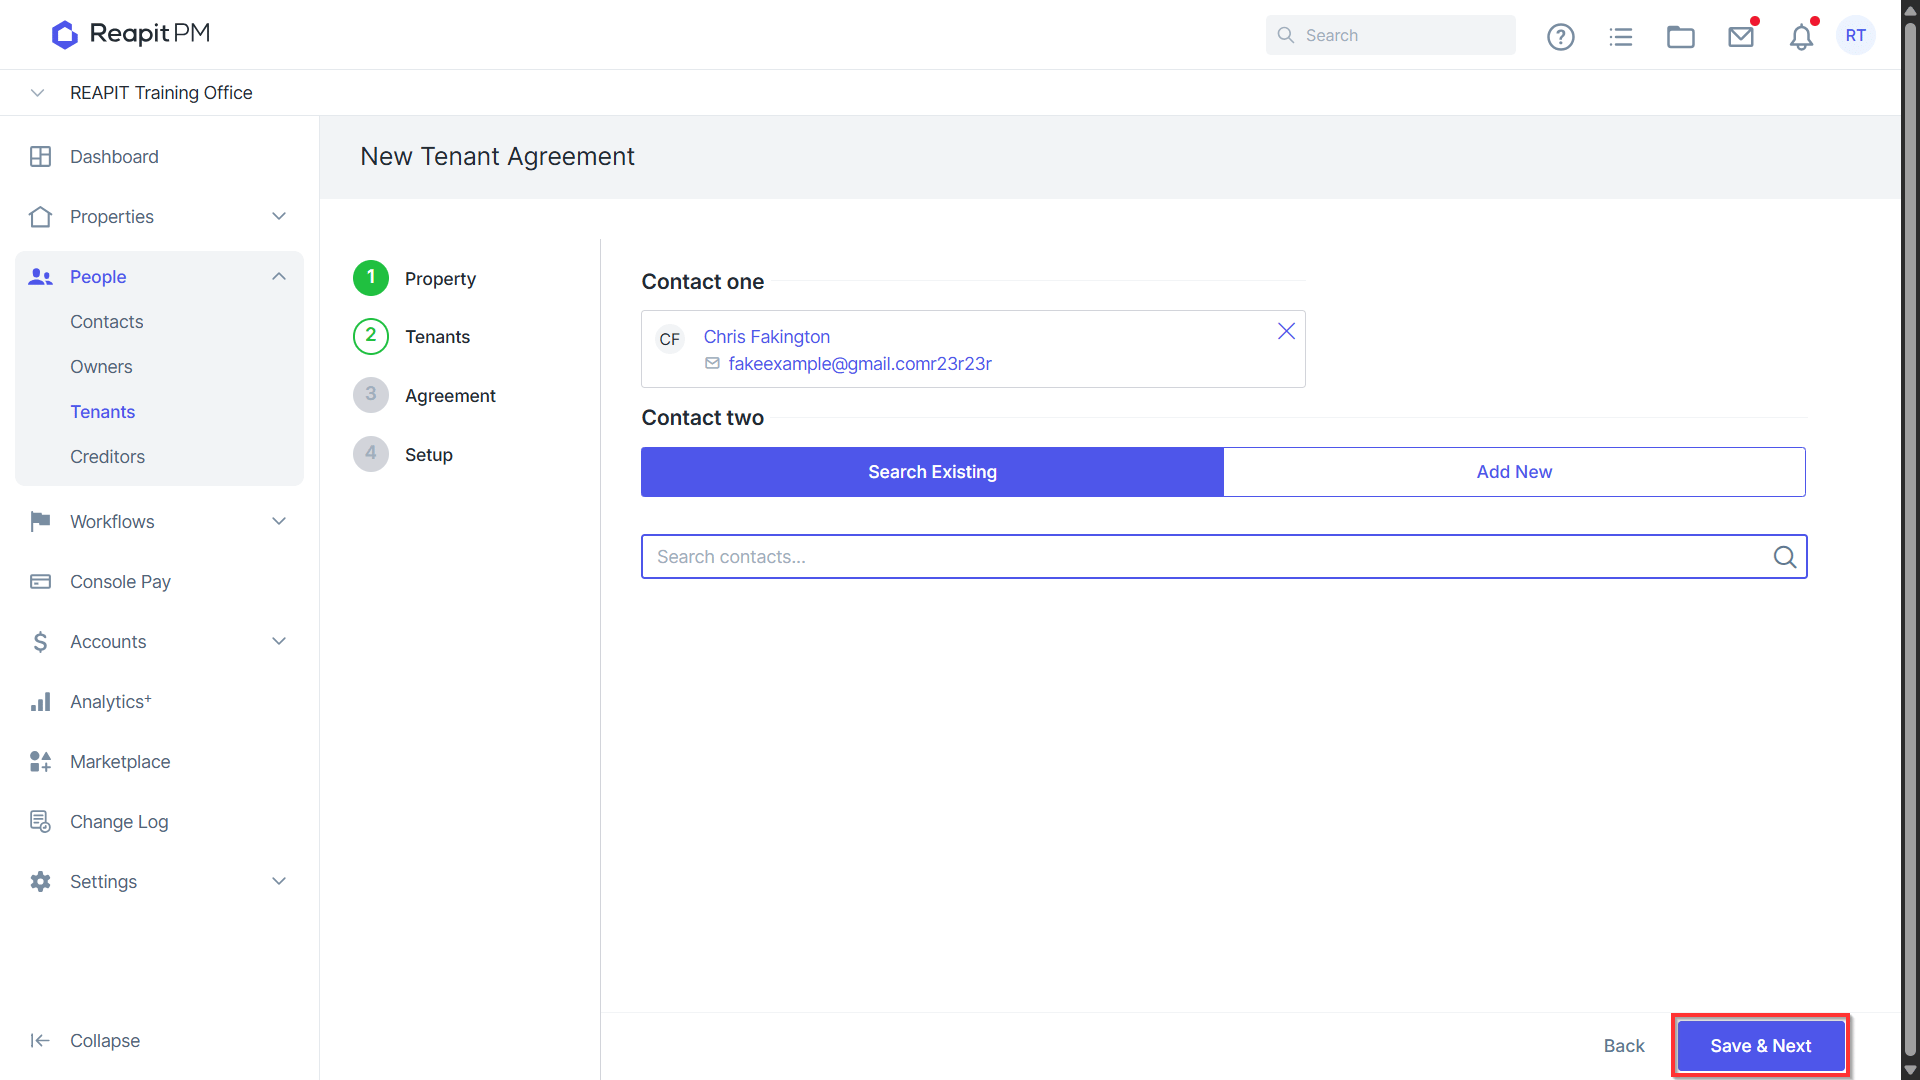
- Add in the new tenant details if the contact already exists by clicking> Search Existing.
The field auto-fills with matches from the database.
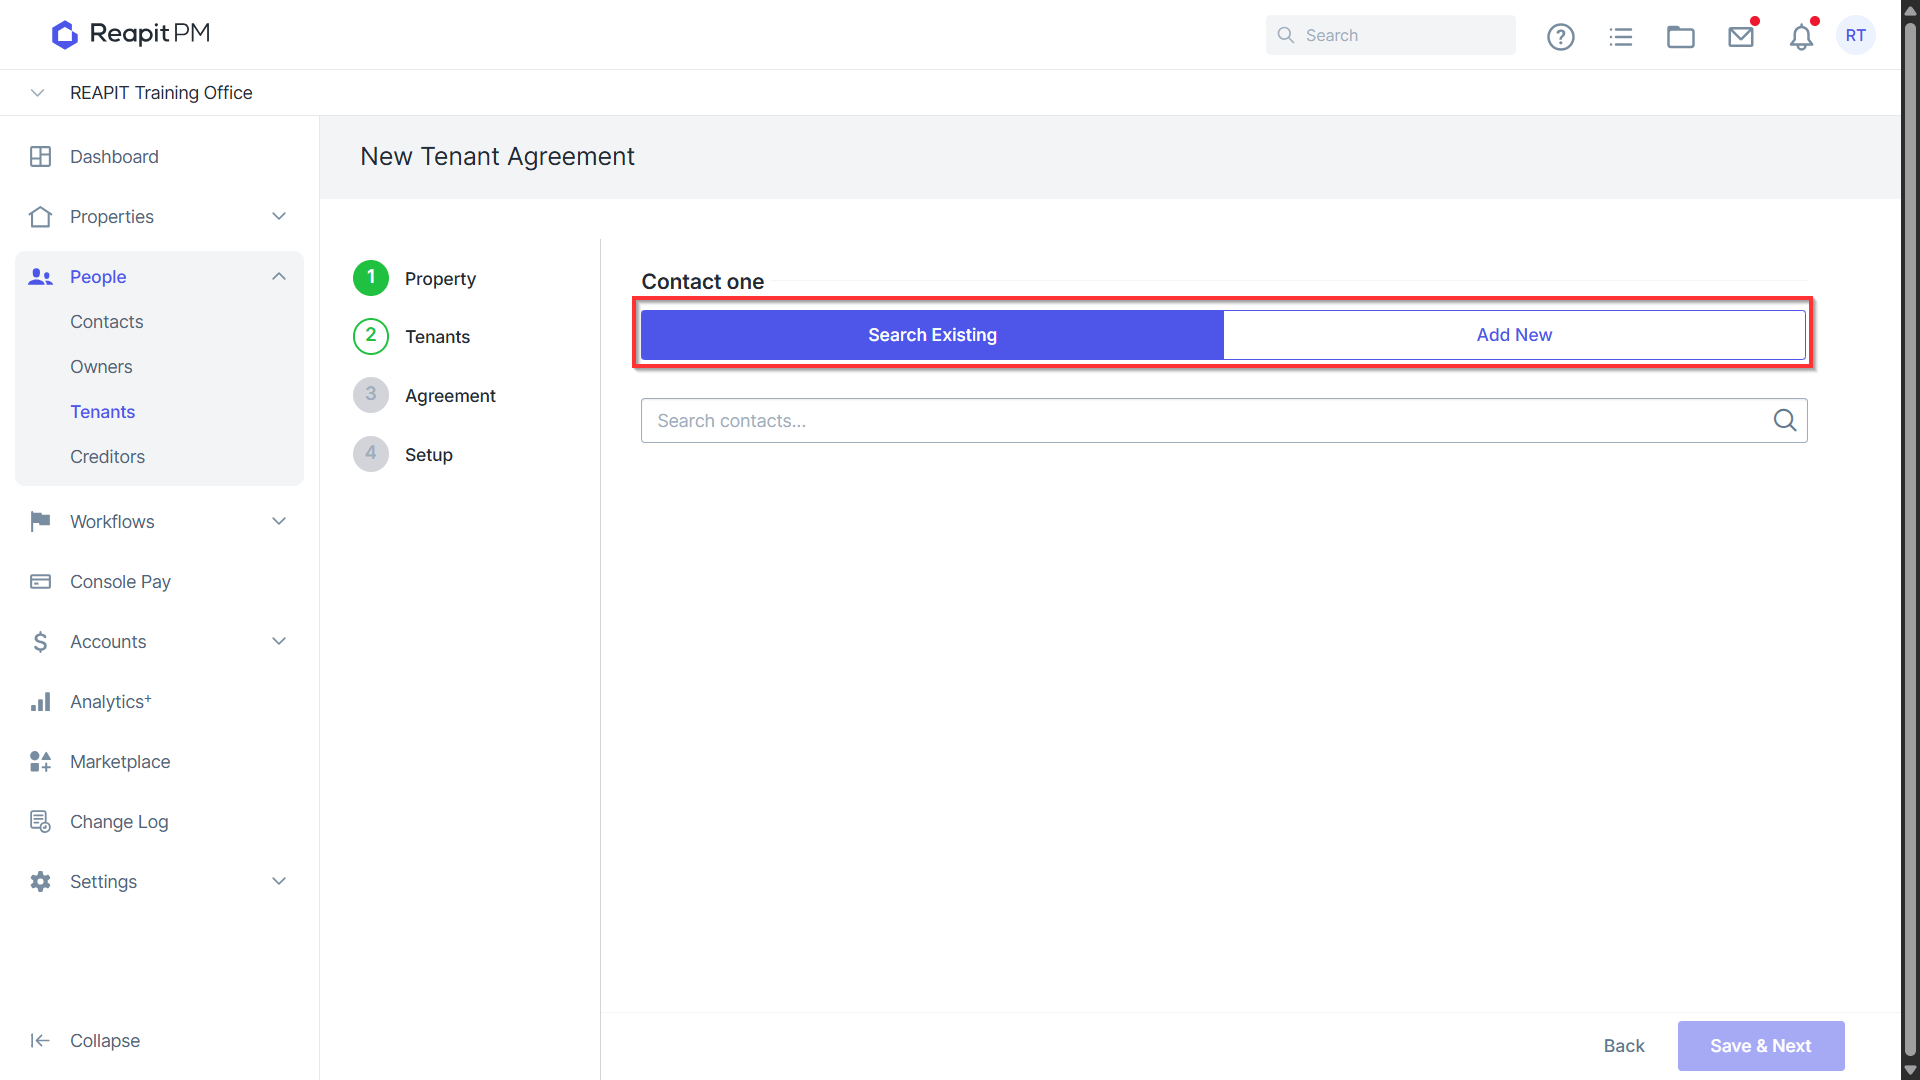
- To create a new Tenant contact click Add New. Fill in the appropriate details and complete all required fields marked with an asterisk. Click > Create Contact.
- Select > Save & Next.
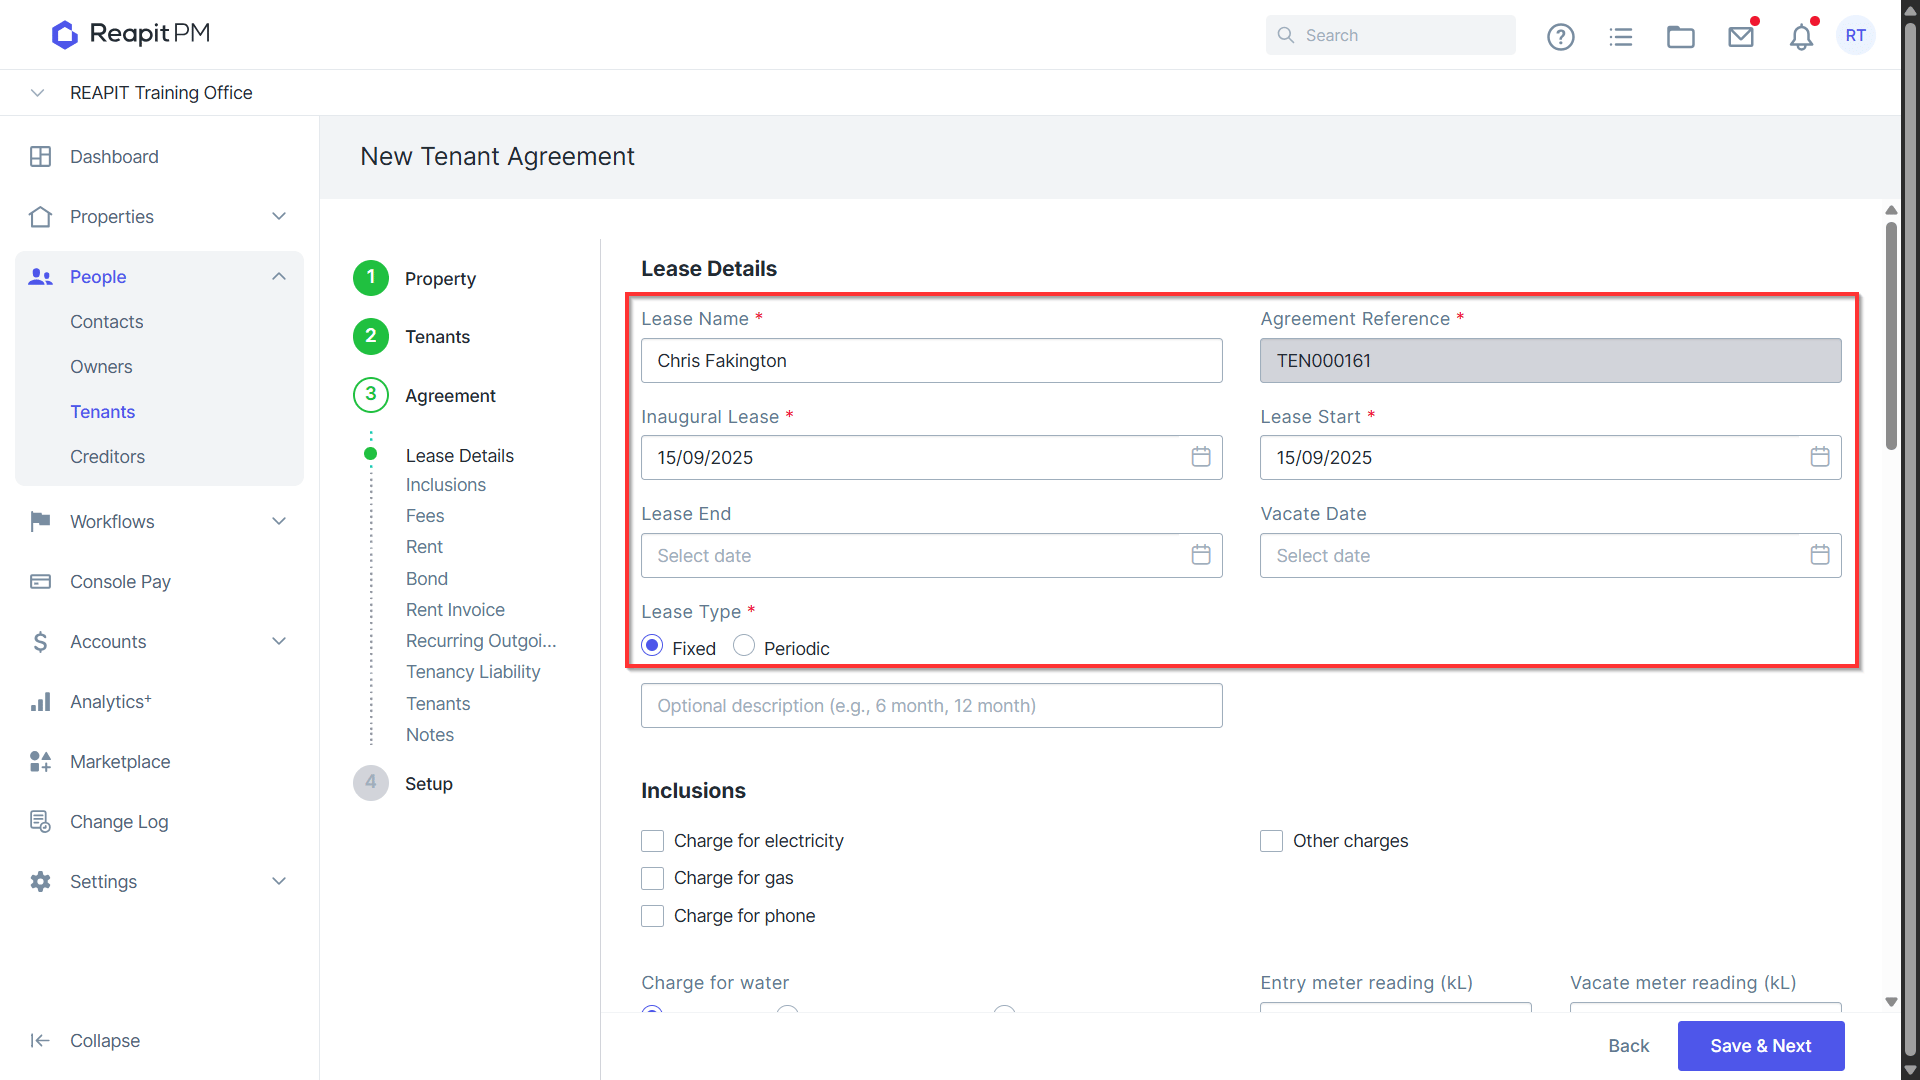
Select Inaugural Lease date. This pre-populates the Lease Begin date. *Note: The inaugural Lease is the date of the first lease with this tenant and is locked once a receipt has been entered.
Select the Lease End date taking care to ensure it is a complete period. The Lease Type is selected to Fixed as a default. Select Periodic if required.
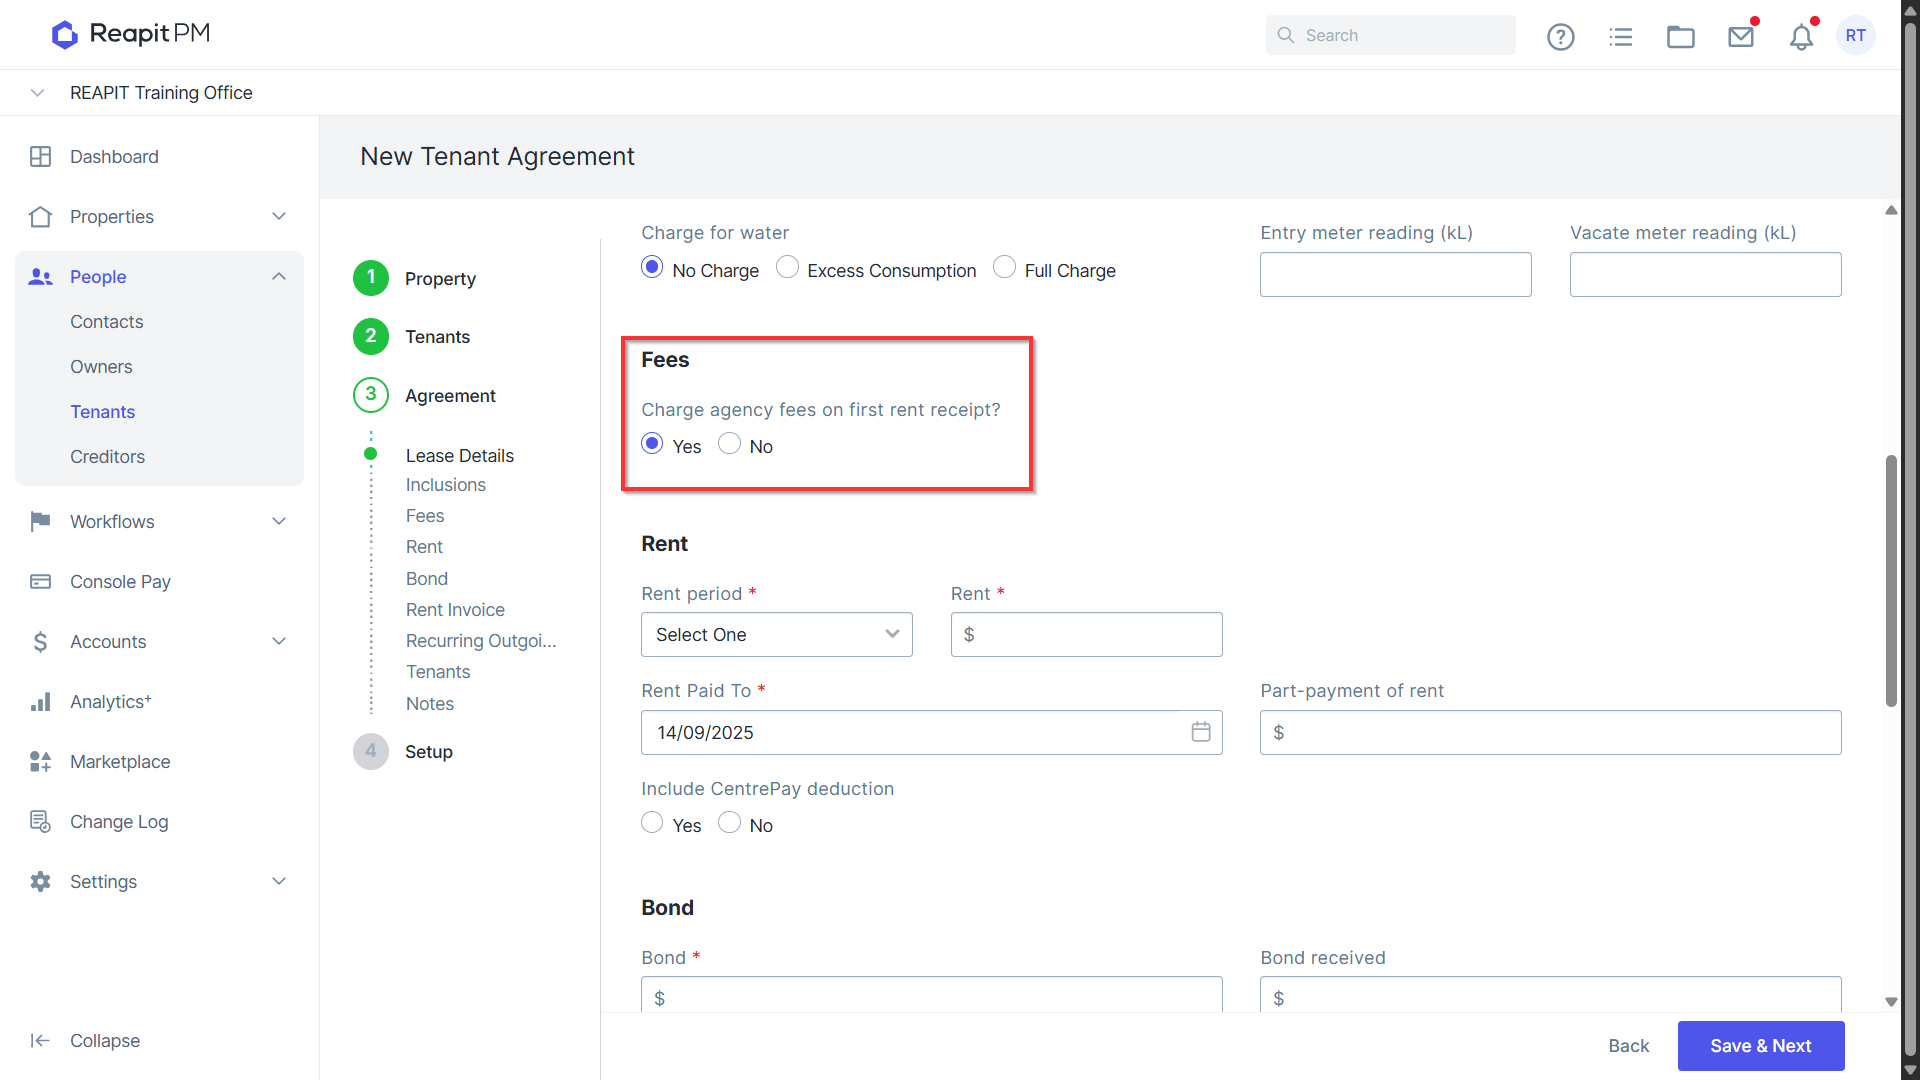
- 'Yes' is ticked by default for "Charge agency fees on first rent receipt?". The system will attempt to charge any fees that are taken "On first rent receipt" (typically letting fees). If you don’t want this to happen then Select > No.
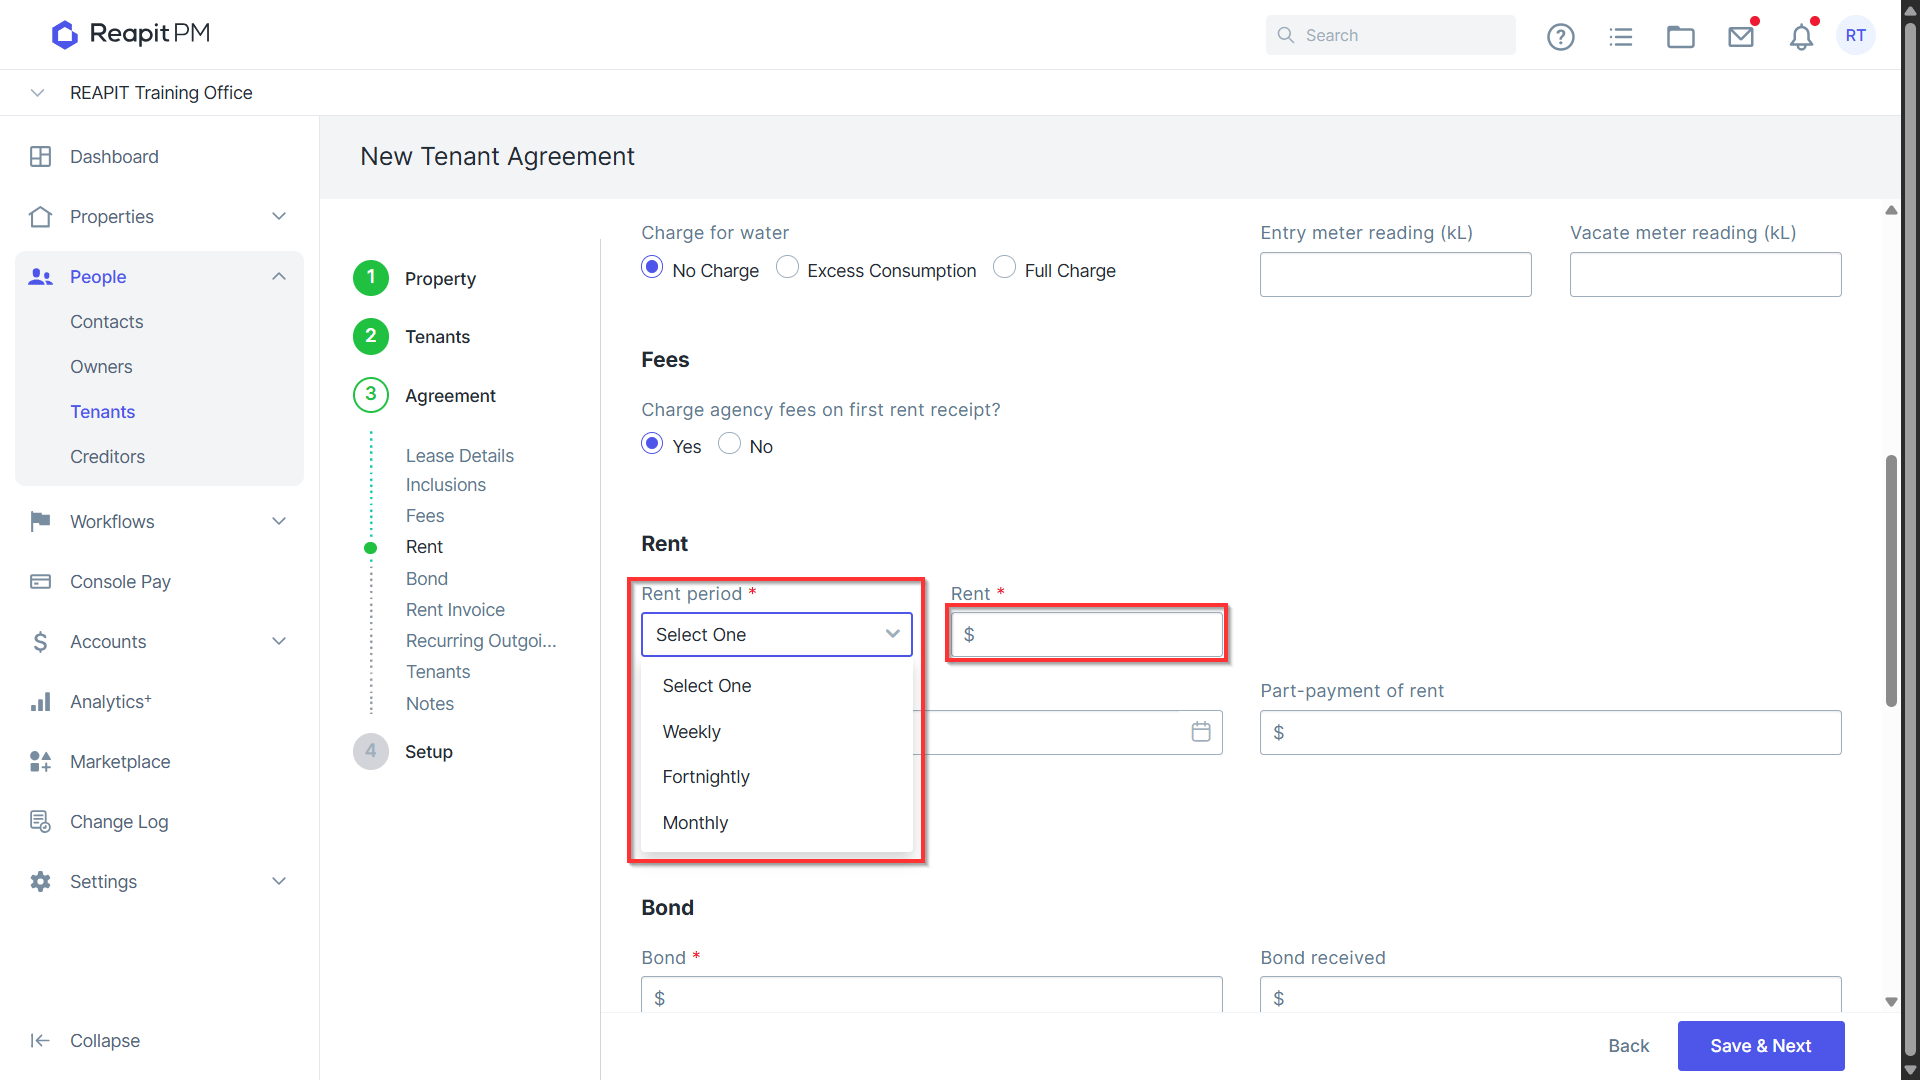
- Enter the Rent period i.e., Weekly and Rent amount. (These are mandatory fields).
The Rent Paid to date automatically pre-populates to the day prior to the lease Start date.
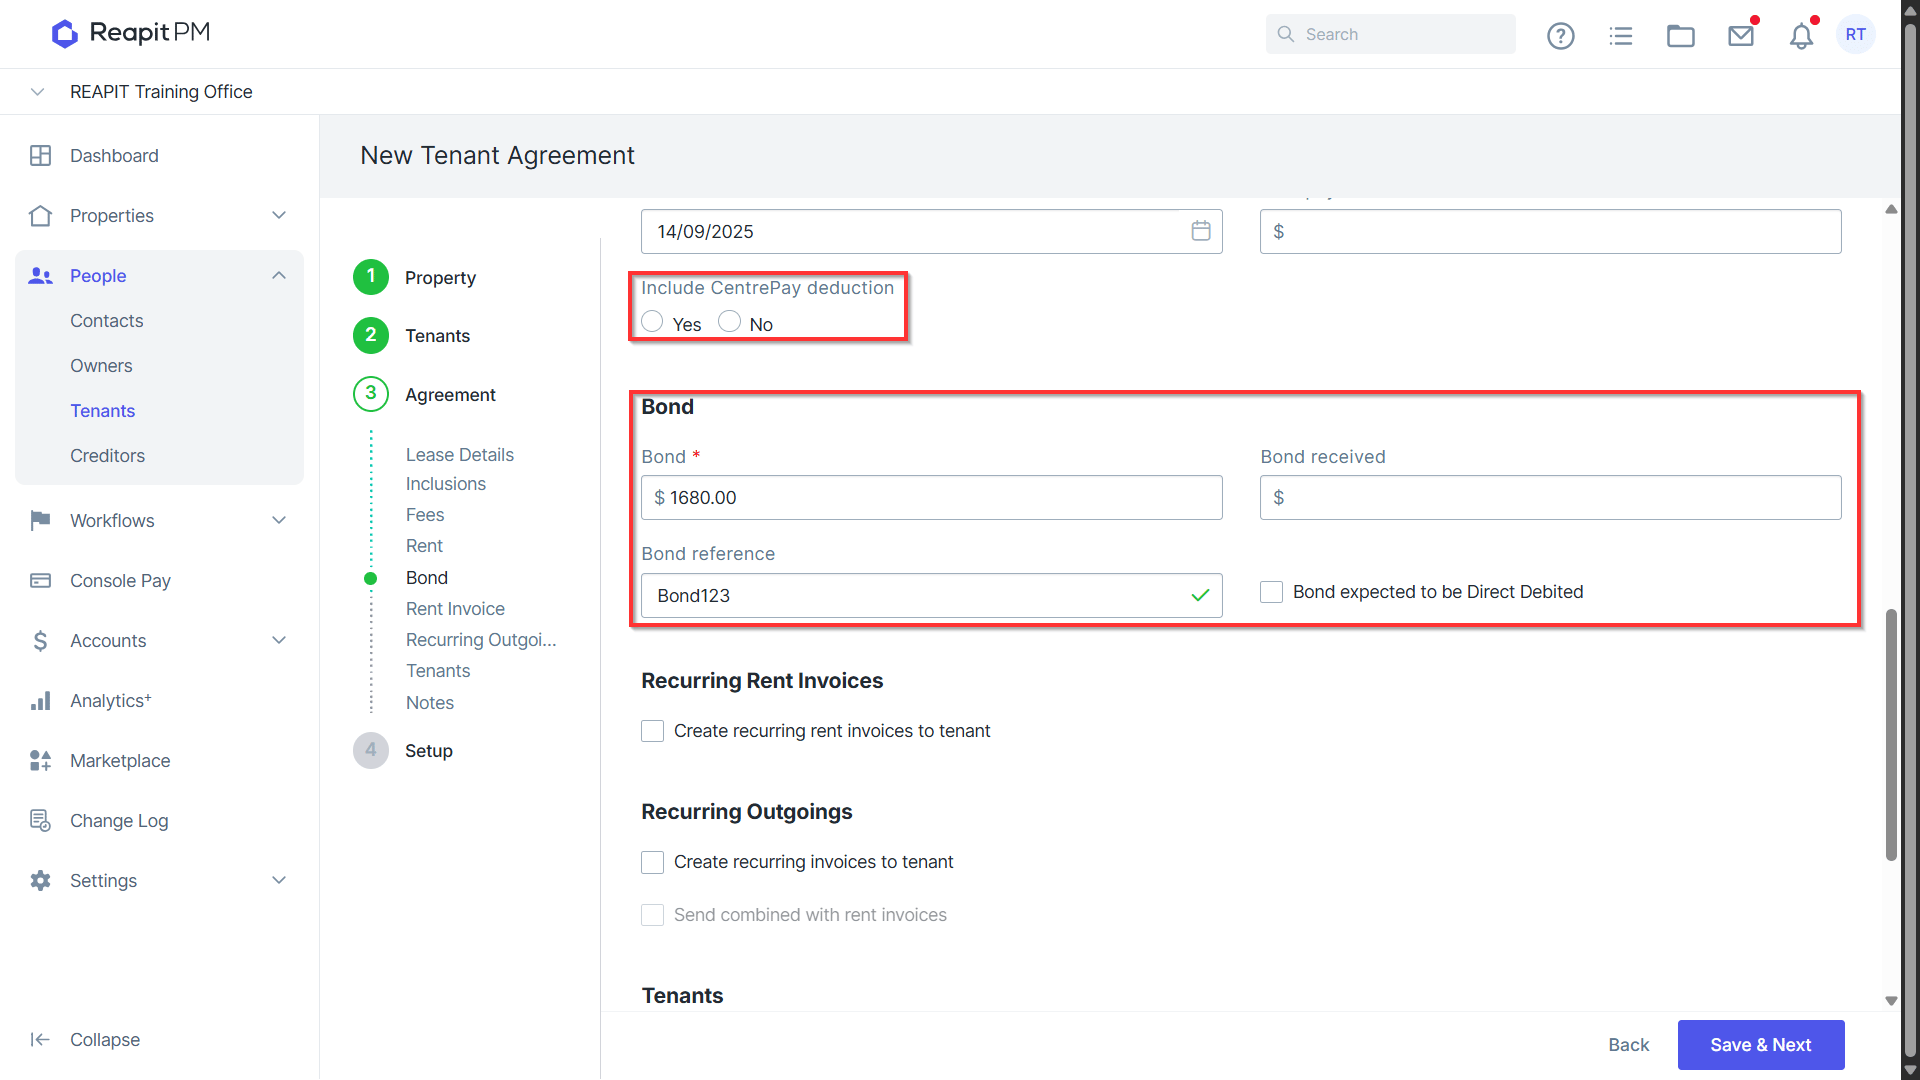
- Select to Include Centrepay deduction if required.
Note: This will ensure PM takes into account the Centrepay amount when adjusting the Paid to Dates of the tenant.
- Enter in the Bond amount required. This is dependent on location and process.
- If you are creating recurring invoices for Tenants, please see - https://help.console.com.au/s/article/Setting-up-Recurring-Tenant-Invoices
- Enter a unique Rent reference for each tenant.
*Note: The reference can contain both numeric and alphanumeric characters and must be between 2 and 15 characters in length.
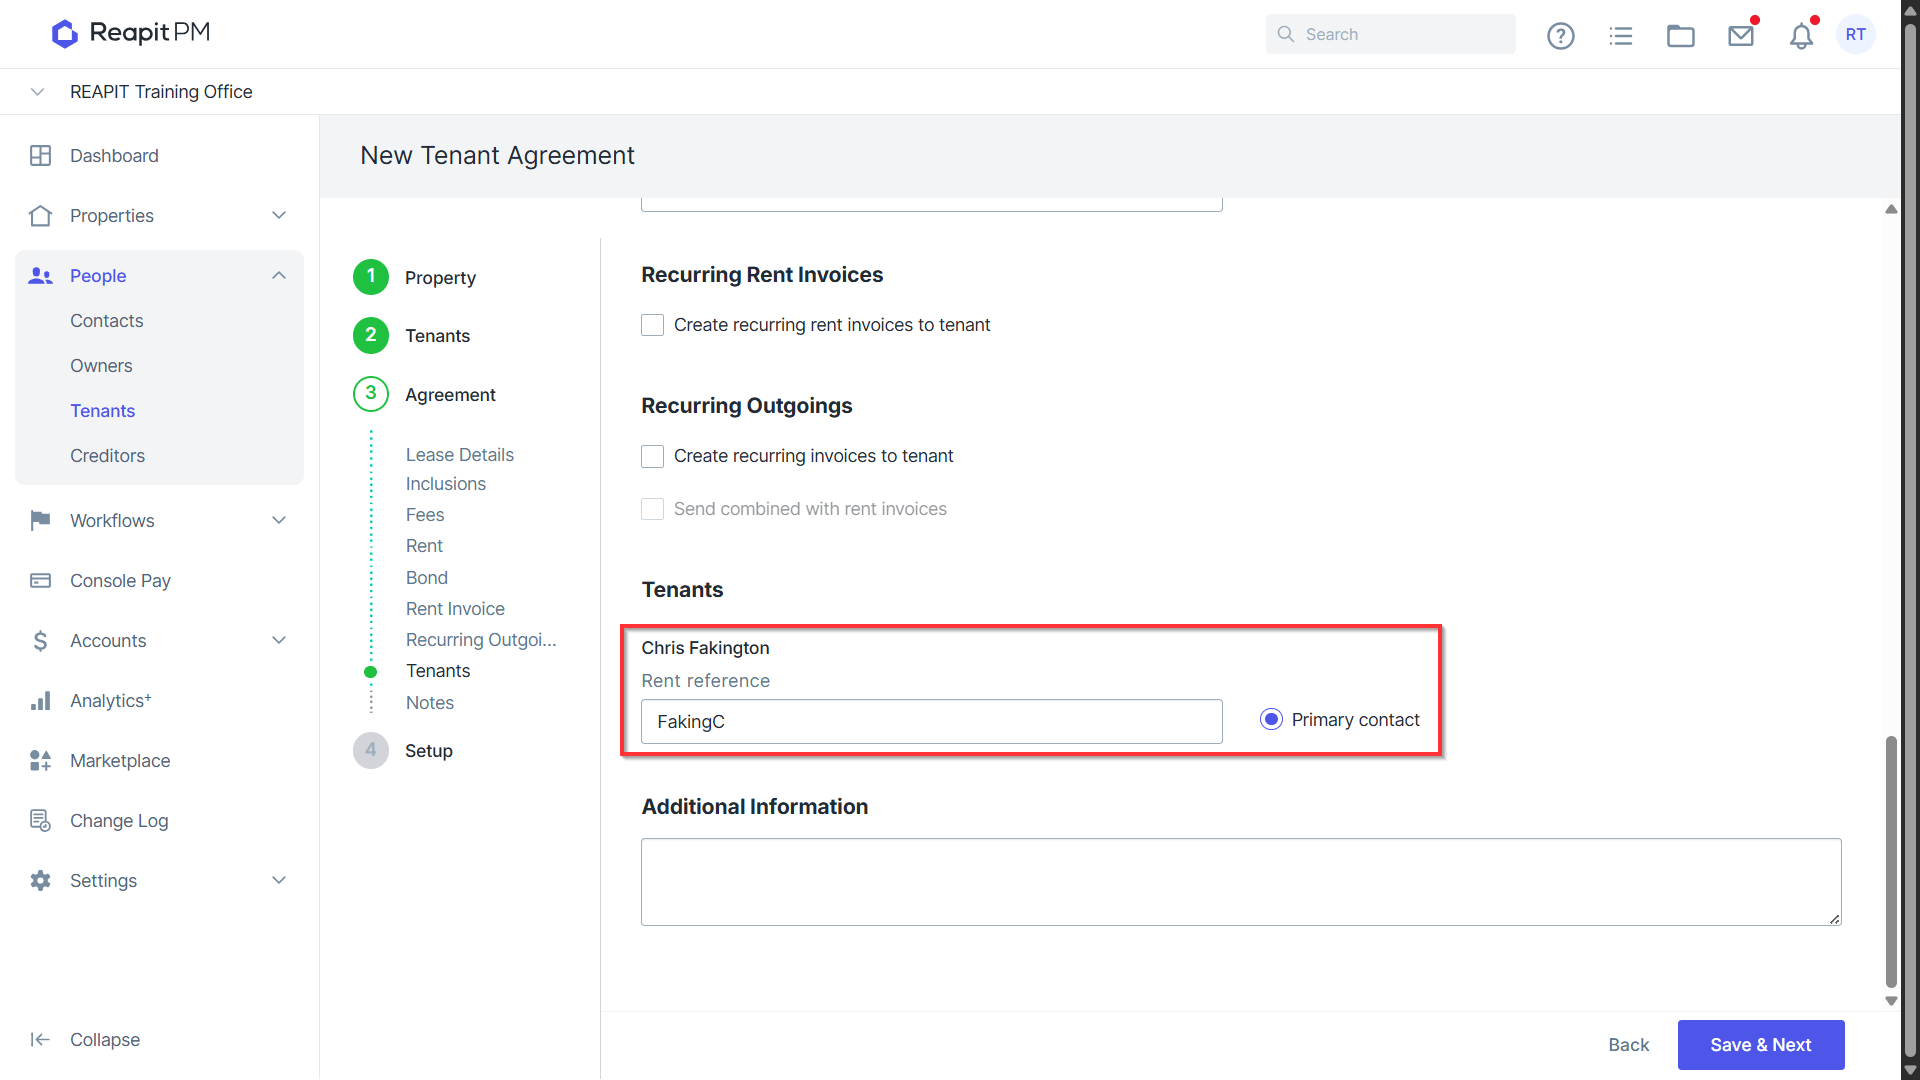
15 . Select the Primary contact for the agreement if there is more than one contact.
Select Allowed or Not Allowed for leads to be submitted.
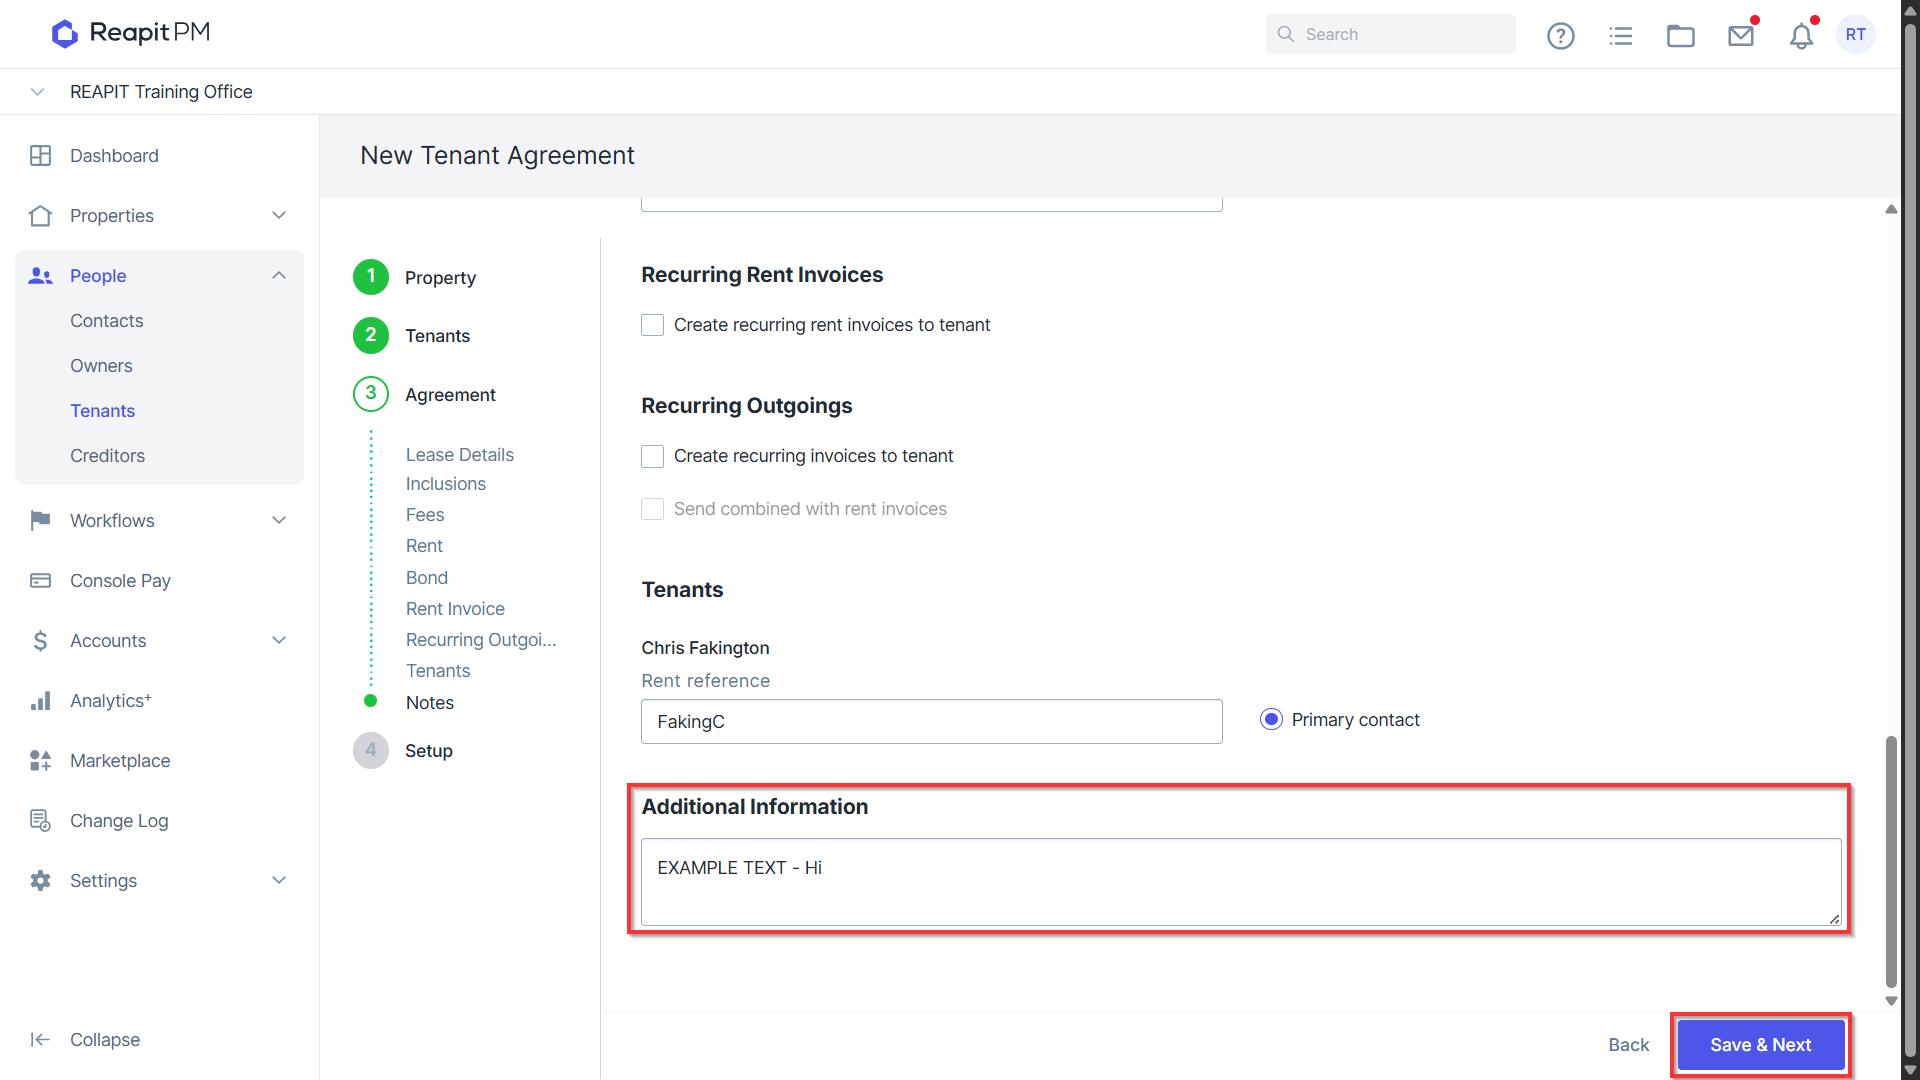
Add any Notes if required.
Select > Save & Next.
- Your Tenant is successfully created.
- Schedule a routine inspection if required. Select when the inspection will occur.
Note: This can be skipped if you don’t have a routine inspection date.
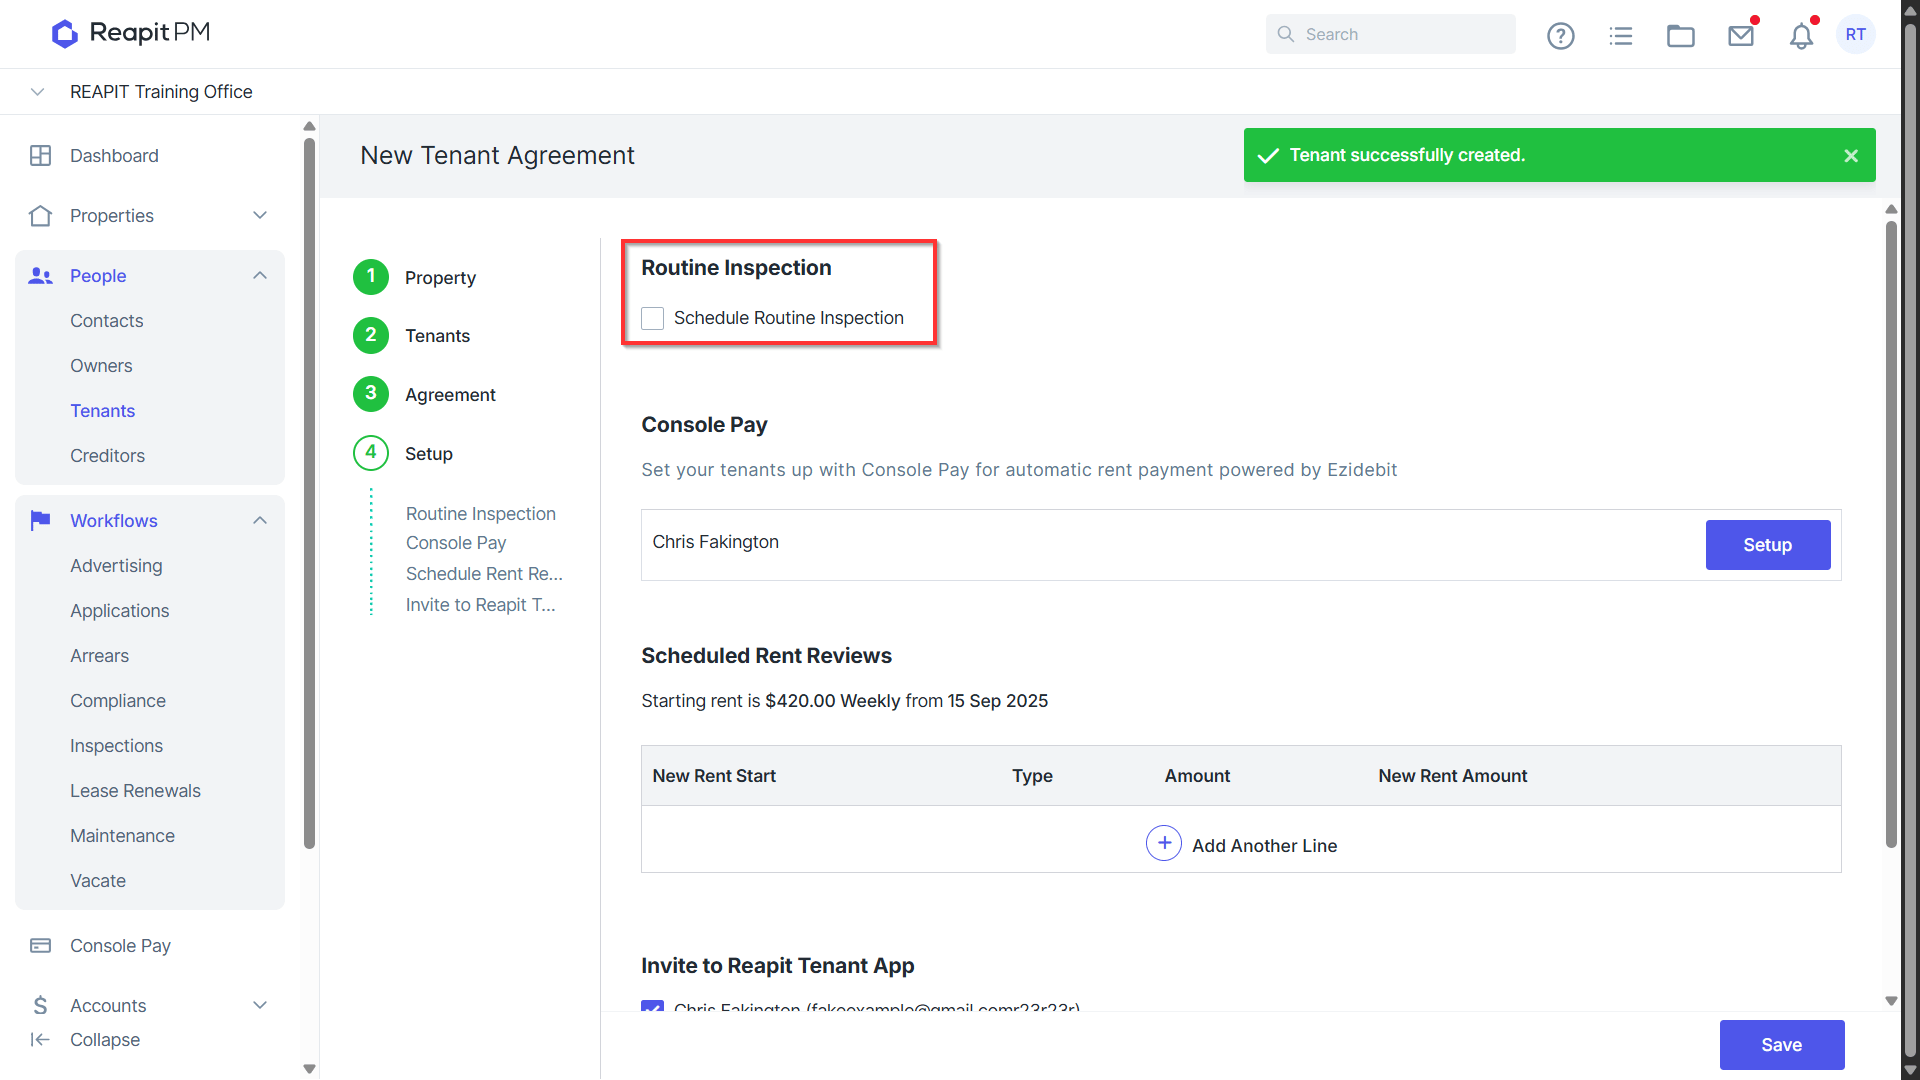
- You have the option to setup your tenants with Console Pay. Click Setup and fill in the required tenant information.
Note: This option will be if your agency is using Console Pay.
- Invite the Tenant to the Console Tenant App by selecting the tenant. Select > Save.
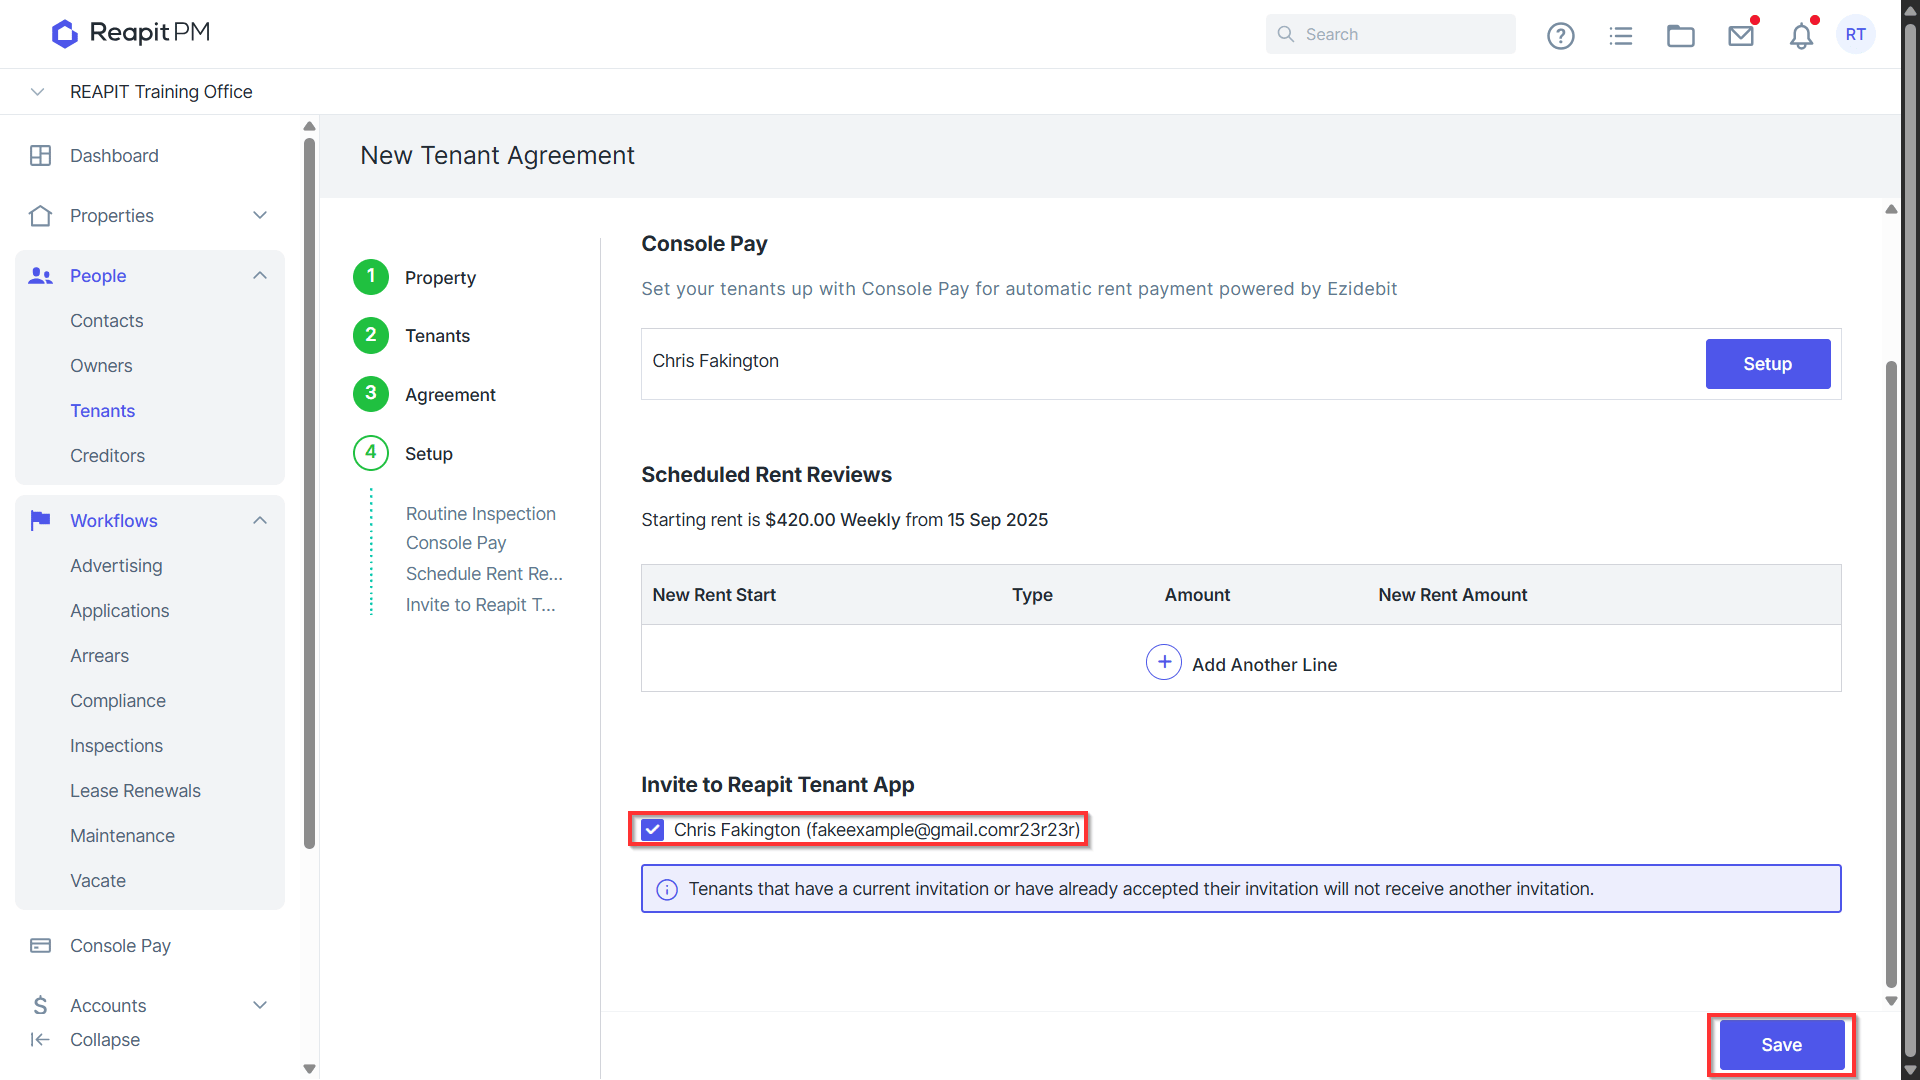
- You have successfully created a Tenant Agreement.