'%20d='M0%208a8%208%200%200%201%208-8h24a8%208%200%200%201%208%208v24a8%208%200%200%201-8%208H8a8%208%200%200%201-8-8V8Z'/%3e%3cpath%20fill='%23fff'%20d='M8.375%2013v14L20.5%2034l12.124-7v-7.737l-1.687-.975-2.806-1.62-1.082-.624v4.83l-.002%204.83H13.95V16.07l3.275-1.89%202.192-1.265%201.082-.625%203.275%201.877%202.192%201.256%201.083.62V9.782L20.5%206%208.376%2013Z'/%3e%3cdefs%3e%3clinearGradient%20id='reapit-pm__a'%20x1='20.702'%20x2='20.702'%20y1='.351'%20y2='31.228'%20gradientUnits='userSpaceOnUse'%3e%3cstop%20stop-color='%235573FD'/%3e%3cstop%20offset='.575'%20stop-color='%234E56EA'/%3e%3c/linearGradient%3e%3c/defs%3e%3c/svg%3e)
Inviting and Setting Up Users
This article will walk you through how to invite, edit and remove access to your Reapit PM office. The processes in this article include: User Access Levels Inviting a New User Editing and Removing Users from Your Office Super Administrator Access and Set Up Changing the Super Administrator
Overview
Inviting and Setting Up Users
This article will walk you through how to invite, edit and remove access to your Reapit PM office.
Note: Each employee in your office must be invited to your office when you start using Reapit PM. You need to have Office Administrator access to invite new users to your office.
For more information around connecting to the office using Reapit Connect, please see - https://help.console.com.au/s/article/Reapit-Connect-and-Console-Cloud
The processes in this article include:
- User Access Levels
- Inviting a New User
- Editing and Removing Users from Your Office
- Super Administrator Access and Set Up
- Changing the Super Administrator
User Access Levels
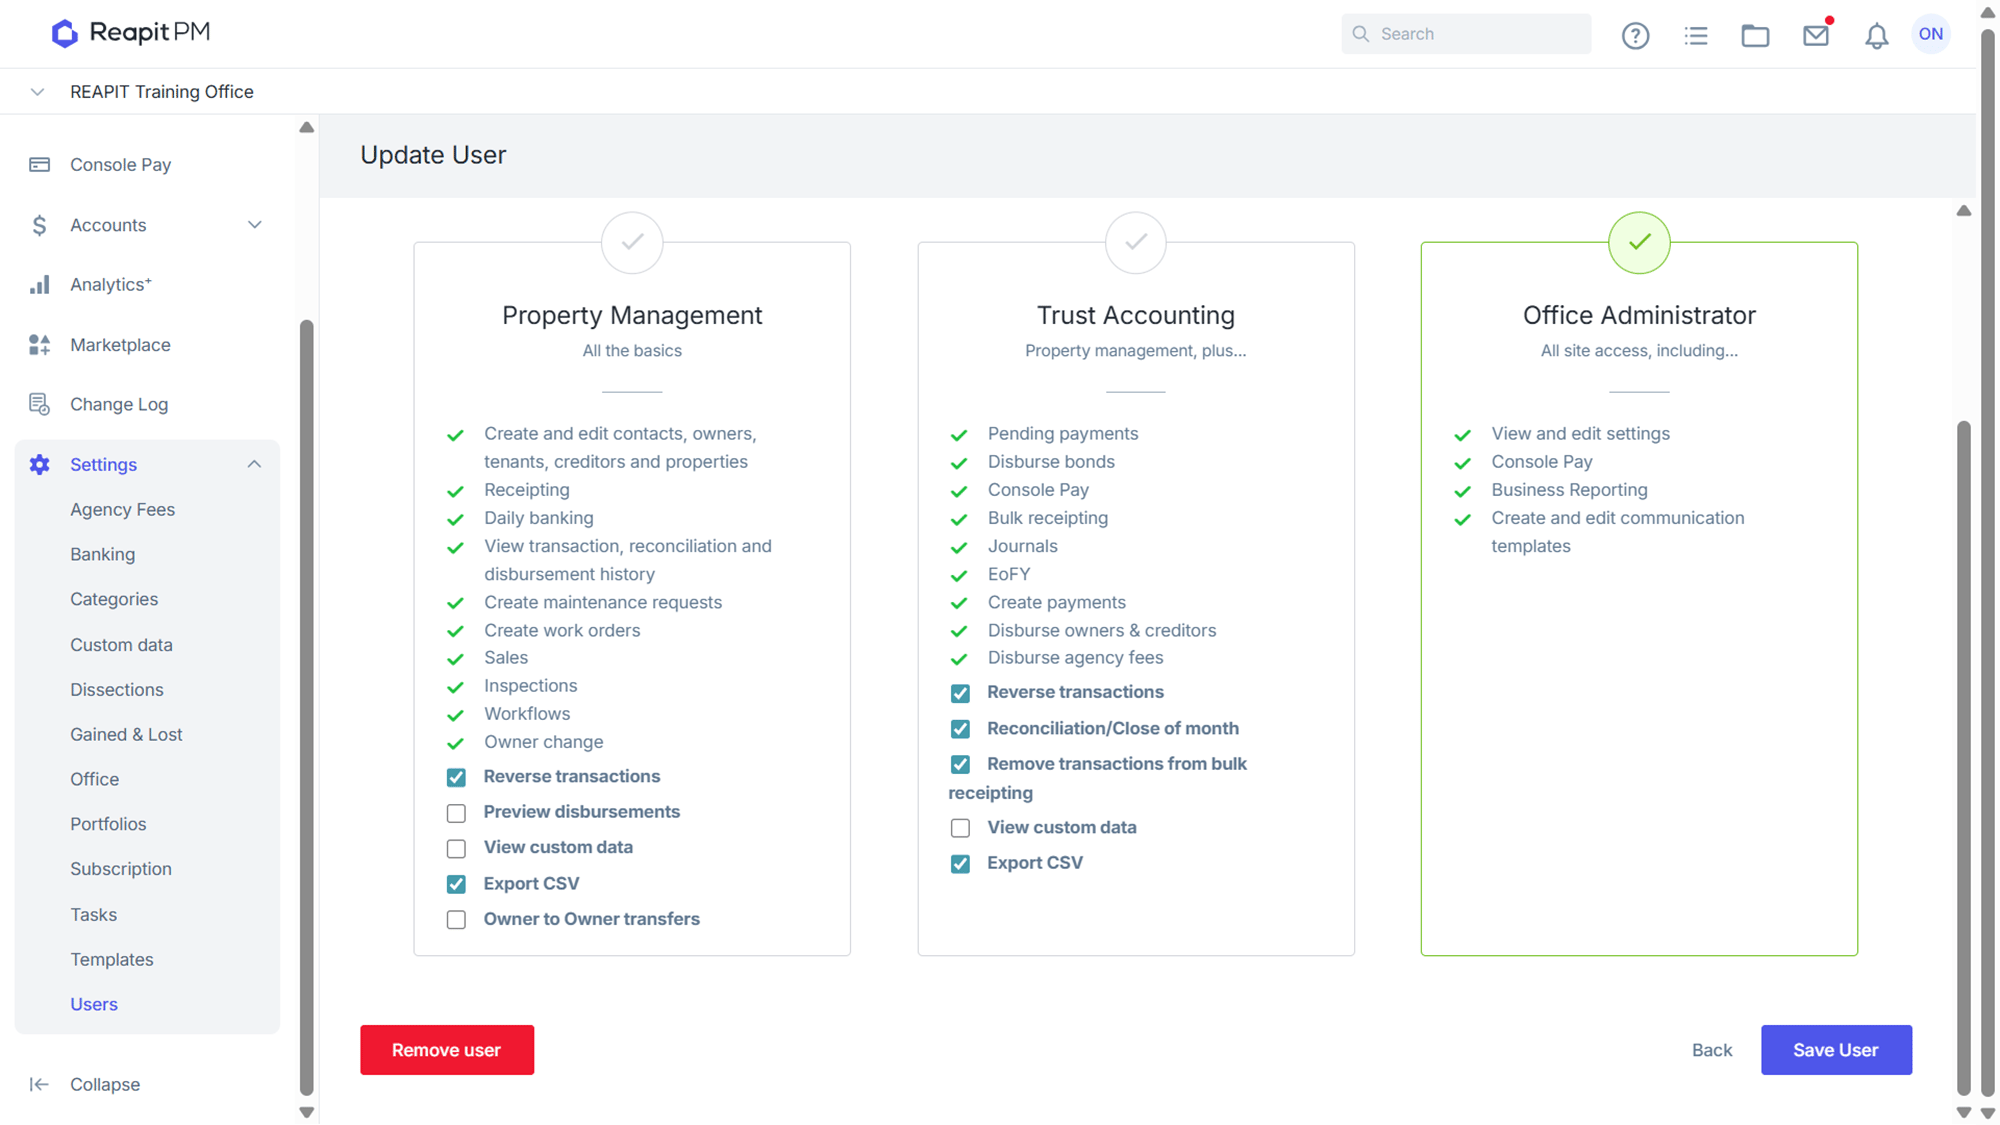
There are three levels you can assign to a staff member. It is recommended you assign the appropriate level of access to the person's role. There are some customisations available in the default sets.
- Property Manager: Provides access to all property management functions in Reapit PM, maintenance, basic receipting, sales, workflows, inspections etc.
- Trust Accounting: Provides access to all property management functions as well as accounting functions such as reconciliation, disbursements, EOFY, close of month etc.
- Office Administrator: Provides full access to all functions in Reapit PM. Usually assigned to Principals, Office Managers and Senior PM’s who perform a number of functions.
Inviting a New User
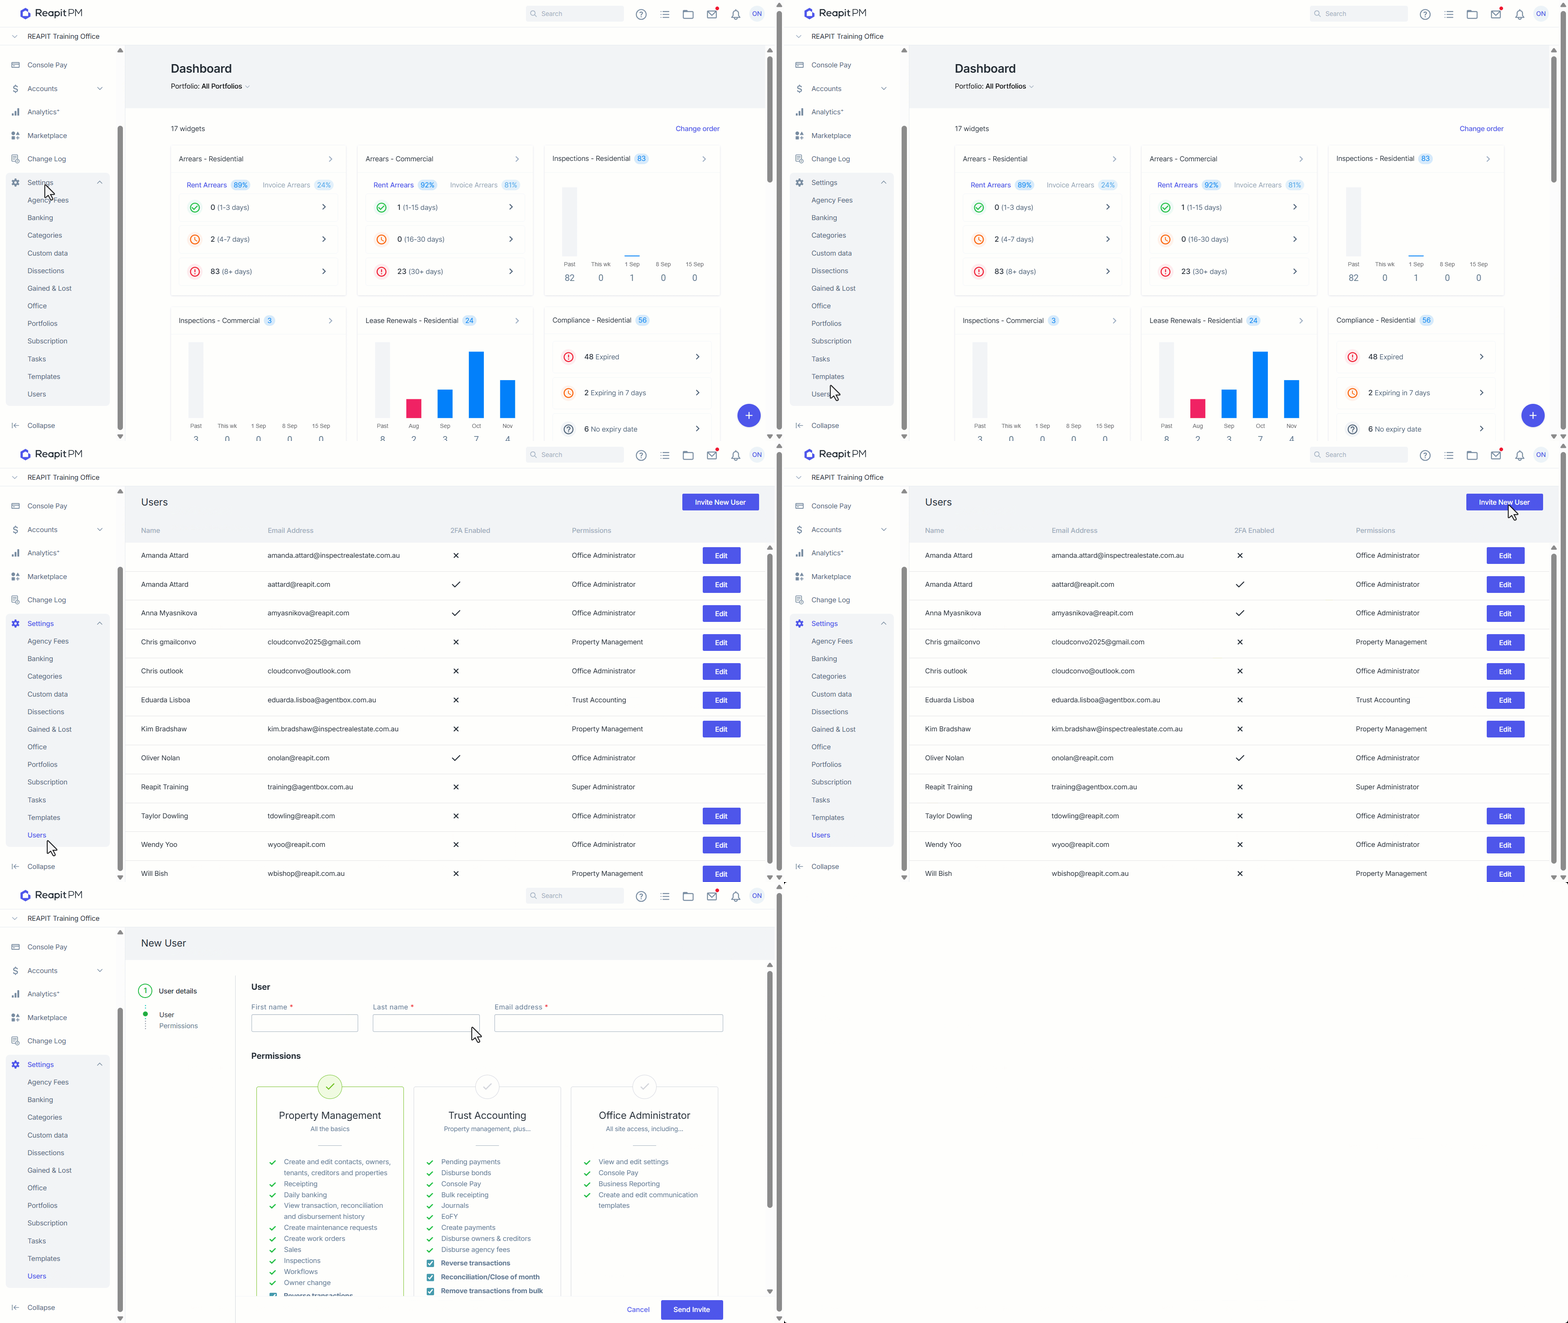
This process will send an invitation to a new users email address allowing them to access Reapit PM.
For more information around connecting to the office using Reapit Connect, please see - https://help.console.com.au/s/article/Reapit-Connect-and-Console-Cloud
- Click on Settings.
- Click on Users.
- Click on Invite New User.
- Enter full name, email address and select the access level, ticking any special access.
- Click Send Invite.
Editing and Removing Users from Your Office
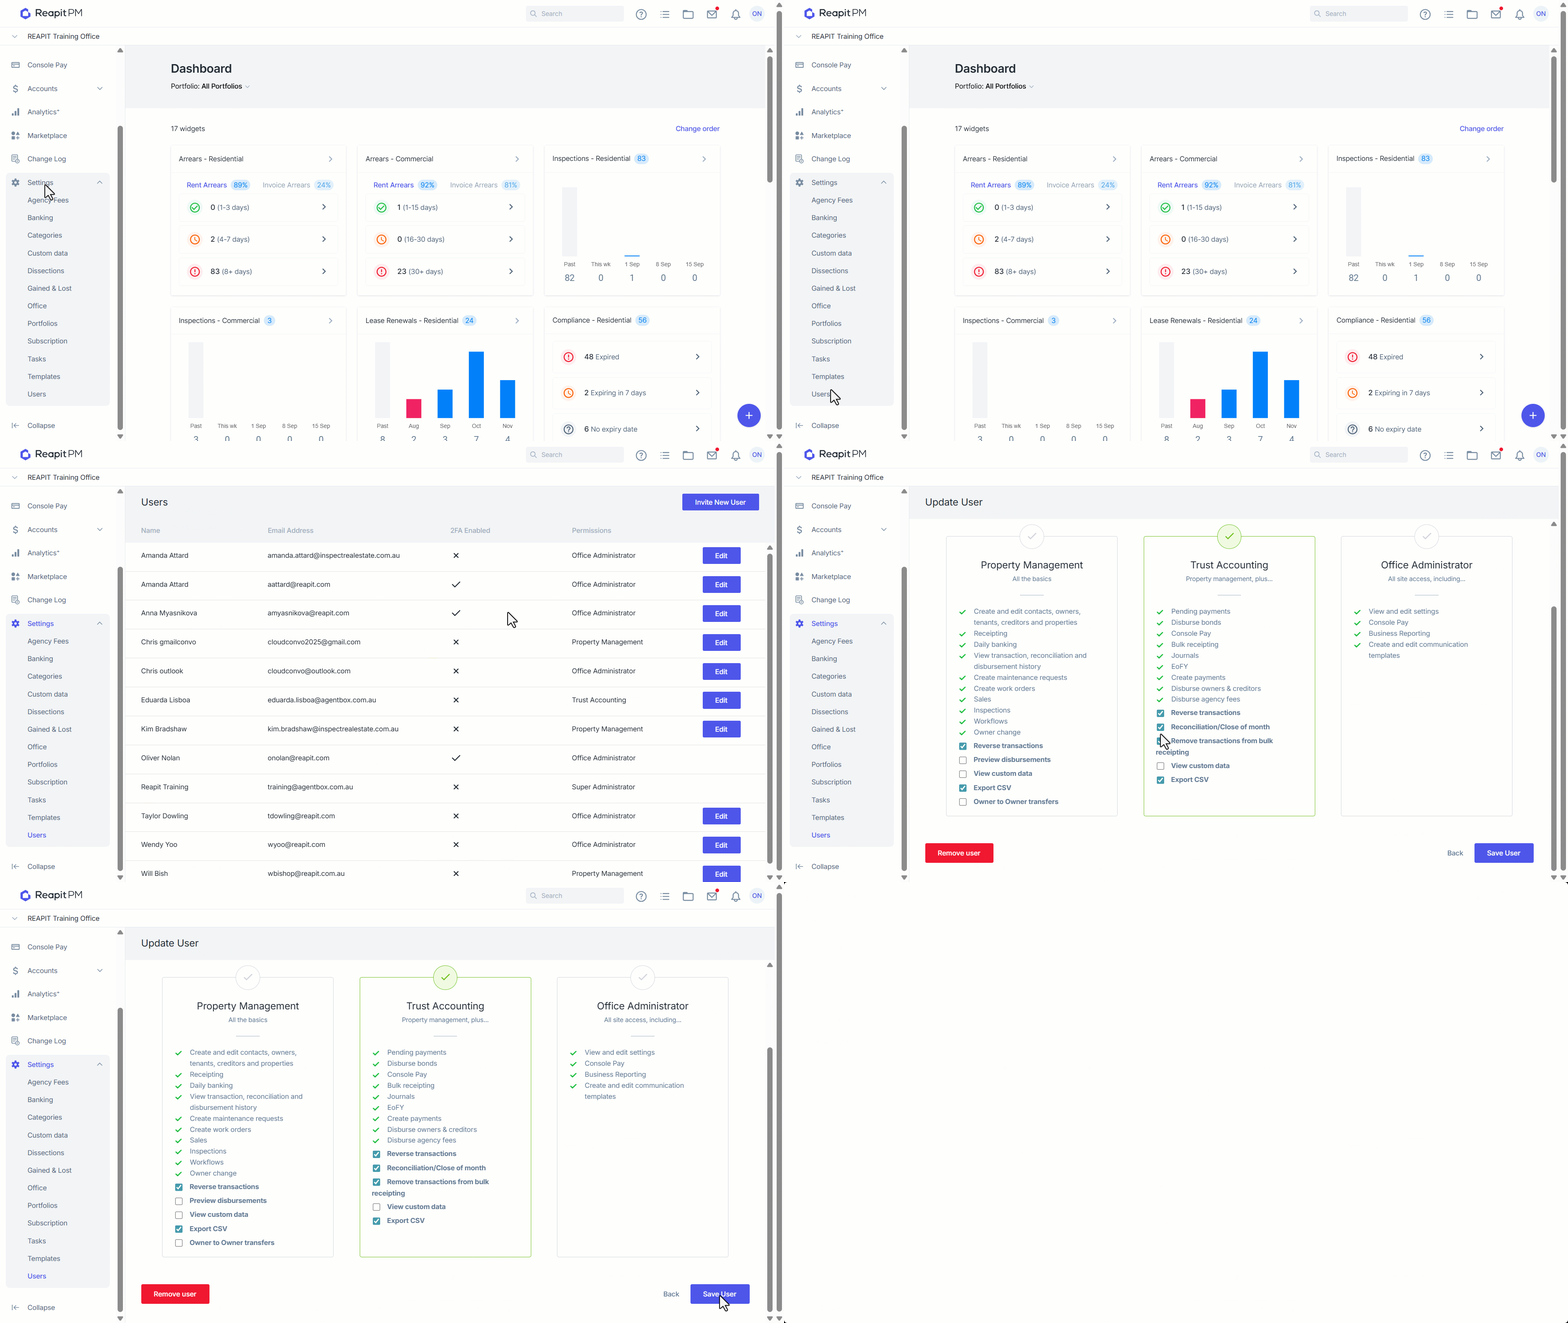
- Click on Settings.
- Click on Users.
- Navigate to the user and click Edit.
- Select the level of access & any additional access options.
- Click Save. Alternatively if you would like to remove a user, click Remove user.
Super Administrator Access and Set Up
What can a Super Admin user do? Super Admin is all around Analytics. They can manage who can access the reports.
- A Super Administrator must first be an Office Administrator.
- If no Super Administrator has been selected for an Office, any Office Administrator can self appoint themselves as the Super Administrator by navigating to Settings > Users.
- All Office Administrators are notified by email that an Office Administrator has appointed themselves as the Super Administrator.
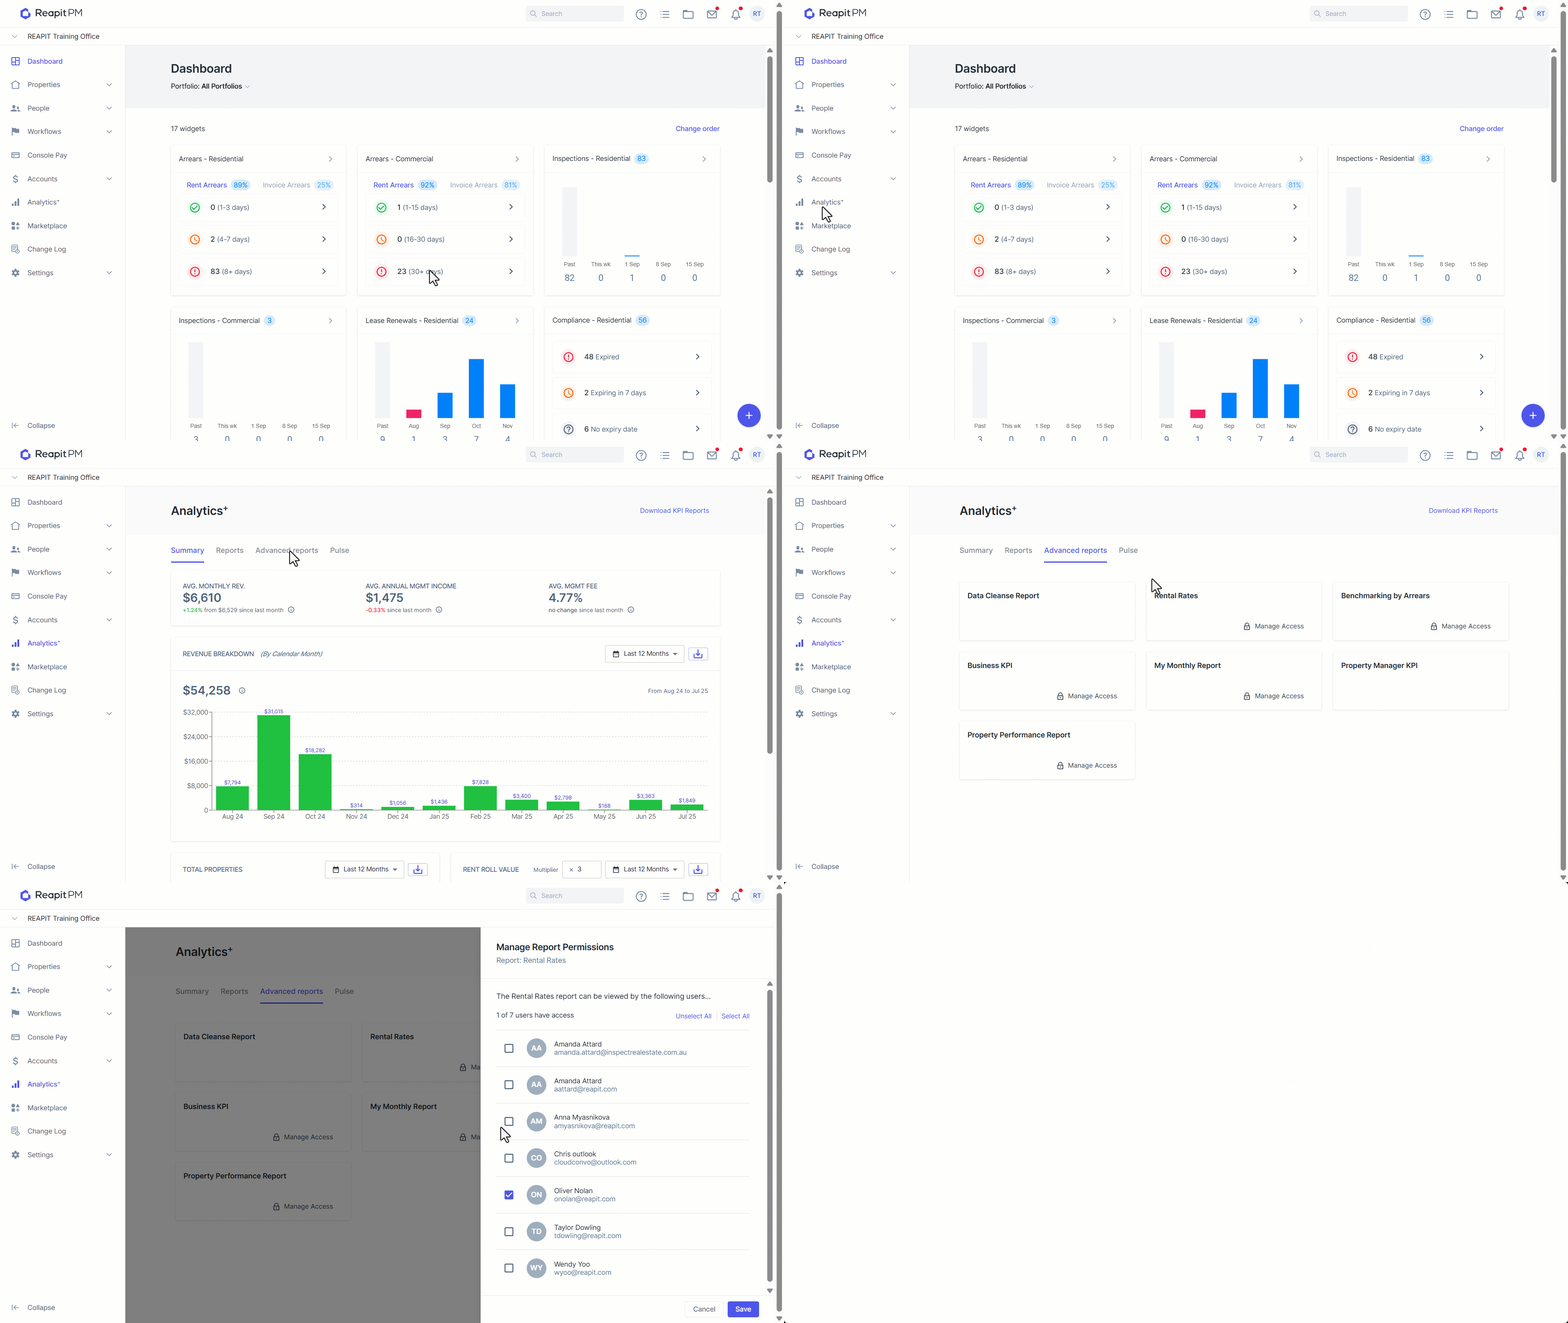
Changing the Super Administrator
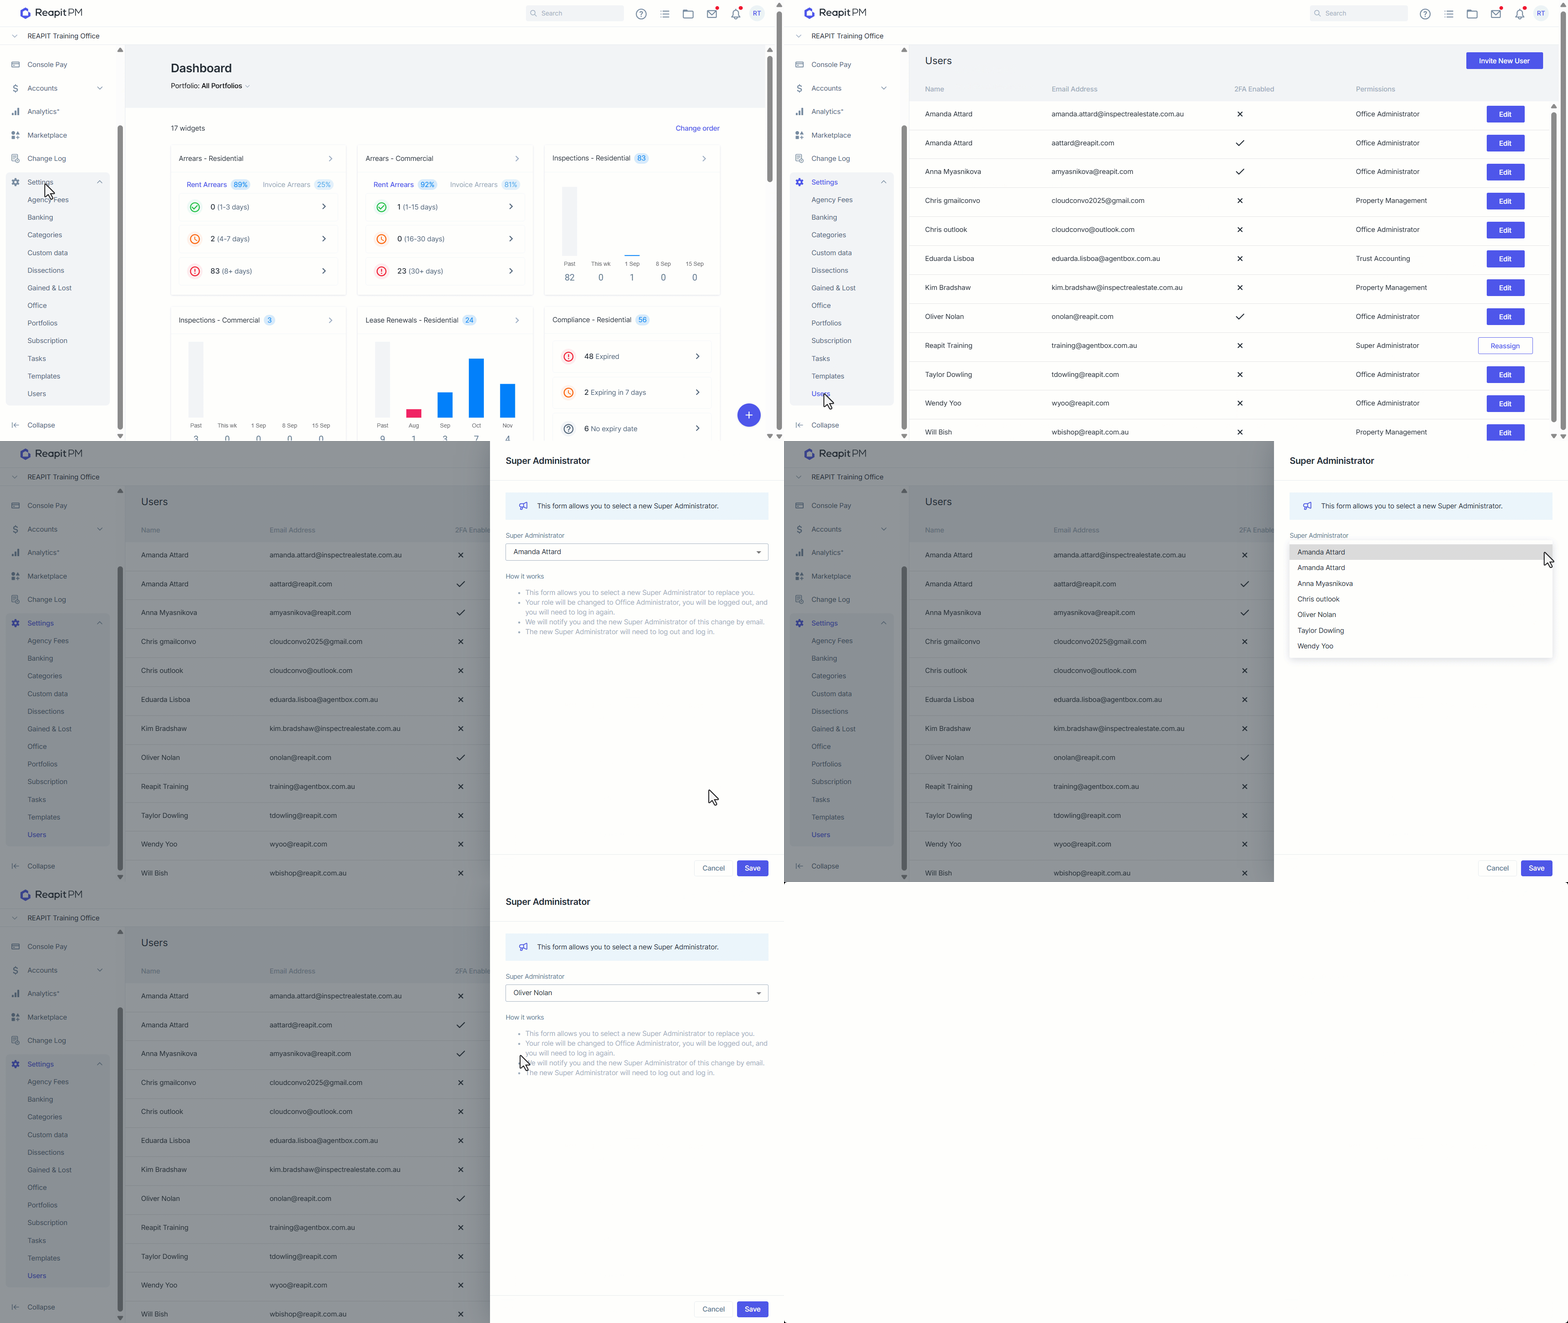
If you are the Super Administrator and wish to give the role to another Office Administrator:
- Click on Settings.
- Click on Users.
- Click on Reassign to the right-hand side of your row.
- Select the Office Administrator that you wish to make the new Super Administrator from the dropdown.
- Click Save. A security notification email will be sent to the current super administrator and the new super administrator.