'%20d='M0%208a8%208%200%200%201%208-8h24a8%208%200%200%201%208%208v24a8%208%200%200%201-8%208H8a8%208%200%200%201-8-8V8Z'/%3e%3cpath%20fill='%23fff'%20d='M8.375%2013v14L20.5%2034l12.124-7v-7.737l-1.687-.975-2.806-1.62-1.082-.624v4.83l-.002%204.83H13.95V16.07l3.275-1.89%202.192-1.265%201.082-.625%203.275%201.877%202.192%201.256%201.083.62V9.782L20.5%206%208.376%2013Z'/%3e%3cdefs%3e%3clinearGradient%20id='reapit-pm__a'%20x1='20.702'%20x2='20.702'%20y1='.351'%20y2='31.228'%20gradientUnits='userSpaceOnUse'%3e%3cstop%20stop-color='%235573FD'/%3e%3cstop%20offset='.575'%20stop-color='%234E56EA'/%3e%3c/linearGradient%3e%3c/defs%3e%3c/svg%3e)
How to Download Inspection Photos
This article will guide you through downloading images from Entry / Exit inspection reports to your device.
This Reapit PM article will guide you through downloading images from Entry / Exit inspection reports to your device.
The processes in this article include:
- How to Download Inspection Report Images
- Downloading Individual Inspection Report Images
How to Download Inspection Report Images
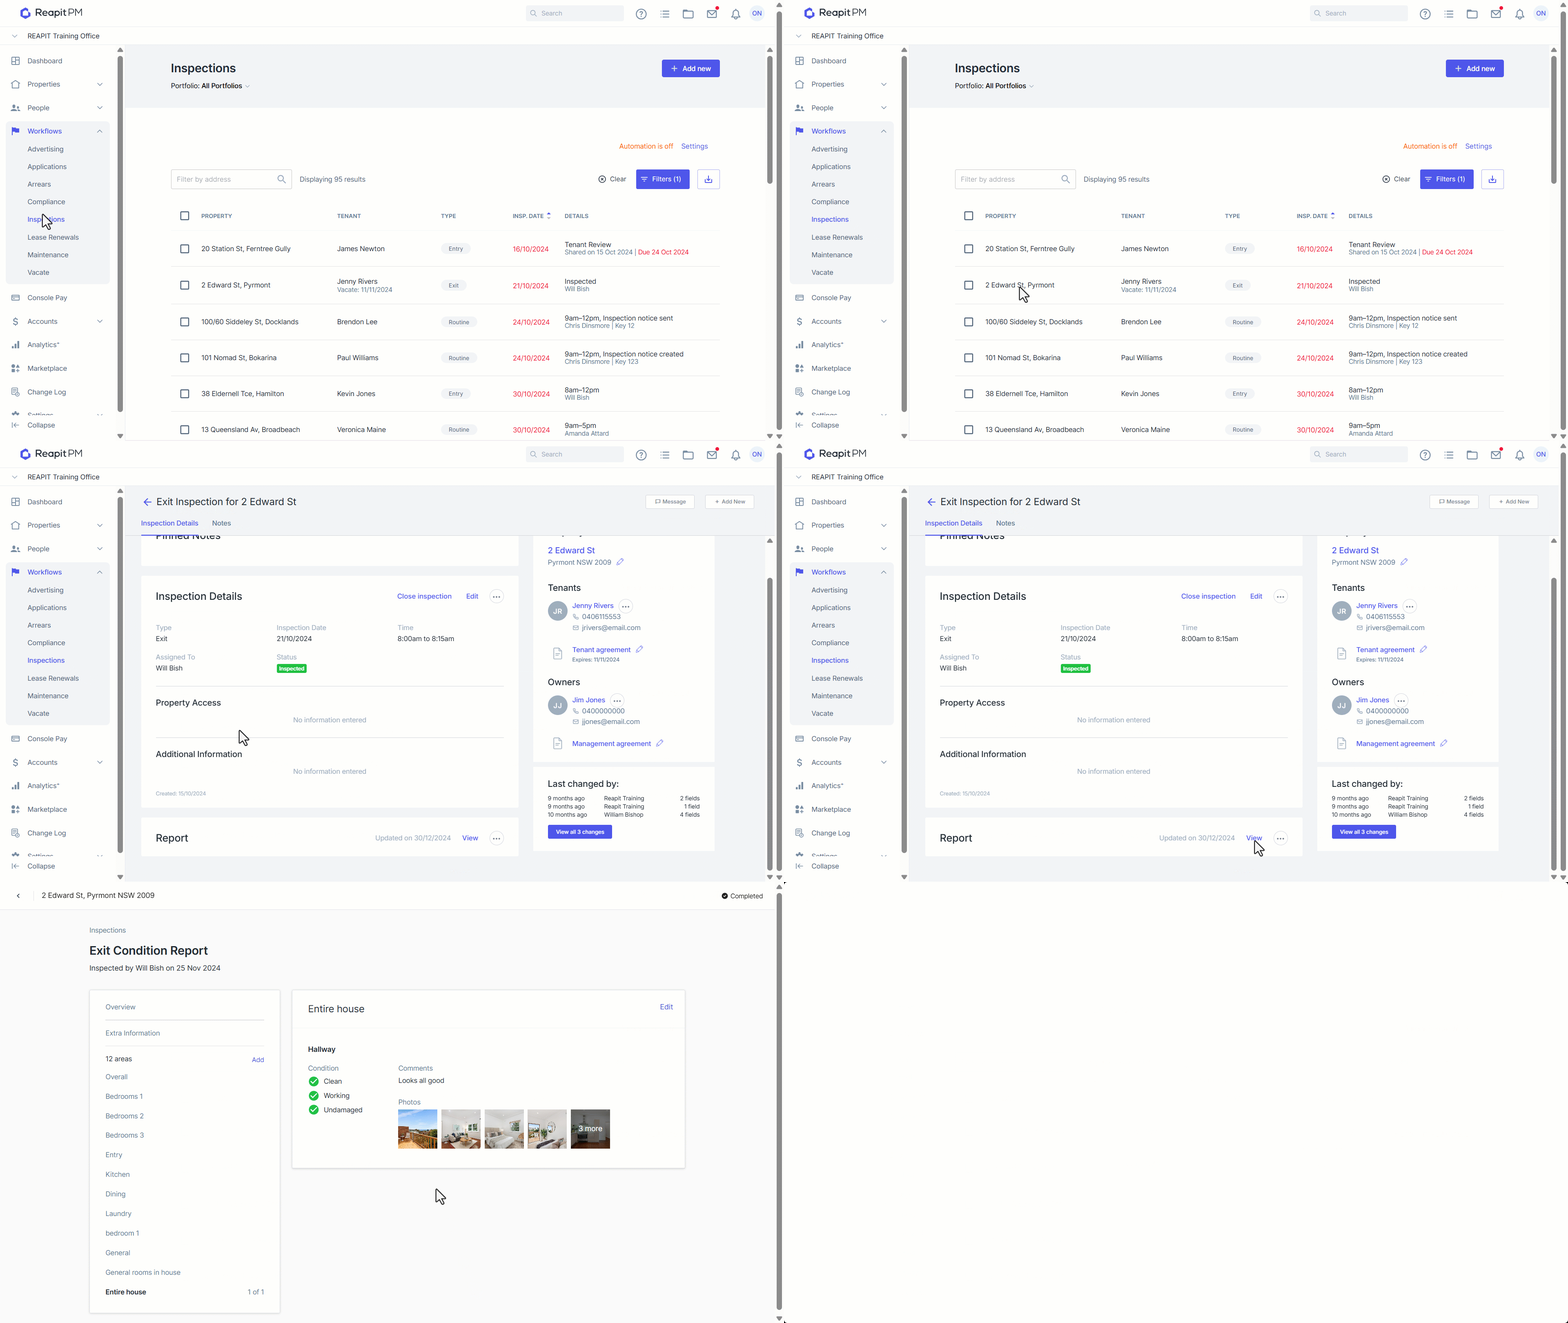
1. Click on Workflows.
2. Click on Inspections.
3. Search and select the address.
4. Locate the Entry or Exit inspection report in the workflow. If required, you can use the filtering to specific results or the search bar to locate the property address.
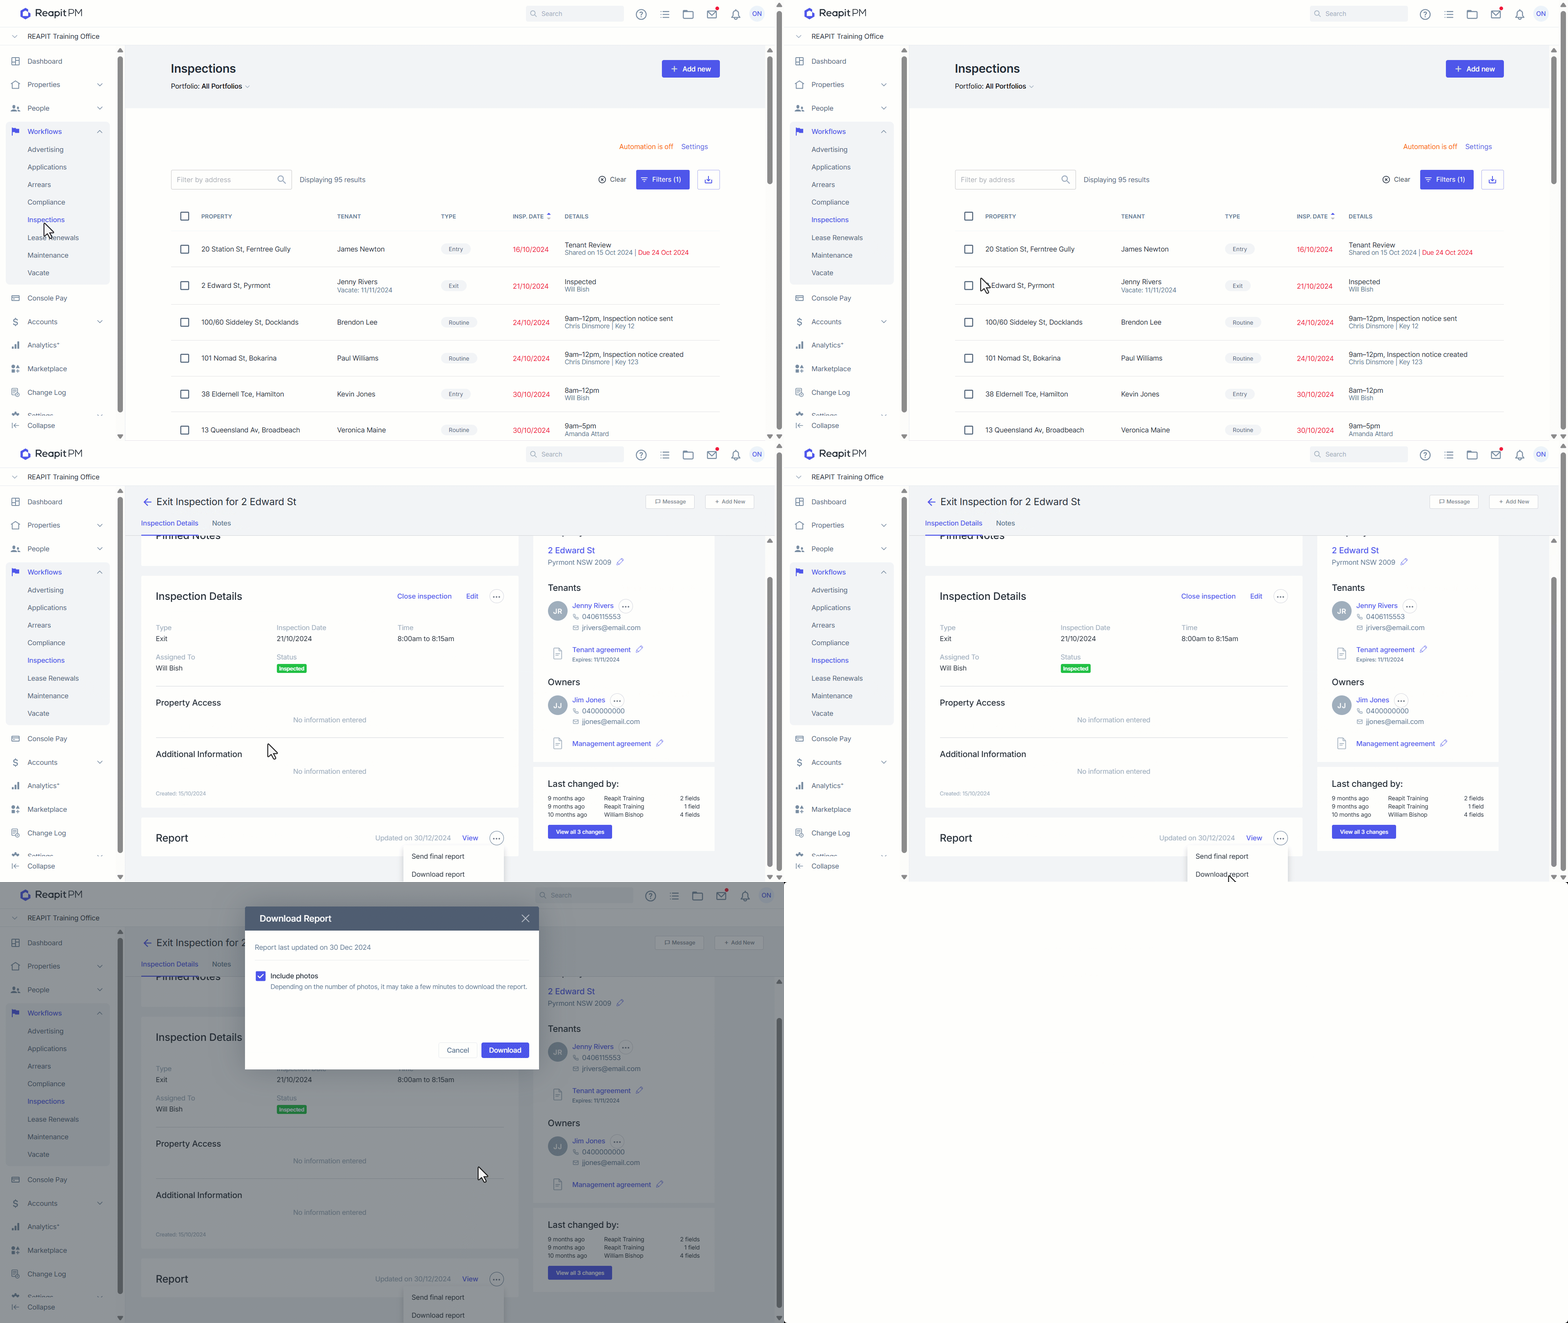
5. From the completed inspection, select the 3-dots to the right of the inspection report and select Download Report.
6. A prompt will appear confirming if you would like images to appear on the inspection report. Select Download to proceed.
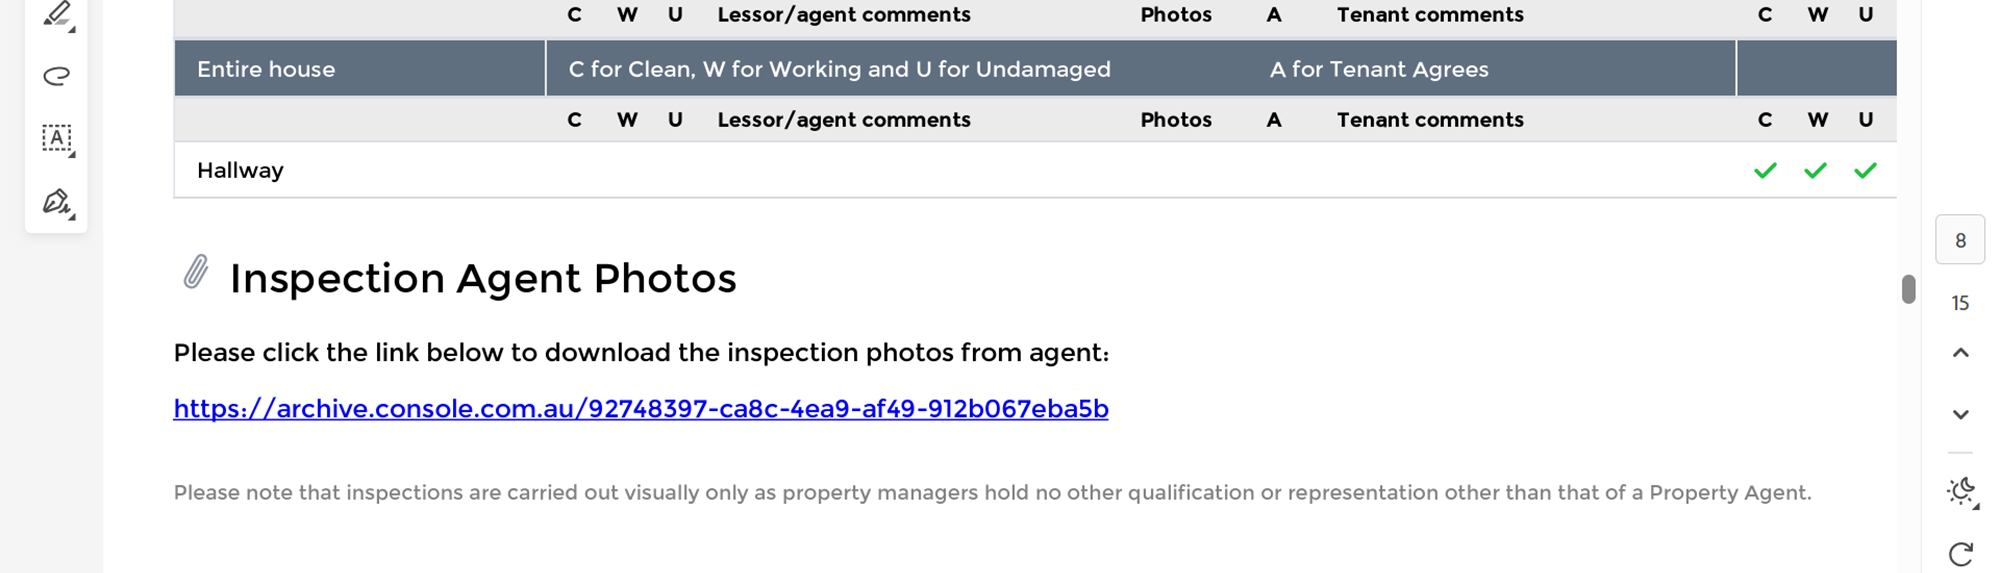
7. Upon opening the report, navigate to the page below the comments recorded in the template. A link will be included to download a zip file containing all of the images recorded in the inspection report.
Note: This may take some time to download depending on the number and size of the images taken in the inspection.
8. Once the .ZIP file has downloaded, you can open the file to display image folders based on where which areas photos have been attached to. You can view the images from this location or move to another path as needed.
Note: Images can only be extracted from inspection reports on Entry and Exit inspections. When a tenant completes an Entry inspection through paperless inspections and the Tenant App, entry inspections will include include a link to download images taken by the tenant as well.
Downloading Individual Inspection Report Images
If you are after a few images from the inspection report without downloading the ZIP file in full, we can also save individual images by viewing the report.
1. Click on Workflows.
2. Click on Inspections.
3. Search and select the address.
4. Navigate to, and open the inspection file to view the details.
5. Click View to display the inspection report.
6. Proceed to the area the image was saved to and click on the image.
7. When the image is displayed, right click and use the Save image as... option to create a copy of the image file to your desired location.
8. Repeat this as required with any other images from the inspection report.