'%20d='M0%208a8%208%200%200%201%208-8h24a8%208%200%200%201%208%208v24a8%208%200%200%201-8%208H8a8%208%200%200%201-8-8V8Z'/%3e%3cpath%20fill='%23fff'%20d='M8.375%2013v14L20.5%2034l12.124-7v-7.737l-1.687-.975-2.806-1.62-1.082-.624v4.83l-.002%204.83H13.95V16.07l3.275-1.89%202.192-1.265%201.082-.625%203.275%201.877%202.192%201.256%201.083.62V9.782L20.5%206%208.376%2013Z'/%3e%3cdefs%3e%3clinearGradient%20id='reapit-pm__a'%20x1='20.702'%20x2='20.702'%20y1='.351'%20y2='31.228'%20gradientUnits='userSpaceOnUse'%3e%3cstop%20stop-color='%235573FD'/%3e%3cstop%20offset='.575'%20stop-color='%234E56EA'/%3e%3c/linearGradient%3e%3c/defs%3e%3c/svg%3e)
Creating and Managing Inspections
This article covers the creation and management of inspections in Reapit PM. The processes in this article include: How to Create an Inspection Filtering Inspections How to Generate a List of Tenants Without Upcoming Routine Inspections How to Update Routine Inspection Dates in Bulk How to Send Inspection Notices in Bulk How to Edit and Delete the Inspection How to Complete the Inspection Owner Attendance at Inspections Workflow Settings How to Manage Routine Inspection Reports that Exceed the Email Size Limit
Overview
Creating and Managing Inspections
This article covers the creation and management of inspections in Reapit PM.
The processes in this article include:
- How to Create an Inspection
- Filtering Inspections
- How to Generate a List of Tenants Without Upcoming Routine Inspections
- How to Update Routine Inspection Dates in Bulk
- How to Send Inspection Notices in Bulk
- How to Edit and Delete the Inspection
- How to Complete the Inspection
- Owner Attendance at Inspections
- Workflow Settings
- How to Manage Routine Inspection Reports that Exceed the Email Size Limit
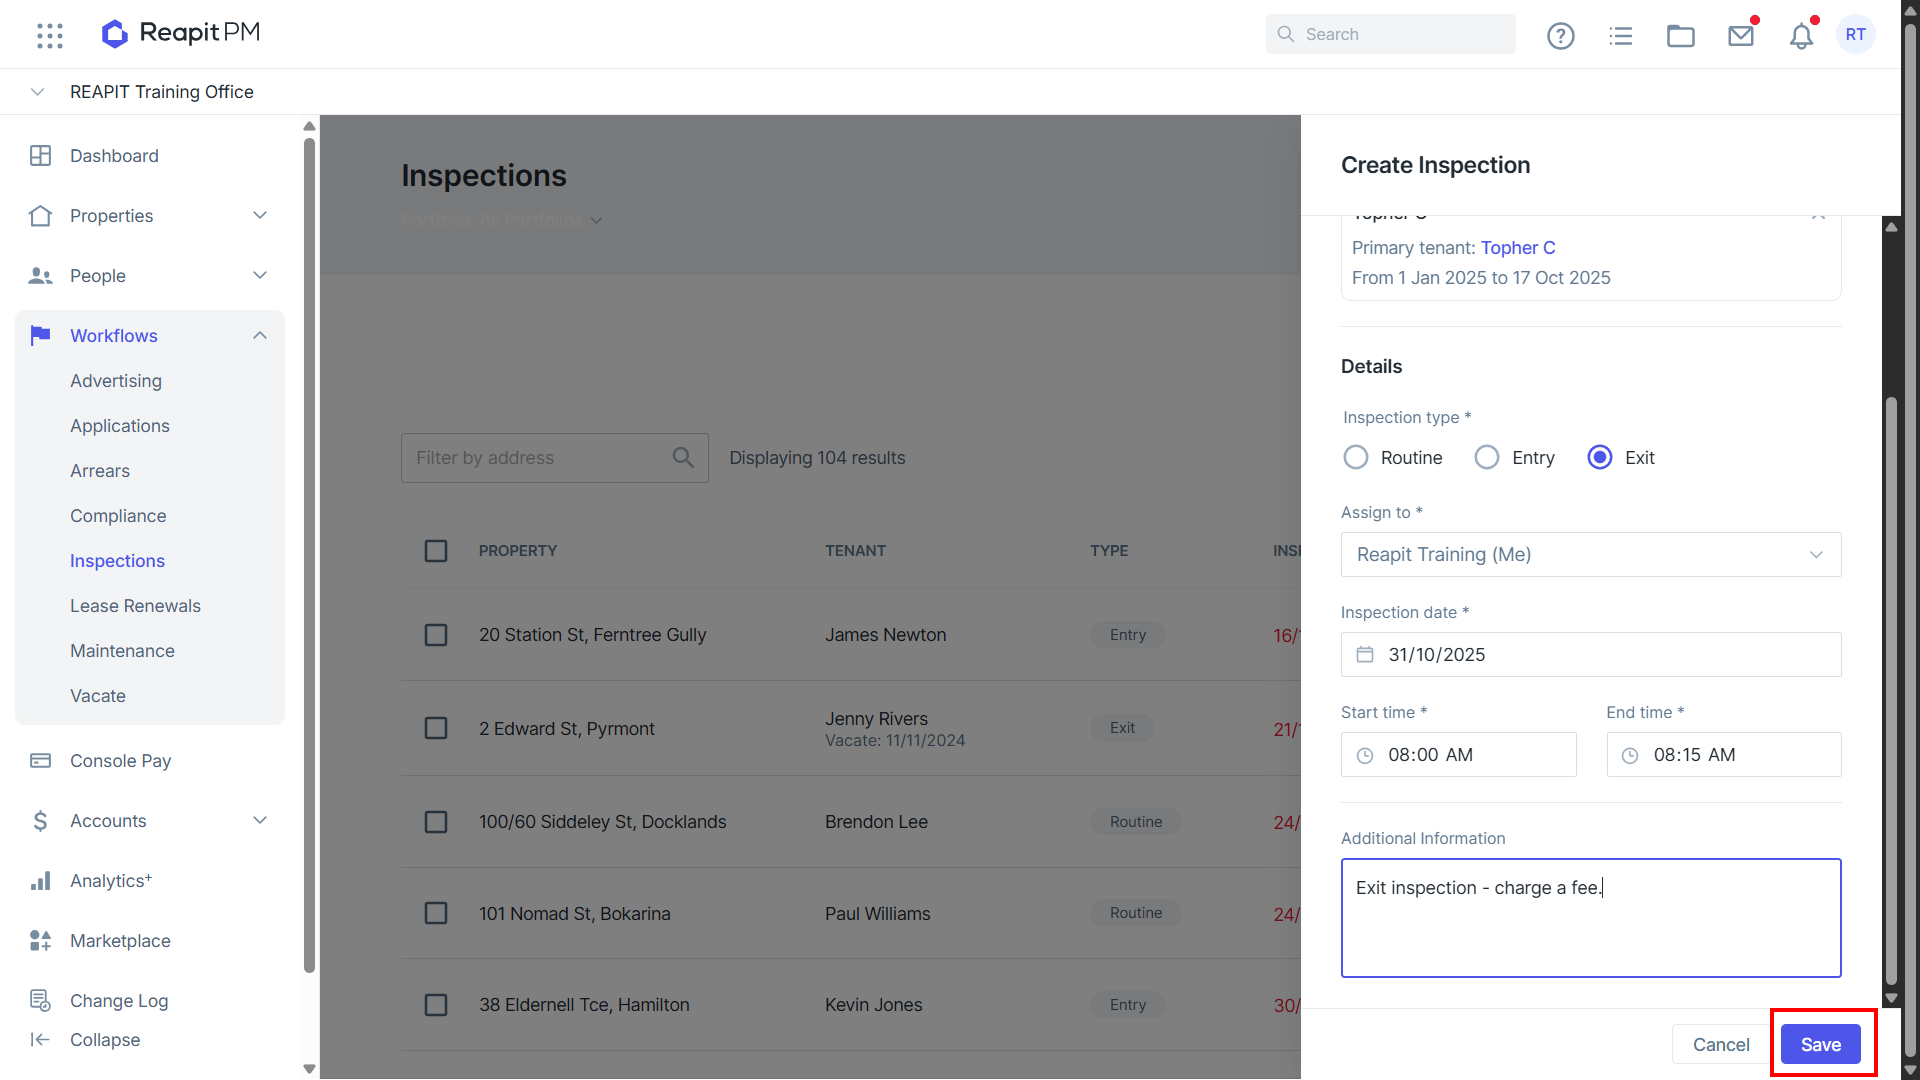
How to Create an Inspection
When entering a tenancy, the first inspection and subsequent routine inspections can be set. Reapit PM will schedule a new inspection at the close of each routine. Alternatively, inspections can be added manually.
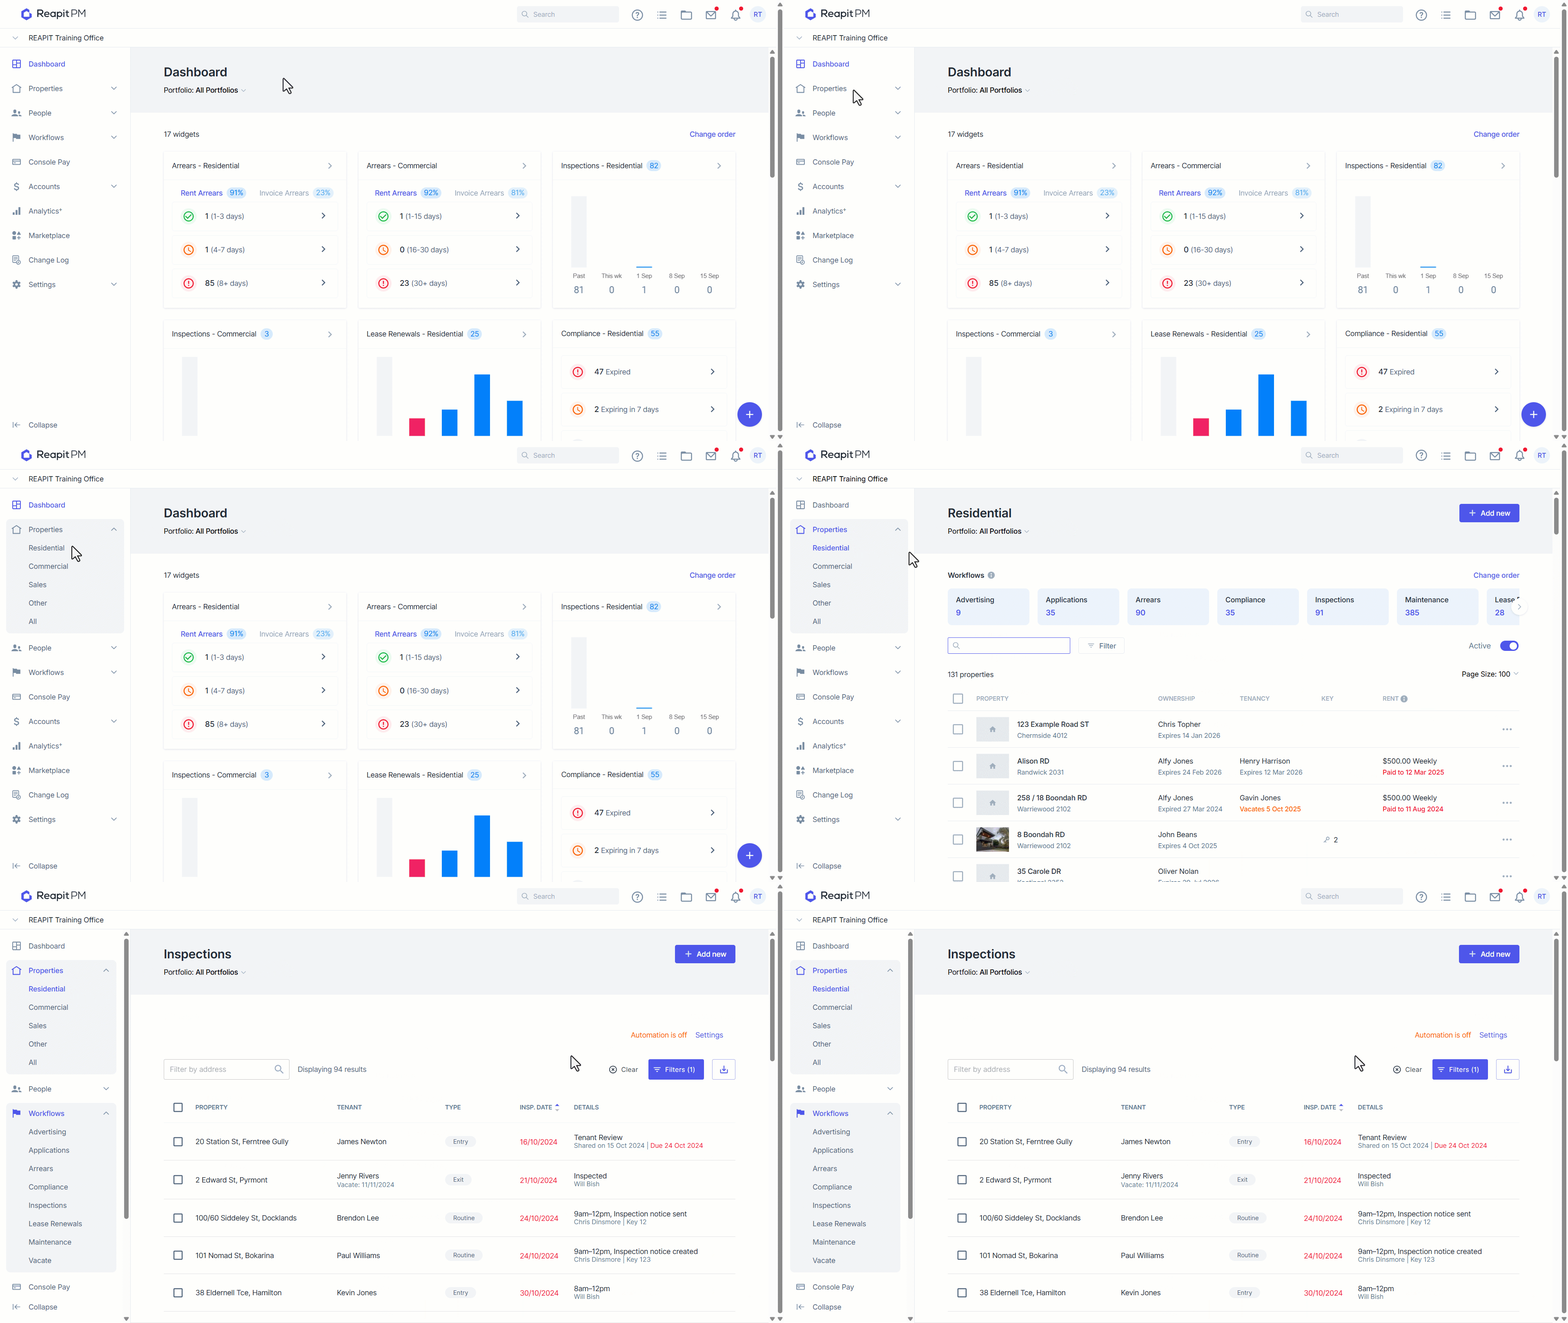
- Navigate to Properties
- Navigate to Residential.
- Select Inspections.
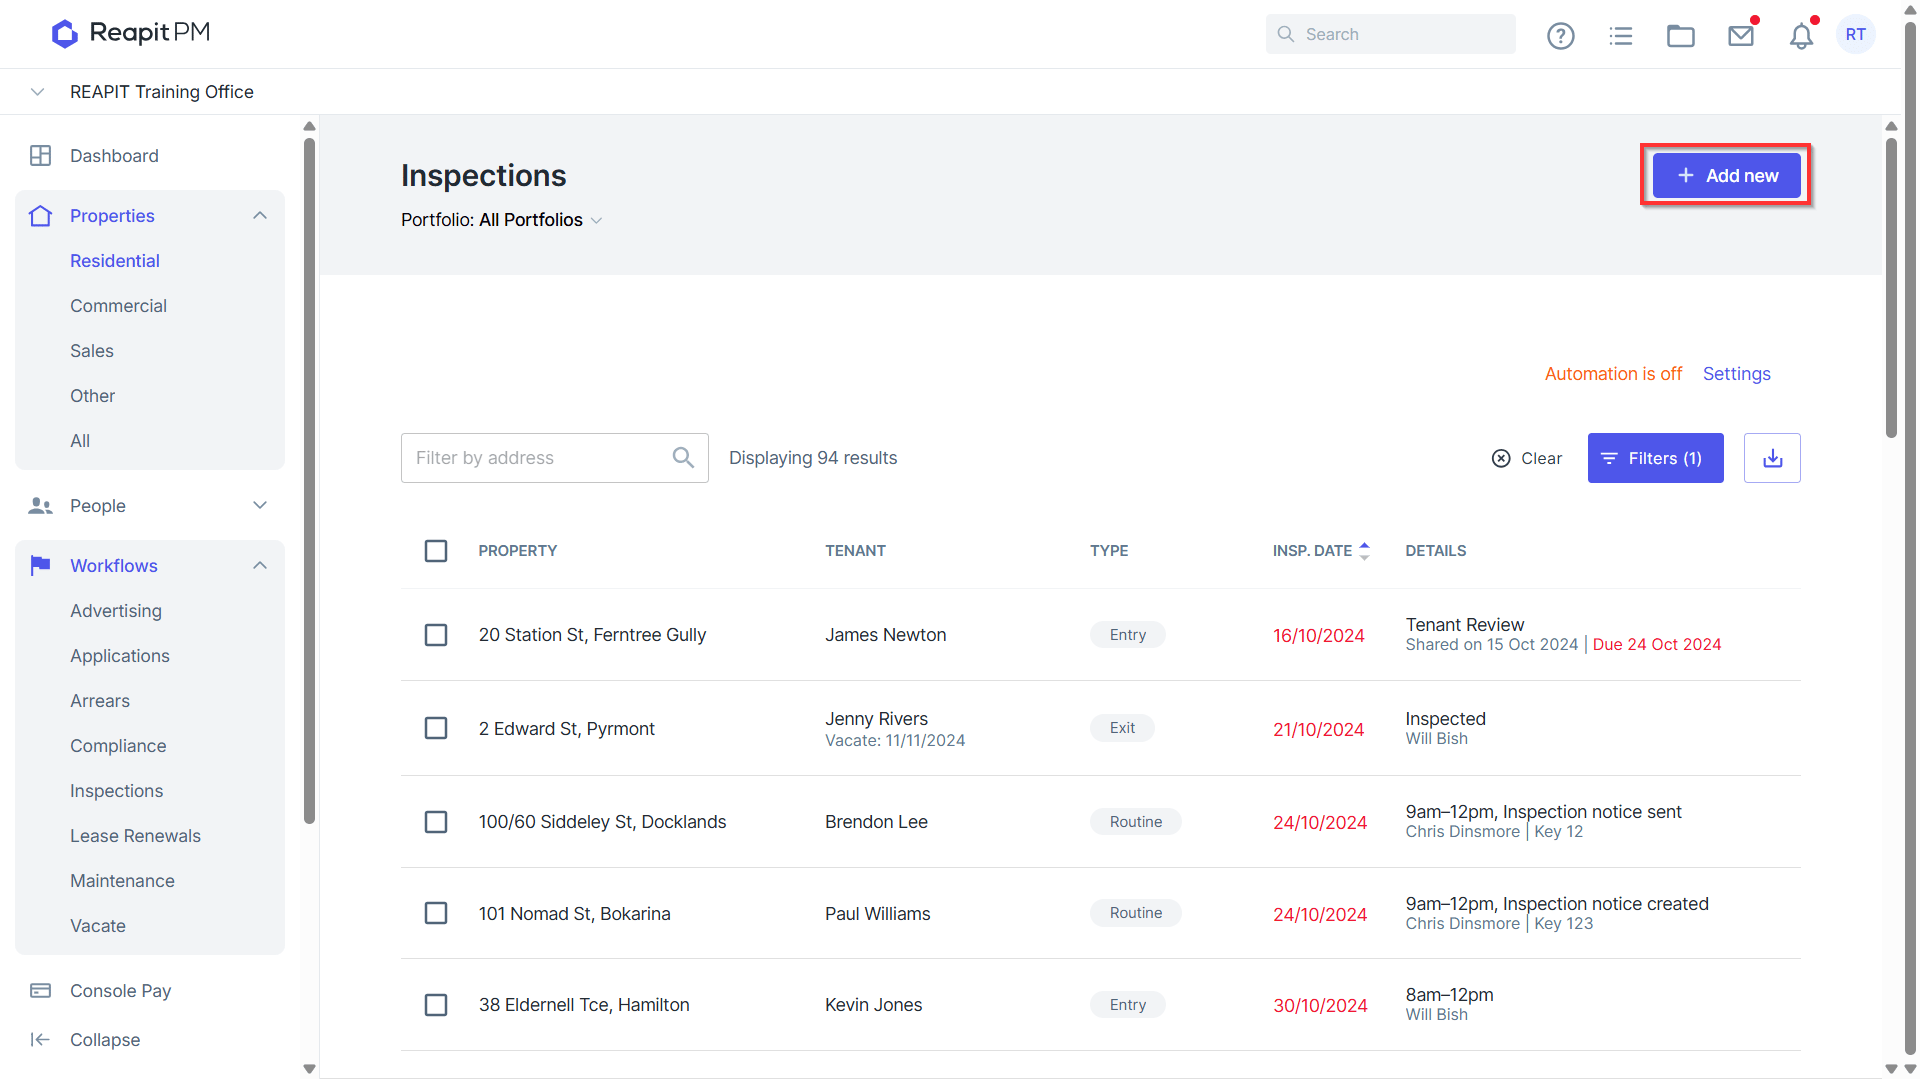
- To add a new inspection, click Add New.
- Begin typing the property address - the field auto-fills with matches from the database.
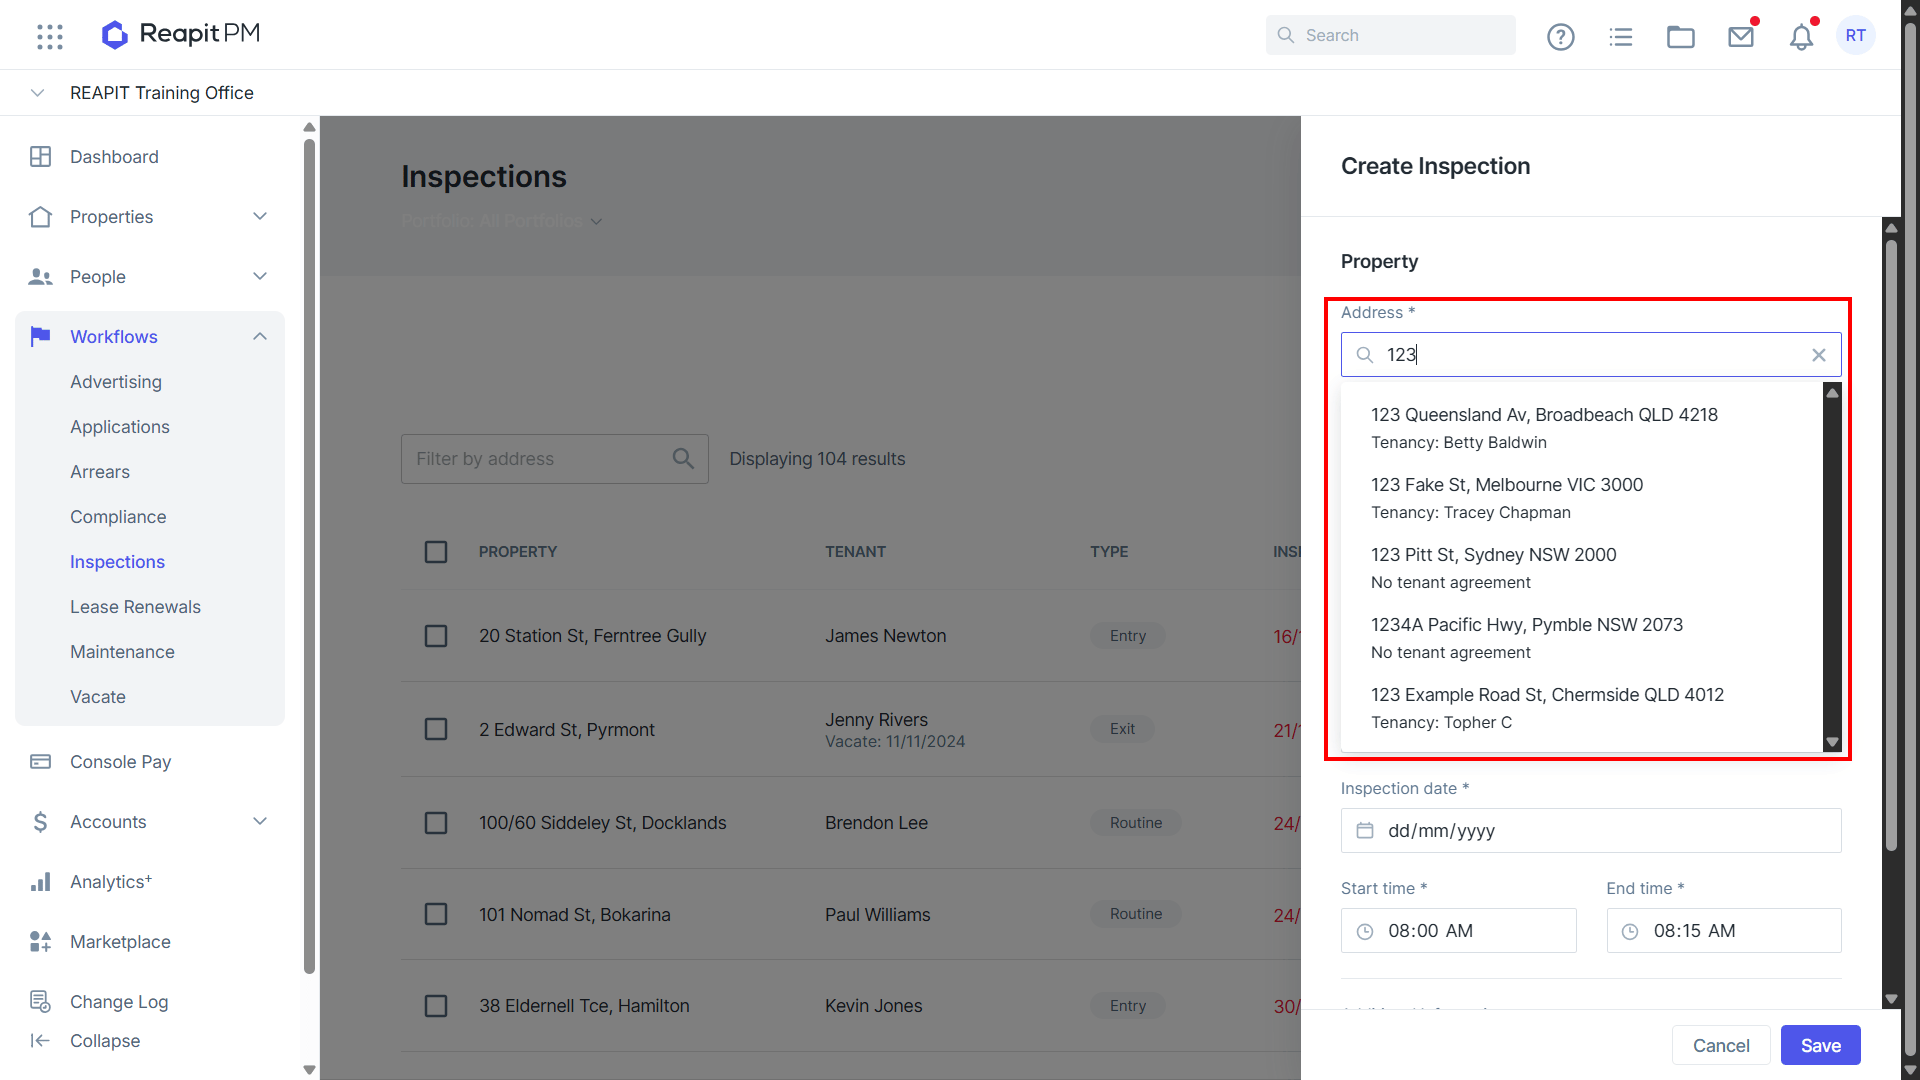
- Select the relevant address and the Tenant will prefill. Select the relevant Tenant from the drop-down.
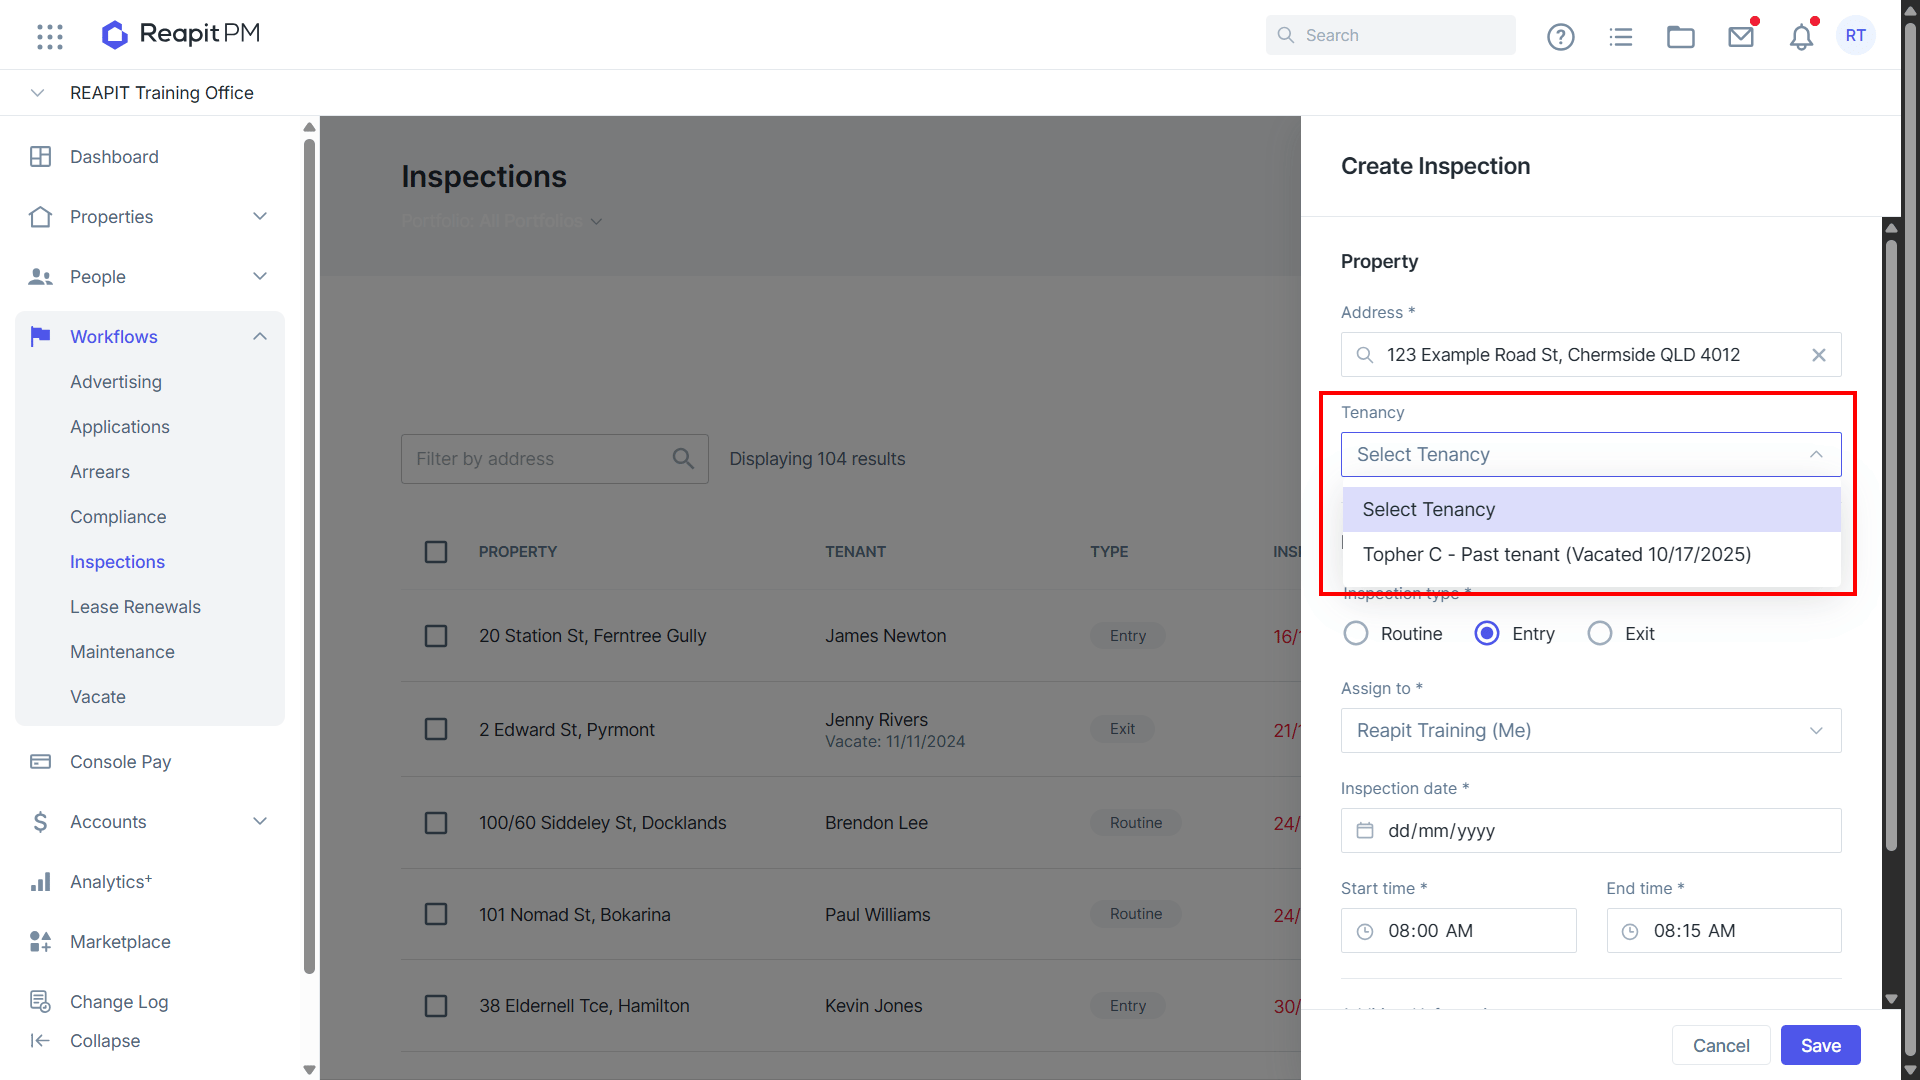
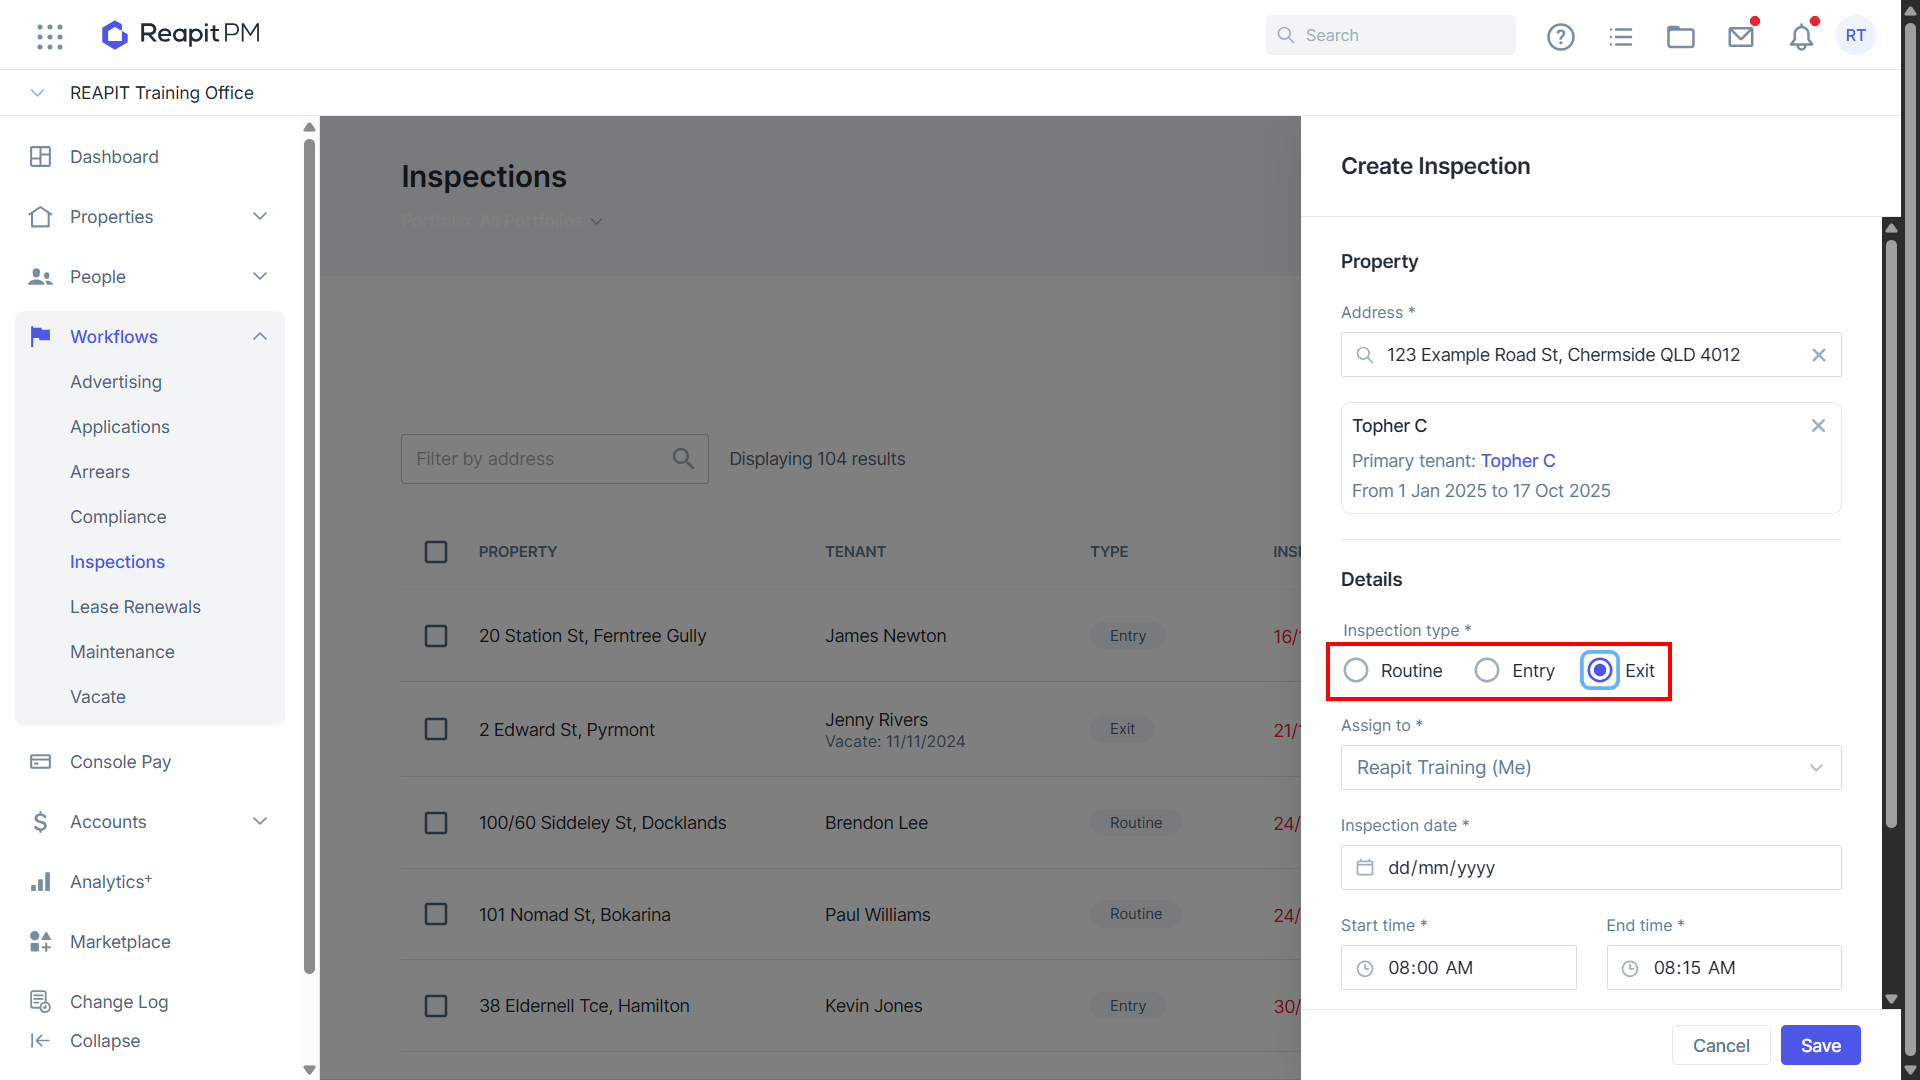
- Select the Type of Inspection e.g., Routine, Entry, or Exit.
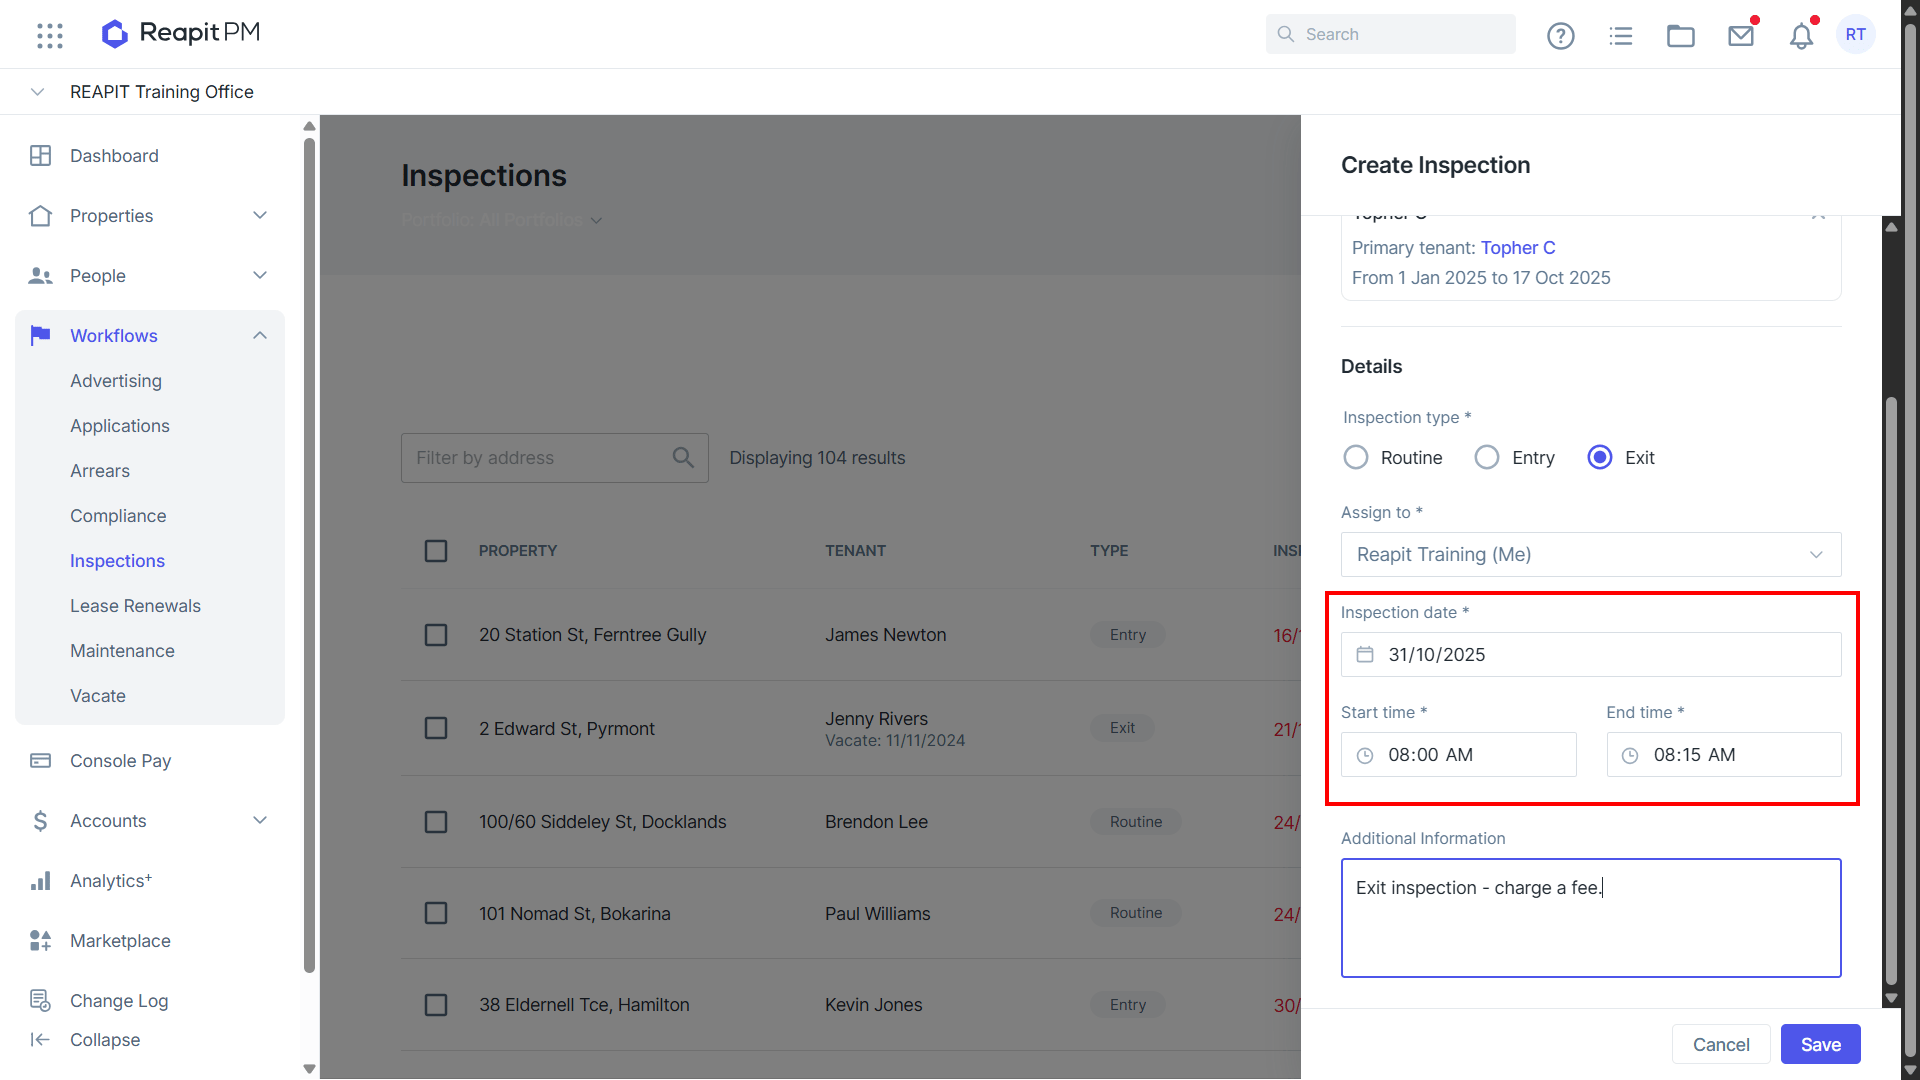
- Select the Date, Start time, and End time.
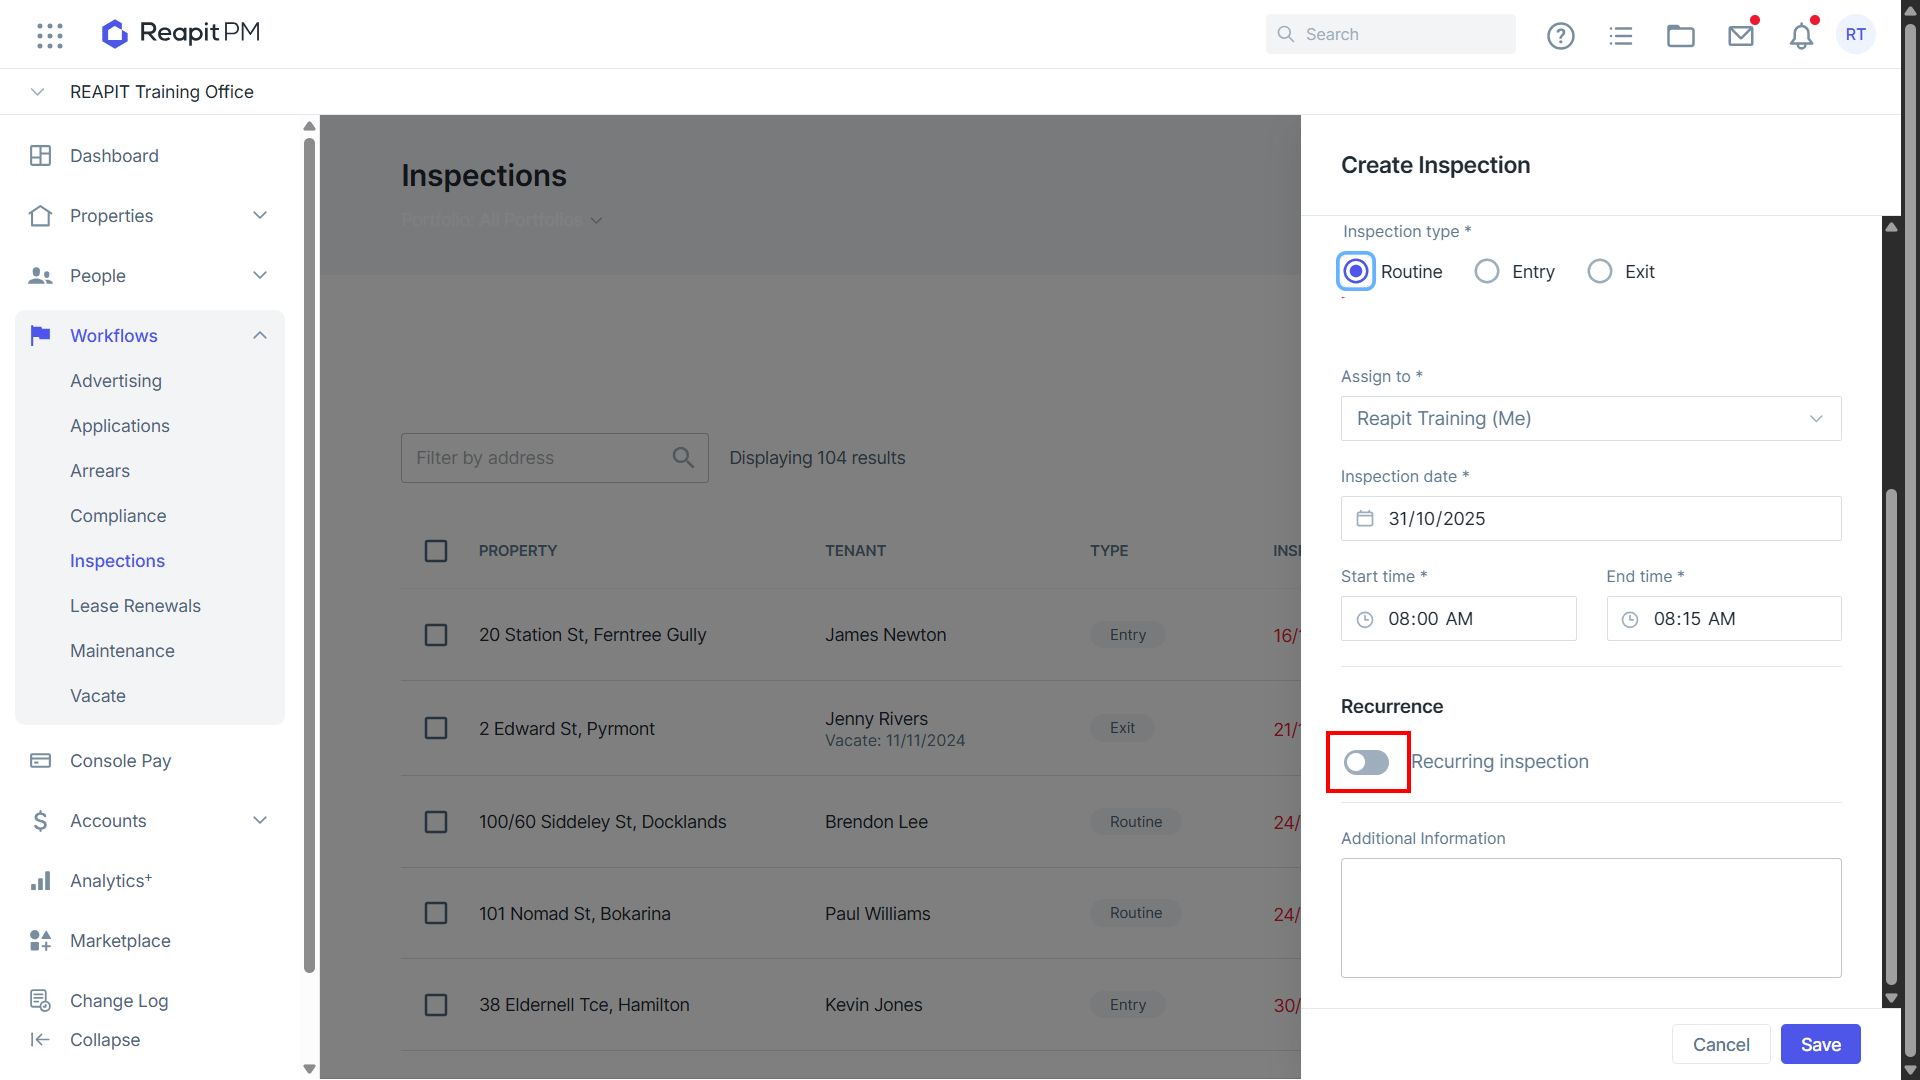
- If a Routine inspection is selected tick Recurring inspection if appropriate - the Next inspection option displays. Select a number and frequency ie. 3 months (if applicable).
- Click Save.
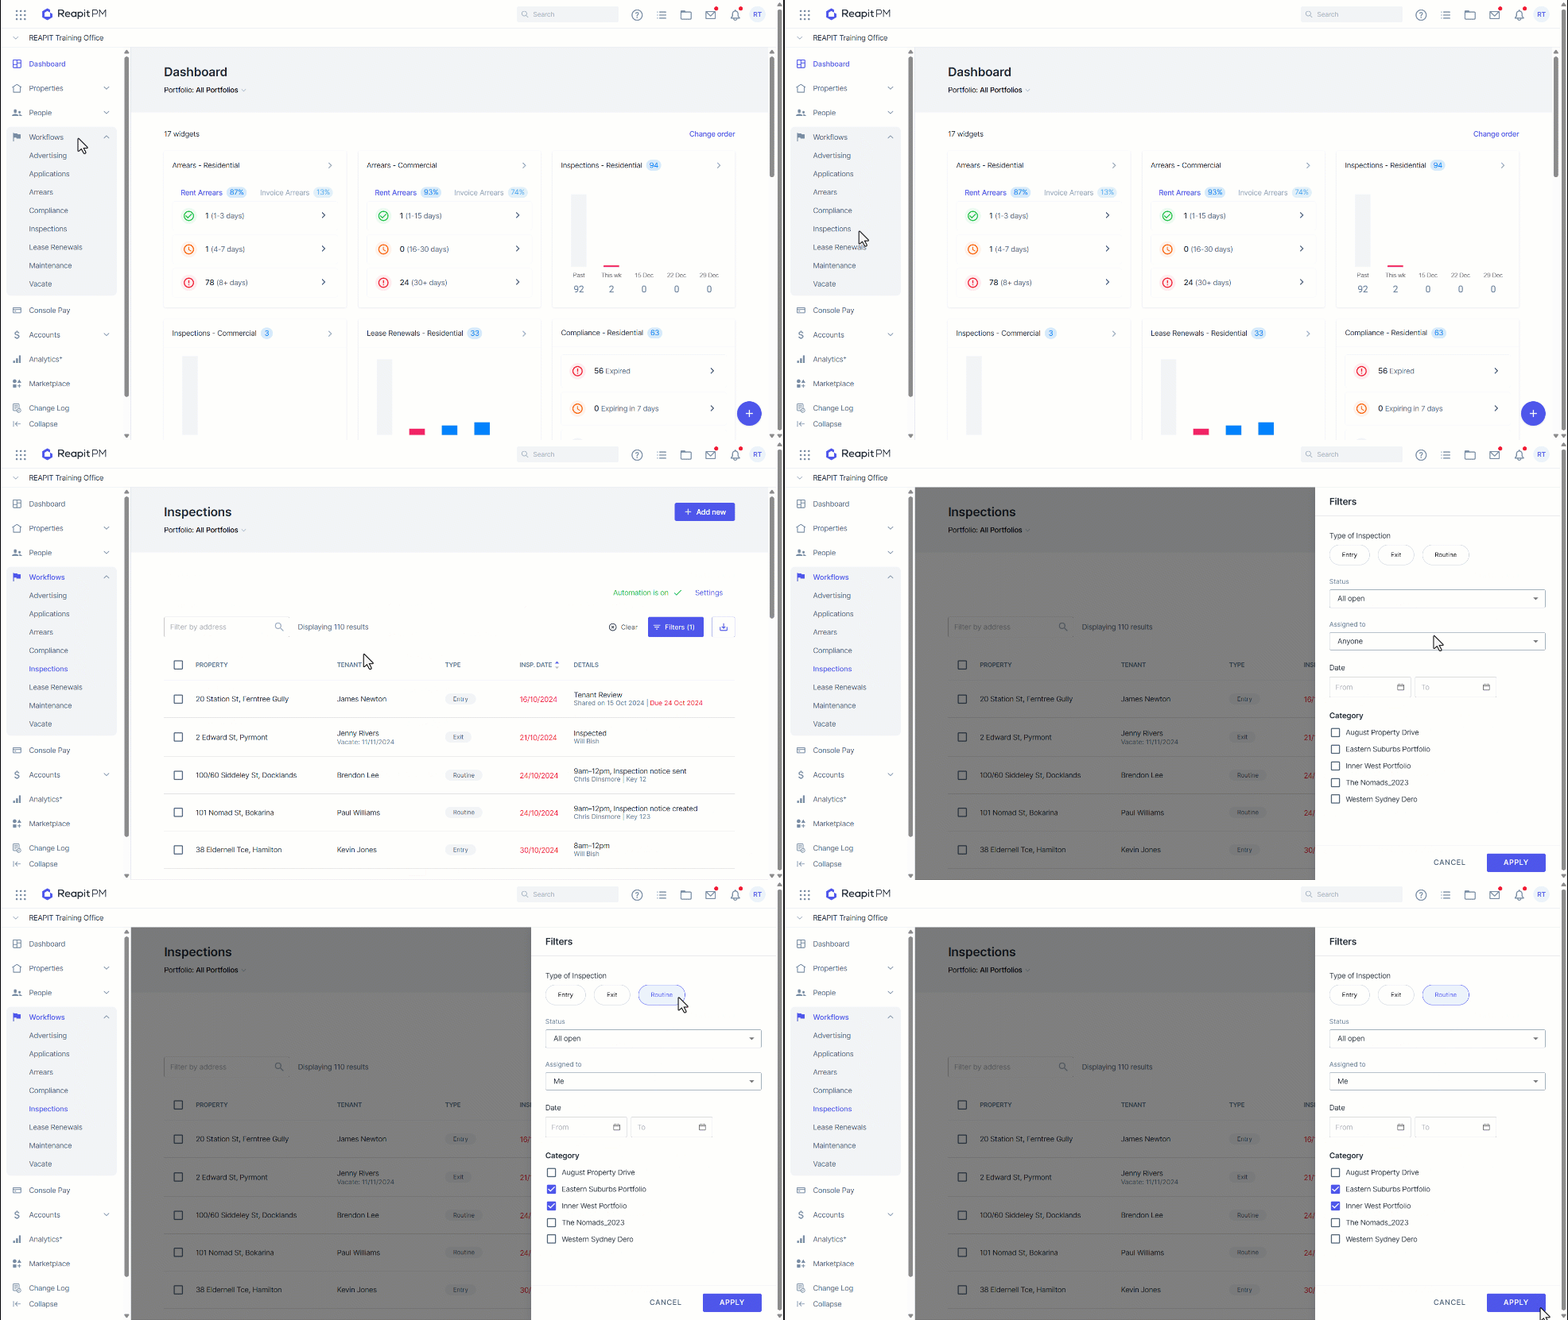
Filtering Inspections
- Navigate to Workflow.
- Click Inspections.
- Click Filters.
- The following filter types are available:
Type of Inspection
Status
Assigned to
Date Range
Category
- Add your filters and click Apply.
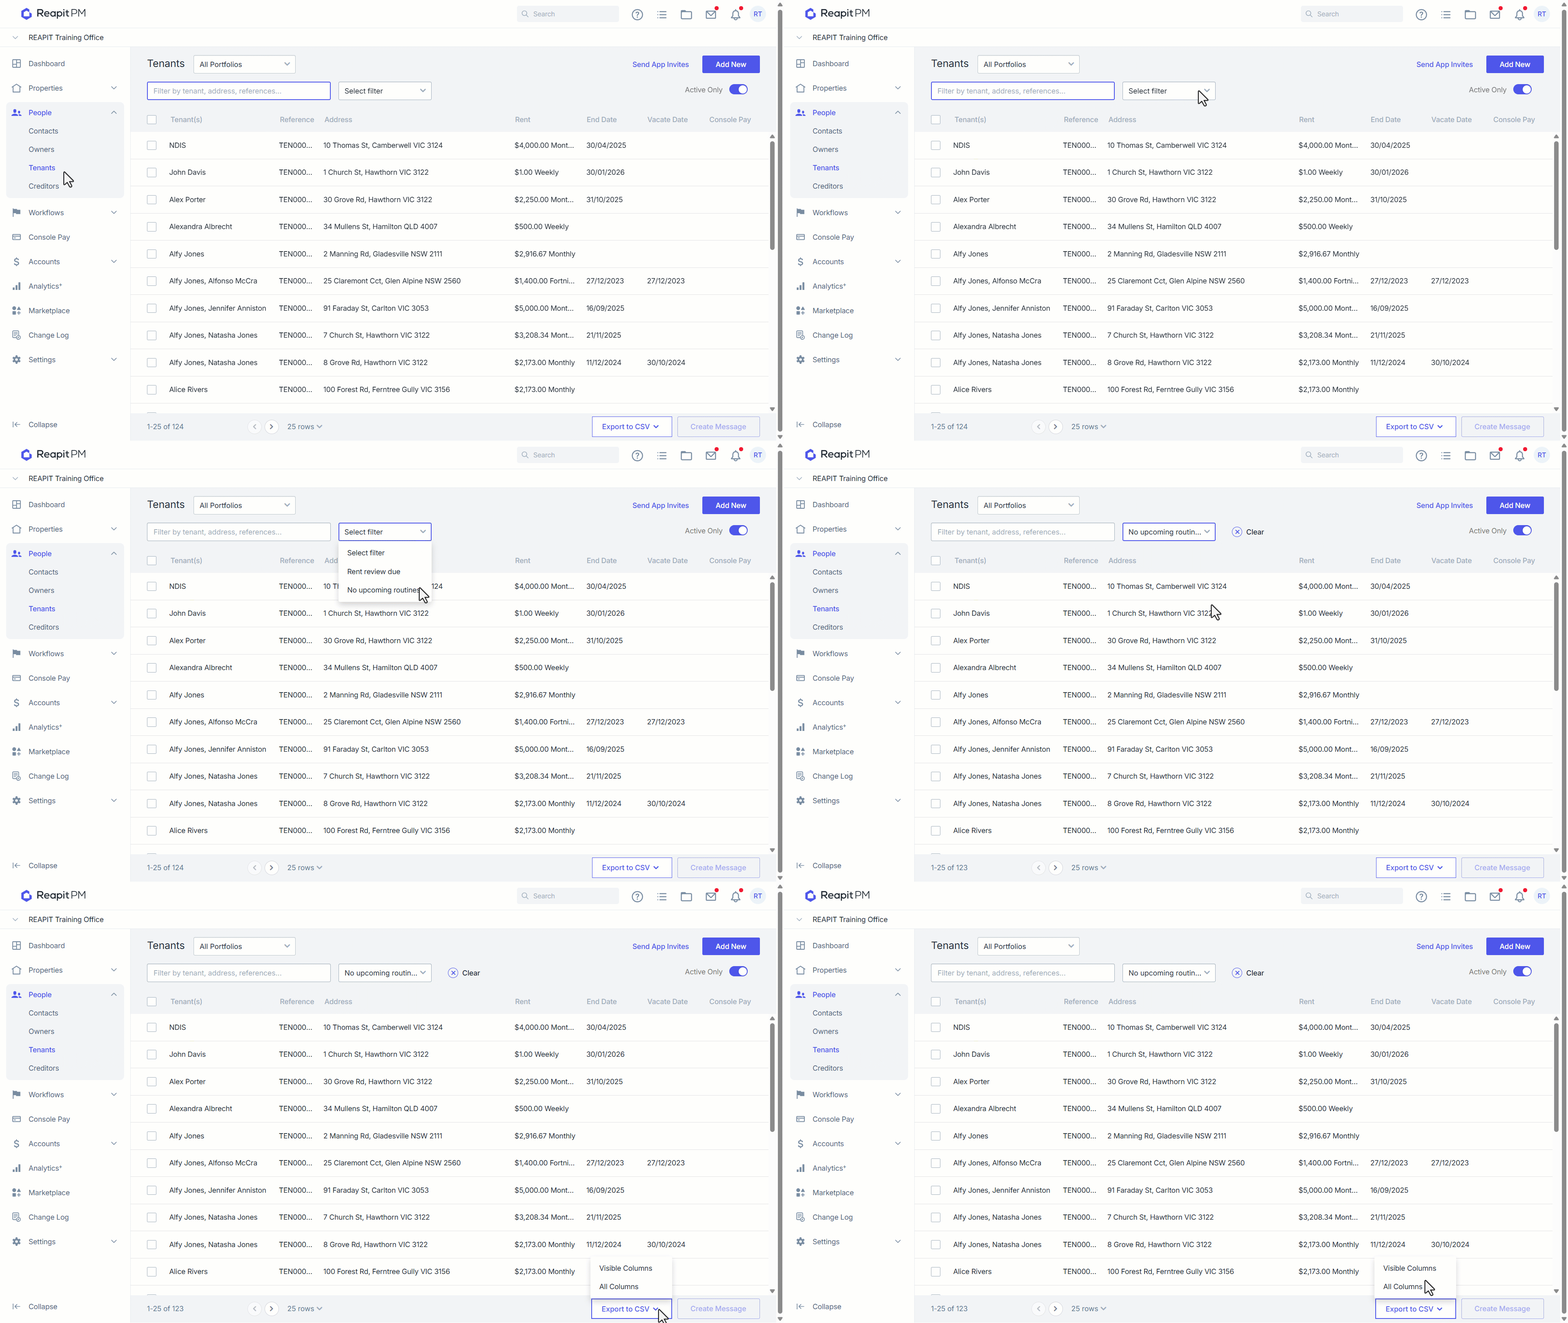
Generating a List of Tenants Without Upcoming Routine Inspections
- Navigate to People > Tenants. 2. Use the Select filter drop-down menu to select No upcoming routines.
- Select Export to CSV > Visible or All Columns.
- The CSV file will display a list of all Tenancy Agreements without an upcoming Routine Inspection as of the date the file is generated.
- Using the details from the CSV file, navigate to Workflows > Inspections, and select Add New to create routine Inspections for Tenants.
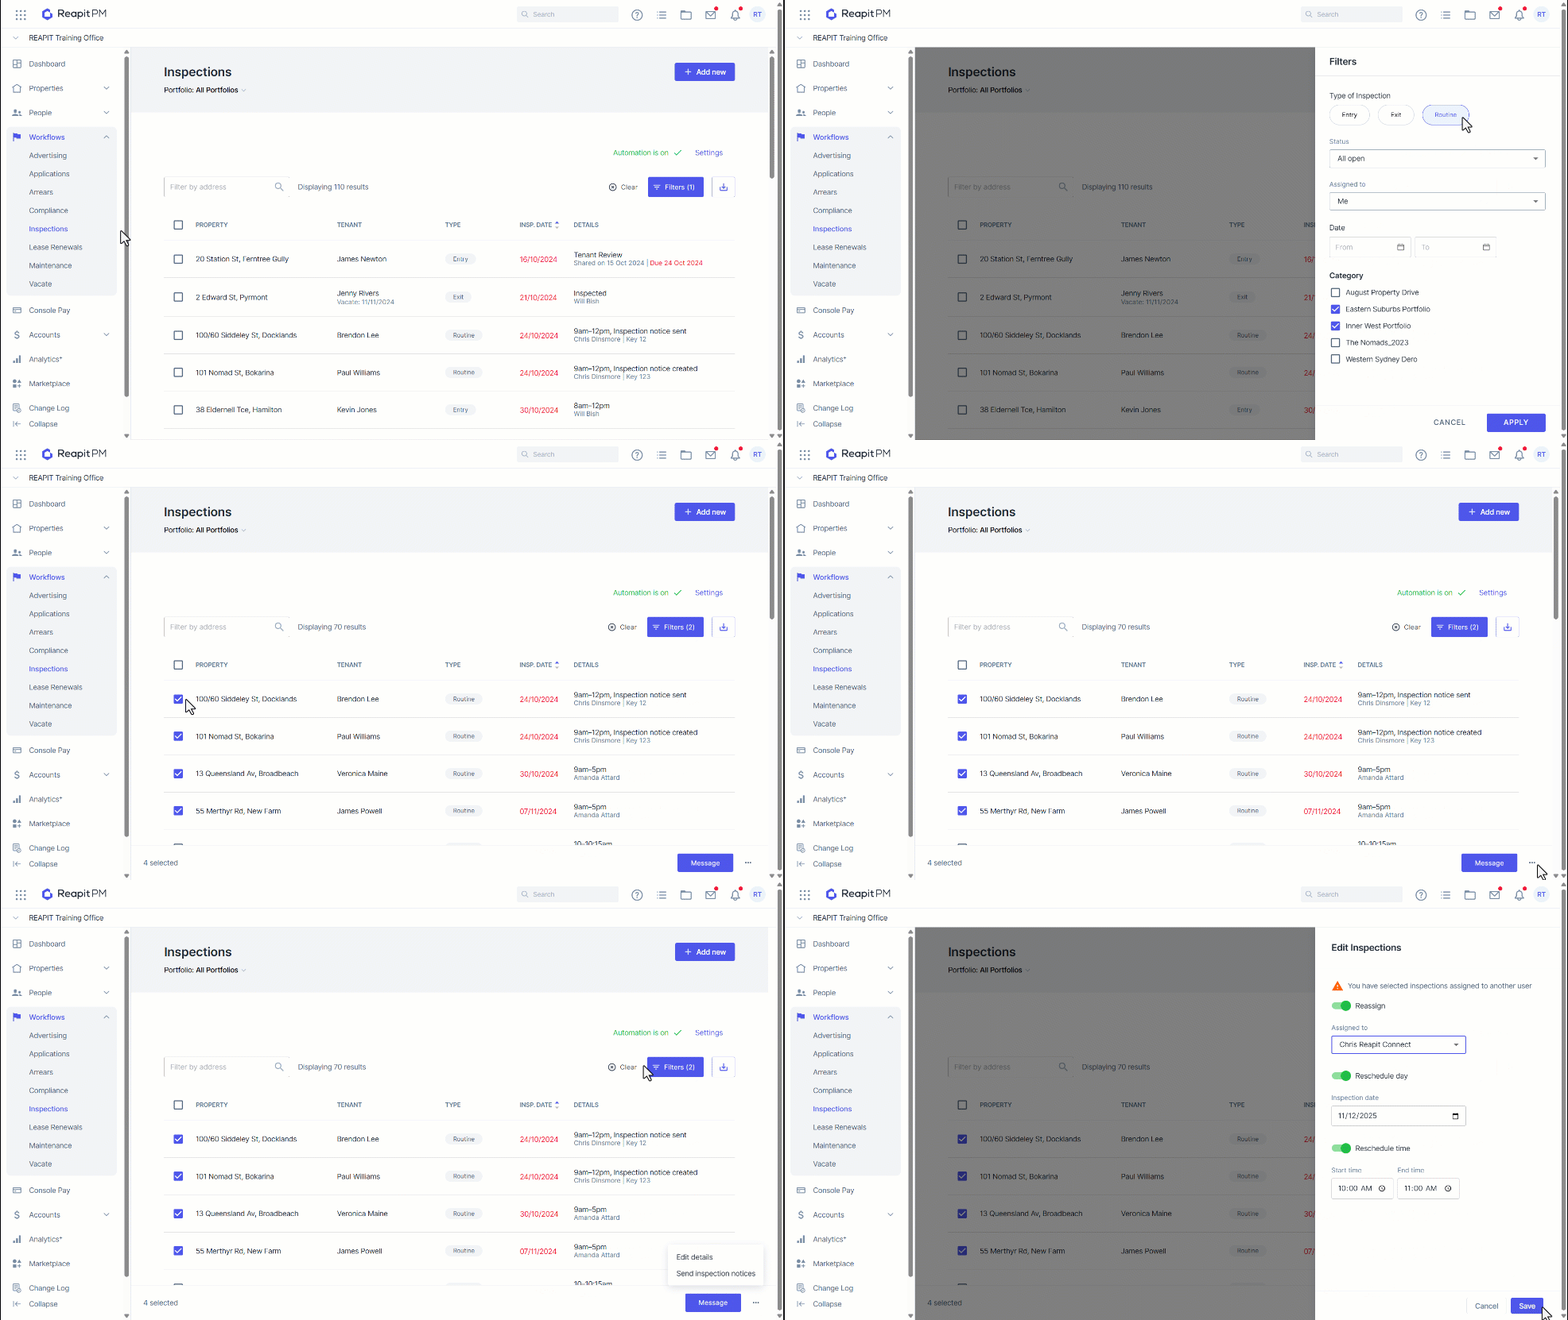
Updating Routine Inspection Dates in Bulk
- Navigate to Workflows > Inspections.
- Select Filters.
- Select the Type of Inspection, Inspection status, Assigned to, and date range you are looking between. Click Apply.
- The filters will now apply and display the results. Click the tick box next to the Property header to select all Properties.
- Click the 3 action dots on the bottom right of the page and select Edit details.
- Use the toggle to enable the option to reassign the inspections to another user, reschedule the day, or reschedule the time of the selected inspections. Once you have made the changes, click Save.
Send Inspection Notices in Bulk
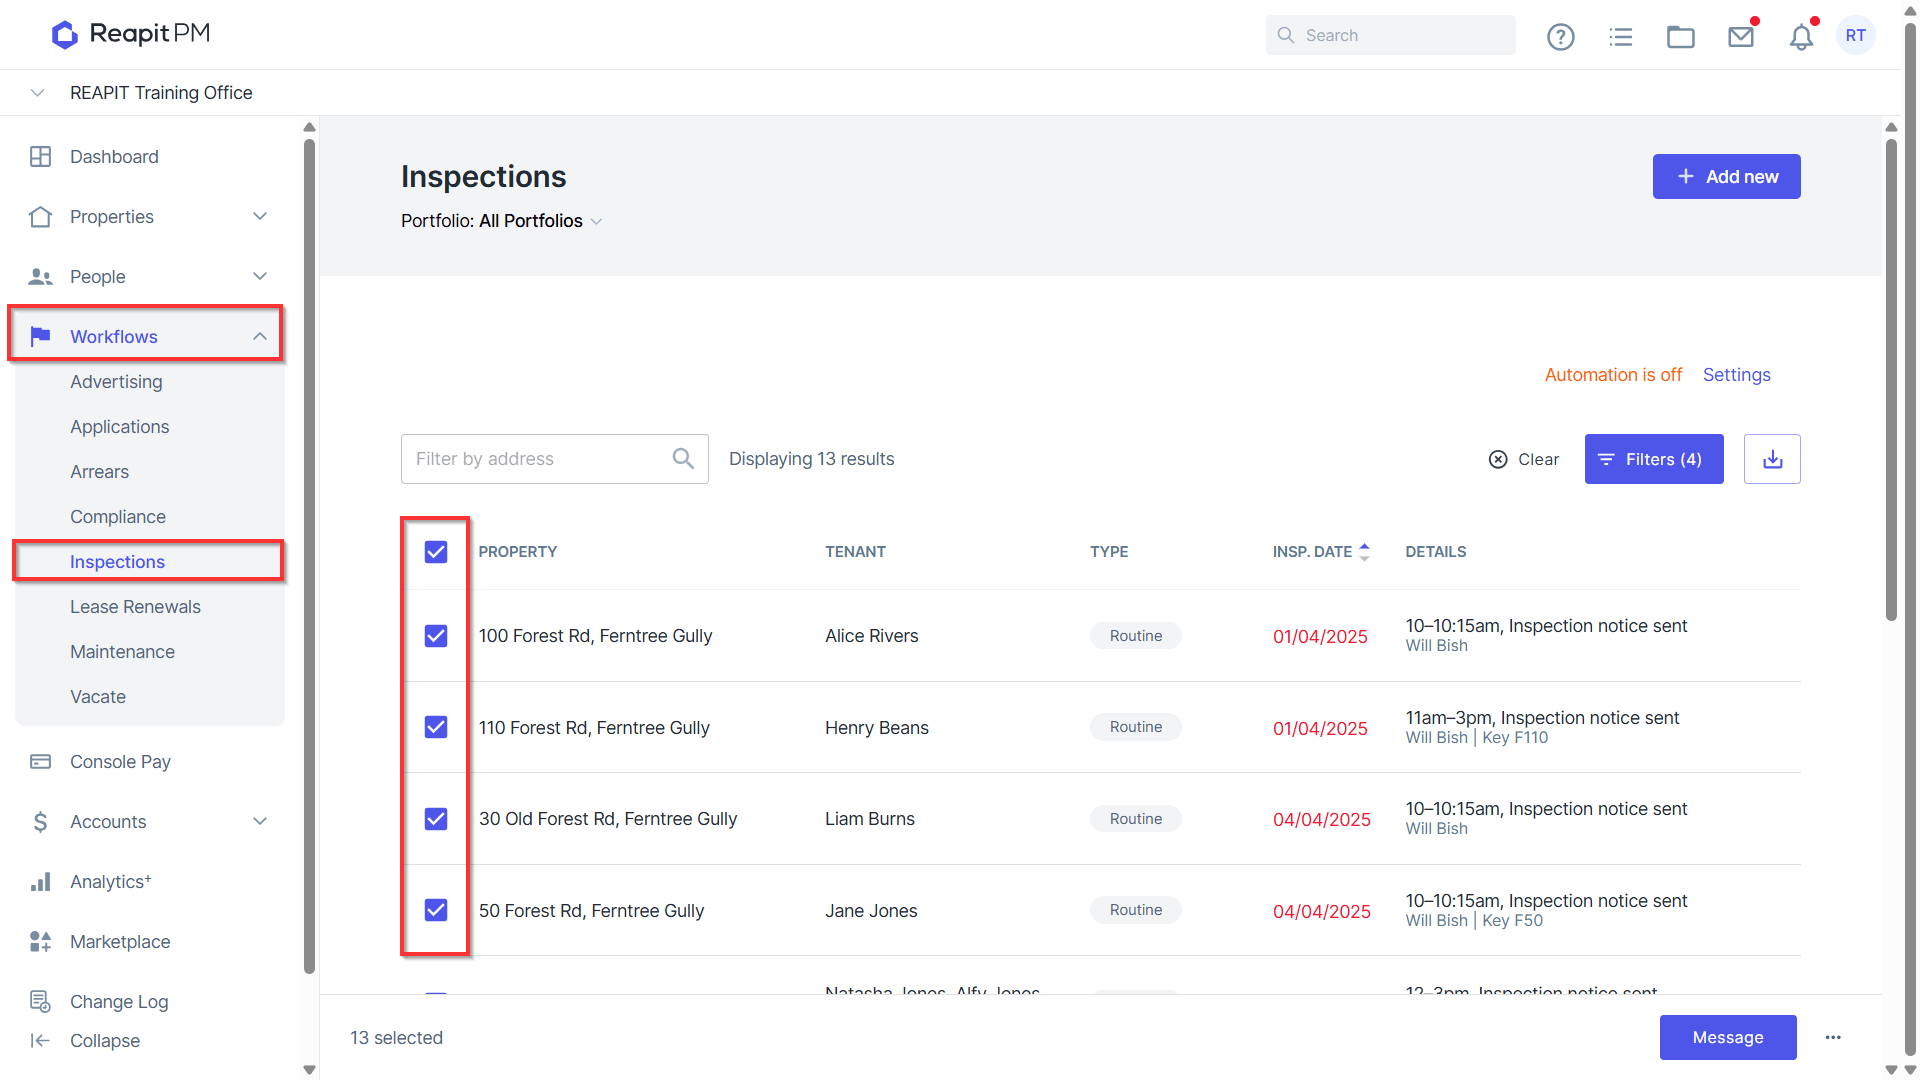
- From the Workflow > Inspections screen, select the Routine Inspections.
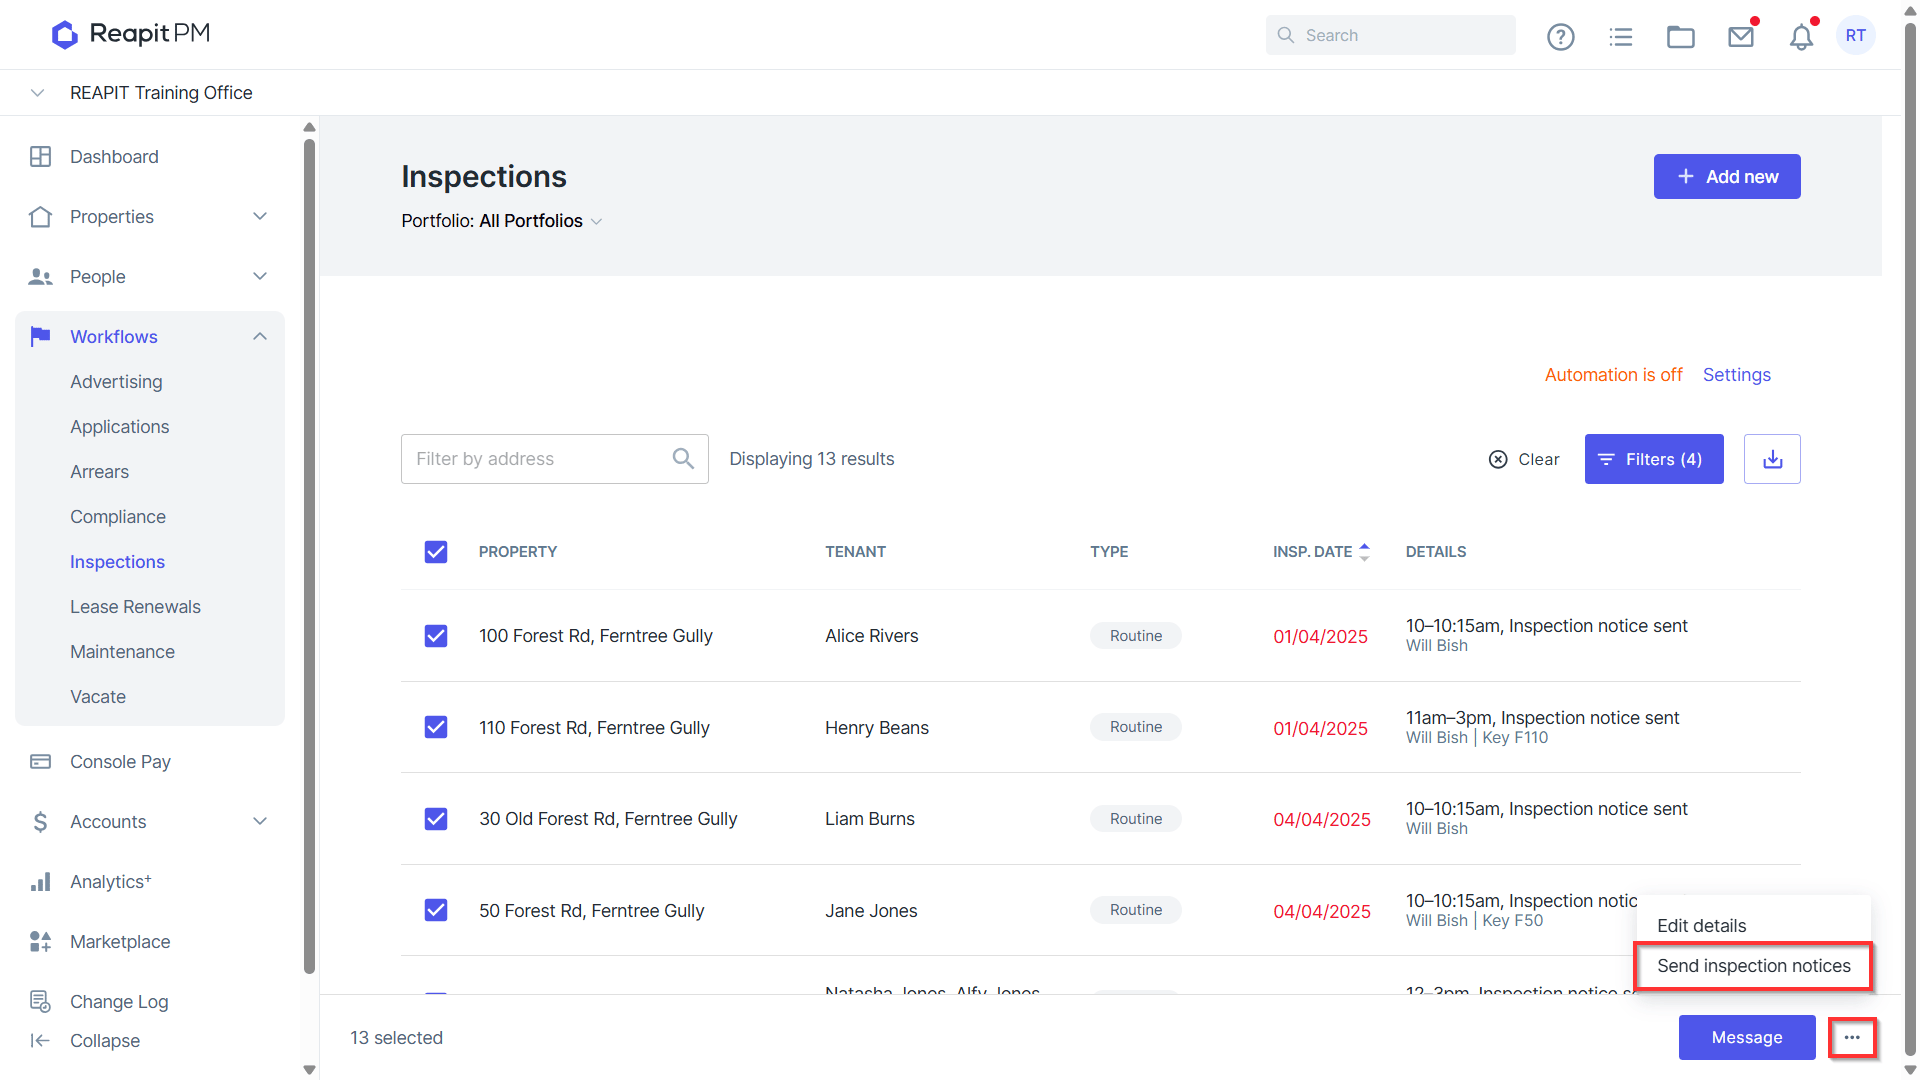
- Click on the 3 action dots on the bottom of the page and select Send inspection notices.
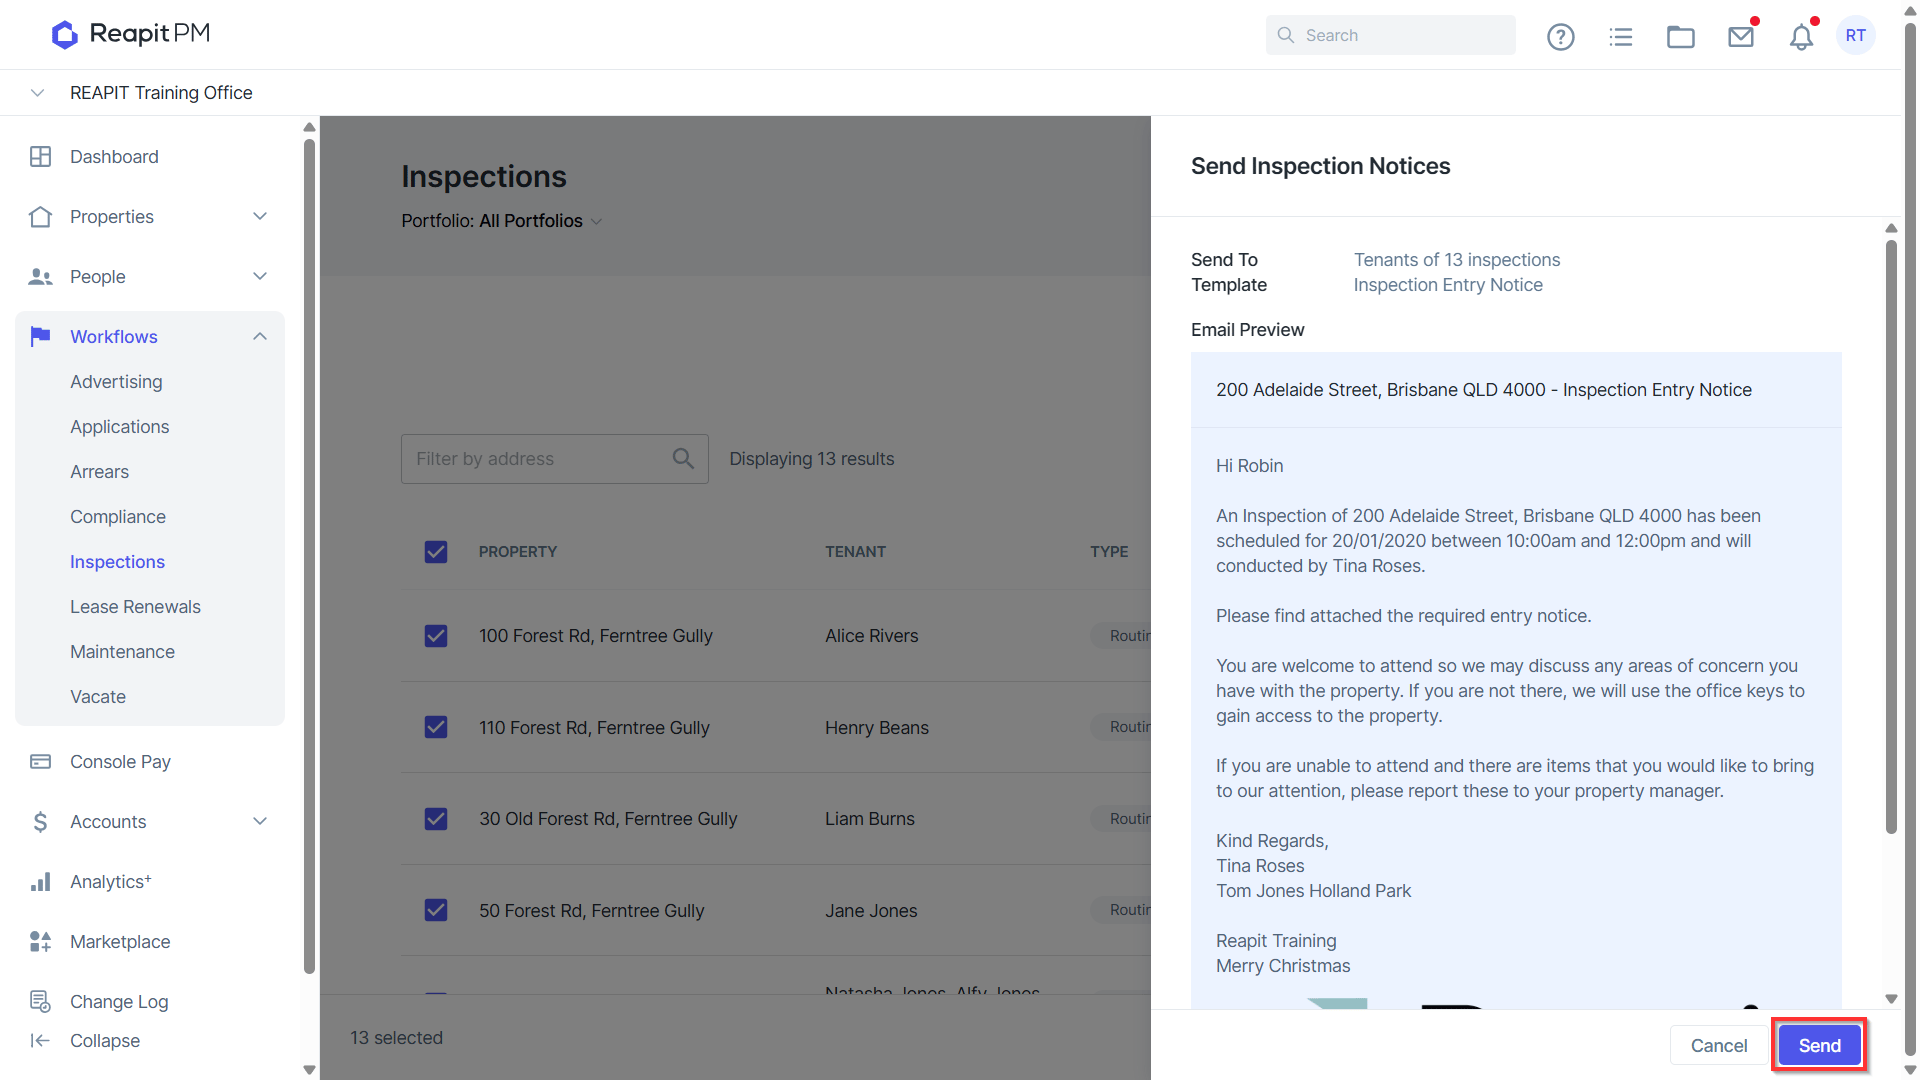
- The Send Inspection Notices template will appear, displaying the number of Tenants the email will be sent to. Click Send to issue the Entry Inspection Notices.
Editing and Deleting the Inspection
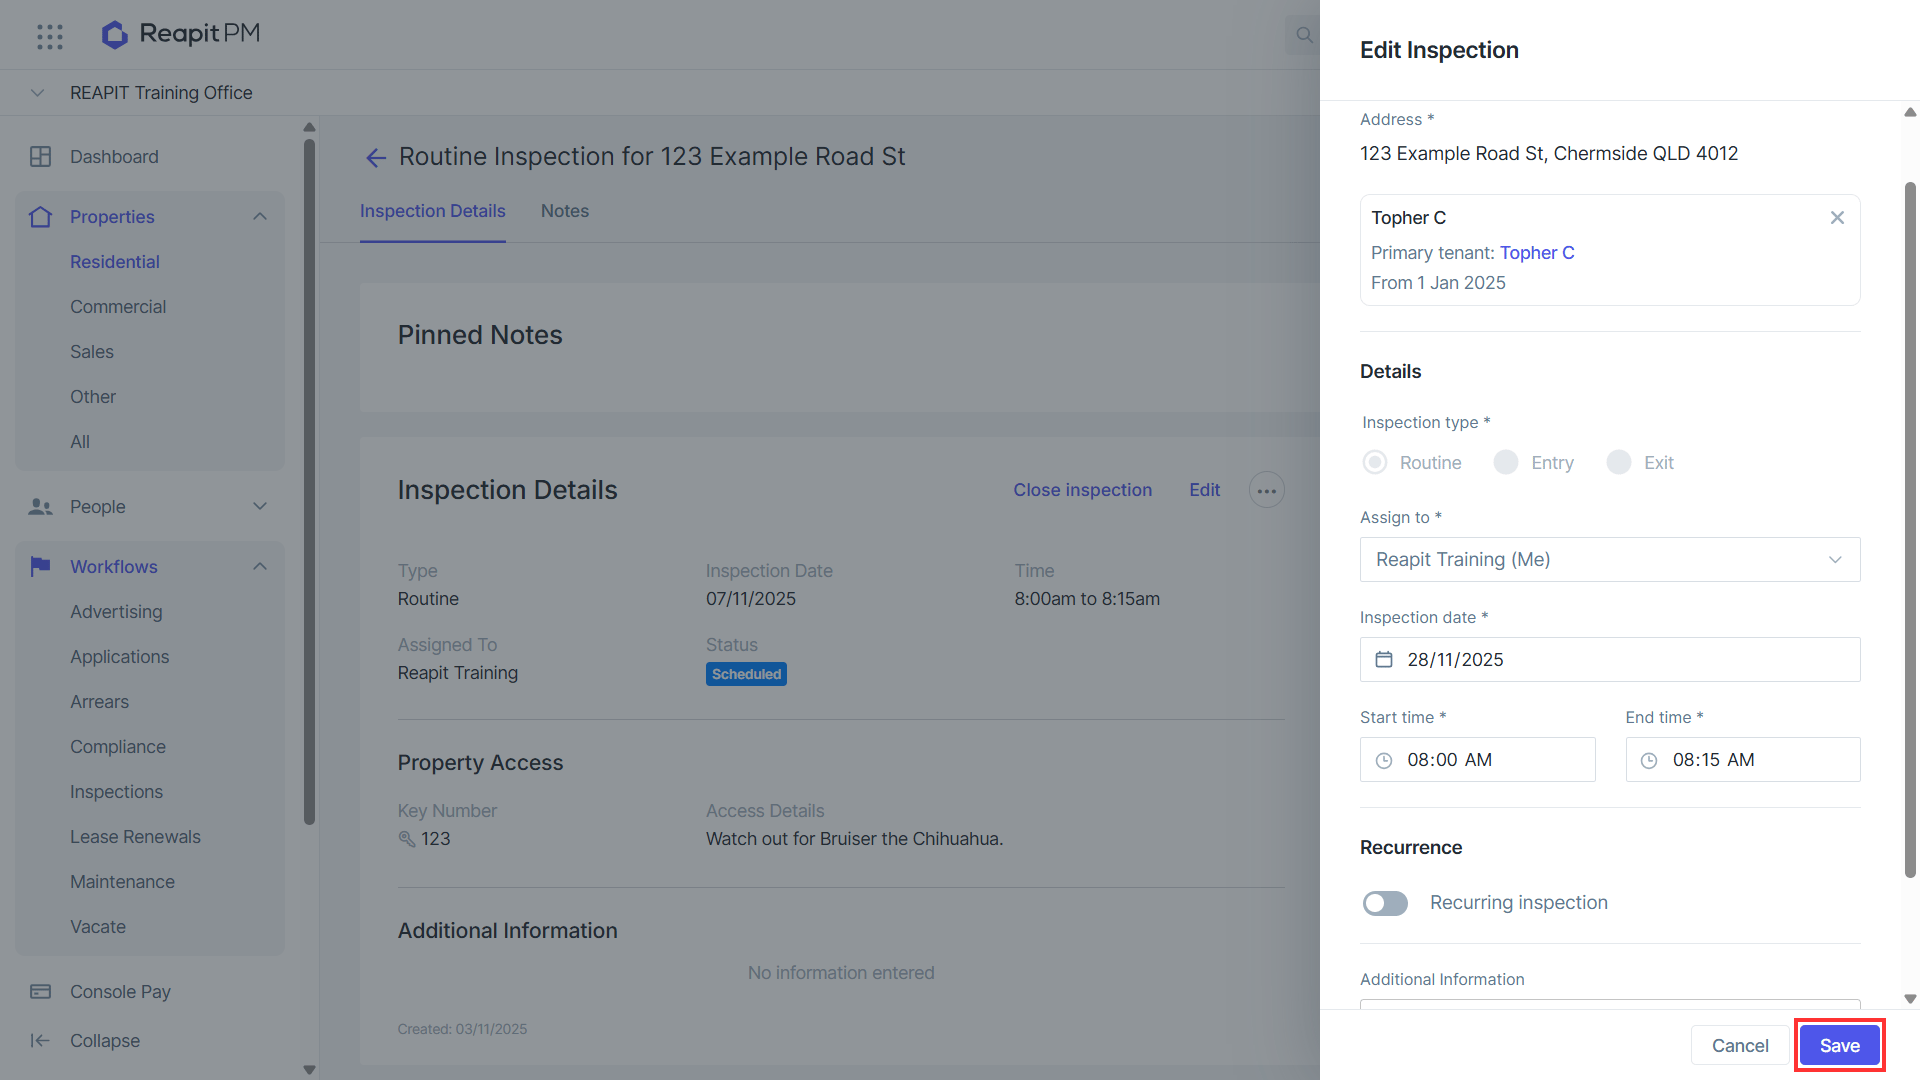
Open the inspection.
Click Edit.
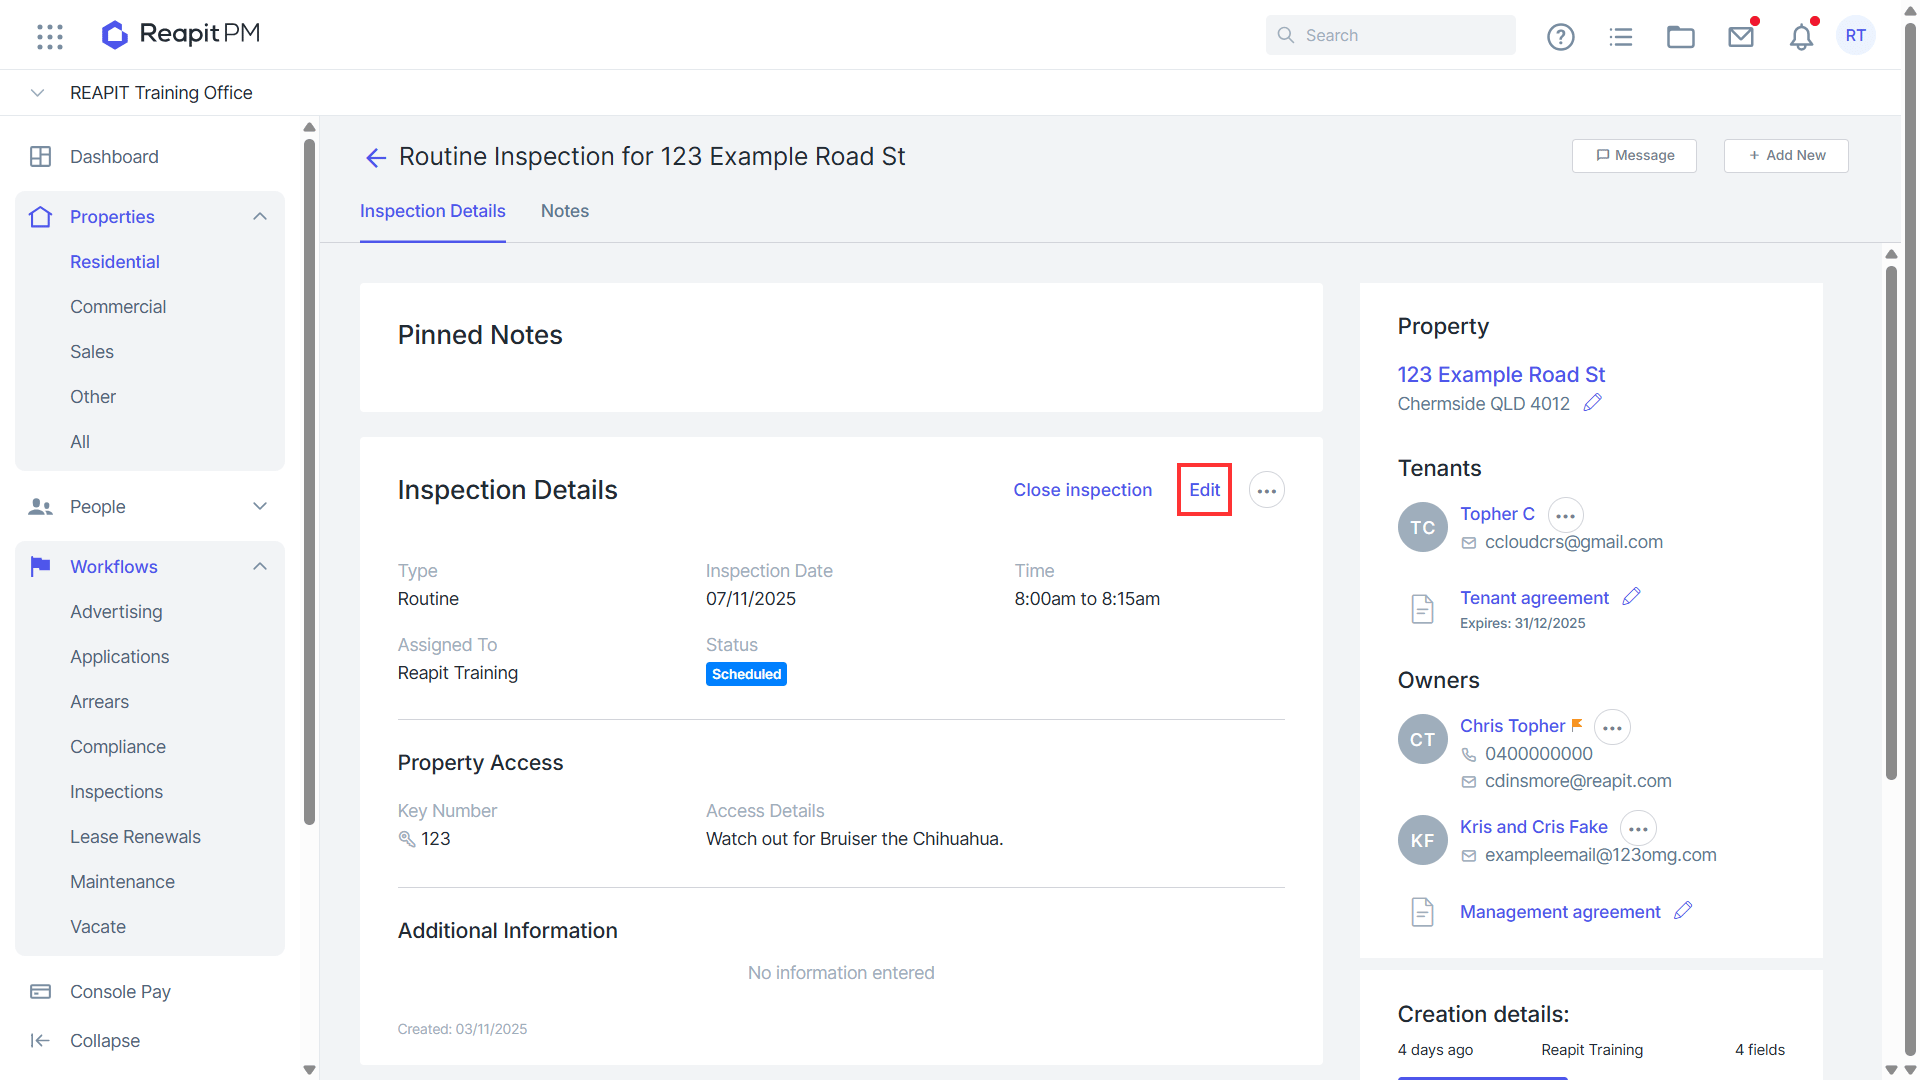
The edit drawer will appear.
Make any required changes.
Click Save.
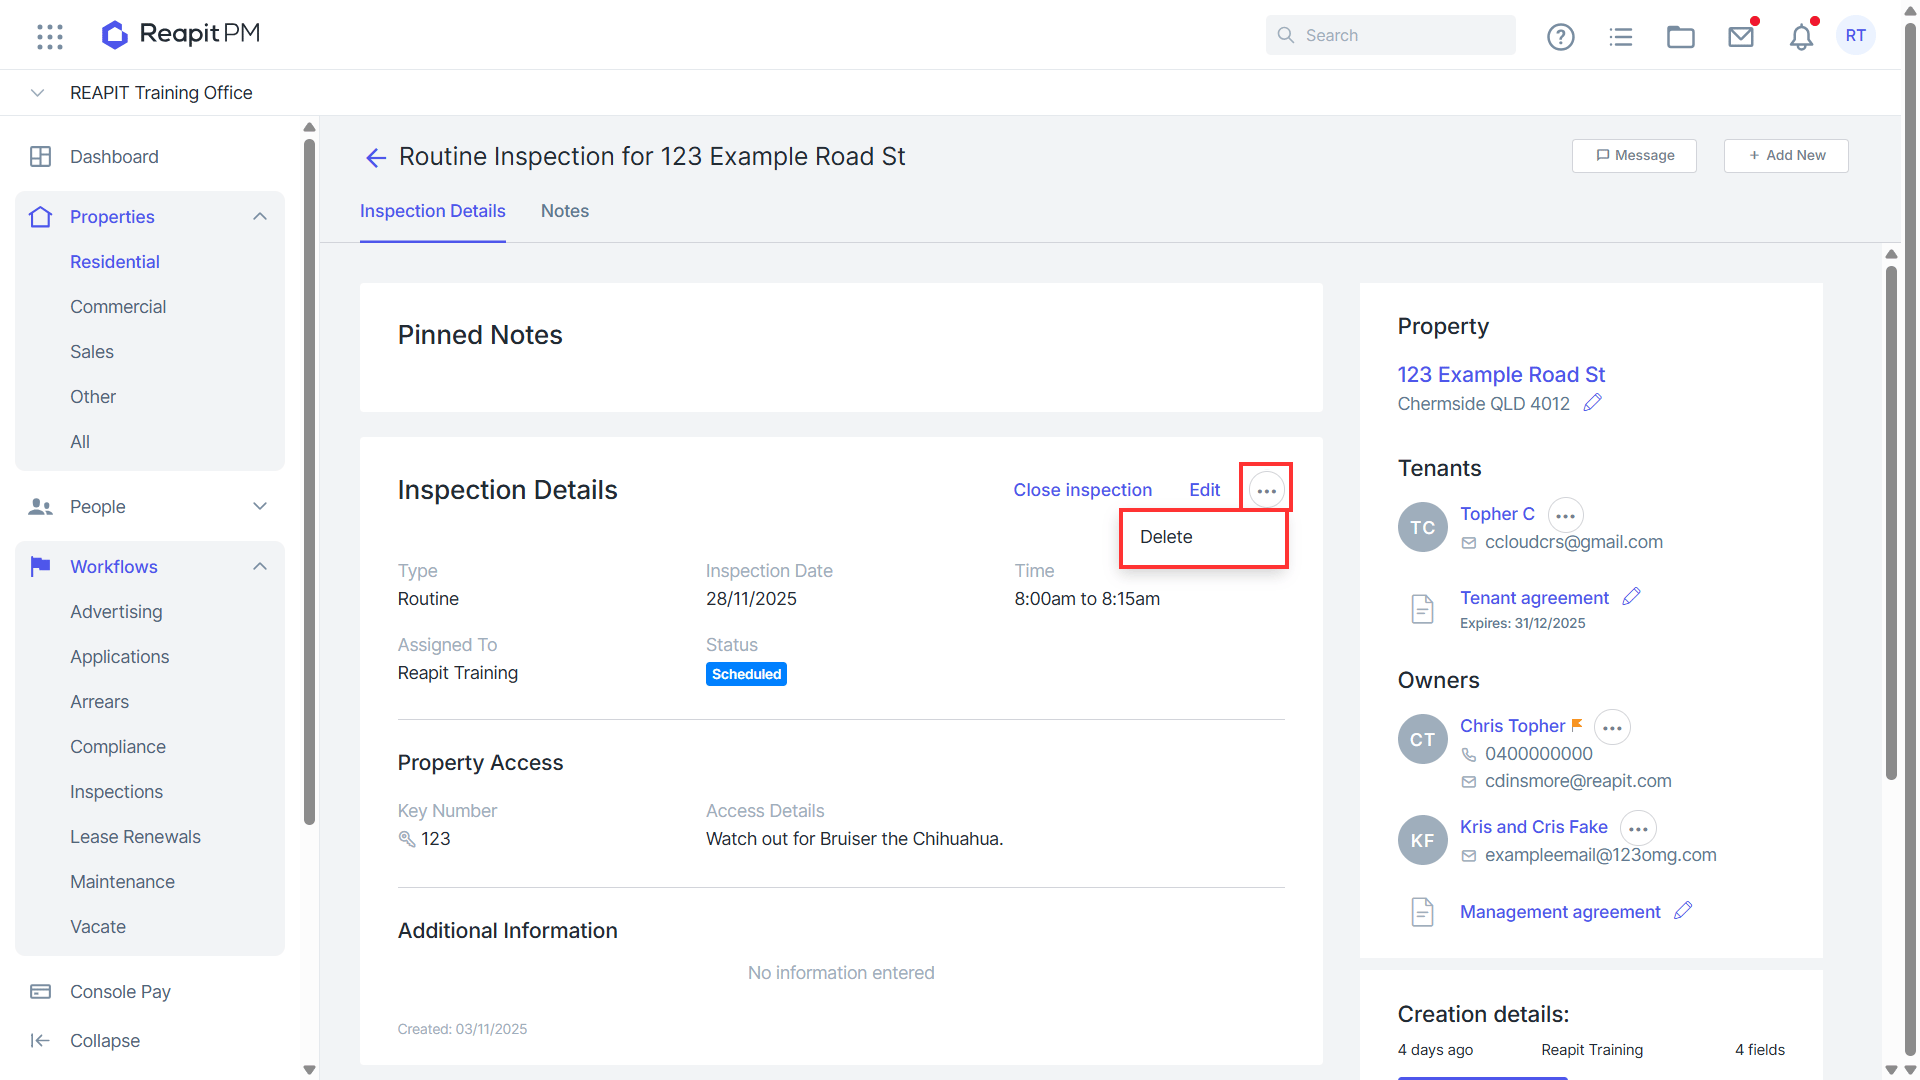
To delete the inspection, click the three dots.
Click Delete.
Note: Once an inspection is deleted, it cannot be recovered. You can also bulk edit to assist in reassigning and rescheduling.
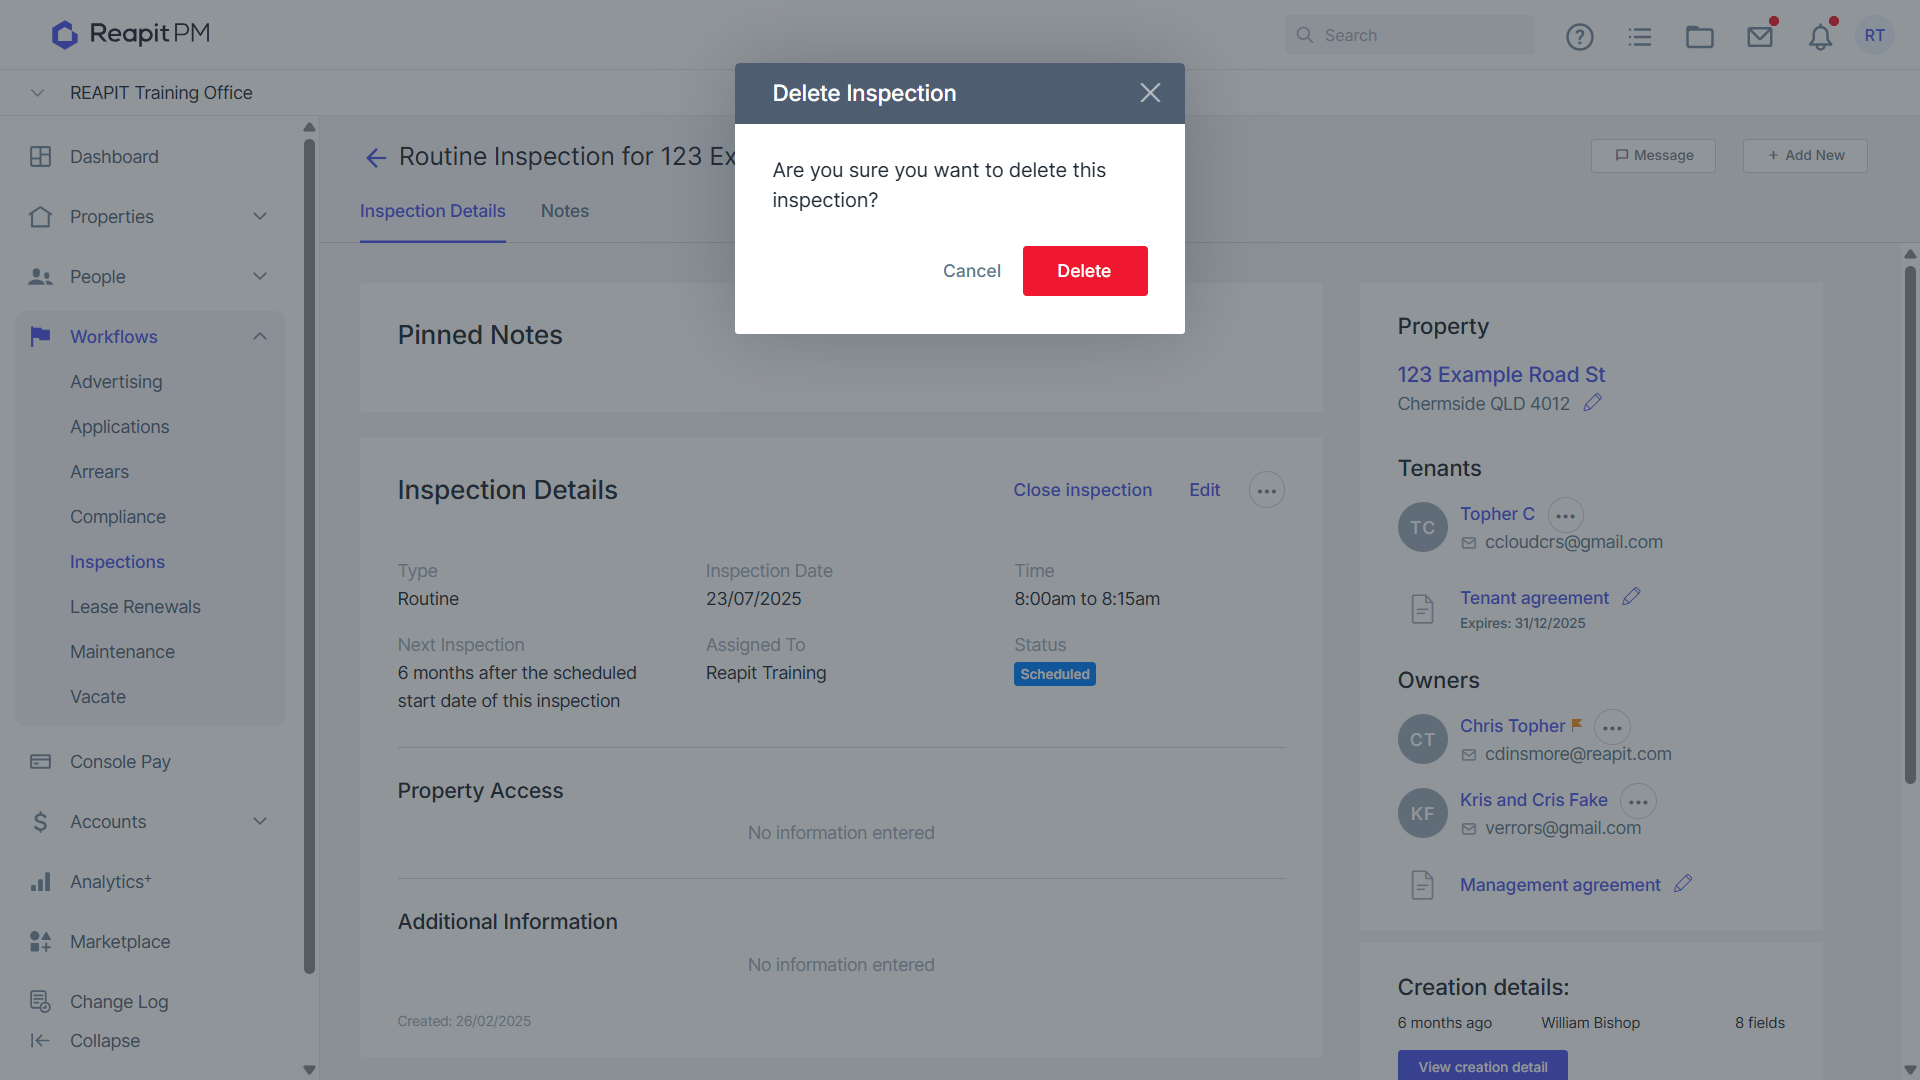
Once you confirm the deletion, click Delete.
Completing the Inspection
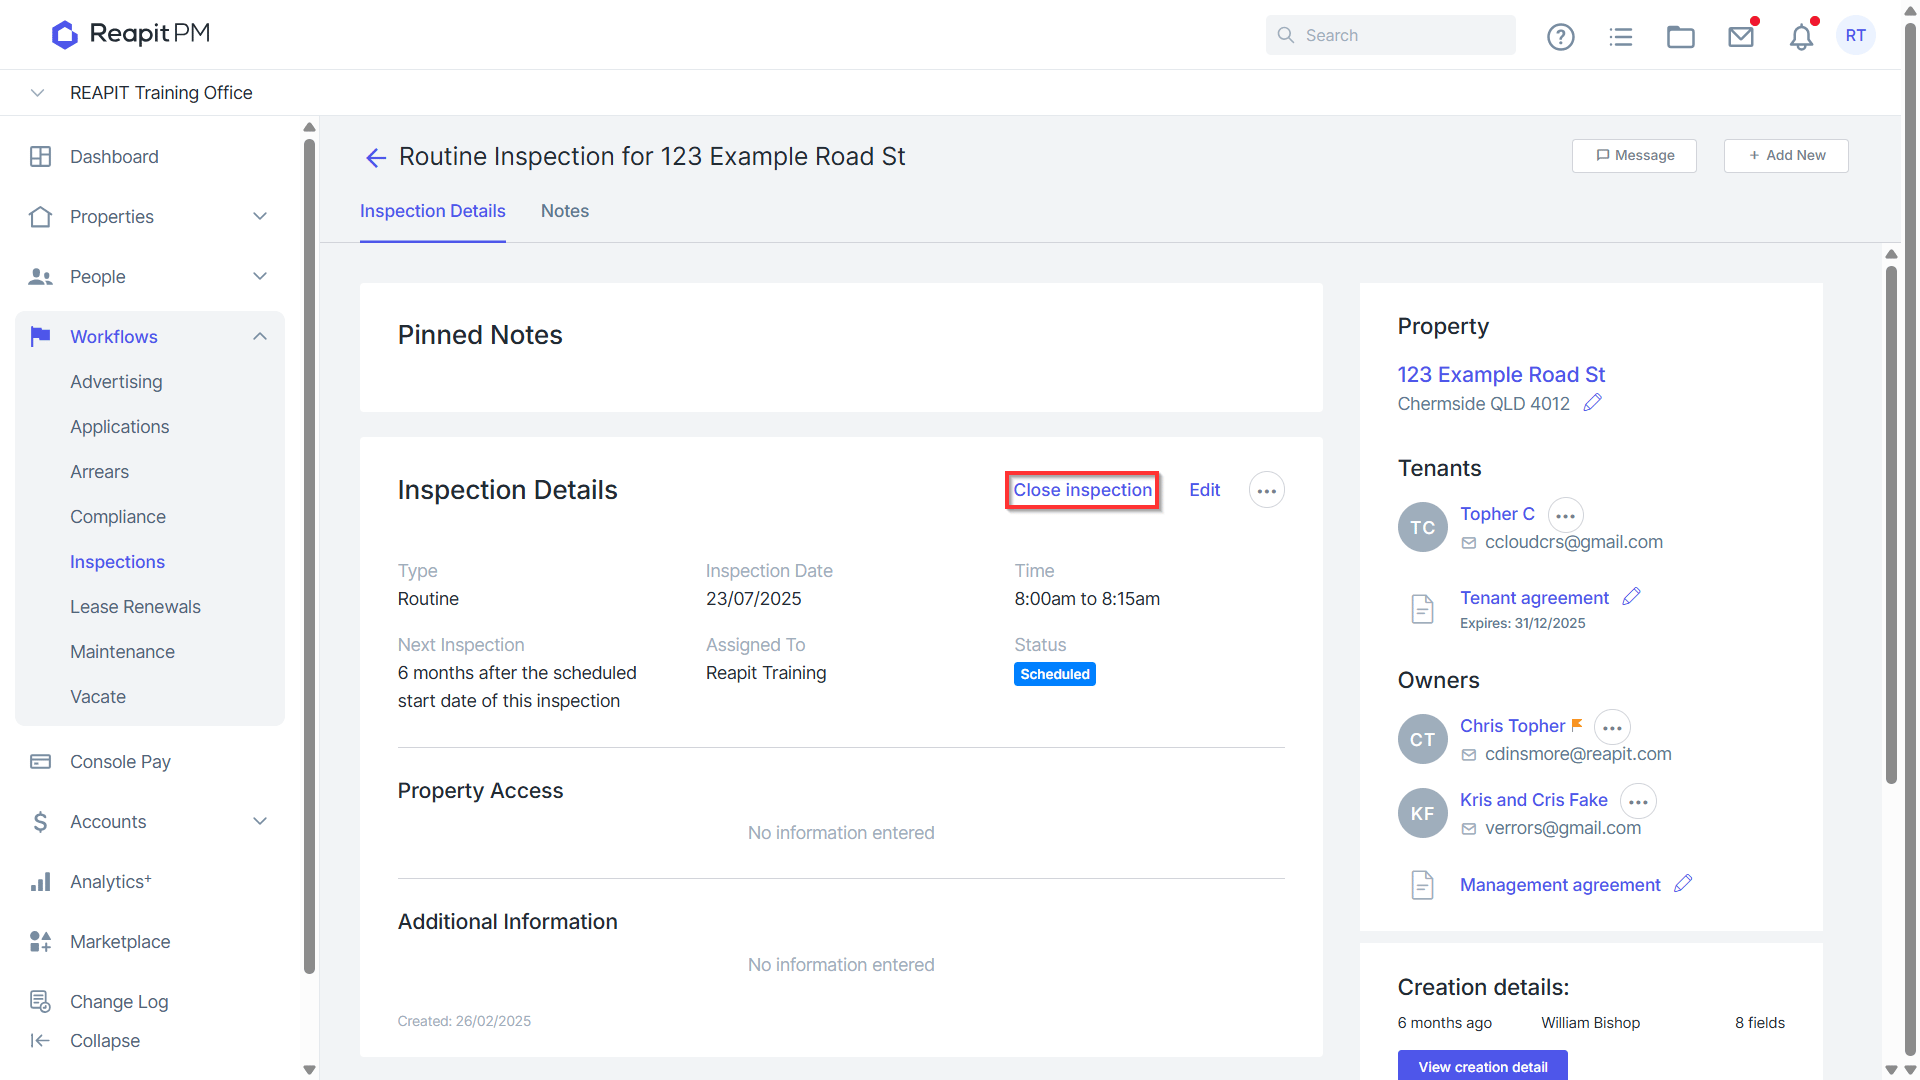
Once you have finalised your inspection, open the inspection.
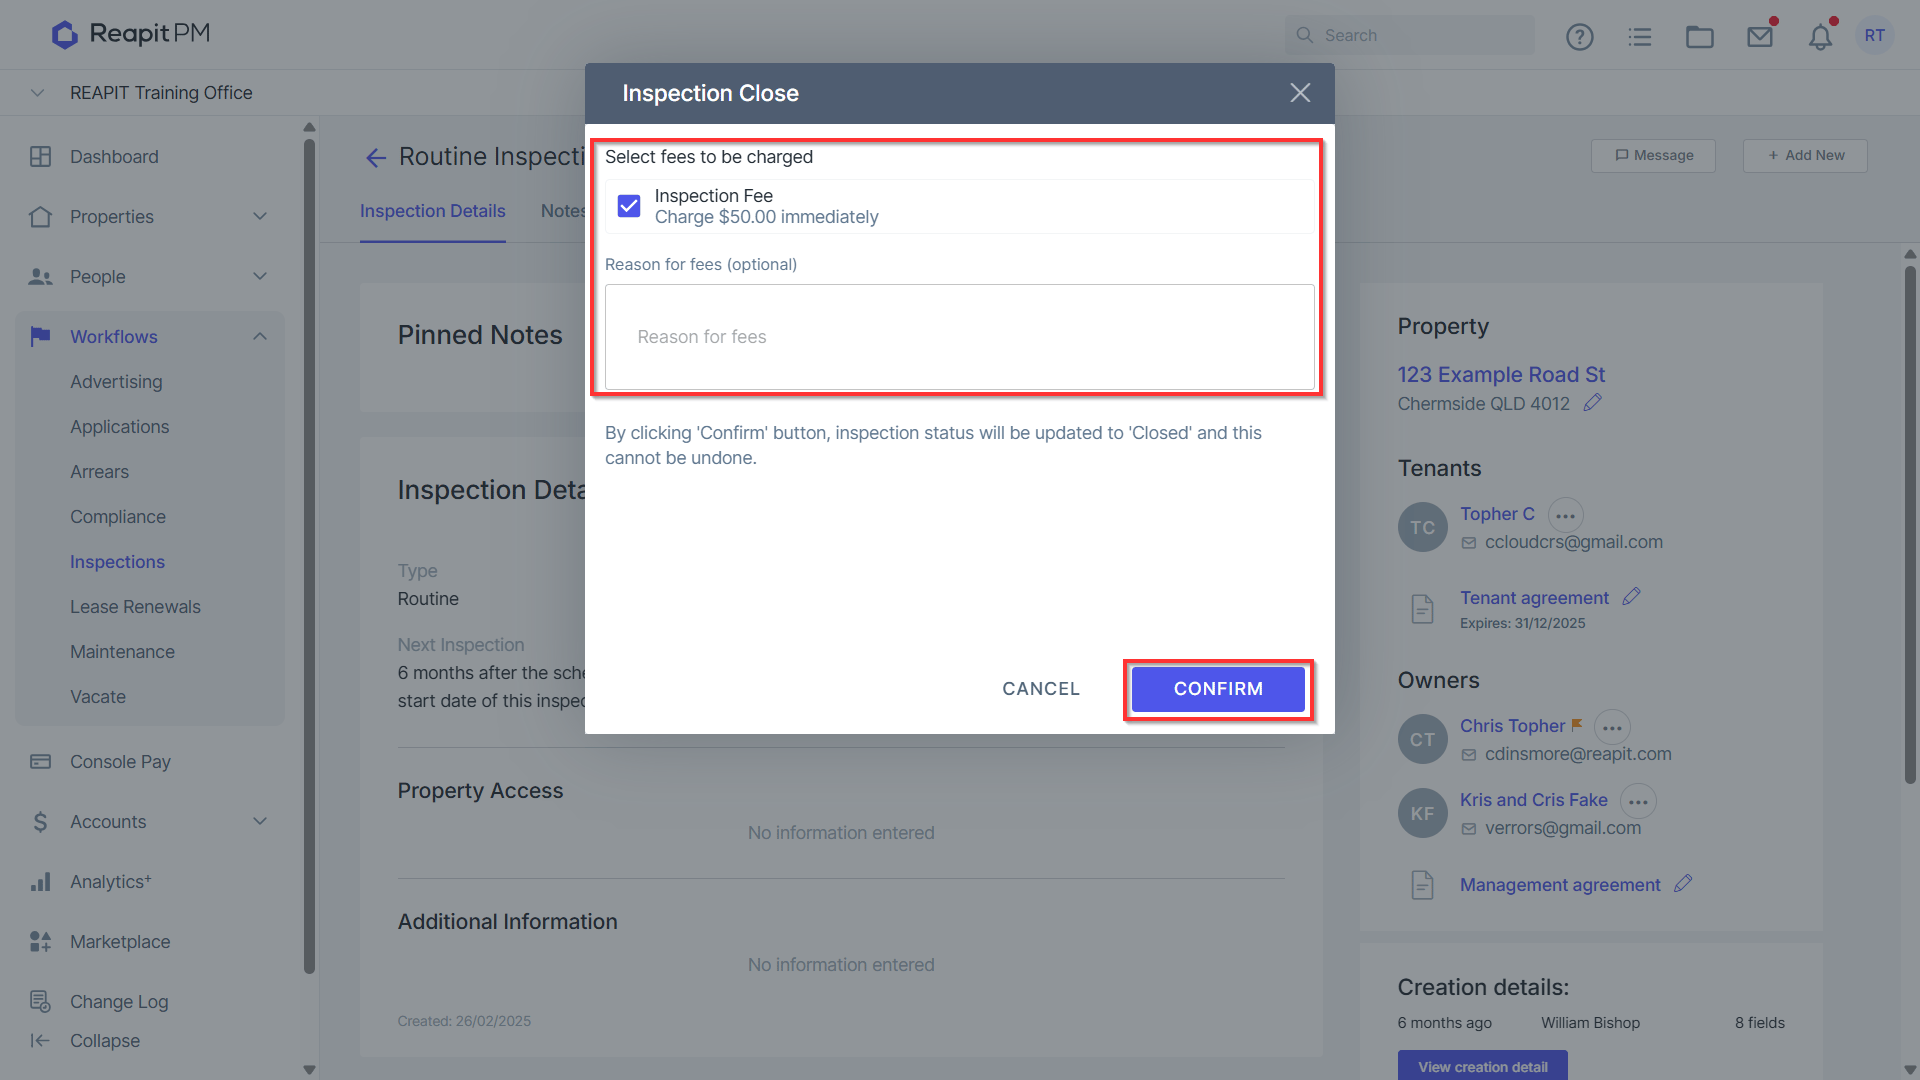
Click Close inspection.
Note: Once an inspection is closed, it cannot be reopened or edited.
Select any fees to be charged, insert a reason and click Confirm.
Owner to Attend Inspections
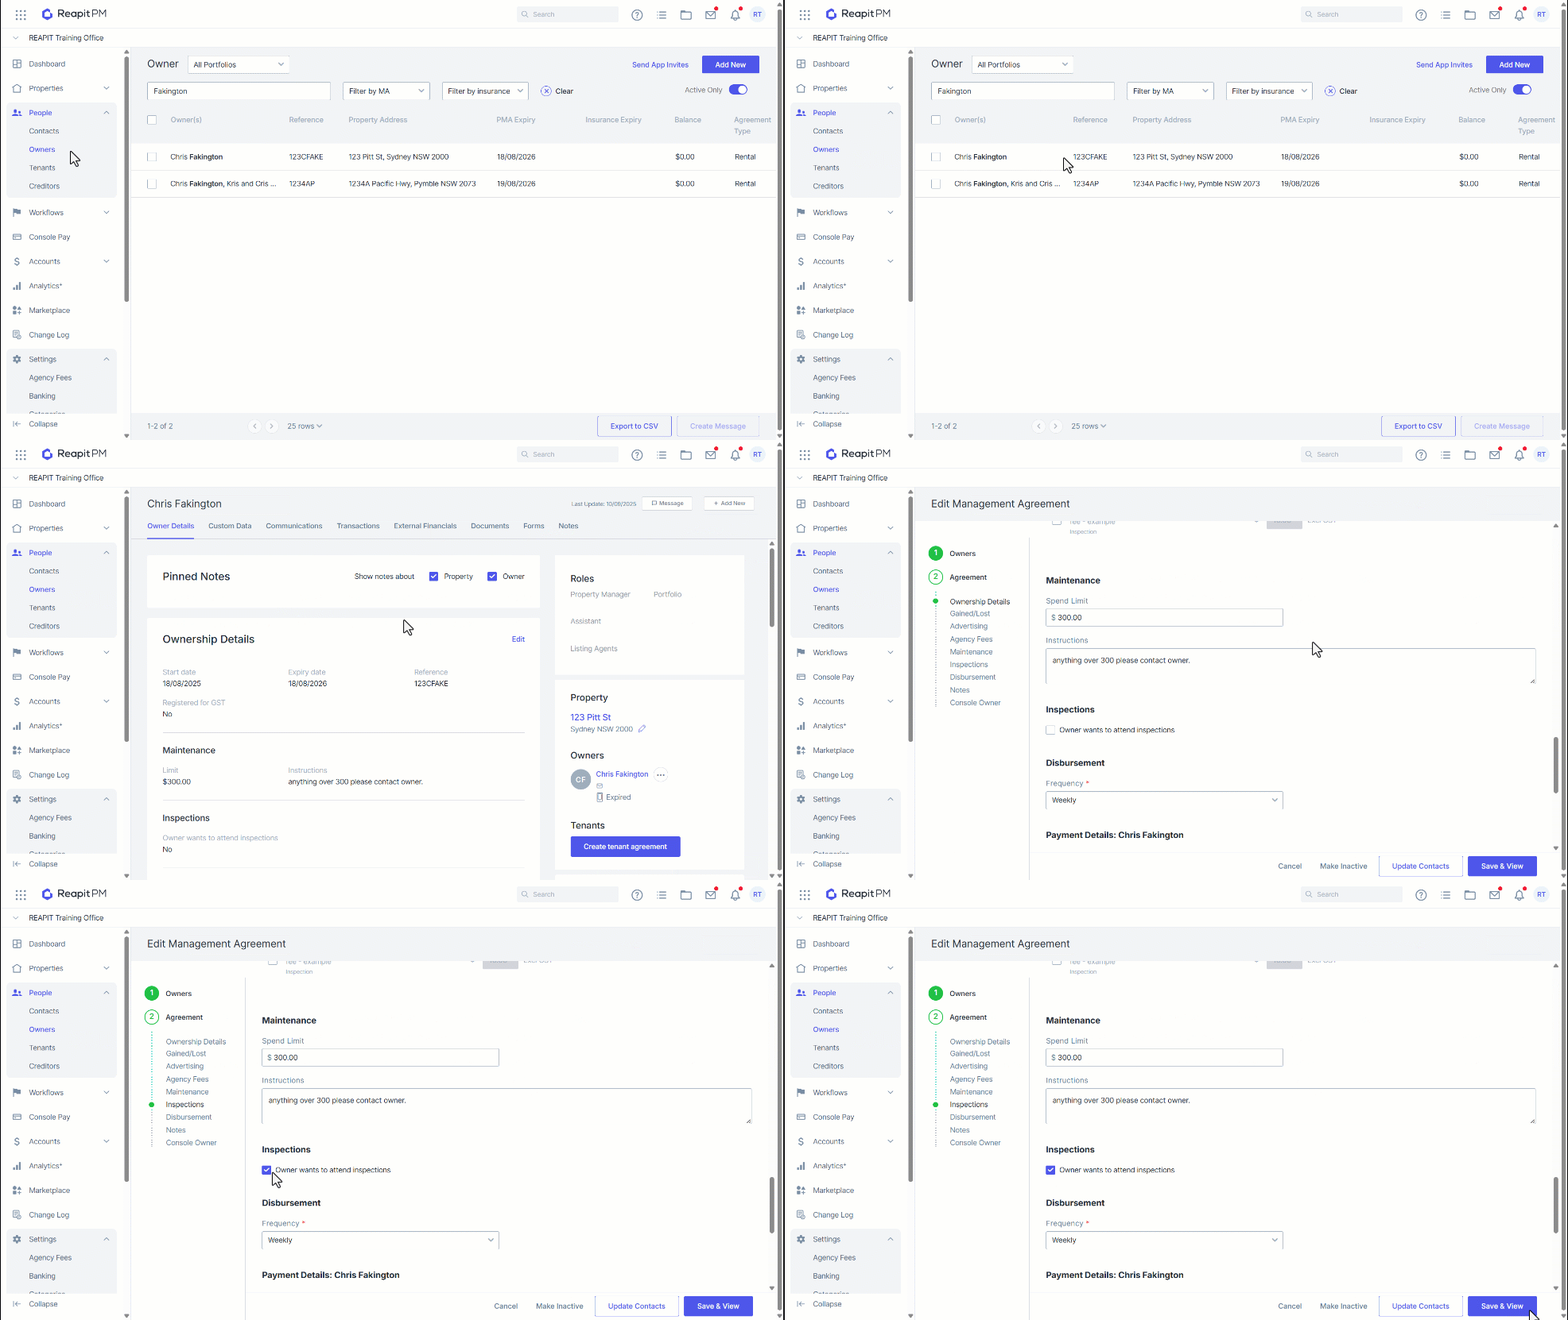
Owners of the property can be marked as wanting to attend inspections from the management agreement.
Navigate to the Owner file.
Click Edit.
Click Owner wants to attend inspections.
Click Save.
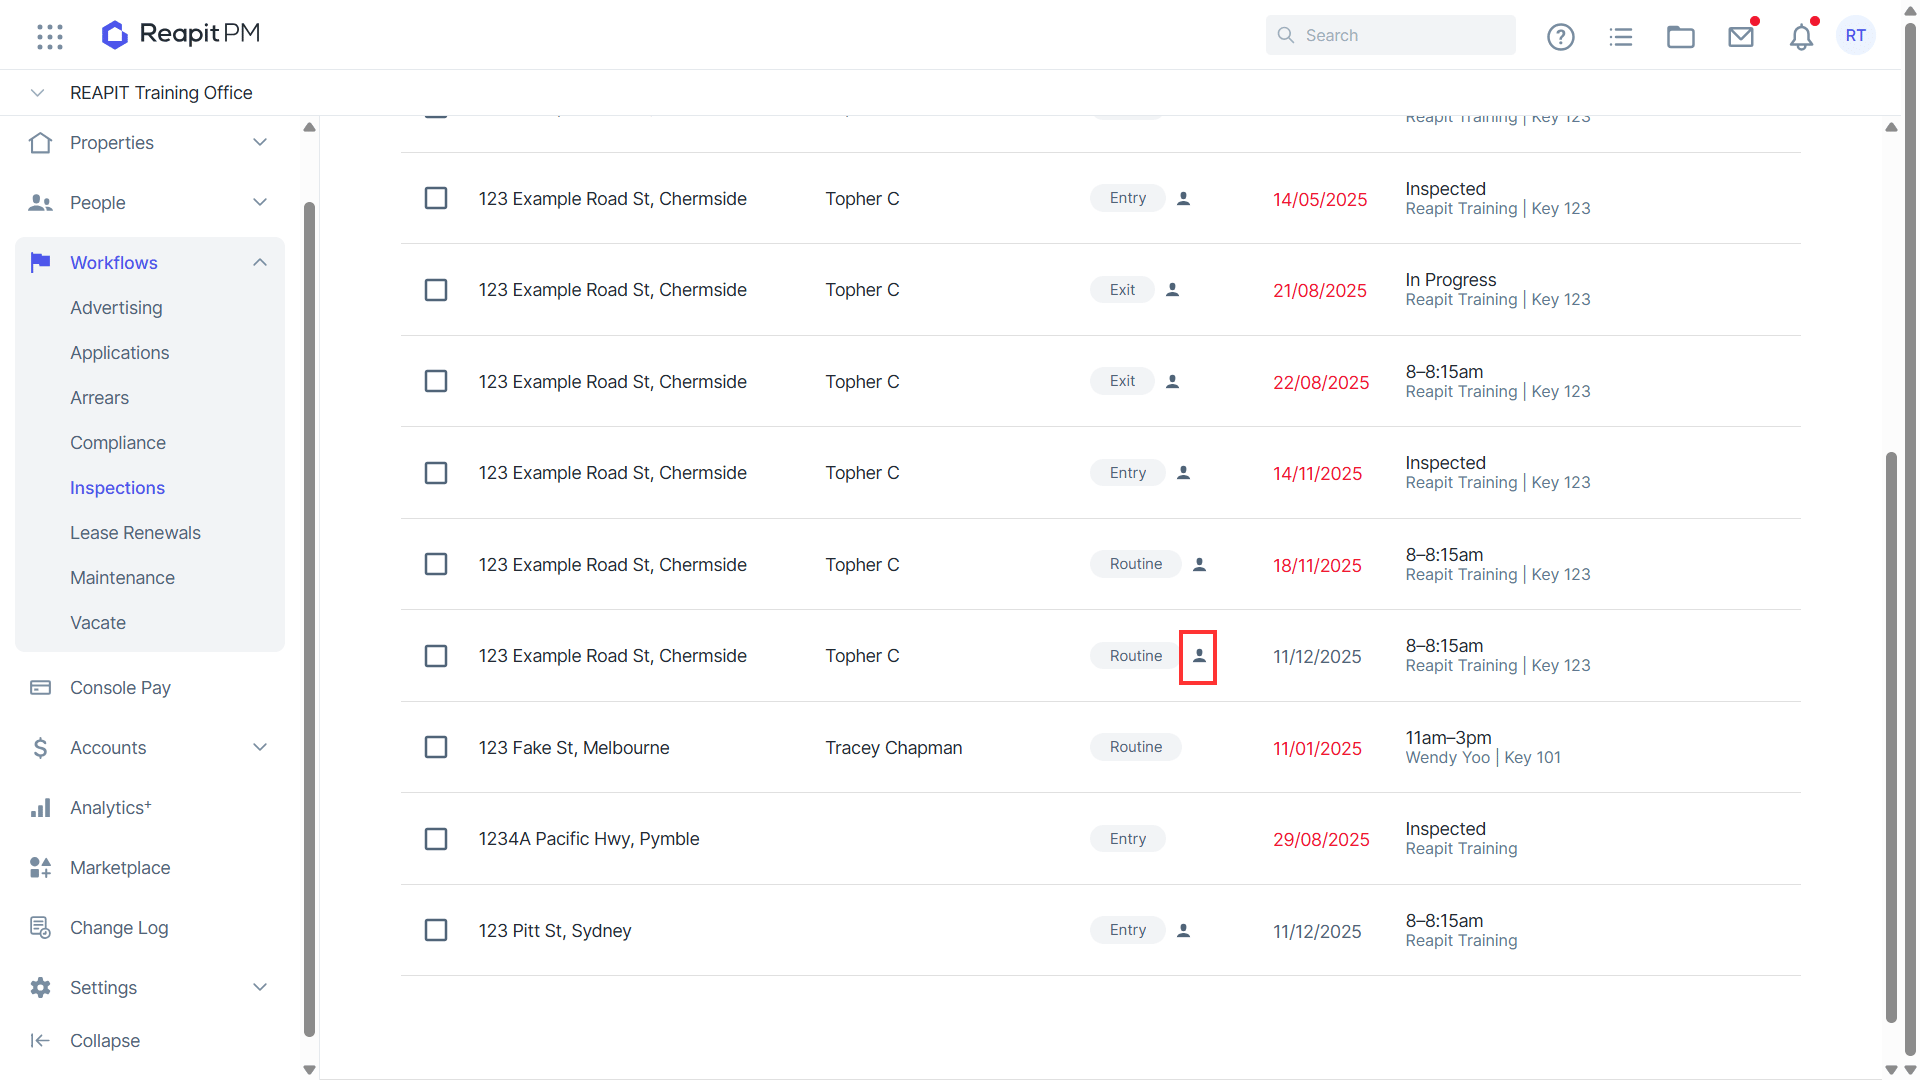
- The Inspection Workflow will display an icon for any properties where the owner has nominated to attend.
Inspection Workflow Settings
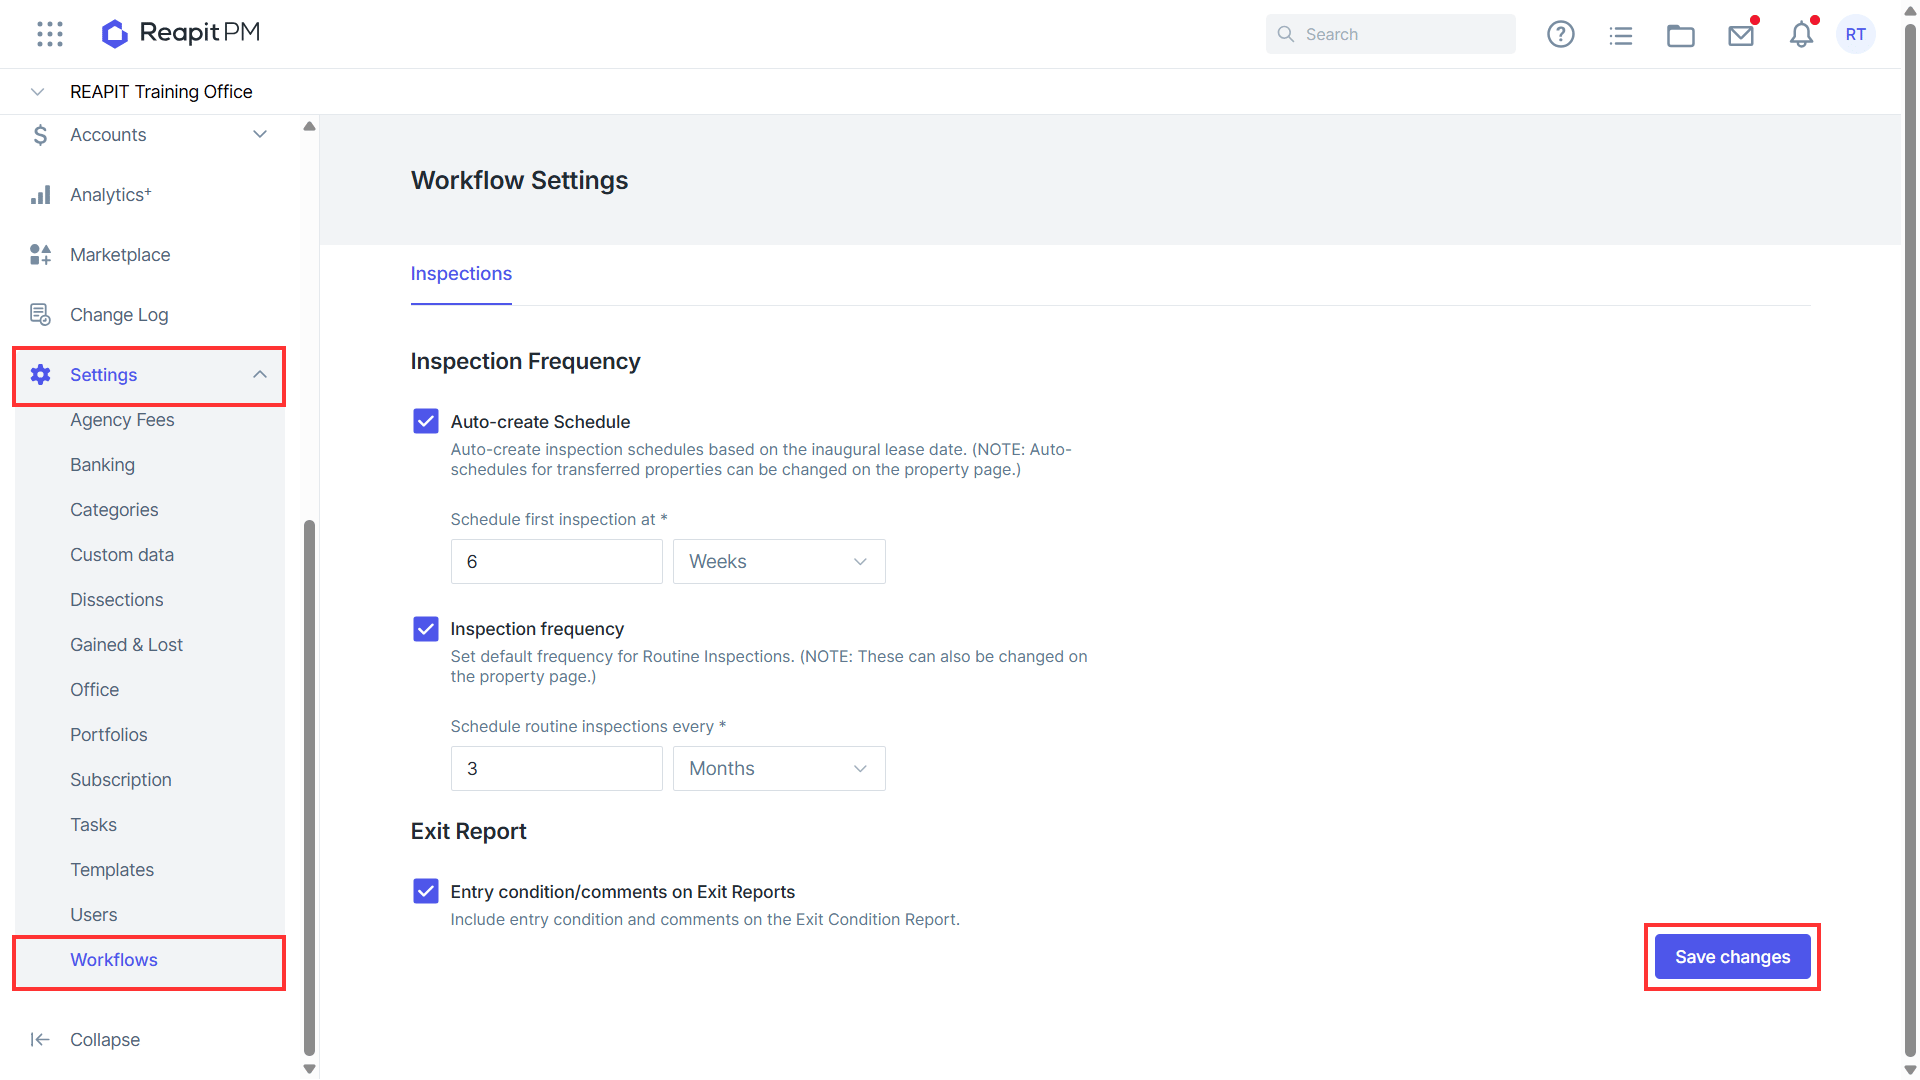
- Navigate to Settings.
- Click Workflows.
- The following inspection settings can be enabled or changed from this screen:
Auto-create Schedule - When enabled, auto-create inspection will create the schedule based on the inaugural lease date.
Inspection frequency - When enabled, this will set the default frequency for routine inspections.
Entry condition/comments on Exit Reports - When enabled, this will include entry condition comments on the exit condition report.
Note: Auto-create schedule and Inspection Frequency settings can be updated for a specific property from the property file.
- Click Save to finalise any changes.
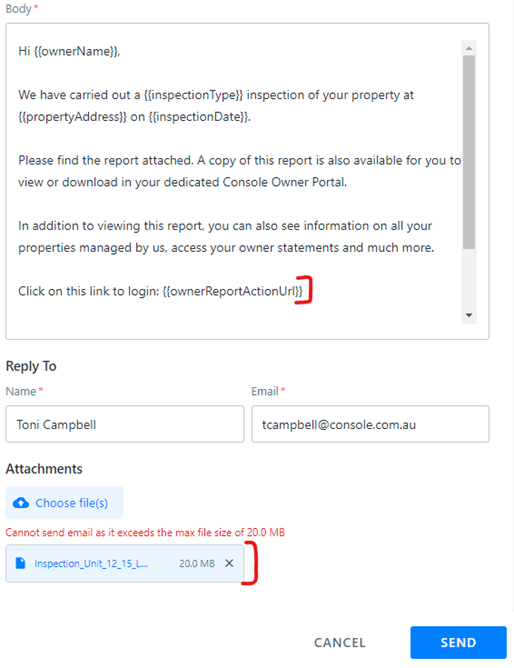
Managing Routine Inspection Reports that exceed the email size limit
1. In App Image Setting
Check the image quality is set to 'Default' (More > Settings > Quality). This will reduce the attachment file size, and will still provide a good quality image that can be used for printing or displaying on screen.
- Sending via the App
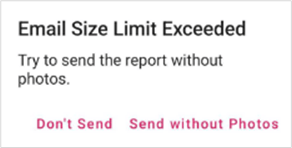
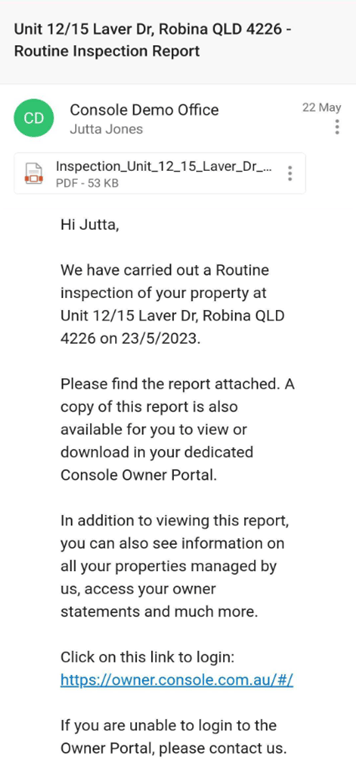
The email template also includes a link to download the report via the owner portal, so by selecting the send without photos option the owner can still access the full report with images, via the link included.
- Sending via Reapit PM.
The email template also includes a link to download the report via the owner portal. If the report exceeds 20MB, select the Send without photos option and the owner can still access the full report with images, via the link included.