'%20d='M0%208a8%208%200%200%201%208-8h24a8%208%200%200%201%208%208v24a8%208%200%200%201-8%208H8a8%208%200%200%201-8-8V8Z'/%3e%3cpath%20fill='%23fff'%20d='M8.375%2013v14L20.5%2034l12.124-7v-7.737l-1.687-.975-2.806-1.62-1.082-.624v4.83l-.002%204.83H13.95V16.07l3.275-1.89%202.192-1.265%201.082-.625%203.275%201.877%202.192%201.256%201.083.62V9.782L20.5%206%208.376%2013Z'/%3e%3cdefs%3e%3clinearGradient%20id='reapit-pm__a'%20x1='20.702'%20x2='20.702'%20y1='.351'%20y2='31.228'%20gradientUnits='userSpaceOnUse'%3e%3cstop%20stop-color='%235573FD'/%3e%3cstop%20offset='.575'%20stop-color='%234E56EA'/%3e%3c/linearGradient%3e%3c/defs%3e%3c/svg%3e)
Commercial Tenancy Schedule in Analytics
This article will cover how to access the Commercial Tenancy Schedule in Analytics+ and the types of data available to view in Reapit PM.
Commercial Tenancy Schedule in Analytics+
This article will cover how to access the Commercial Tenancy Schedule in Analytics+ and the types of data available to view in Reapit PM.
Accessing the Commercial Tenancy Schedule
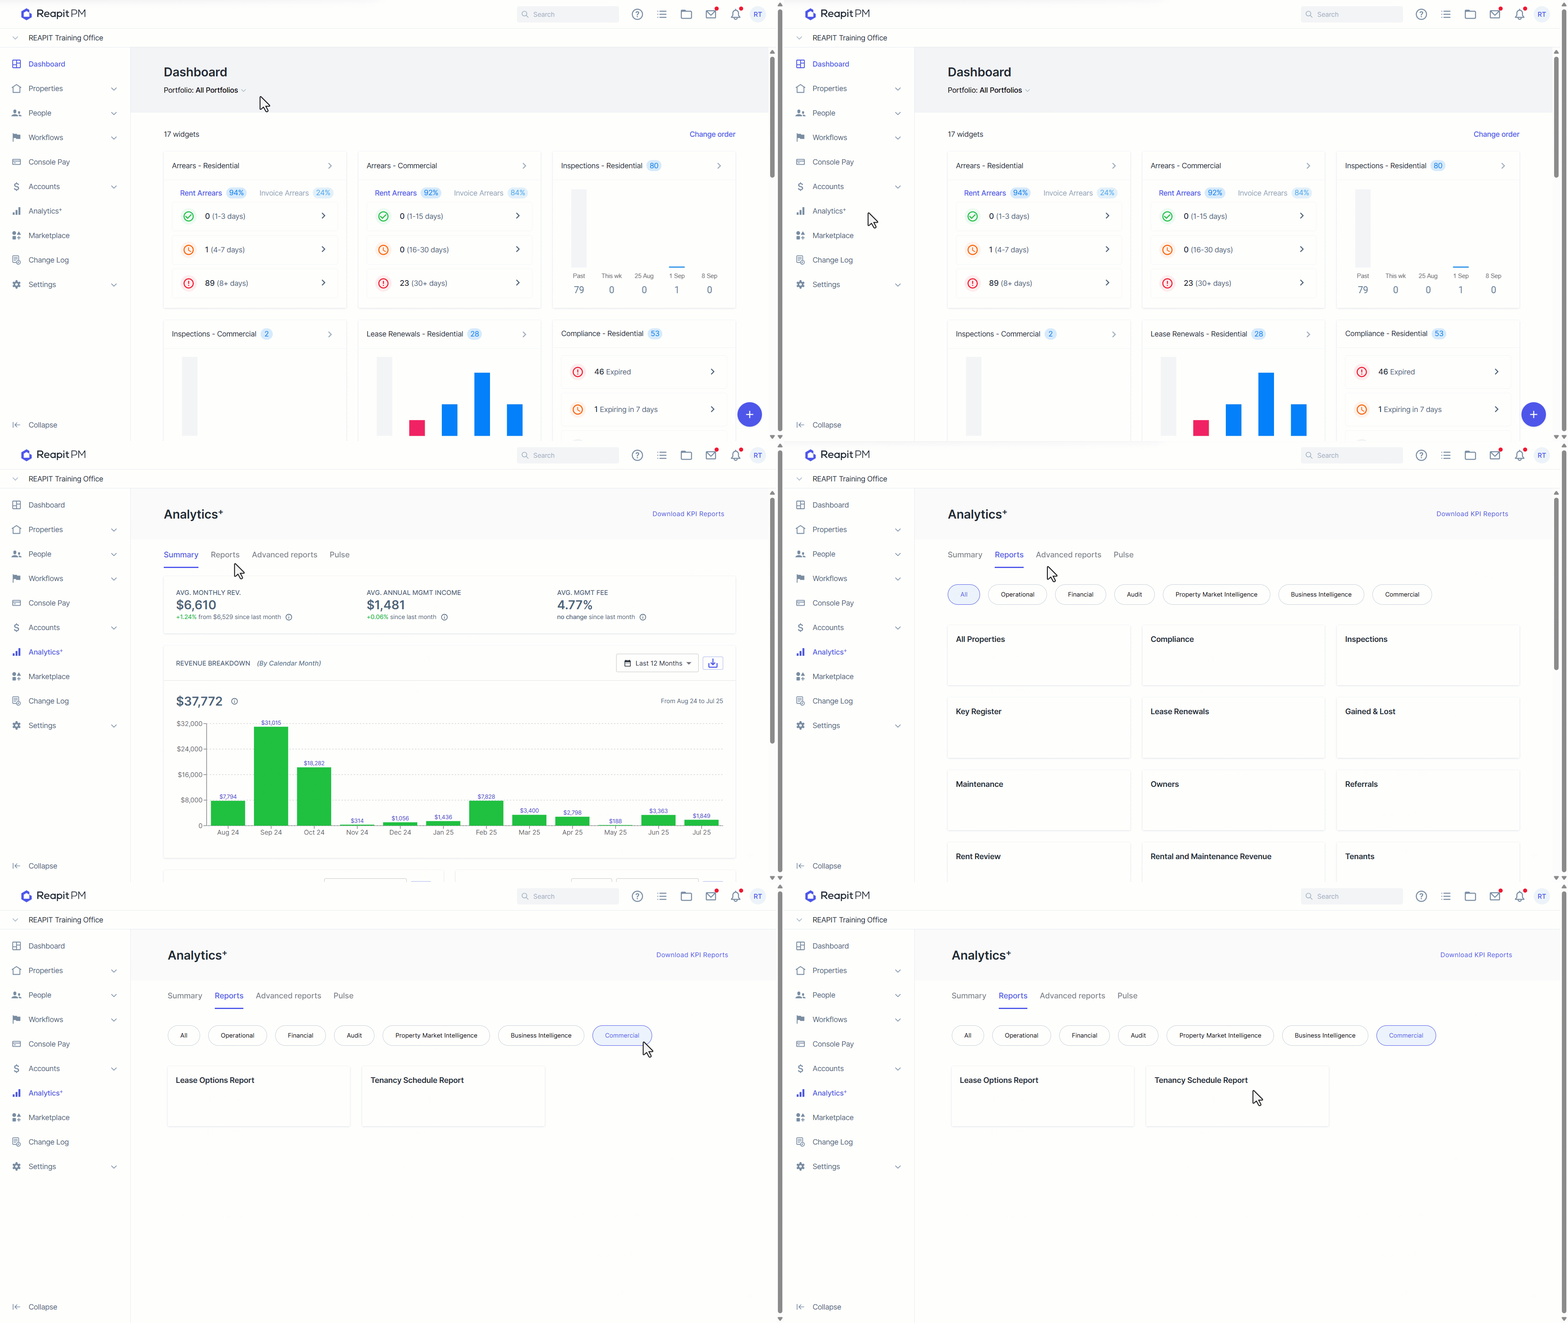
- From the Dashboard, navigate to Analytics+.
- Click on Reports.
- Tap on the Commercial filter, and select Tenancy Schedule Report.
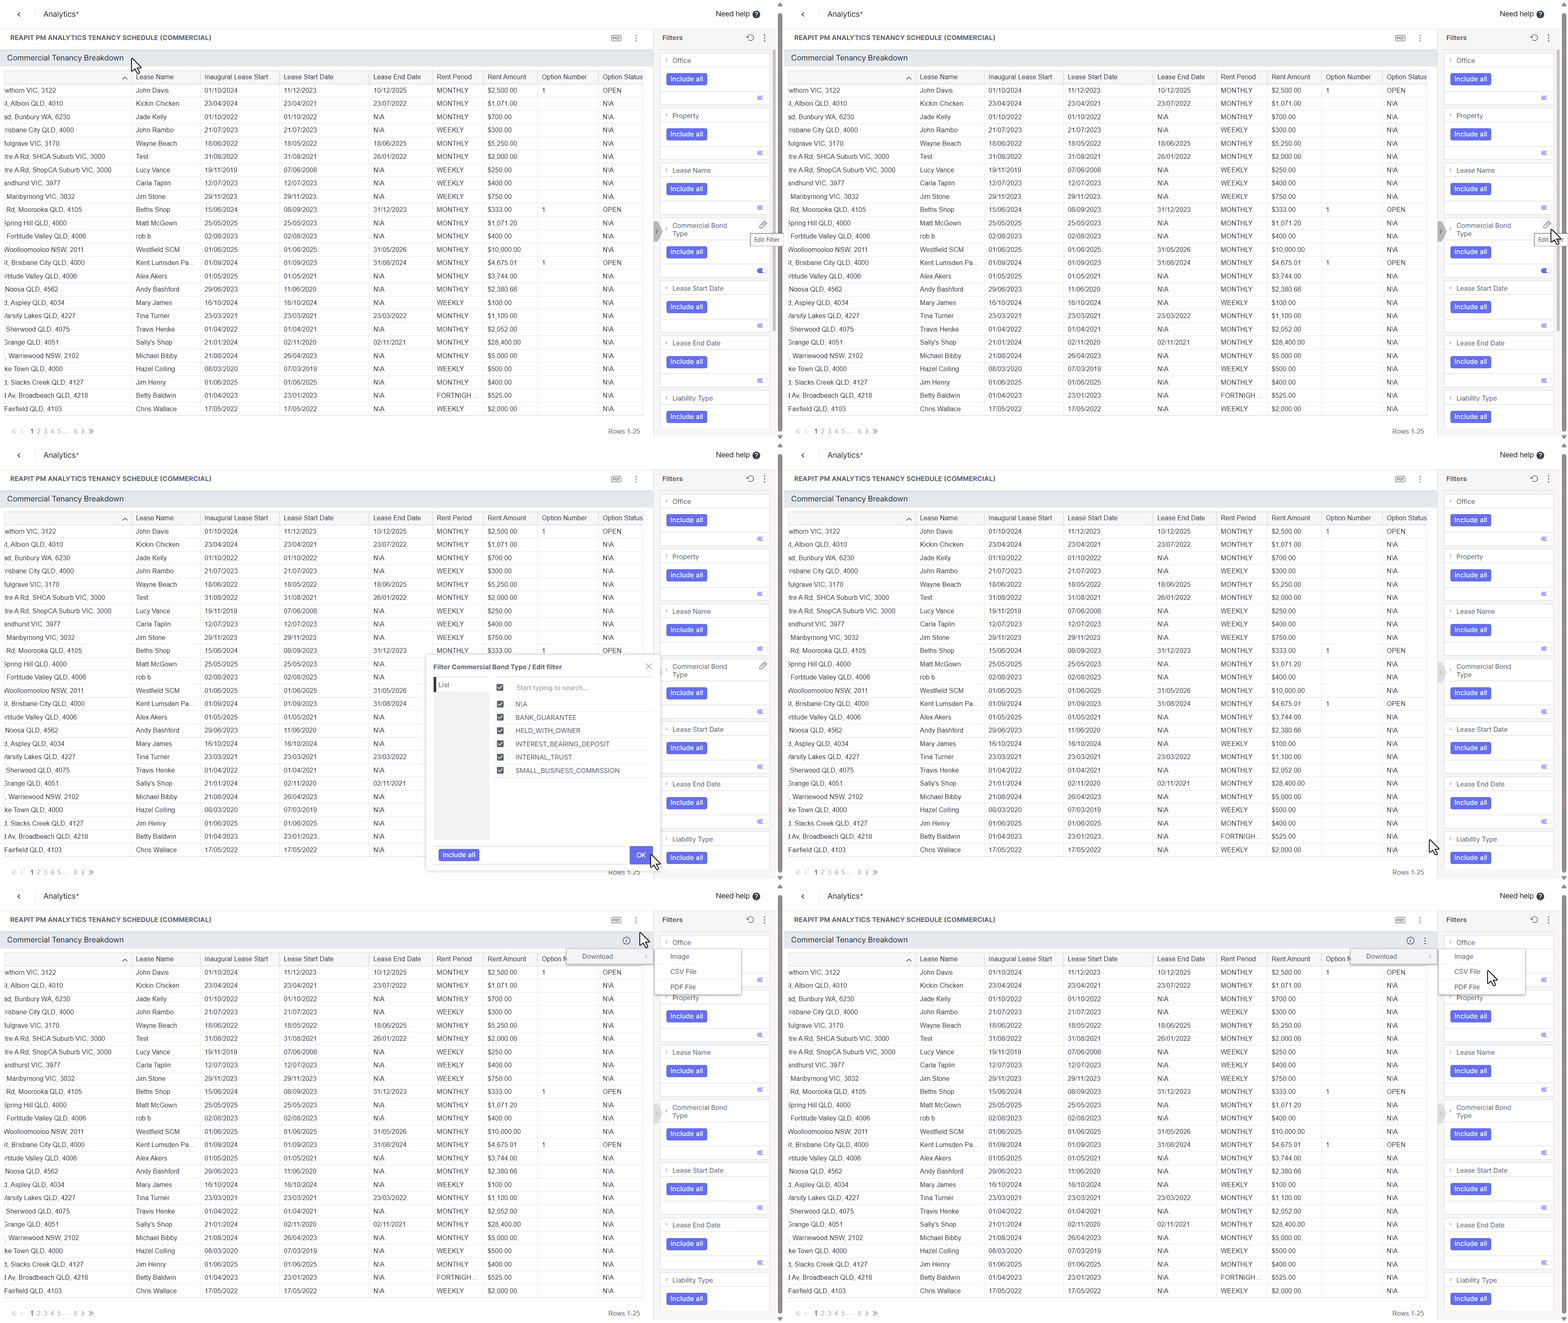
- The Commercial Tenancy Schedule report data will populate on the page.
- Some of the data columns on the report include:
- Property
- Lease Name
- Inaugural Lease Start
- Lease Start Date
- Lease End Date
- Rent Period
- Rent amount
- Option Number
Note: Use the slider located at the bottom of the report to view the additional data columns on the right side of the table.
- The Filters options located on the right side of the report will include:
- Lease Start Date
- Lease End Date
- Liability Type
- Option Review Type
- Option Status
Placing your mouse cursor in the filtering tile will display the pencil Icon, allowing you to apply filters to that specific data in the report table.
- Clicking on the 'PDF' button will allow you to edit the layout of the report data and include/exclude headers or footers. Selecting the three action dots > Download will provide you with additional exporting options for Image, CSV File or PDF (with no editing).