'%20d='M0%208a8%208%200%200%201%208-8h24a8%208%200%200%201%208%208v24a8%208%200%200%201-8%208H8a8%208%200%200%201-8-8V8Z'/%3e%3cpath%20fill='%23fff'%20d='M8.375%2013v14L20.5%2034l12.124-7v-7.737l-1.687-.975-2.806-1.62-1.082-.624v4.83l-.002%204.83H13.95V16.07l3.275-1.89%202.192-1.265%201.082-.625%203.275%201.877%202.192%201.256%201.083.62V9.782L20.5%206%208.376%2013Z'/%3e%3cdefs%3e%3clinearGradient%20id='reapit-pm__a'%20x1='20.702'%20x2='20.702'%20y1='.351'%20y2='31.228'%20gradientUnits='userSpaceOnUse'%3e%3cstop%20stop-color='%235573FD'/%3e%3cstop%20offset='.575'%20stop-color='%234E56EA'/%3e%3c/linearGradient%3e%3c/defs%3e%3c/svg%3e)
Setting up and Creating Tenant Water Invoices via On-Charging
Reapit PM allows users to store a property’s entry and vacate water reading, create and send tenant invoices and manage what information is present on a water bill for tenant invoicing. The process in this article include: Setting up Creditors, Properties and Tenants for Water Invoicing Processing Water Bills
Overview
Setting up and Creating Tenant Water Invoices via On-Charging
Reapit PM allows users to store a property’s entry and vacate water reading, create and send tenant invoices and manage what information is present on a water bill for tenant invoicing.
The process in this article include:
- Setting up Creditors, Properties and Tenants for Water Invoicing
- Processing Water Bills
Setting up Creditors, Properties and Tenants for Water Invoicing
- Navigate to the People > Creditors.
- If you are adding a new creditor, click Add New, or search for an existing creditor via the search bar.
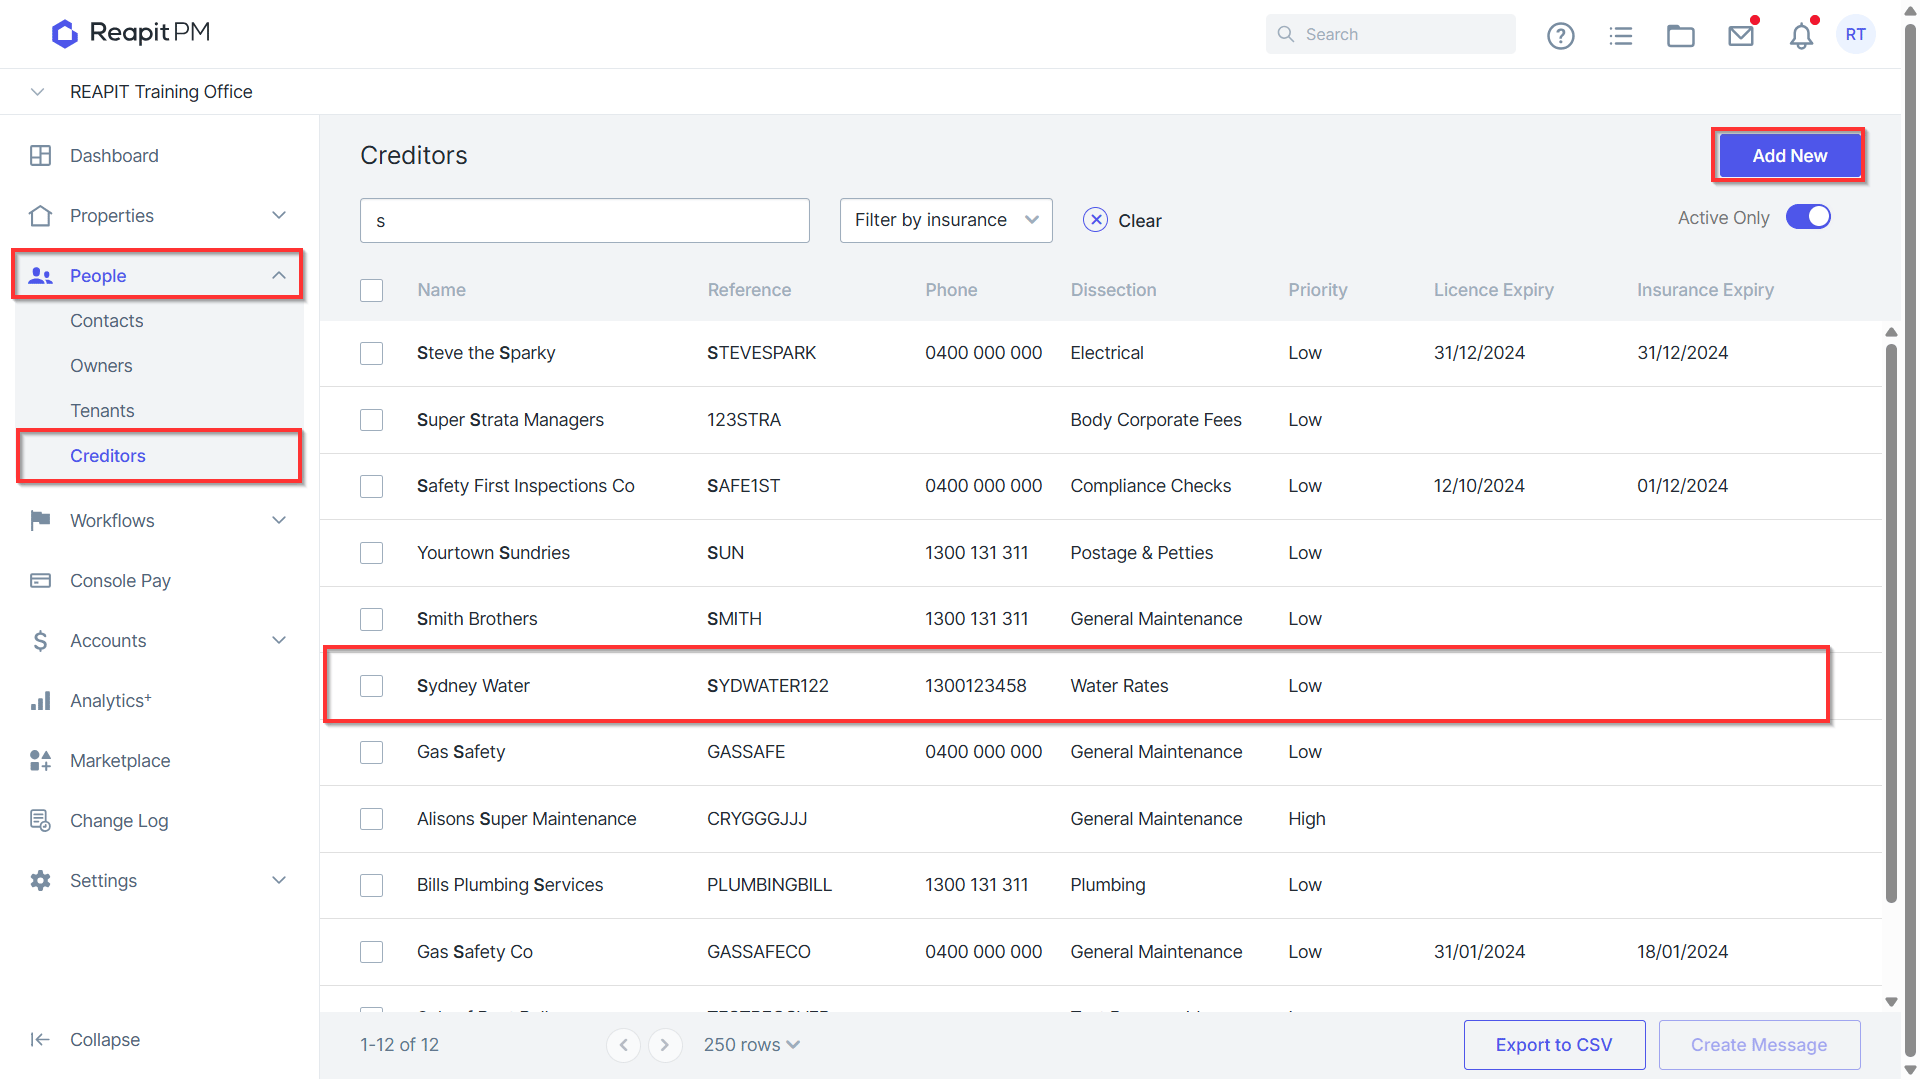
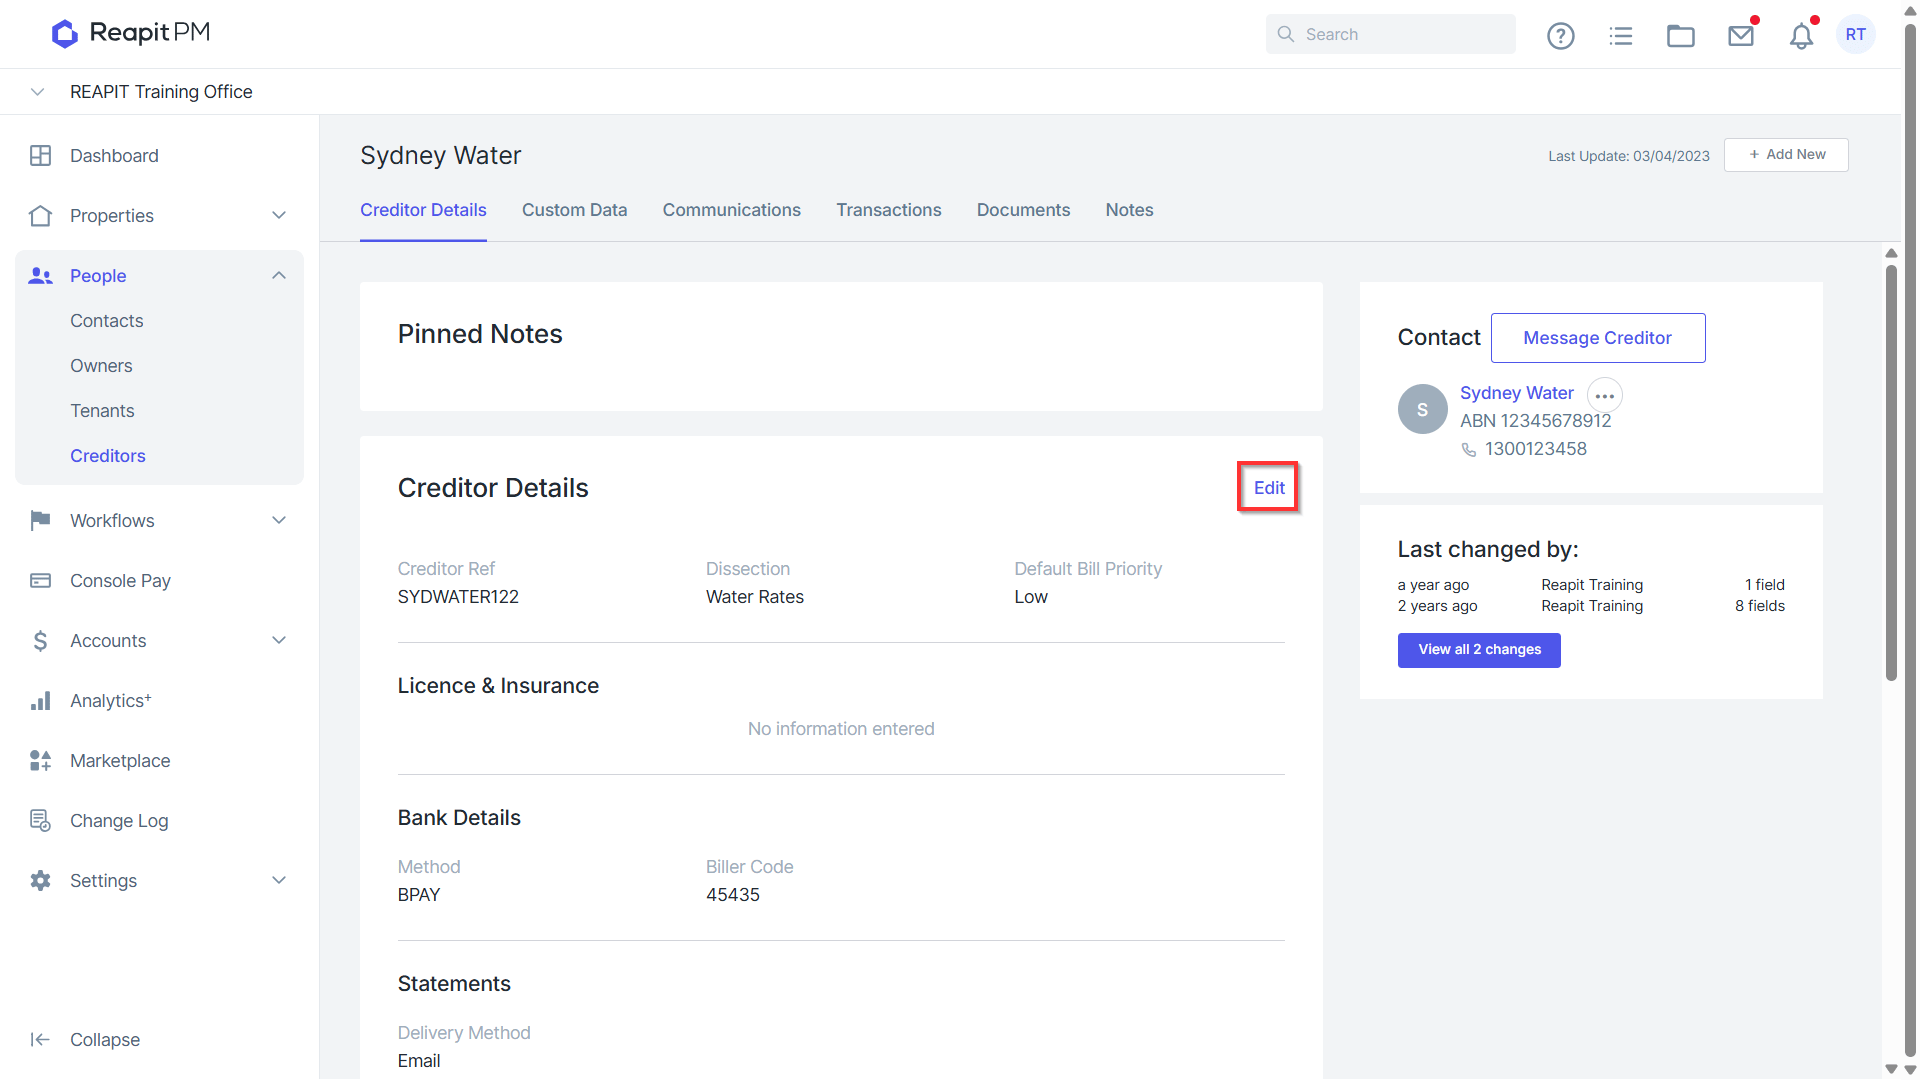
- Search and Select your Creditor, then click Edit to update Creditor Details.
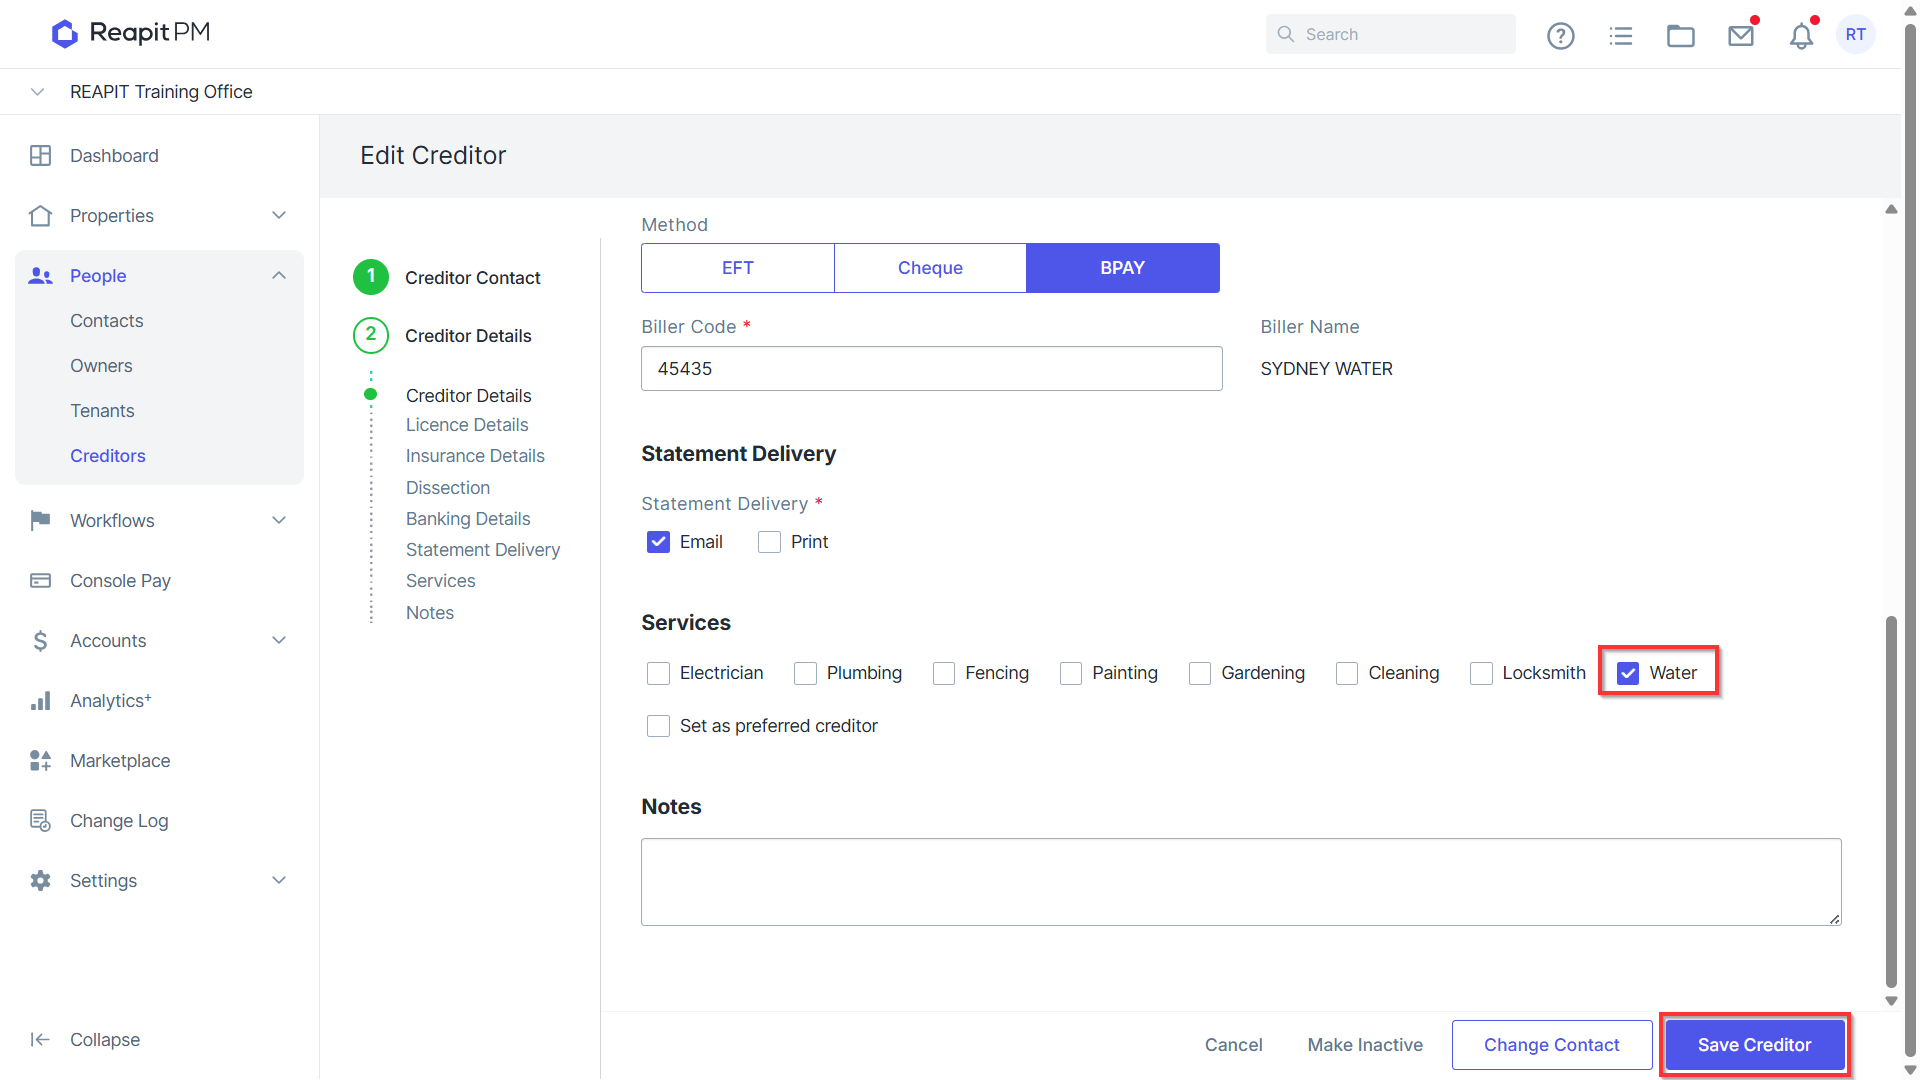
- Against Services, select Water. Reapit PM requires this information for accurate water bill processing.
- Click Save Creditor.
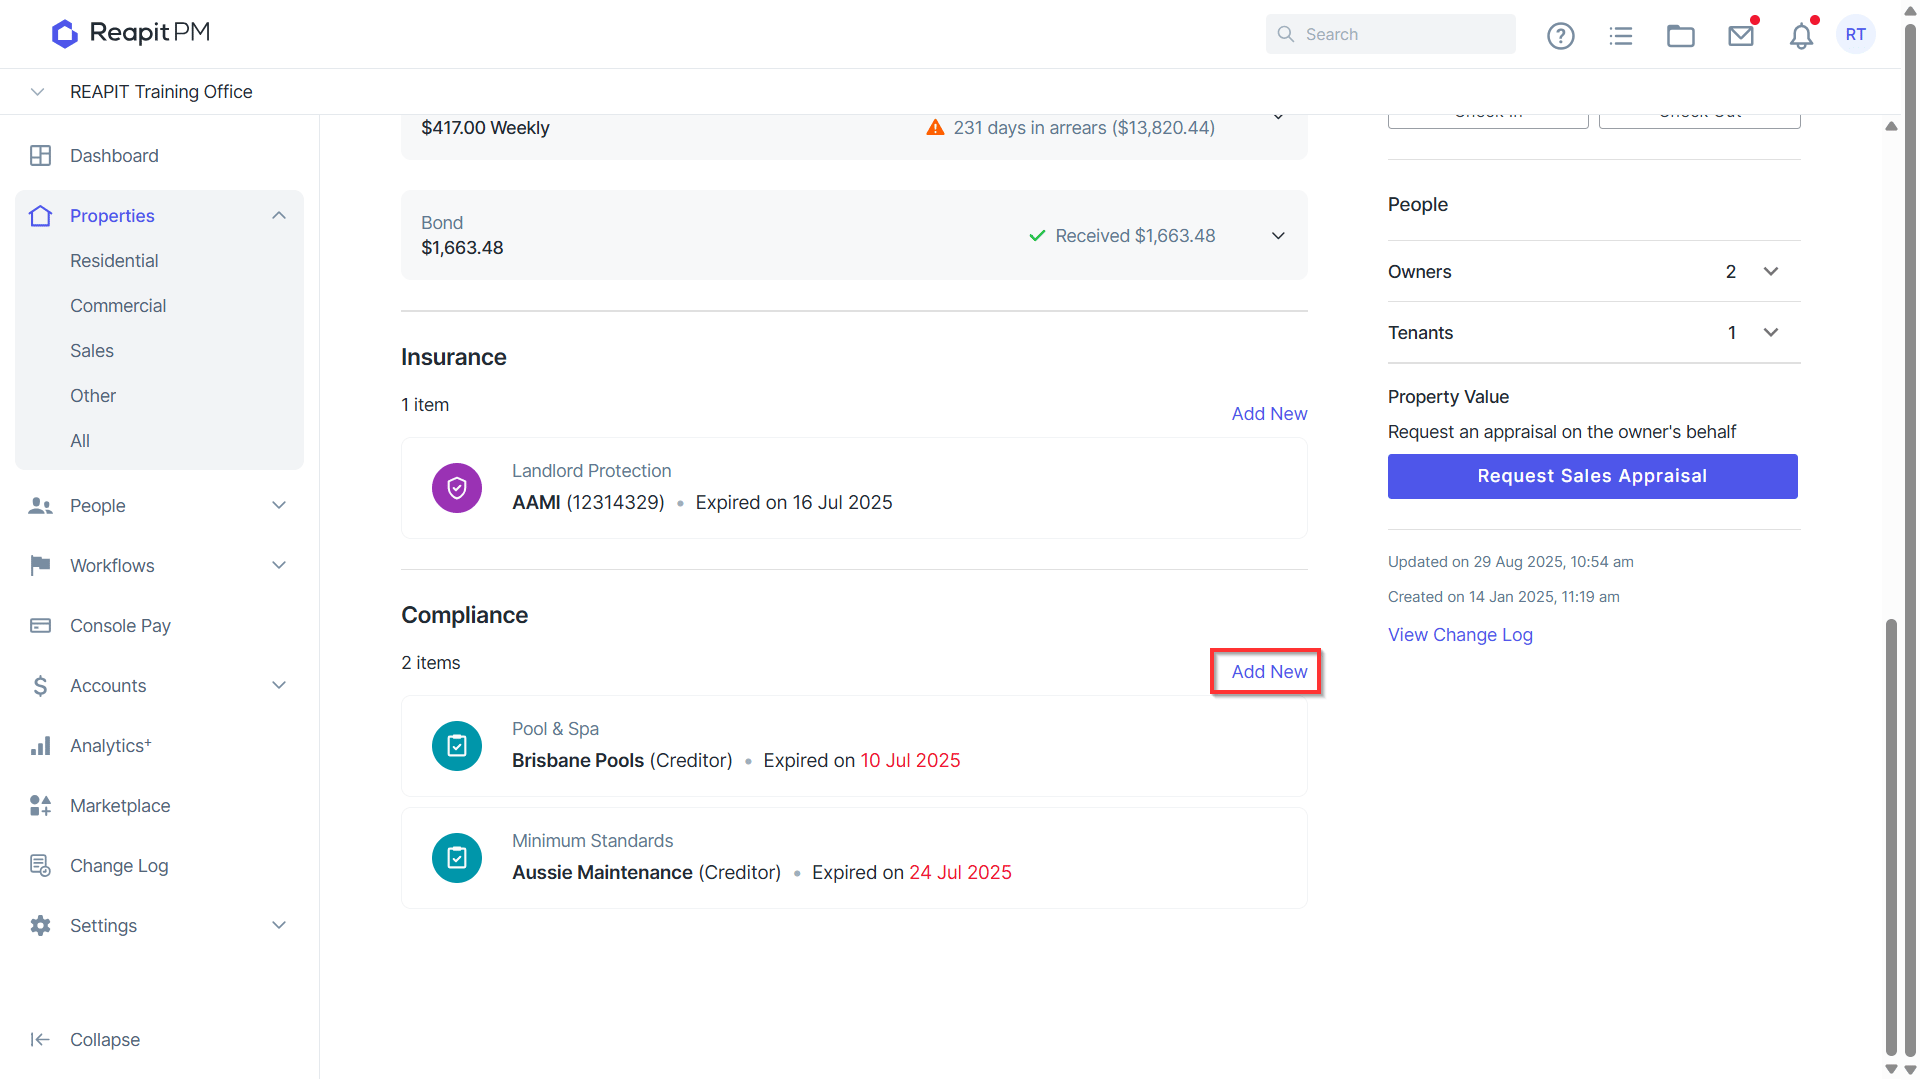
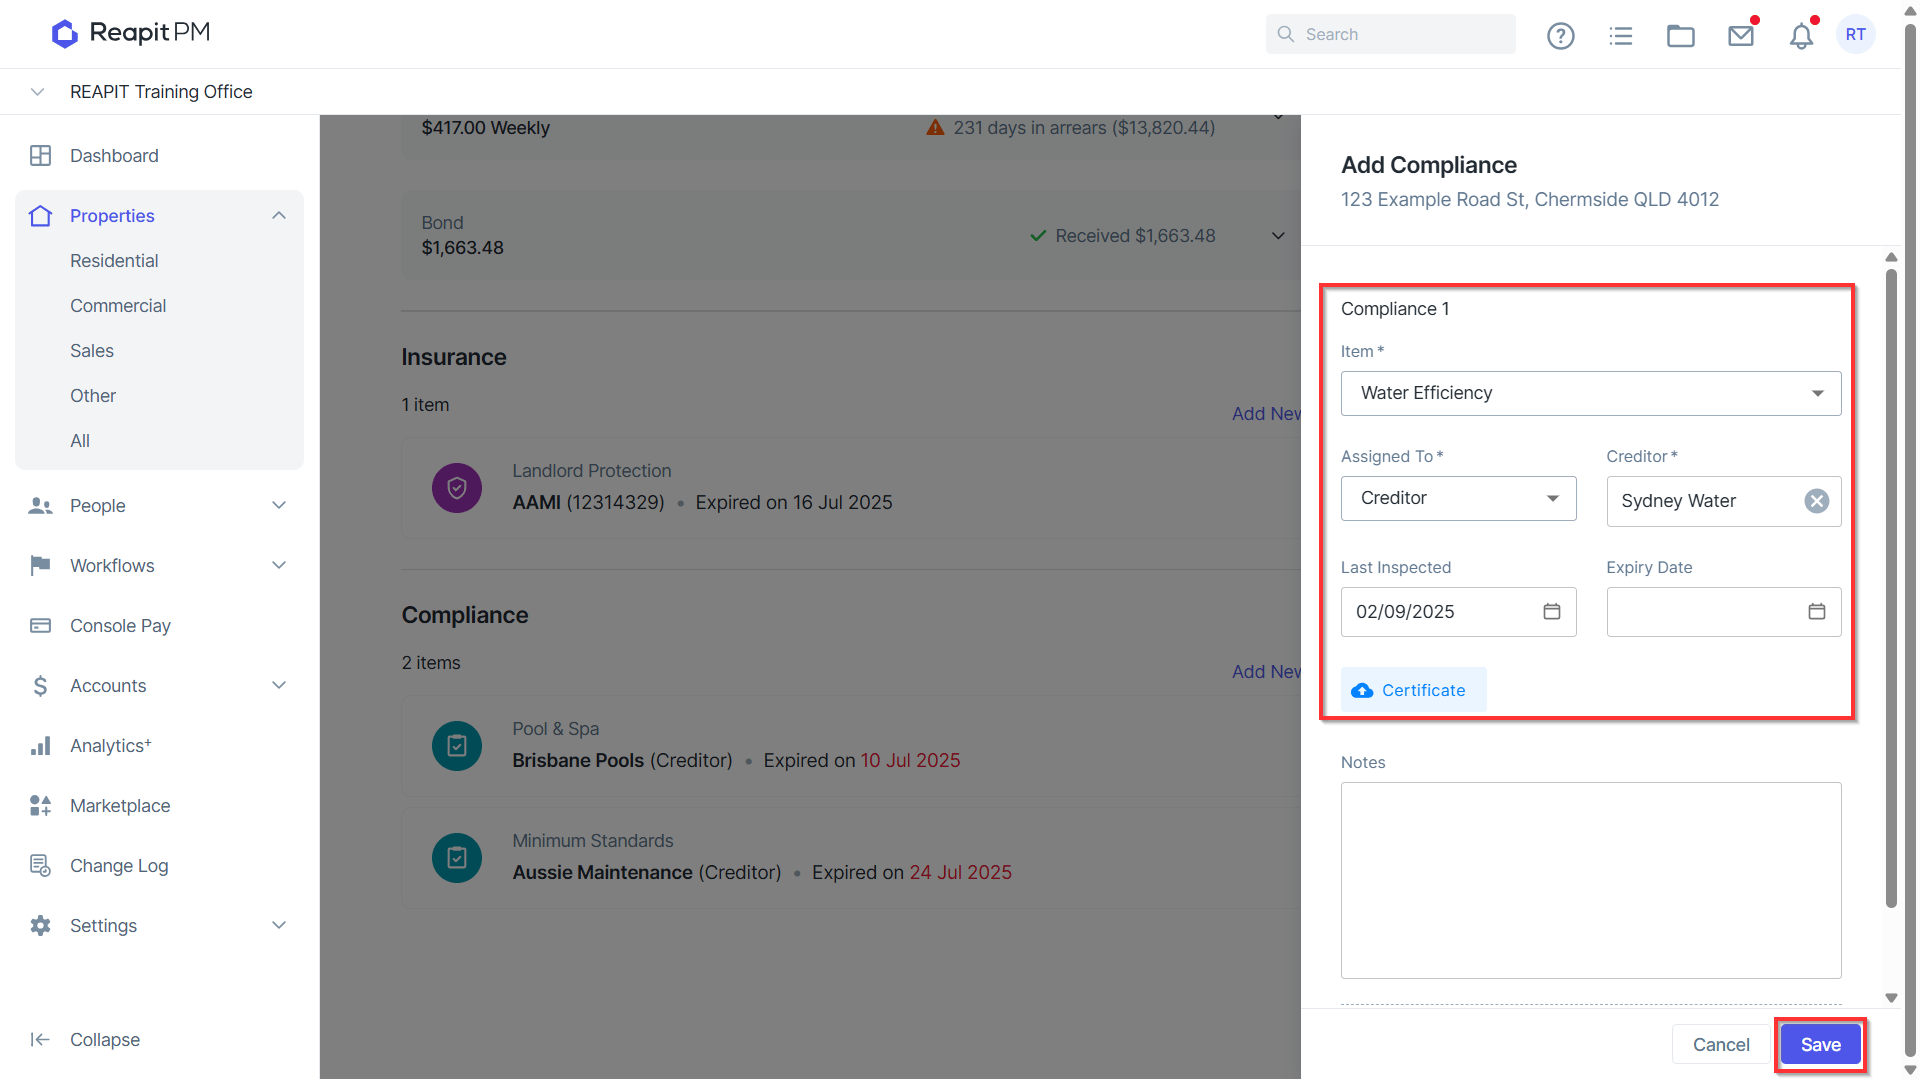
- Against your Property navigate to the Compliance section, click Add New
- Select Water Efficiency, assign to the relevant Creditor, add Last Inspected, Expiry Date and any Certifications/Notes as applicable.
- Click Save
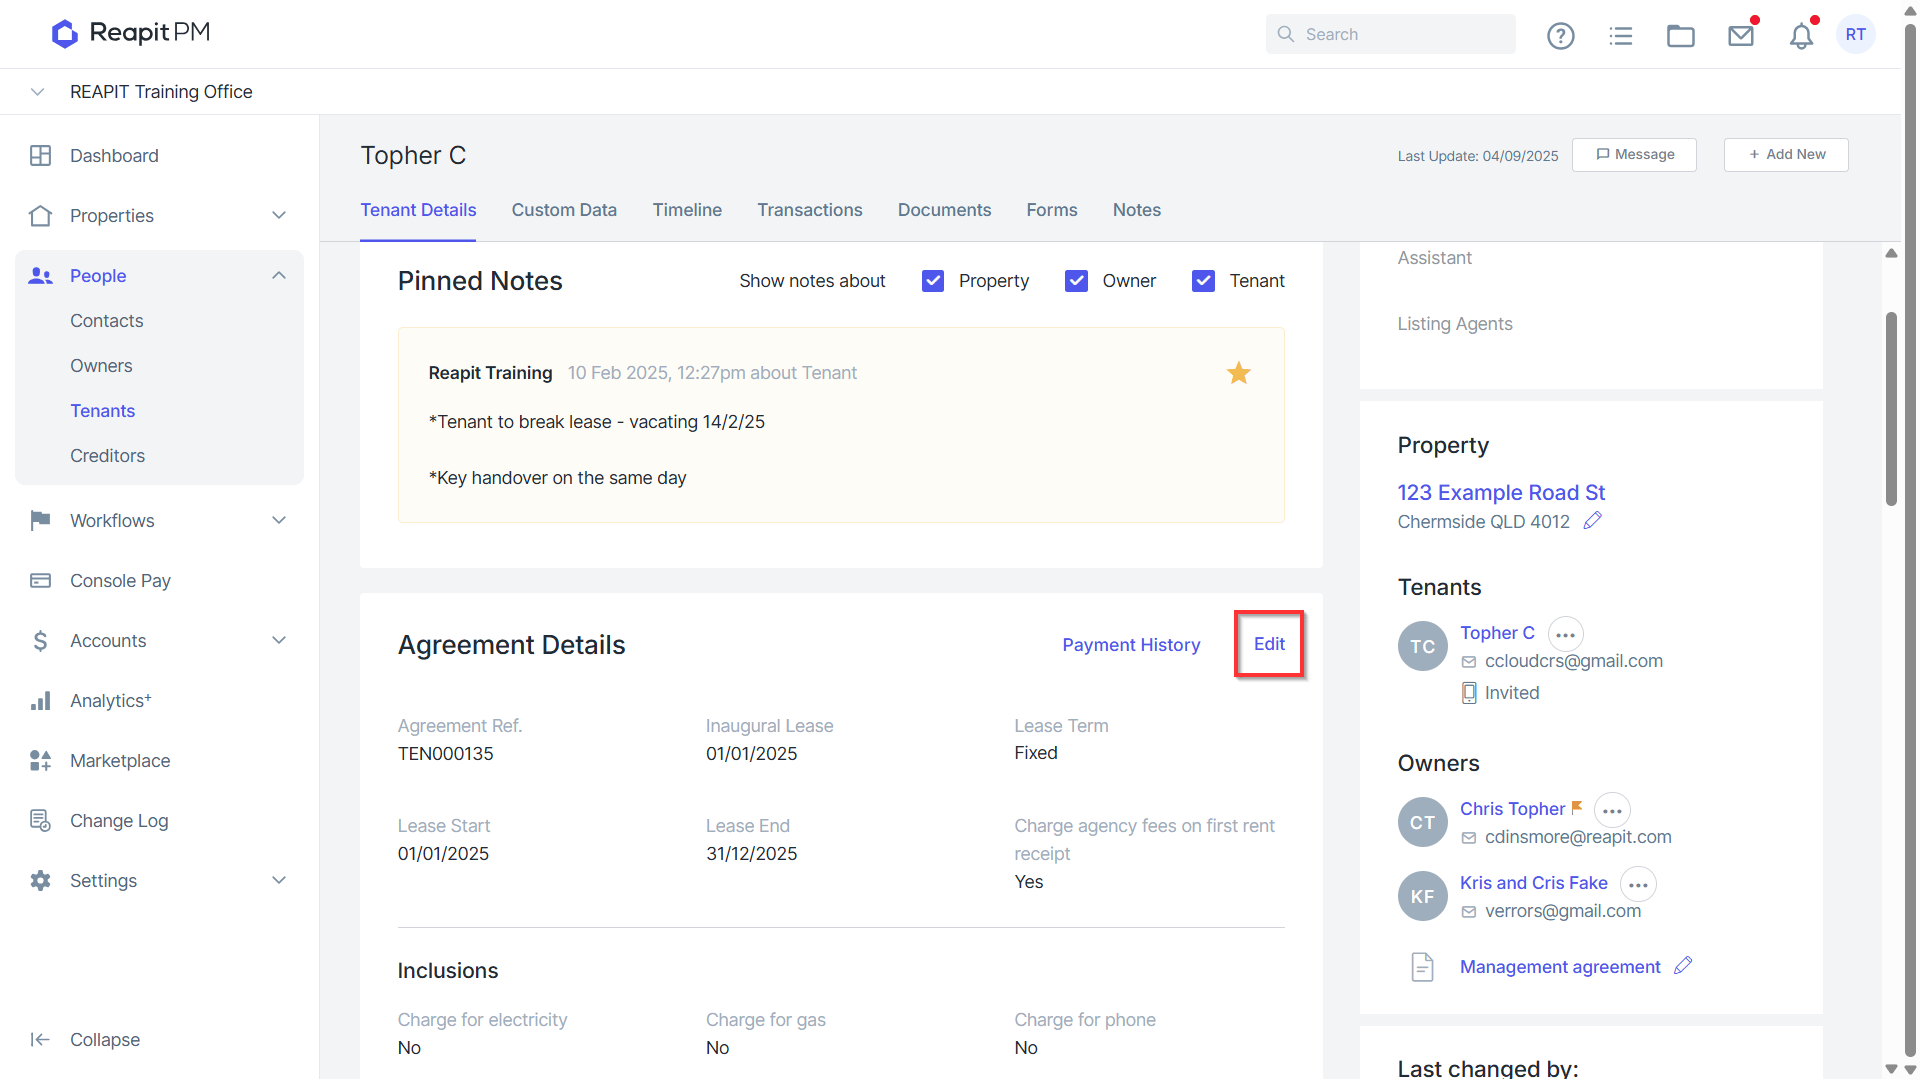
- Against the relevant tenancy agreement, select edit
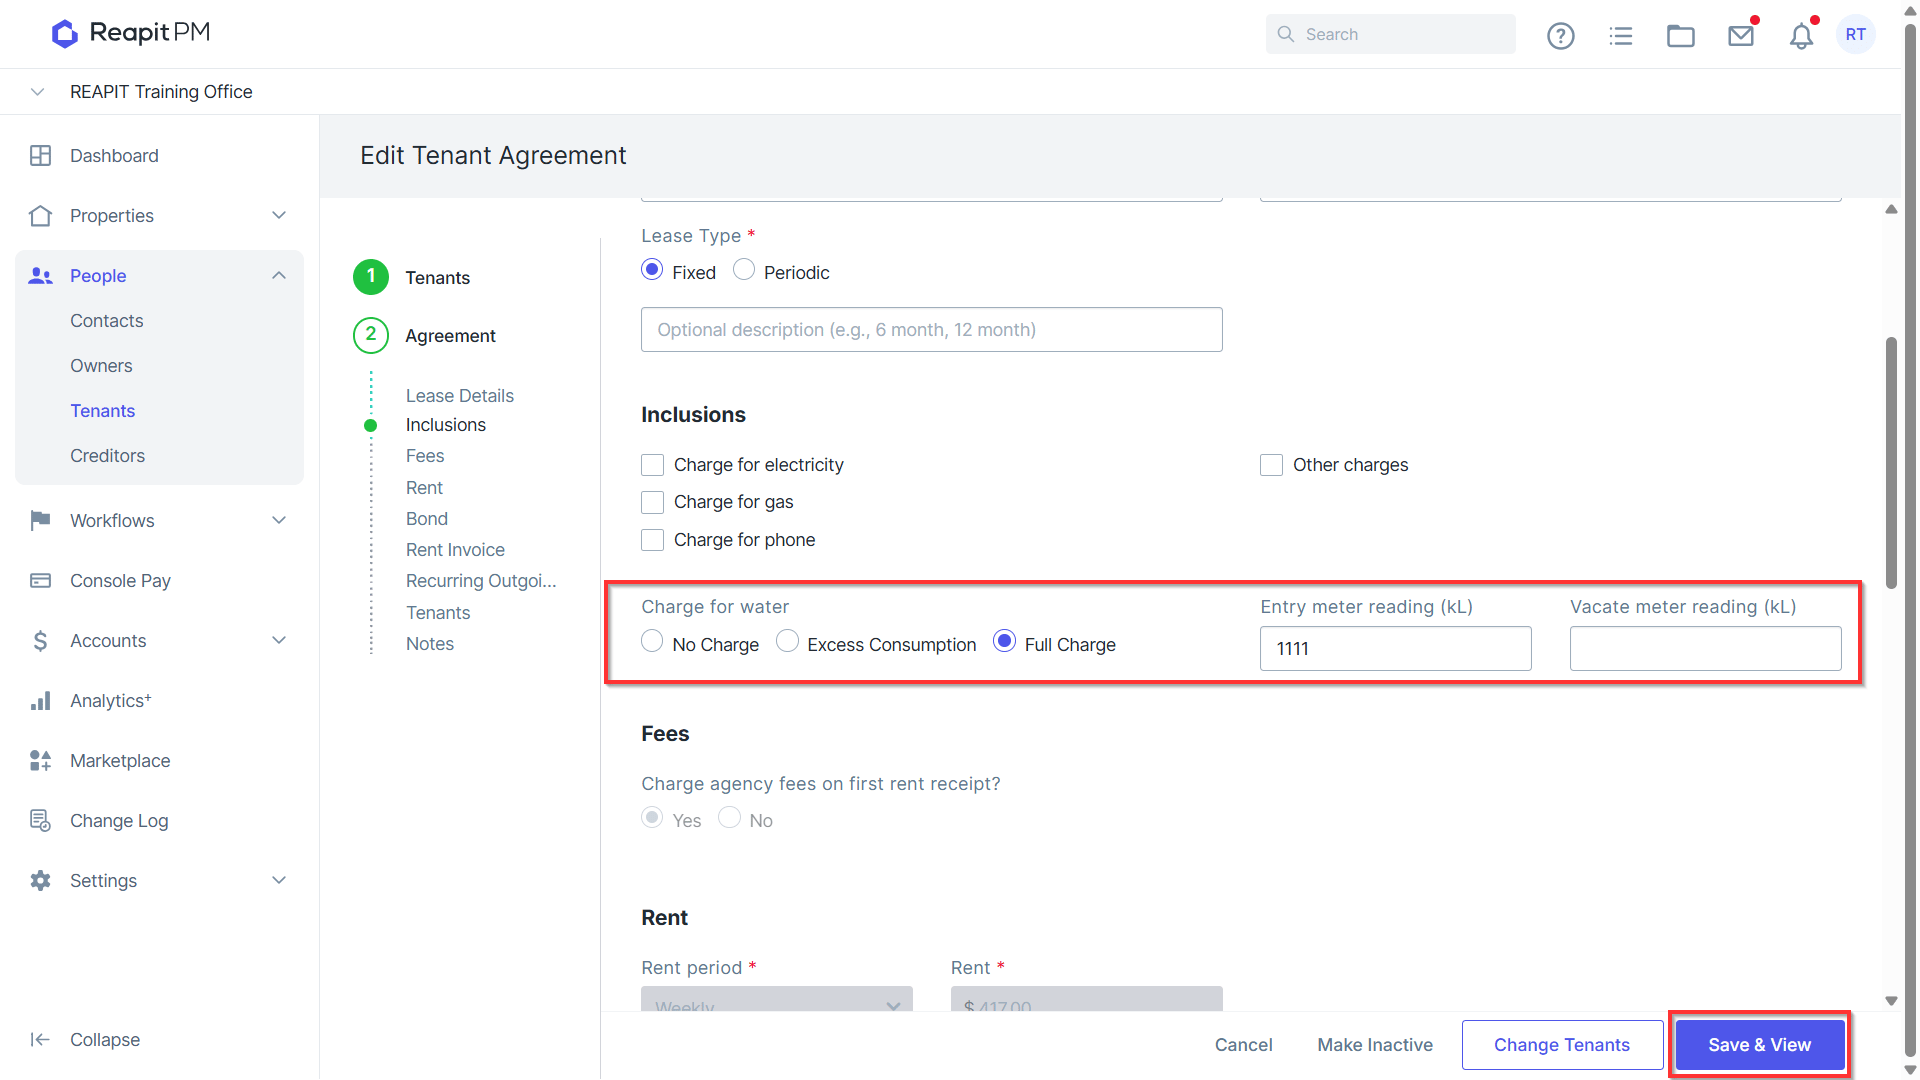
- Navigate to the Inclusions > Charge for Water section. Select between Excess Consumption or Full Charge and enter an Entry meter reading if known.
- Click Save & View.
Processing Water Bills
For detailed instructions on processing Bills, access our Bills article here. Once the Water Bill has been uploaded follow the below steps to manage your Tenant Invoice.
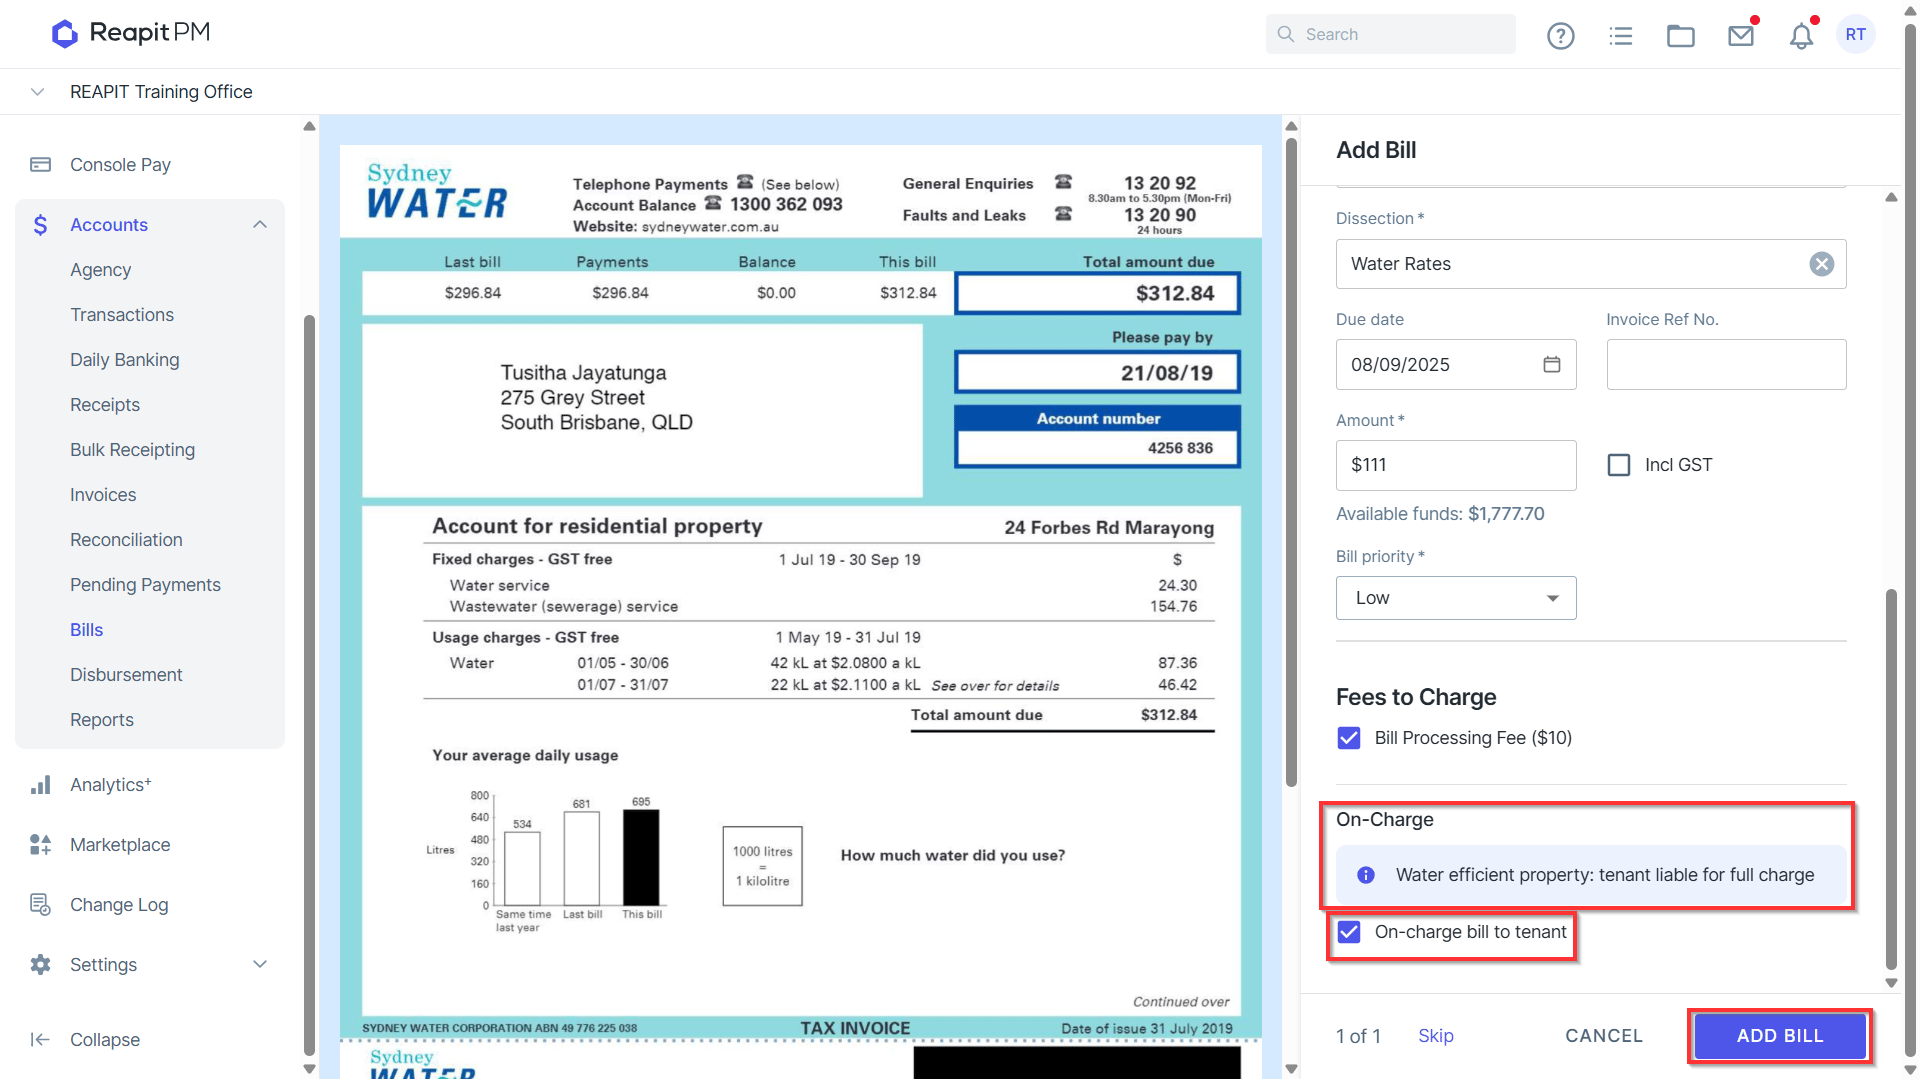
- When uploading a property’s bill for the first time, users may be required to select or update the bill information. After the bill is allocated to the property’s creditor PM will automatically process it as a water efficient property.
- Select to On Charge to Tenant and hit Add Bill
- Within the Invoice select the Paint Roller to Redact Information. This will allow you to draw blackout blocks across select information.
- Delete any mistakes by selecting the blackout area and hit the trash bin
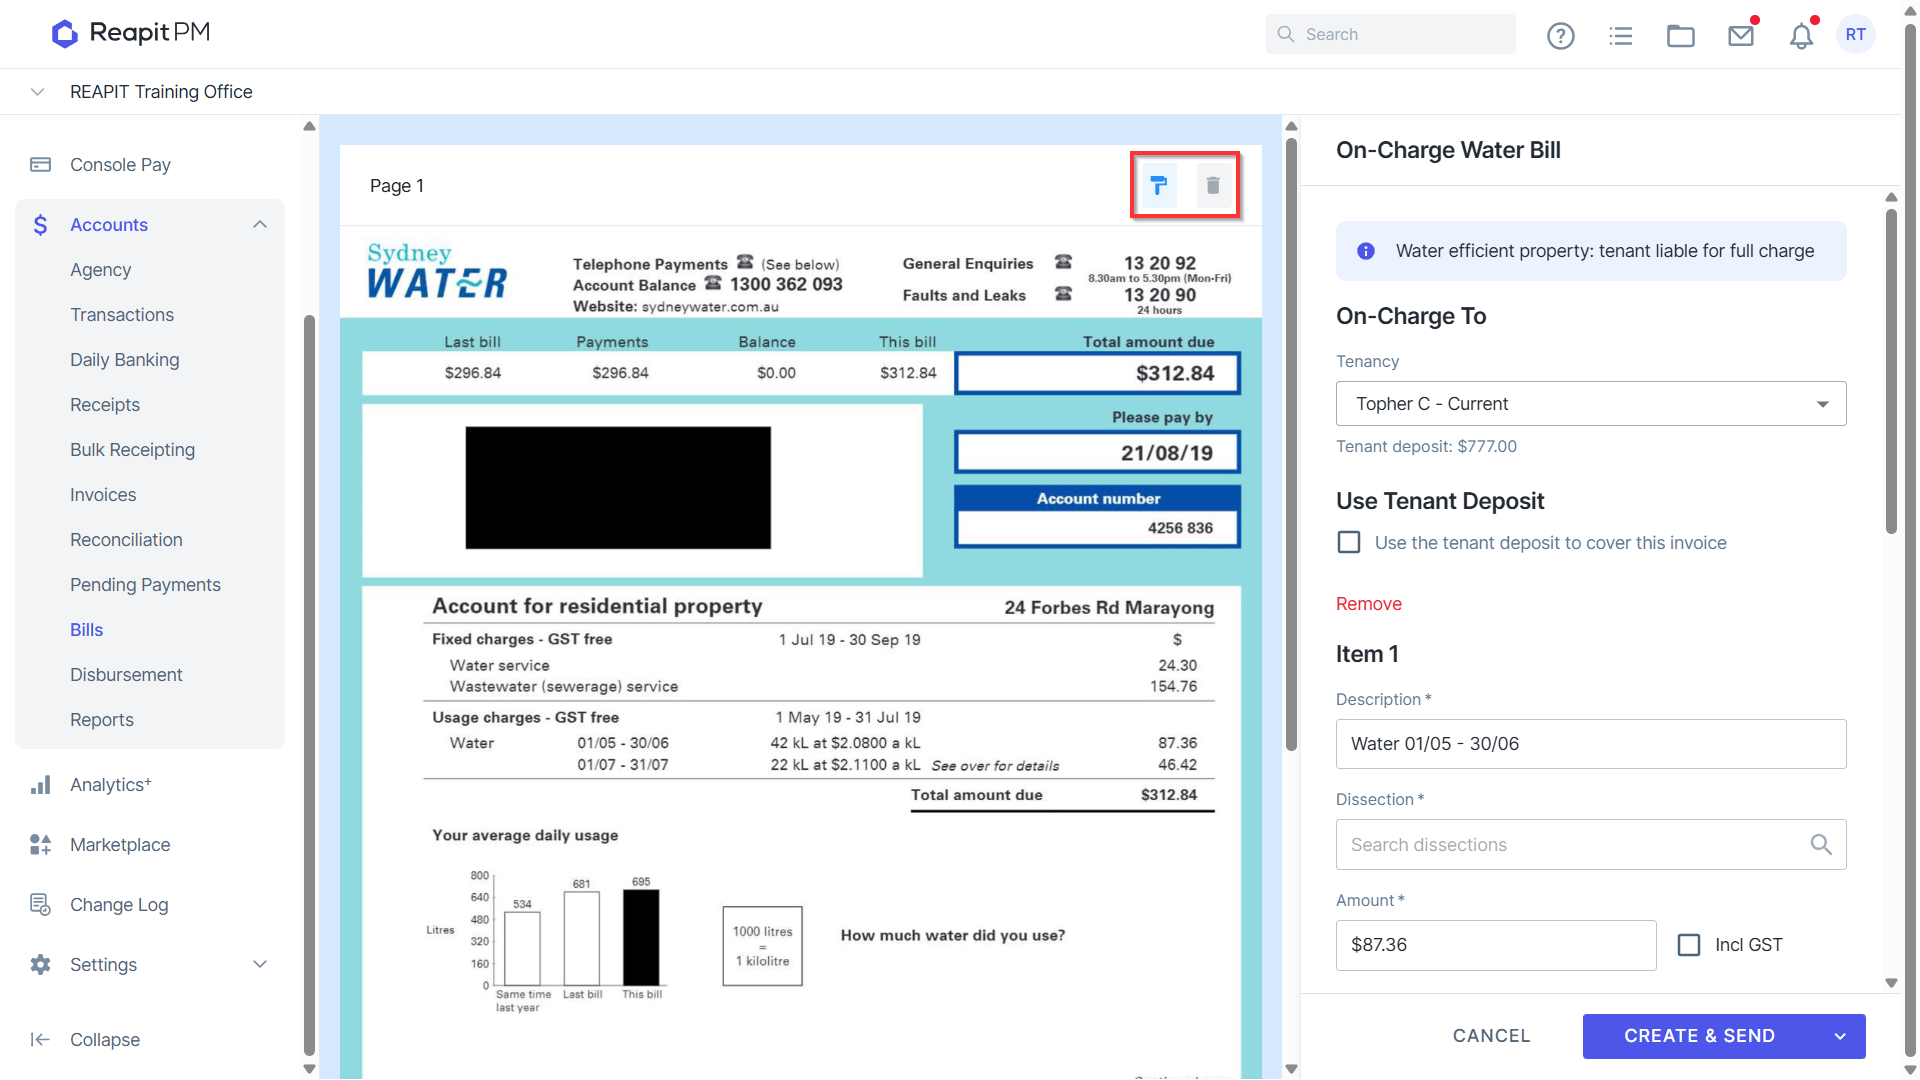
- Update the Invoice information as required, and hit Create & Send to send to the Tenancy
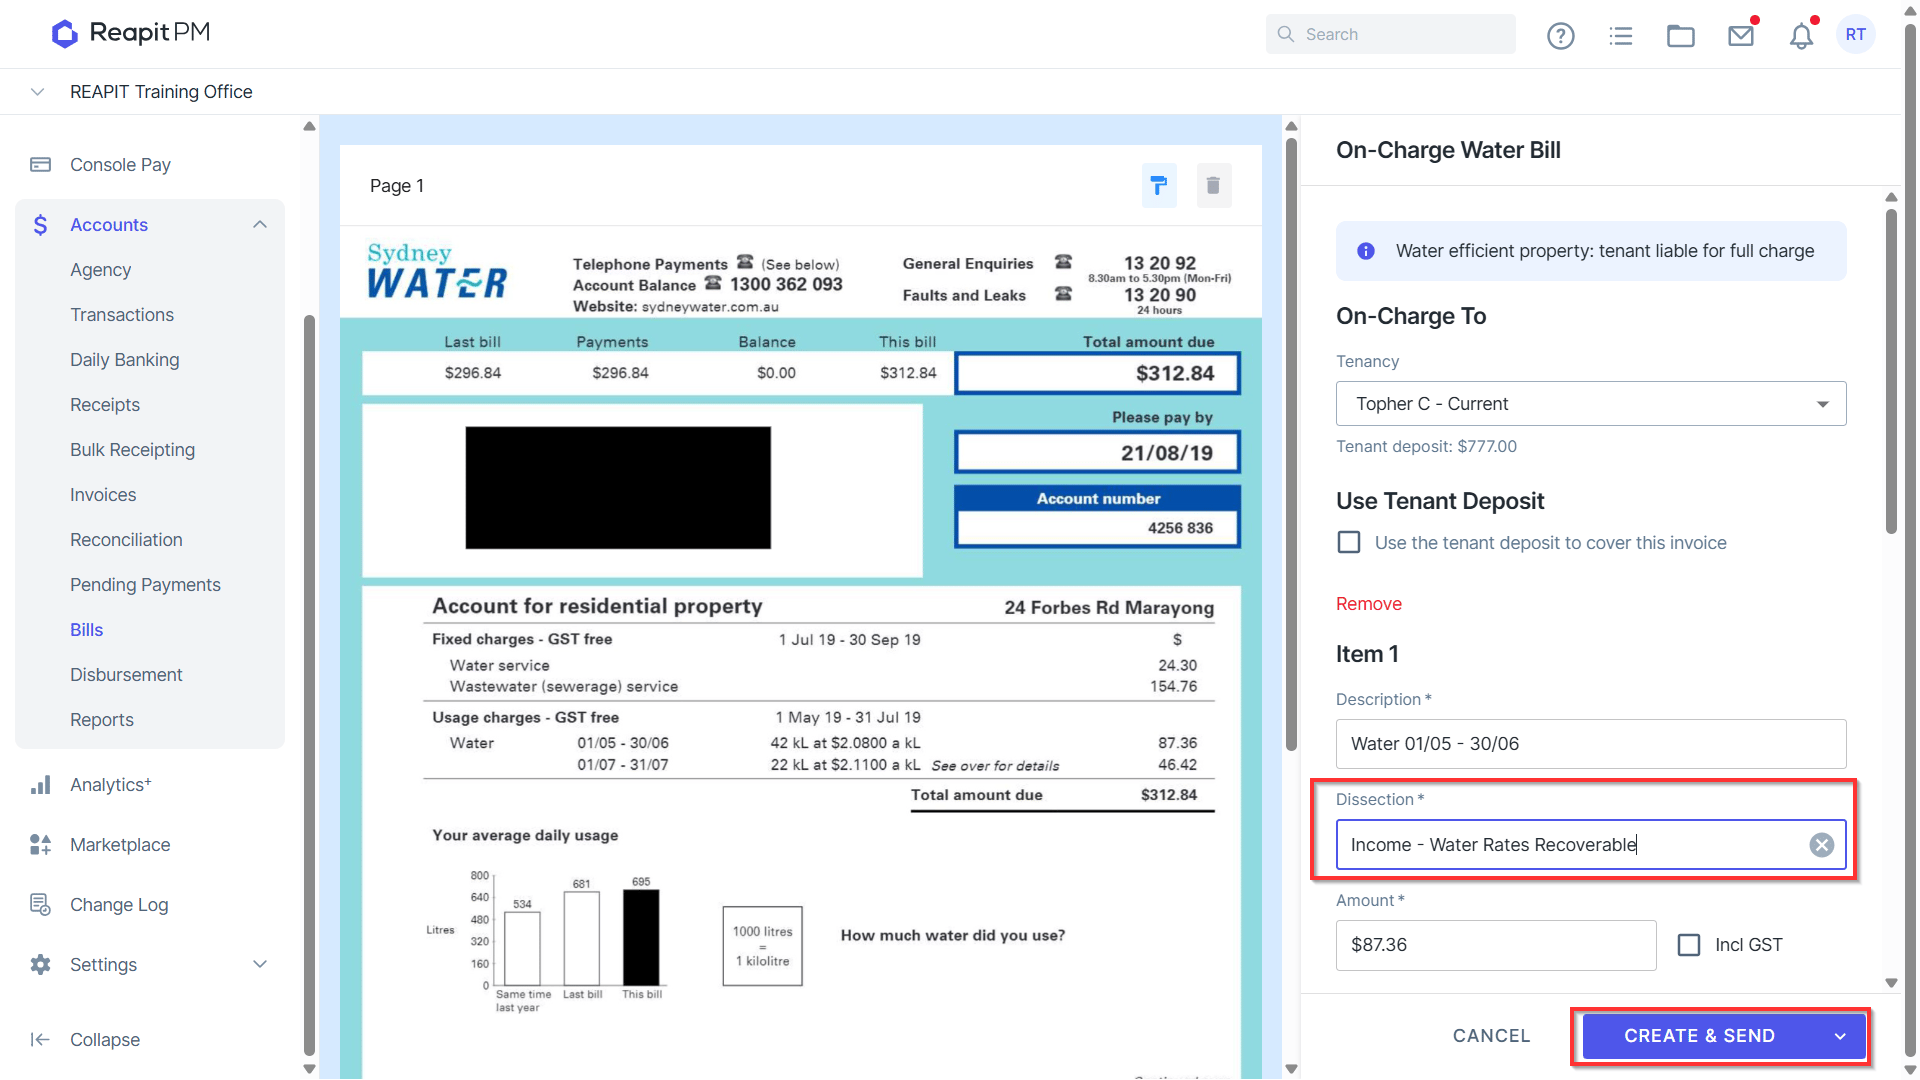
Once Bills have been processed, they will appear in the processed tab of the Bills area. Tenancy Invoices can be accessed by clicking through to the Tenancy invoice number.