'%20d='M0%208a8%208%200%200%201%208-8h24a8%208%200%200%201%208%208v24a8%208%200%200%201-8%208H8a8%208%200%200%201-8-8V8Z'/%3e%3cpath%20fill='%23fff'%20d='M8.375%2013v14L20.5%2034l12.124-7v-7.737l-1.687-.975-2.806-1.62-1.082-.624v4.83l-.002%204.83H13.95V16.07l3.275-1.89%202.192-1.265%201.082-.625%203.275%201.877%202.192%201.256%201.083.62V9.782L20.5%206%208.376%2013Z'/%3e%3cdefs%3e%3clinearGradient%20id='reapit-pm__a'%20x1='20.702'%20x2='20.702'%20y1='.351'%20y2='31.228'%20gradientUnits='userSpaceOnUse'%3e%3cstop%20stop-color='%235573FD'/%3e%3cstop%20offset='.575'%20stop-color='%234E56EA'/%3e%3c/linearGradient%3e%3c/defs%3e%3c/svg%3e)
Console Pay - Create an Agreement
This article outlines the steps within Reapit PM to create a Console Pay agreement.
Console Pay - Create an Agreement
This article outlines the steps within Reapit PM to create a Console Pay agreement.
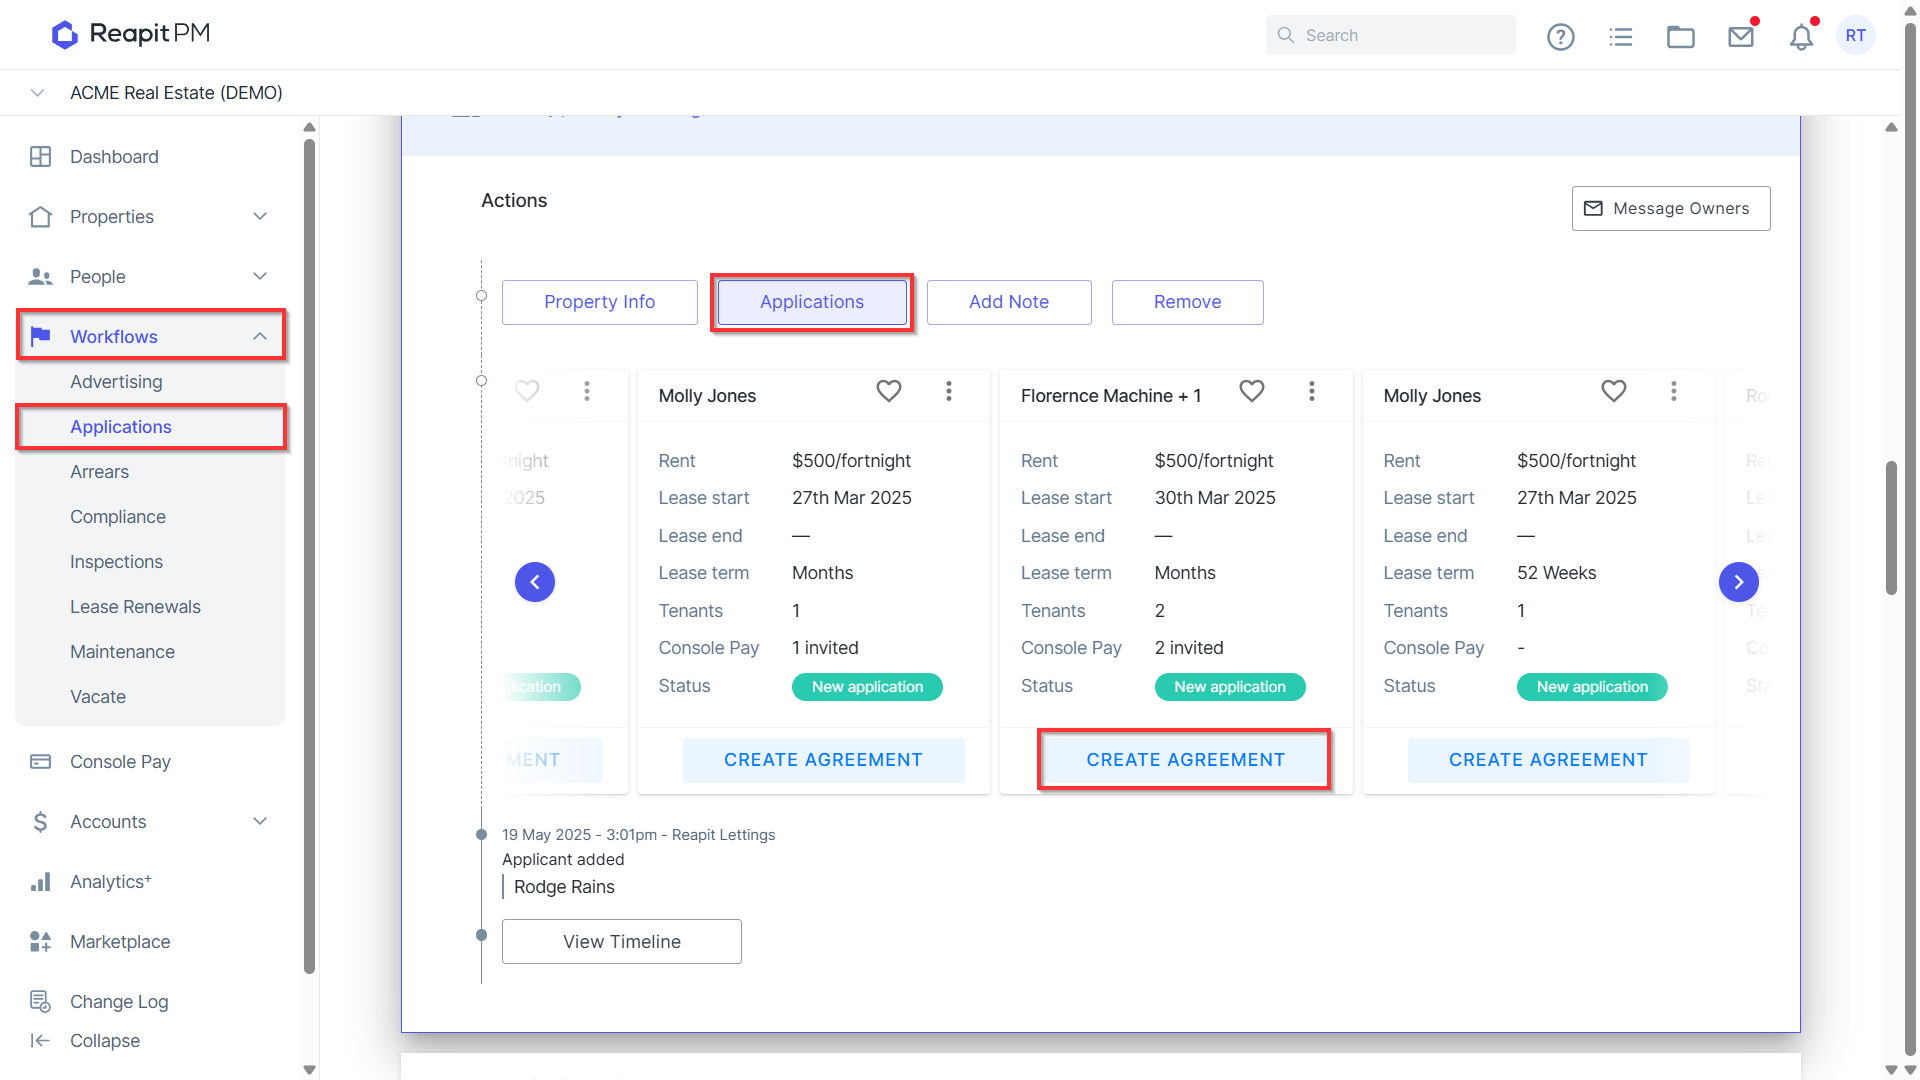
- From Reapit PM, navigating to Workflow > Applications with display the application that has come across from IRE with the Integrations. The applicant will display Invited to Console Pay already. At this point, you can proceed with creating the Tenancy by clicking Create Agreement.
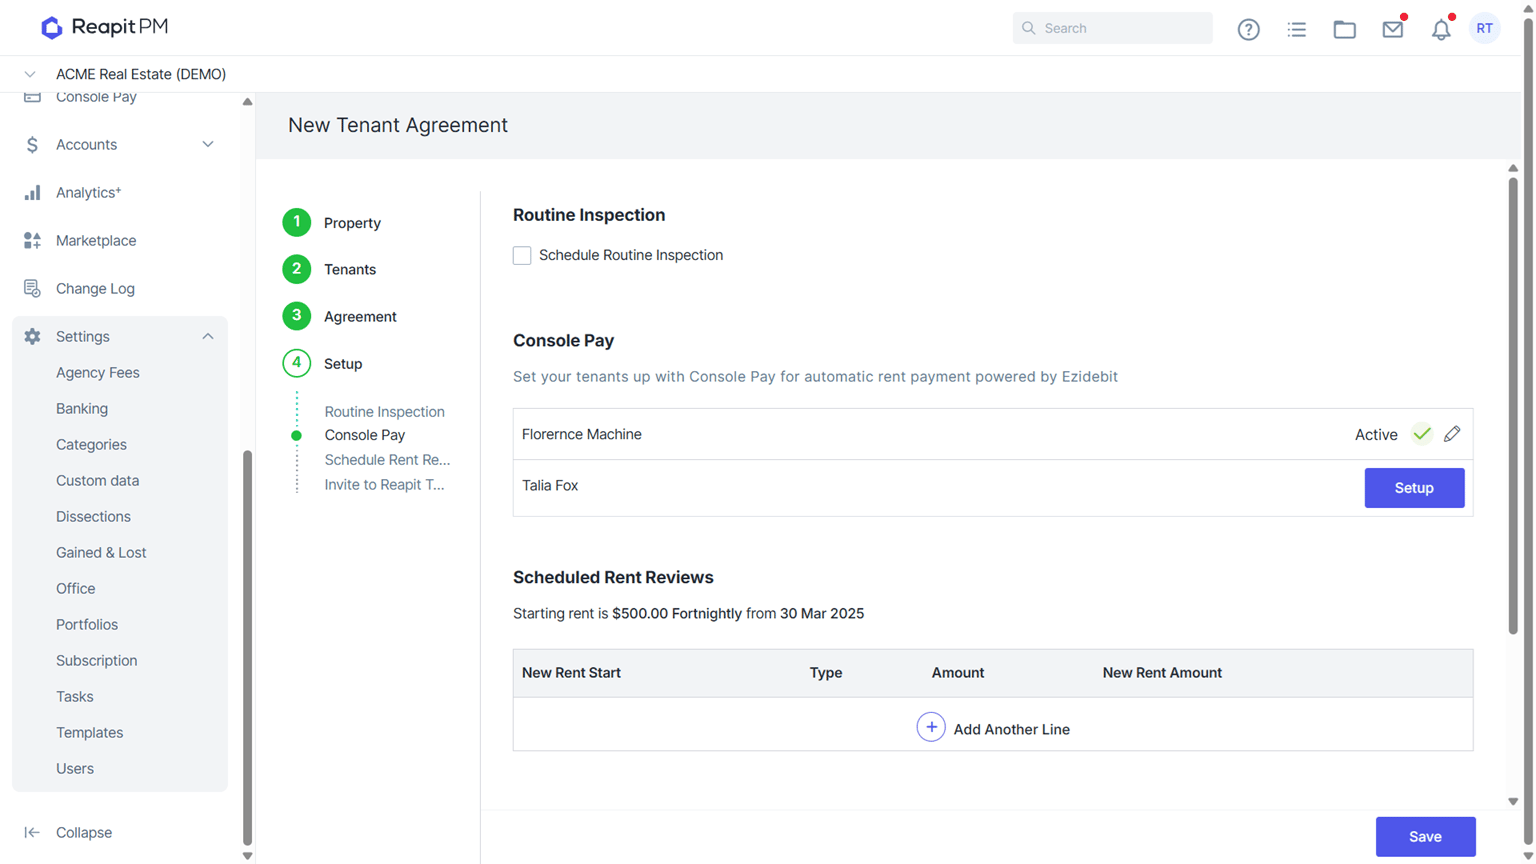
- During the 'Setup' step in the Tenancy creation process, approved tenants who have received the approval email containing console pay details will appear as 'Active' in the Console Pay section. At this point, you can proceed with creating the tenancy, and no further action is required.
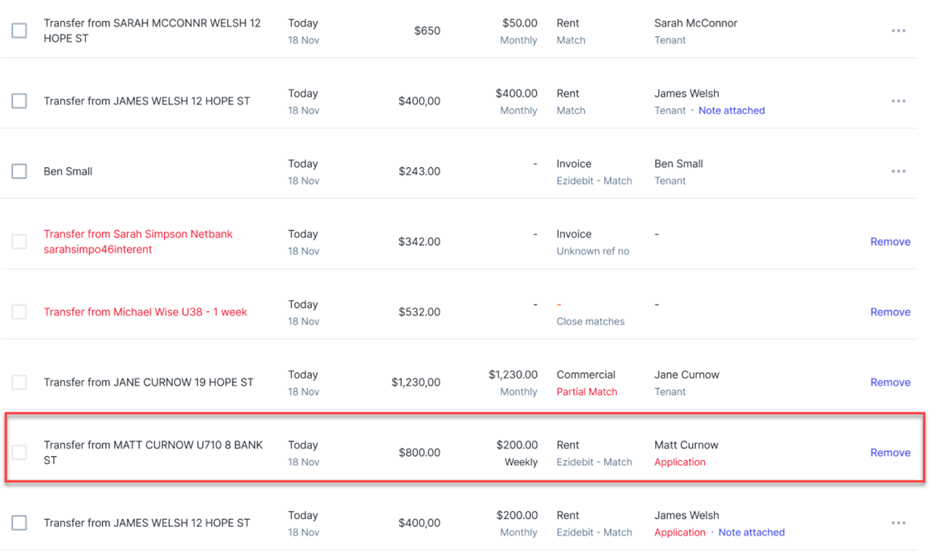
- Bulk receipting conducted during this time for any new tenancies that have not yet been created in the system will display the Application status. Direct debit balances for tenants not yet in the system will prevent you from processing the receipting of these lines.
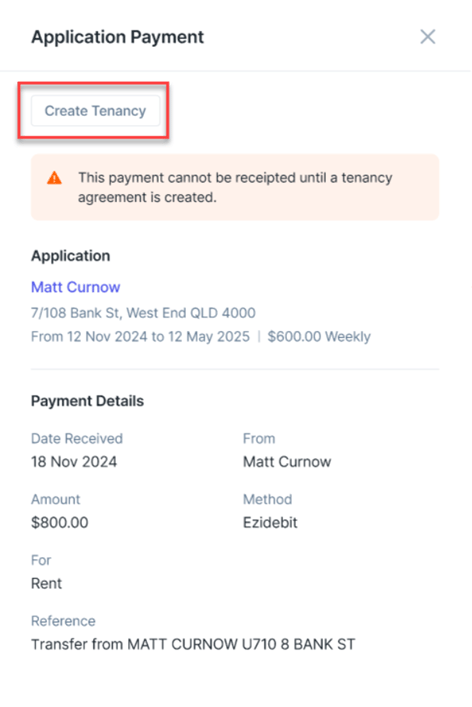
- Clicking on the transaction will display a summary, along with the option to Create Tenancy before the receipt can be processed.
Note: If a tenant signs up for Console Pay, but a Tenancy Agreement is not created, - for example, if the tenant decides not to proceed with the property - the payment schedule must be deleted from Ezidebit. This is necessary because payment schedules cannot be tracked outside of a tenancy. in such cases, contacting Ezidebit directly is the best way to ensure the schedule is promptly removed.