'%20d='M0%208a8%208%200%200%201%208-8h24a8%208%200%200%201%208%208v24a8%208%200%200%201-8%208H8a8%208%200%200%201-8-8V8Z'/%3e%3cpath%20fill='%23fff'%20d='M8.375%2013v14L20.5%2034l12.124-7v-7.737l-1.687-.975-2.806-1.62-1.082-.624v4.83l-.002%204.83H13.95V16.07l3.275-1.89%202.192-1.265%201.082-.625%203.275%201.877%202.192%201.256%201.083.62V9.782L20.5%206%208.376%2013Z'/%3e%3cdefs%3e%3clinearGradient%20id='reapit-pm__a'%20x1='20.702'%20x2='20.702'%20y1='.351'%20y2='31.228'%20gradientUnits='userSpaceOnUse'%3e%3cstop%20stop-color='%235573FD'/%3e%3cstop%20offset='.575'%20stop-color='%234E56EA'/%3e%3c/linearGradient%3e%3c/defs%3e%3c/svg%3e)
Setting up Recurring Tenant Invoices
This article will walk you through how to set up rent invoices for your new tenancies (commercial and residential) within Reapit PM.
Overview
Setting Up Recurring Tenant Invoices
This article will walk you through how to set up rent invoices for your new tenancies (commercial and residential) within Reapit PM.
The process in this article include:
- Setting up
Note: You can prevent from sending recurring invoices by navigating to Settings > Office and scrolling down to Email & SMS. Slide the toggle and click confirm.
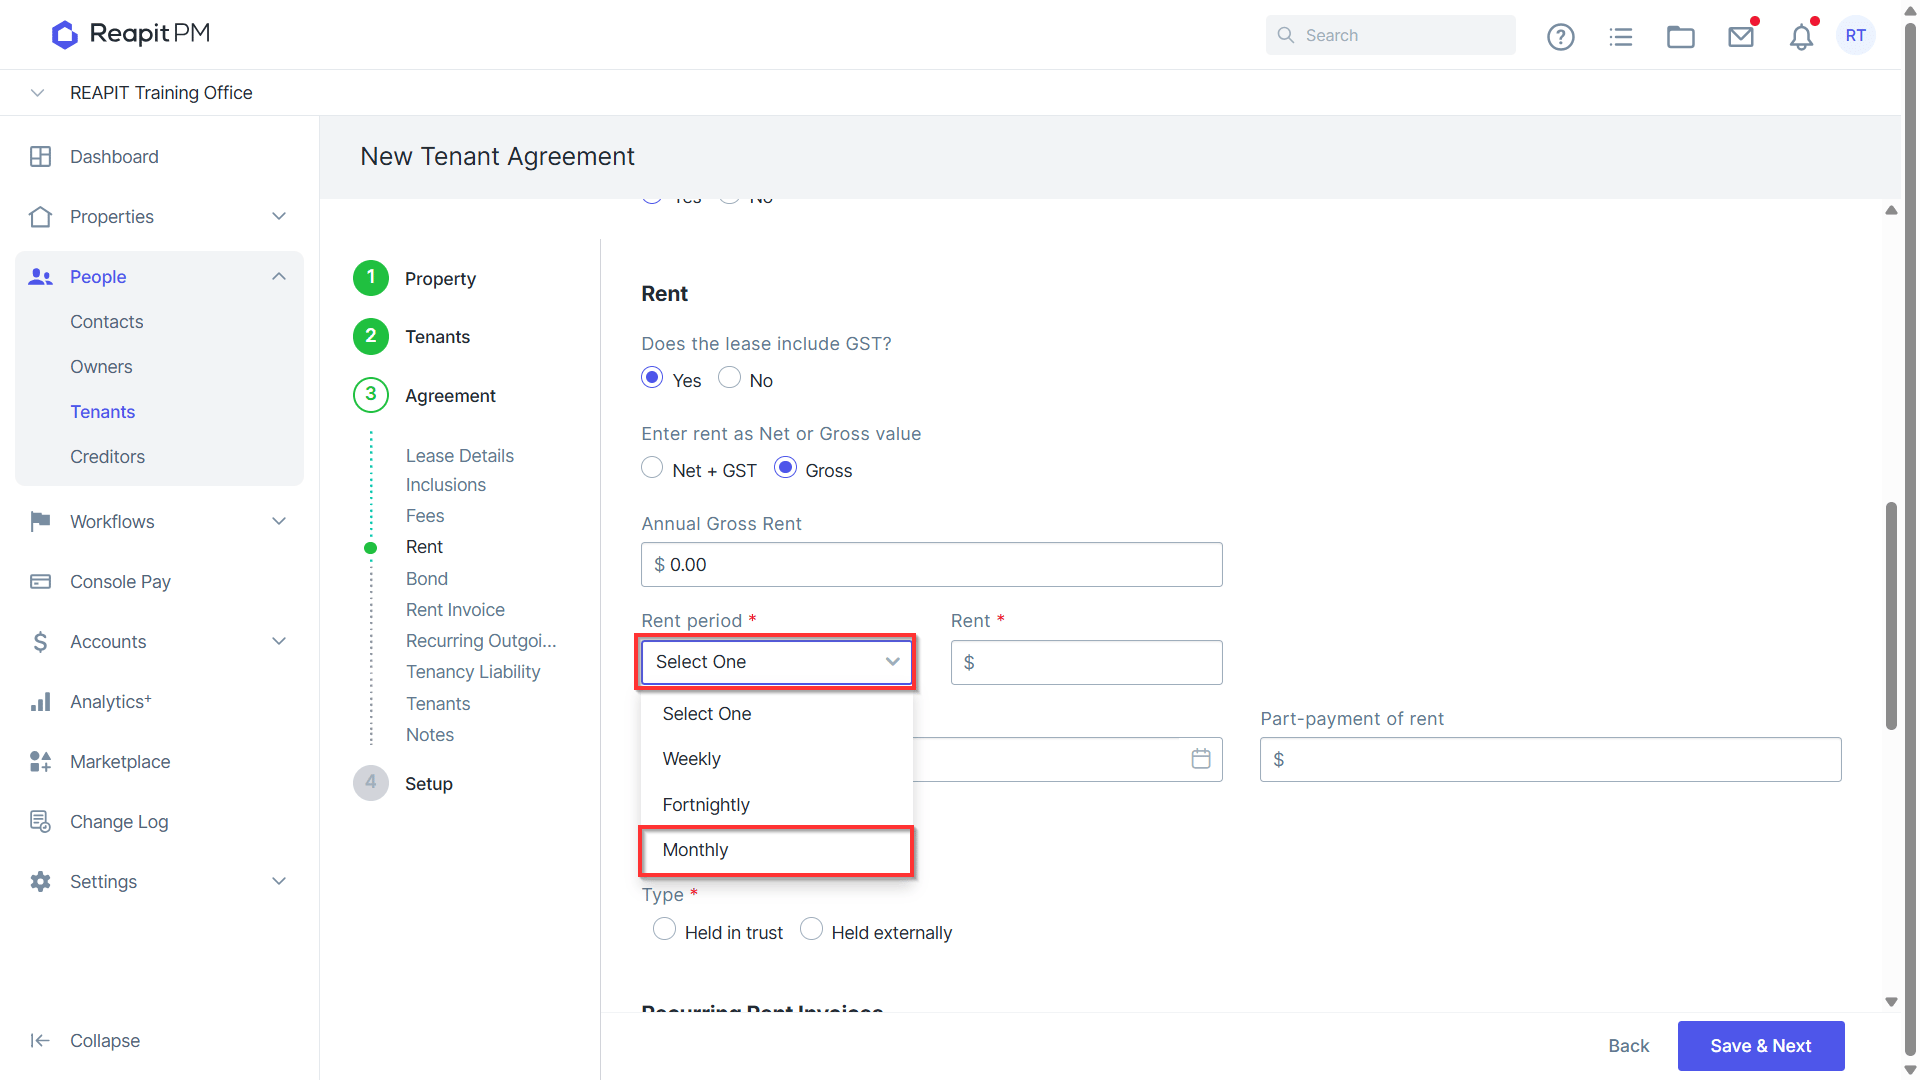
- When creating a new tenant agreement, ensure that you have selected Monthly for the rent period under the rent section.
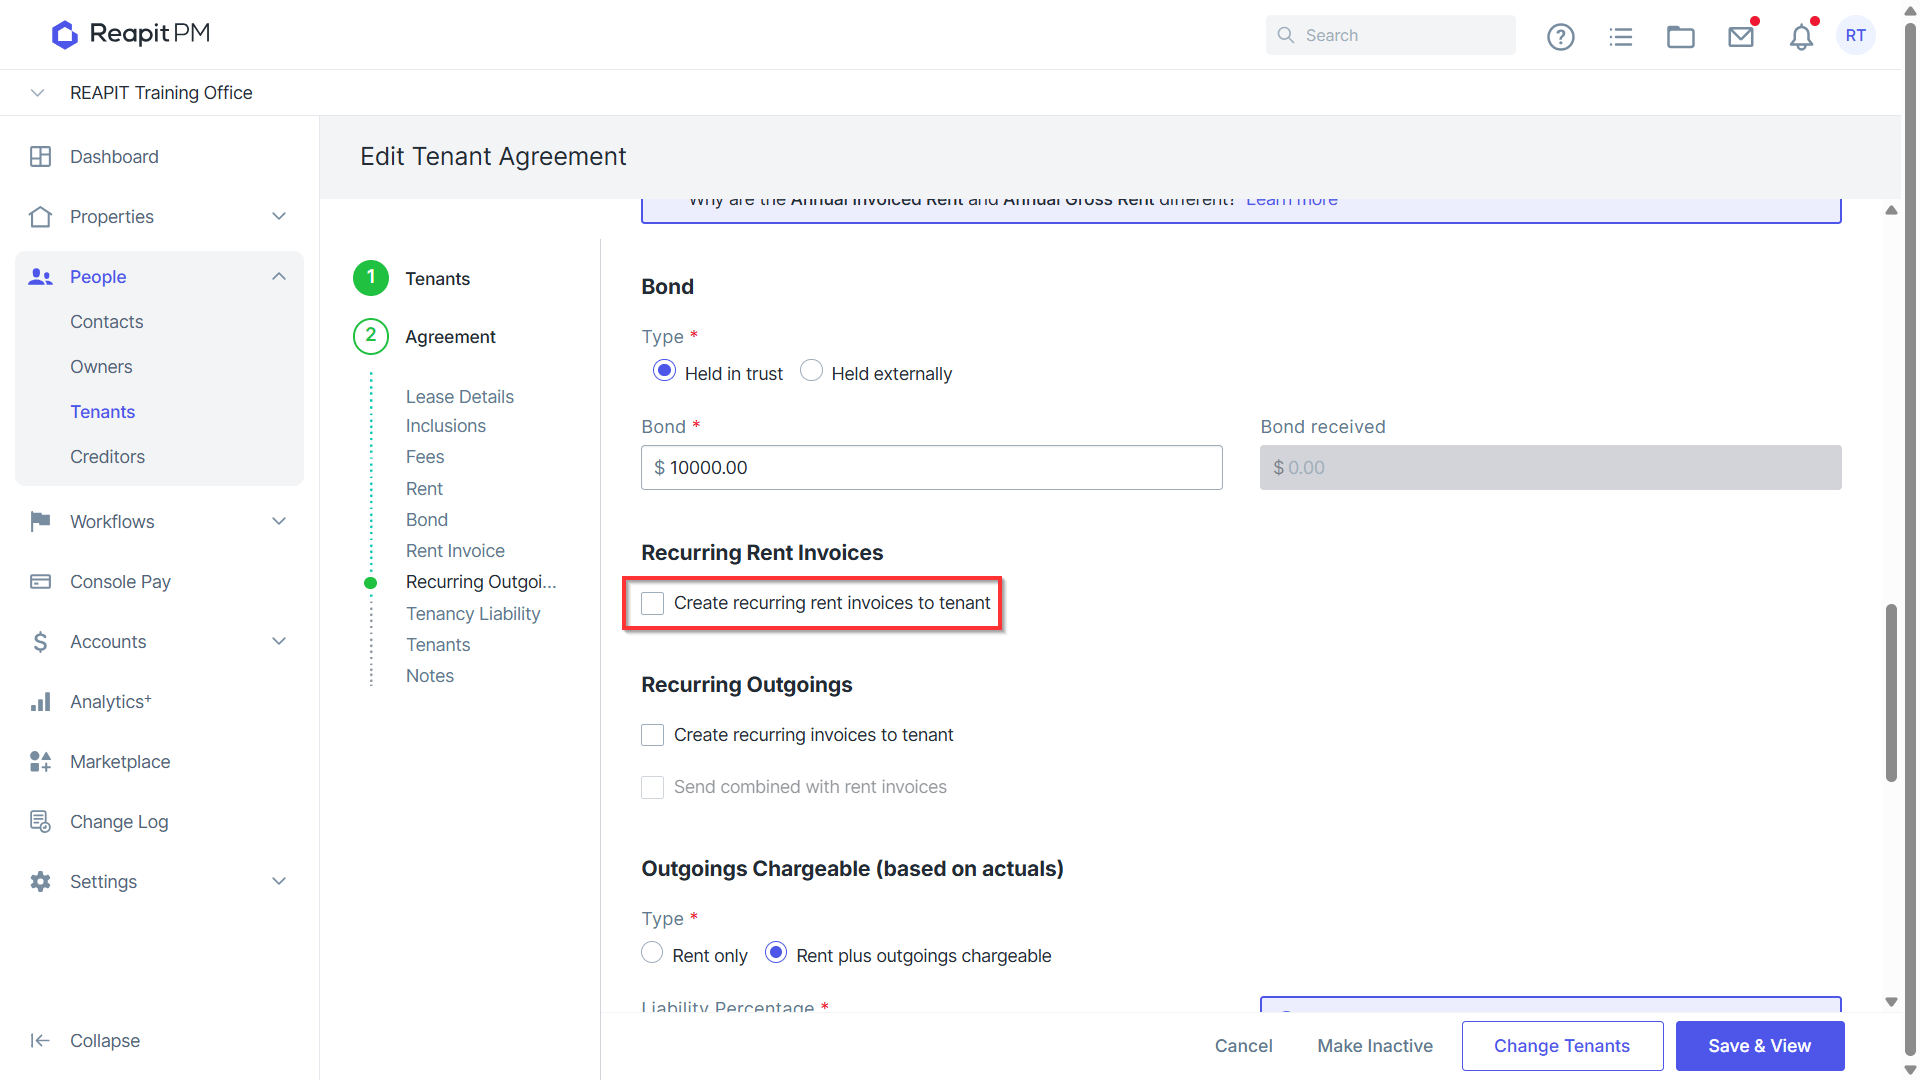
- Under the Recurring Rent Invoices section, select the Create Recurring Rent to tenant check box. This will enable rent invoice set up options.
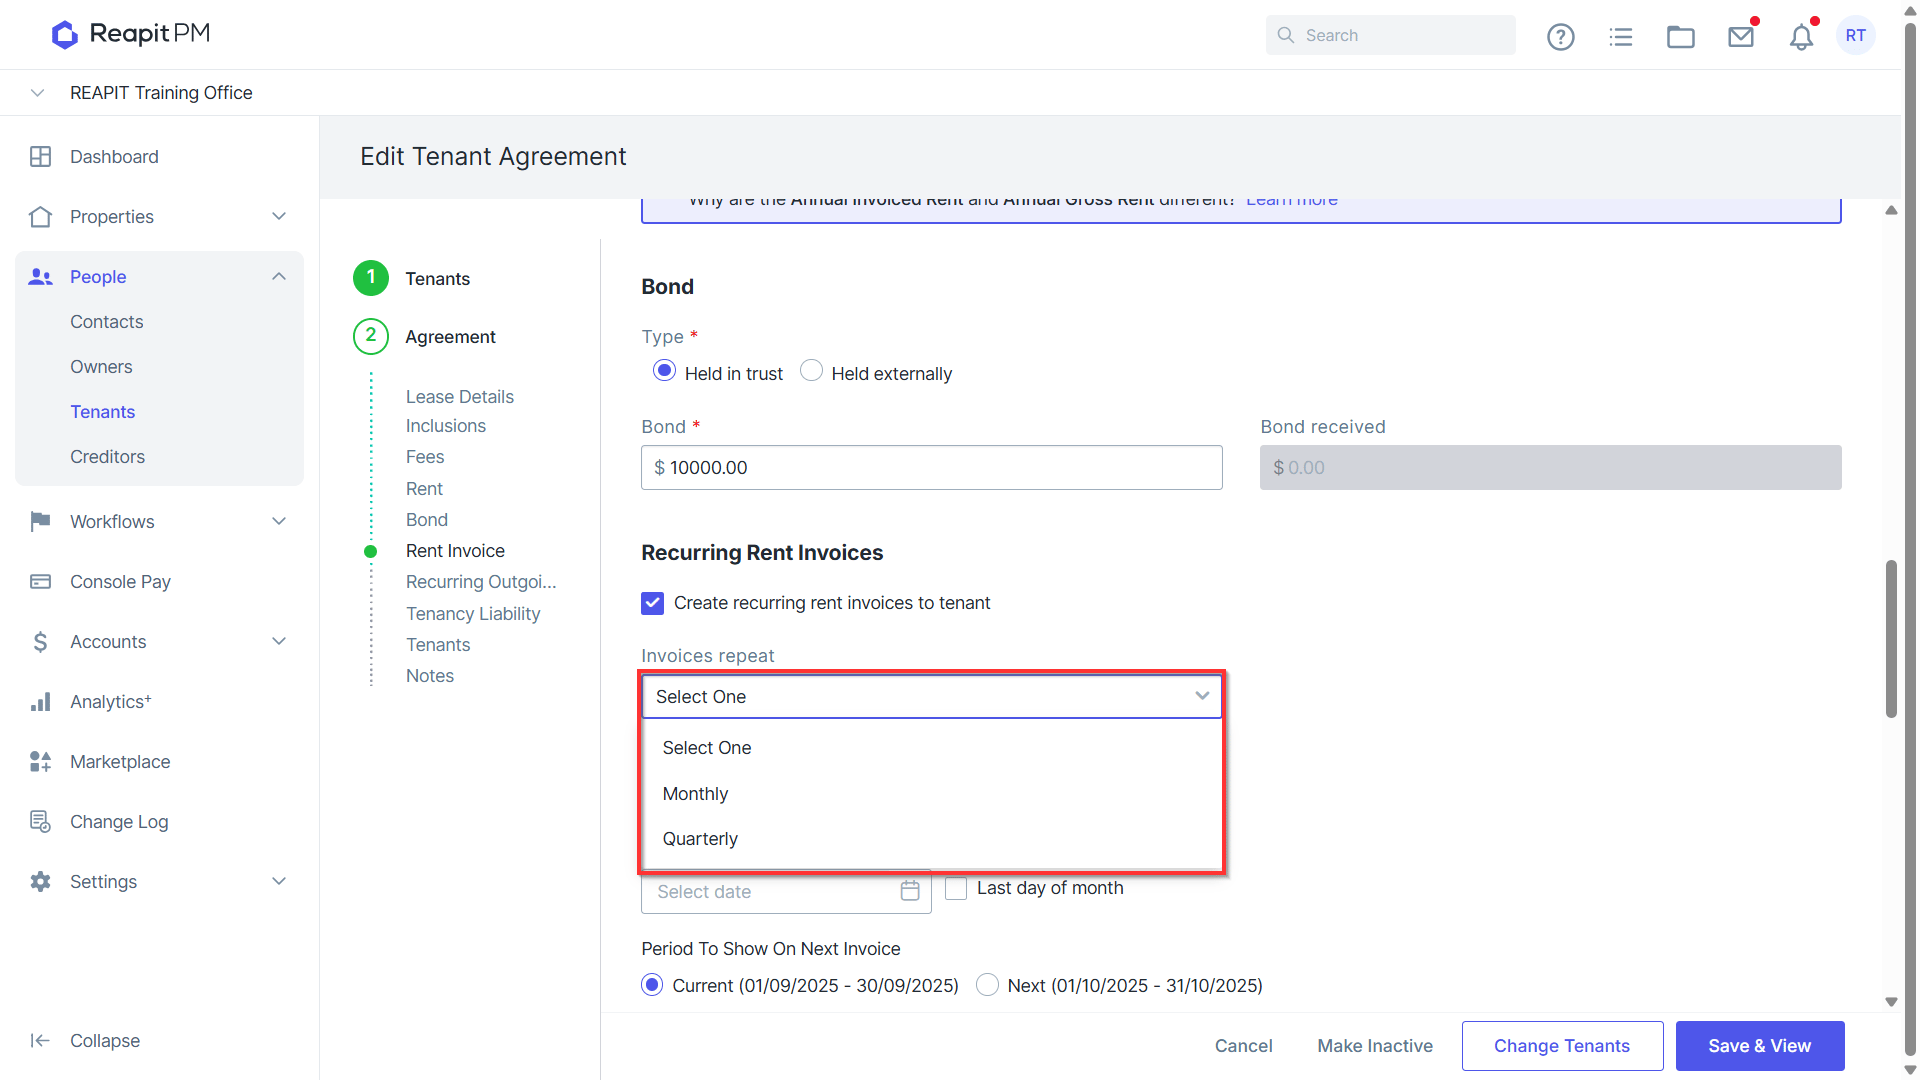
- Select how often you would like the invoices to repeat, either monthly or quarterly.
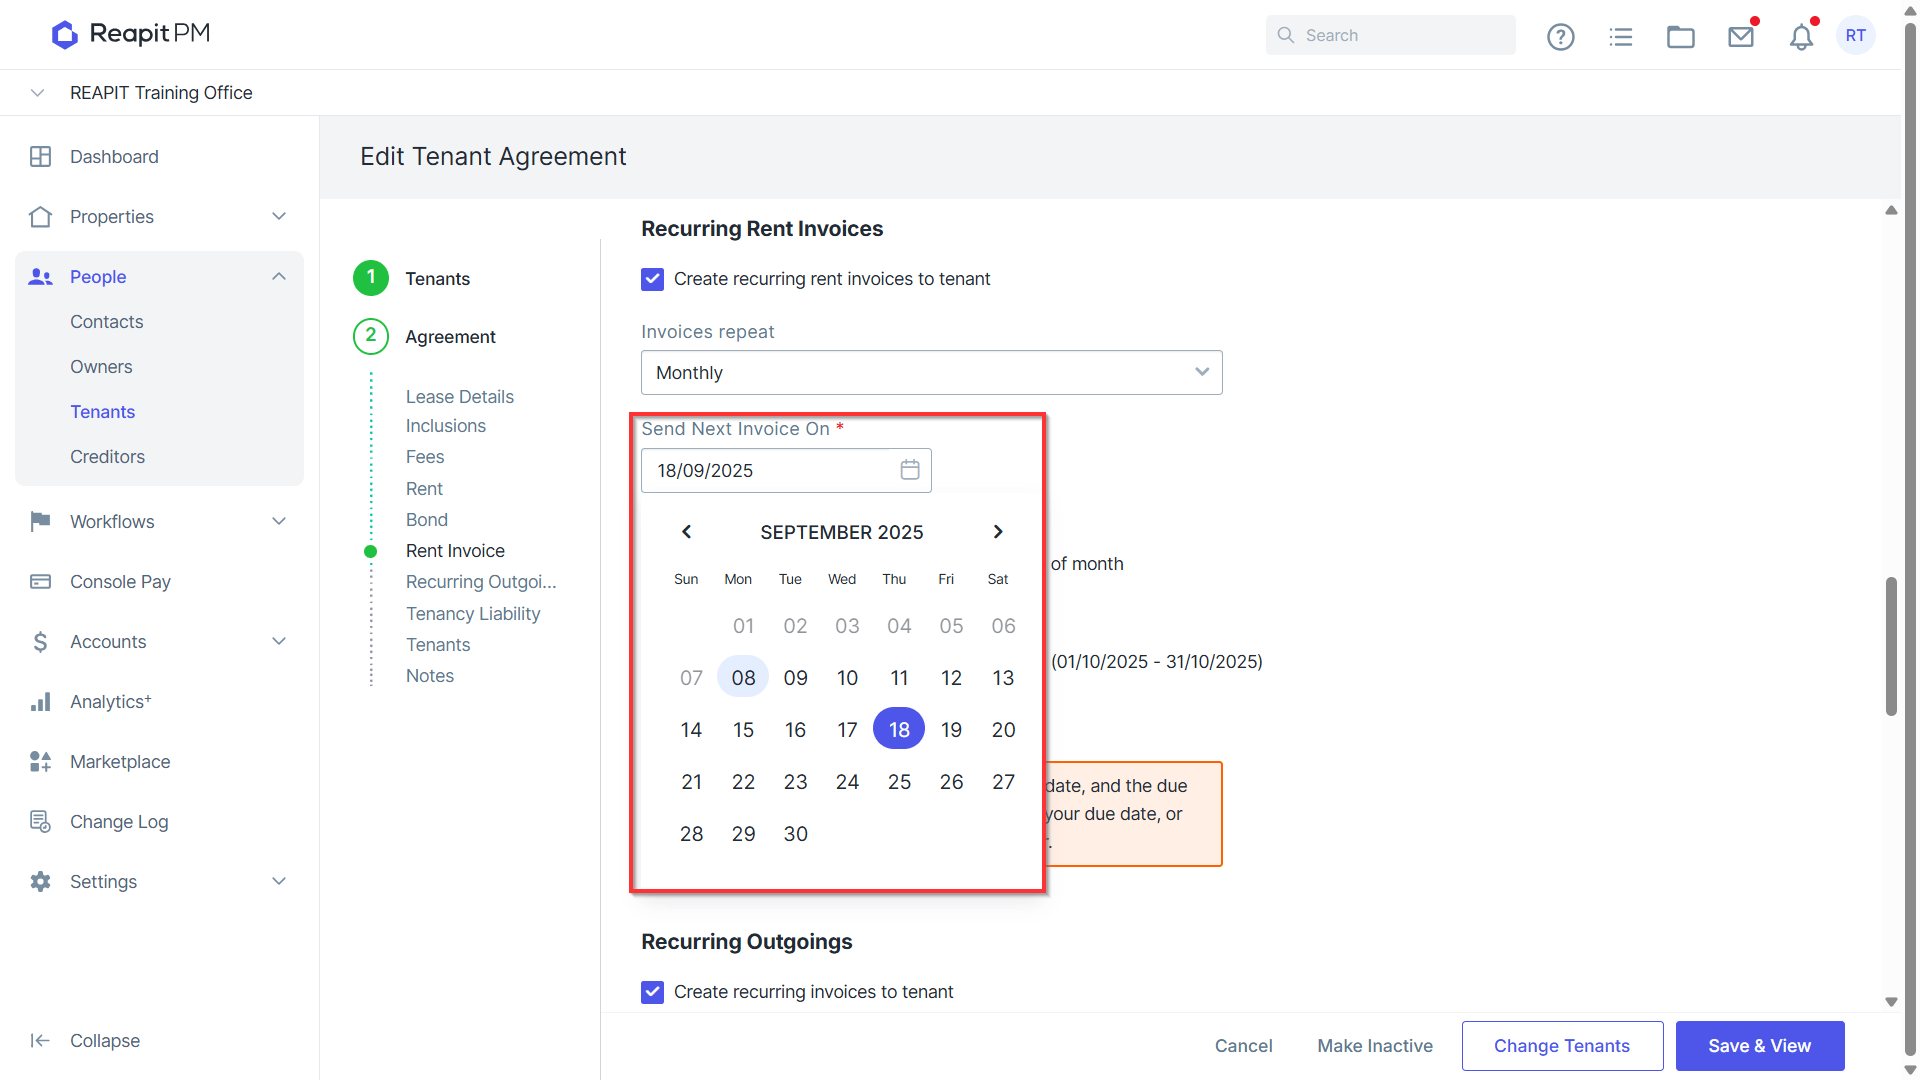
- Select the Send Next Invoice On date.
- Select the Invoice Due date OR select the last day of the month check box.
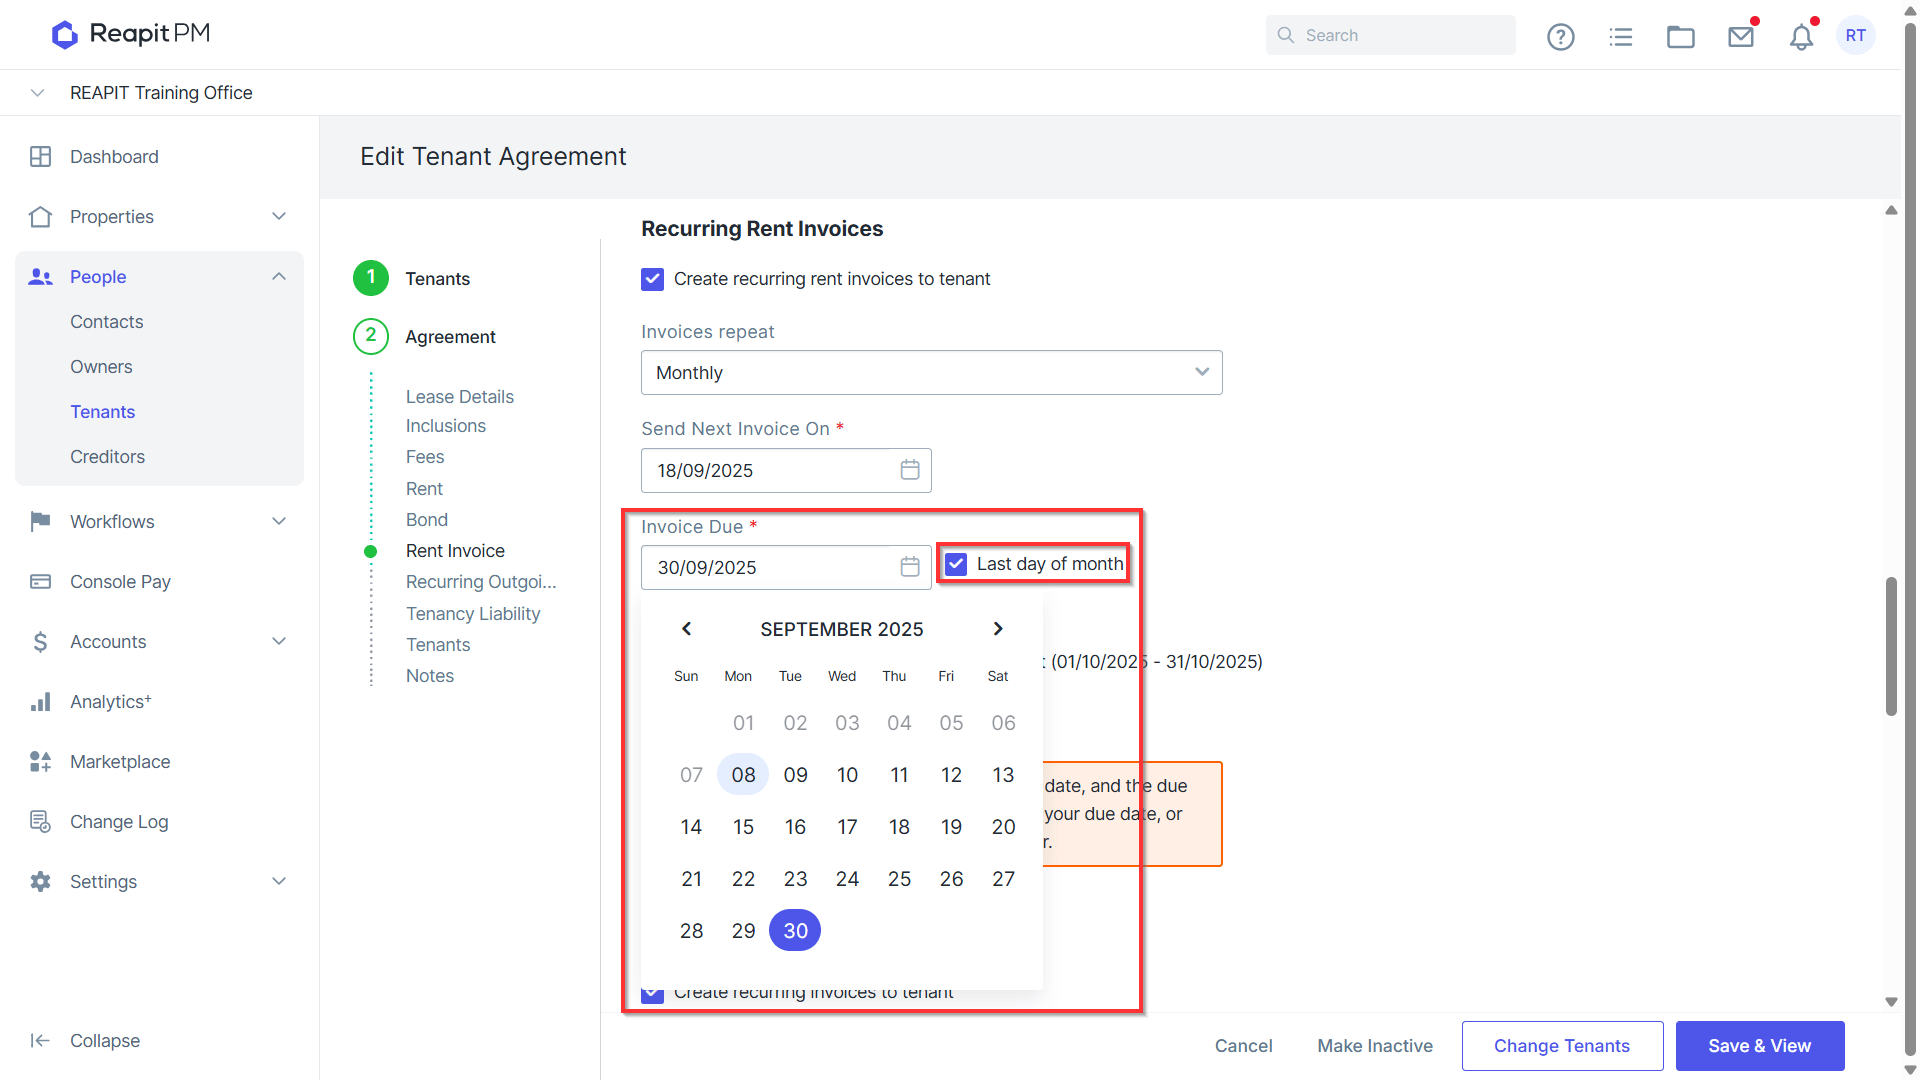
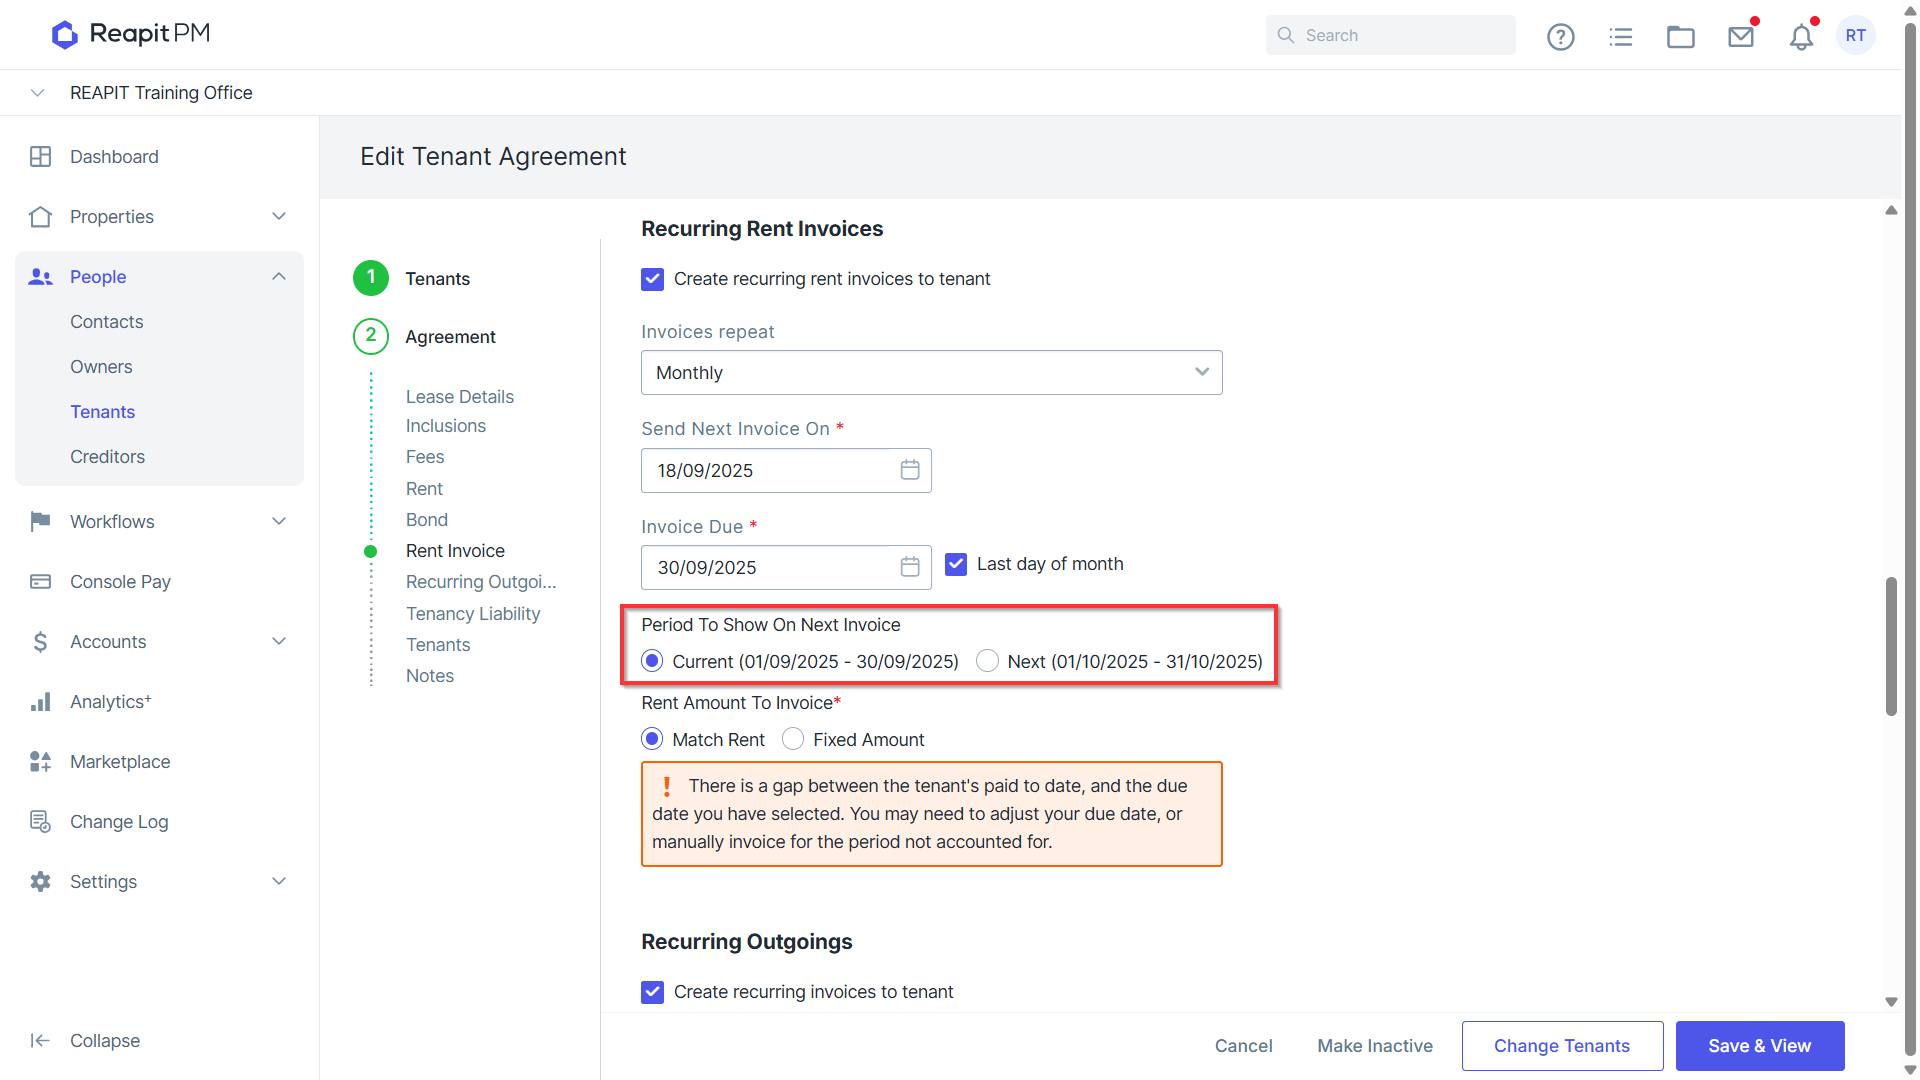
- Select what period you would like to show on the next invoice, either current or next period.
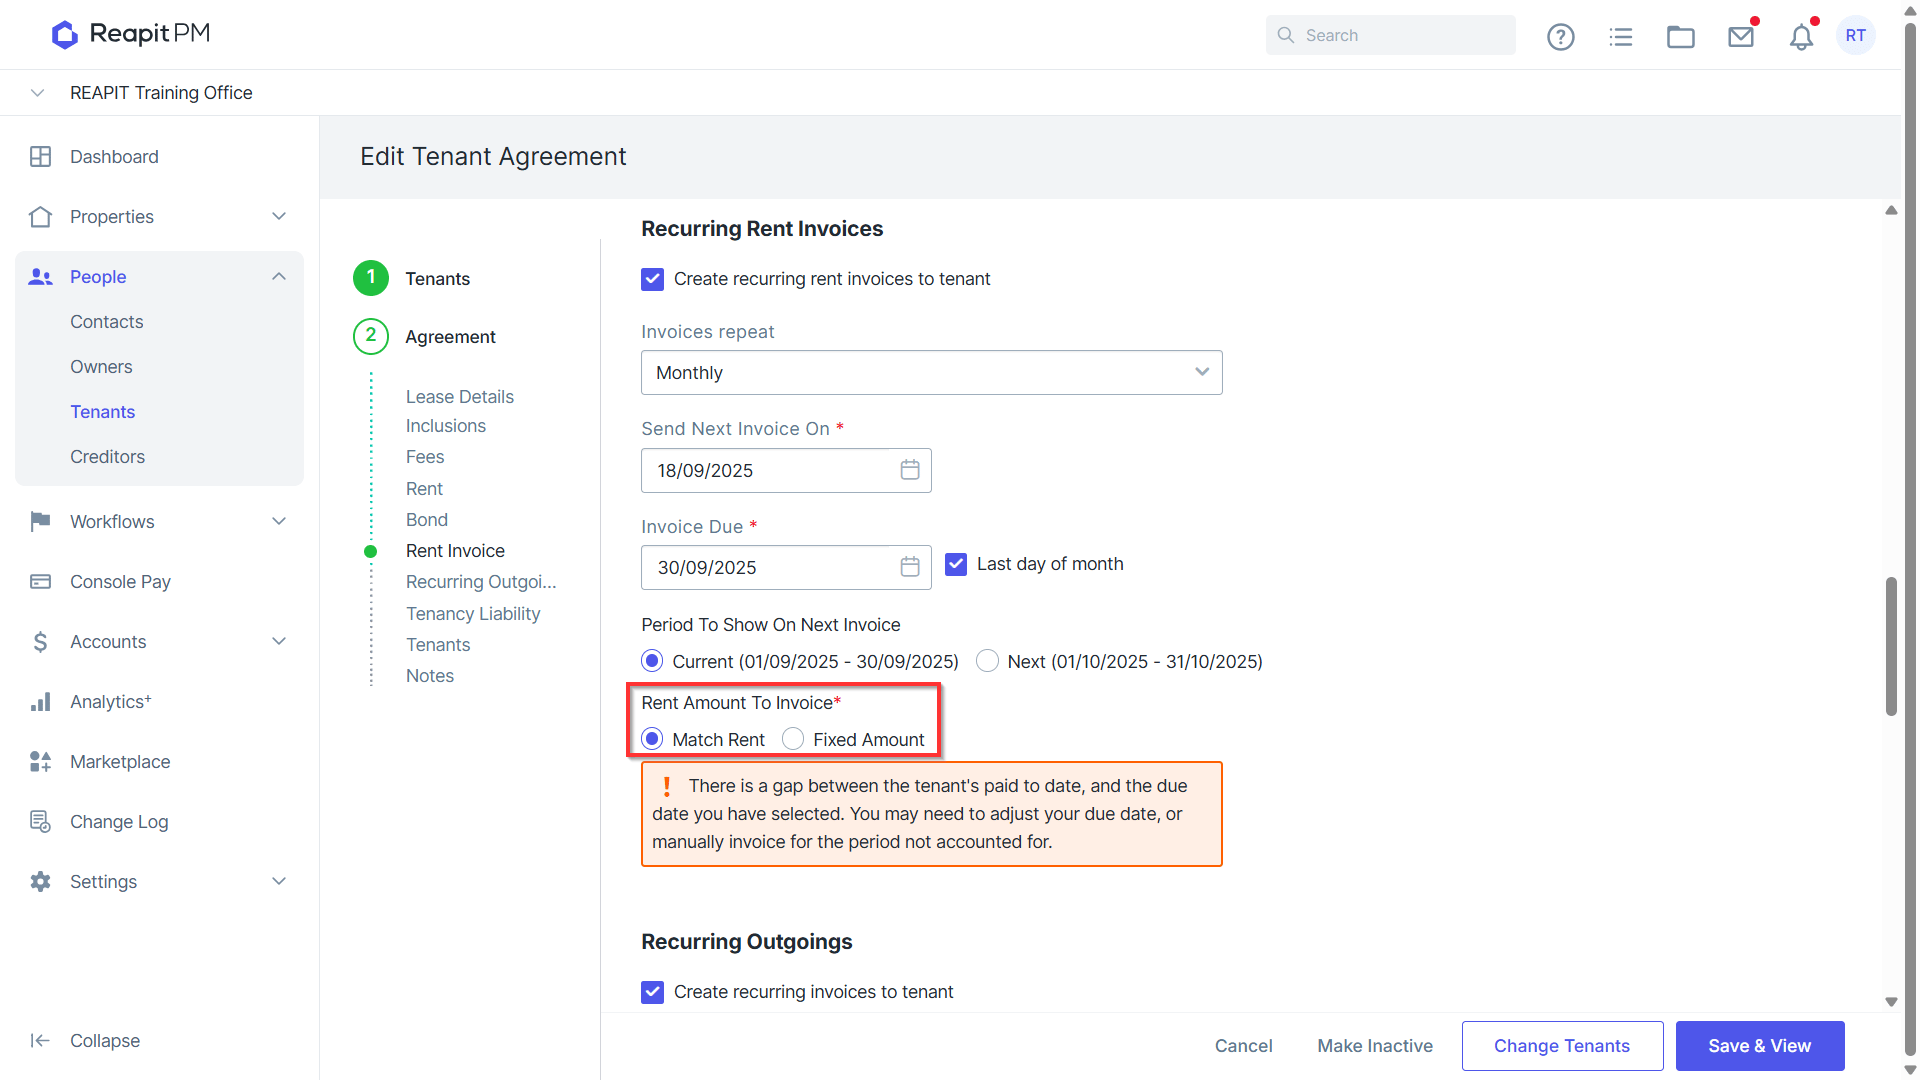
- Select the Rent Amount to Invoice, this is a matched amount or a set fixed amount.
Note: when using a fixed amount, they have to enter a monthly amount as well.
Note: You may see warnings and information boxes appear during this process, please ensure you read these in detail. If you are setting tenancies up in the middle of a rent period, in some cases you may need to adjust due dates, create an invoice for a shorter period or add a rent rent credit (if commercial & applicable).
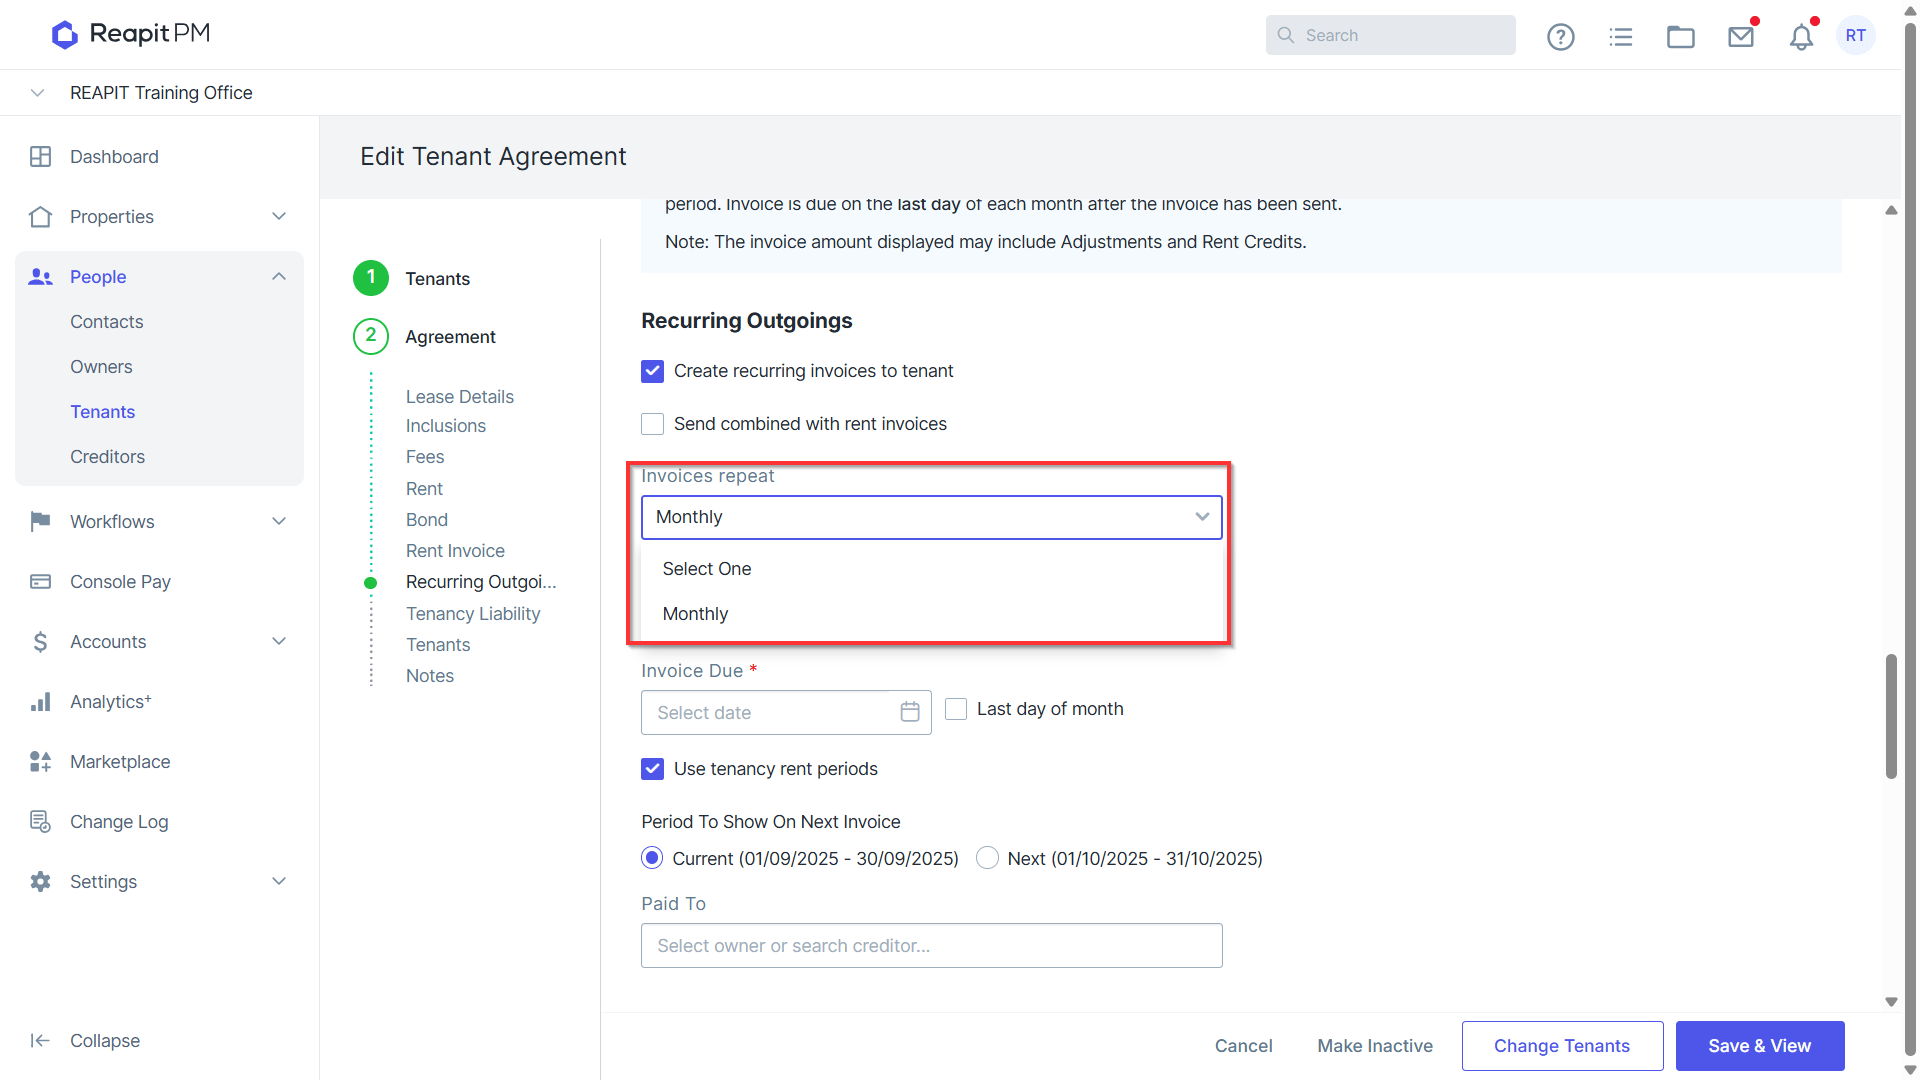
- Select the Create recurring invoices to tenant checkbox.
*Note: Within the Paid to section, if rent and outgoings are not combined, then you will be able to select a creditor for the 'Paid to' option.
- Select the Monthly option.
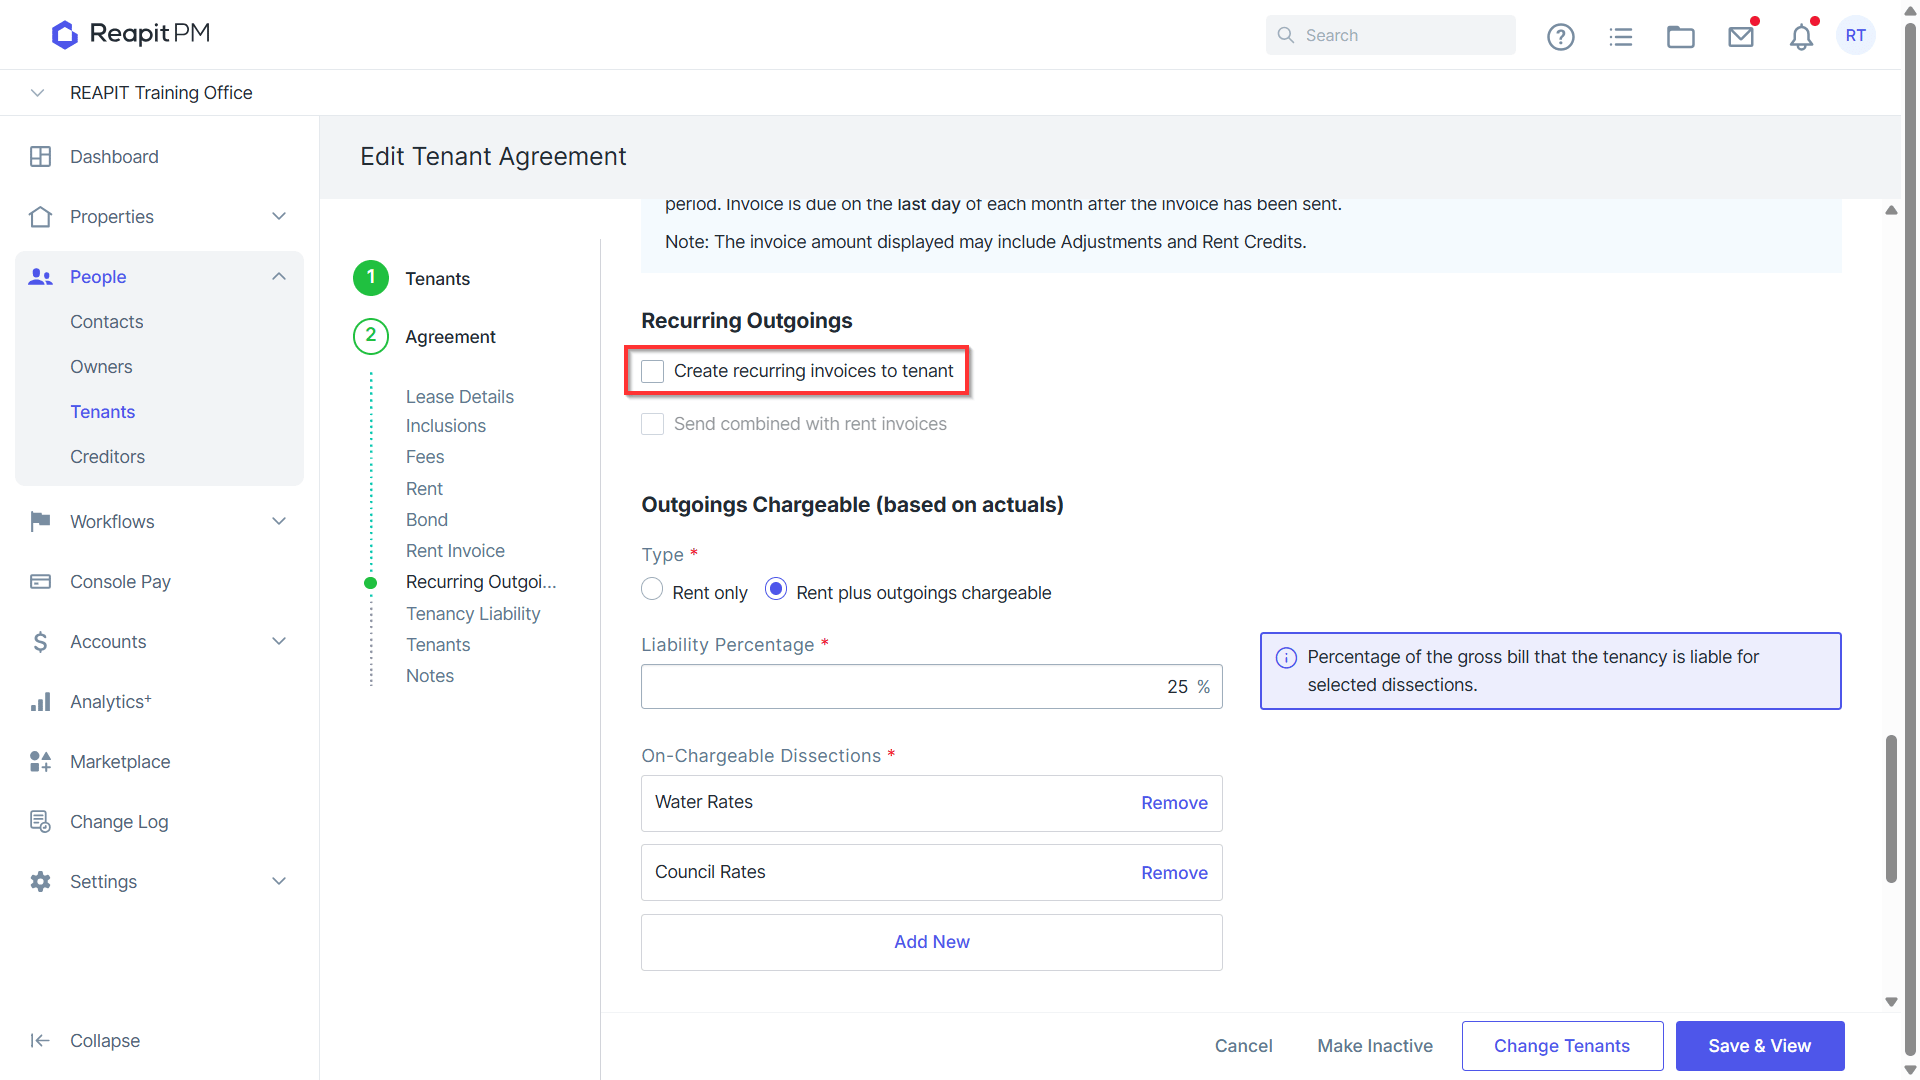
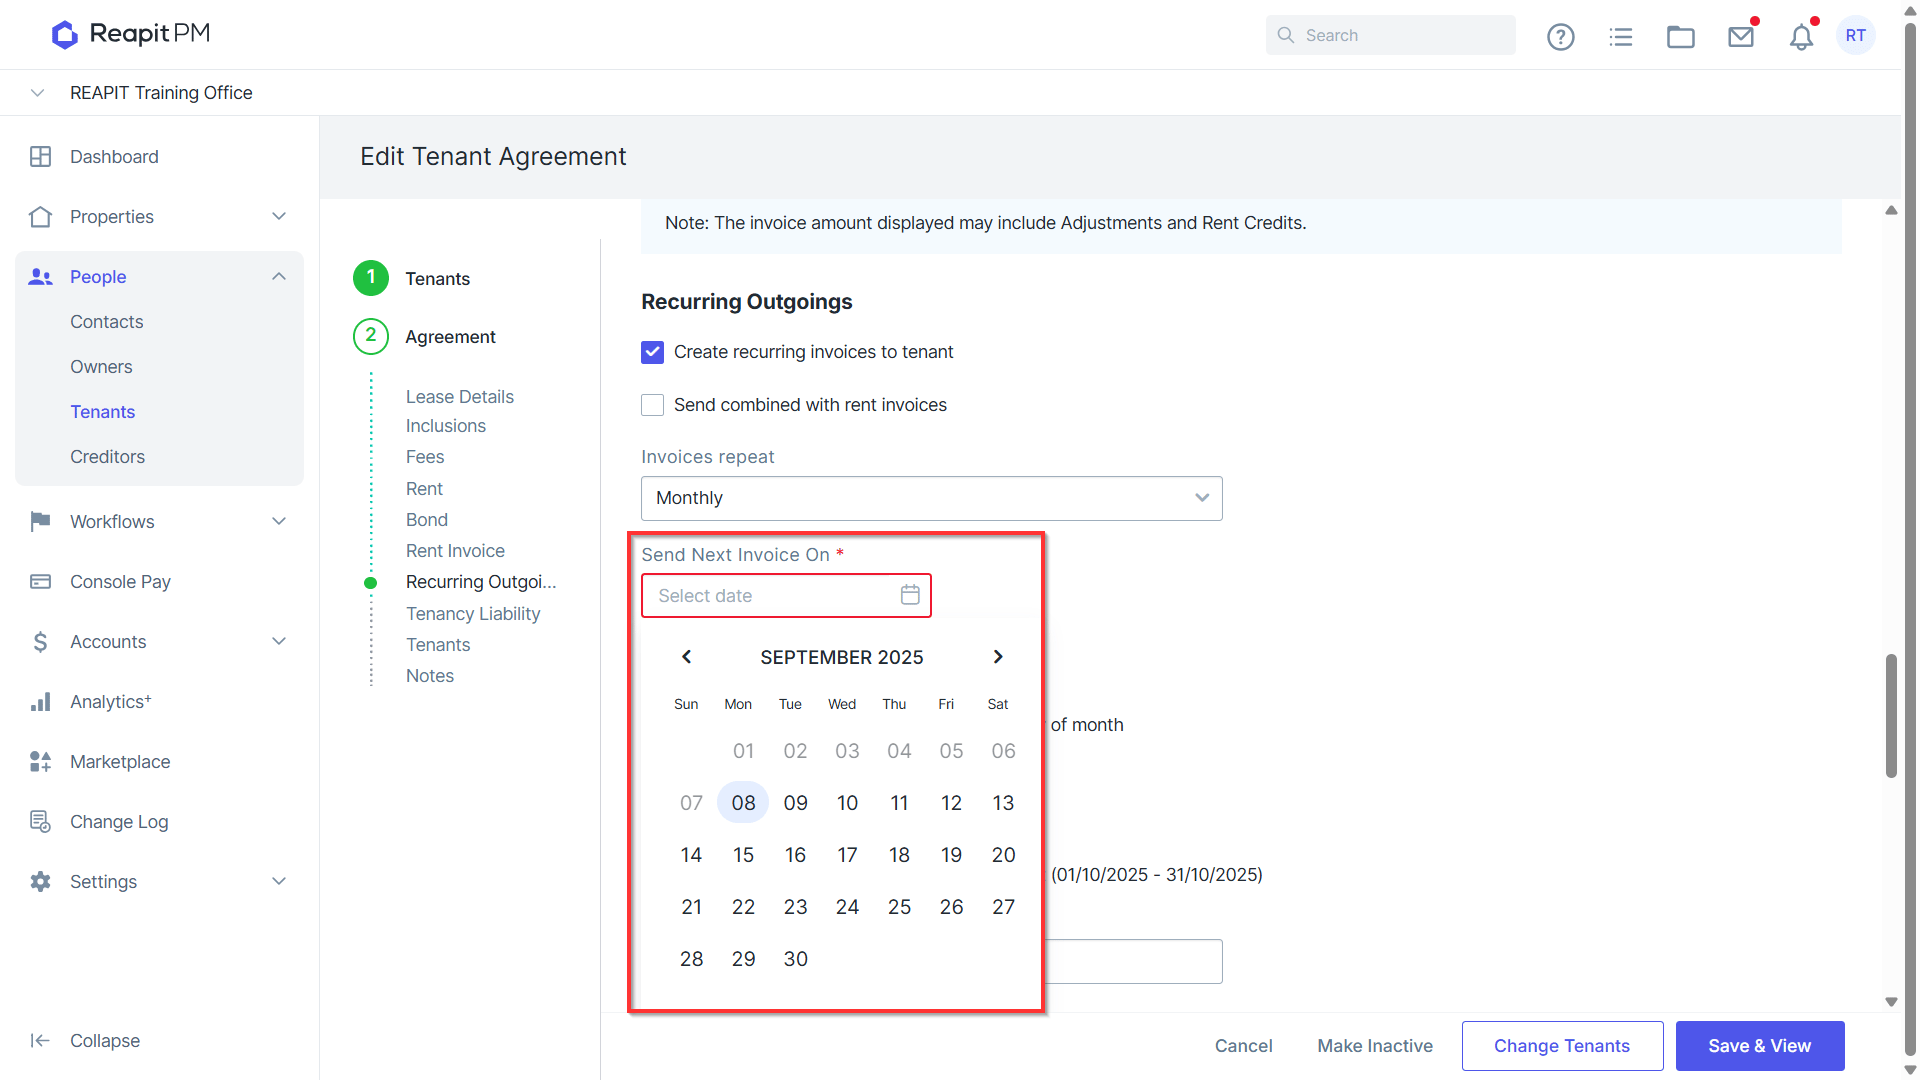
- Select the Create Next Invoice On date.
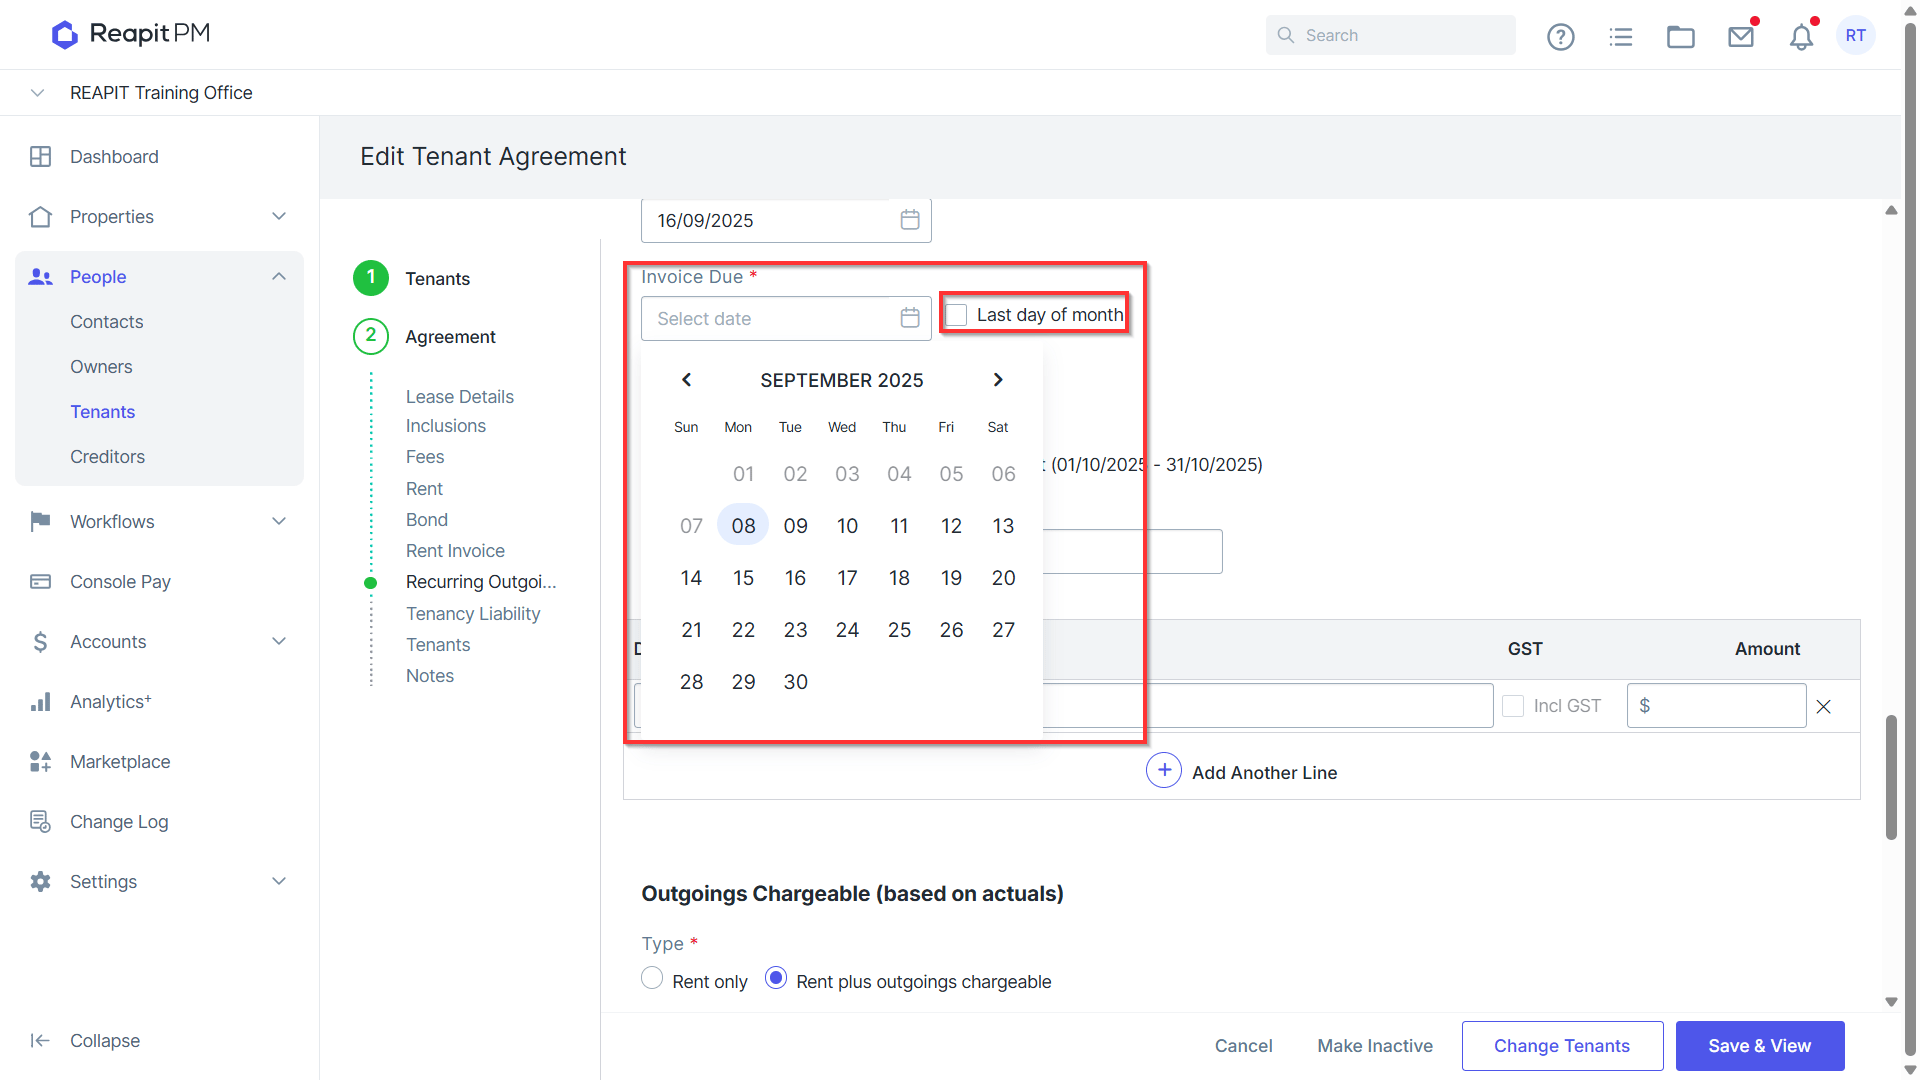
- Select the Invoice Due date OR select the last day of the month check box.
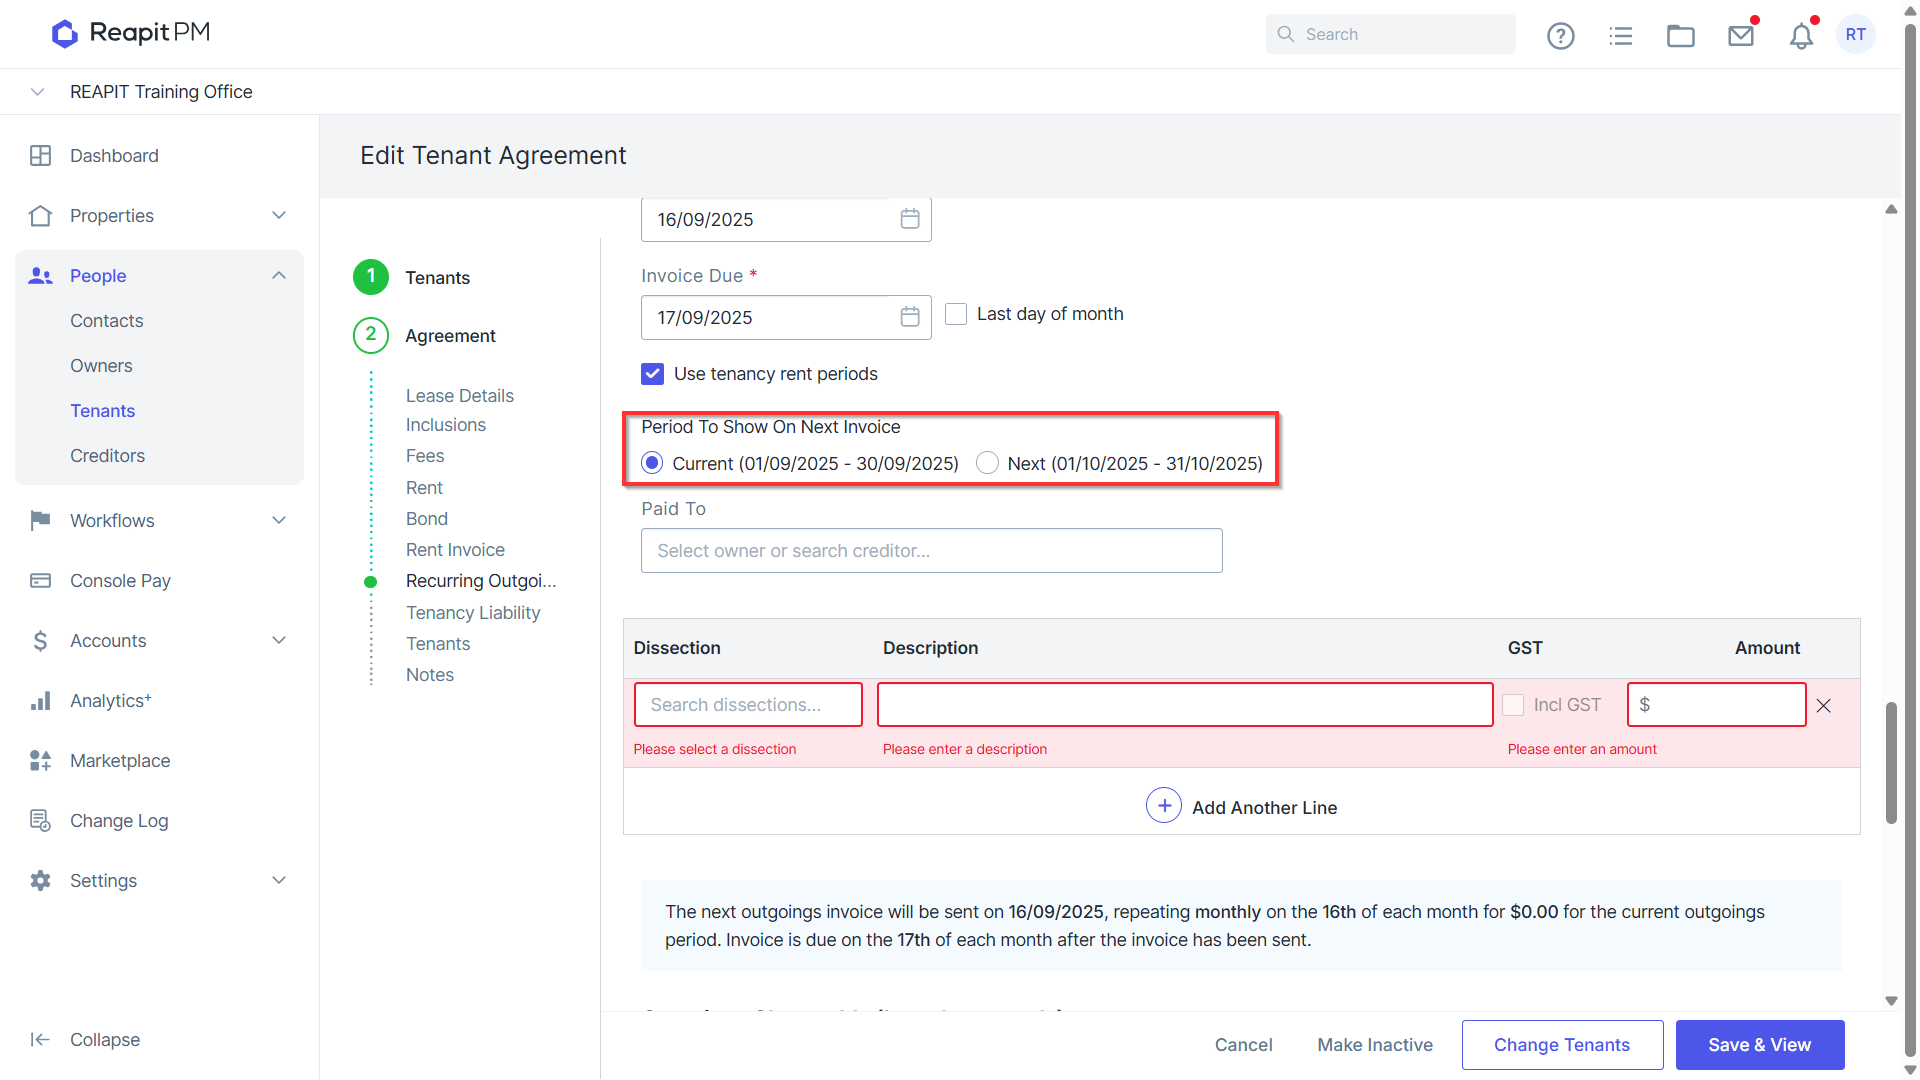
- Select what period you would like to show on the next invoice, either current or next period.
- Select Paid to.
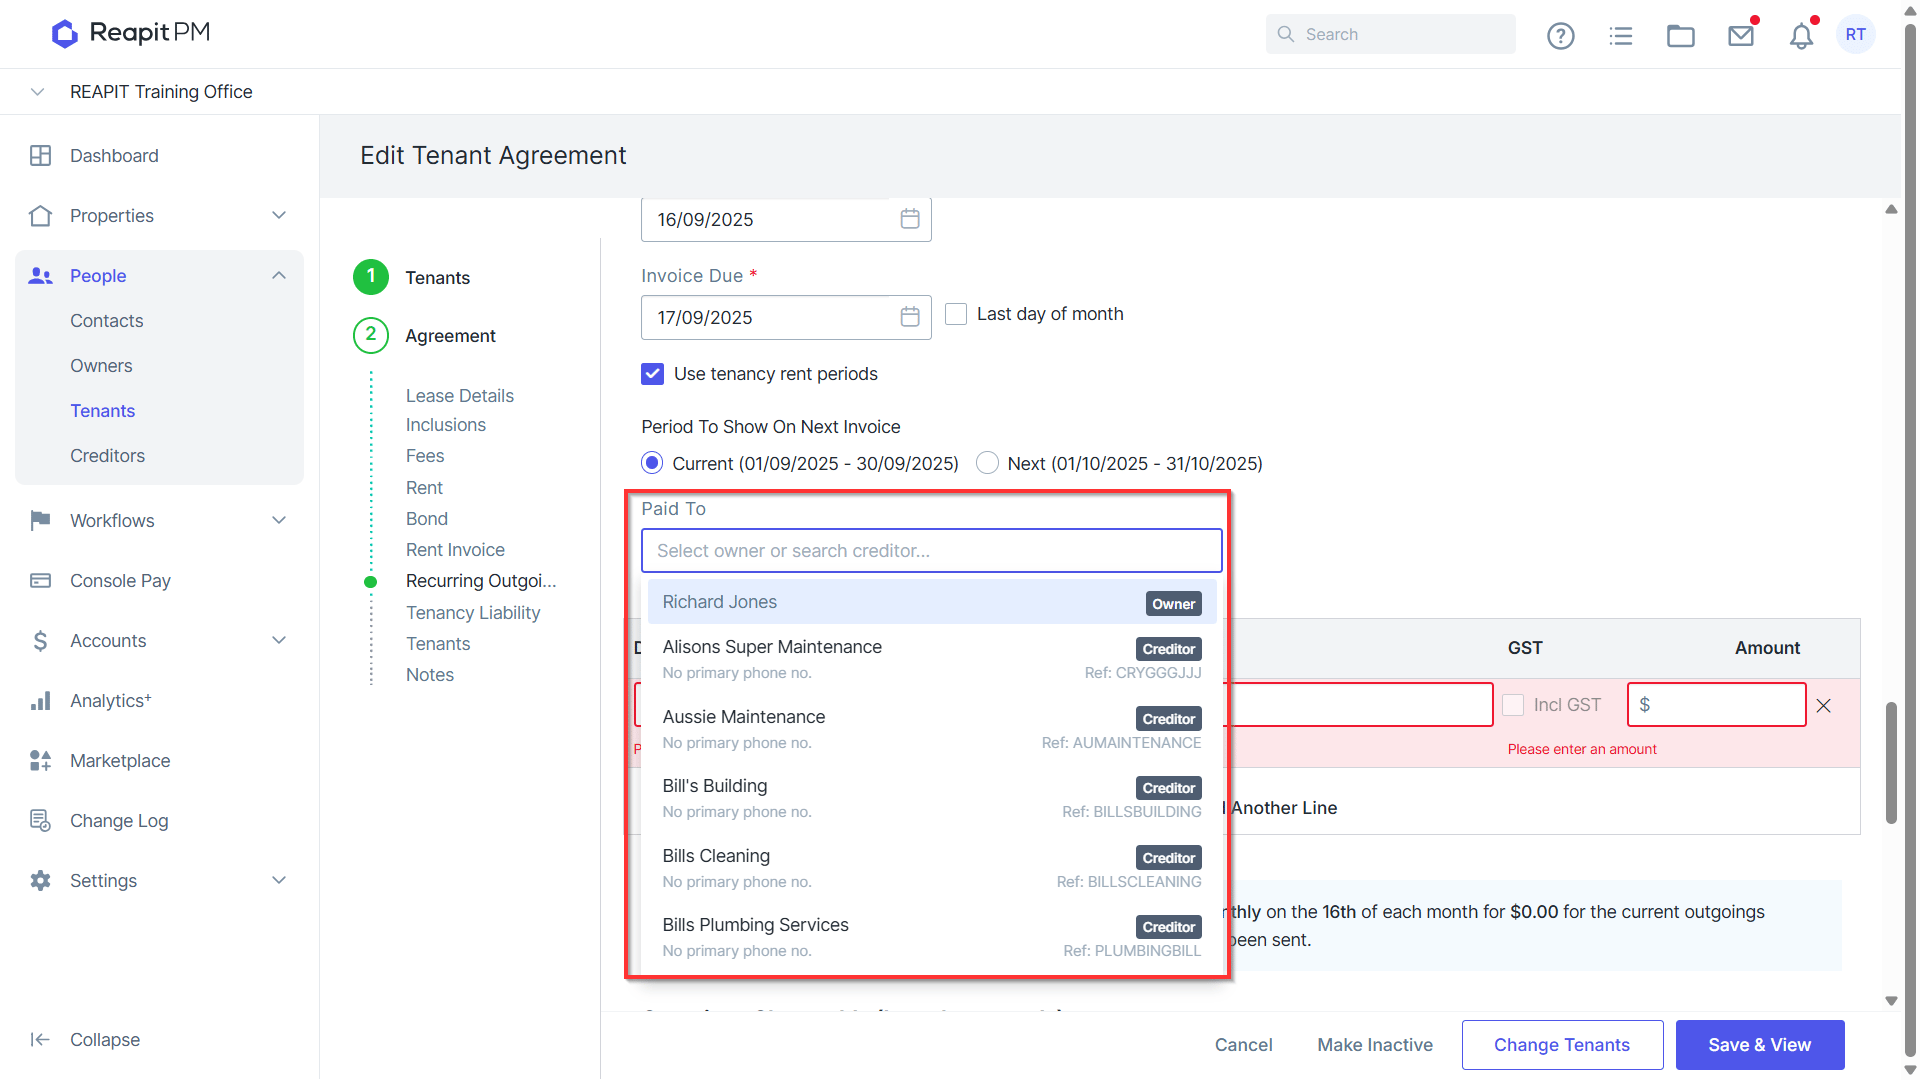
- Enter the description, tick if GST is included and amount.
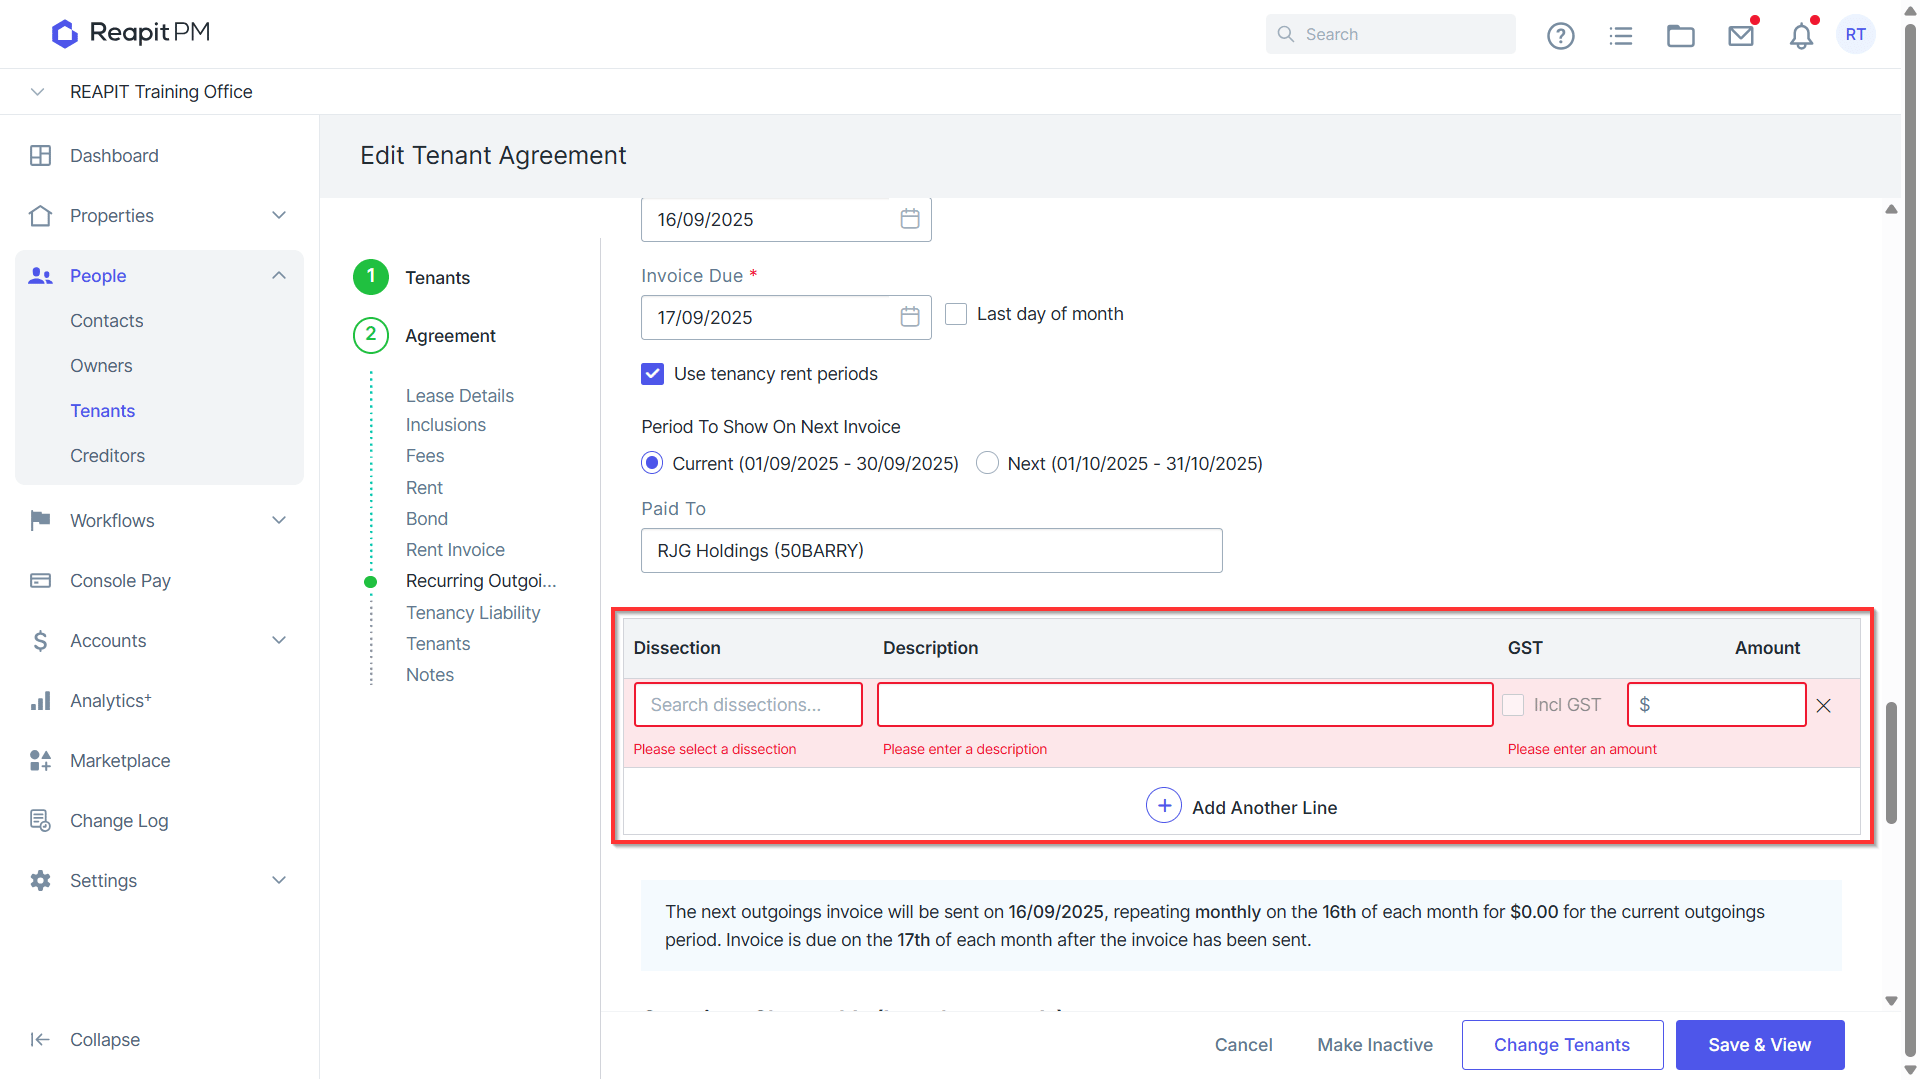
- Continue completing the rest of the fields in your tenant agreement. Click Save & View once completed.