'%20d='M0%208a8%208%200%200%201%208-8h24a8%208%200%200%201%208%208v24a8%208%200%200%201-8%208H8a8%208%200%200%201-8-8V8Z'/%3e%3cpath%20fill='%23fff'%20d='M8.375%2013v14L20.5%2034l12.124-7v-7.737l-1.687-.975-2.806-1.62-1.082-.624v4.83l-.002%204.83H13.95V16.07l3.275-1.89%202.192-1.265%201.082-.625%203.275%201.877%202.192%201.256%201.083.62V9.782L20.5%206%208.376%2013Z'/%3e%3cdefs%3e%3clinearGradient%20id='reapit-pm__a'%20x1='20.702'%20x2='20.702'%20y1='.351'%20y2='31.228'%20gradientUnits='userSpaceOnUse'%3e%3cstop%20stop-color='%235573FD'/%3e%3cstop%20offset='.575'%20stop-color='%234E56EA'/%3e%3c/linearGradient%3e%3c/defs%3e%3c/svg%3e)
Conversations - Managing Email Actions and Features
This article will guide cover the actions and features within Conversations in Reapit PM
Conversations - Managing Email Actions and Features
This article will guide cover the actions and features within Conversations in Reapit PM.
The process in this article includes:
- Deleting Emails
- Archive / Archive Threads
- Conversations AI
- Reply, Reply All, and Forward Emails
- Bulk Remove Properties and Agreements
- Using the Bill Workflow in Conversations
- Notes
- Save Emails Print Screen or Export Timeline
Deleting Emails
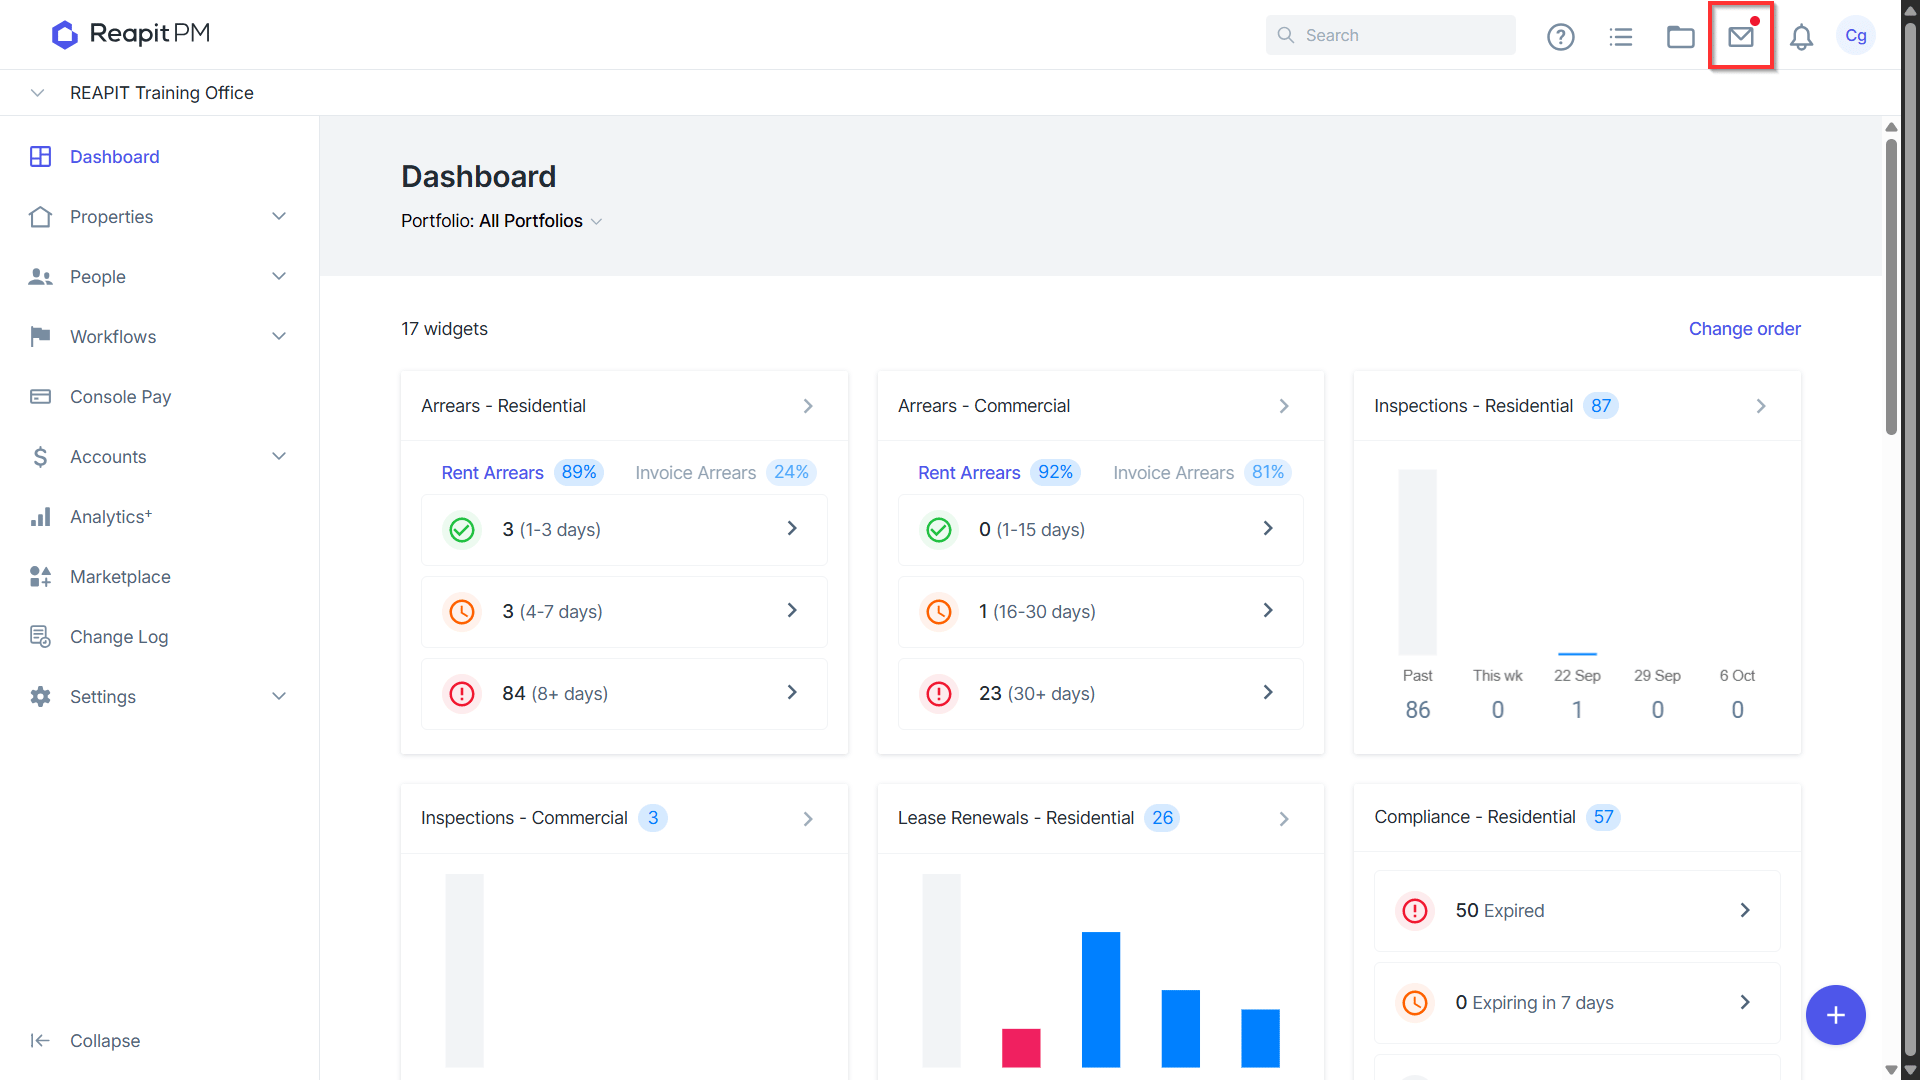
- Deleting an email from Conversations will only remove the email from Conversations, not from your linked Gmail or Outlook account. Navigate to Conversations.
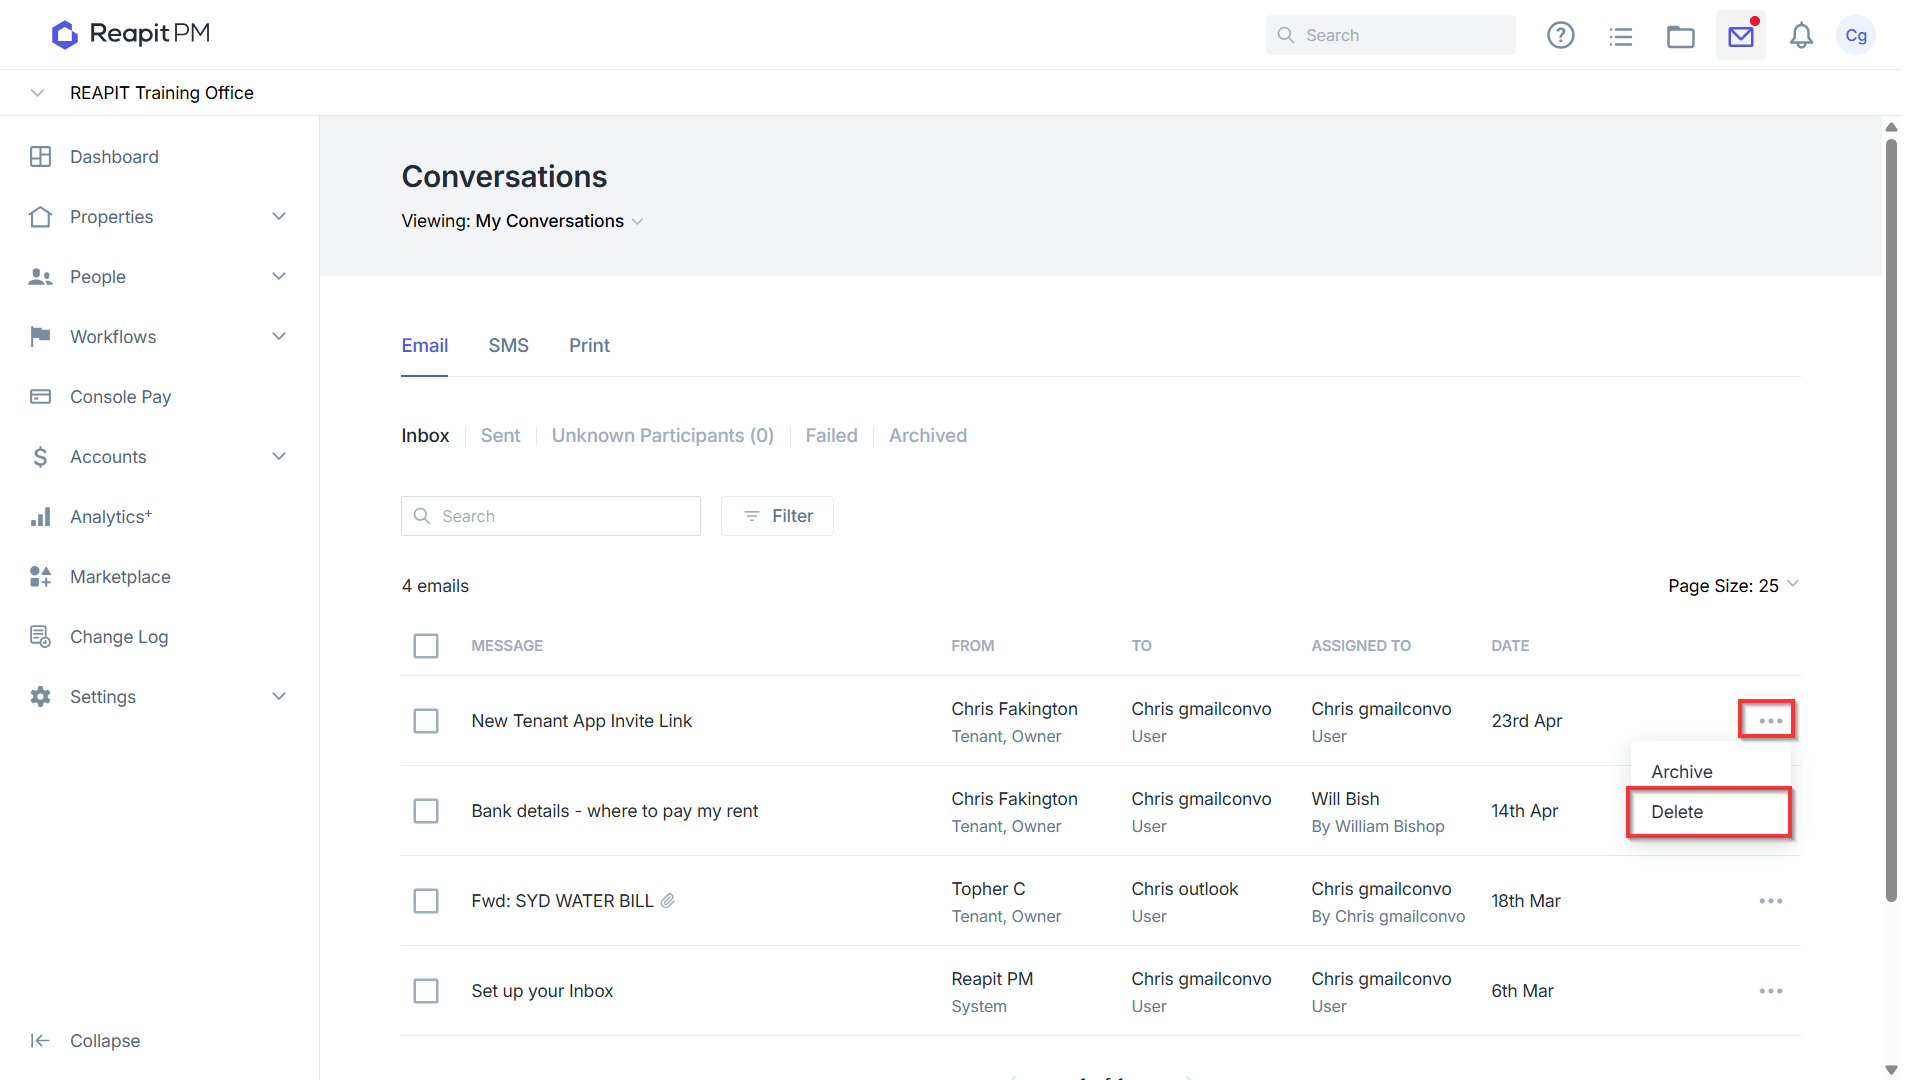
- Should you receive an email that is not required or might have been received in error, select the three dots to the right of the email, and select 'Delete'.
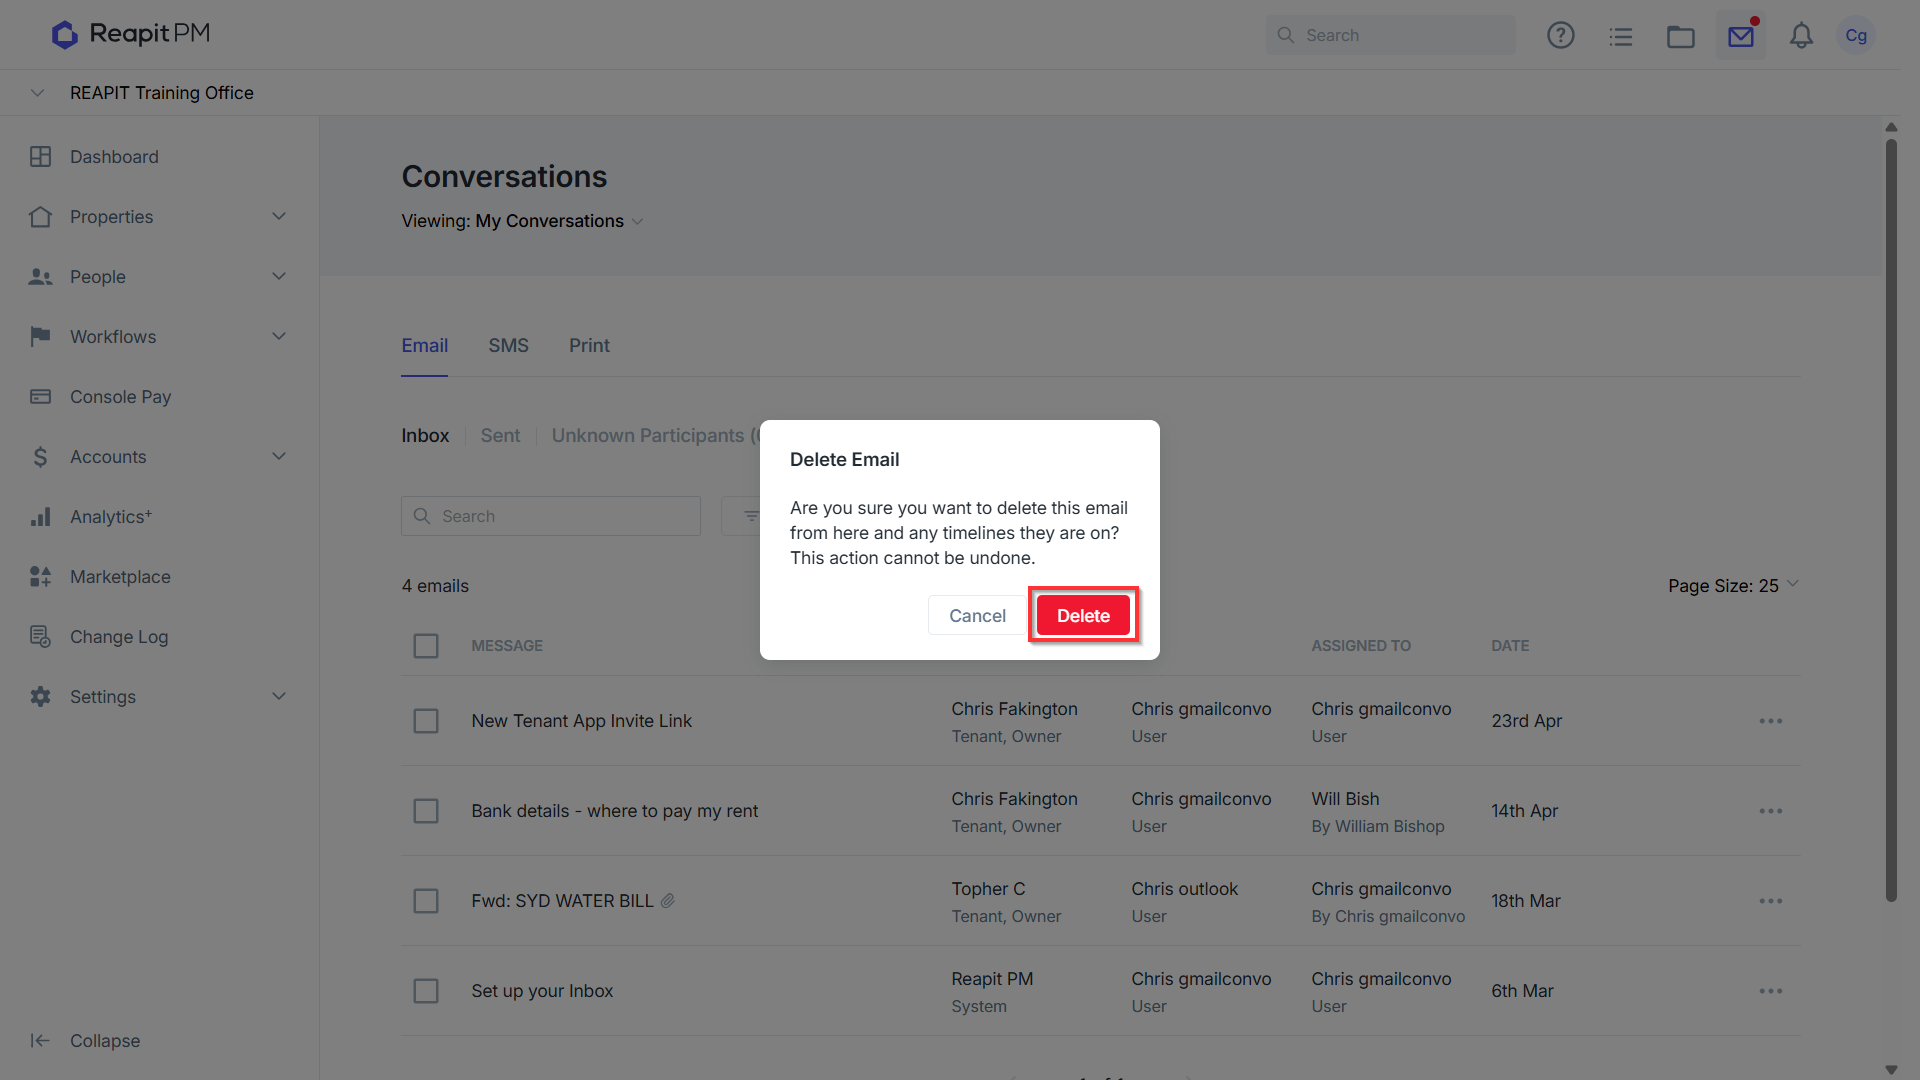
- The confirmation prompt will appear. Confirming if you would like to delete this email also removing it from any timelines (Contact, Owner, Tenant Creditor) cards it might have been appearing on. Click Delete.
- A confirmation prompt will notify you that the email has been successfully deleted.
Archive / Archive Threads
- If an email has been addressed and is no longer needed, navigate to Conversations.
- Navigate to the email and click the three action dots, and select 'Archive'.
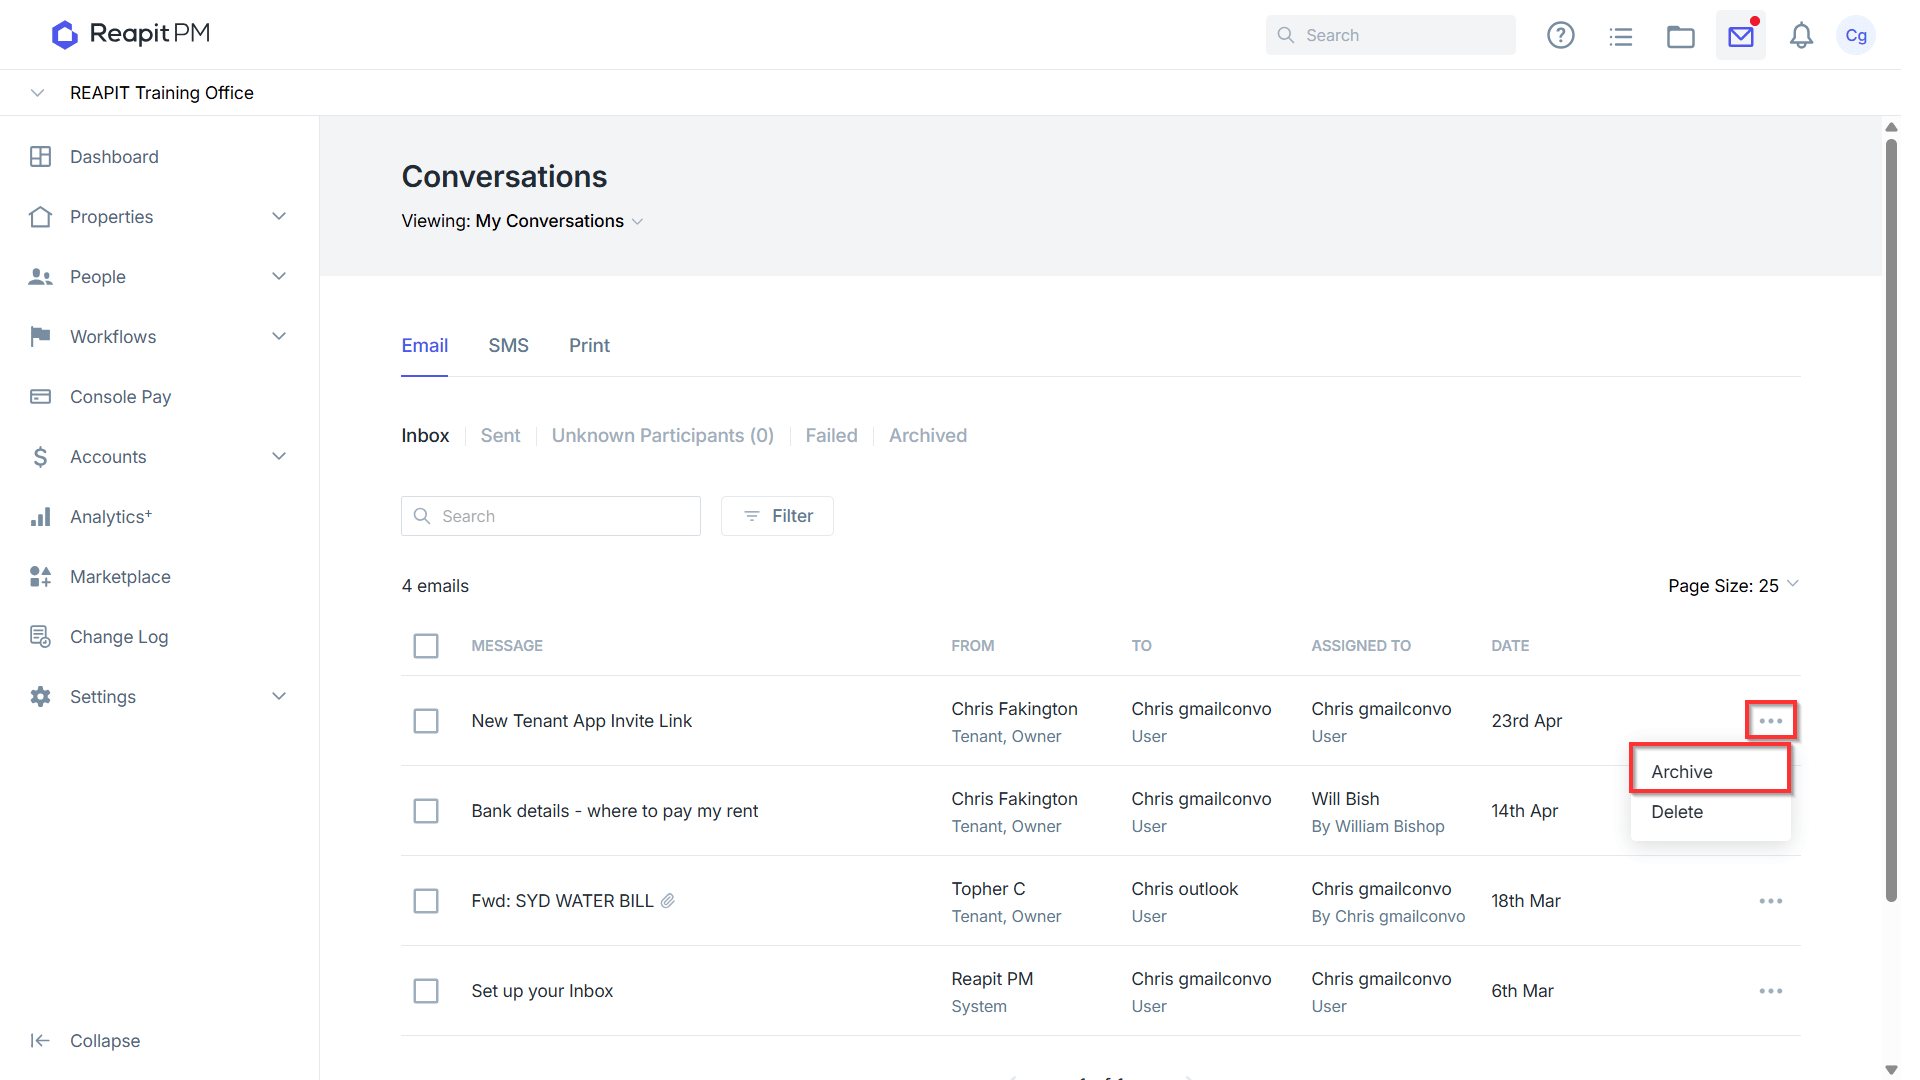
- The confirmation prompt will appear advising that if any other users have been involved with the Conversation it will be archived for them as well. Click Archive ****to proceed.
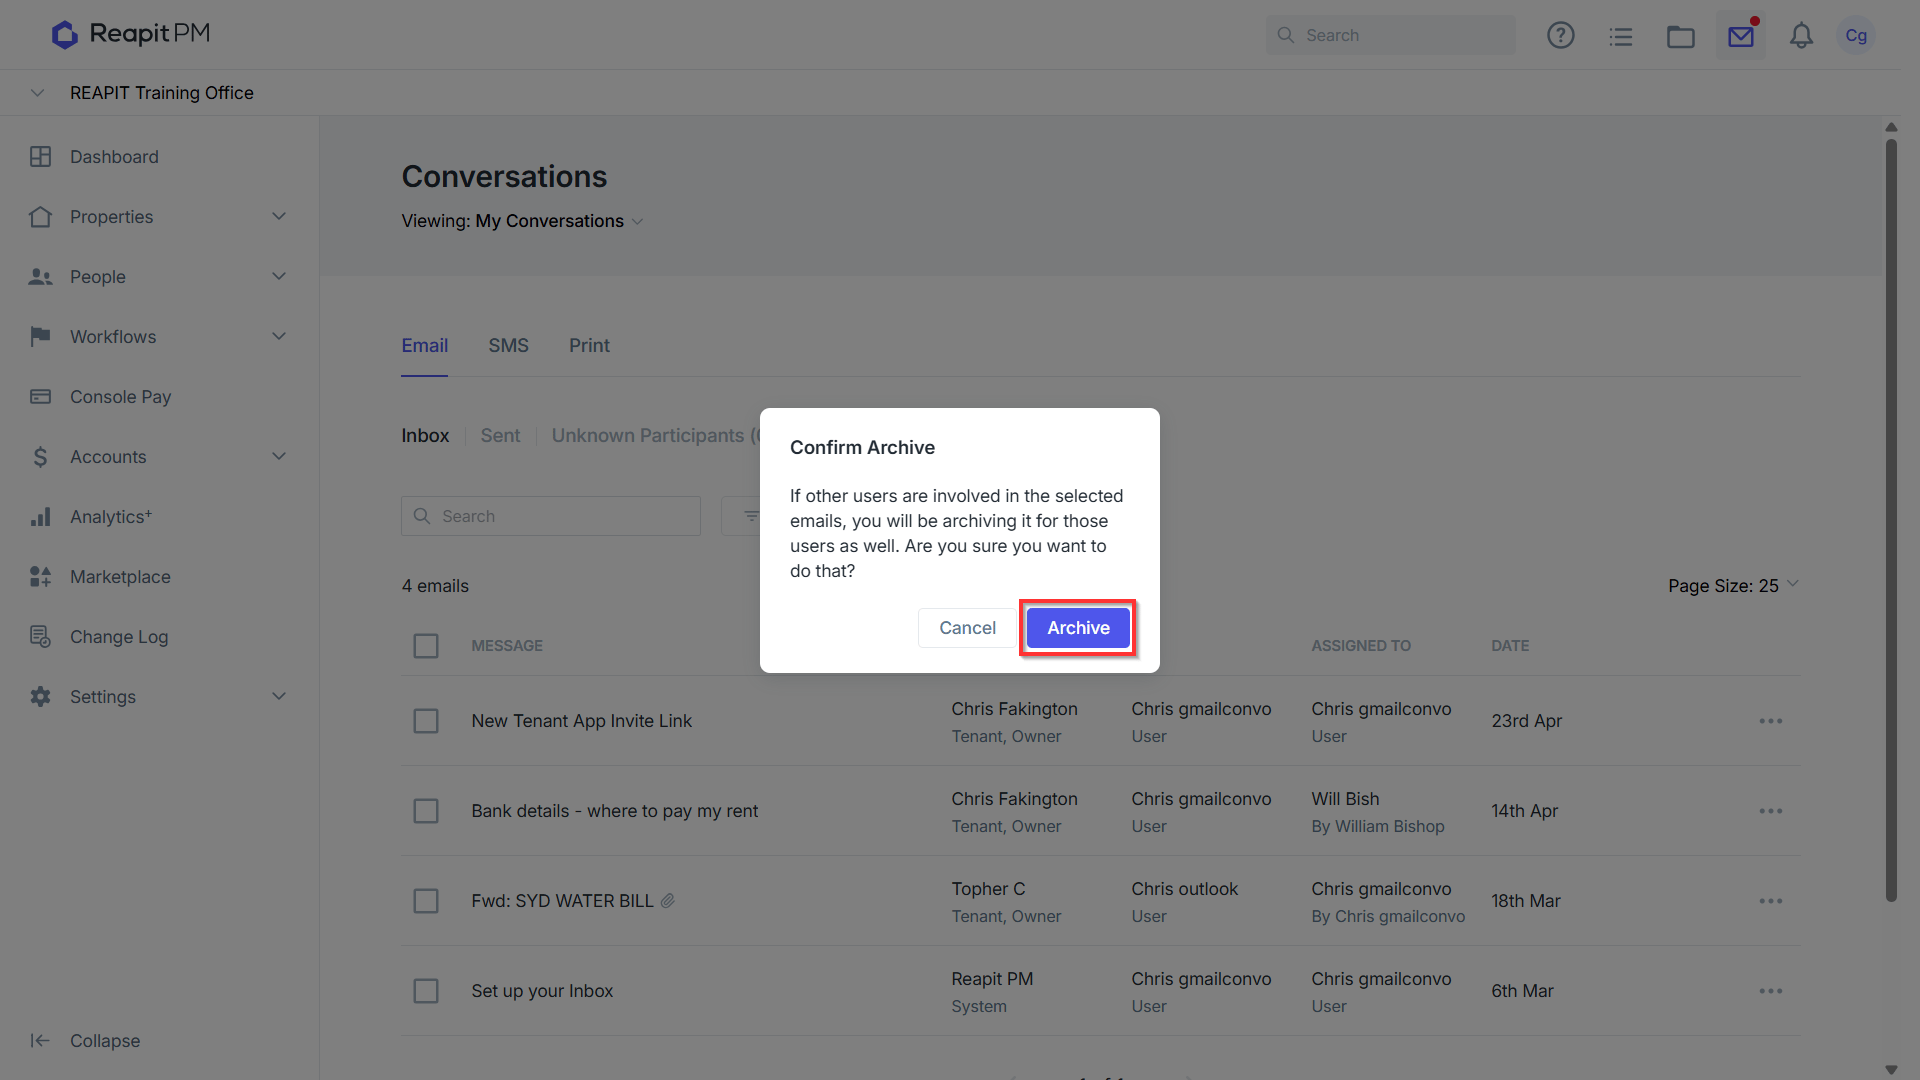
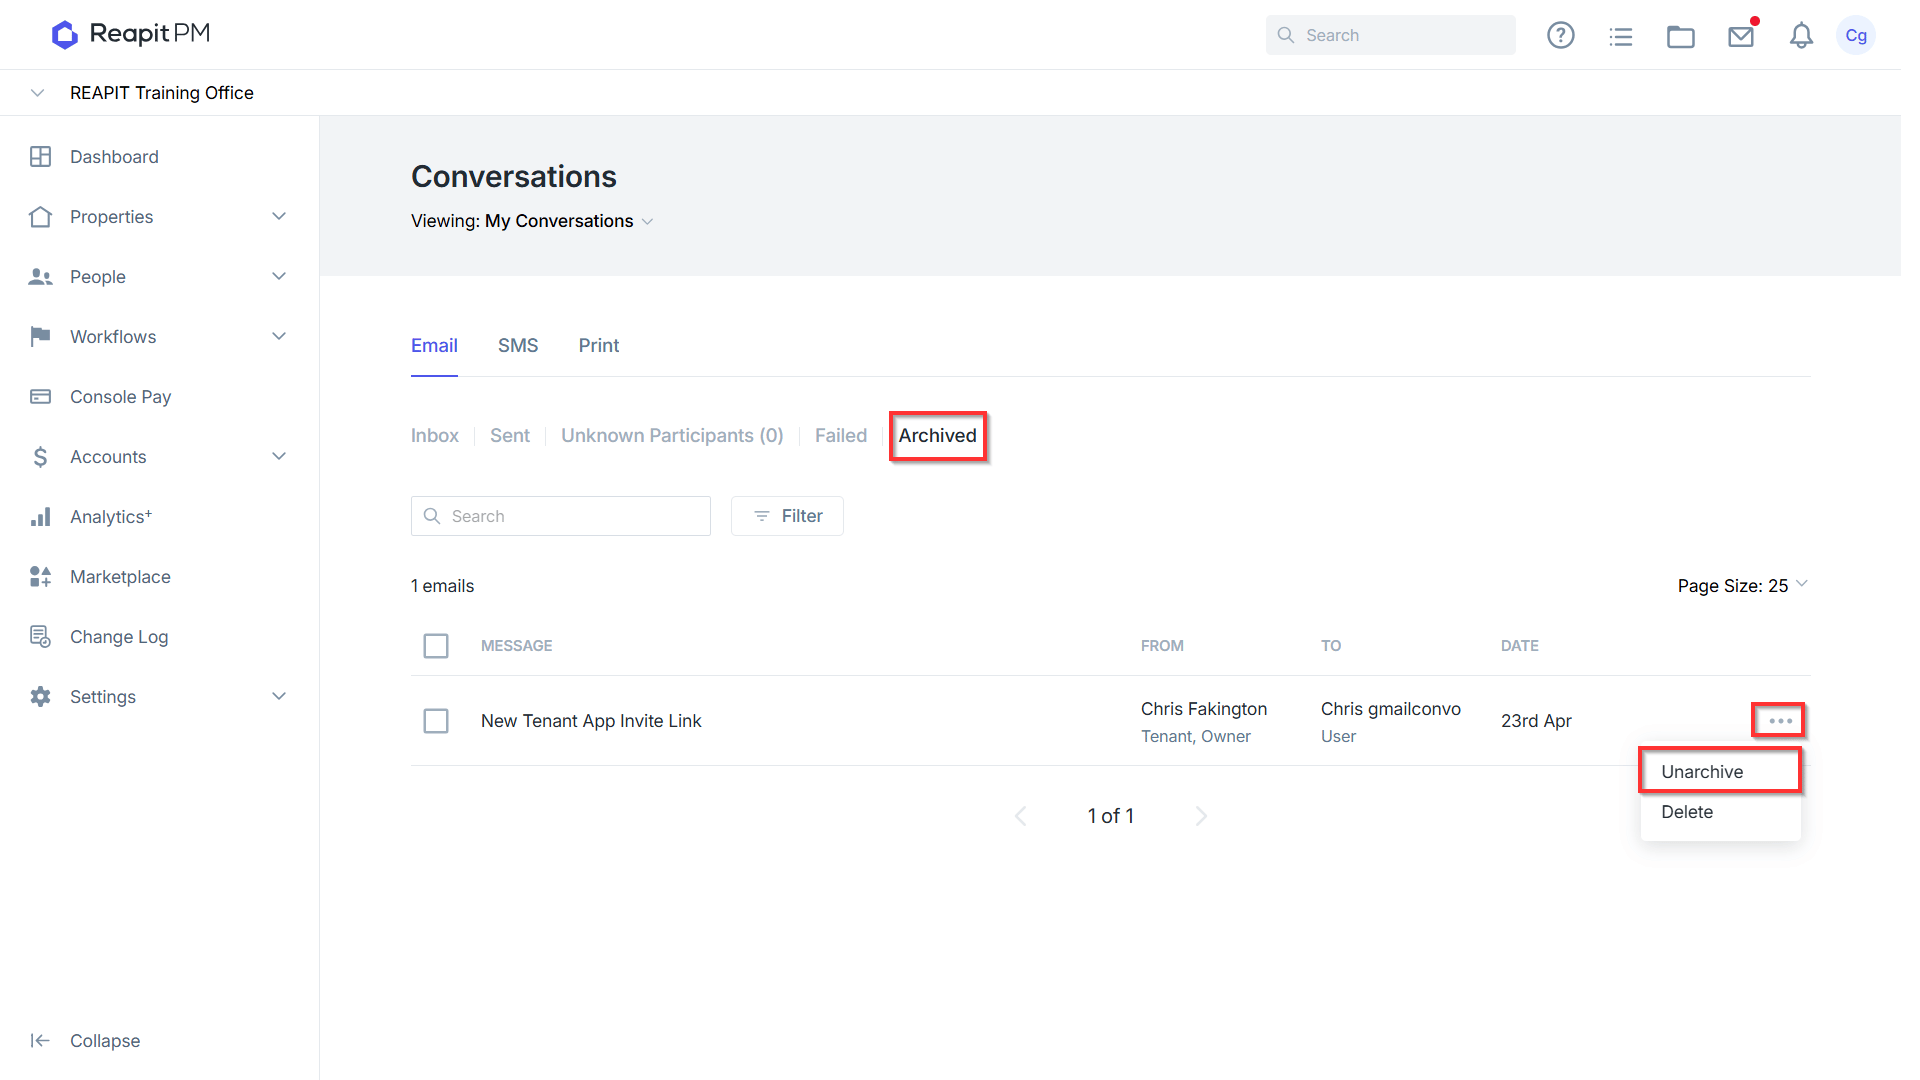
- A confirmation prompt will appear confirming the Email has been archived. If you need to restore an archived email for any reason, click on the Archived tab on the top of Communications. Select the three action dots to the right of the email and select Unarchive.
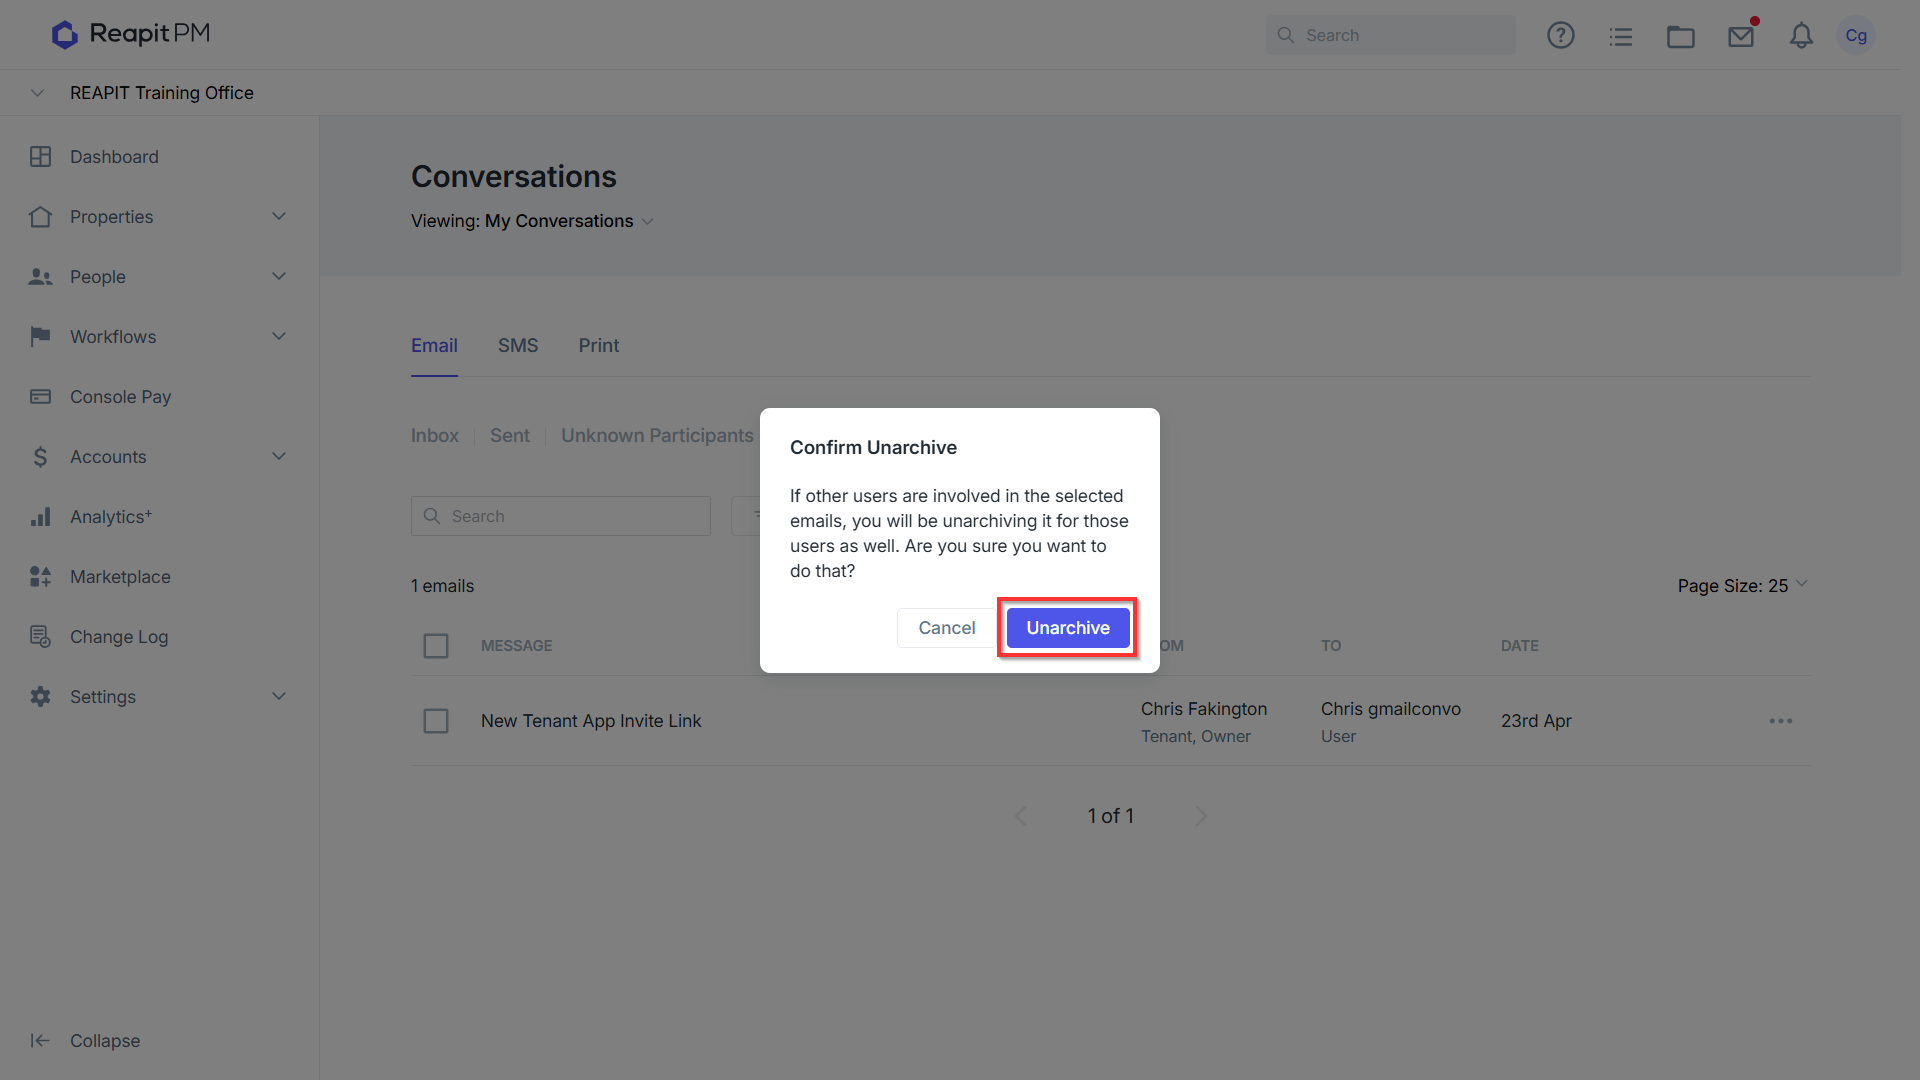
- A confirmation prompt will appear confirming that the email will be unarchived for any other users involved in the email as well. To proceed, select Unarchive.
- A confirmation prompt will confirm the email has been restored.
- Clicking on any email with multiple replies in a thread will provide an option to archive the entire thread. Select any email within the thread to view its details.
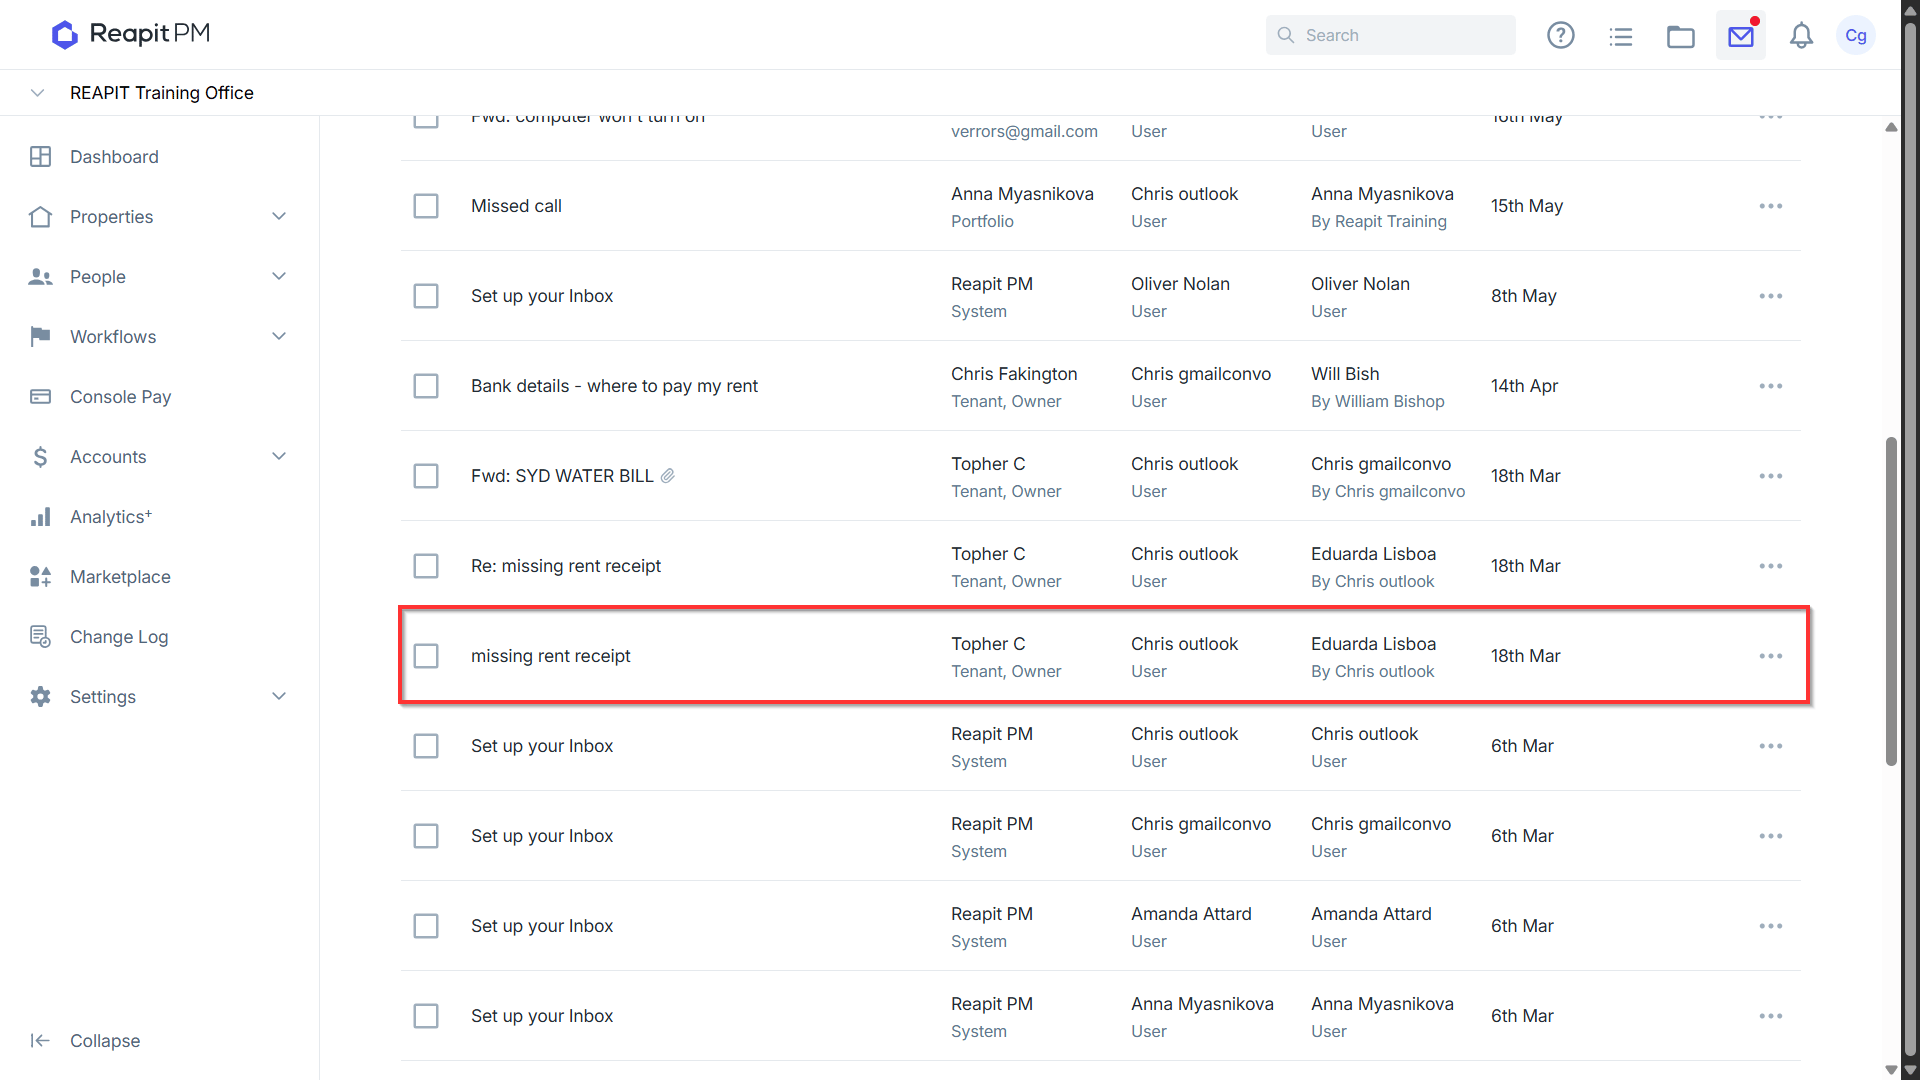
- Navigate to the bottom of the page and select 'Archive Thread'.
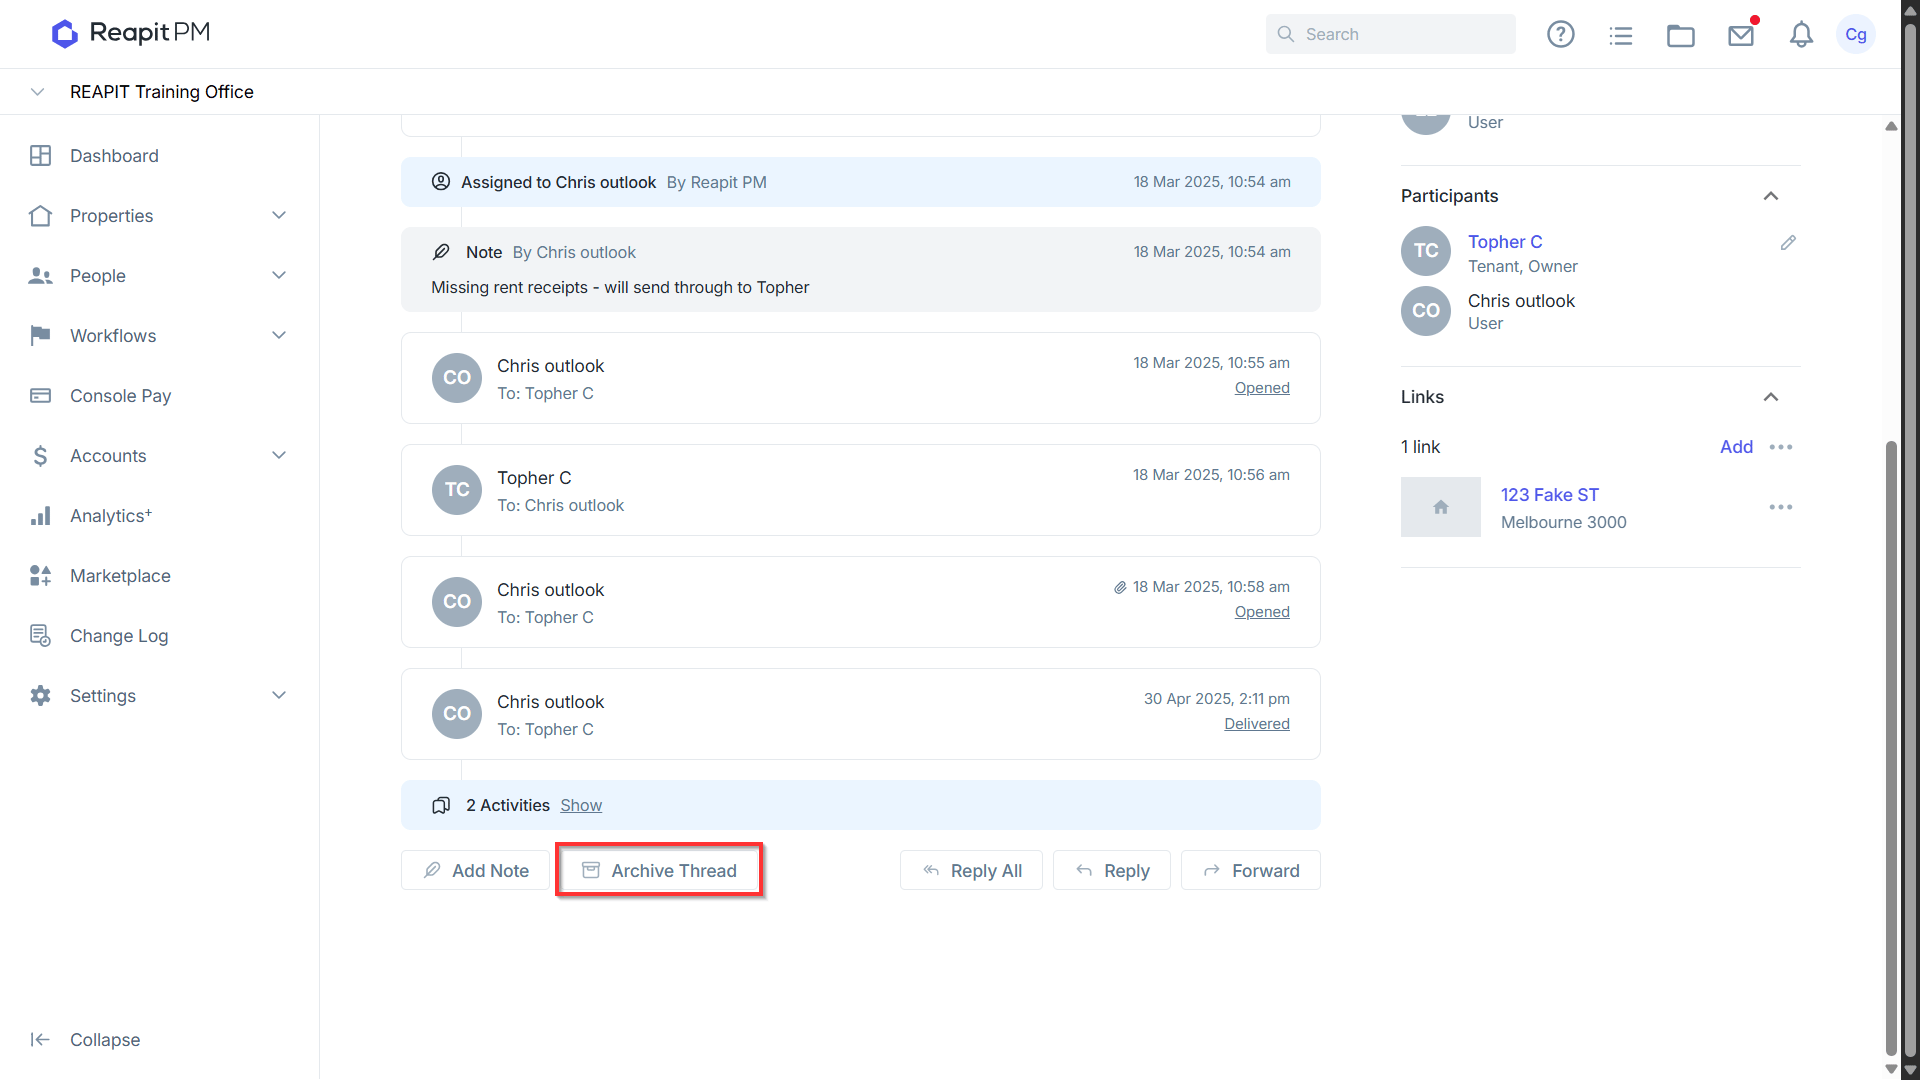
- A confirmation prompt will appear showing the Email(s) in the thread have been archived.
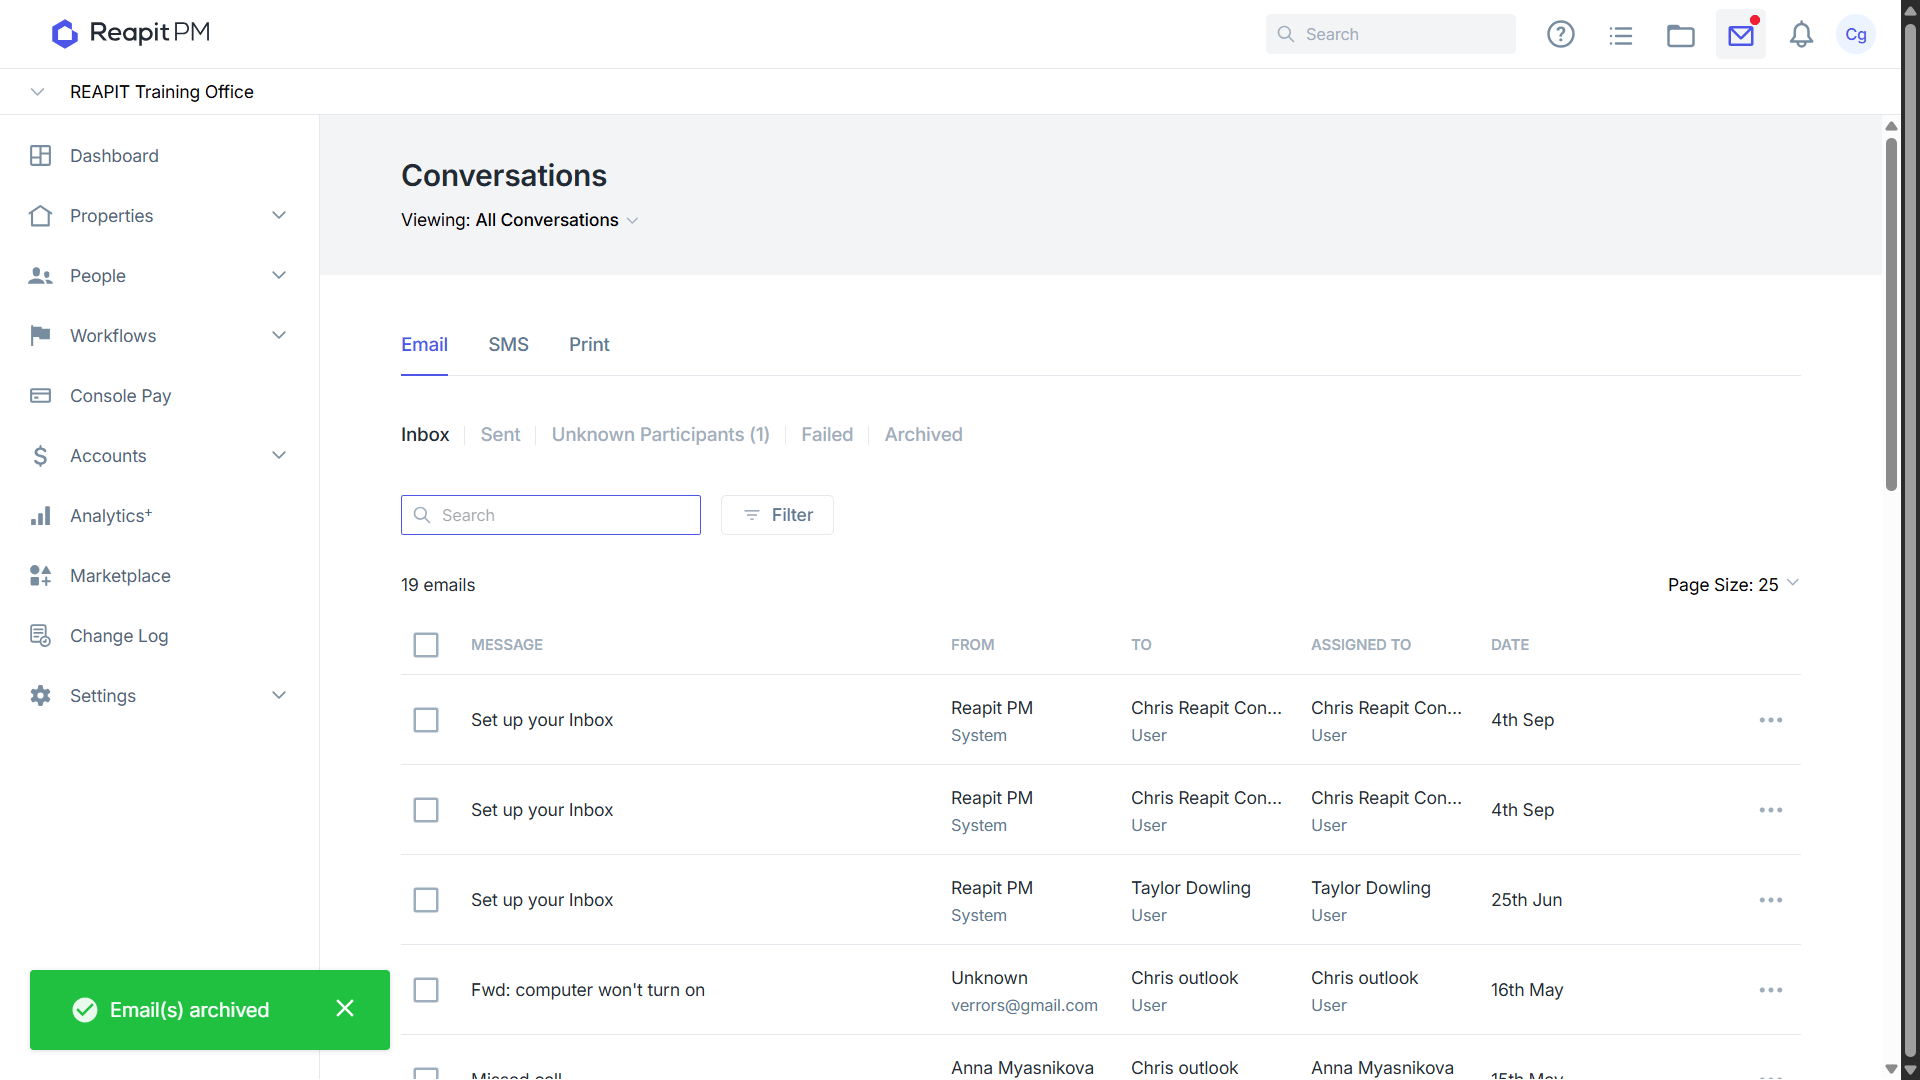
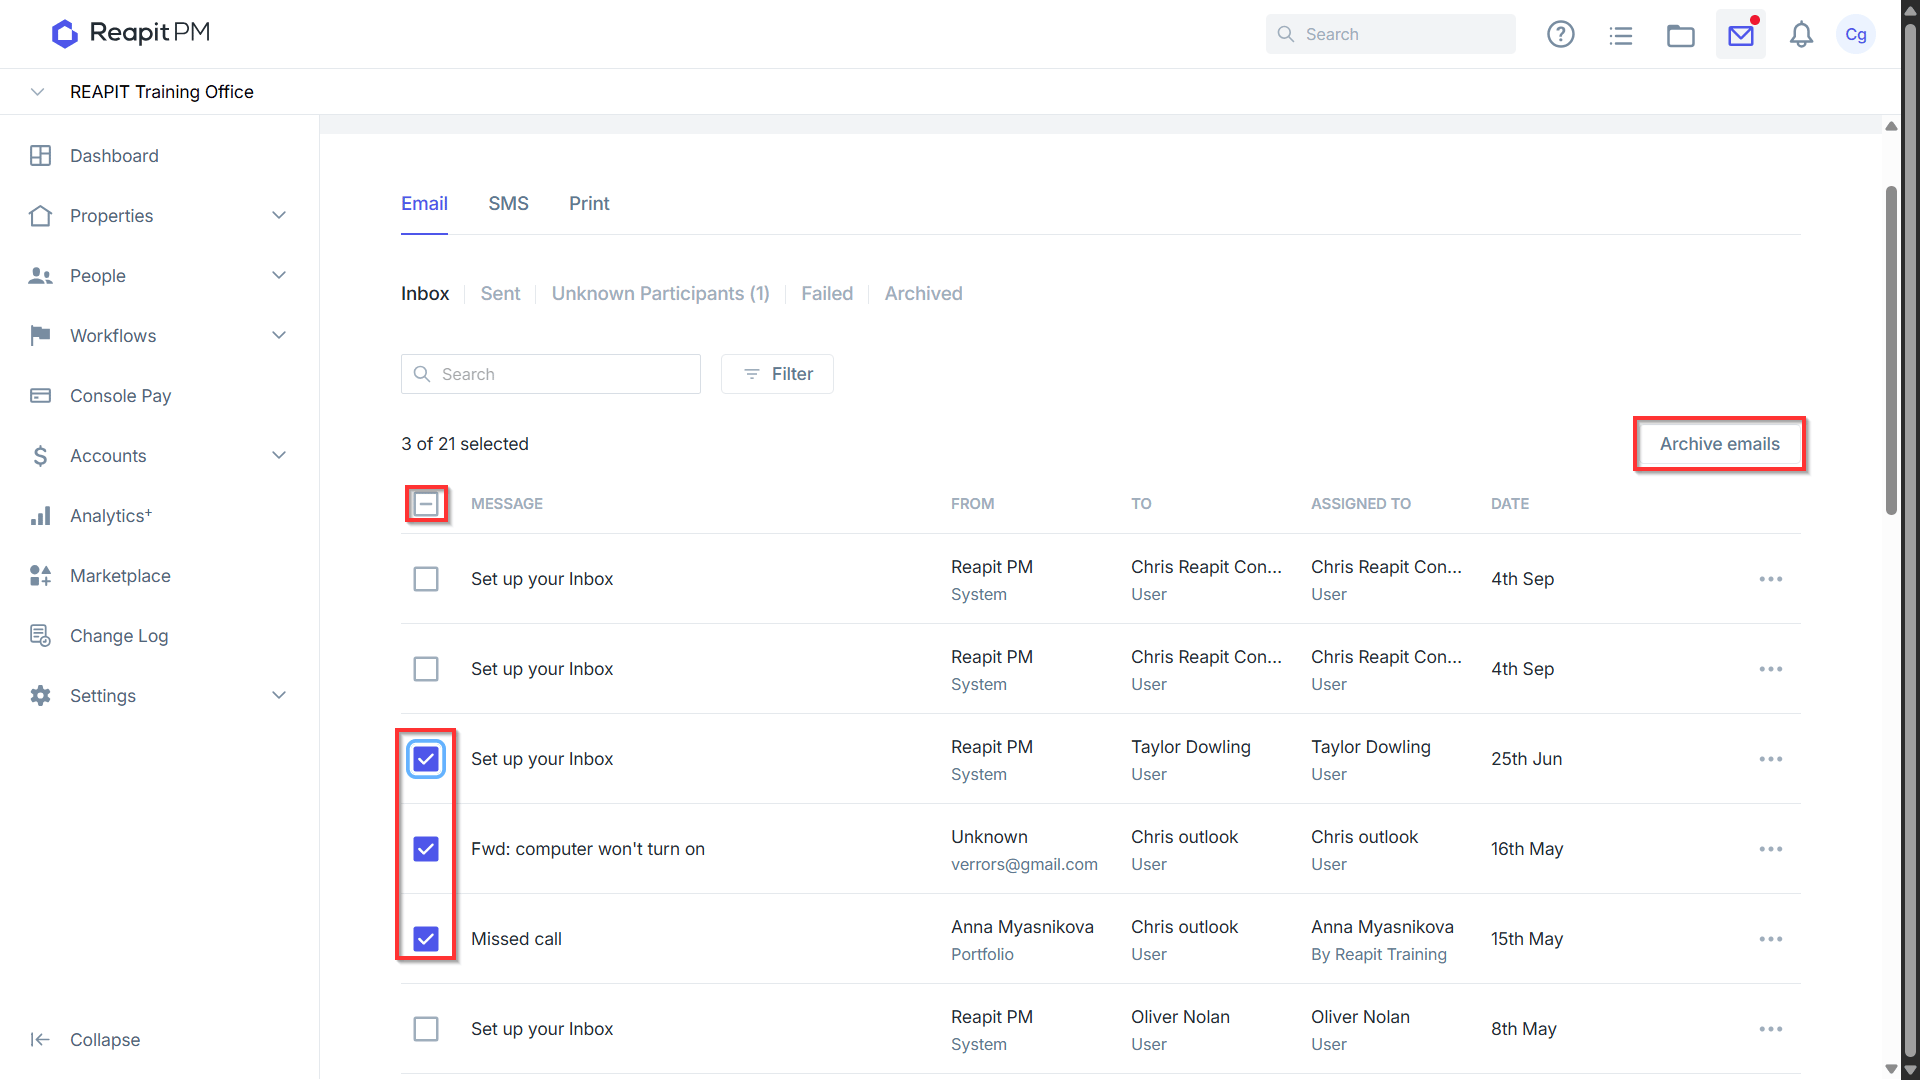
- To archive multiple emails at once, select the desired emails from the Conversations inbox list, then tap 'Archive Emails.' Confirm your action to complete the bulk archiving process.
Conversations AI
Note: AI in Conversations is available to Premium & Enterprise users.
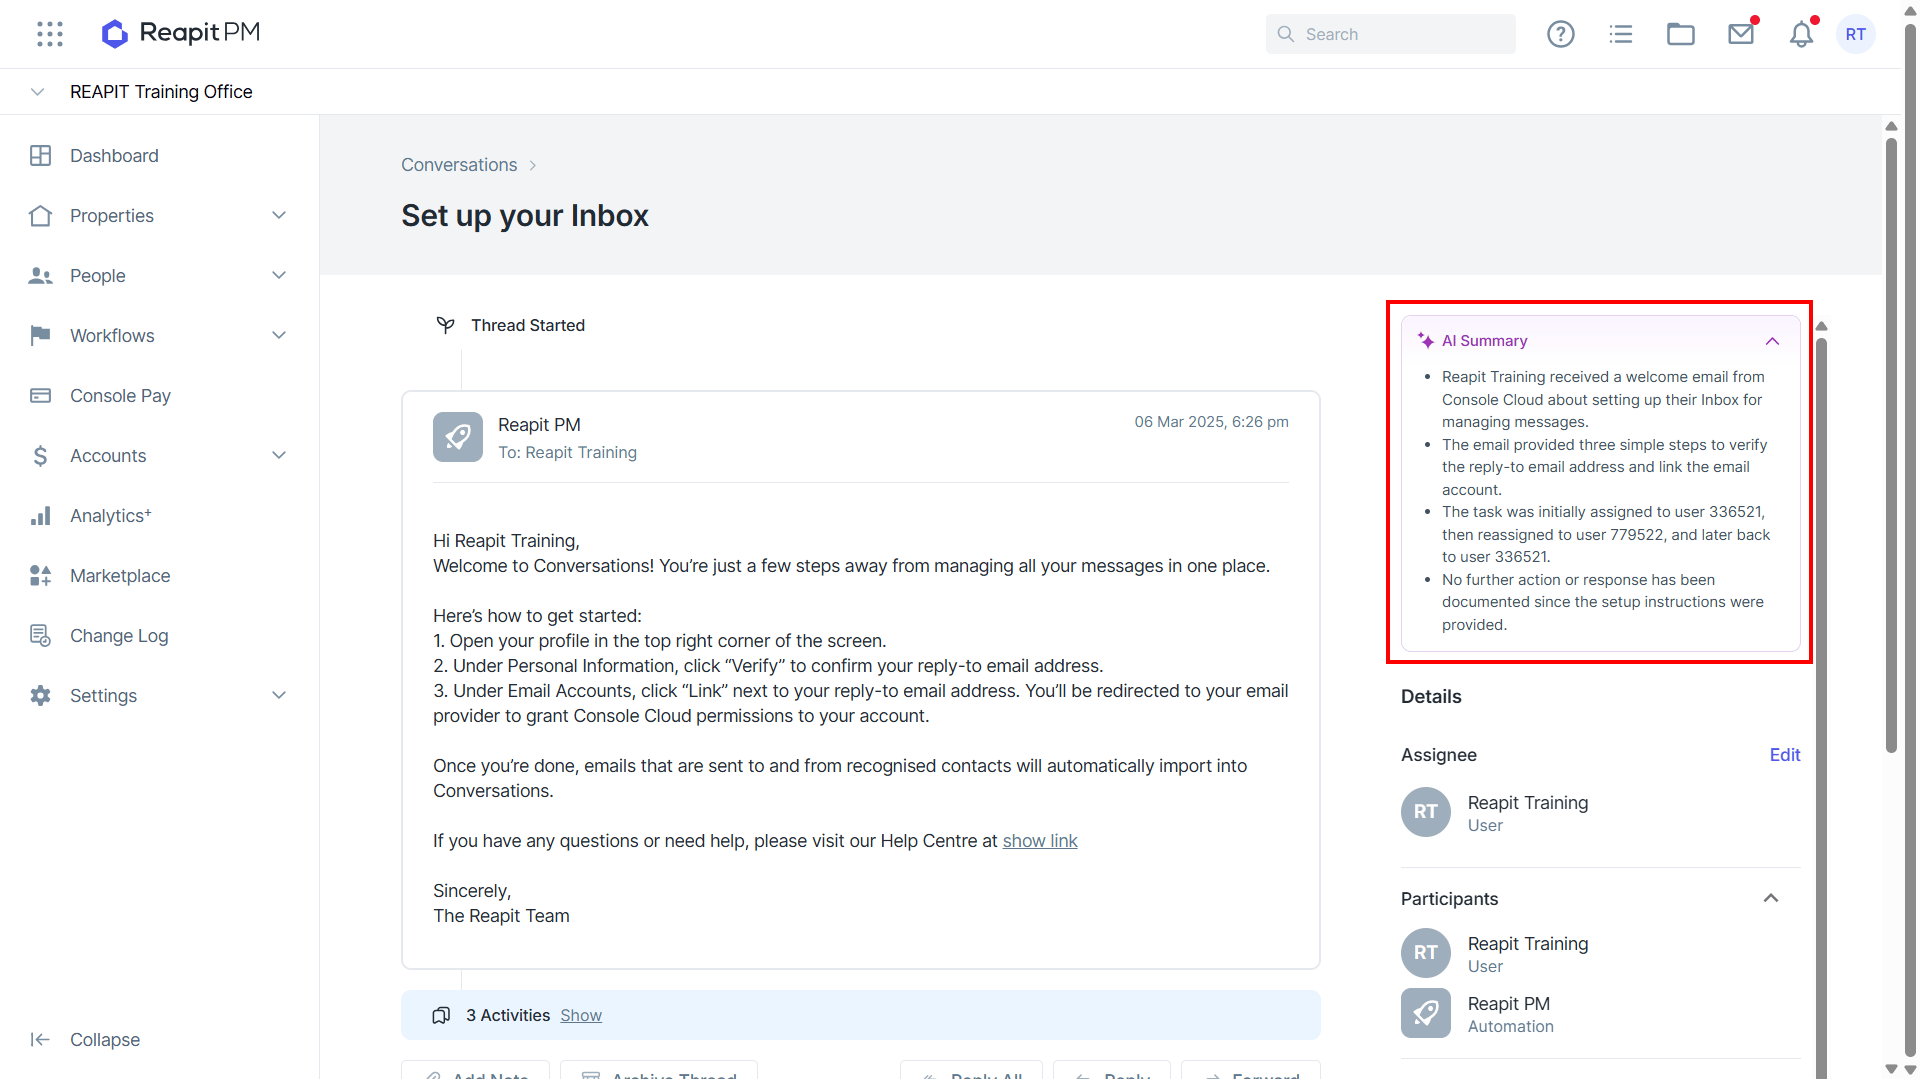
AI integration is now available in Conversations, providing an automatic AI‑generated summary for any individual message or entire thread. This summary gives a concise overview of the key points in the conversation.
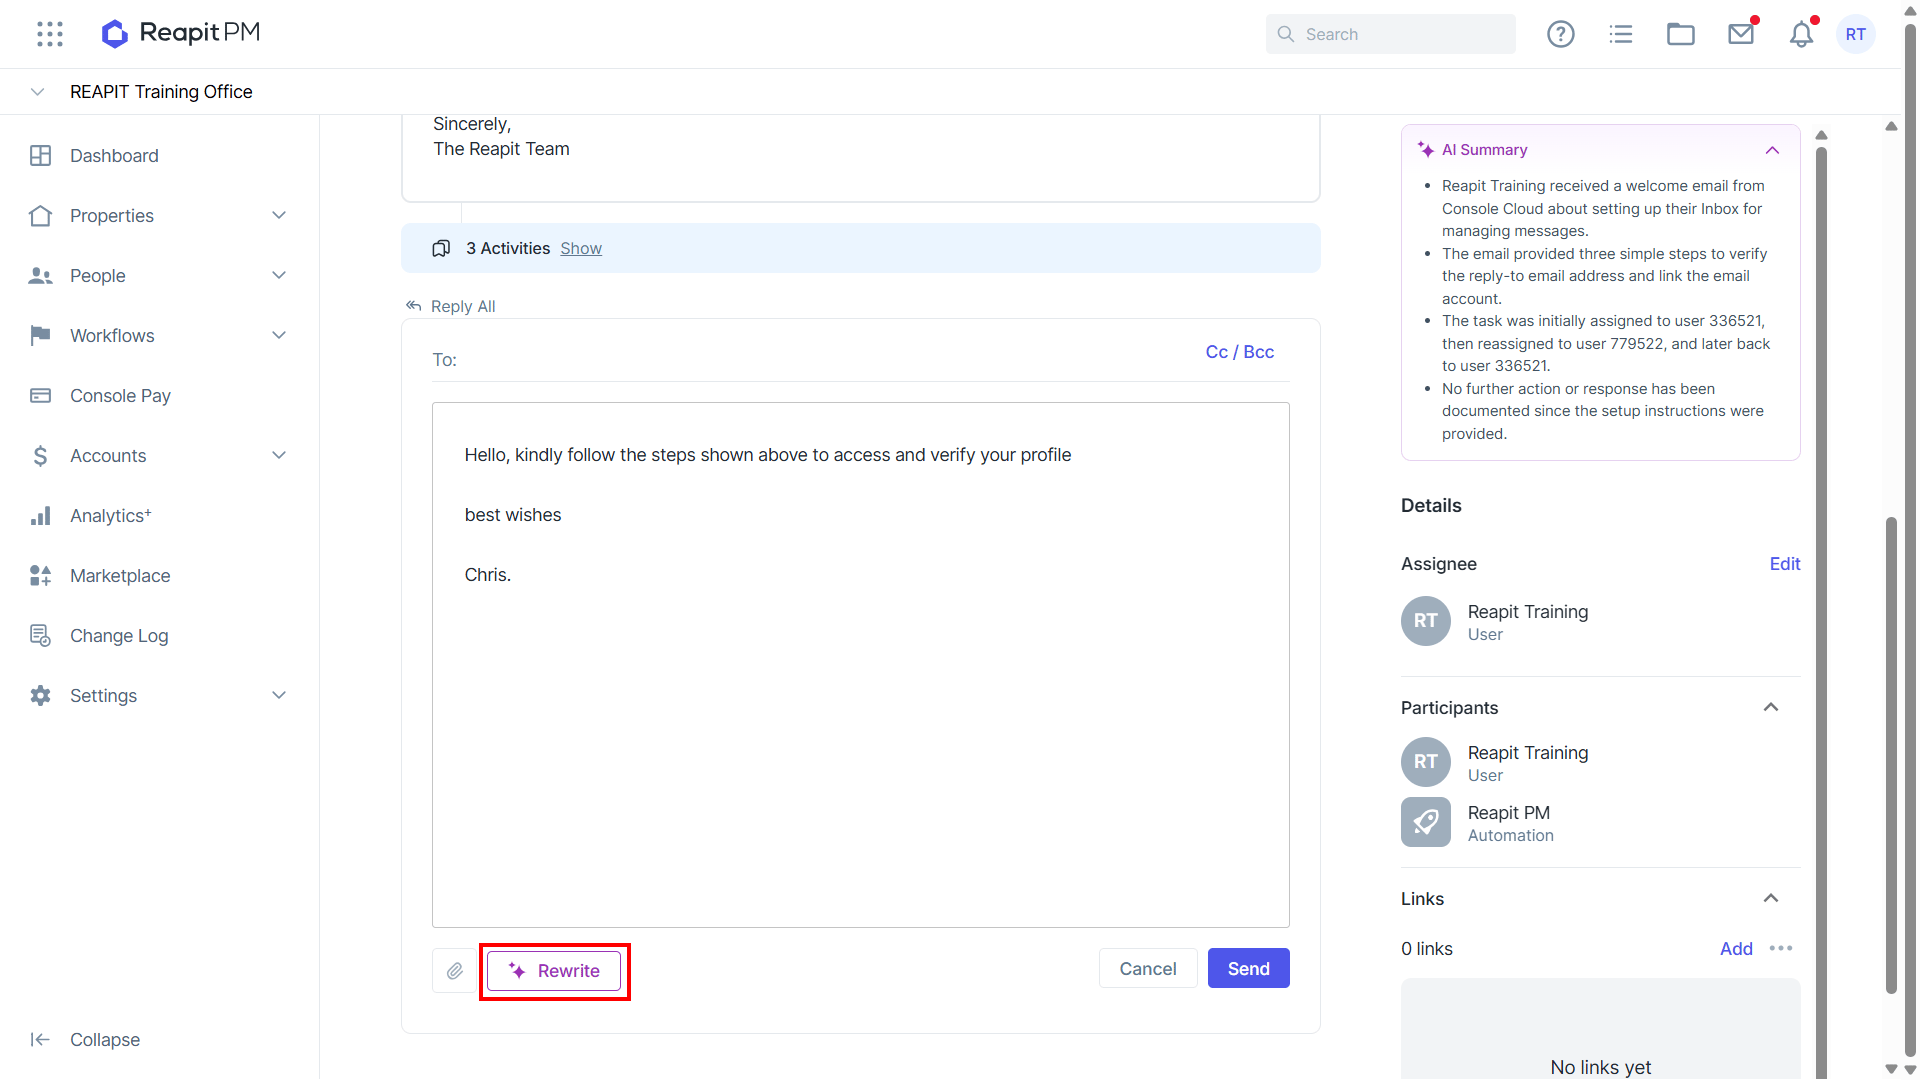
When replying to a message in Conversations, you can use AI to rewrite your response. Enter your message or simply list the key points you want to include. Click Rewrite to generate an improved version.
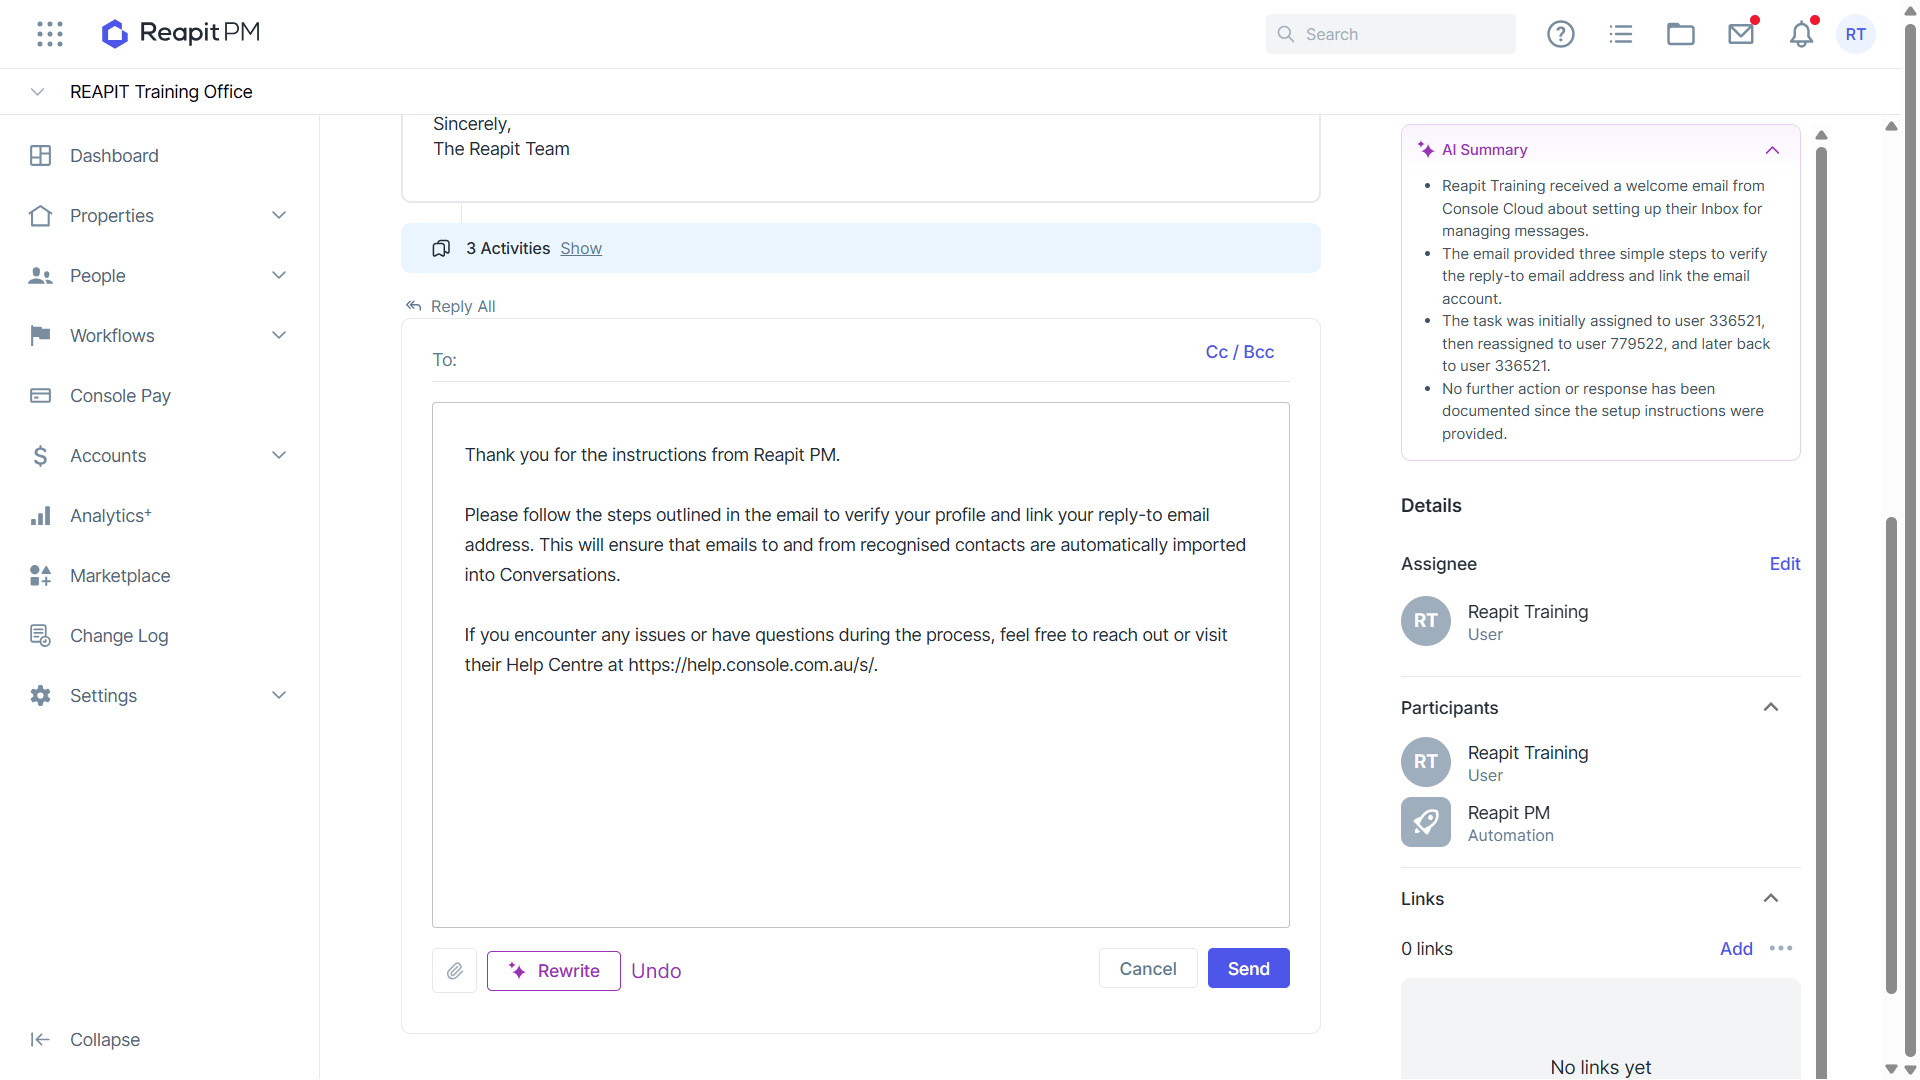
Conversations AI will generate a new reply based on the information provided. If you would like to return to the previous displayed message, click Undo or click Rewrite again to generate another response.
Reply, Reply All, and Forward Emails
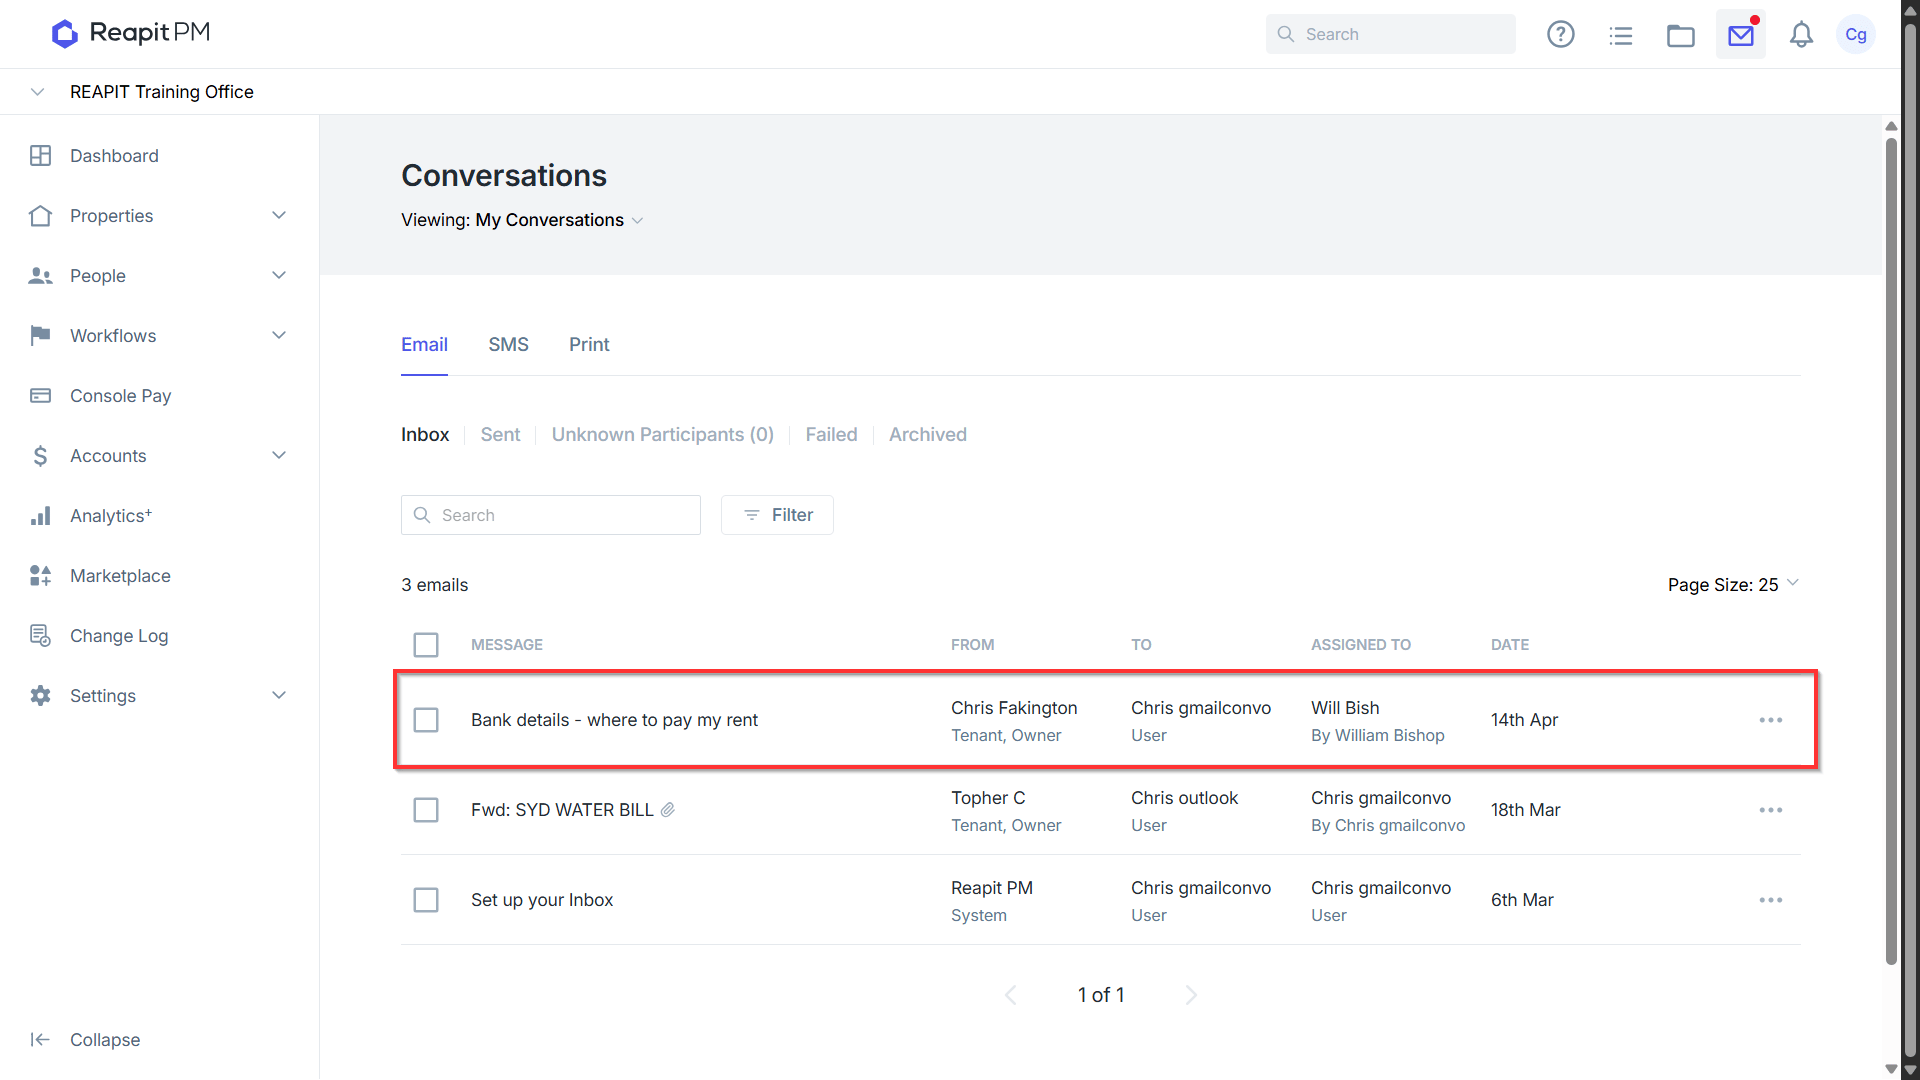
- Conversations provides comprehensive email sending options, including Reply, Reply All, and Forward. To get started, click on 'Conversations'.
- From Conversations, click on the desired email.
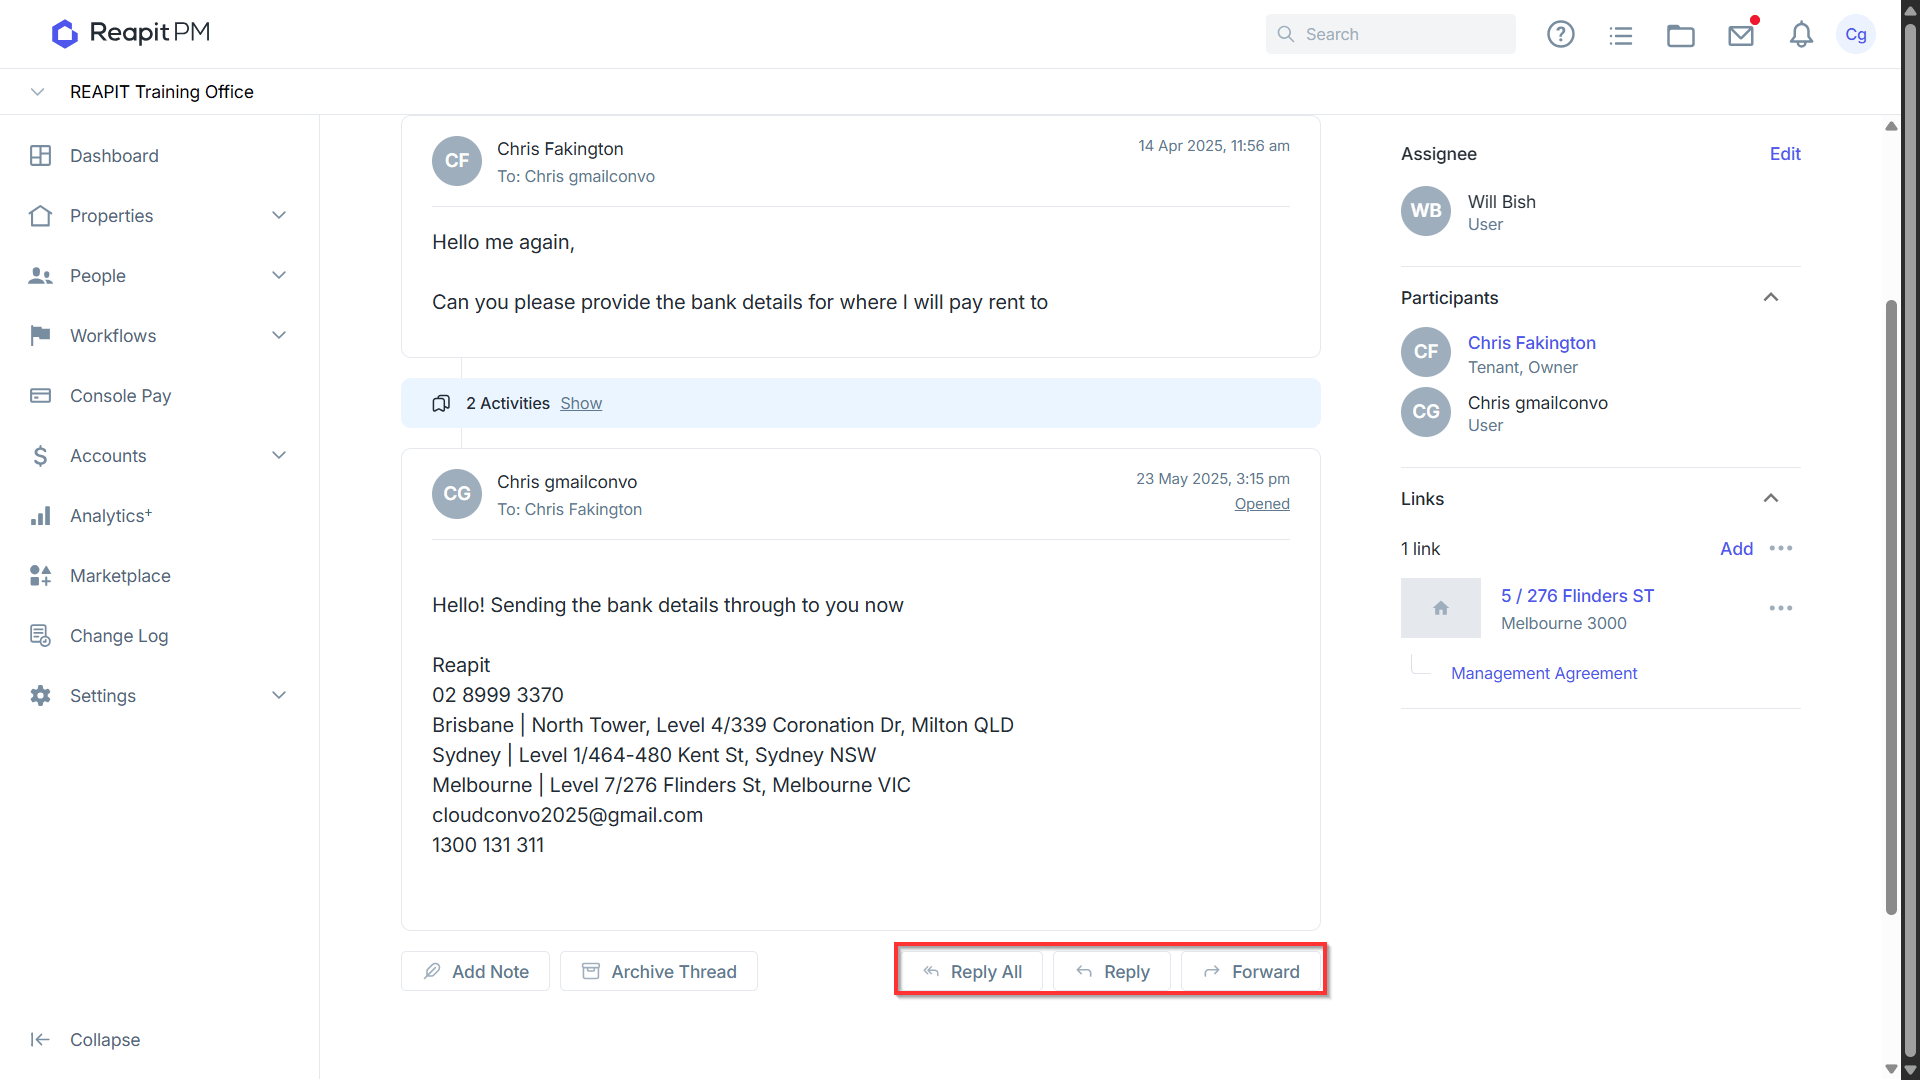
- Scrolling to the bottom of the email will display the Reply, Reply All, and Forward options.
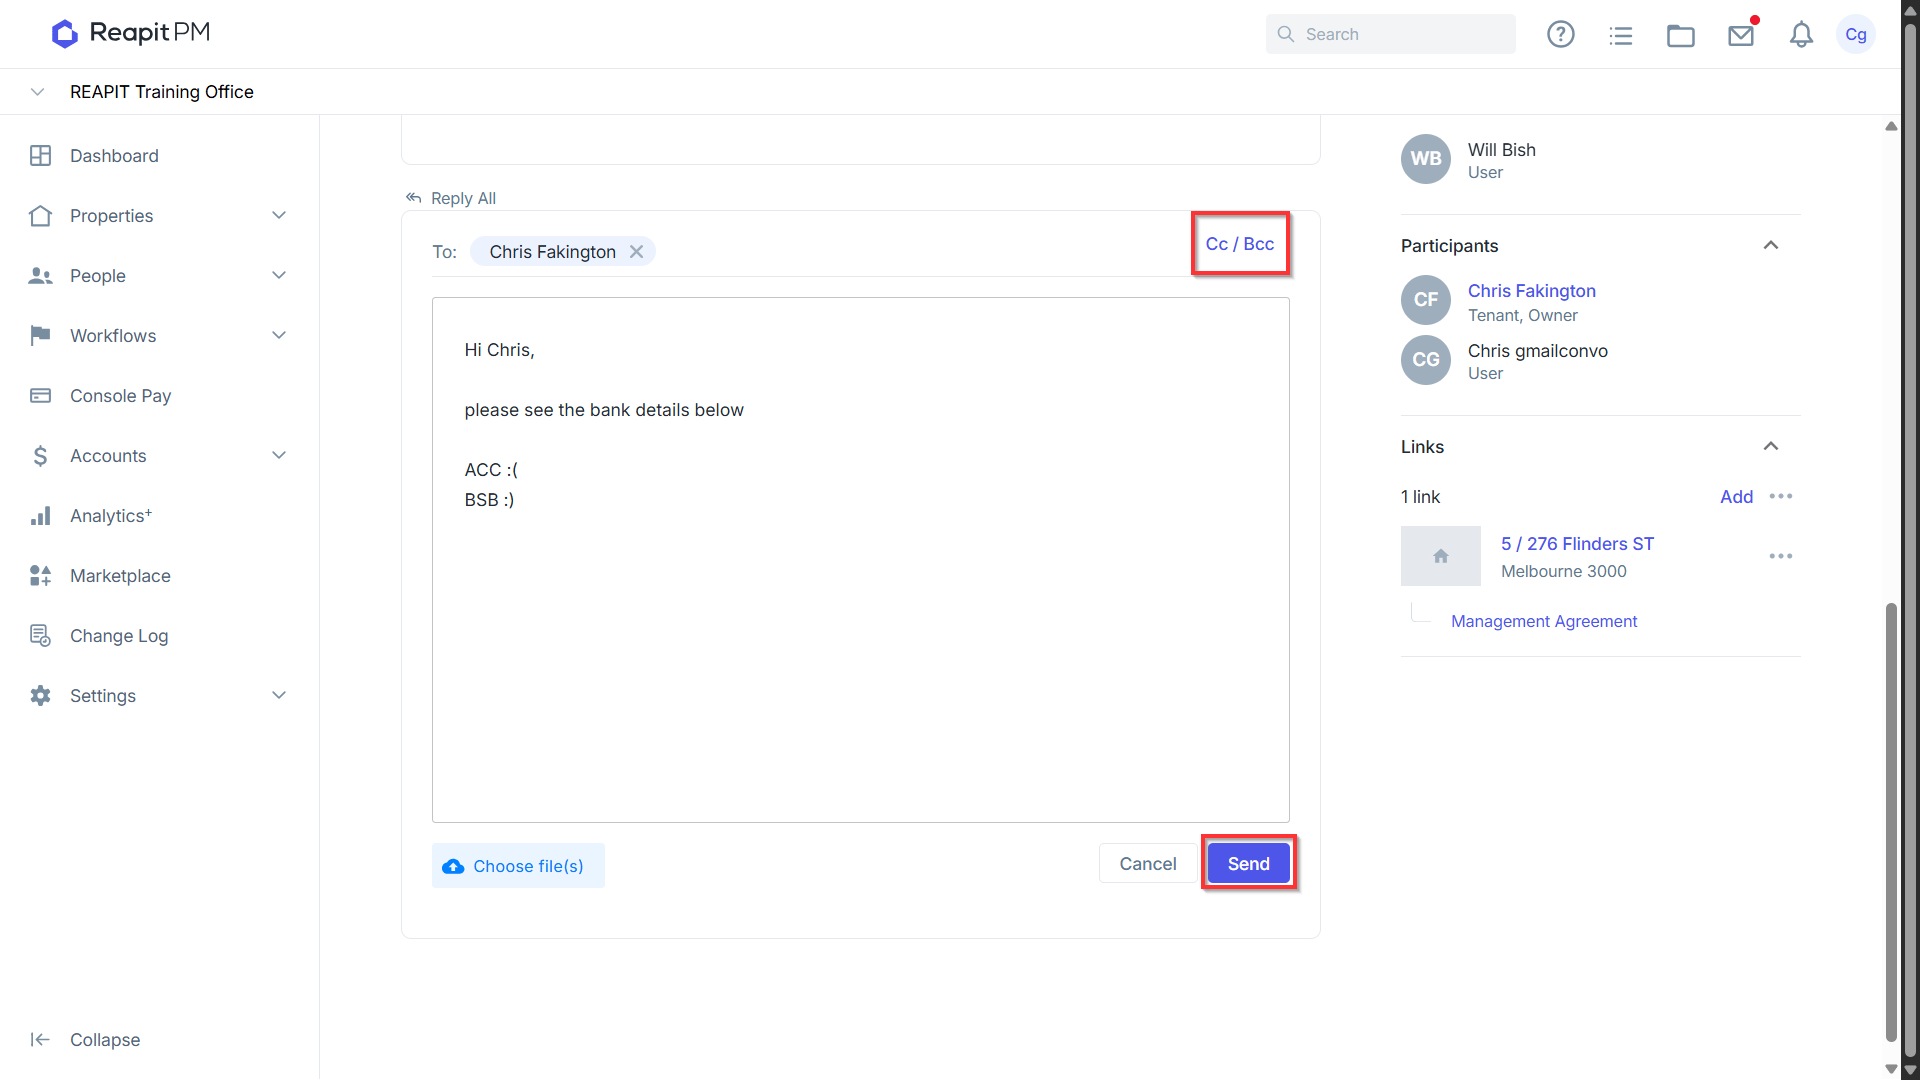
- When using any of the reply options, you can add CC or BCC contacts to include additional recipients in the conversation. These recipients will also be listed as participants in the Conversation. Once you've finished composing your message, click 'Send' to send the email.
Bulk Remove Properties and Agreements
To remove links for properties, Owner agreements, and Tenant agreements—and to remove the associated conversation from their timelines and communications—use the bulk remove option available in the email section of Conversations. To get started, click 'Conversations'.
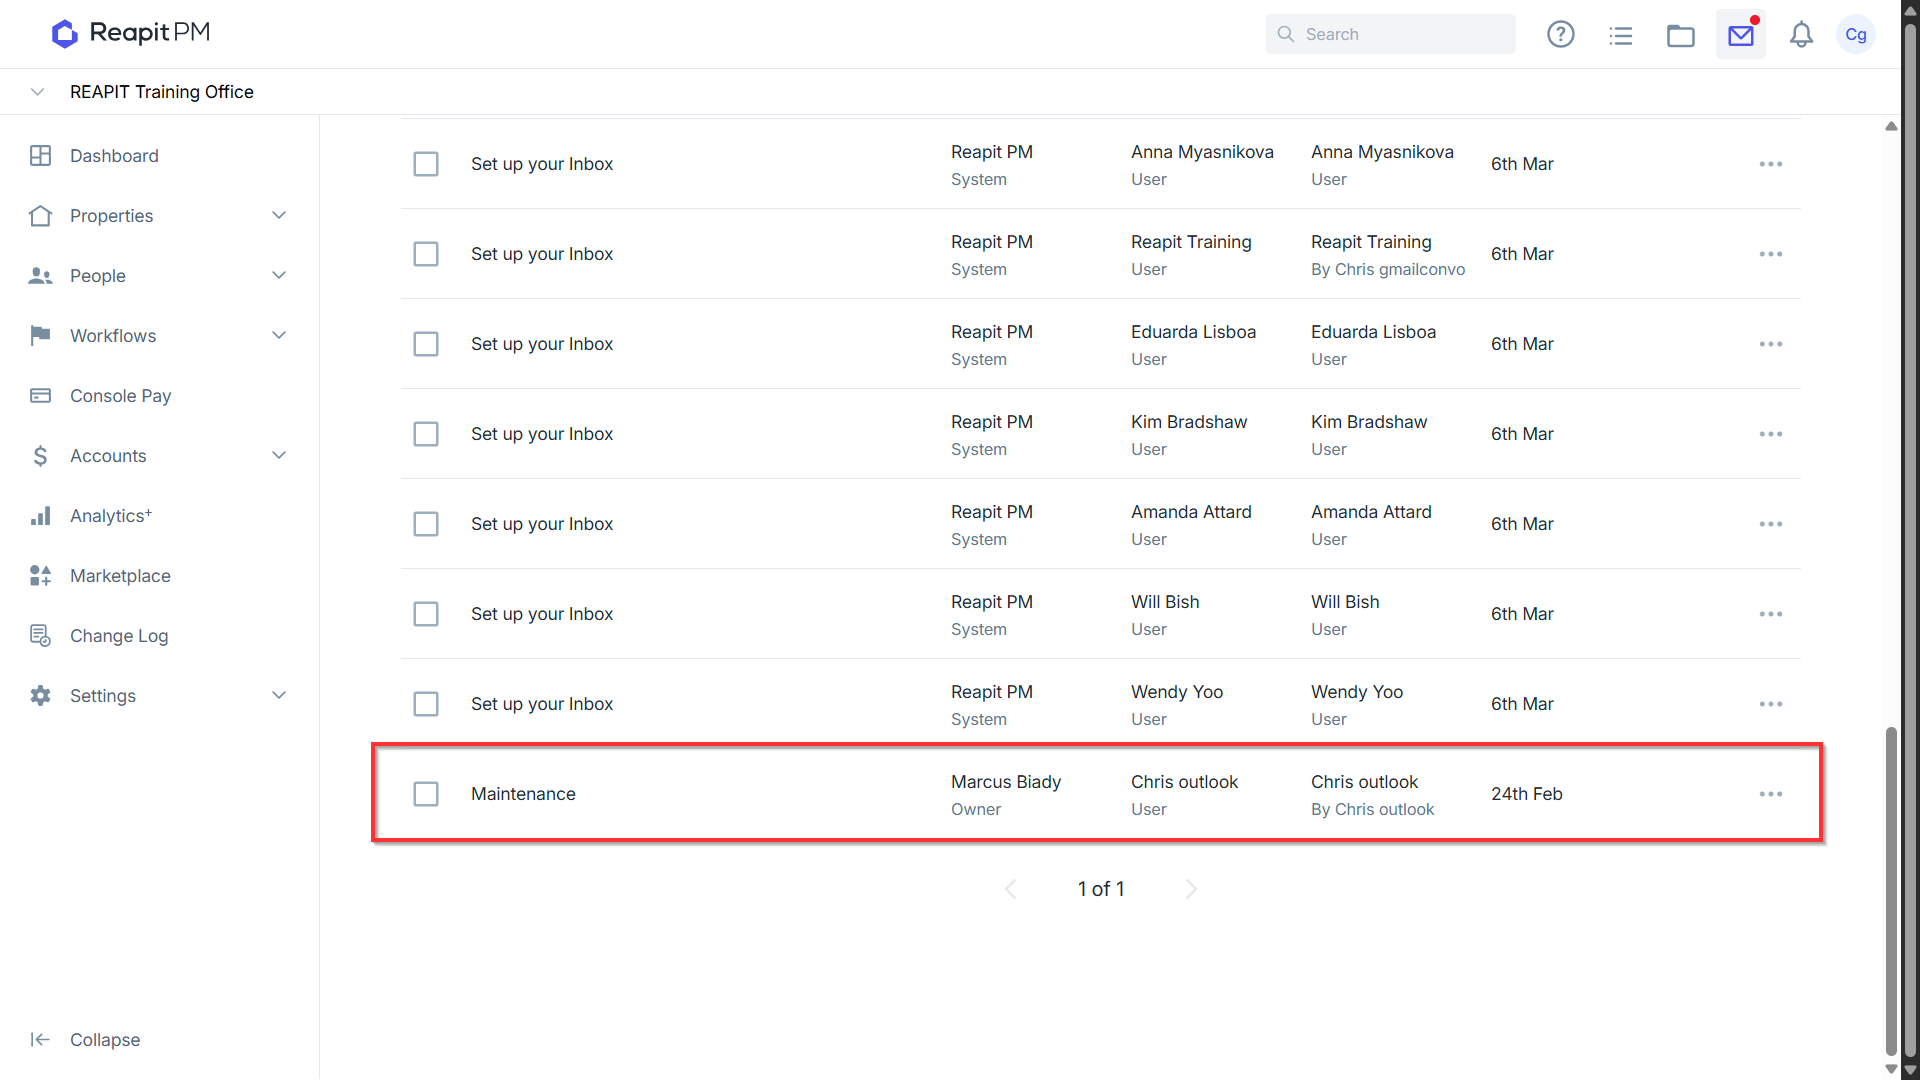
Click to view the email.
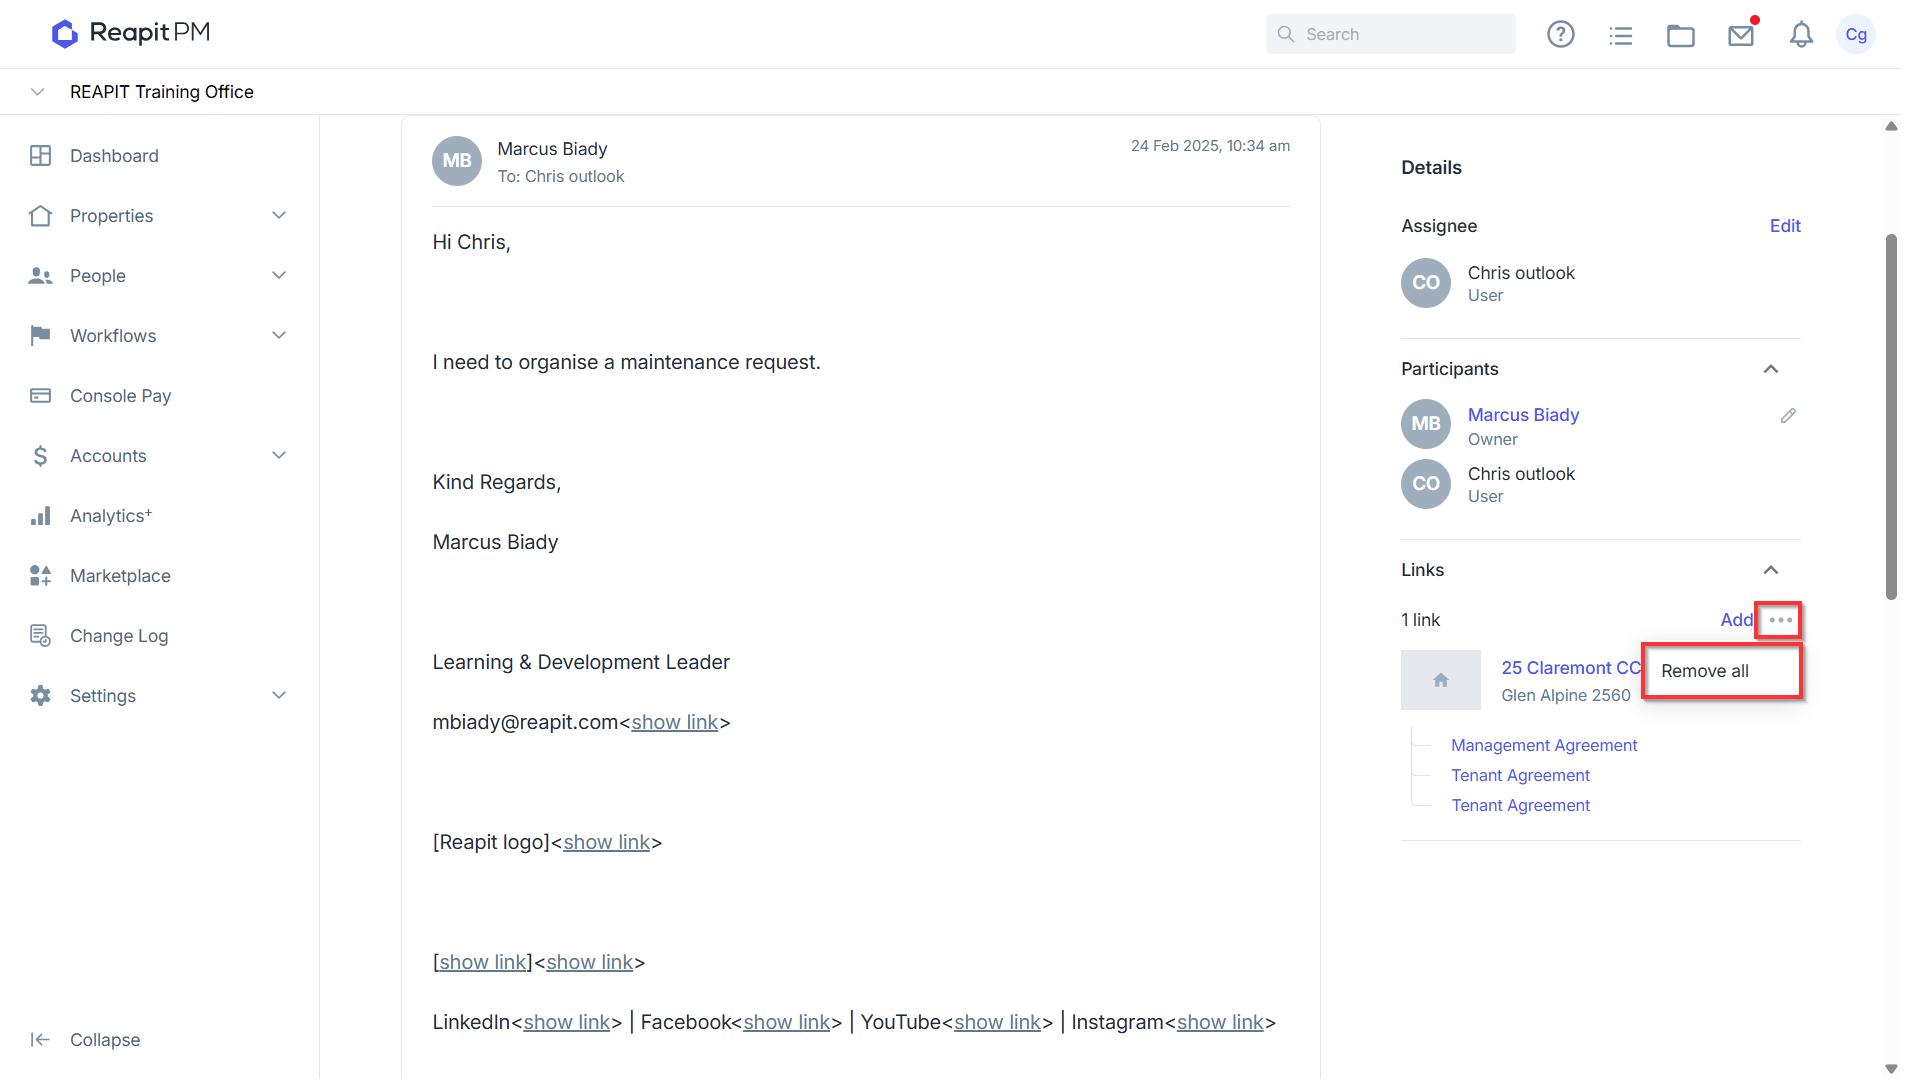
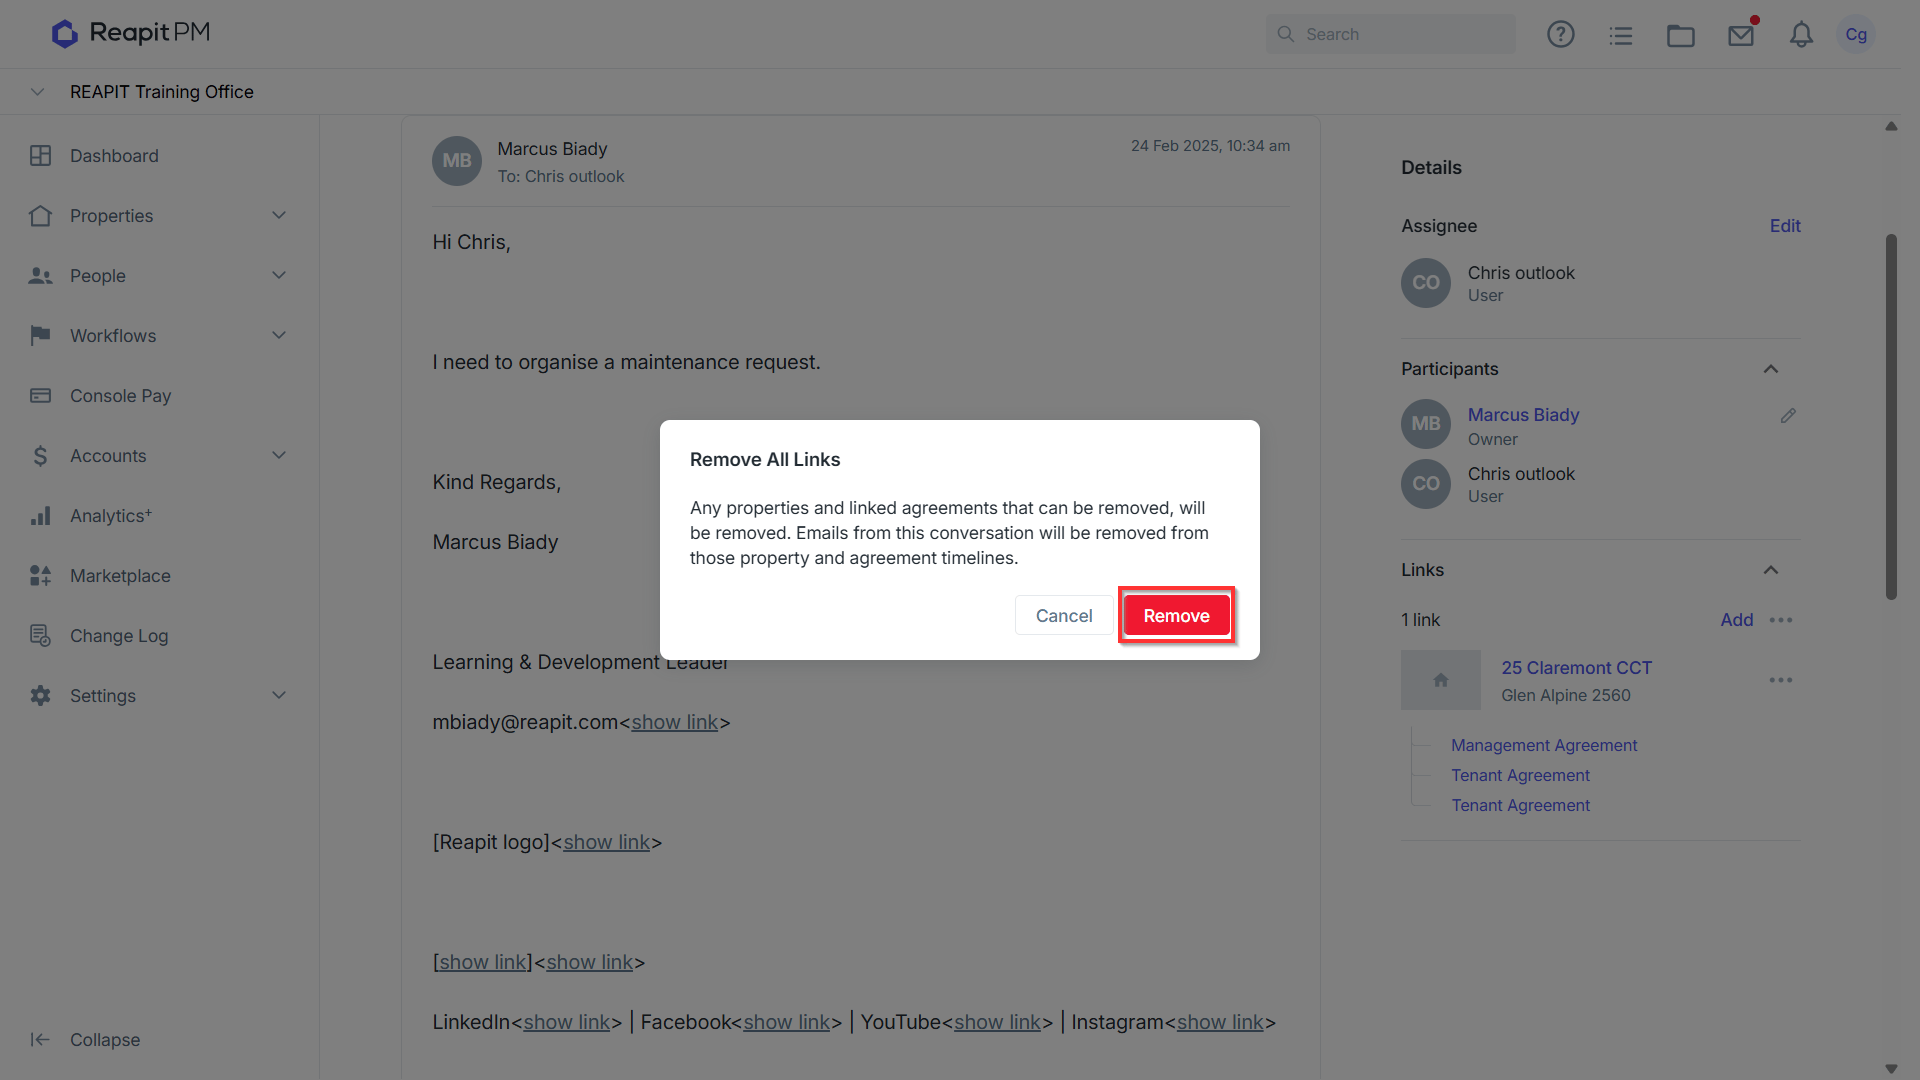
The email will display showing currently linked Properties, Owner management agreement, and Tenant agreements. To remove links, click the three action dots and select Remove all.
The remove all links confirmation will display, advising that any properties or linked agreements that can be removed will be removed and that the conversation will be removed from those property and agreement timelines. Click Remove to proceed.
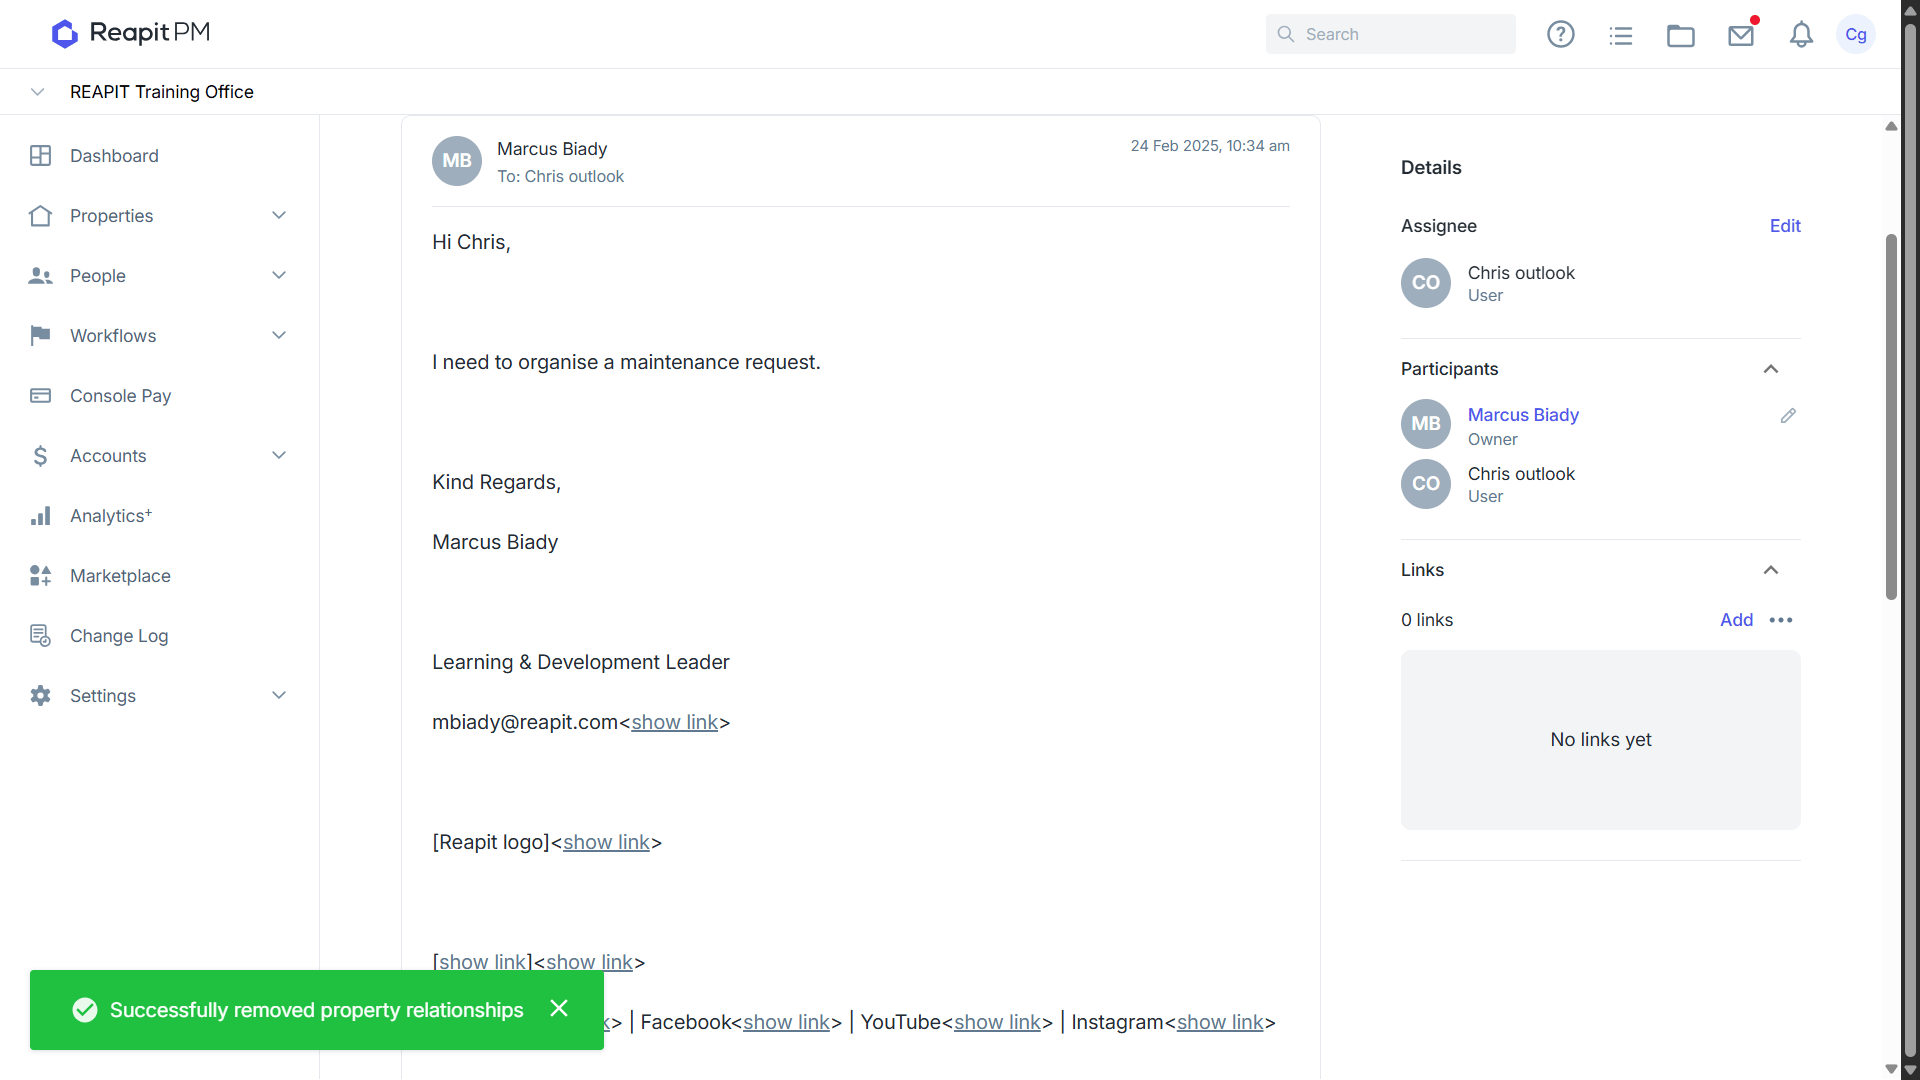
A prompt will display confirming the successful removal of property relationships.
Using the Bill Workflow in Conversations
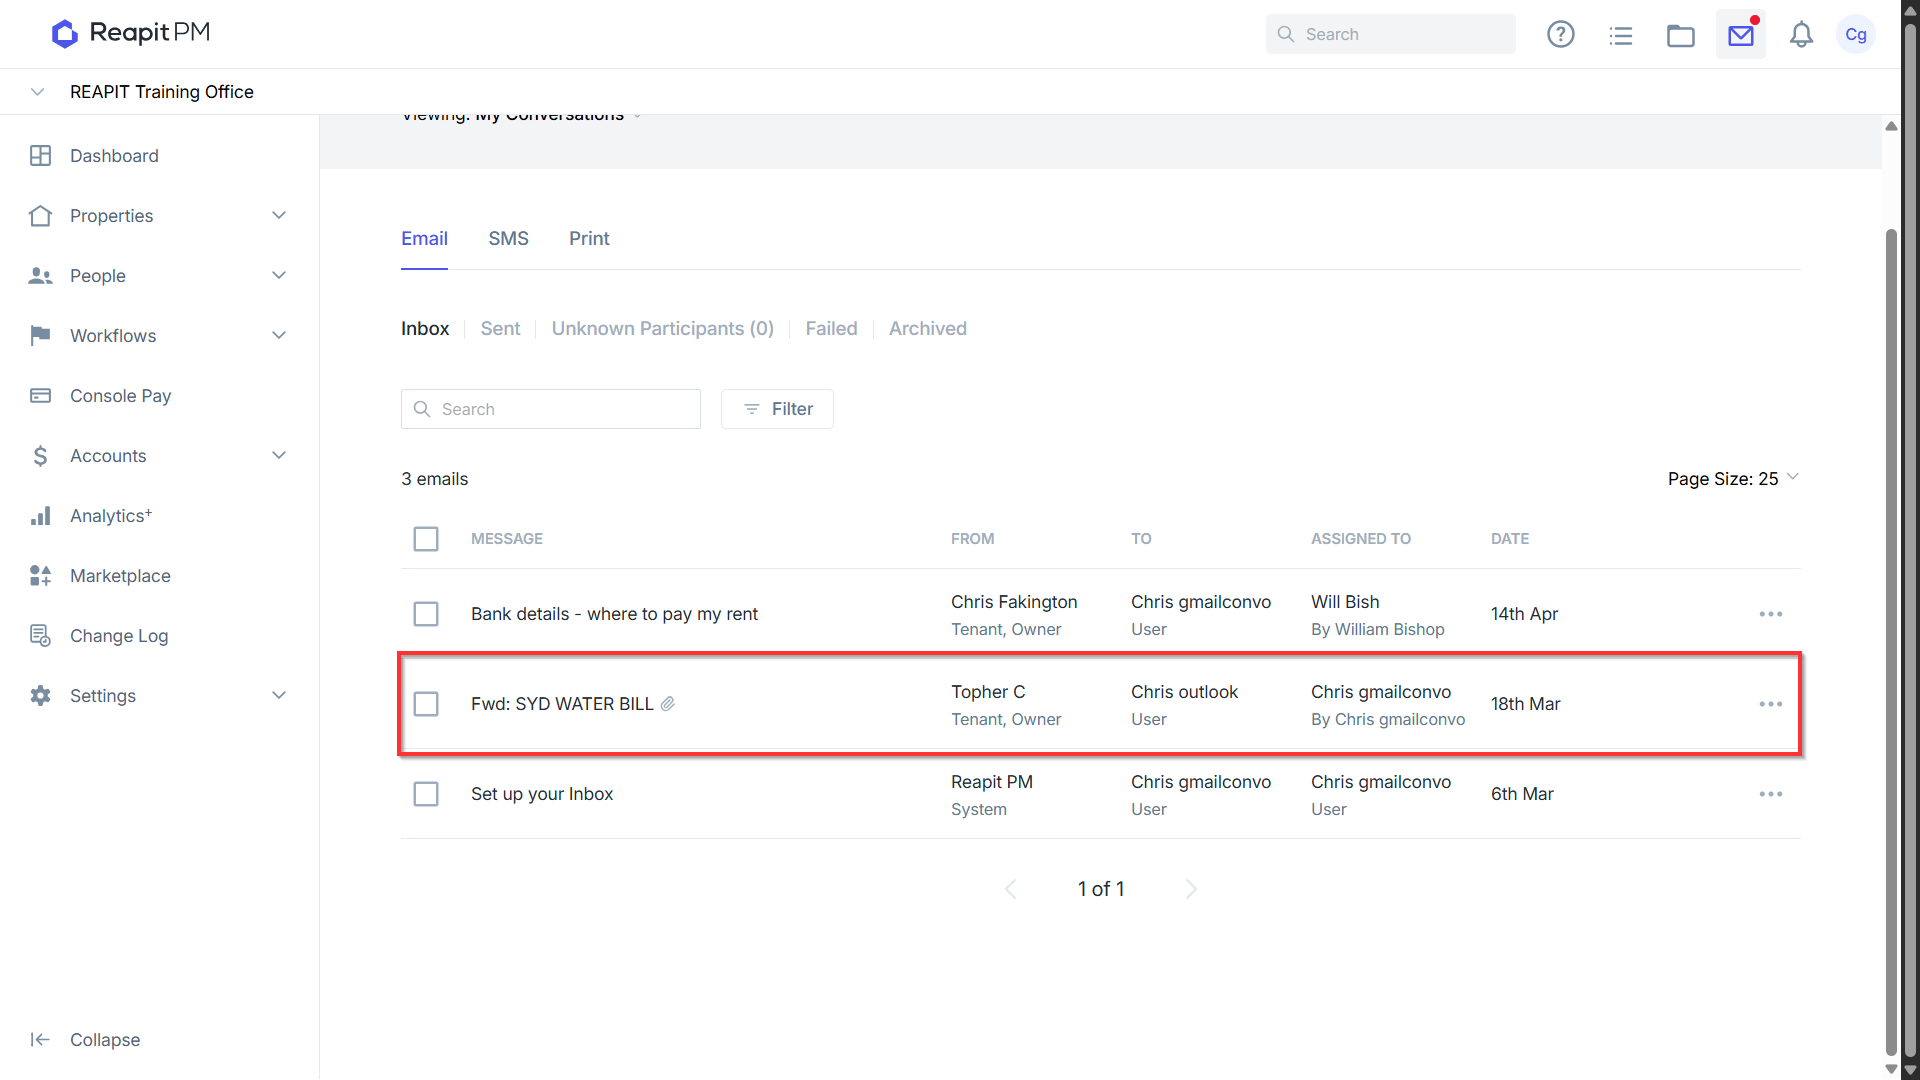
- Emails with attachments, such as Bills received through Conversations linked to a Gmail or Outlook account, can be reviewed and processed in the bills workflow for adding the bill. To start, click on 'Conversations'.
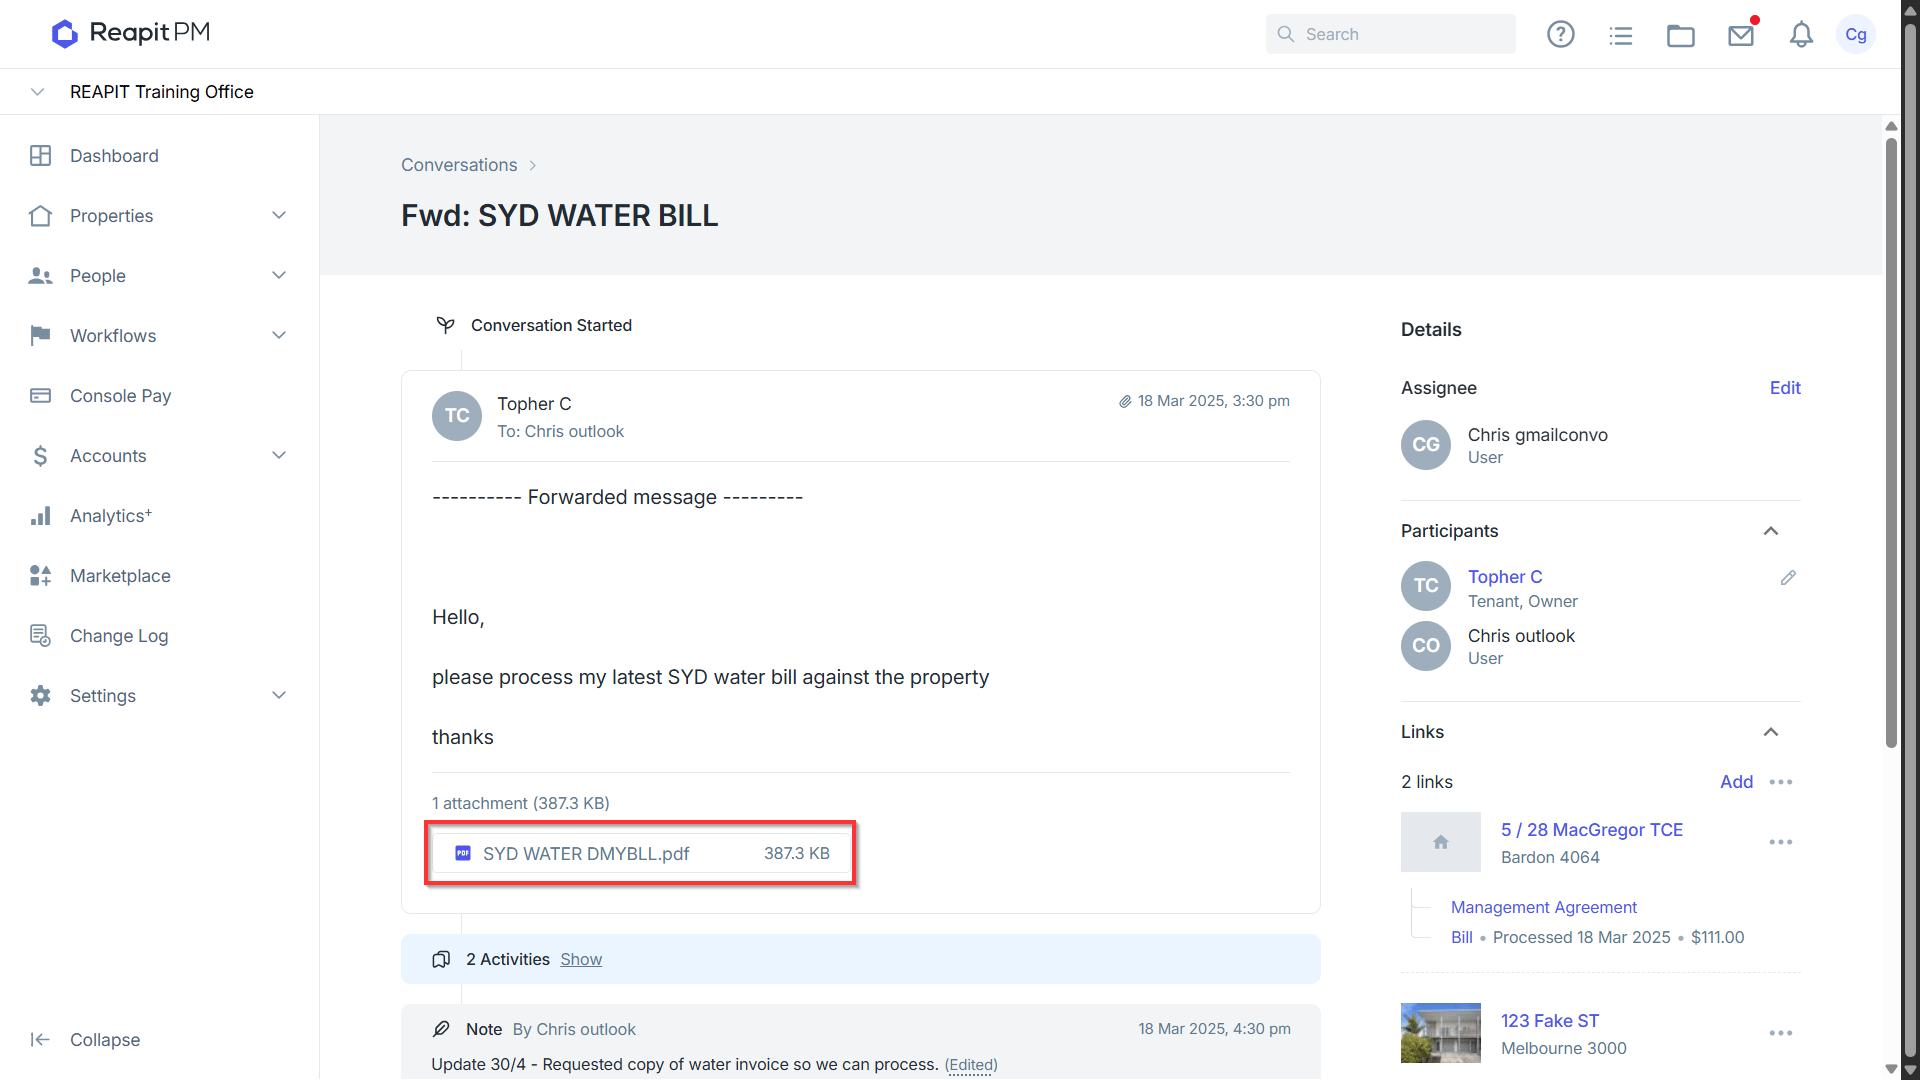
- Click on the email to view the summary and attachment.
- Click on the attachment name to view the preview of the file.
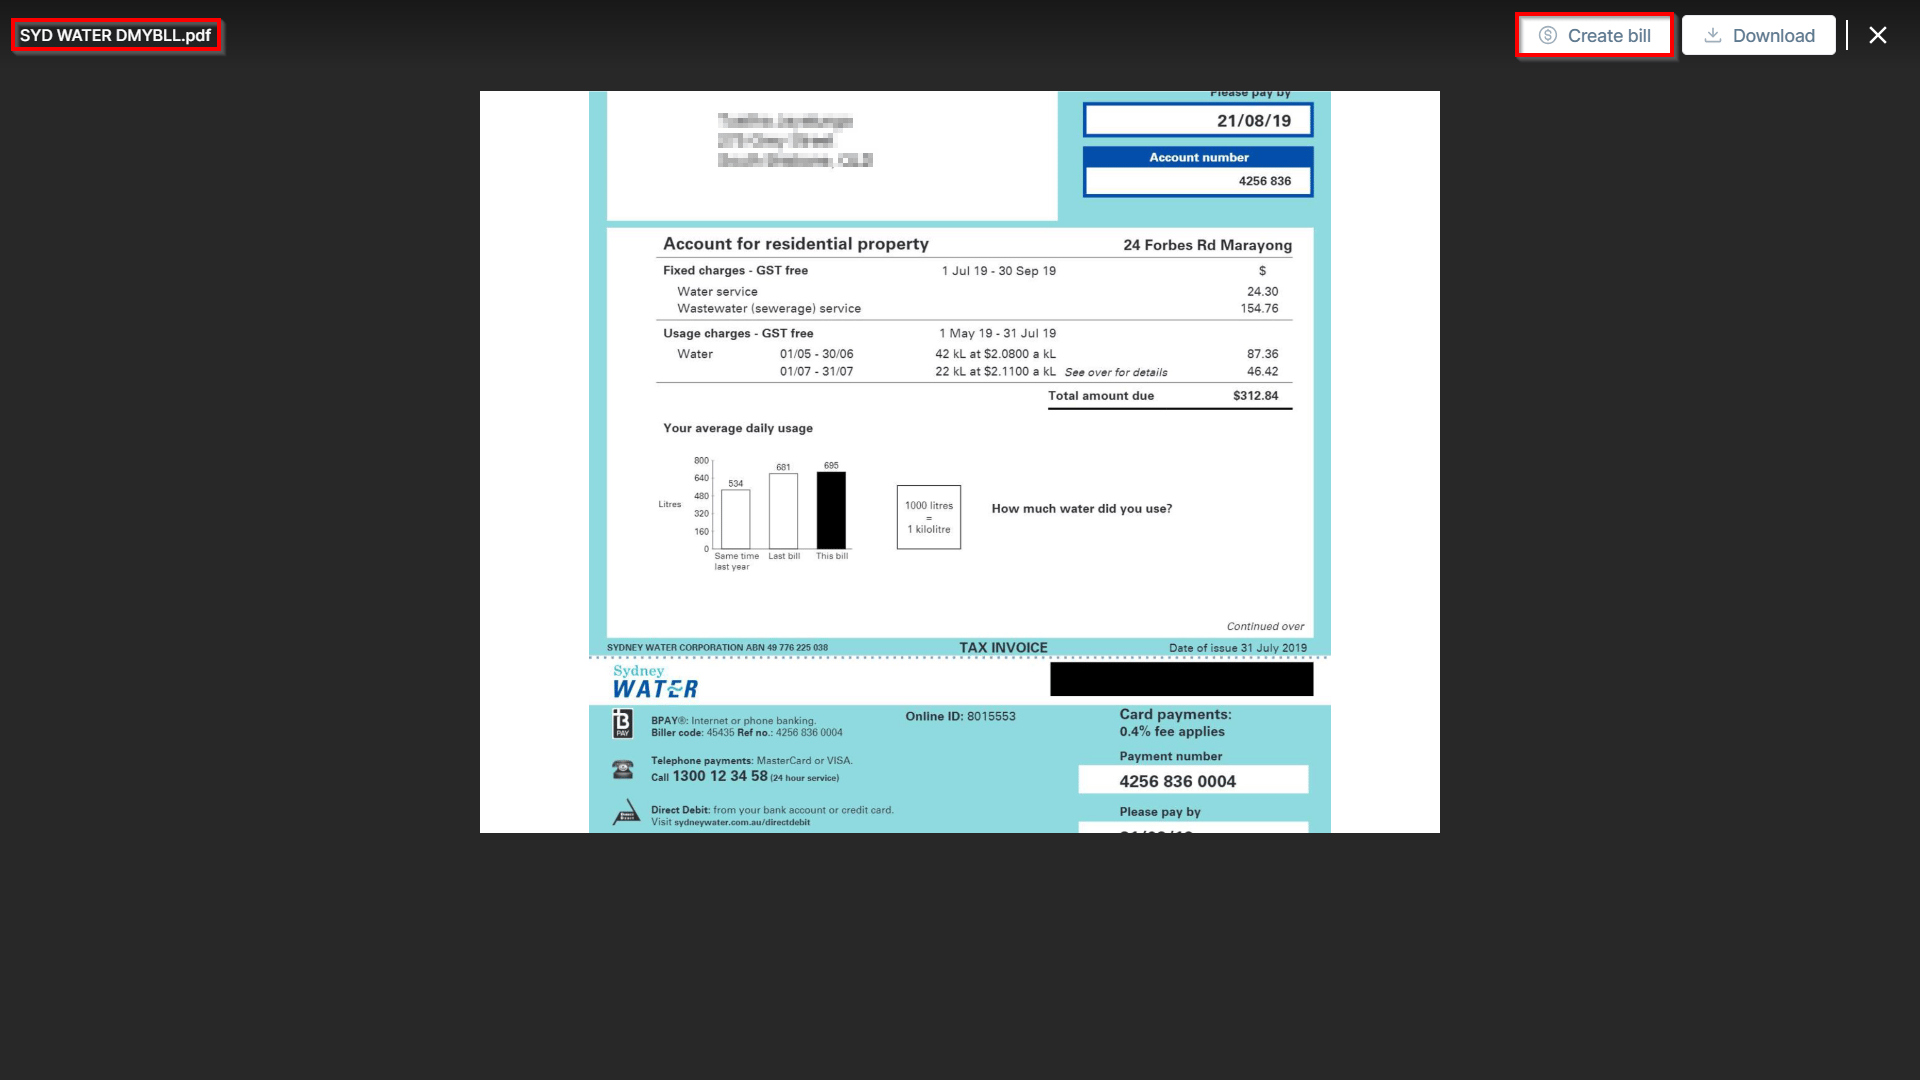
- While viewing the preview of the file, you will have the option to download or create the bill. Select 'Create bill'.
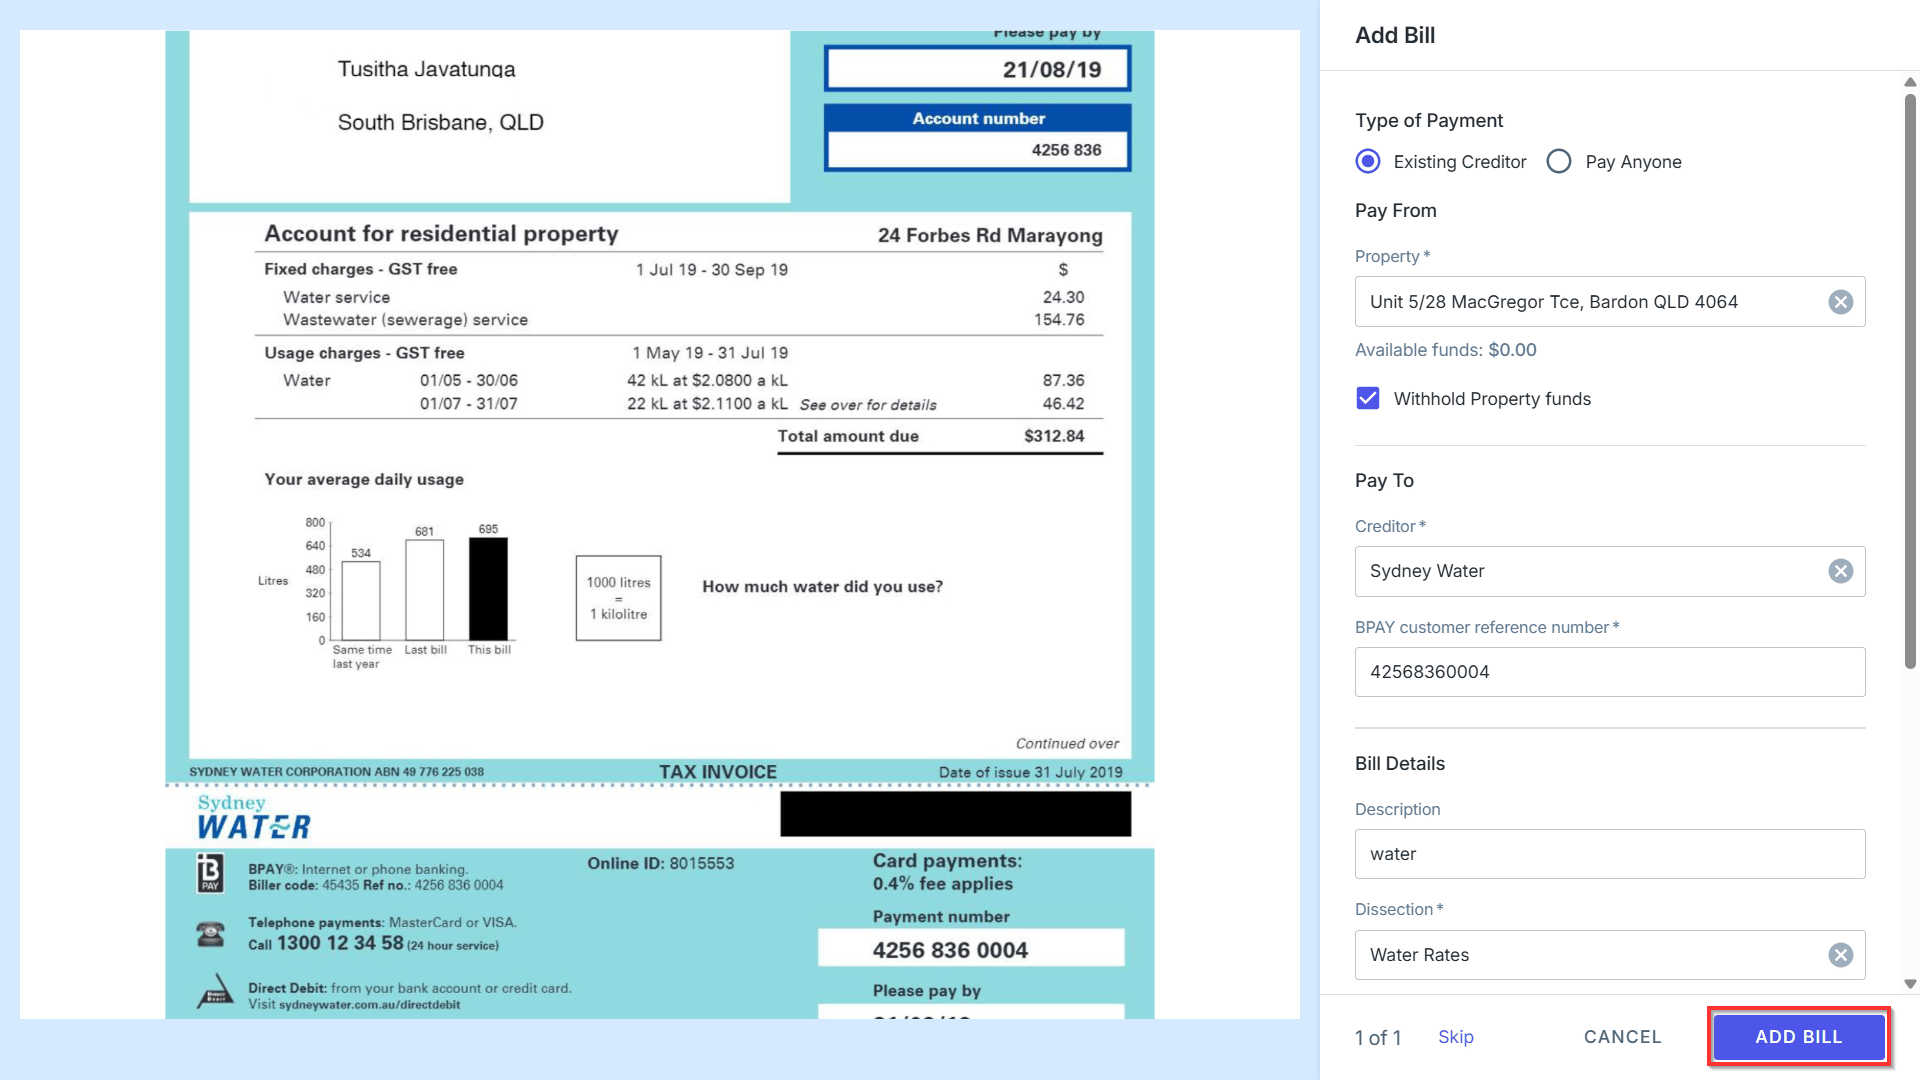
- The Bill workflow will scan the file to extract details from the PDF. Complete any additional fields as needed, then click 'Add Bill' to finalise adding the bill.
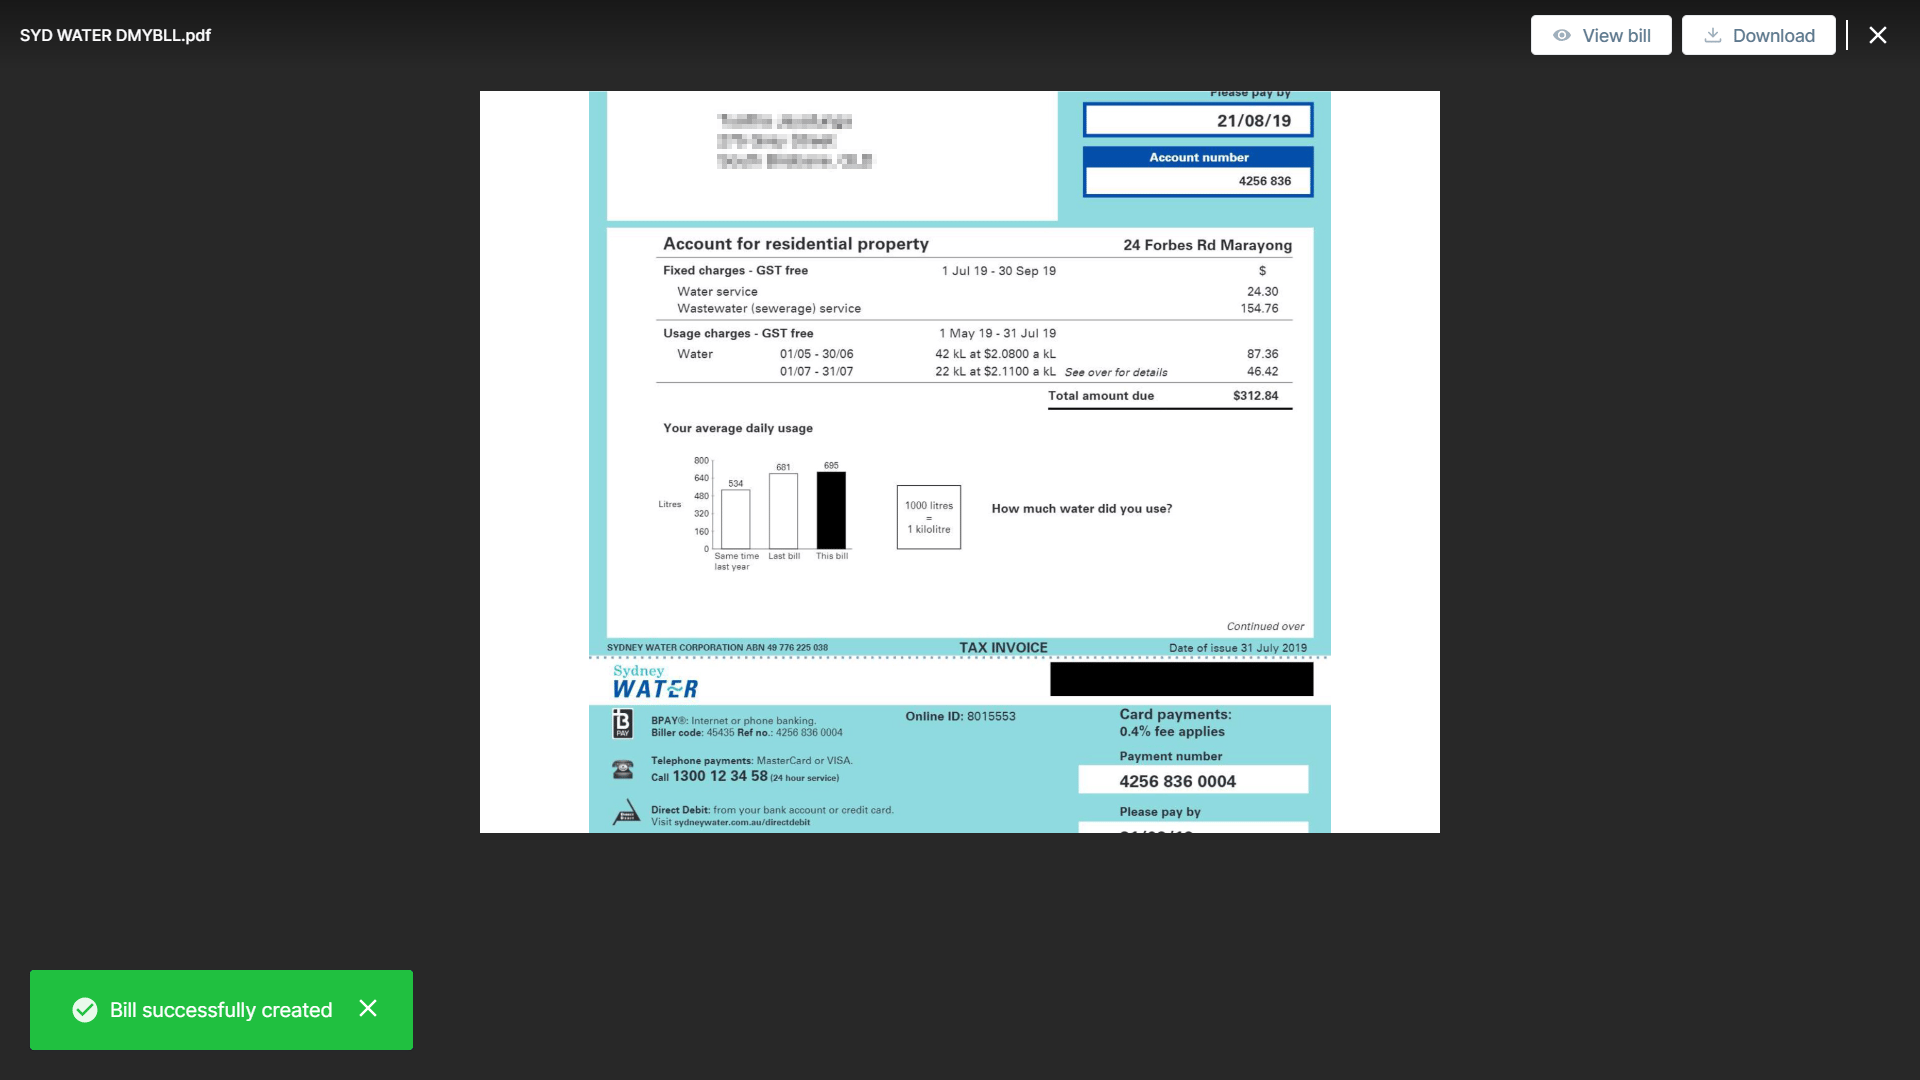
- Confirmation of the Bill being successfully added will appear. you can now close the window or create any other Bill payments if required.
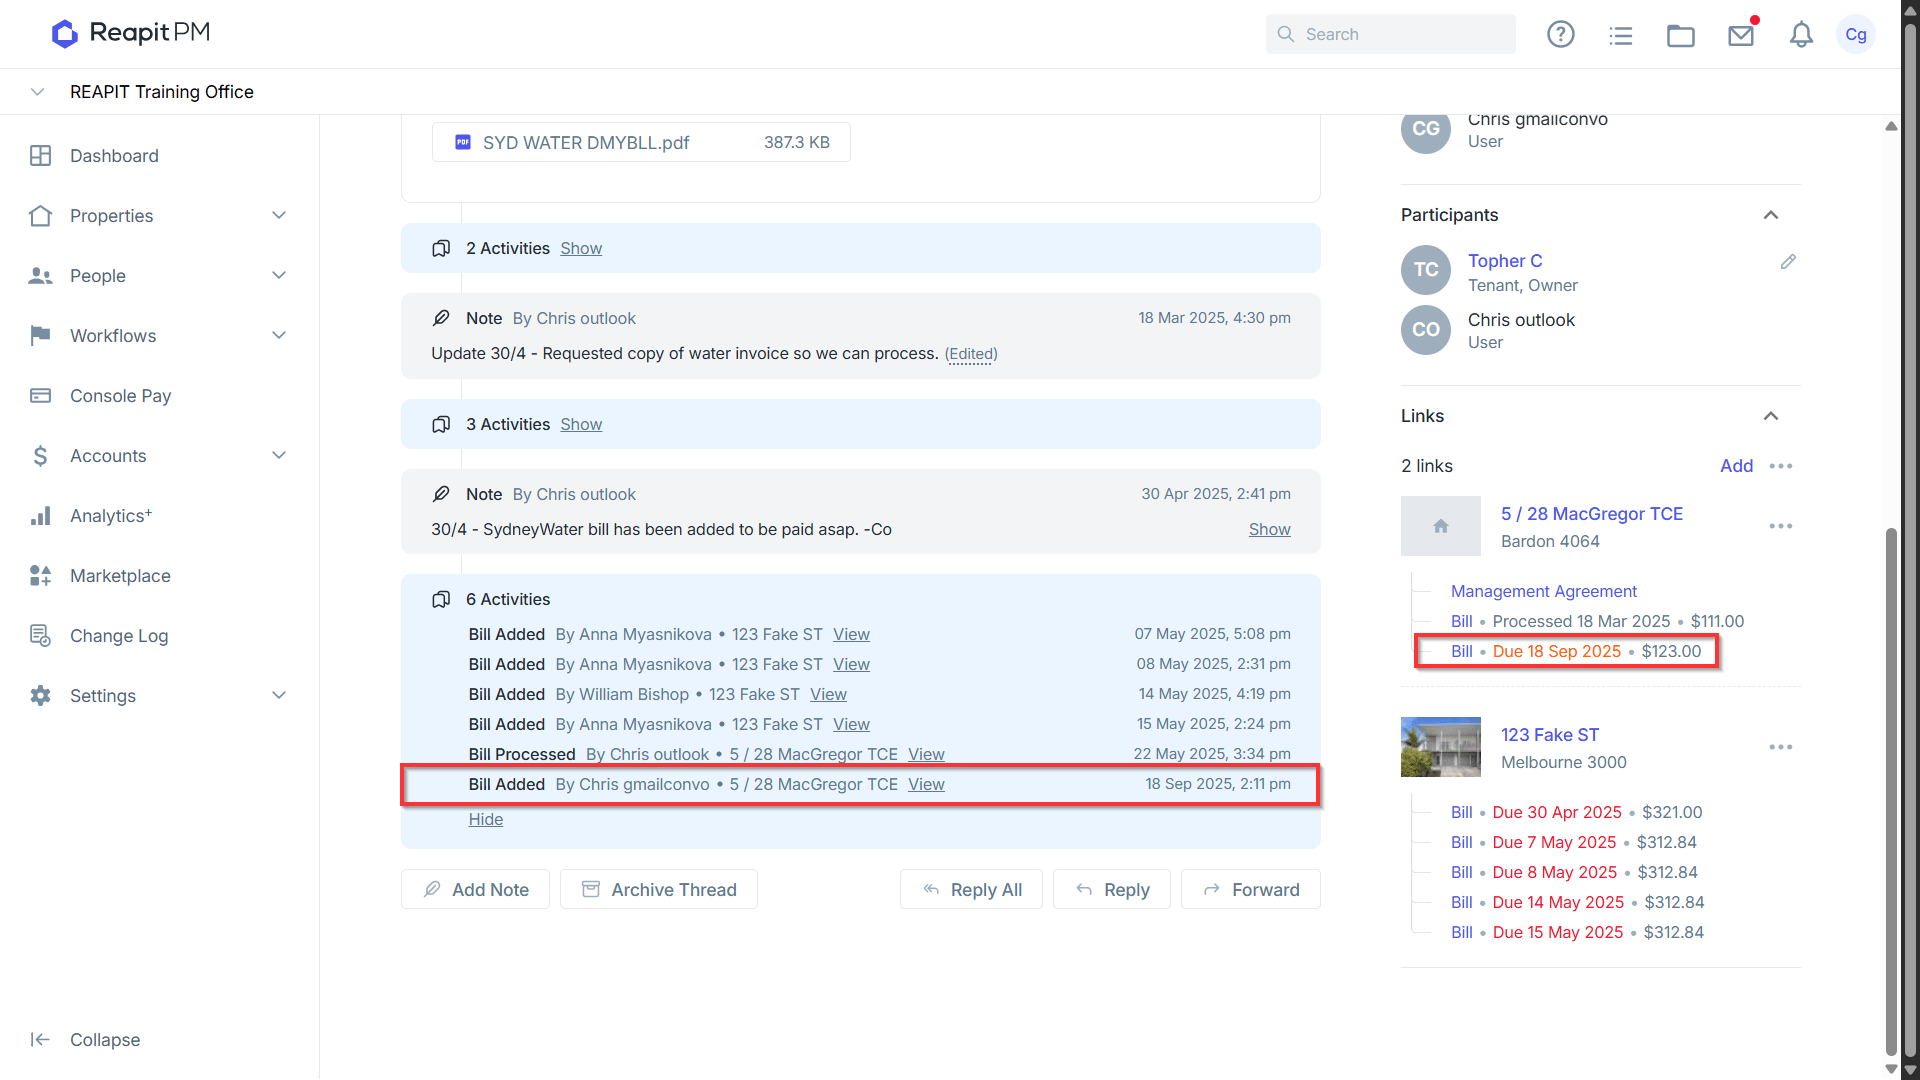
- Returning to the email will display an activity of the Bill being added into Reapit PM.
Notes
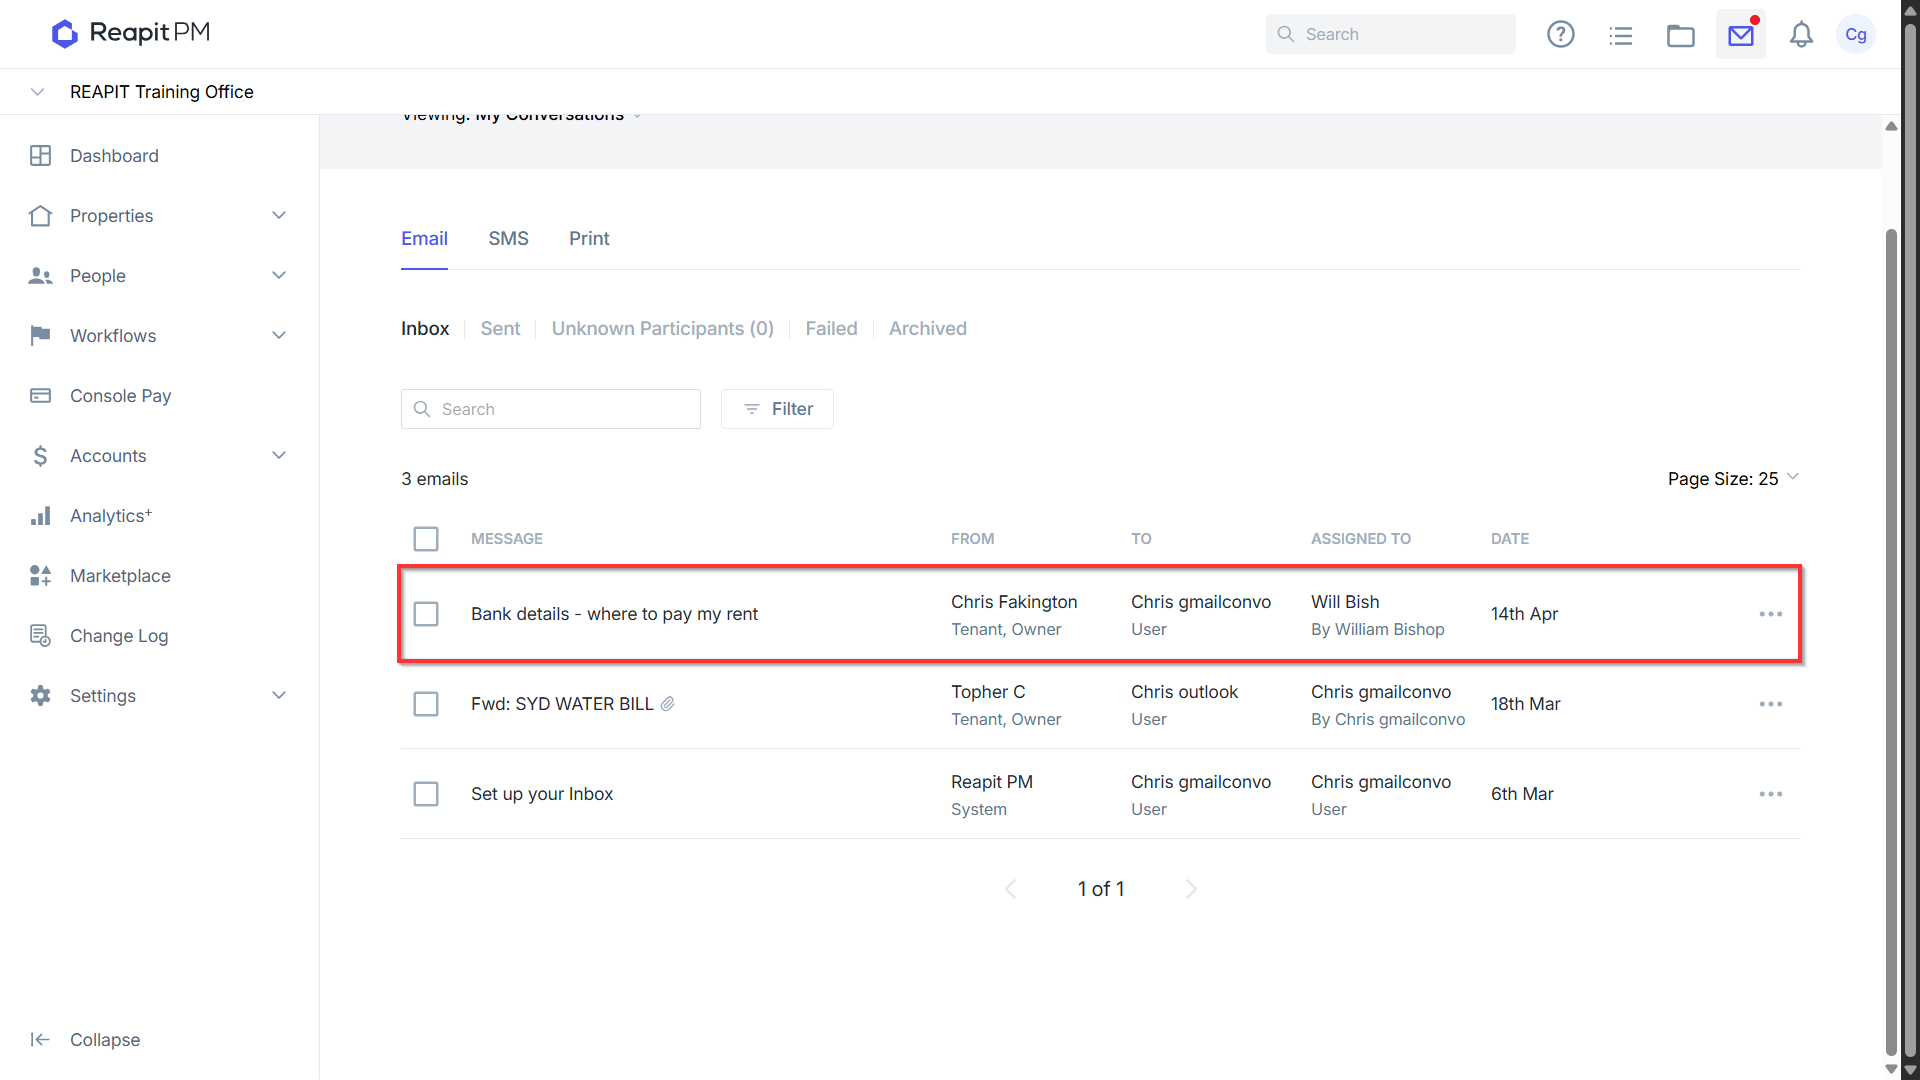
- Conversations allows you to record notes for emails and email threads to support effective record-keeping. Notes added within Conversations will only be visible when viewing the specific email or email thread they are attached to. To begin, select 'Conversations'.
- Click on the email you wish to view.
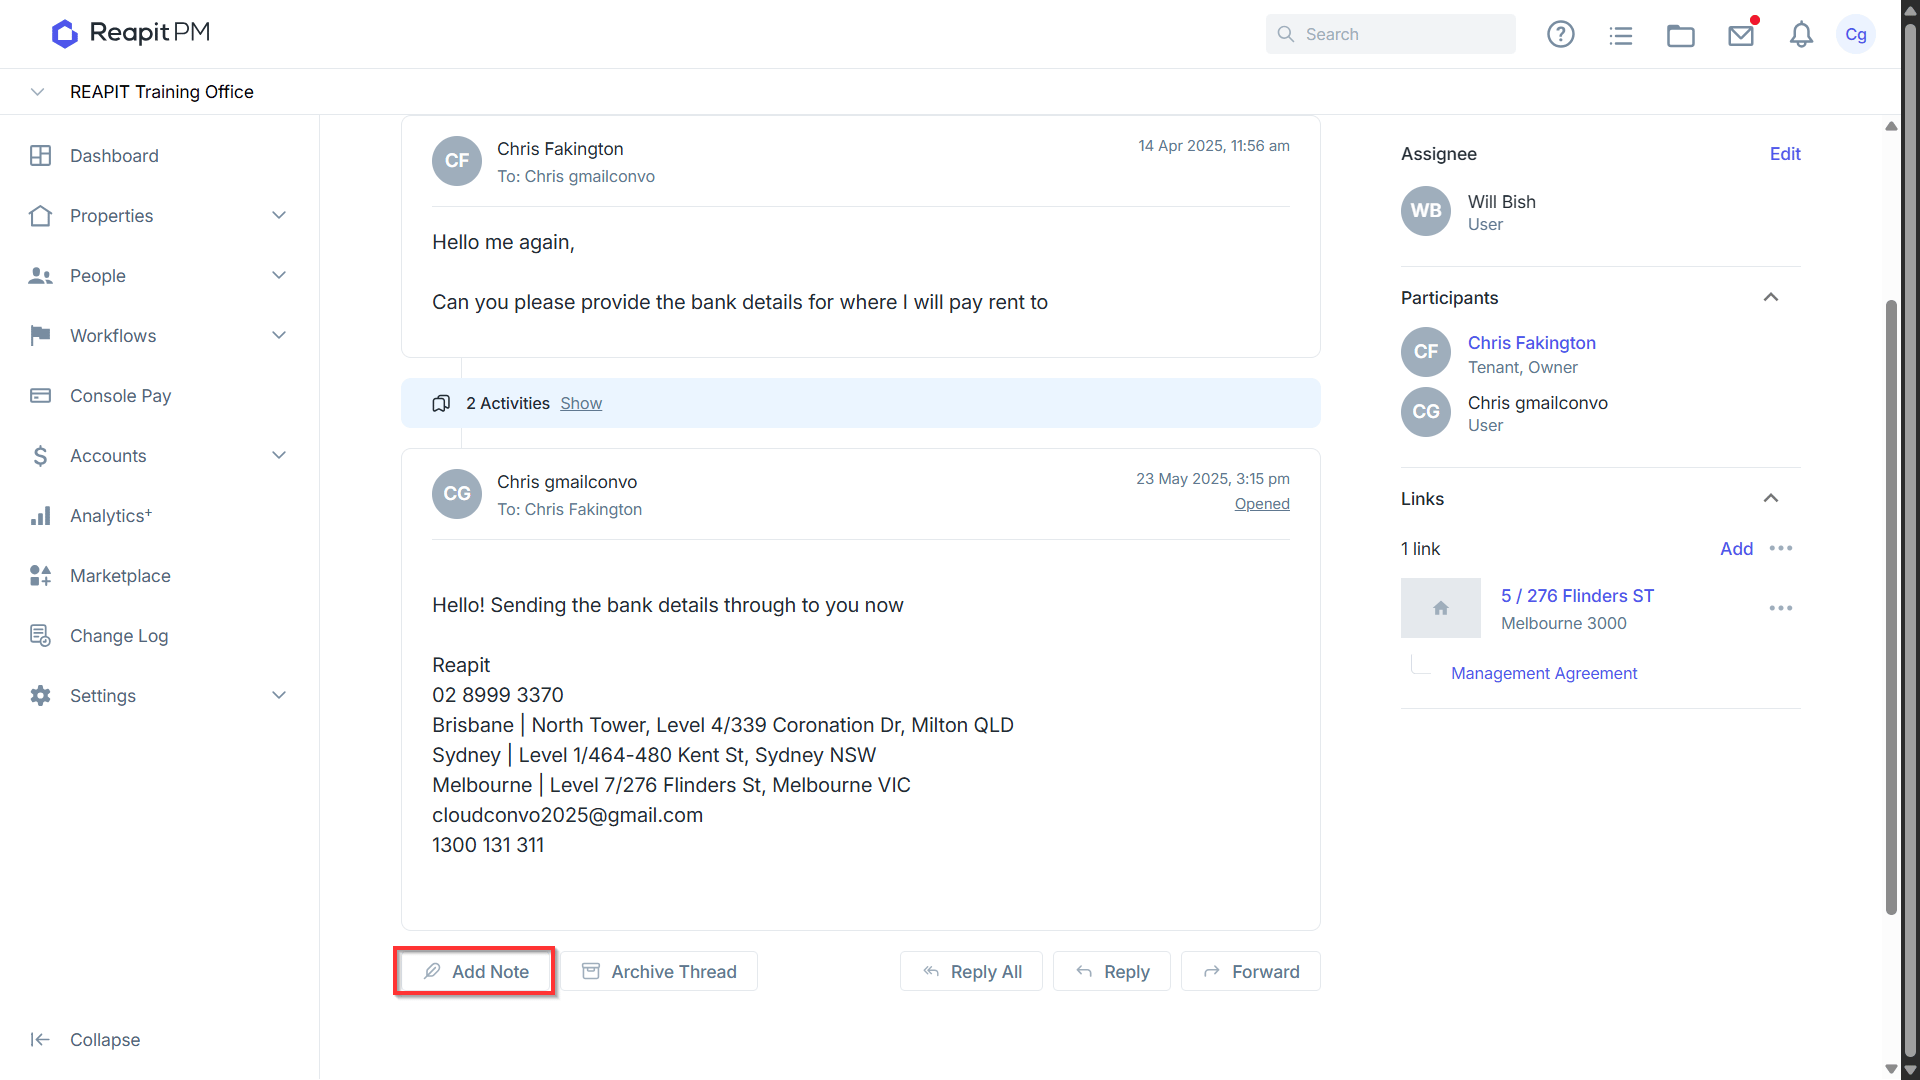
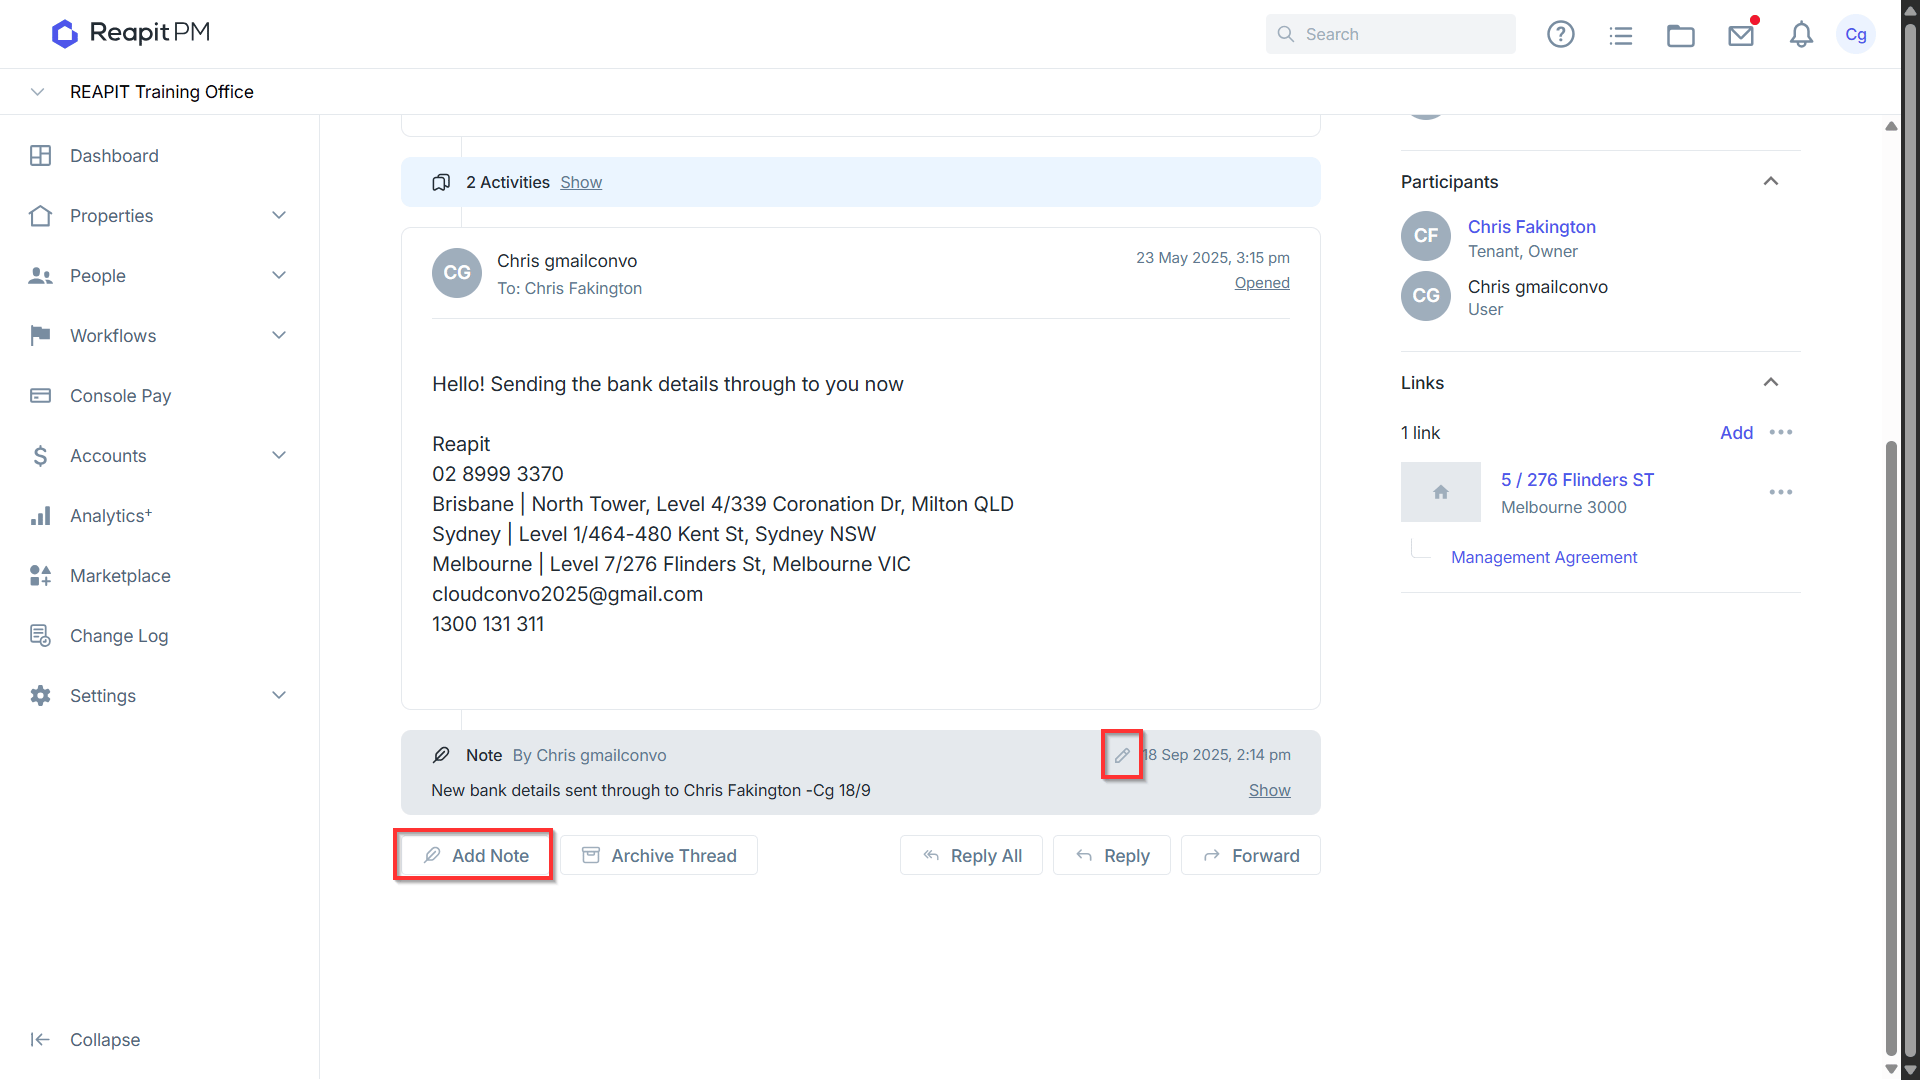
- Click the 'Add Note' button to add a note to the conversation.
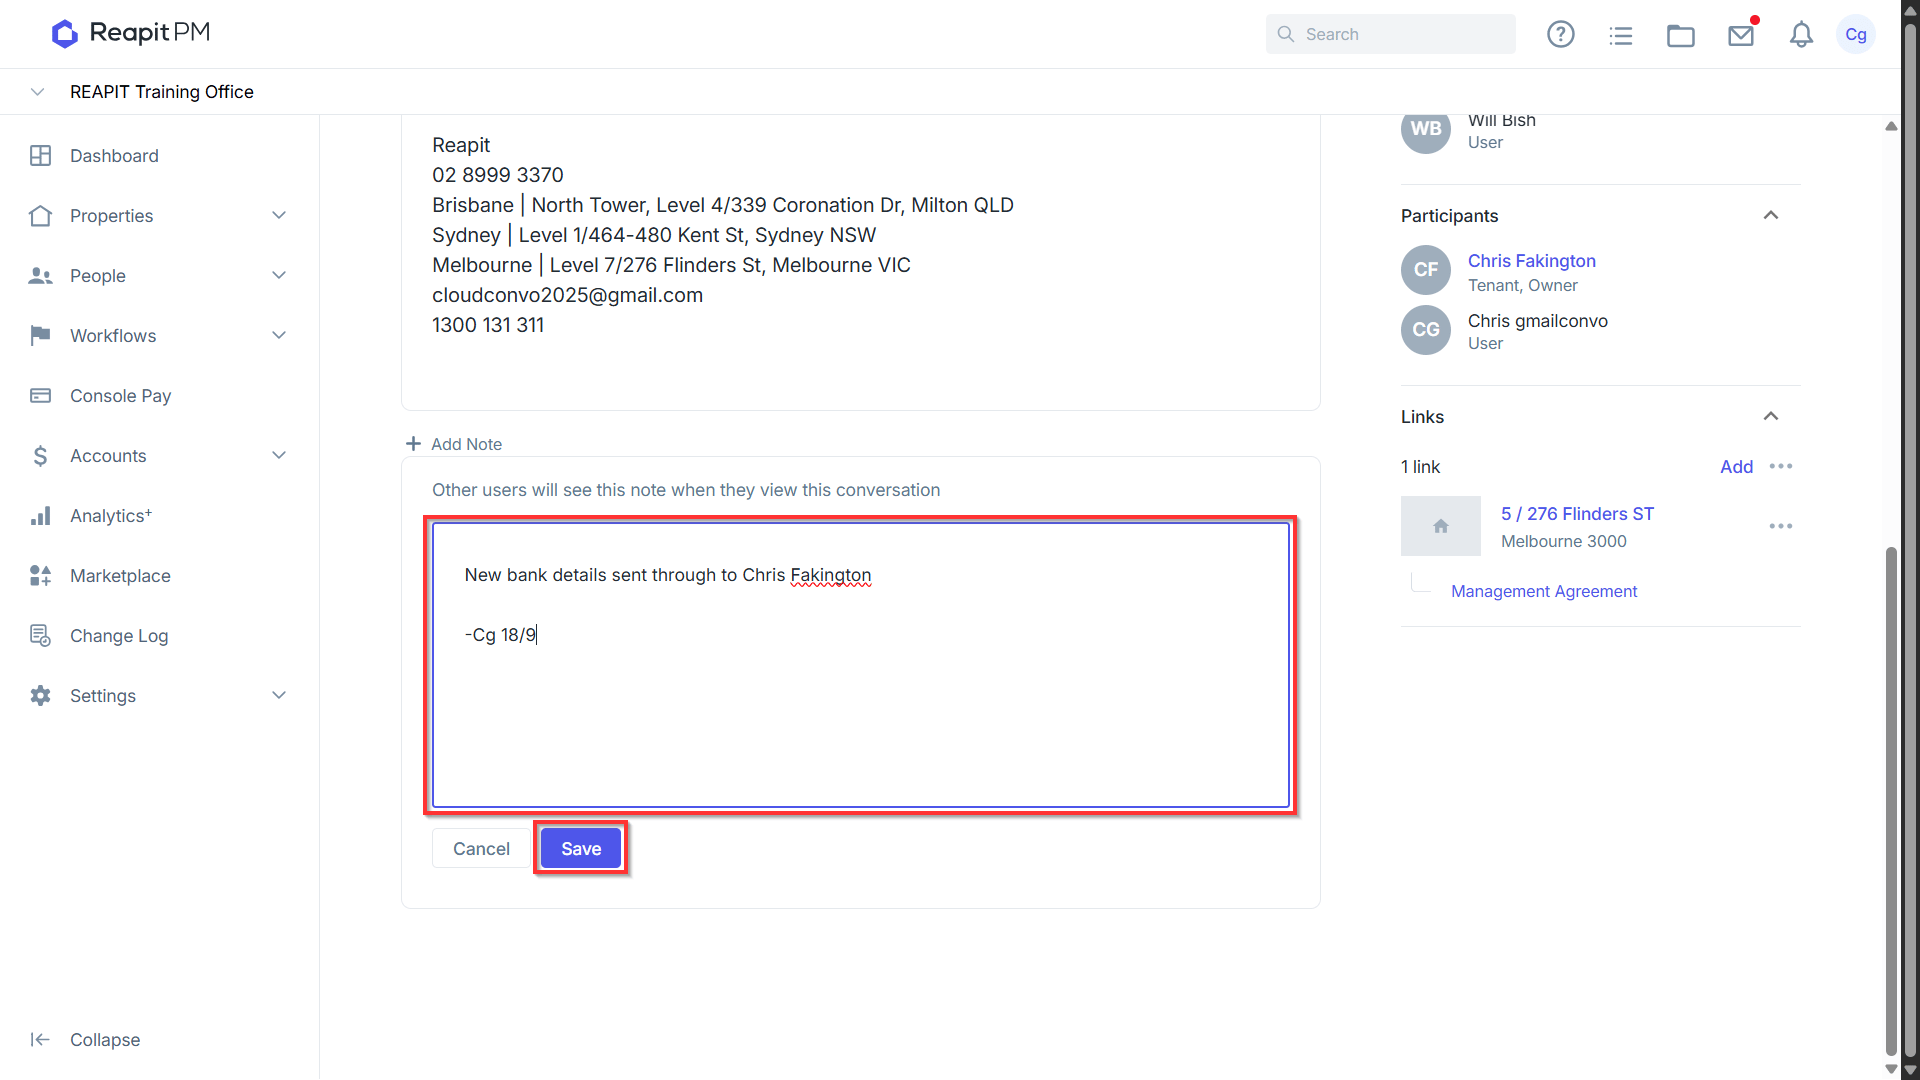
- Enter in the details for the note, and press 'Save'.
- Confirmation of note being added will appear.
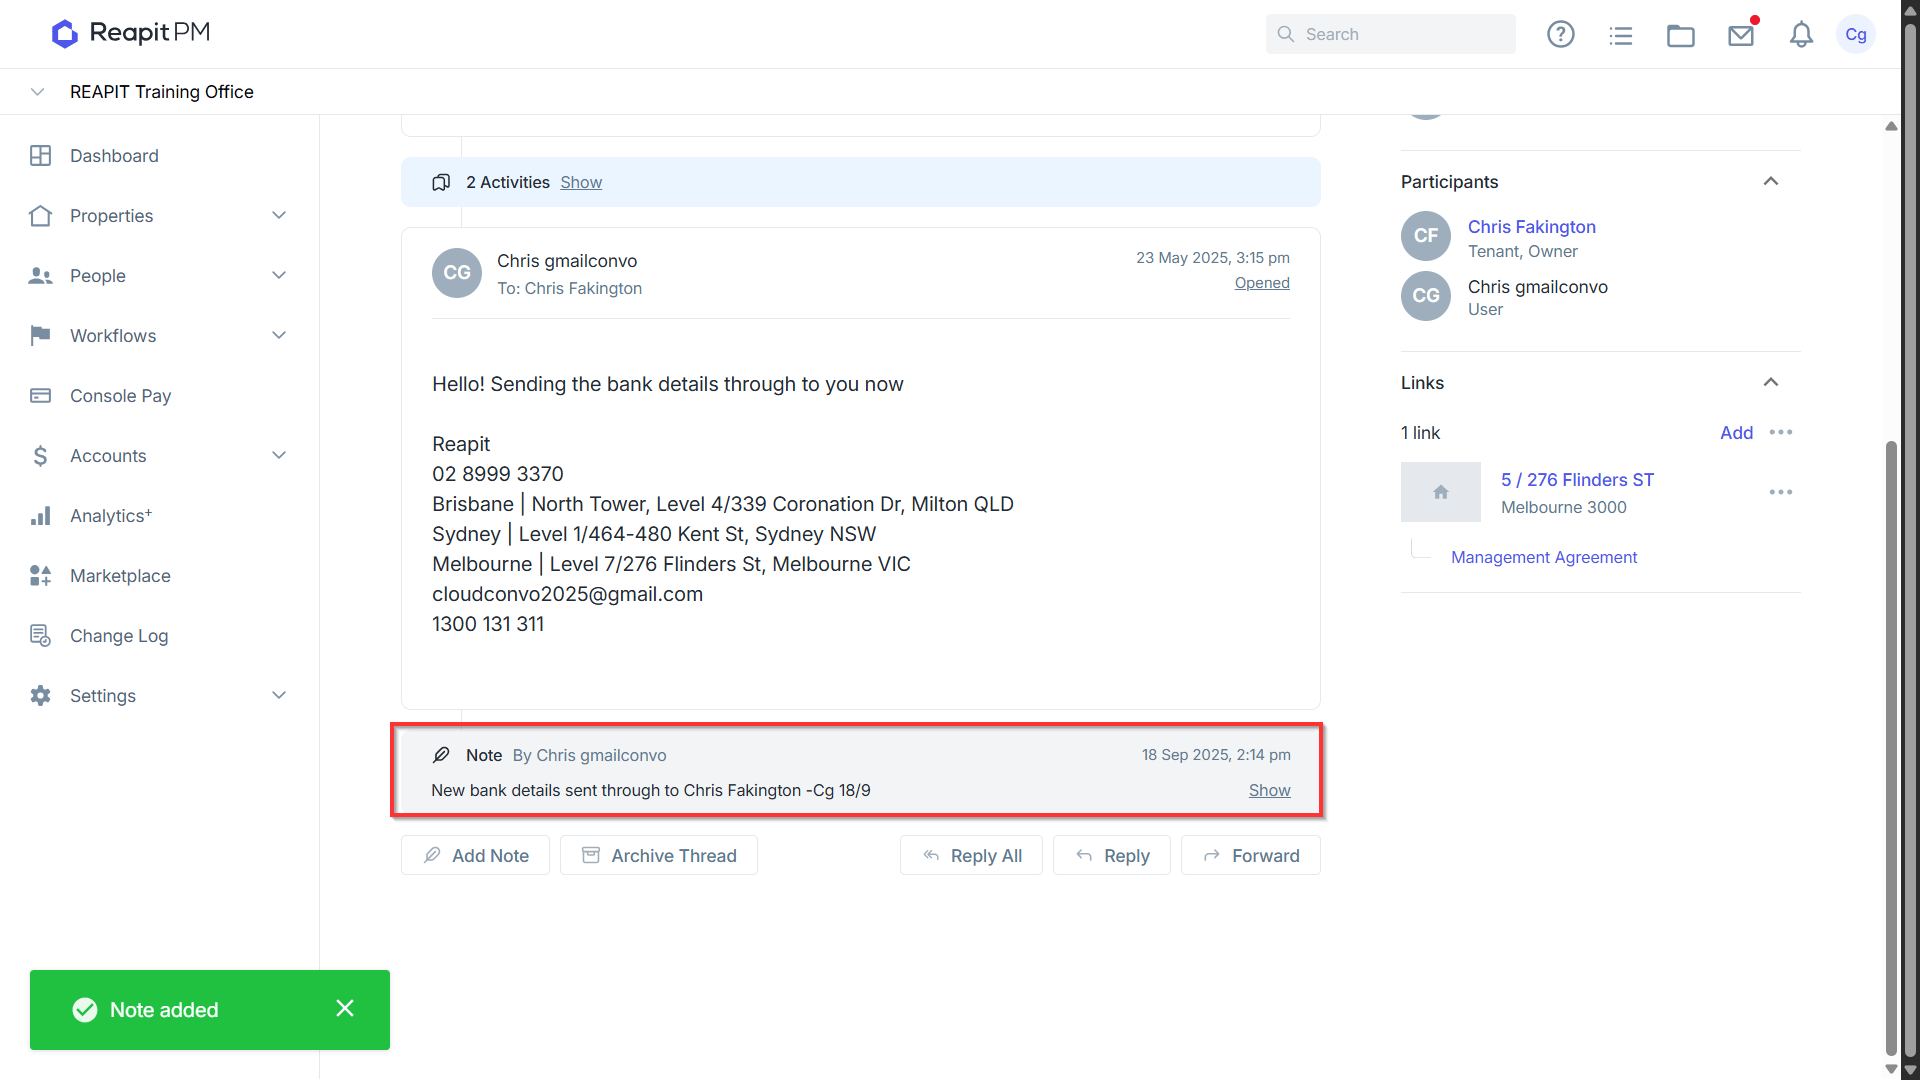
- Placing your mouse cursor on the note will allow you to make any changes as required. alternatively, you will be able to create new notes as well.
Save Emails Print Screen or Export Timeline
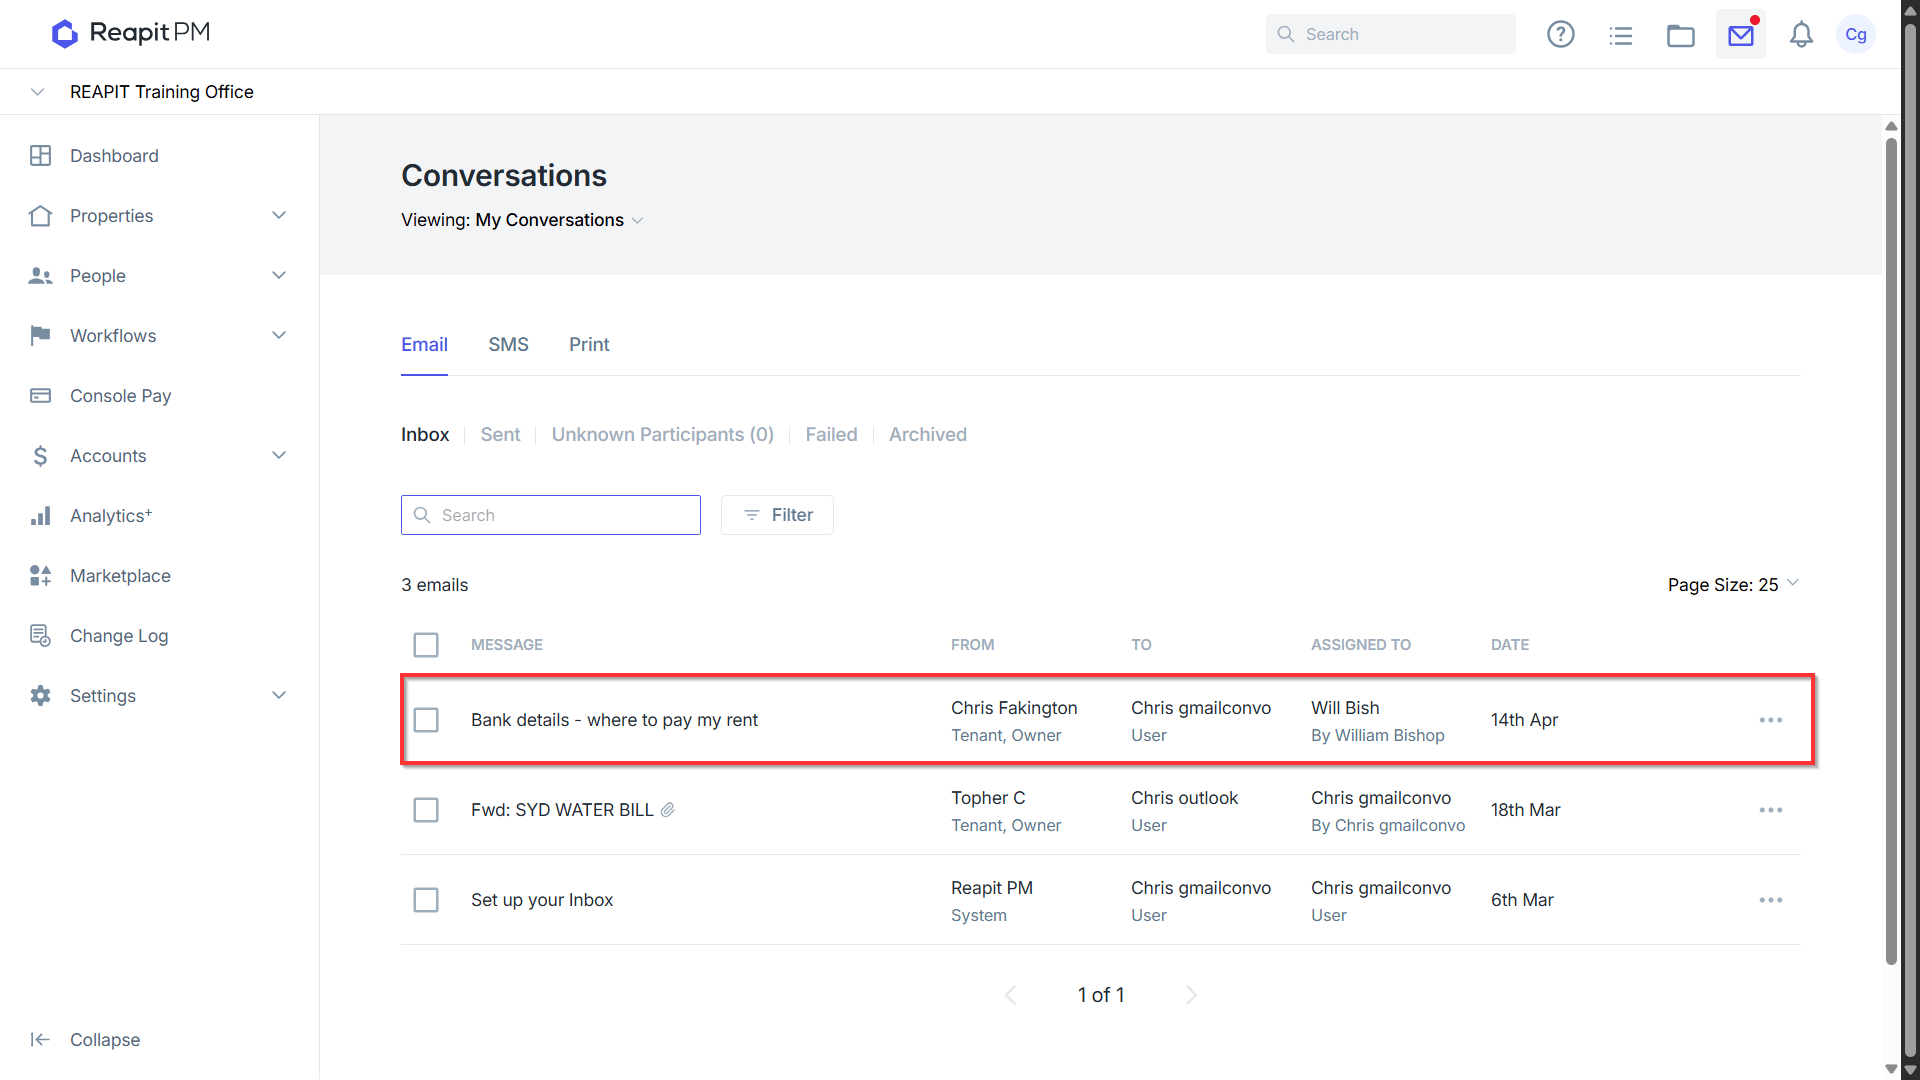
- Exporting email communication can be done in multiple ways. To begin, navigate to 'Conversations'.
- Navigate to the email you wish to view / save.
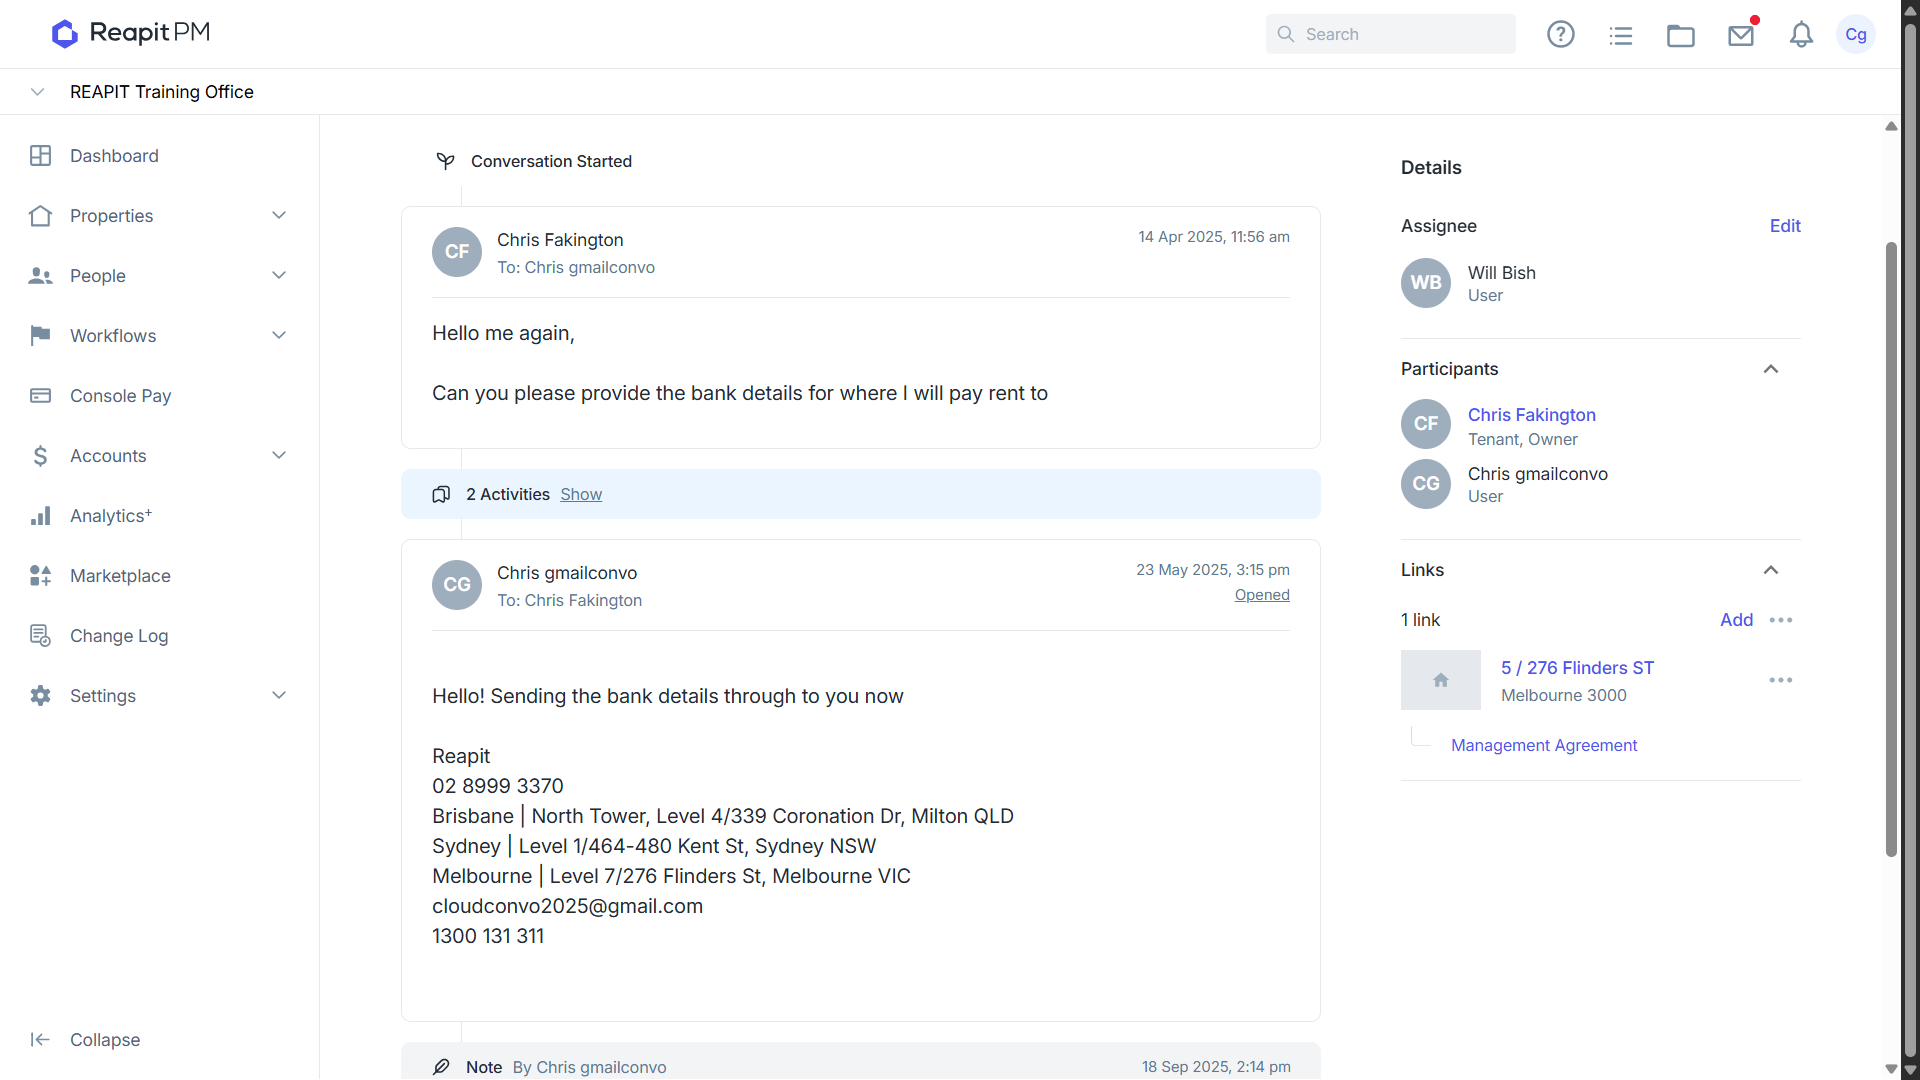
- You can take a screenshot of the page, including the email chain, using the Print Screen key on your keyboard. This captures an image of your entire screen, which you can then paste into a program like Paint to save. Alternatively, you can use a tool like Snipping Tool to take a screenshot of a specific part of the page. Open Snipping Tool, select 'New,' then click and drag to capture the area you want. Once done, you can save the screenshot for later use.
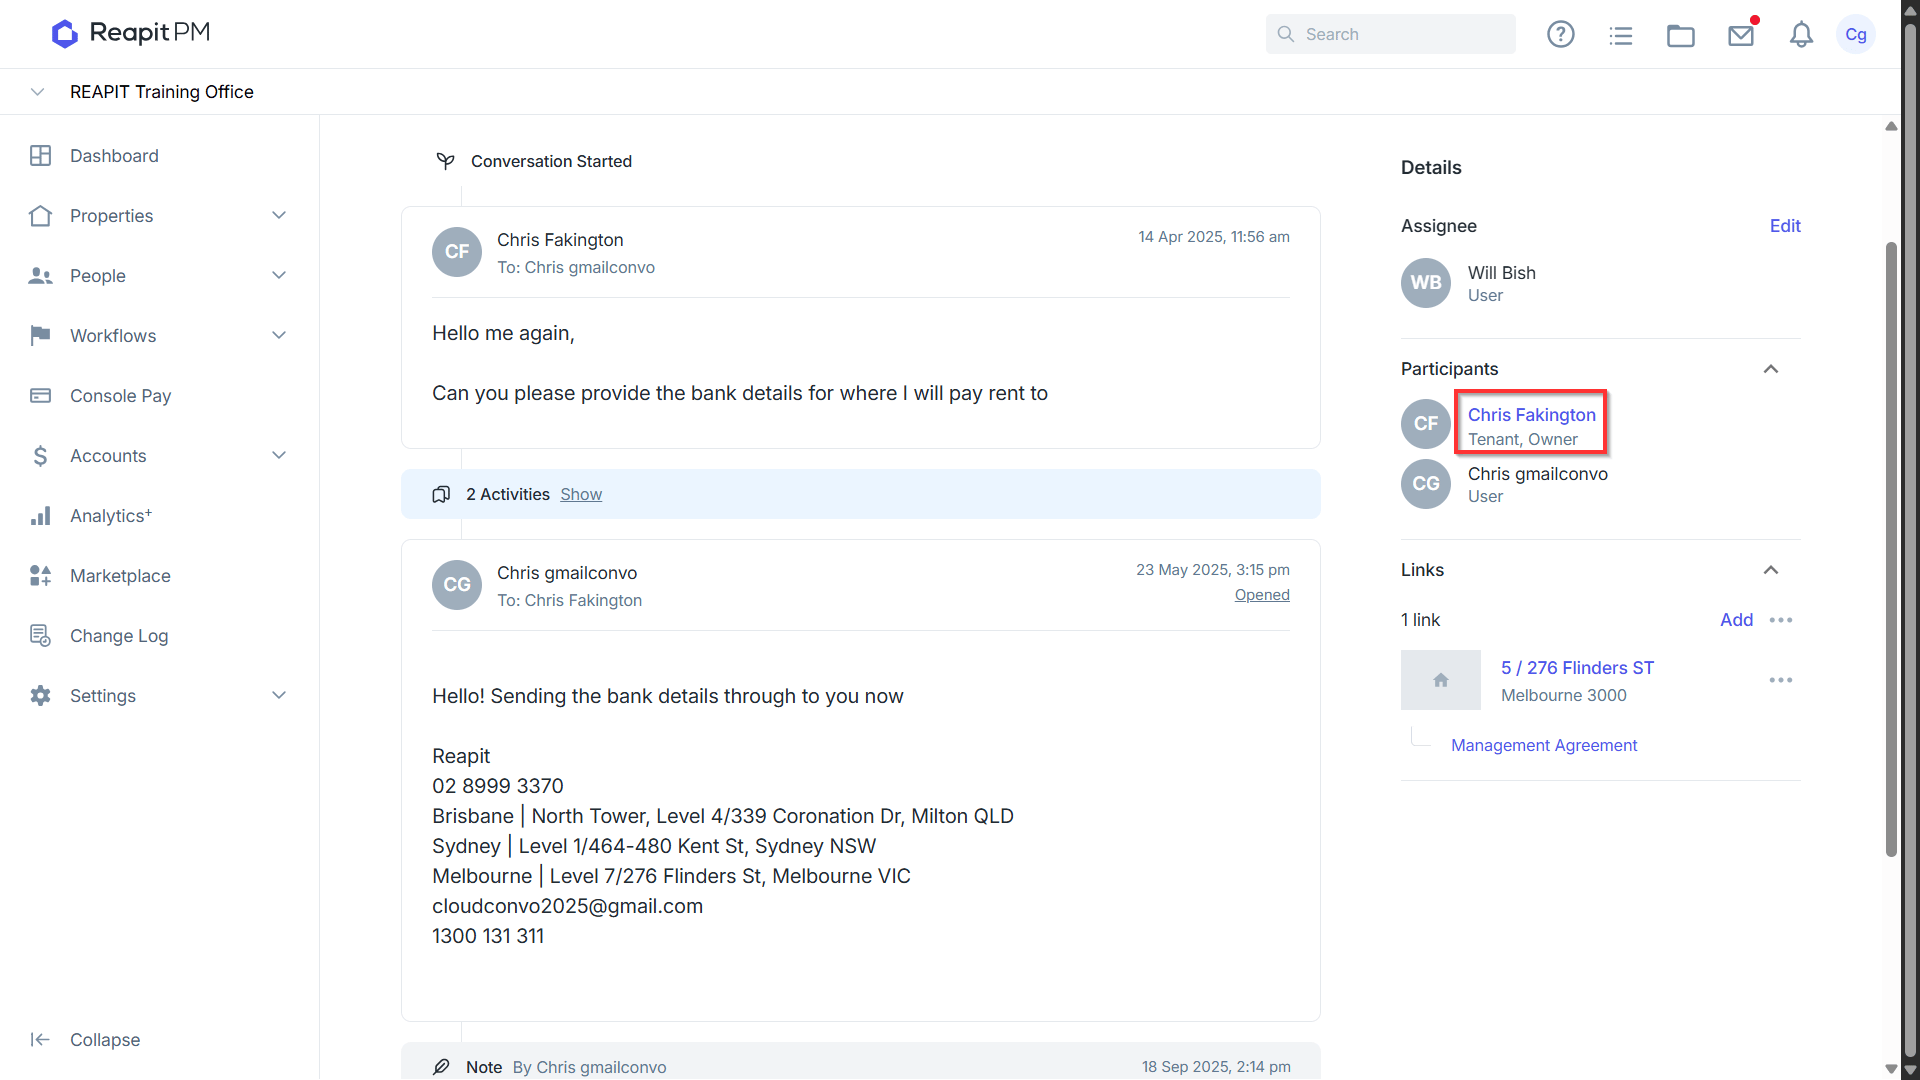
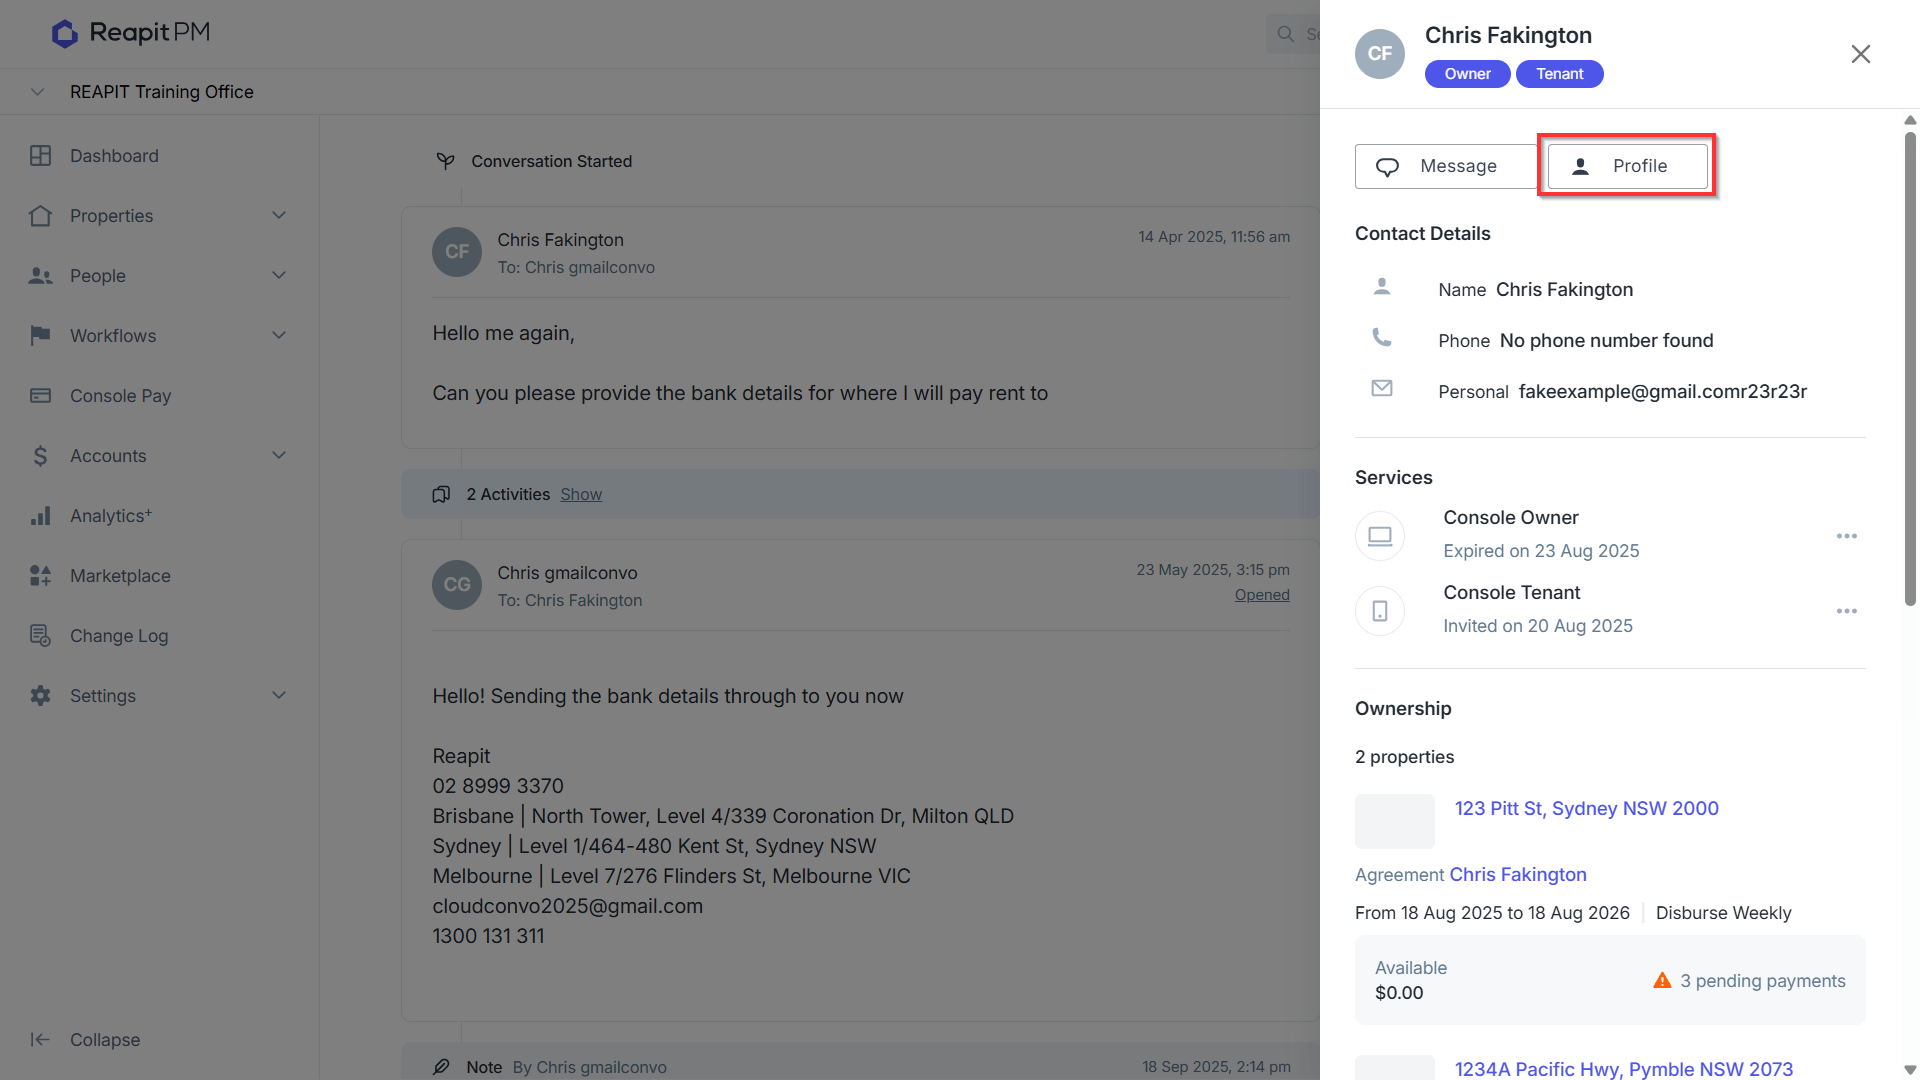
- To export a copy of the timeline (applicable for Contacts, Owners, Tenants, or Creditors), start by clicking on the contact card for the relevant participant.
- When the card drawer appears, click on Profile.
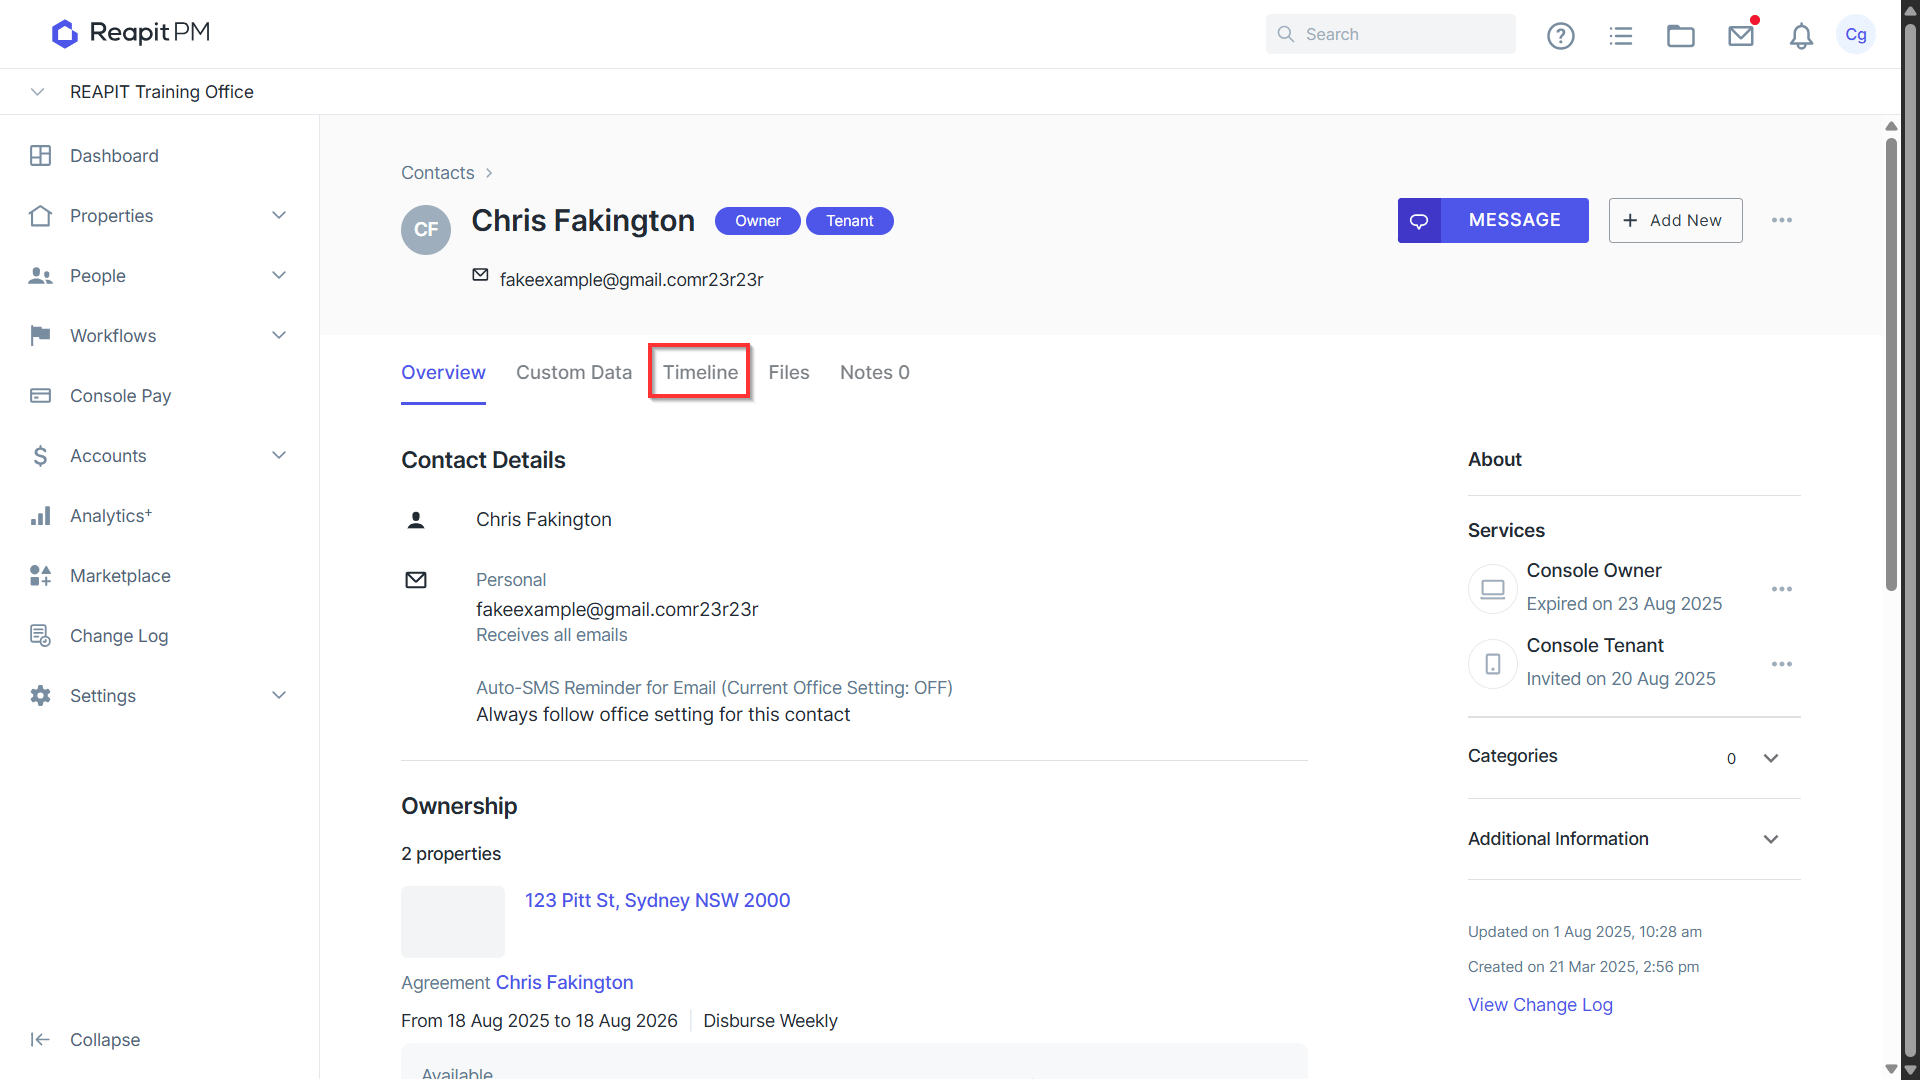
- Click on the Timeline tab (or the Communication tab, depending on whether you are viewing a Contact, Owner, Tenant, or Creditor card).
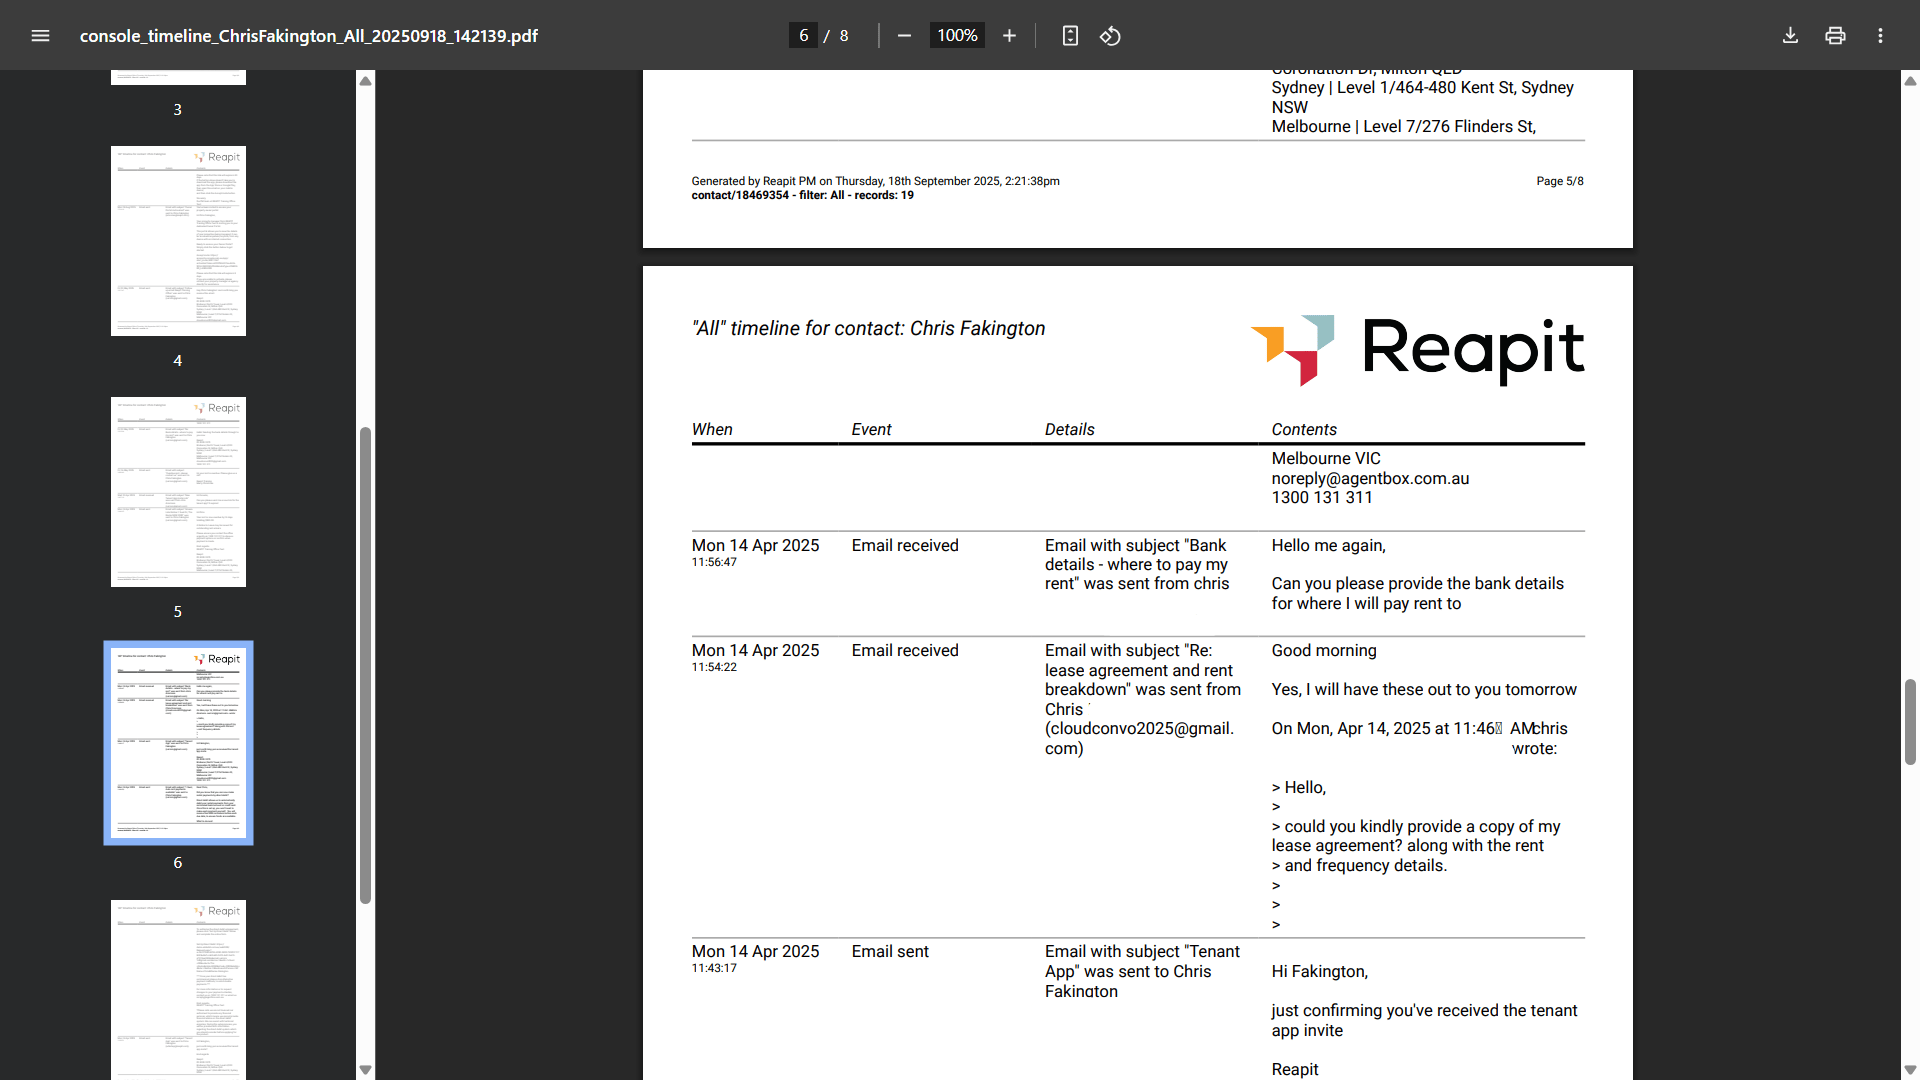
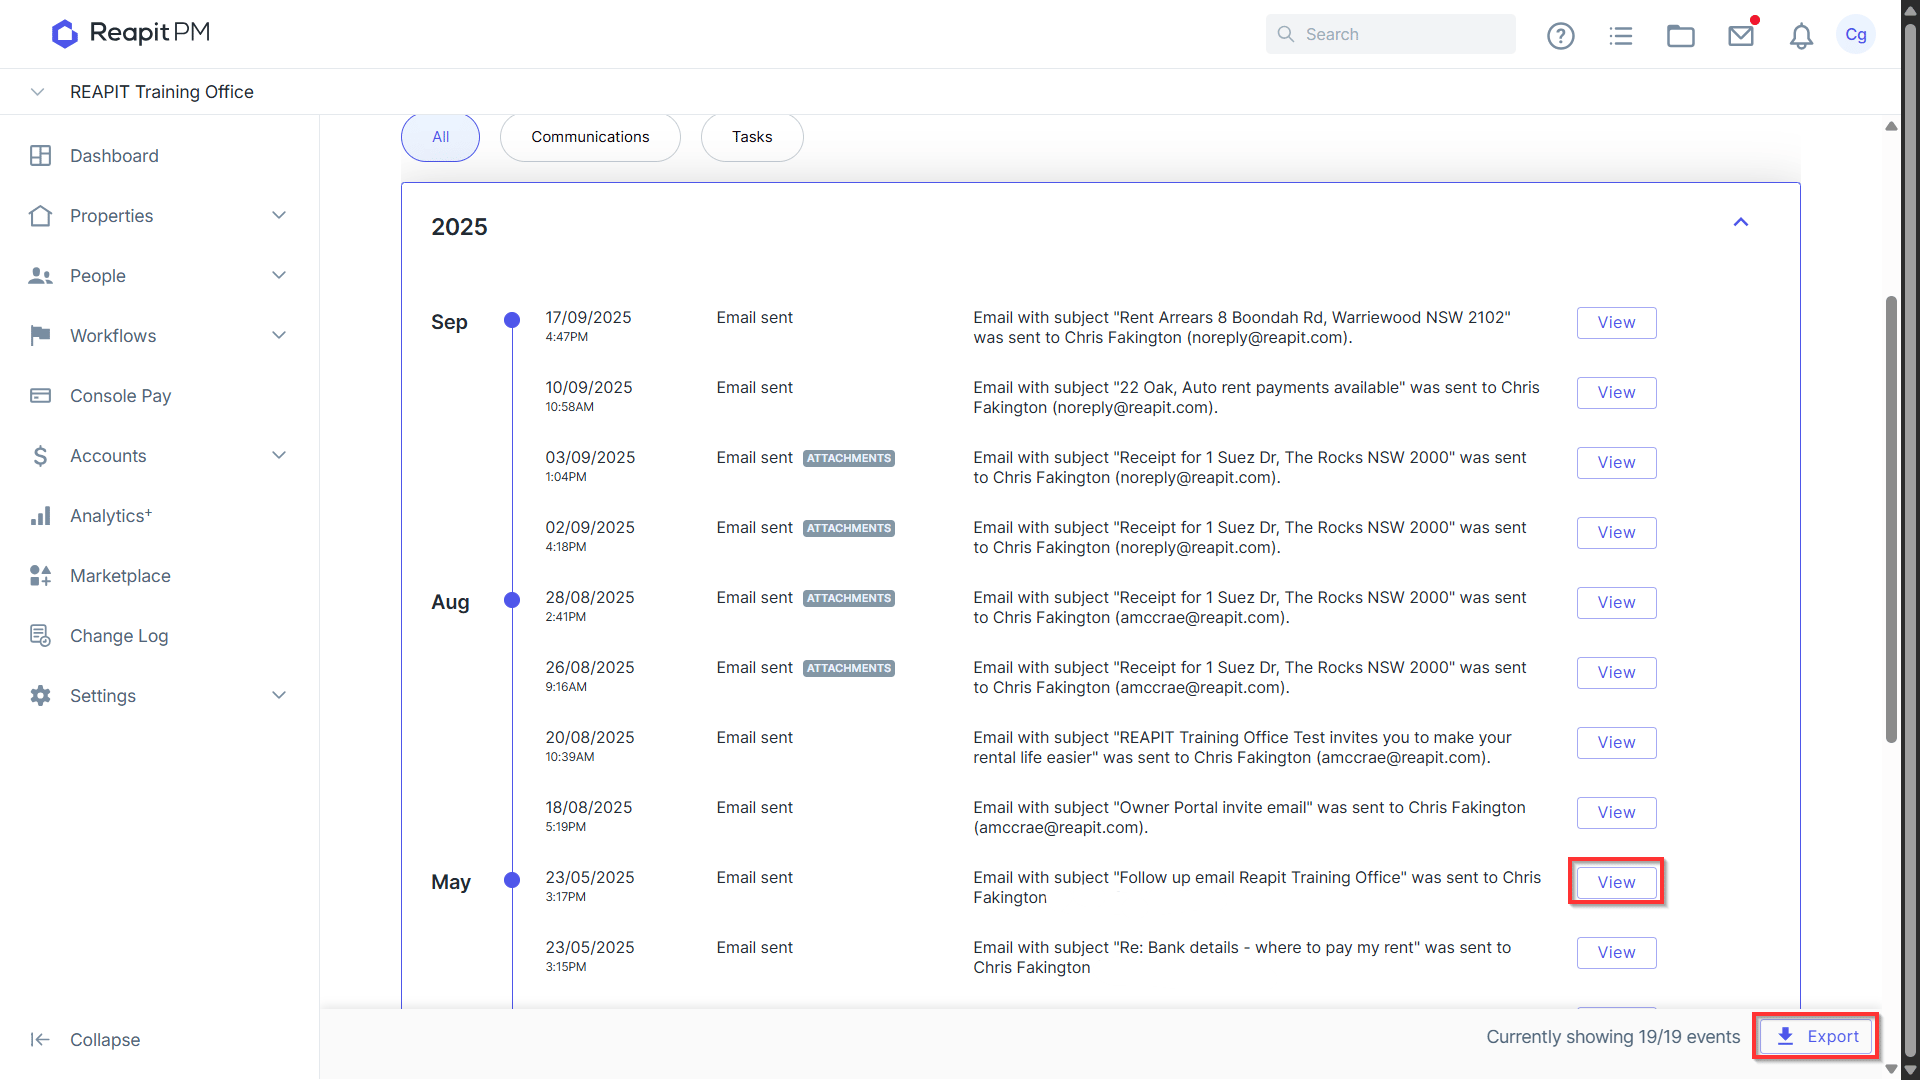
- Clicking the View button from here will display the email communication. By clicking Export, you will be provided with a PDF covering all communication sent.
- Below is an example of the PDF file displaying all sent and received emails for the Contact, Owner, Tenant, Or Creditor.