'%20d='M0%208a8%208%200%200%201%208-8h24a8%208%200%200%201%208%208v24a8%208%200%200%201-8%208H8a8%208%200%200%201-8-8V8Z'/%3e%3cpath%20fill='%23fff'%20d='M8.375%2013v14L20.5%2034l12.124-7v-7.737l-1.687-.975-2.806-1.62-1.082-.624v4.83l-.002%204.83H13.95V16.07l3.275-1.89%202.192-1.265%201.082-.625%203.275%201.877%202.192%201.256%201.083.62V9.782L20.5%206%208.376%2013Z'/%3e%3cdefs%3e%3clinearGradient%20id='reapit-pm__a'%20x1='20.702'%20x2='20.702'%20y1='.351'%20y2='31.228'%20gradientUnits='userSpaceOnUse'%3e%3cstop%20stop-color='%235573FD'/%3e%3cstop%20offset='.575'%20stop-color='%234E56EA'/%3e%3c/linearGradient%3e%3c/defs%3e%3c/svg%3e)
Creating and managing sales/sales contracts
This article will guide you through the steps on creating and managing Sales contracts in Reapit PM. The processes in this article include: How to Create Sale Contracts How to Receipt Buyer Deposits to the Sale File How to Terminate a Sales Contract How to Pay from Sale Contract/Seller How to Preview Settlement of the Sale How to Settle the Sale File
Overview
Creating and Managing Sale/Sales Contracts
This article will guide you through the steps on creating and managing Sales contracts in Reapit PM.
The processes in this article include:
- How to Create Sale Contracts
- How to Receipt Buyer Deposits to the Sale File
- How to Terminate a Sales Contract
- How to Pay from Sale Contract/Seller
- How to Preview Settlement of the Sale
- How to Settle the Sale File
Note: this option requires the Reapit PM Sales Extension add-on located in the Marketplace.
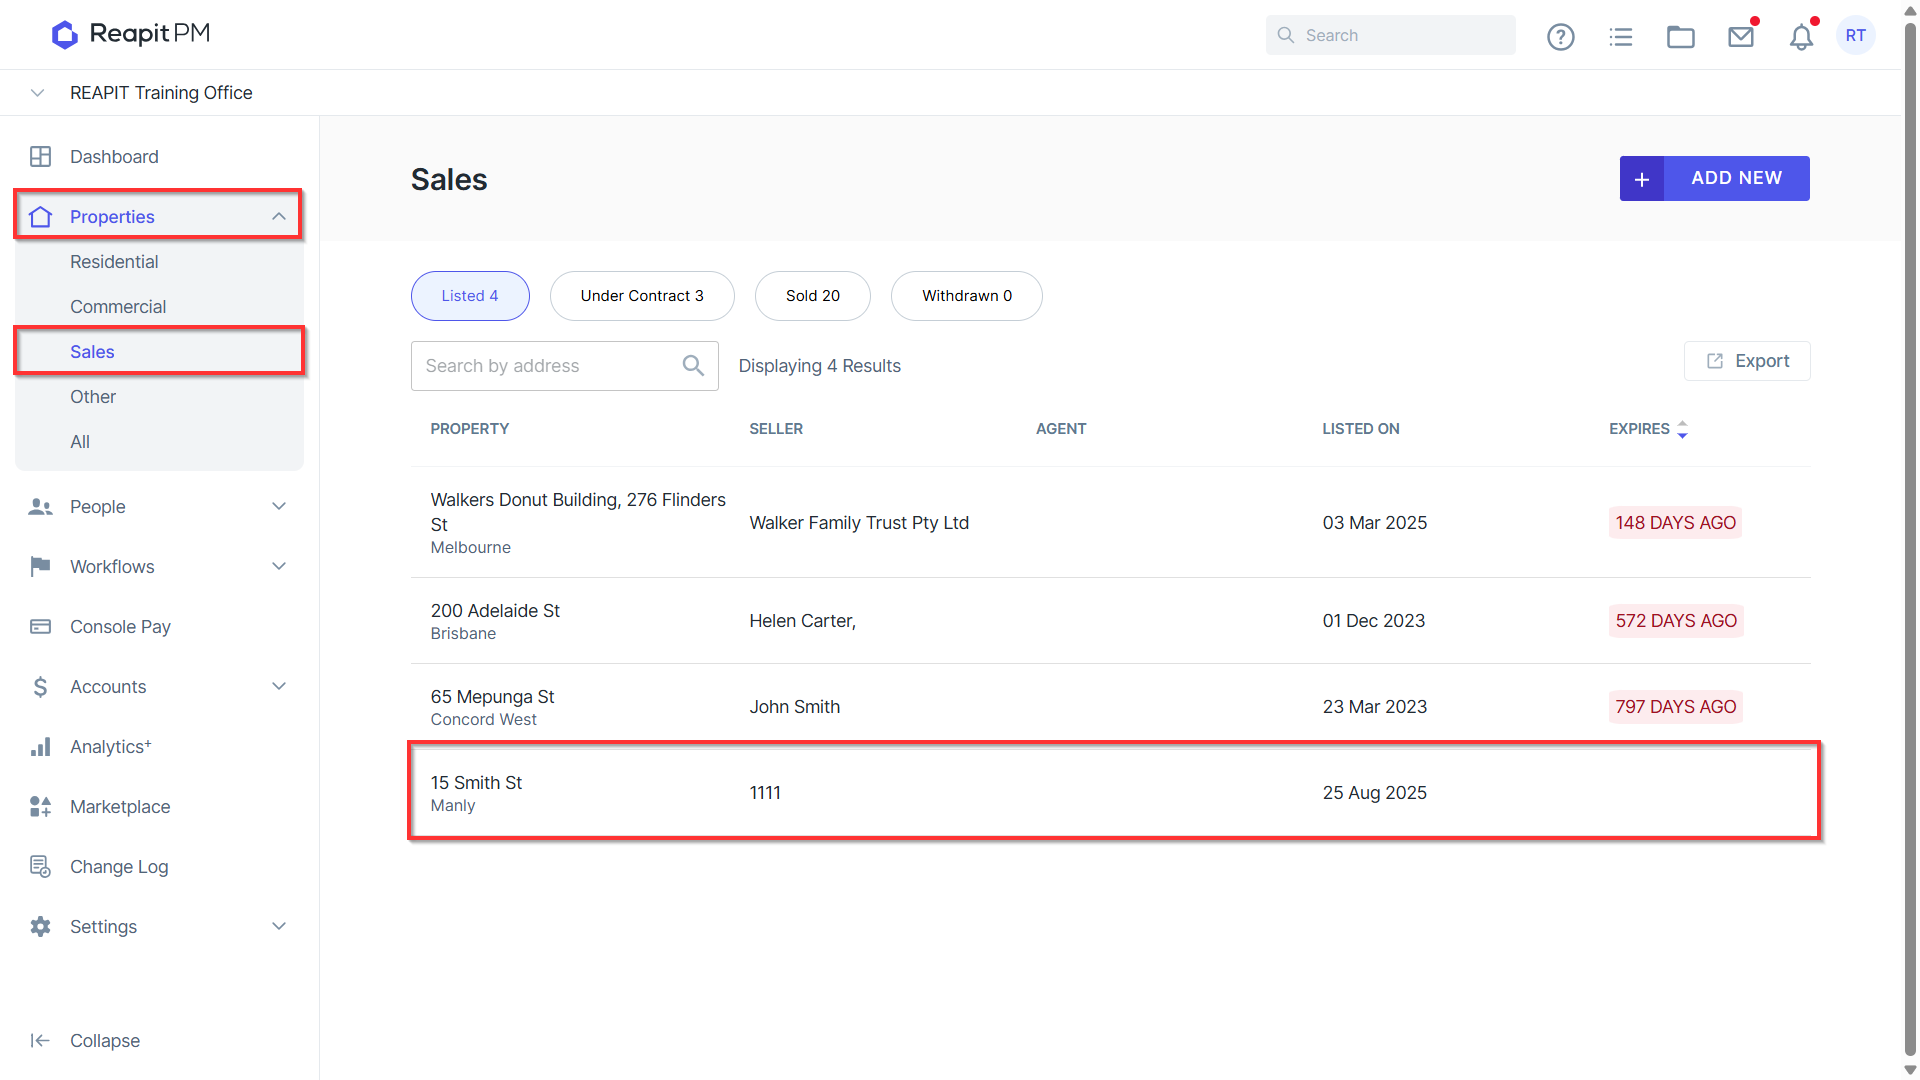
- Navigate to the Properties > Sales > select the listed Property
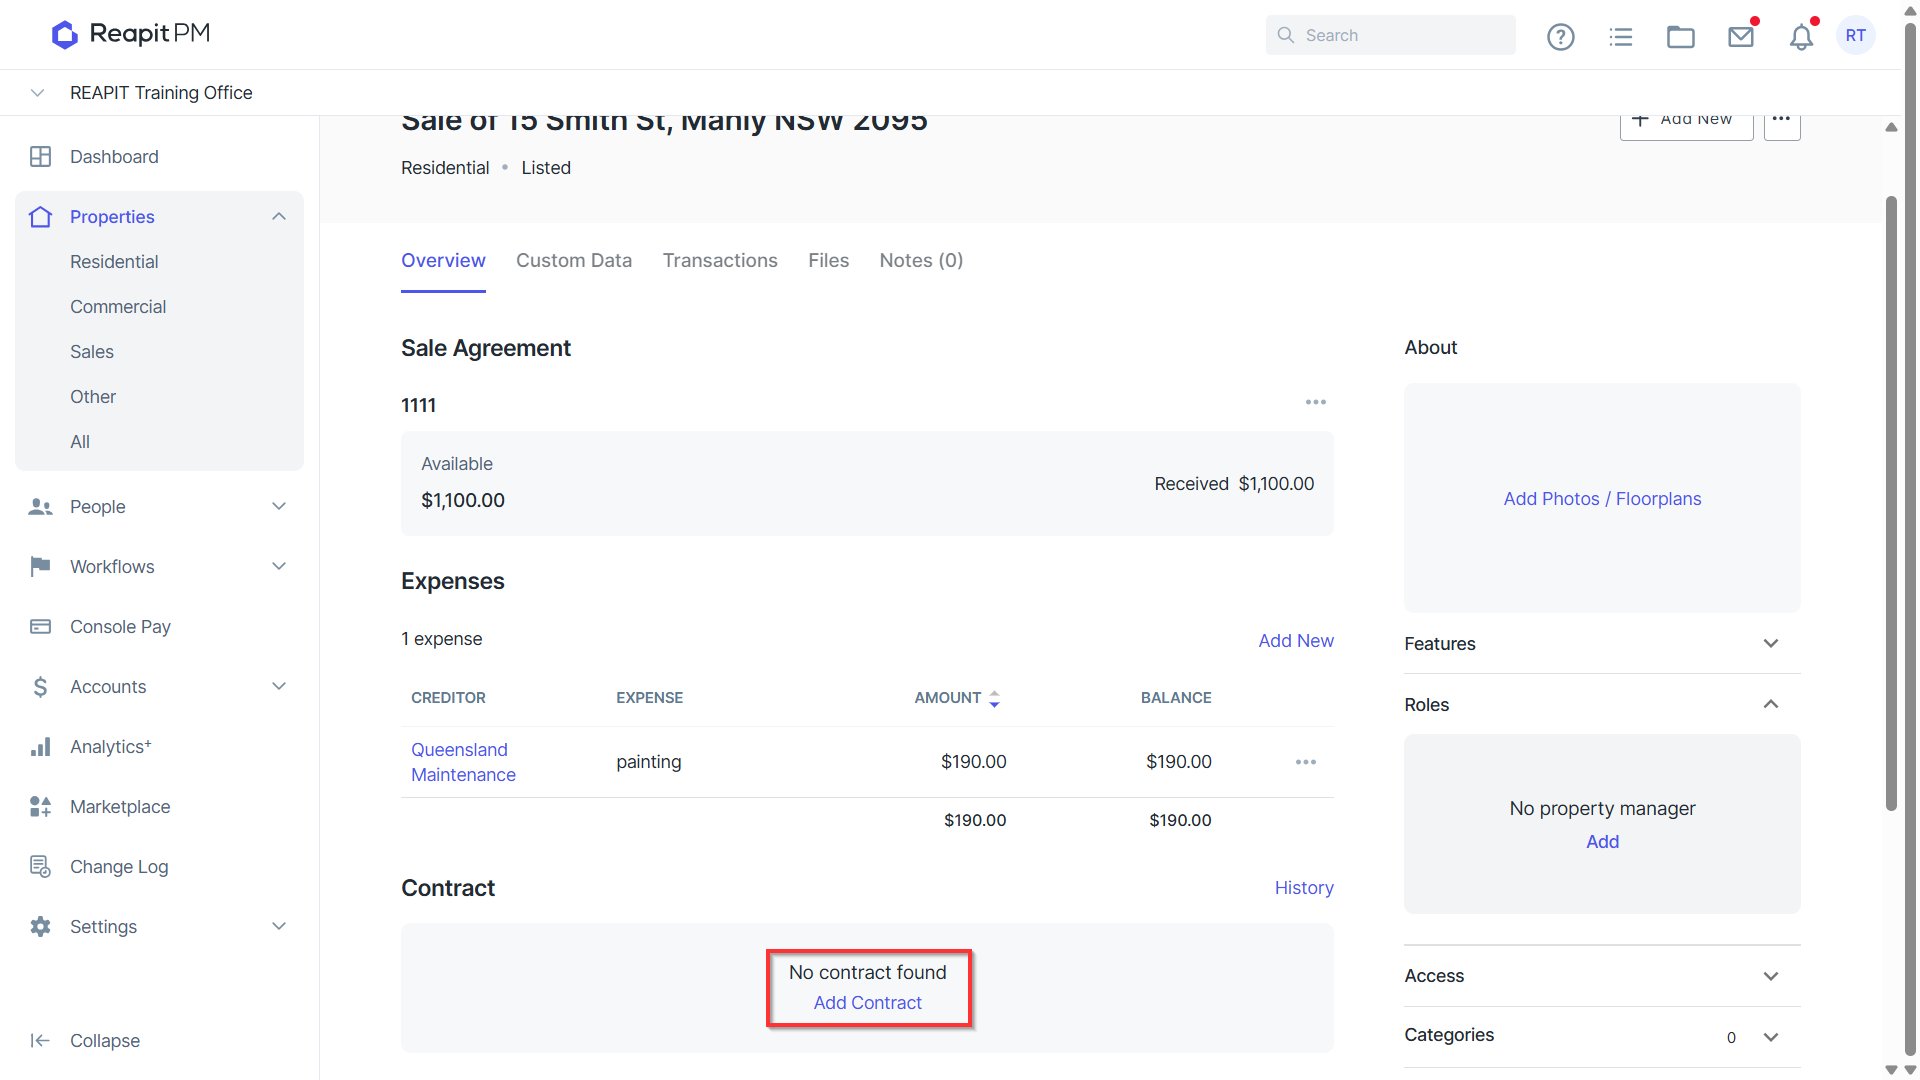
- Select Add Contract from the Overview of the Sale file
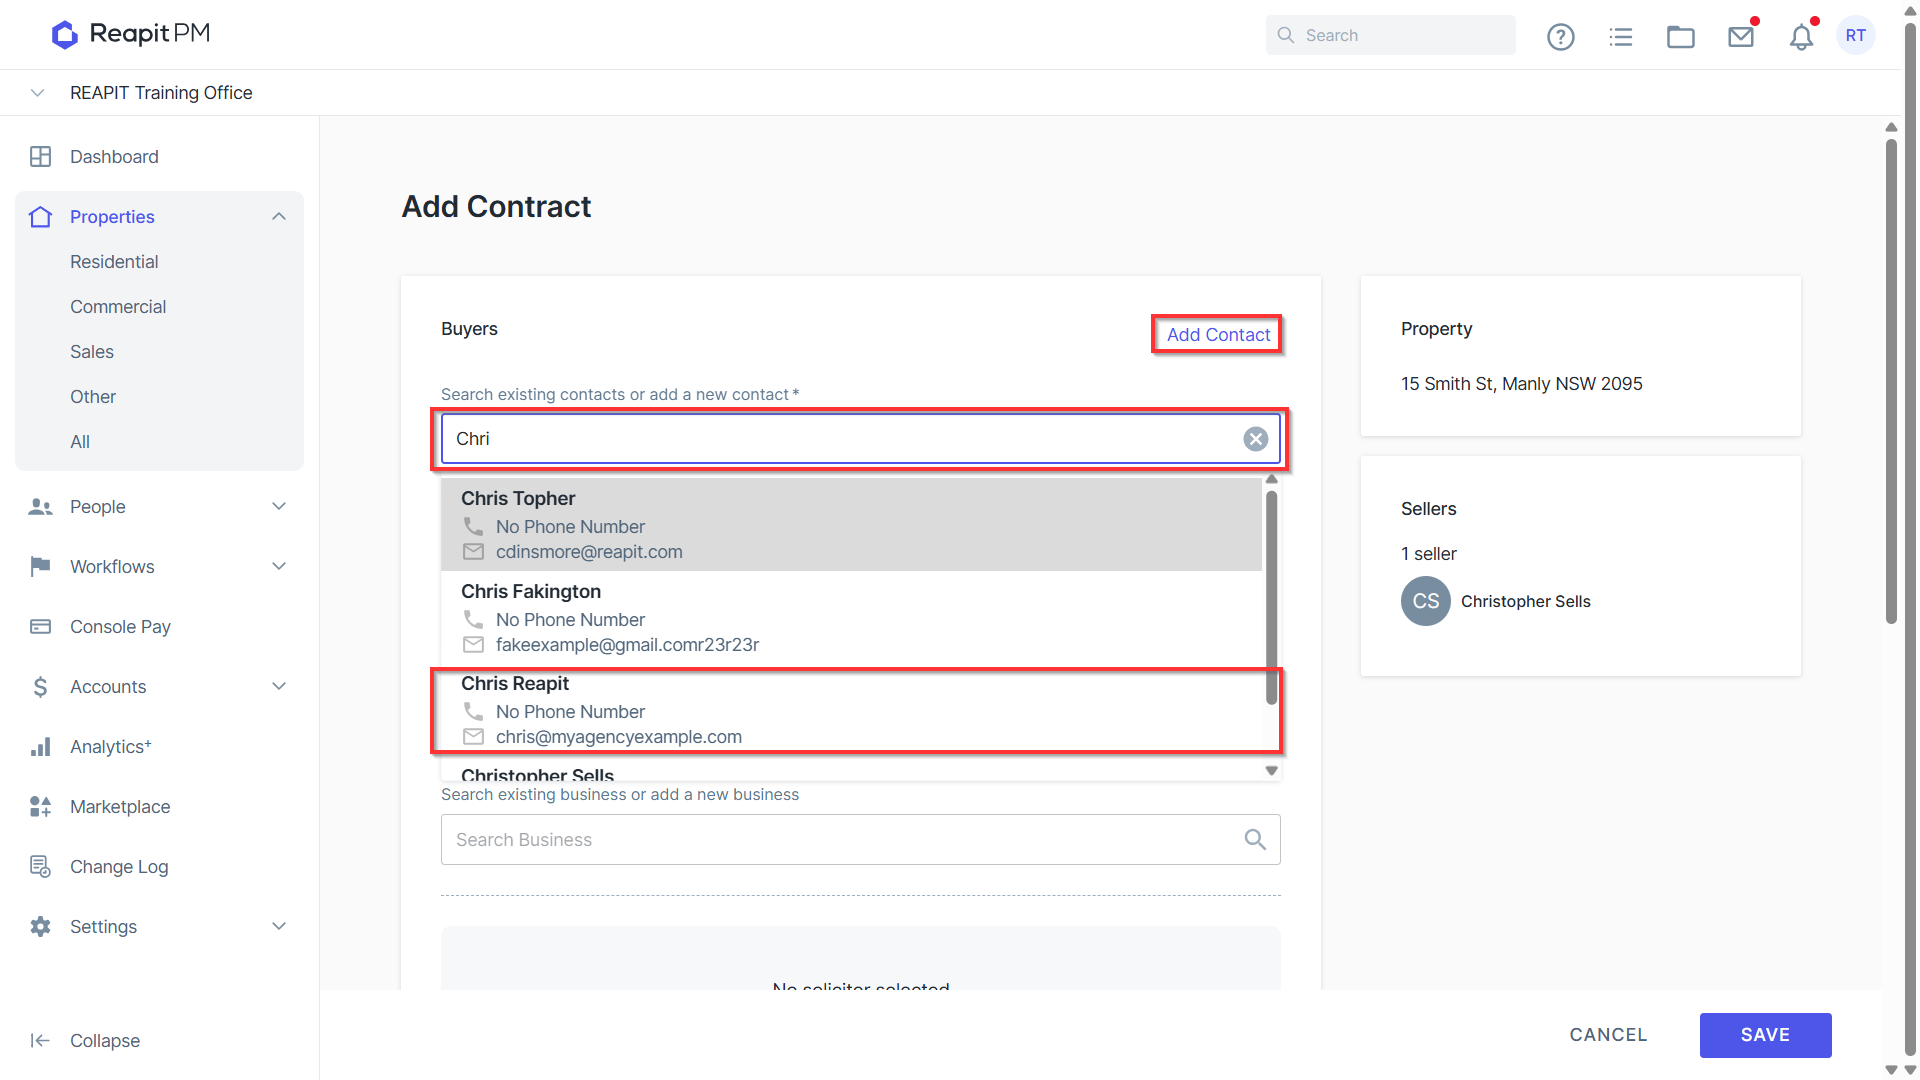
- In the Buyers search select Add Contact > Select if this is an Individual or Business > Fill in the Name > Phone Type > Email address and Save.
You can add additional email addresses or contact numbers if required. You will also have the option to add this information later through the Contact card directly.
If the Buyer already exists as a Contact in the system, you can use Search existing to locate and select the contact.
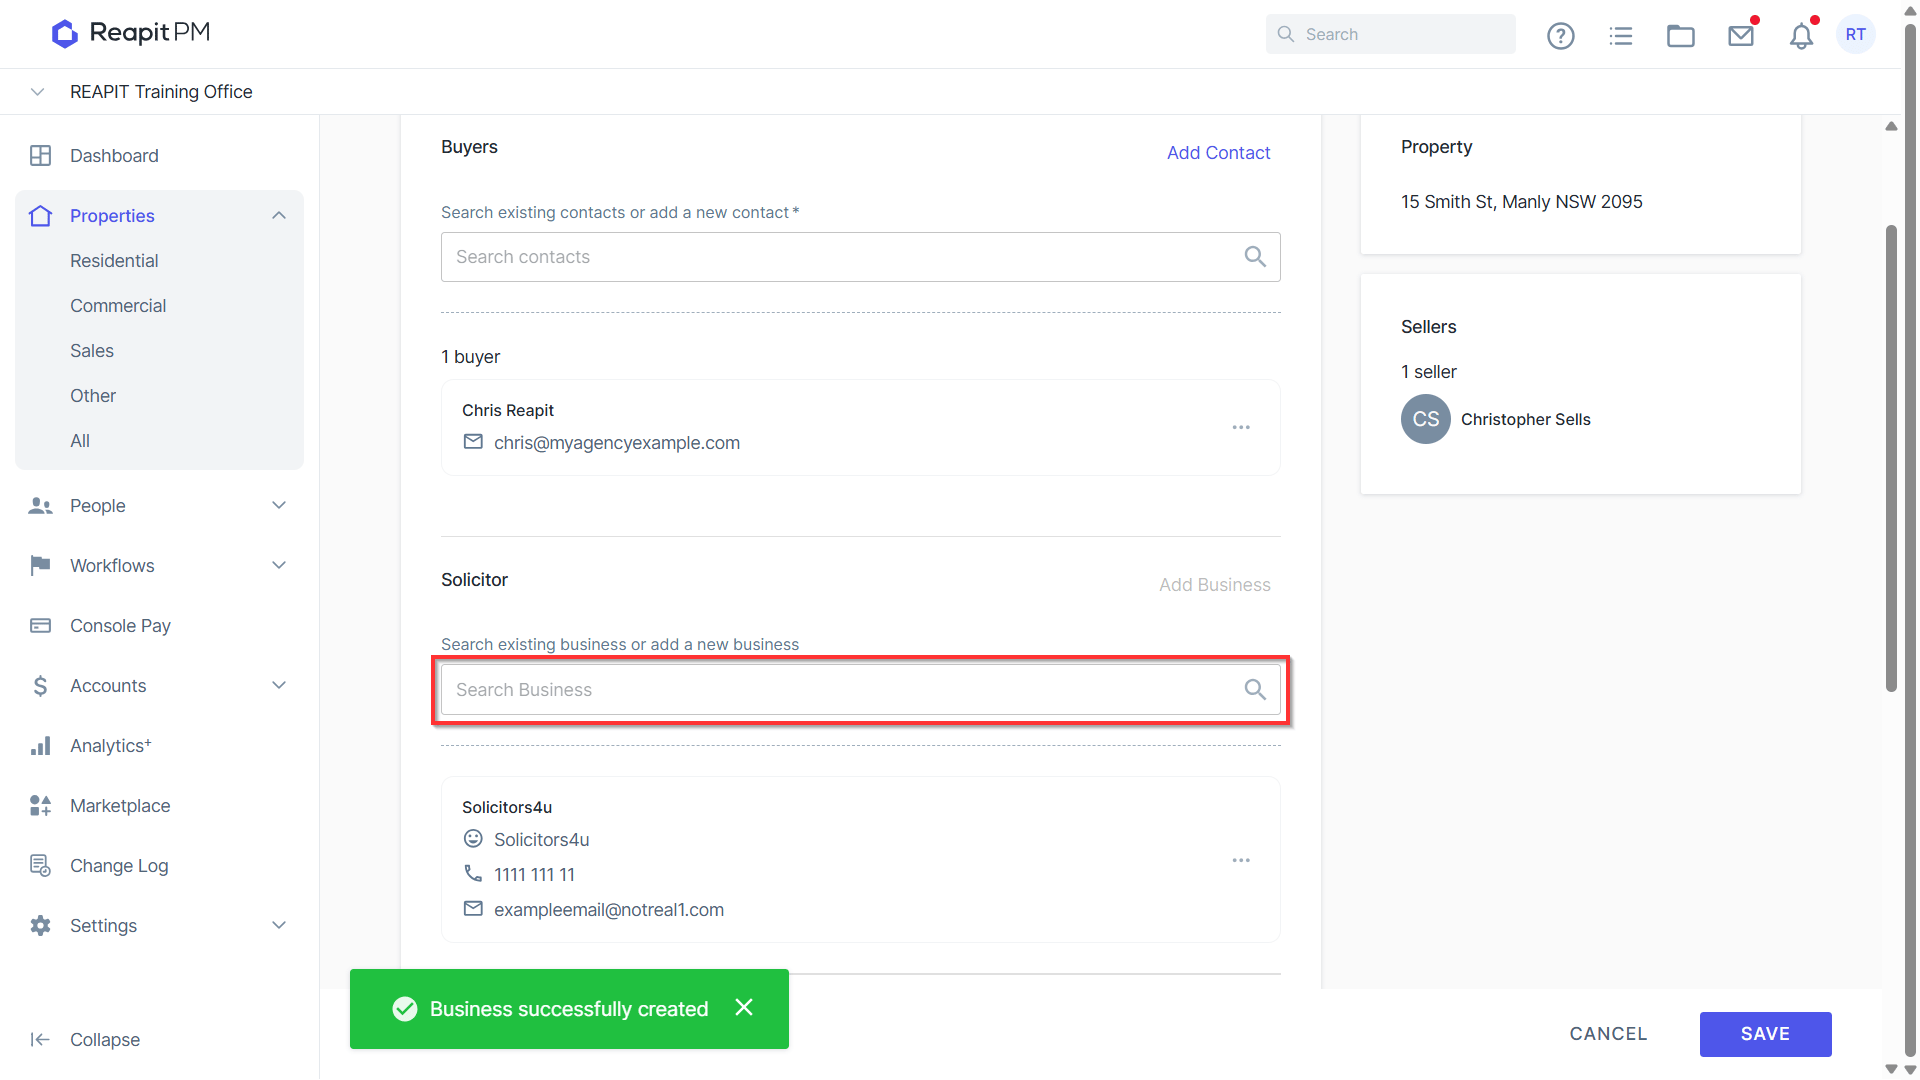
- Select Add Business to create the Solicitor to appear on the Sale Agreement. Fill out the Business Name > First & Last name for the point of contact for the business > Contact details and save.
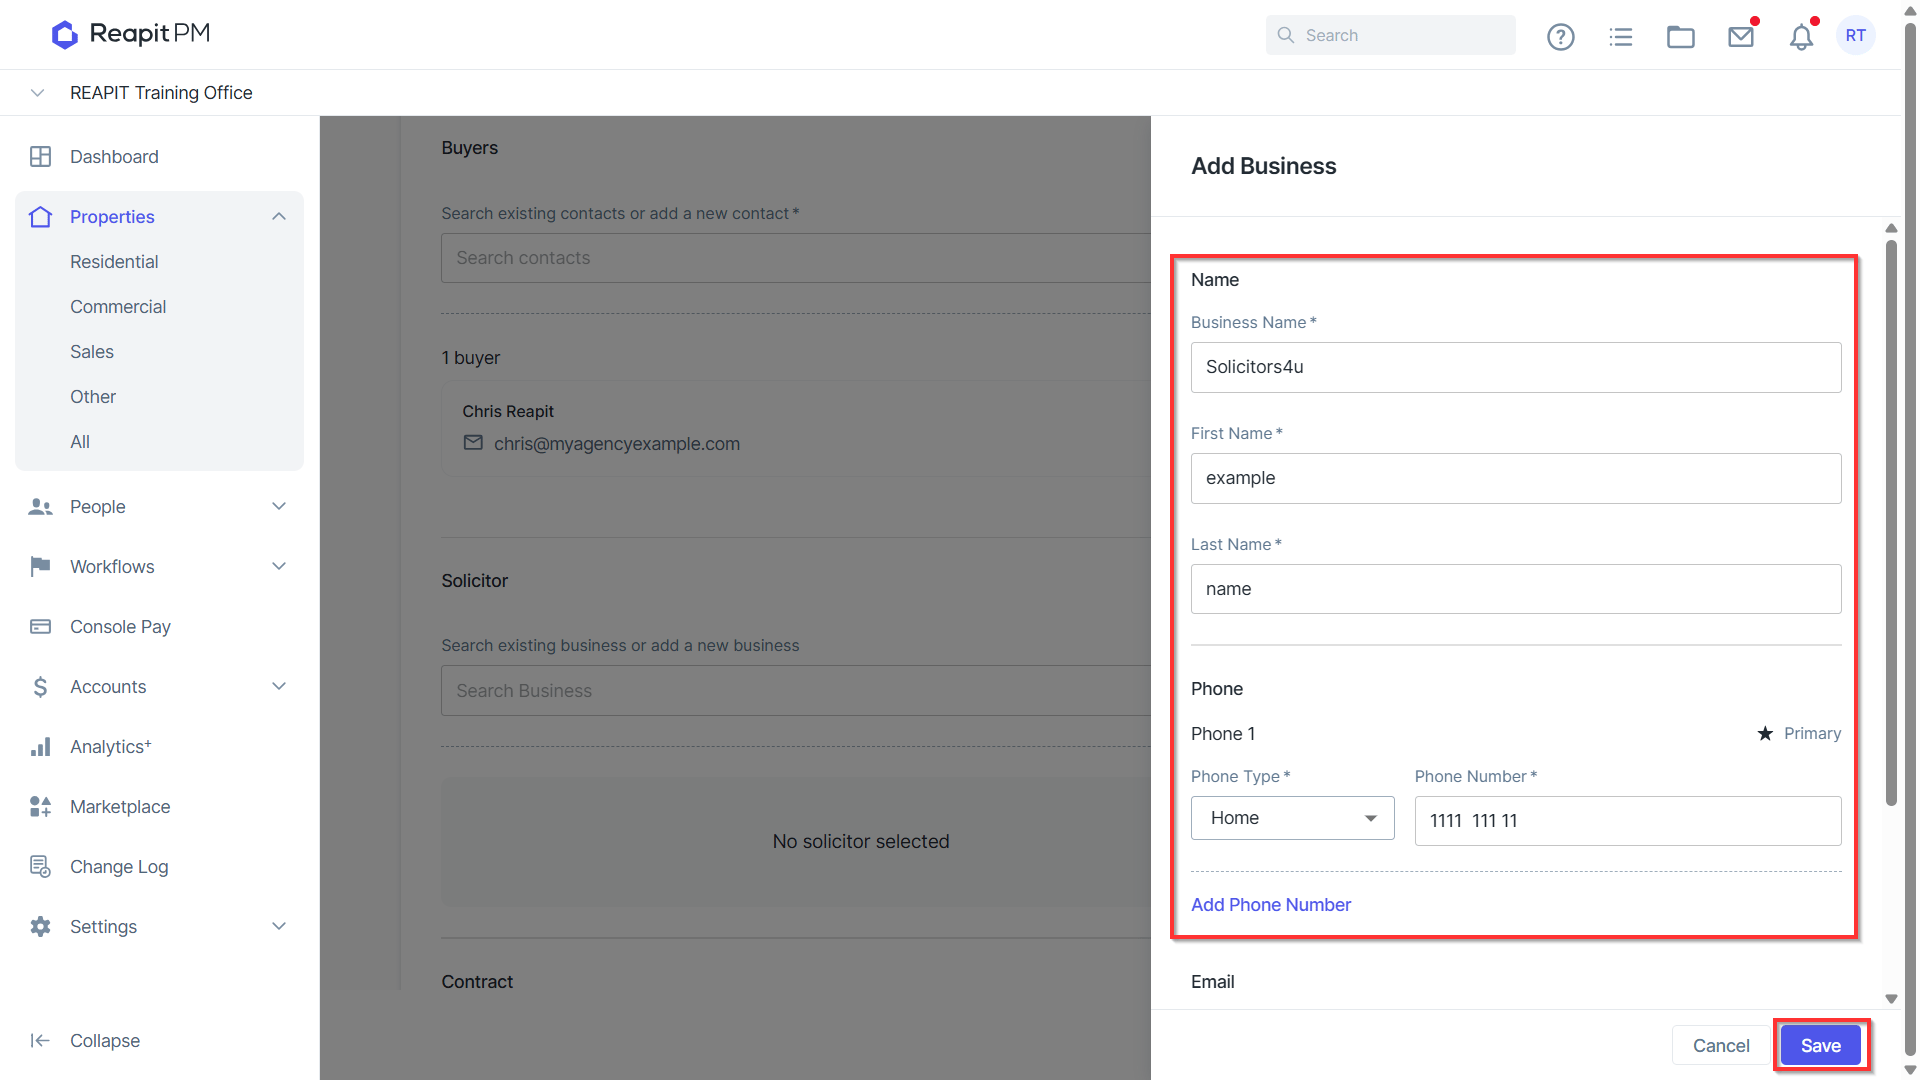
If the Solicitor exists already as a contact in the system, search for the business and attach to the Contract.
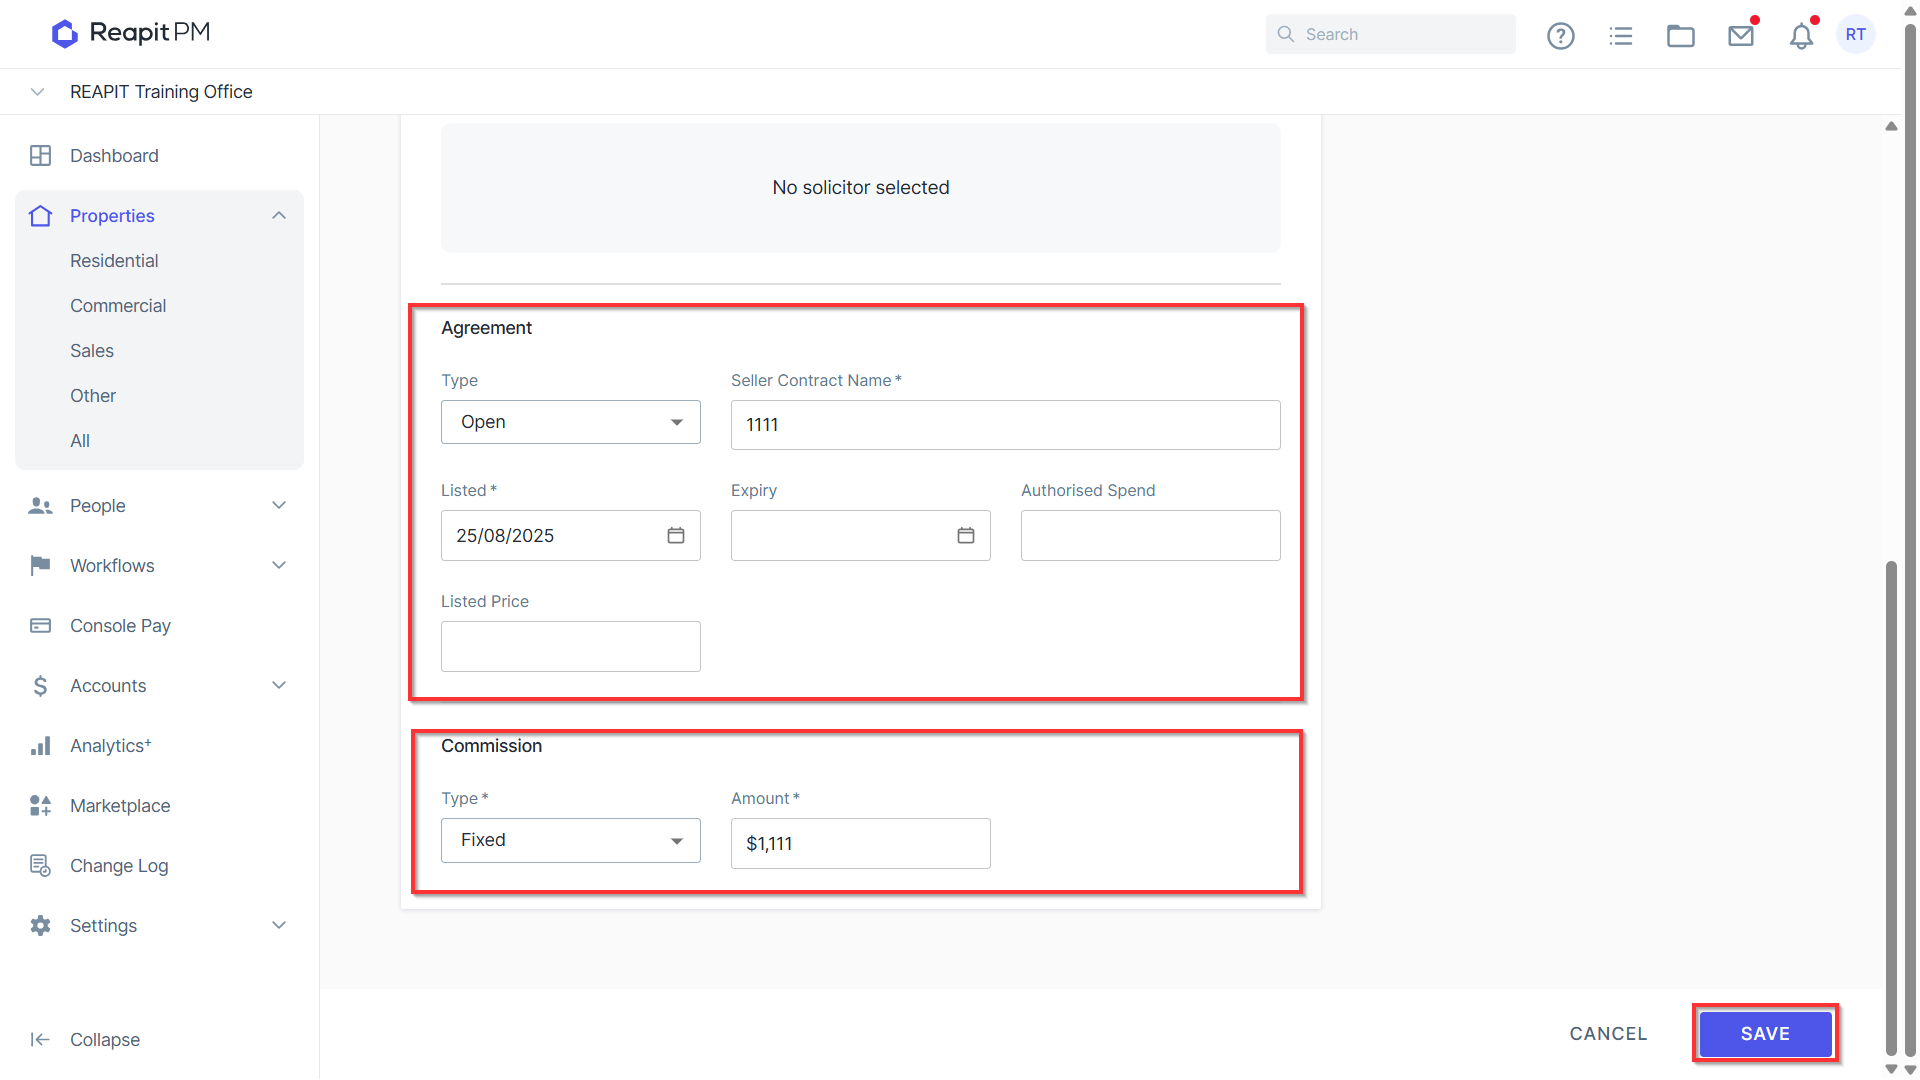
- Complete the Contract details. Buyer Contract Name > Contract Date > Unconditional Date > Settlement Date > Purchase Price are all required Fields. Fill in the deposit information and press Save.
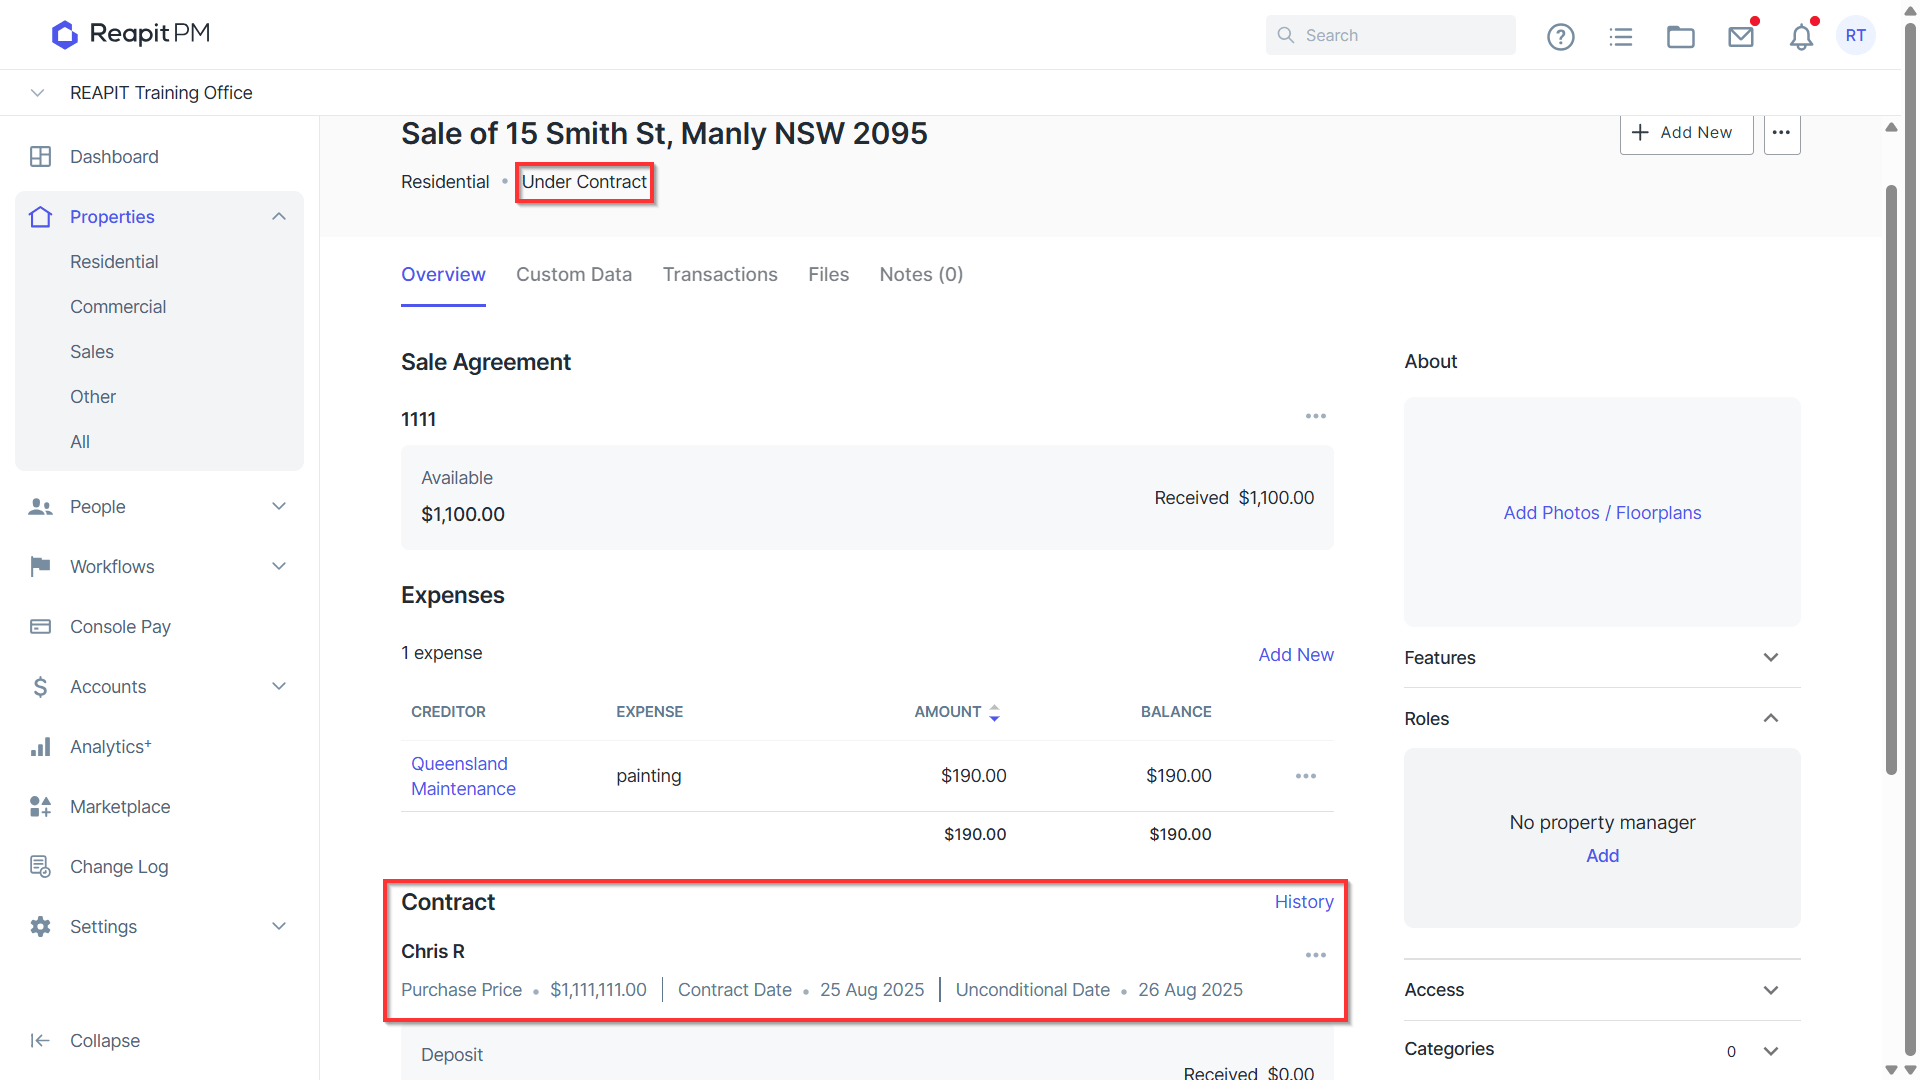
- The Buyers information will now appear under the Contract on the Overview of the Sale file. The status of the Sale file will also update from Listed to Under Contract.
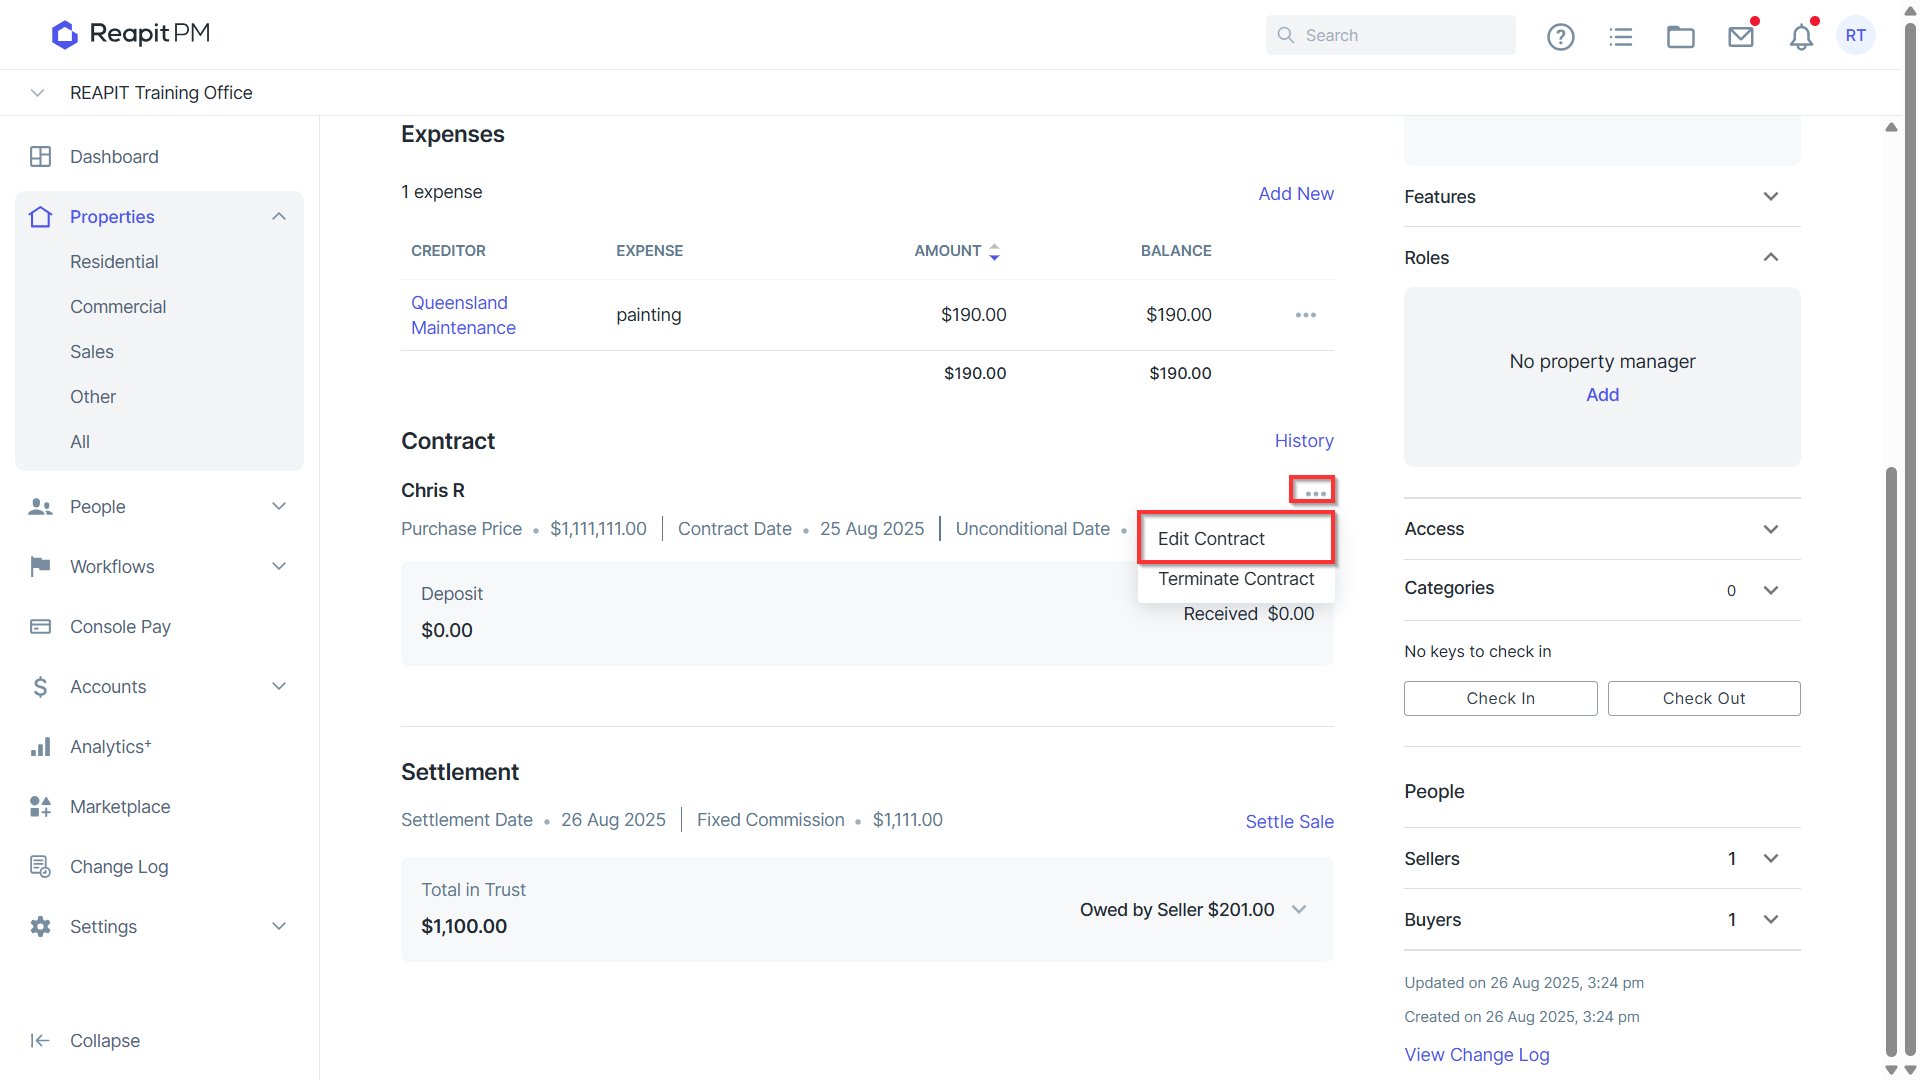
- If any editing is required for the Contract’s information you can select the ellipses tool (3 dots) to the right of the Contract’s name > Edit Contract.
Receipting Buyers Deposit to the Sale File
Once the funds have come in to trust from the Contract/Buyer, we can use the steps below to receipt to the Sale file
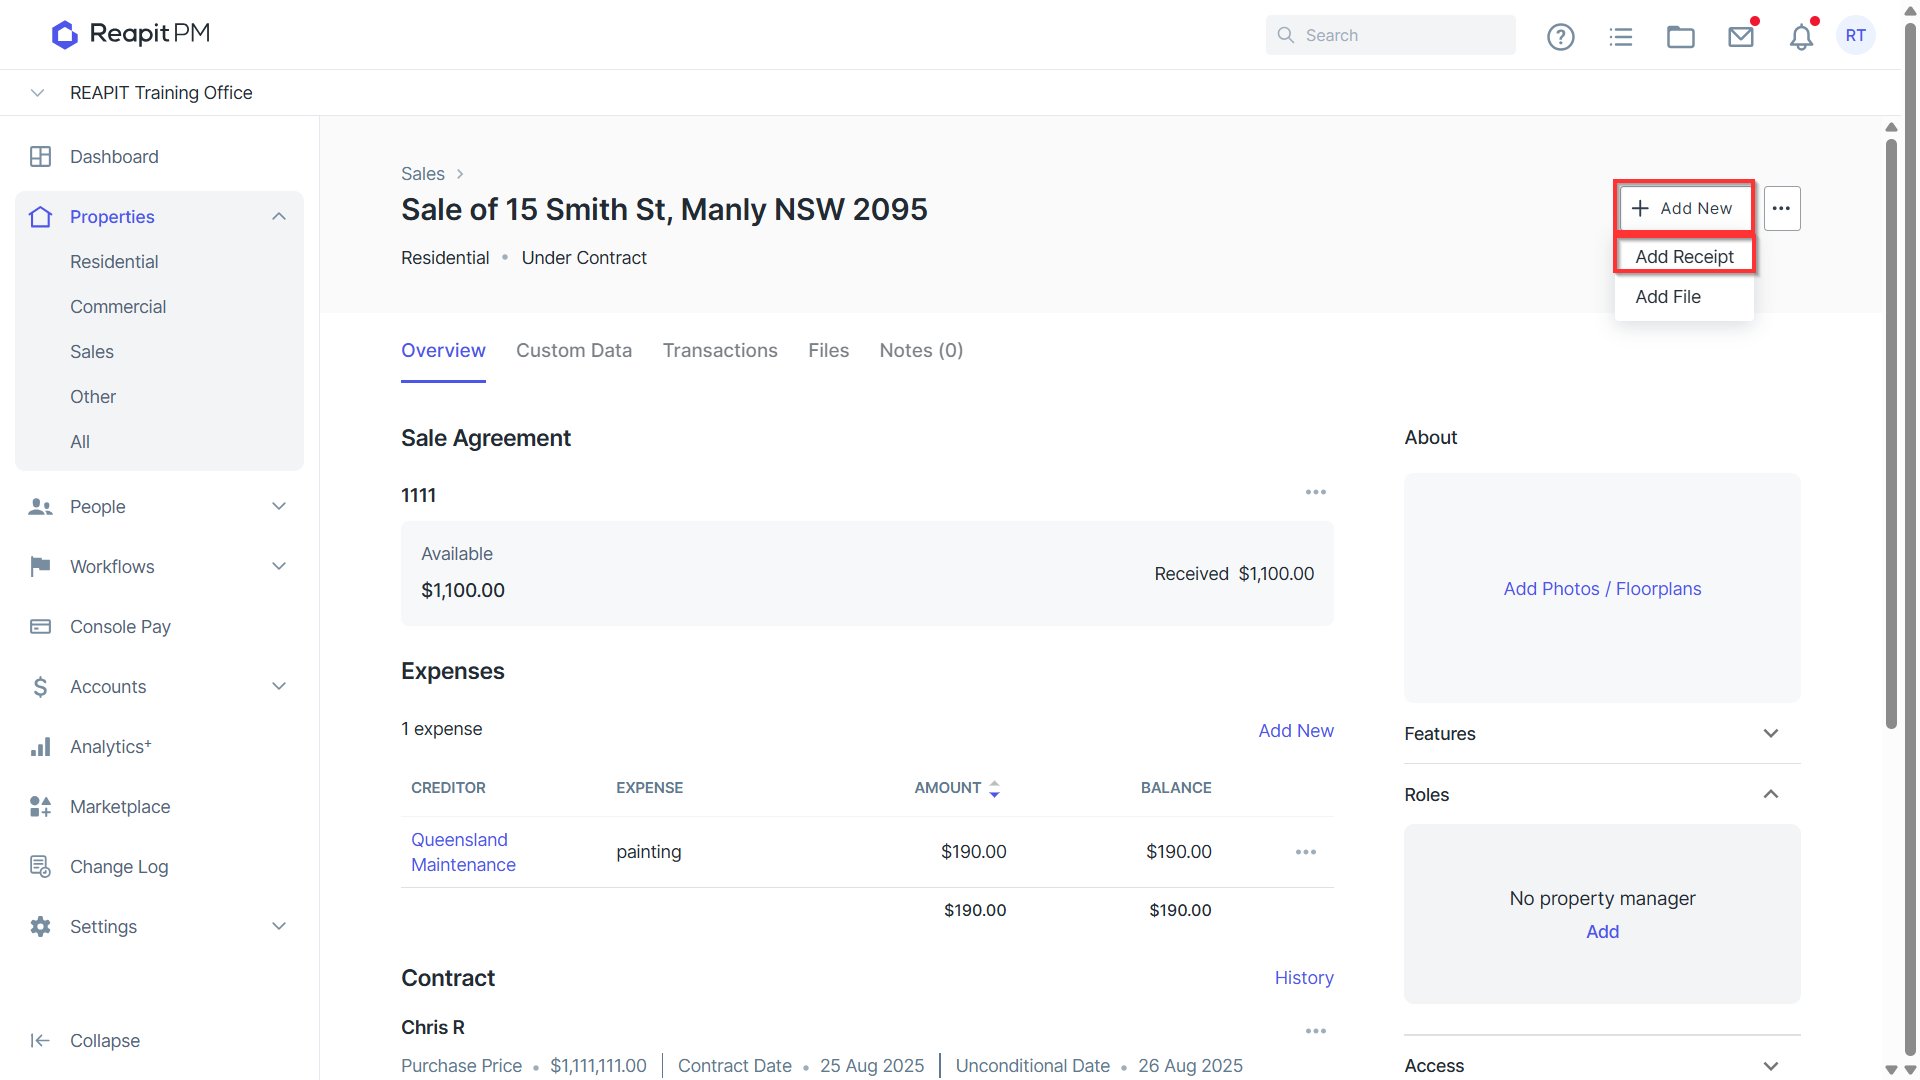
- Select Add New > Add Receipt.
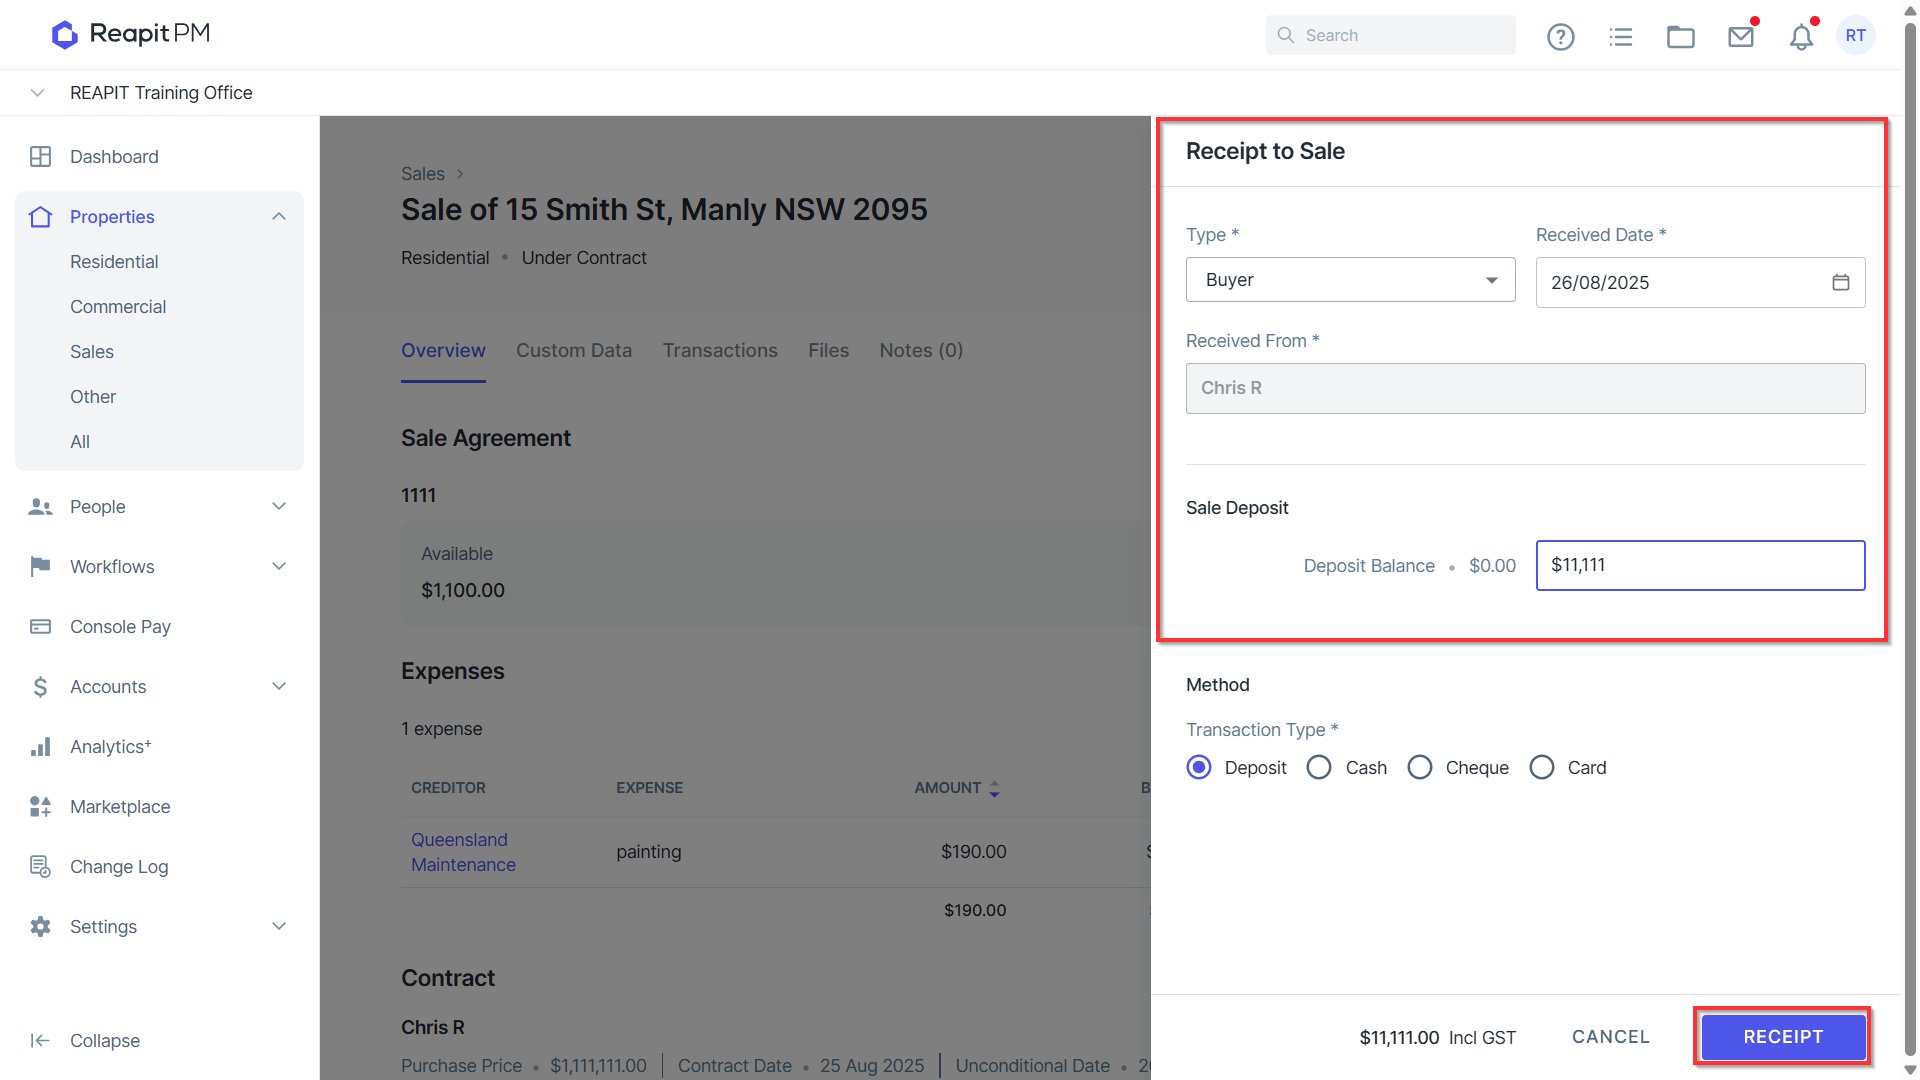
- Select Buyer from the Type drop down menu > Enter the Received date > The amount received to receipt > The method of the balance received > Receipt.
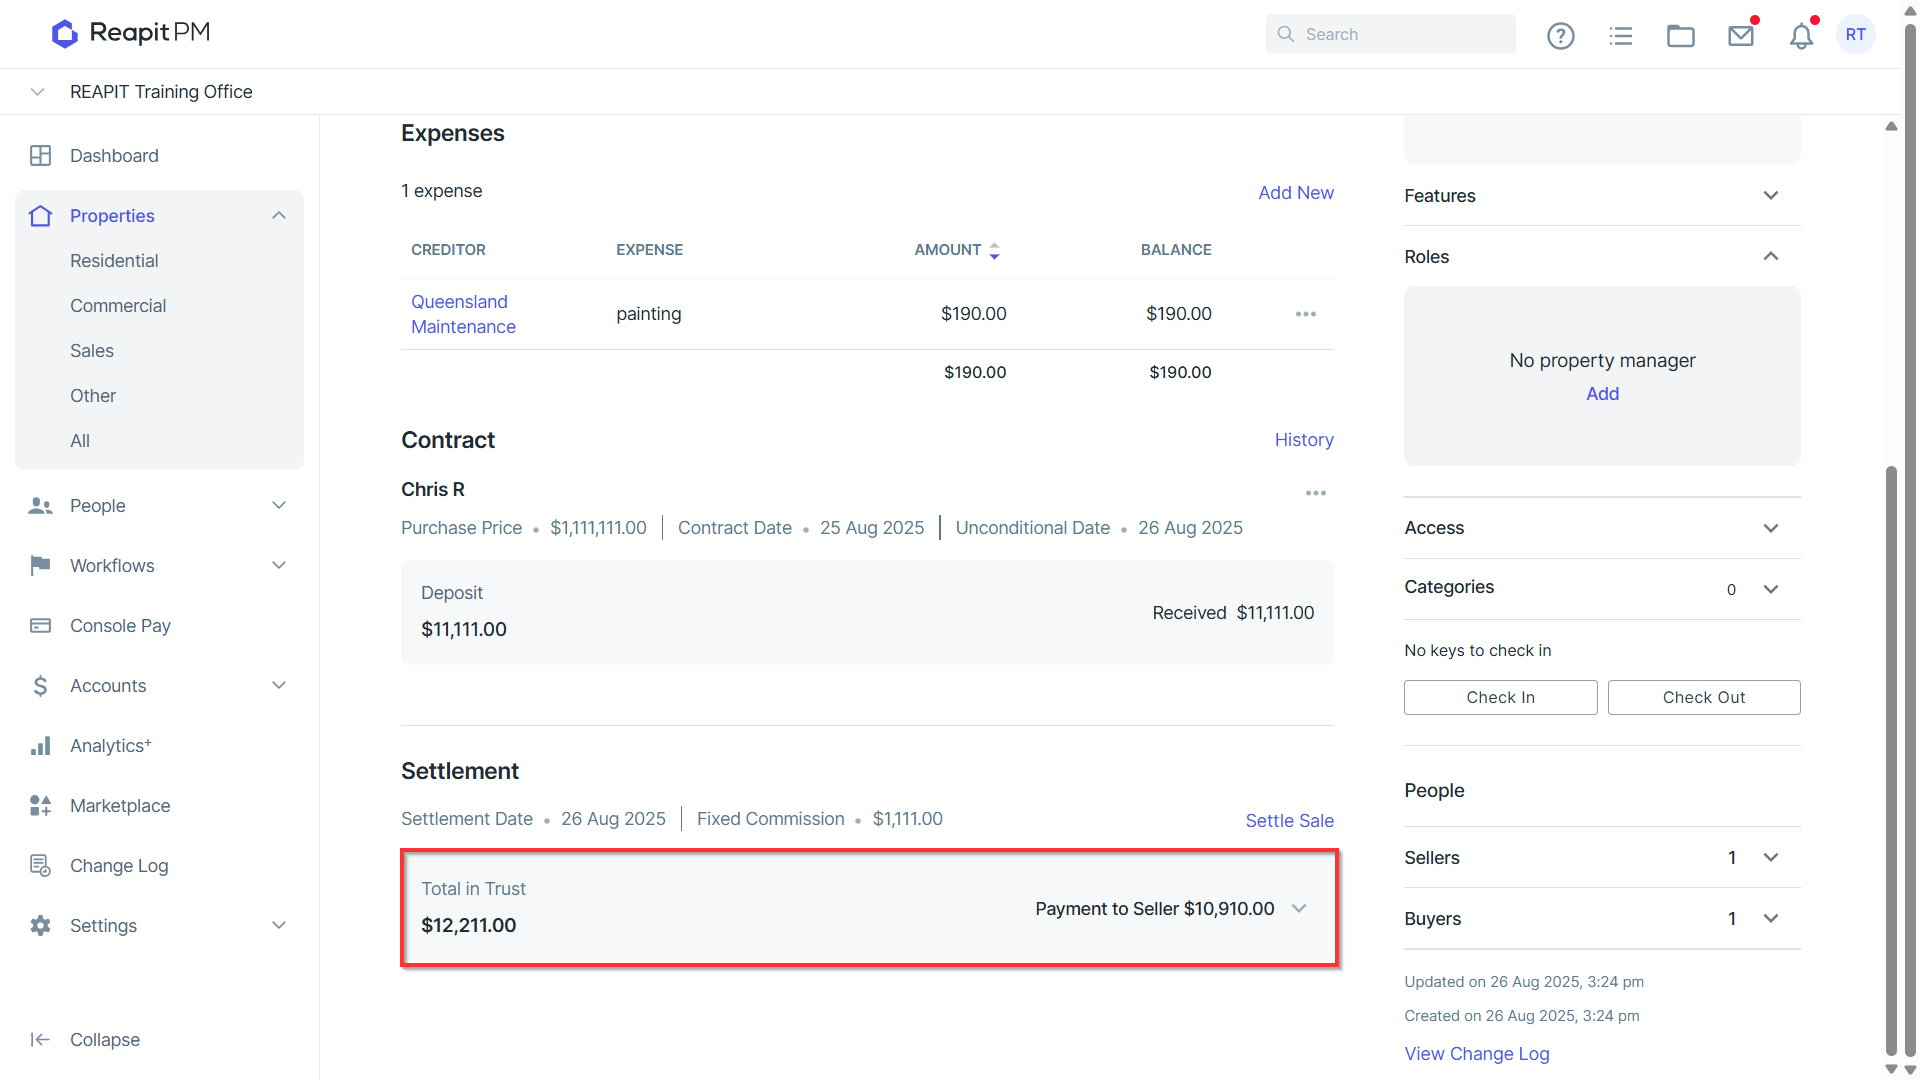
- A copy of the receipt will be generated for your records and the balance received will now appear under the Contract/Buyer information on the overview of the Sale.
Terminating Sales Contract
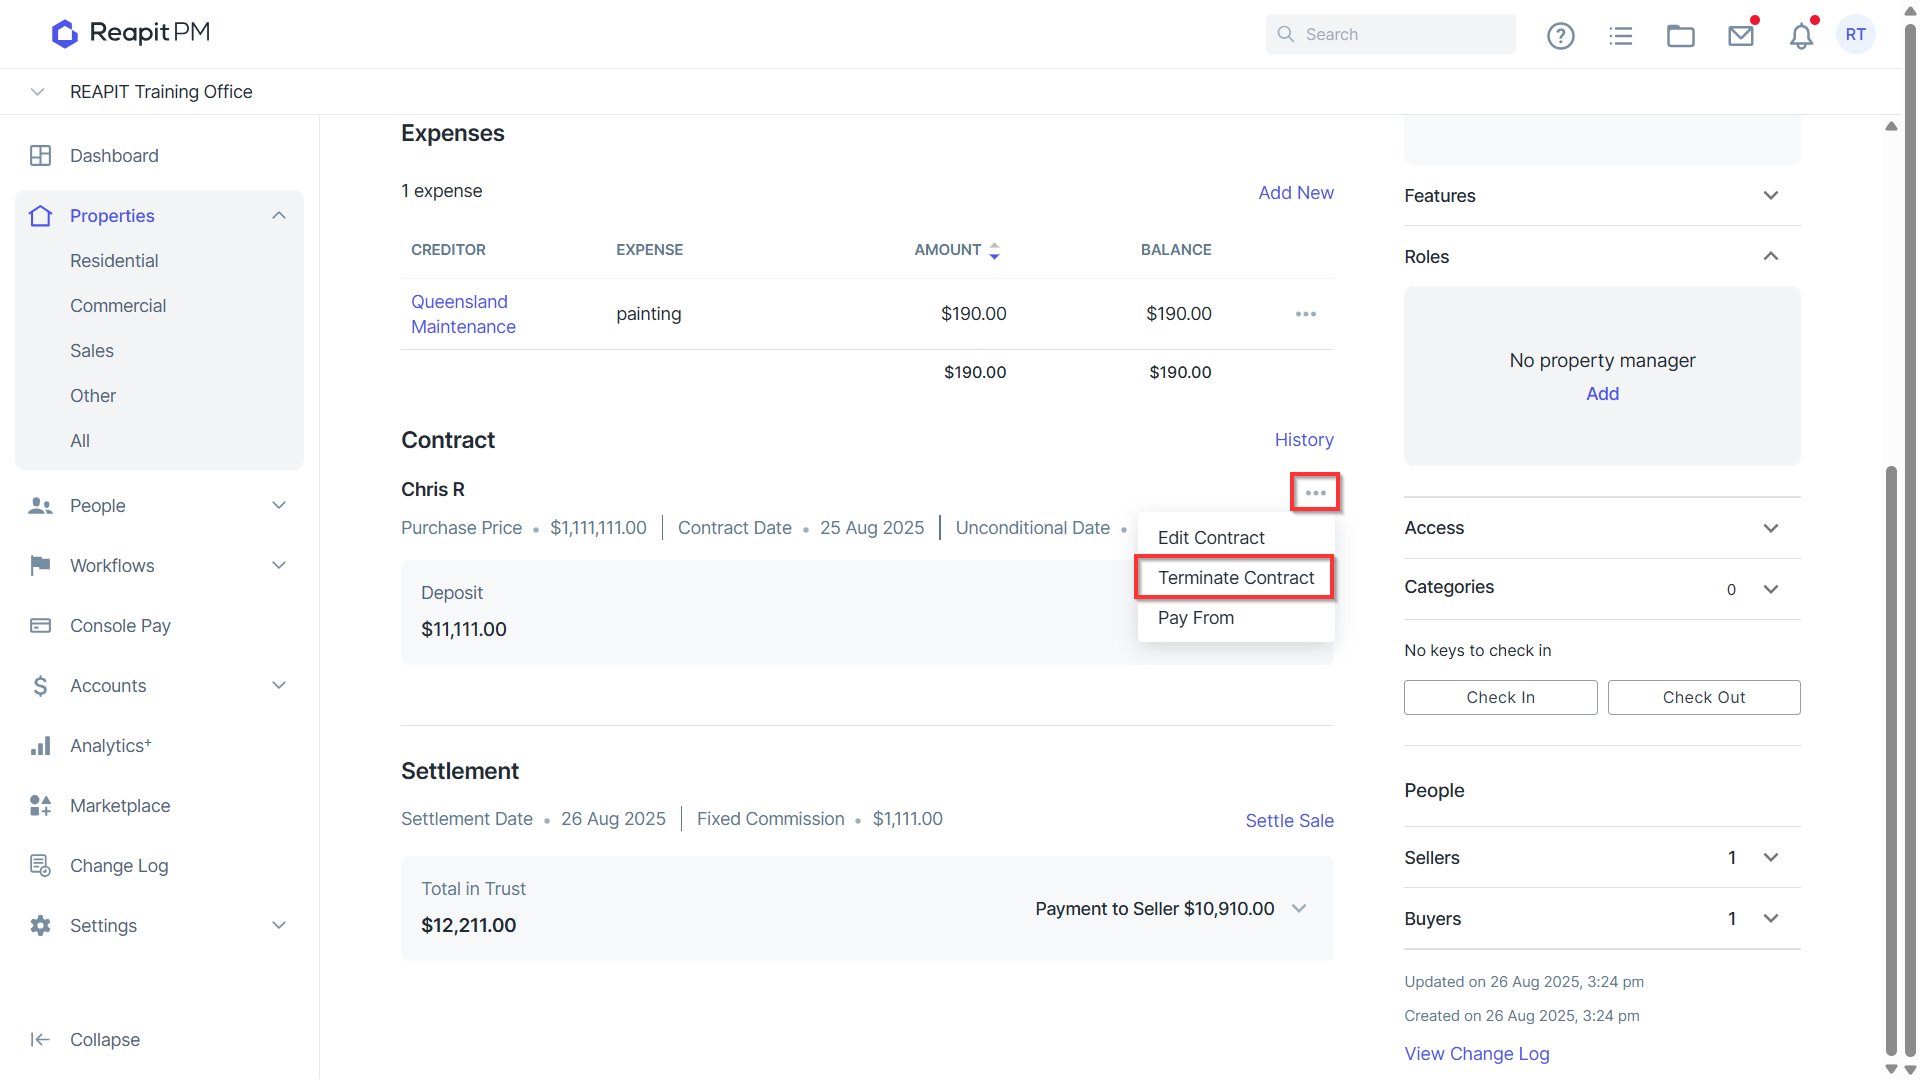
- Click the 3 dots and select Terminate Contract.
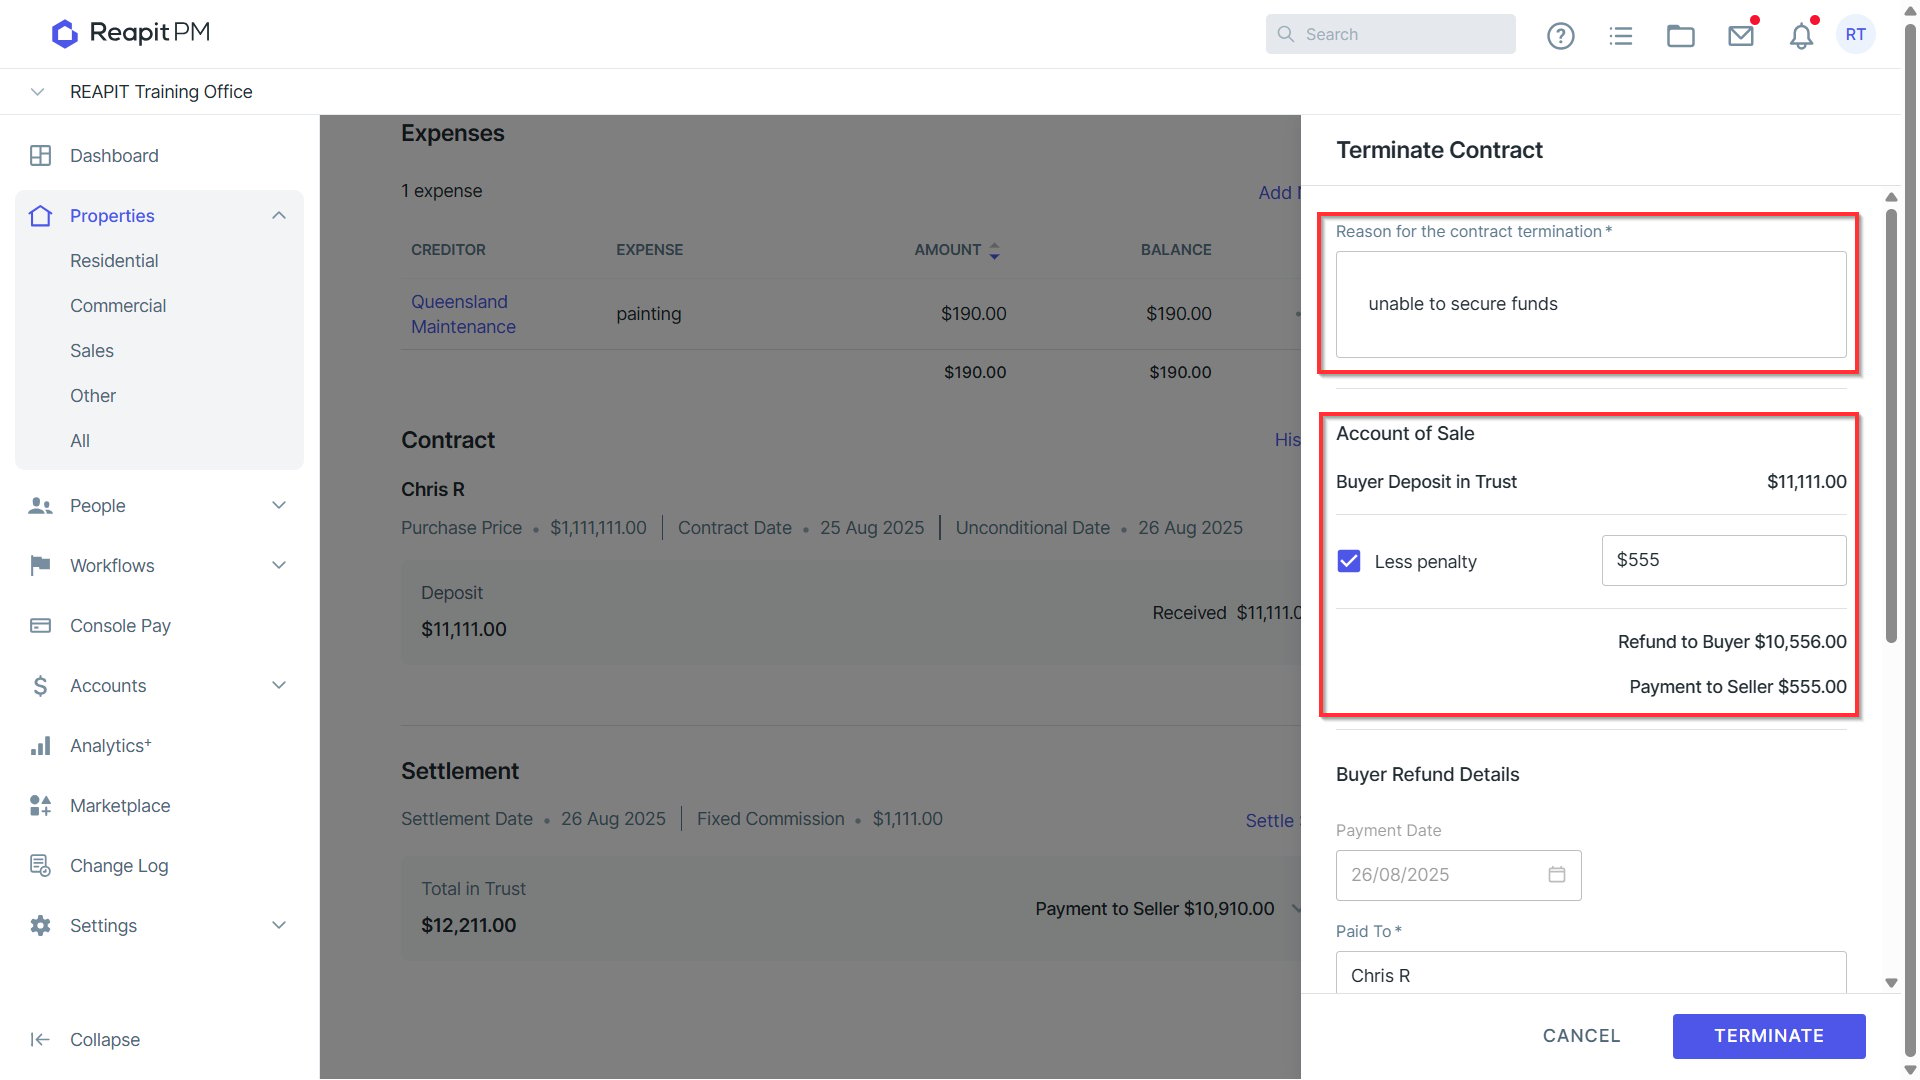
- Type in the reason for Contract termination > Select Less penalty if the Seller will receive an amount of the Contract/Buyers deposit upon Termination. The balance summary for Buyer Refund and Seller Payment will appear below.
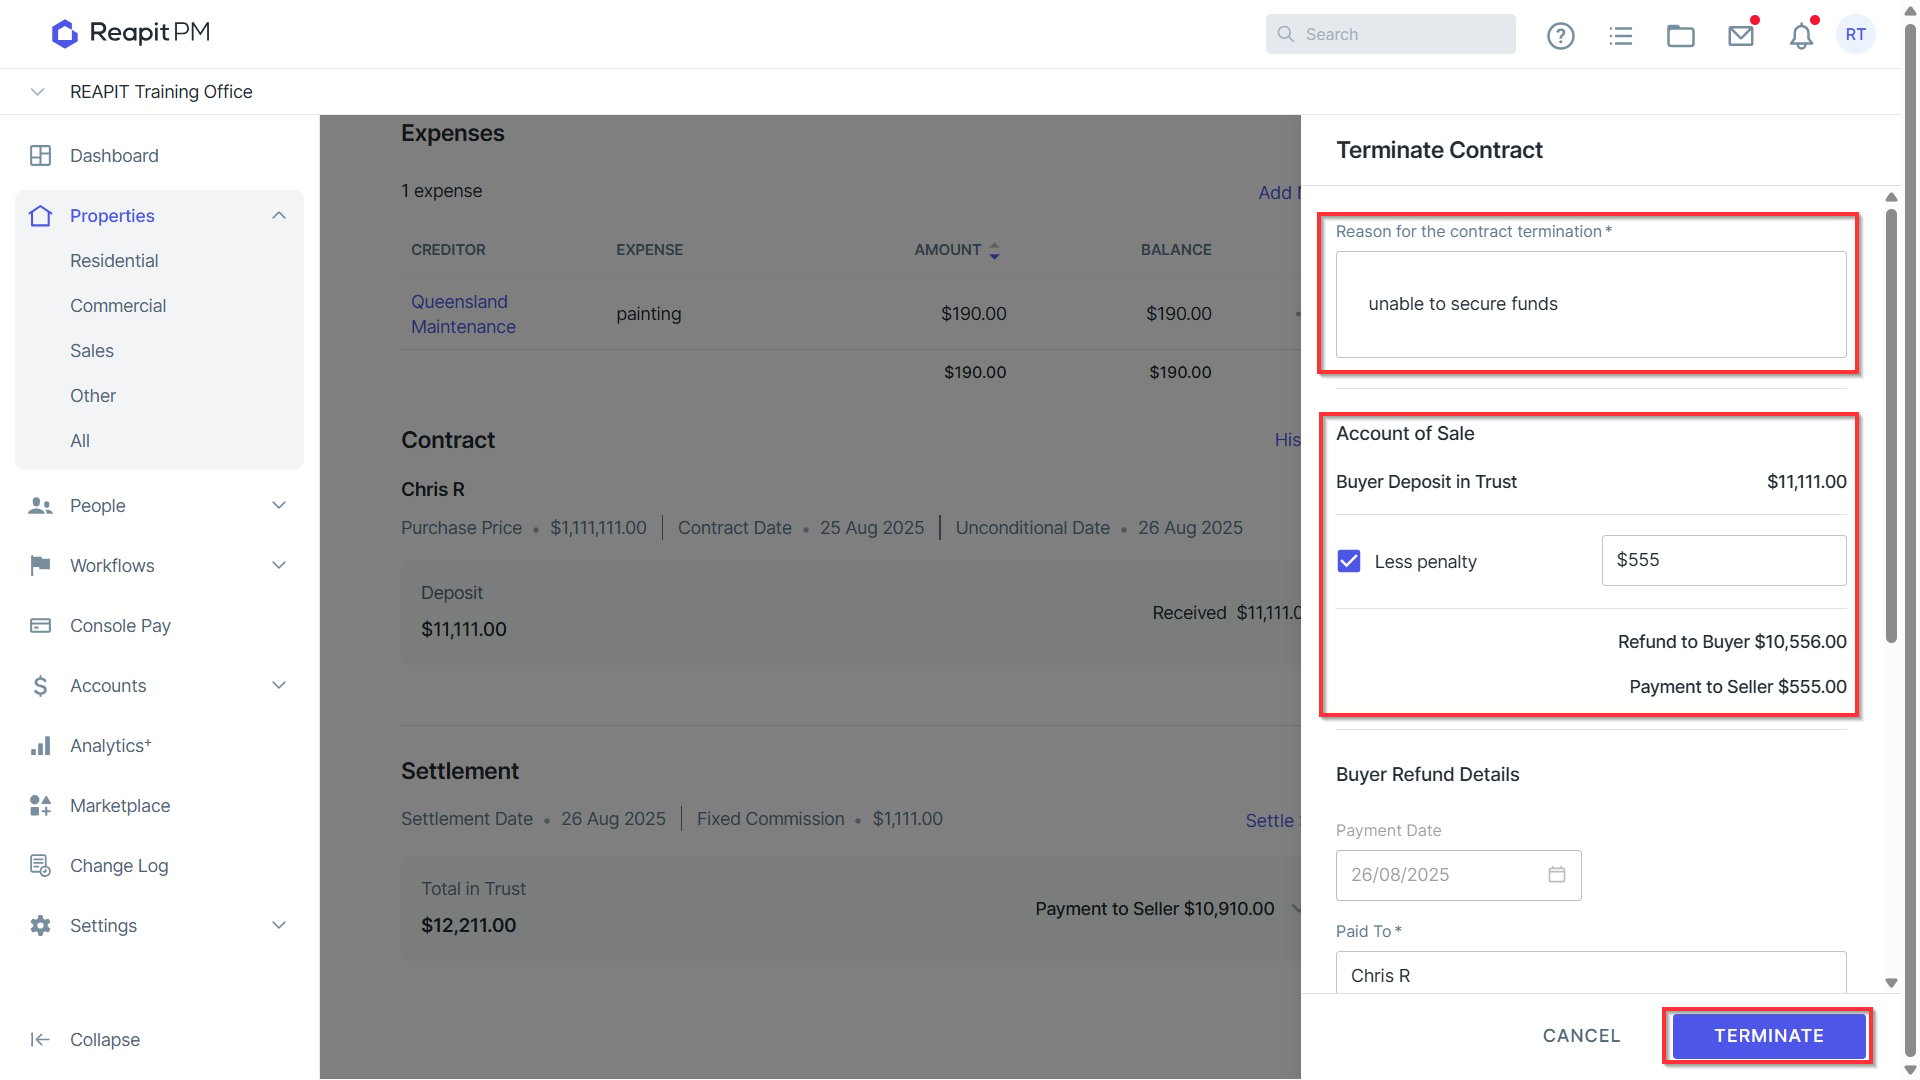
- Fill in the Buyer details for the remaining balance of the refund > Select the method of the Seller payment for the Penalty > Terminate.
Confirmation of the contract being terminated will appear and a copy of the zip folder containing the payment file will be provided for payment out of the bank.
Note: Once a contract has been terminated, the sale file will return to Listed status, and you will have the option to Add Contract again.
Paying from Sale Contract/Seller
In some circumstances, you may need to pay from the Sale. This can include paying out the penalty to the seller, paying out Money remaining in the sales trust and other approved reasons.
- Navigate to the 3 dots to the right of the Seller or Contract and click Pay From.
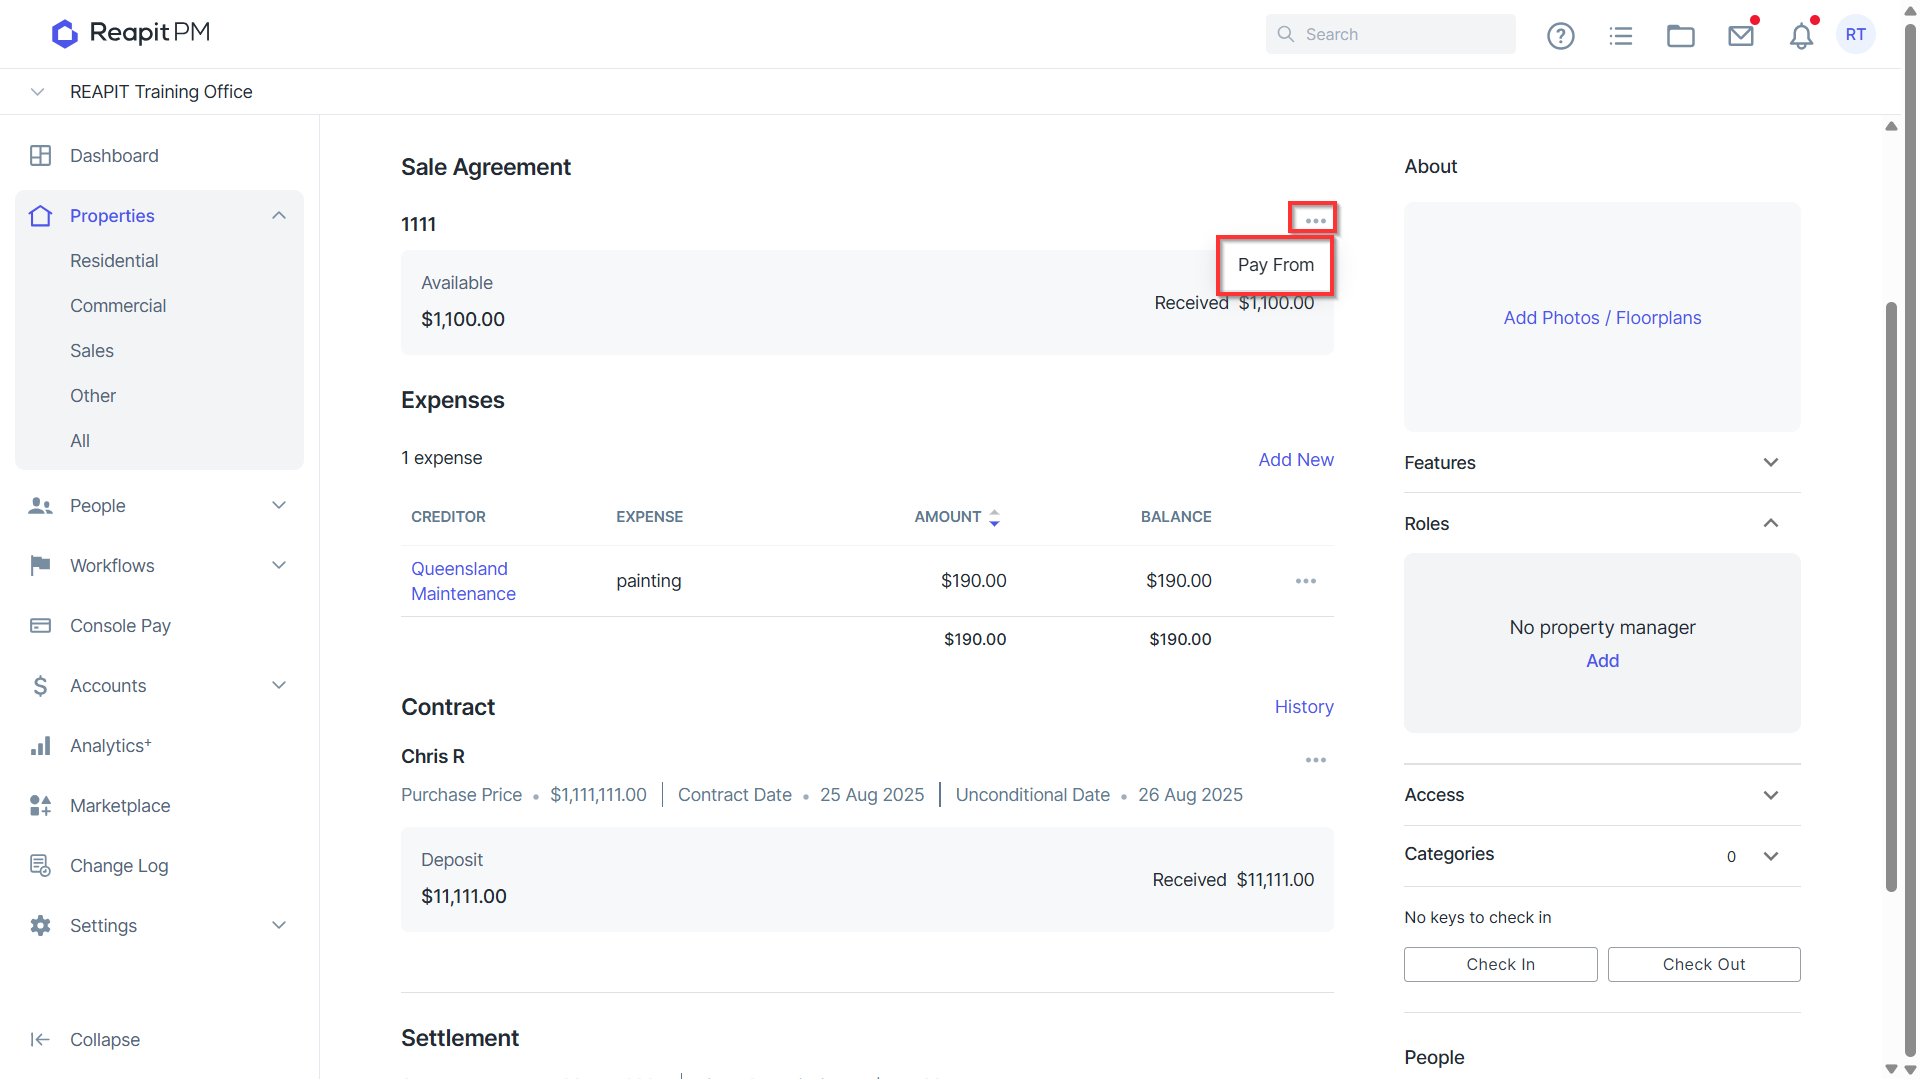
- Select the Type for method of payment > Payment date > Recipients name of the payment and the account details > Description of the payment > Balance to be paid > Pay.
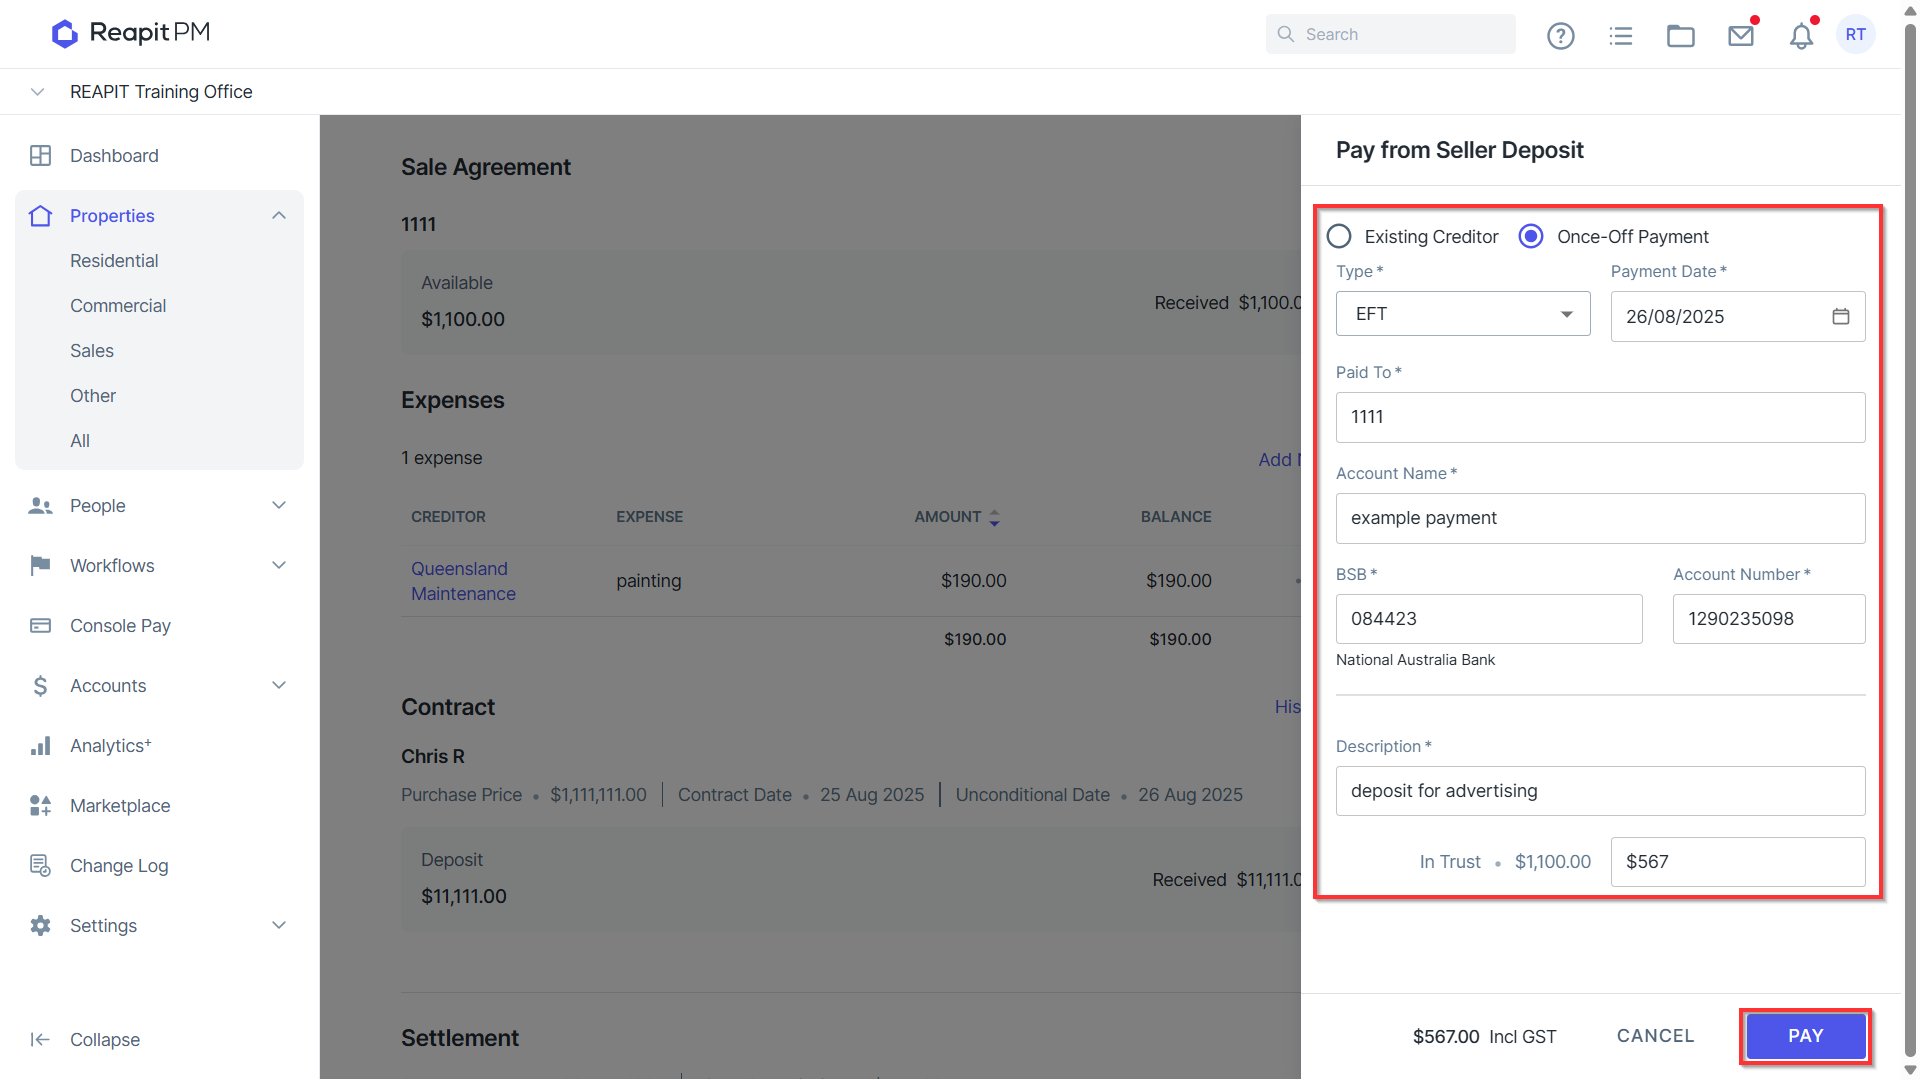
A green confirmation banner will appear to confirm the payment is successful. You will also receive a copy of the zip folder with the payment file and summary.
Preview settlement of Sale
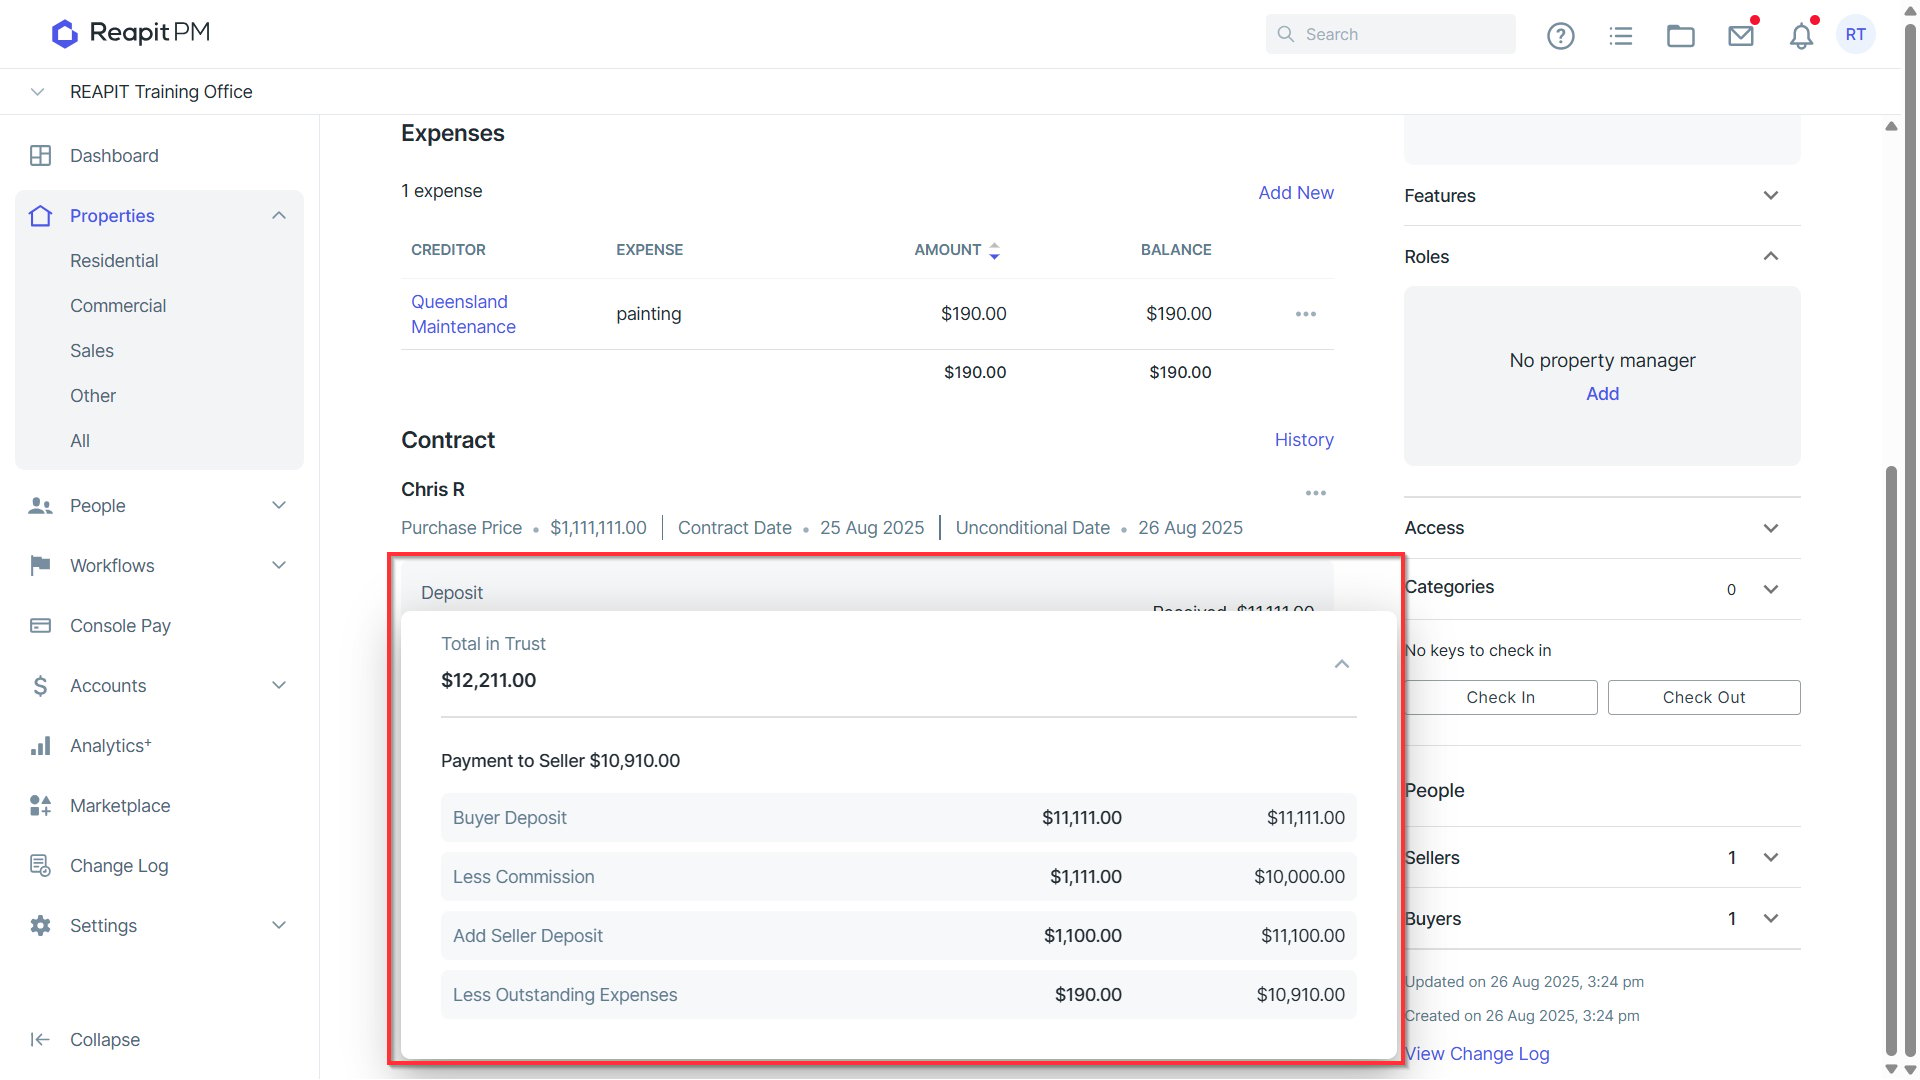
- Under the Settlement section, click on the drop down on the total in trust / payment to seller amounts.
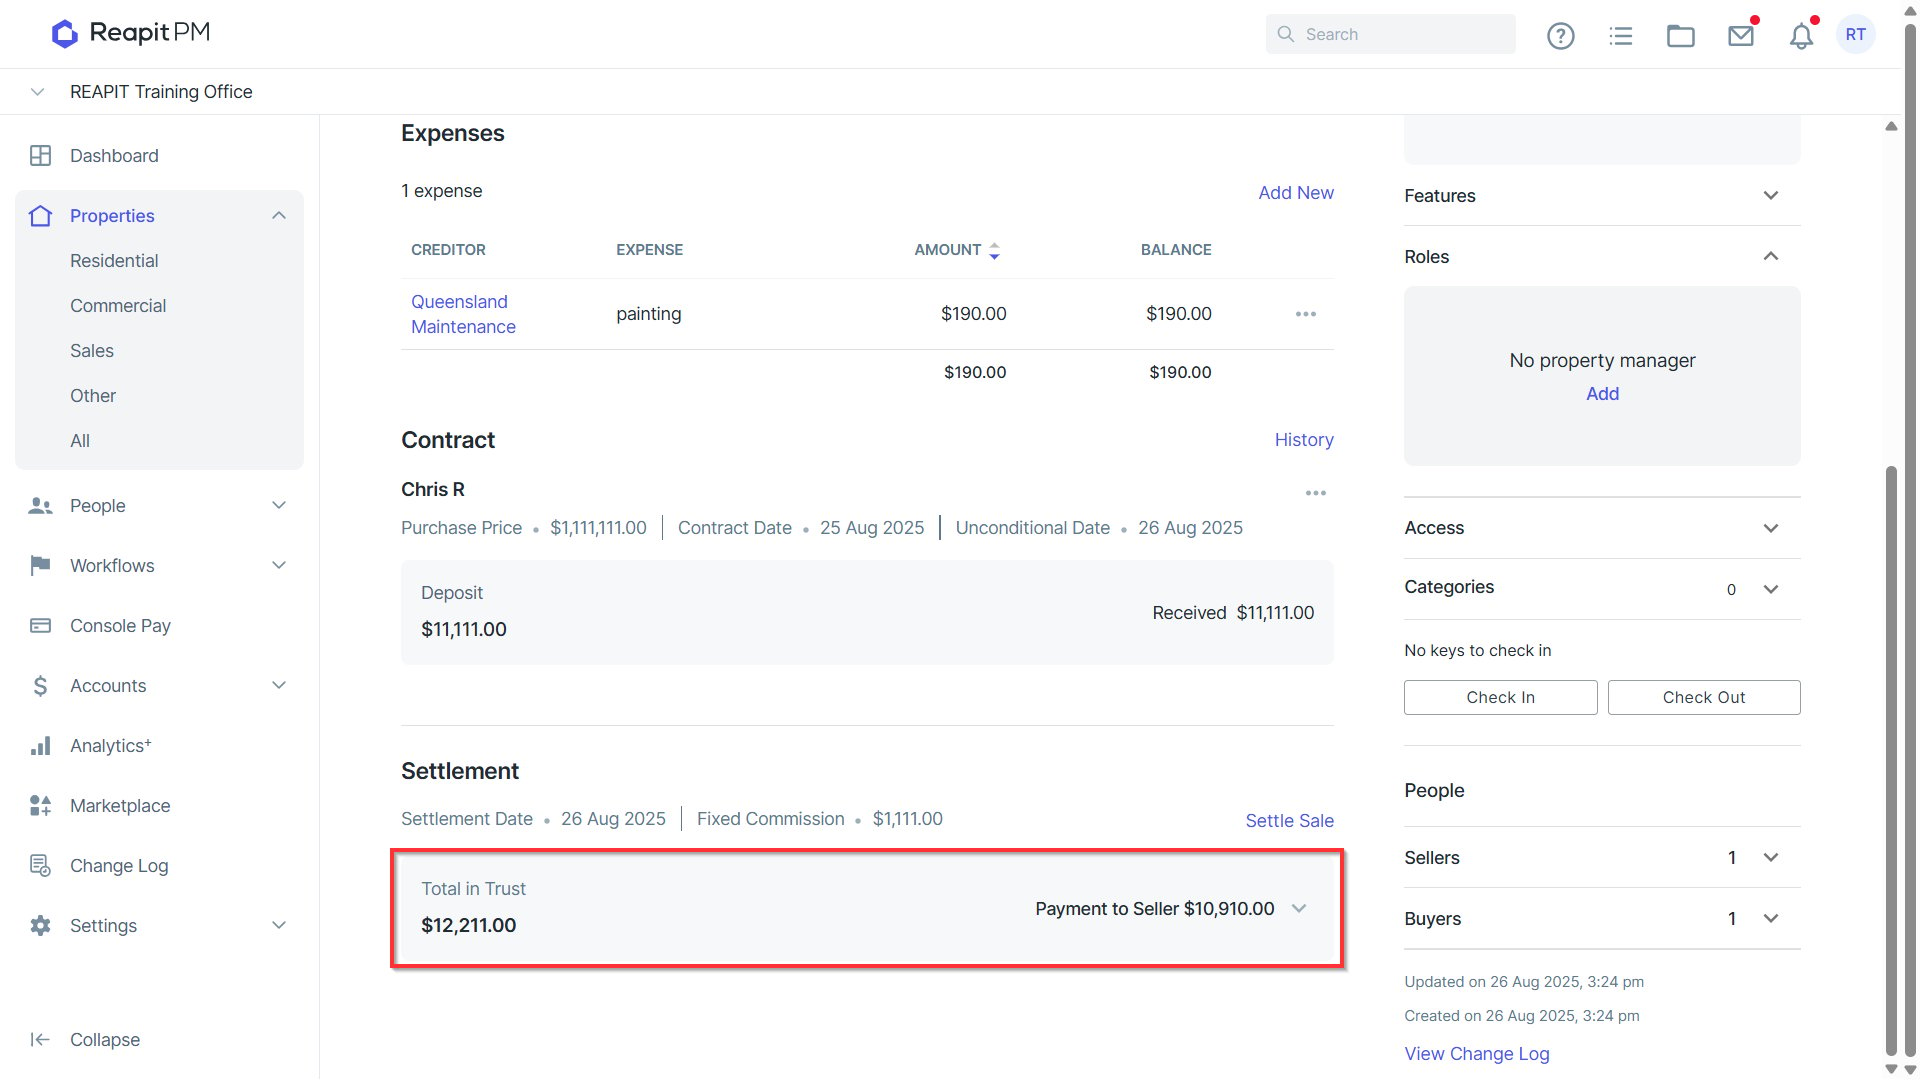
- The settlement summary will open to show the preview including the total in Trust and the Payment to Seller based on the amount Less Commission and Less outstanding expenses.
Settling the Sale File
- Select Settle Sale from the Settlement area of the File.
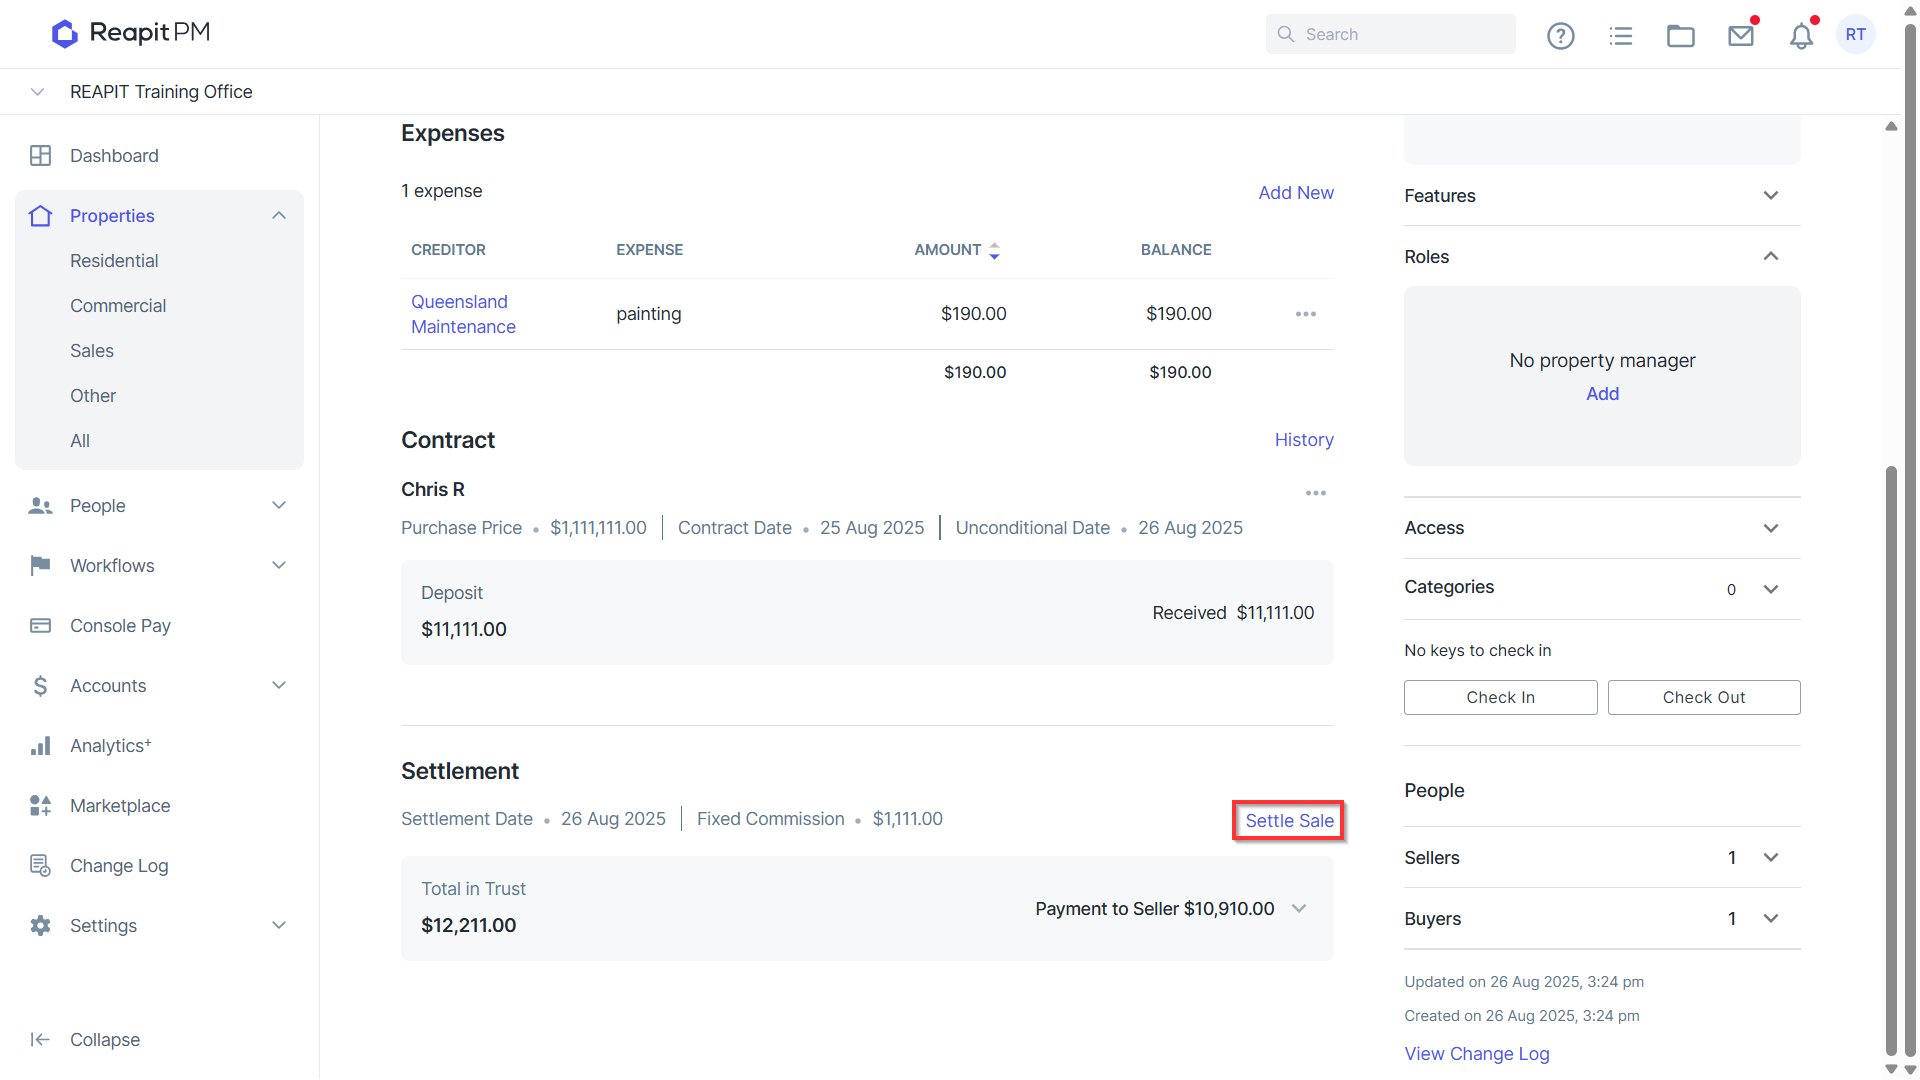
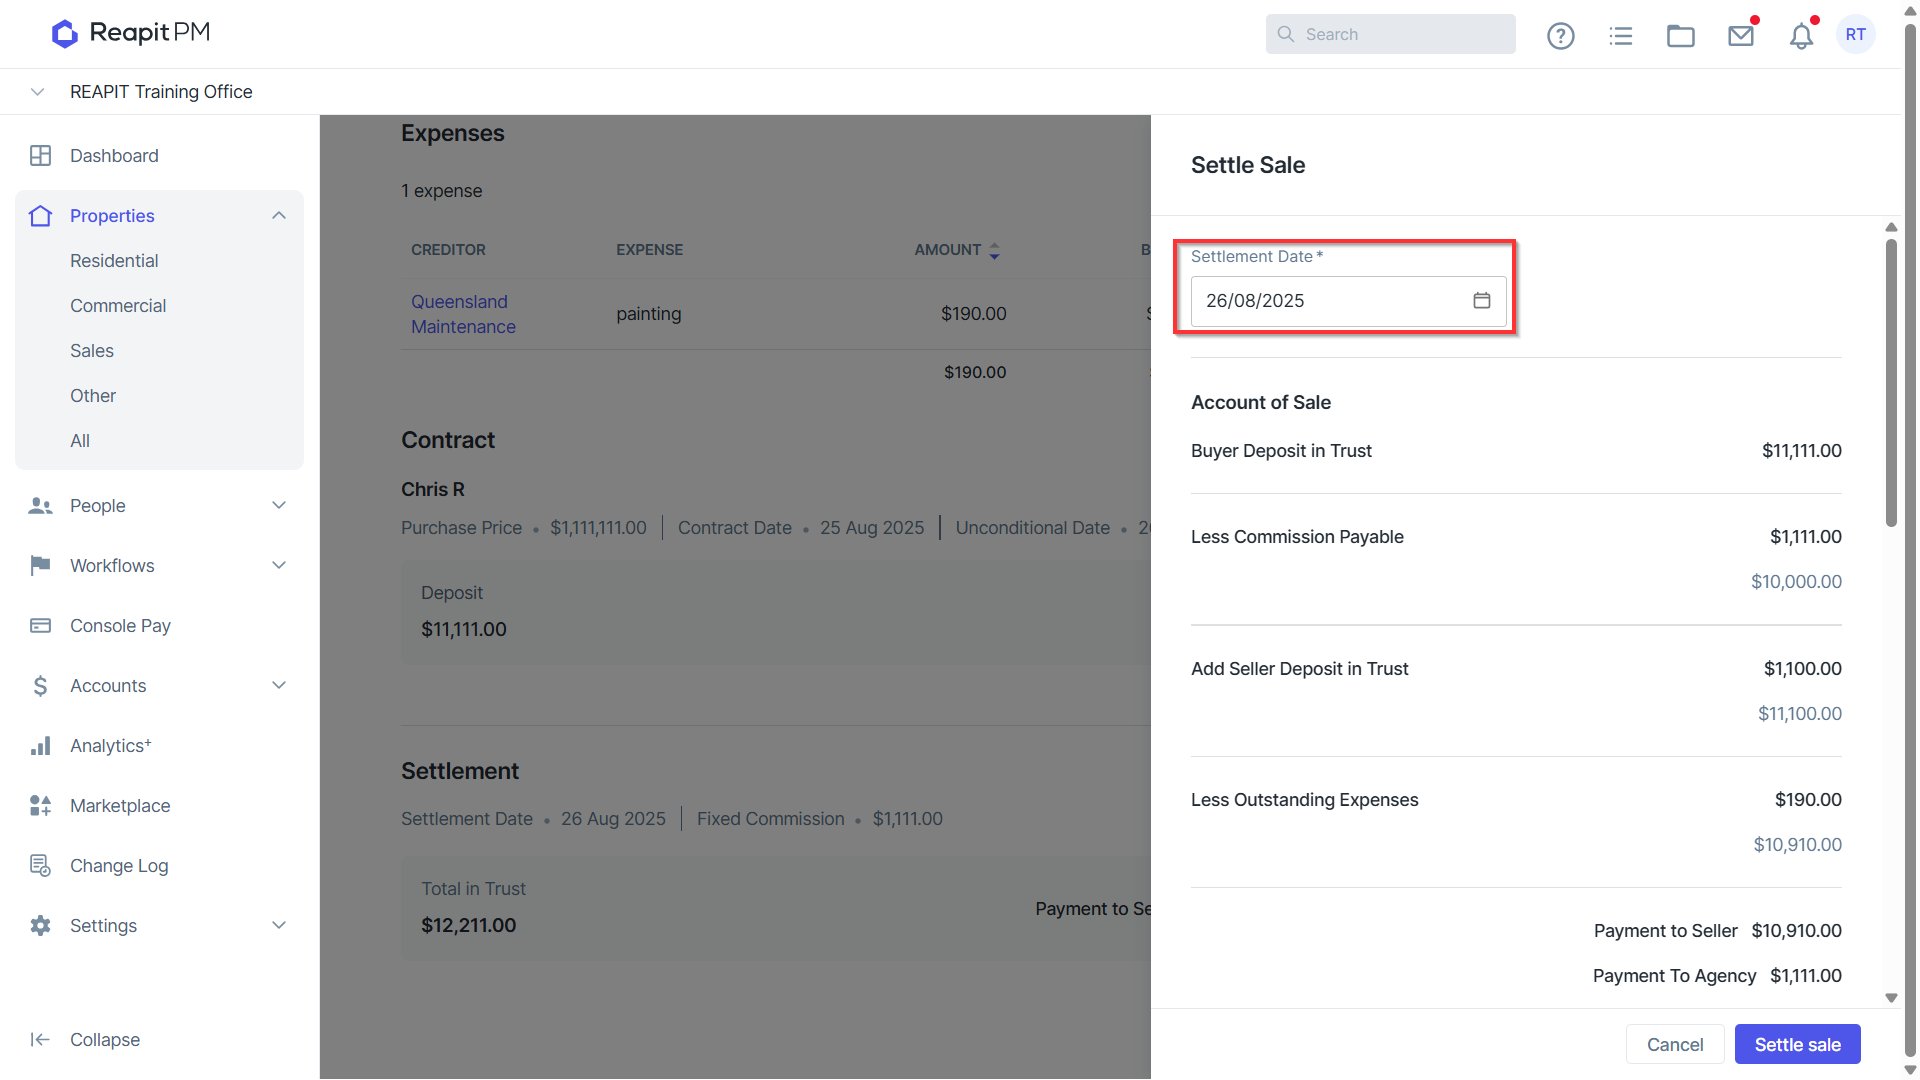
- The Settlement window will appear with the Summary of the Settlement. Enter the Settlement Date.
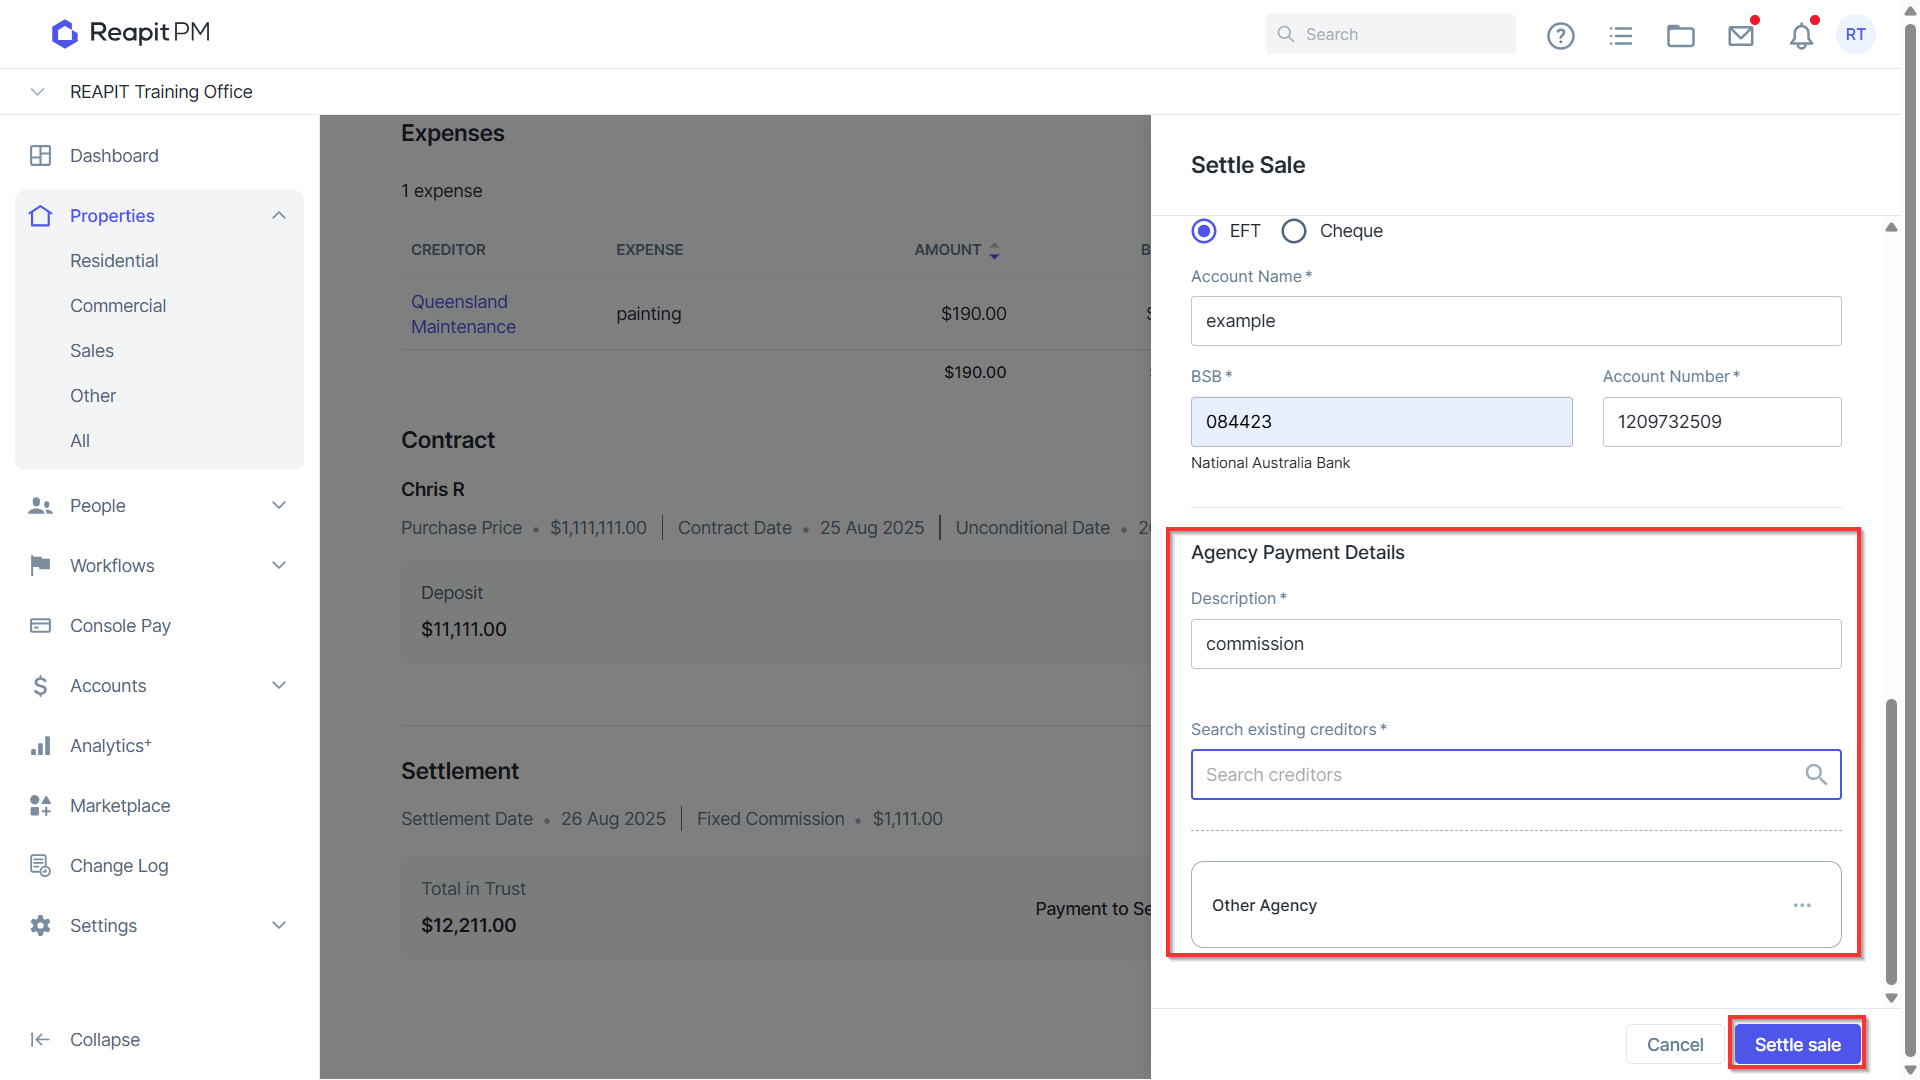
- Enter the Seller Refund Details > Fill in description for the payment the agency will receive > Select a Creditor to receive the Agency Payment > Settle Sale.
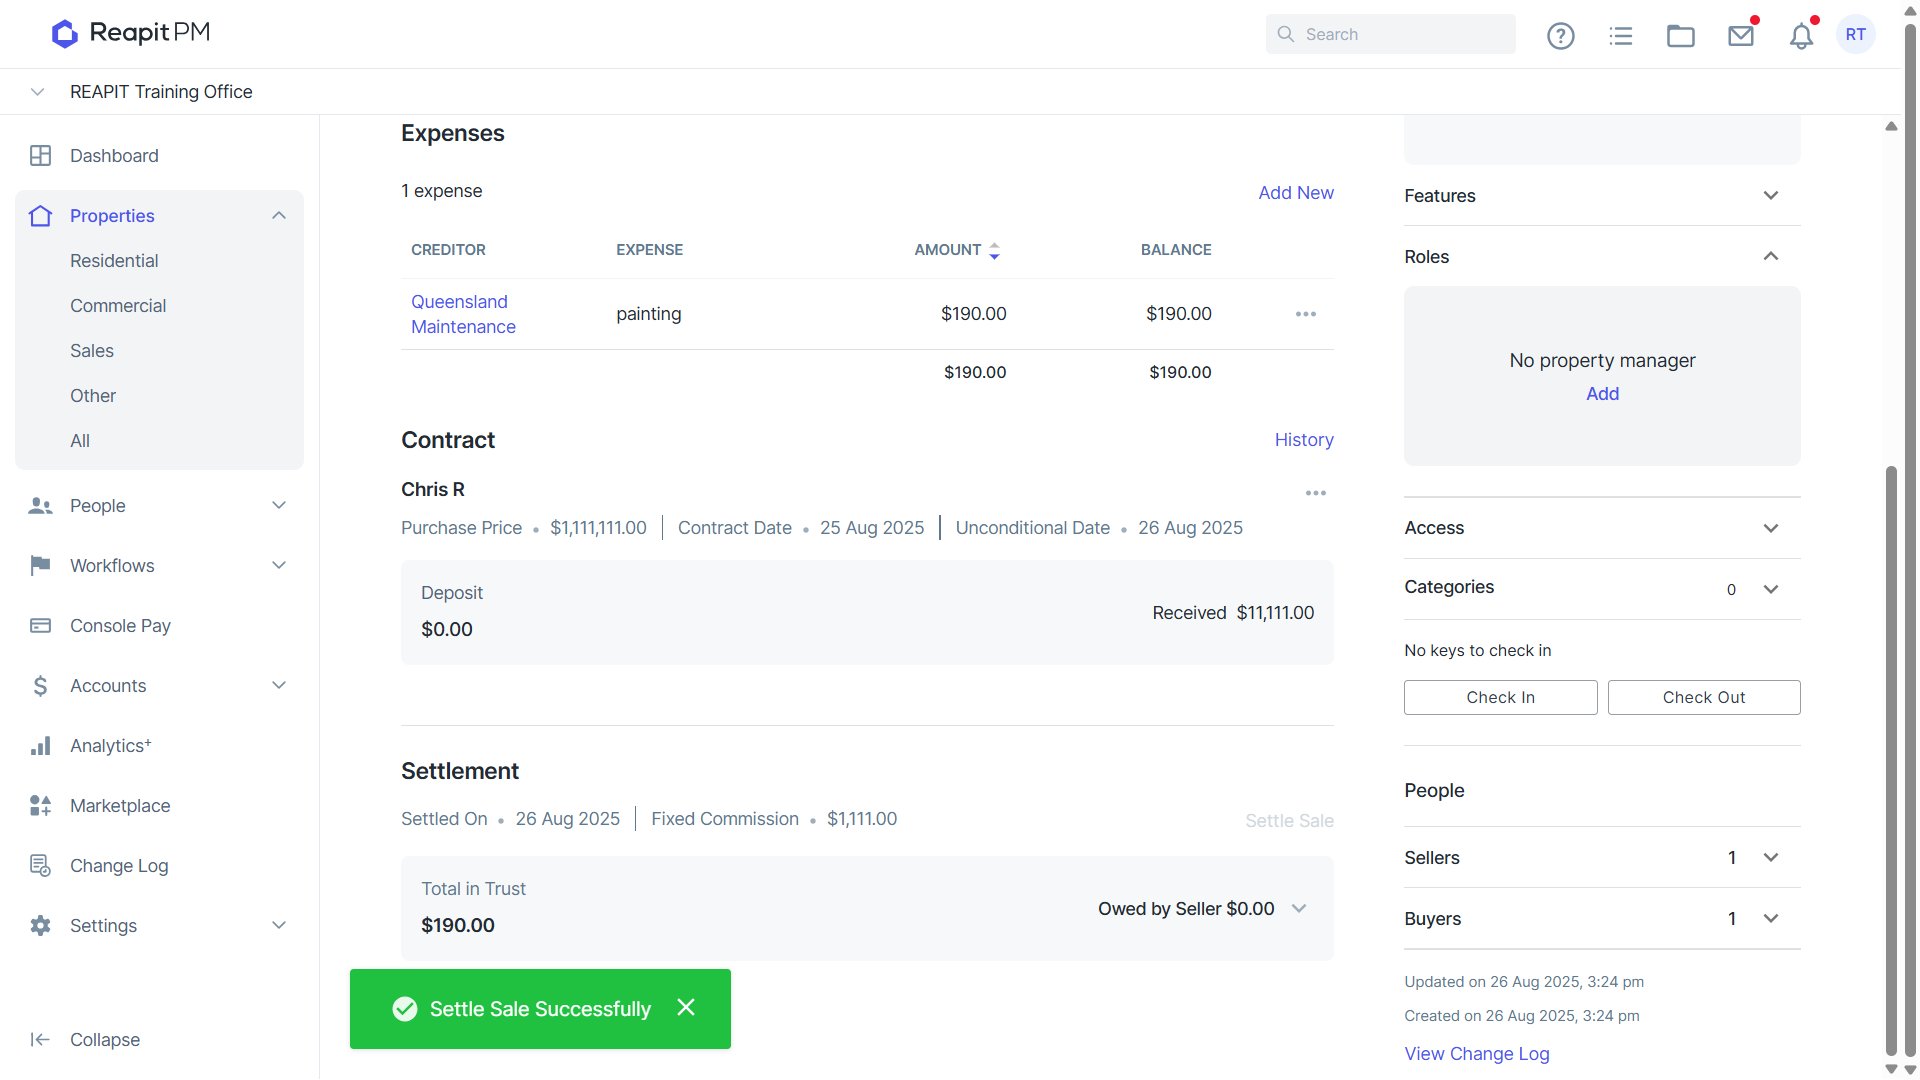
A banner will confirm that the Sale has been Settled successfully. The status of the Sale file will now appear as Sold. You will also receive a copy of the zip folder with the payment file and summary.