'%20d='M0%208a8%208%200%200%201%208-8h24a8%208%200%200%201%208%208v24a8%208%200%200%201-8%208H8a8%208%200%200%201-8-8V8Z'/%3e%3cpath%20fill='%23fff'%20d='M8.375%2013v14L20.5%2034l12.124-7v-7.737l-1.687-.975-2.806-1.62-1.082-.624v4.83l-.002%204.83H13.95V16.07l3.275-1.89%202.192-1.265%201.082-.625%203.275%201.877%202.192%201.256%201.083.62V9.782L20.5%206%208.376%2013Z'/%3e%3cdefs%3e%3clinearGradient%20id='reapit-pm__a'%20x1='20.702'%20x2='20.702'%20y1='.351'%20y2='31.228'%20gradientUnits='userSpaceOnUse'%3e%3cstop%20stop-color='%235573FD'/%3e%3cstop%20offset='.575'%20stop-color='%234E56EA'/%3e%3c/linearGradient%3e%3c/defs%3e%3c/svg%3e)
Create a Management Agreement
This article will guide you through the process of creating a new Management in Reapit PM.
Overview
Create a Management Agreement
This article will guide you through the process of creating a new Management in Reapit PM.
How to Create a Management Agreement
Navigate to the main menu. Select People > Owners > Add New. Note: If the property is already entered, then you can add the owner by selecting Properties> Residential > select the property or type the address in the search box > Add ownership.
You are now on the New Management Agreement page. Enter the property address if not already entered. Note: This will validate in Google Maps & will populate additional fields once selected.
Complete all required fields marked with an asterisk e.g. Building, location, etc. (if required).
Add a Property Reference. Using the drop-down, select the Property Use and Property Type. Click Save & Next to proceed.
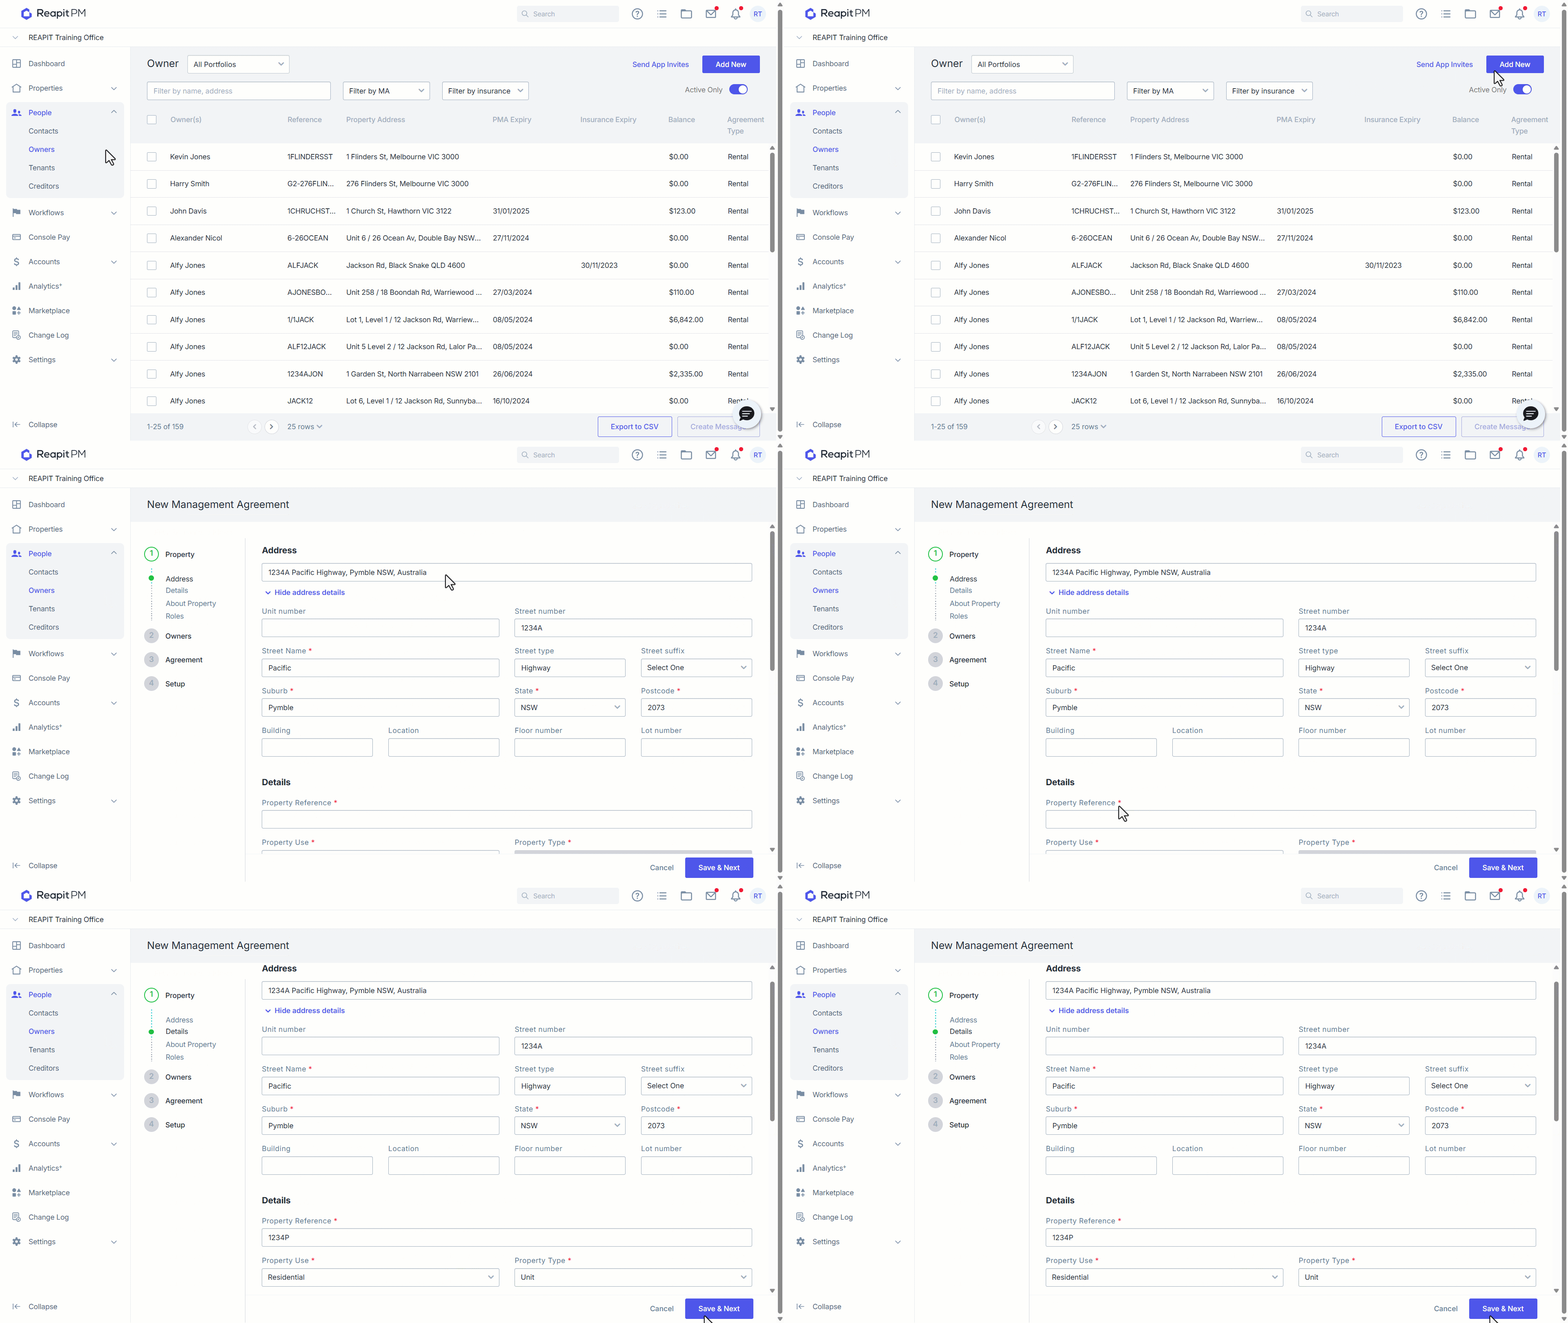
Note: References can contain numeric and alphanumeric characters. Keep a consistent reference structure throughout your data.
Your Property is successfully created when you see a green banner appear.
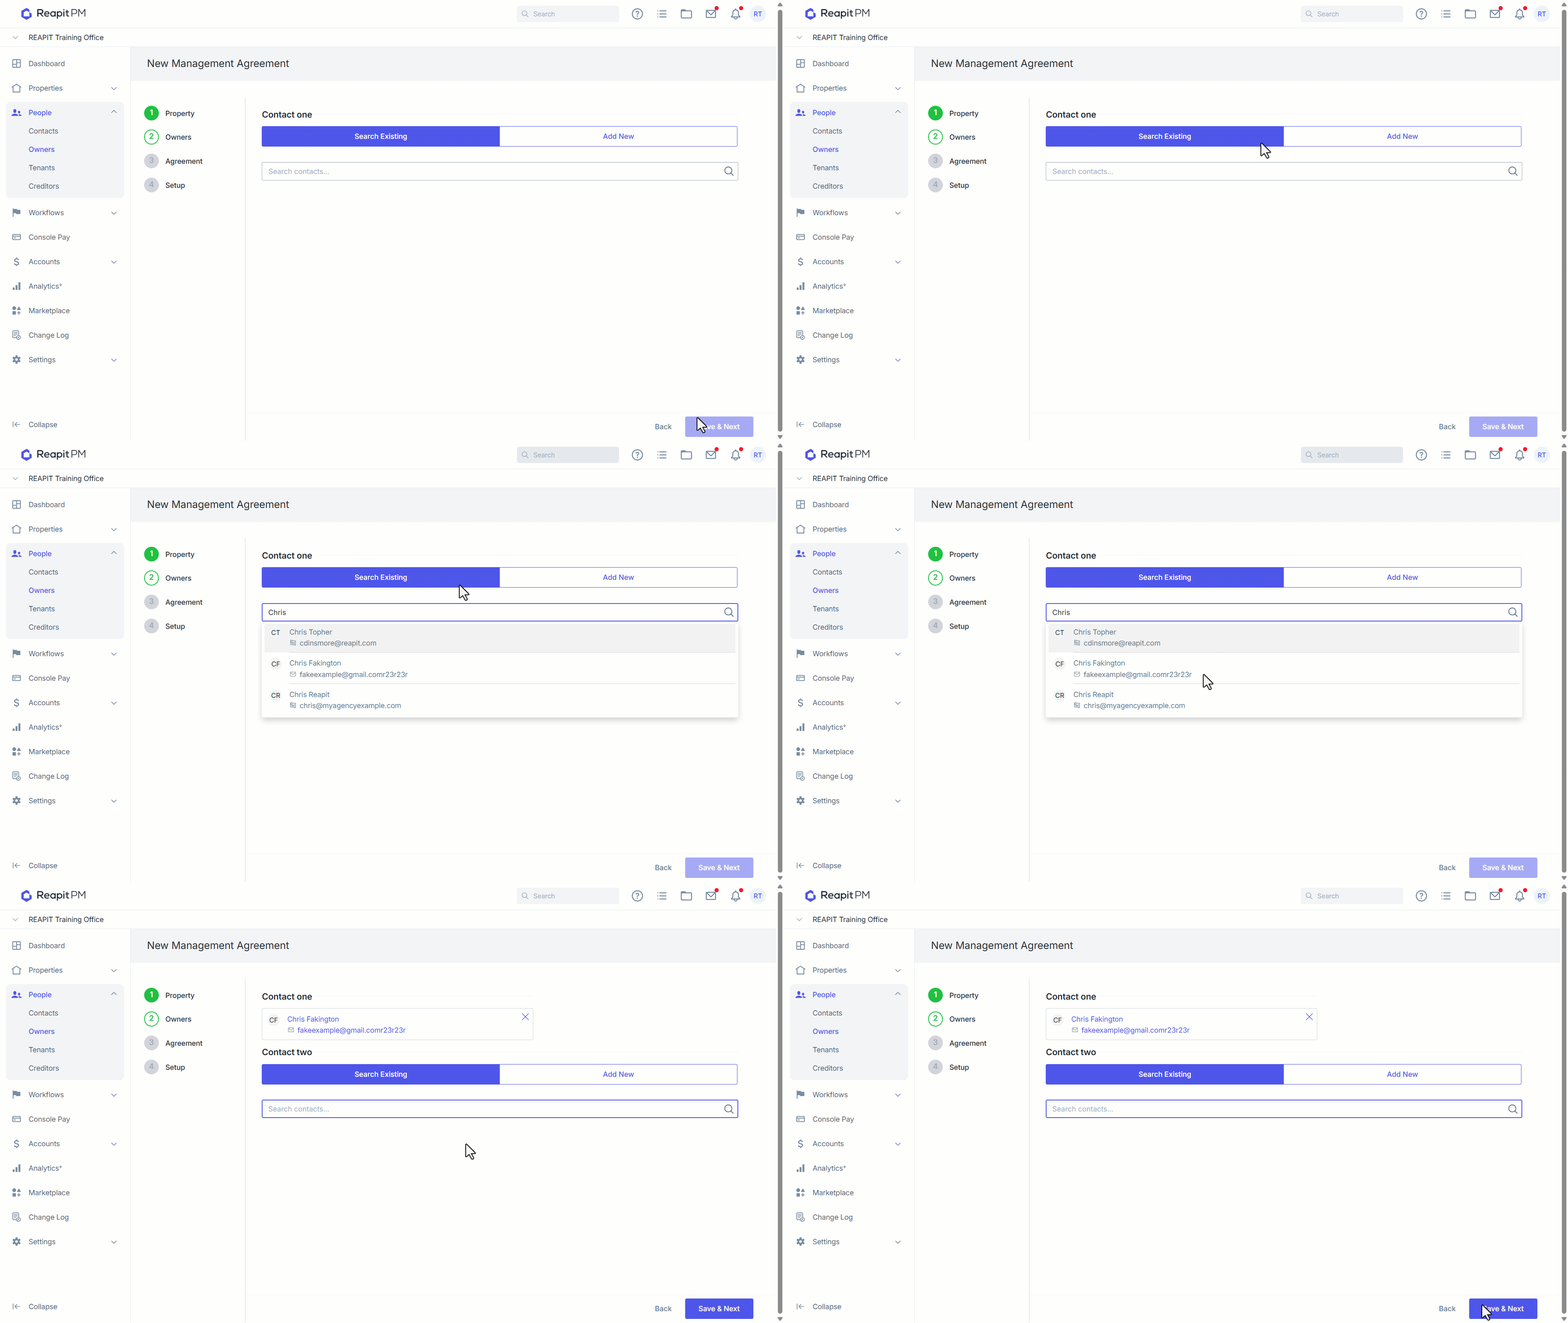
Add in the new owner details by searching or adding a new contact. You can add multiple contacts to the ownership agreement by selecting > Add New button or searching for an existing. Once you have filled in the owner details, select> Save & Next.
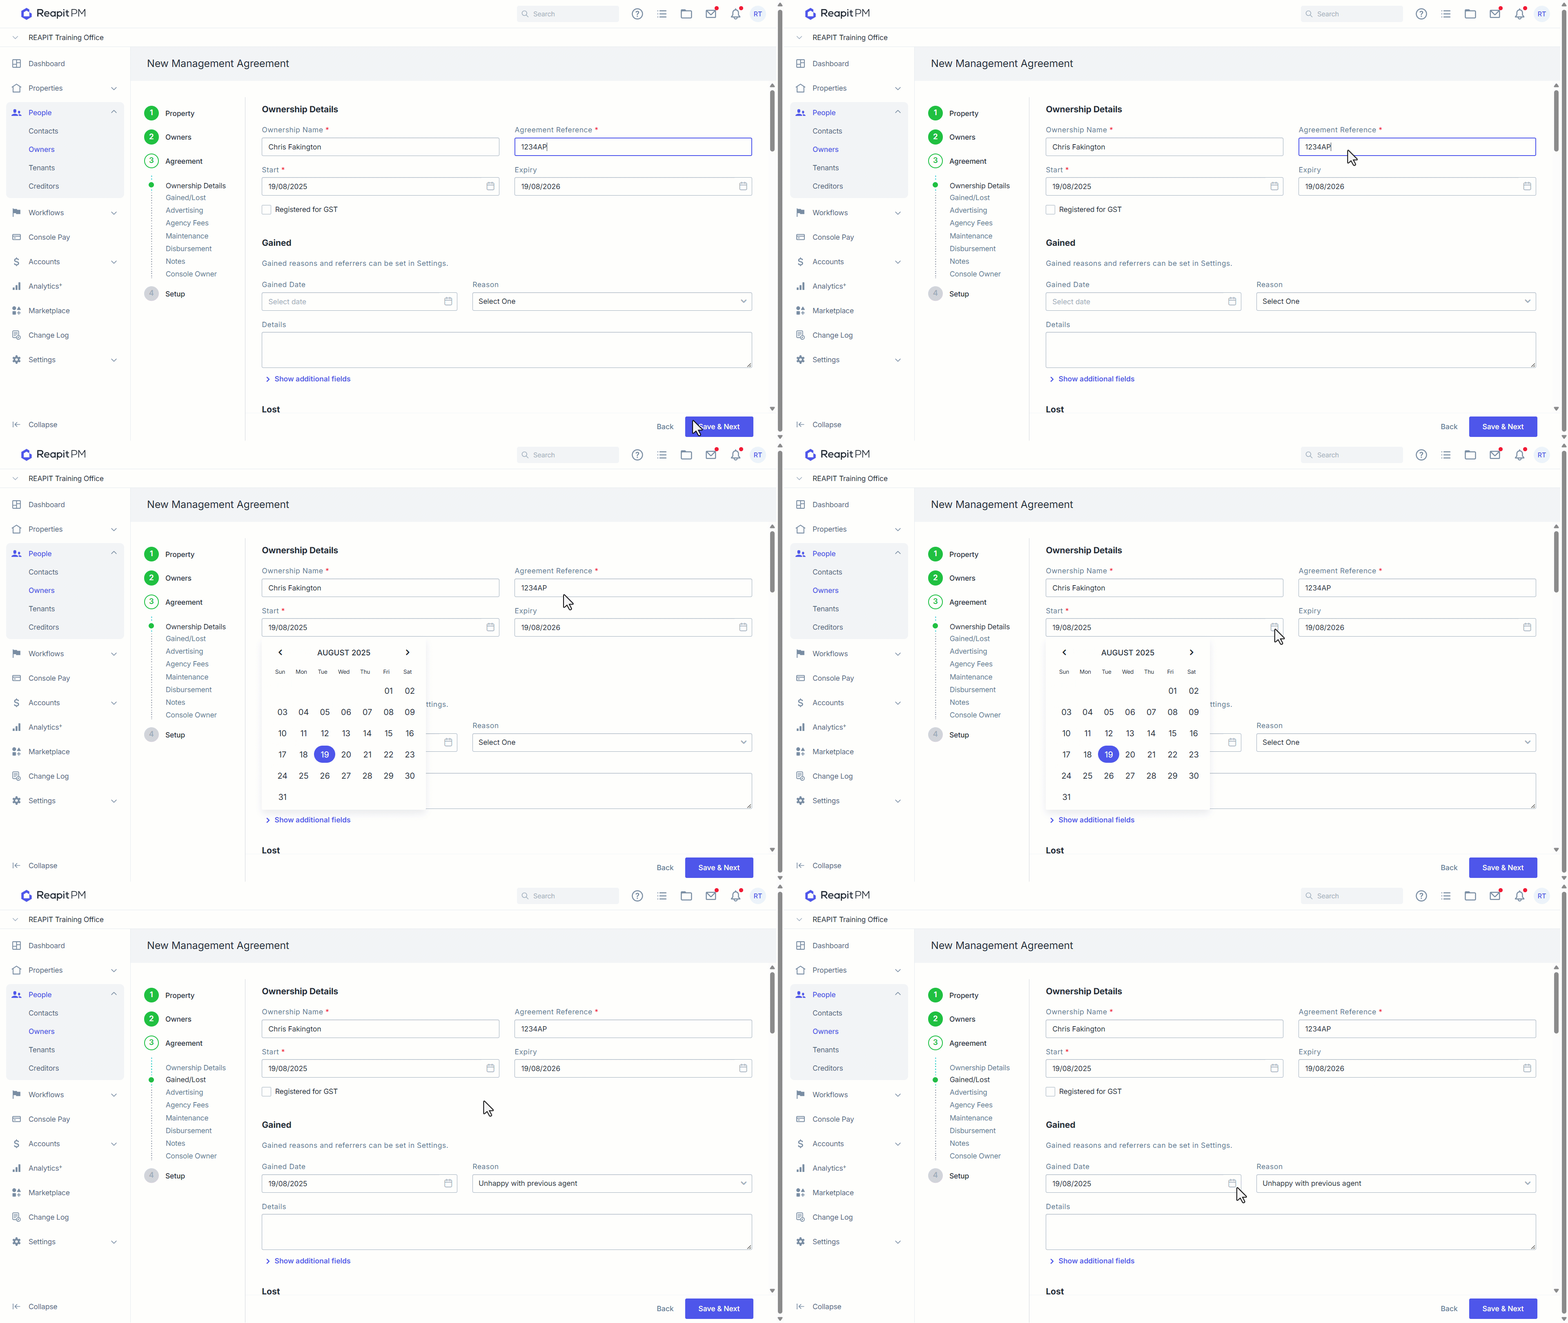
Complete the new owner management agreement details. Ownership Name defaults from Owner entered.
Add a unique Agreement Reference for the management. The reference can contain both numeric and alphanumeric characters and must be between 2 and 15 characters in length. It is recommended that you keep a consistent reference structure throughout your data.
Note: If the Registered for GST checkbox is selected will result in automatically including GST on any invoices created via the On-Charging process in Accounts > Bills.
Select the Start date and Expiry date. These automatically default to today's date and expire in one year's time, but can be changed.
In the Gained section, select the date and reason on how you gained the management, if applicable.
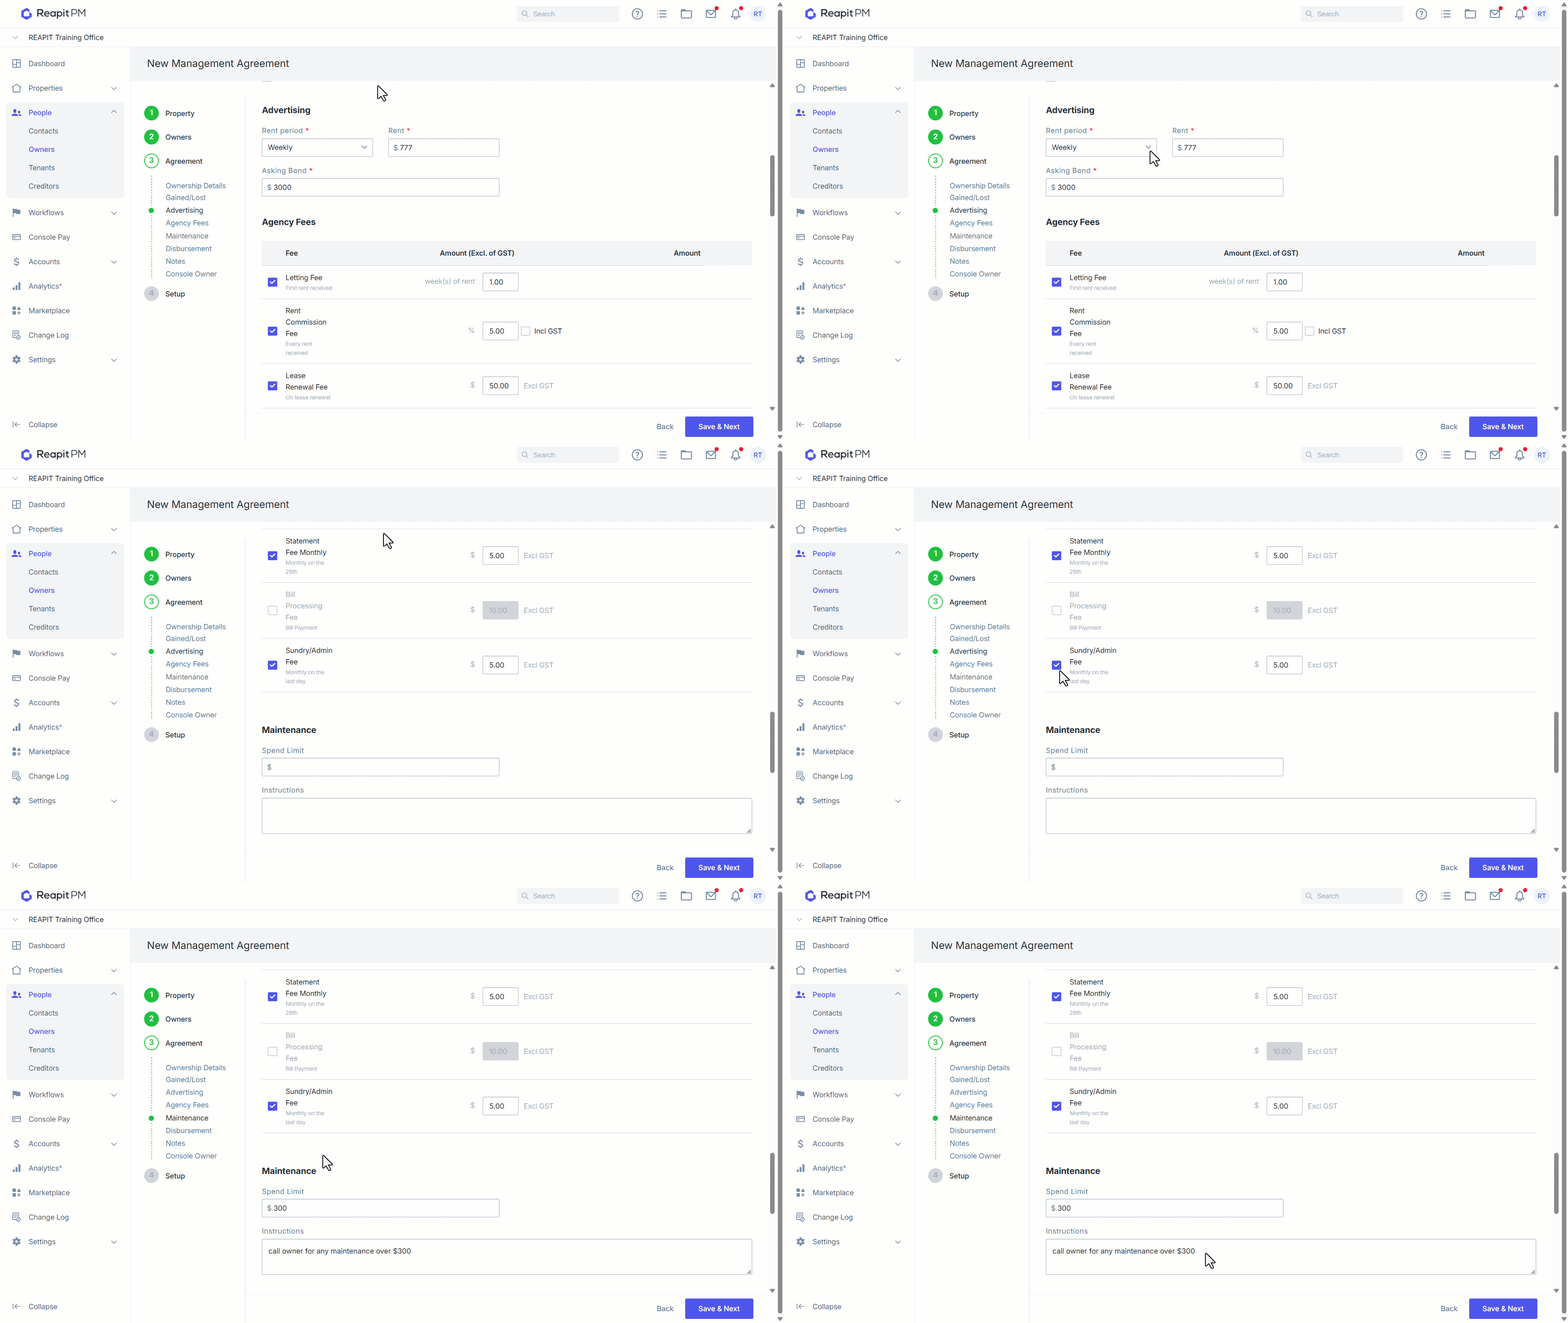
- From the Advertising section, enter the Asking Rent, Asking Rent Frequency and Asking Bond amounts.
Note: These are the Advertised amounts. The rent required is determined by the rent on the Tenant Agreement.
Tick any Agency Fees that this Owner will be charged and update the rates as per your agreement if required.
From the Maintenance section, enter a Spend Limit and Instructions regarding Maintenance (if supplied).
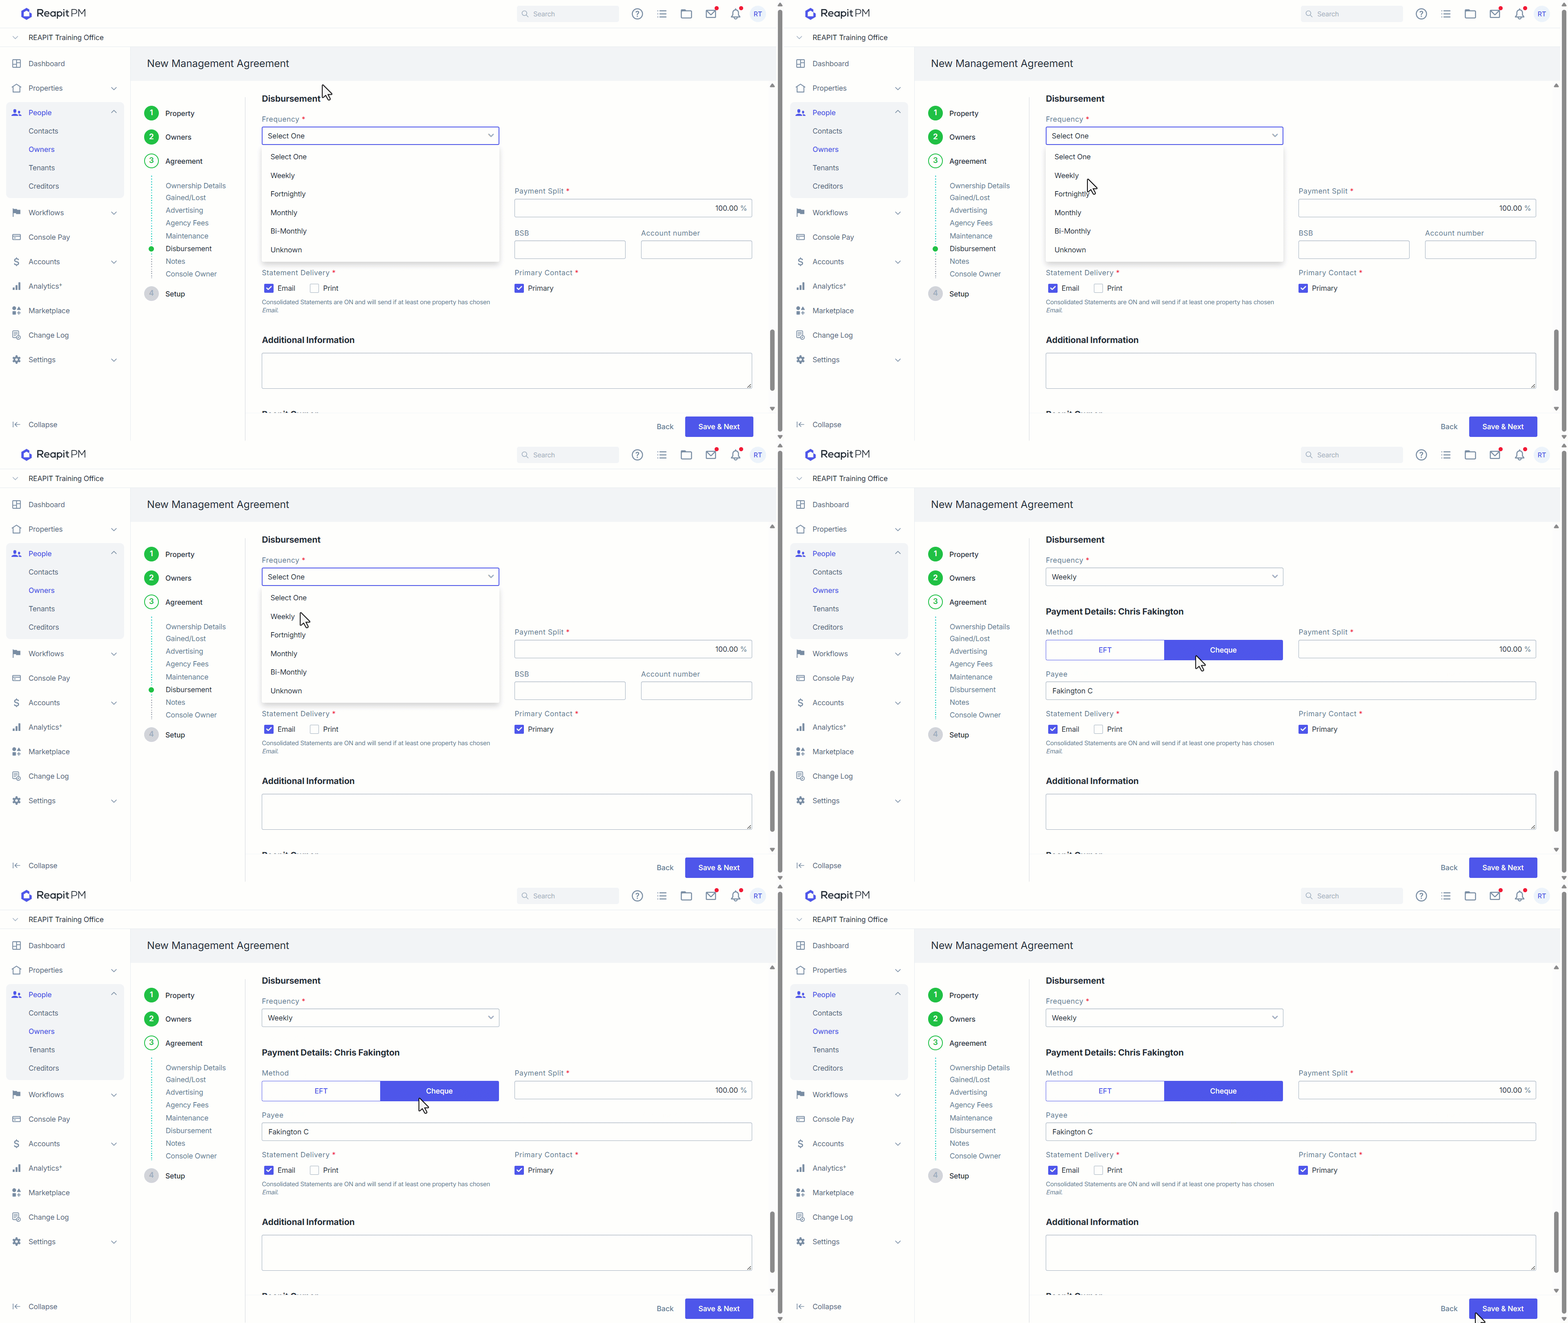
Select the frequency of the Disbursement from the drop-down e.g. Weekly.
Payment Details section, enter the payment information for the owner. Click EFT or Cheque payment Method, the available fields differ depending on choice - complete all relevant. Enter the Payment Split for the Owner.
Note: The payment split must total 100% in an example where there are 2 owners but only one is paid during disbursement the split would be 100/0.
- Select the Statement Delivery method, Primary Contact and Reapit Owner (These are ticked by default). Add any Additional Information and assign a portfolio if required.
Click Save & Next.
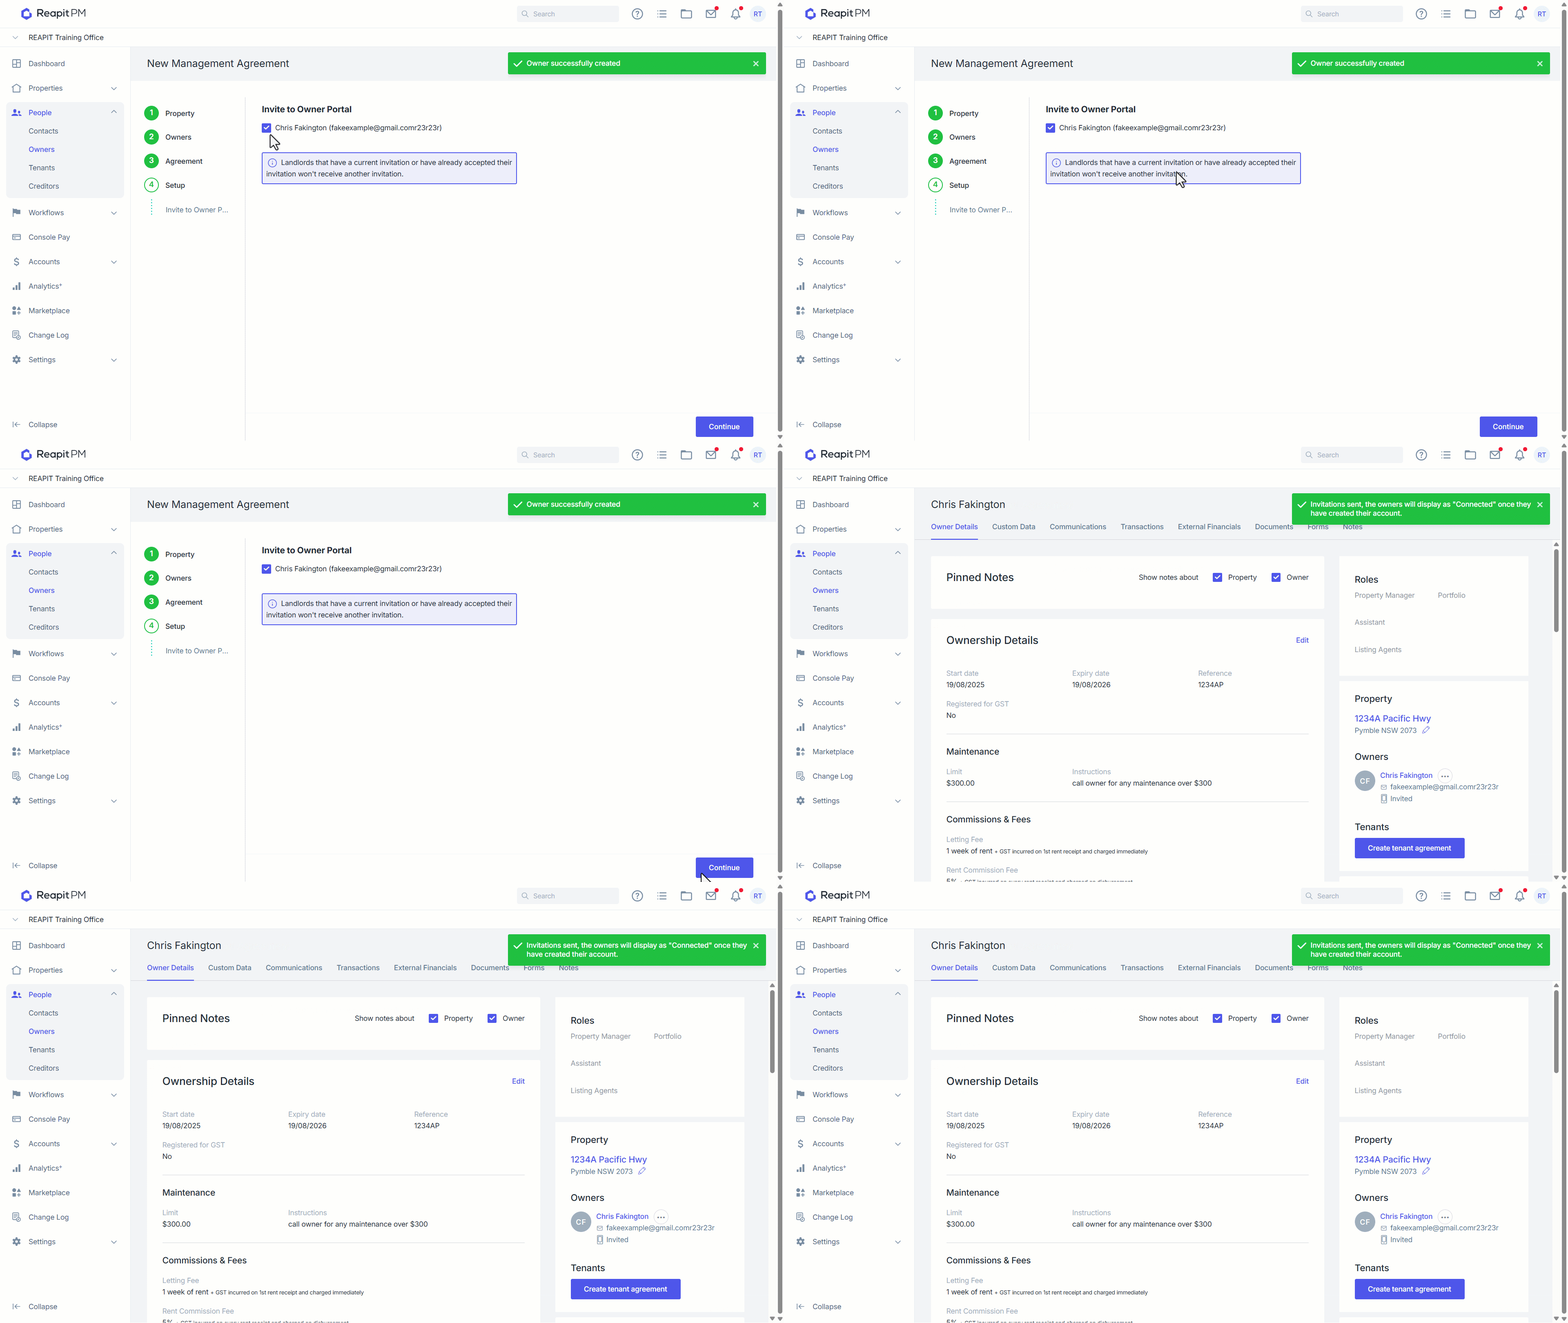
Note: “Invite to owner portal” are ticked by default. So keeping it selected will automatically invite the owner to the portal whereas deselecting it will not.
- Click Continue. Your New management Agreement is successfully created when you see a green banner.
Video Resources