'%20d='M0%208a8%208%200%200%201%208-8h24a8%208%200%200%201%208%208v24a8%208%200%200%201-8%208H8a8%208%200%200%201-8-8V8Z'/%3e%3cpath%20fill='%23fff'%20d='M8.375%2013v14L20.5%2034l12.124-7v-7.737l-1.687-.975-2.806-1.62-1.082-.624v4.83l-.002%204.83H13.95V16.07l3.275-1.89%202.192-1.265%201.082-.625%203.275%201.877%202.192%201.256%201.083.62V9.782L20.5%206%208.376%2013Z'/%3e%3cdefs%3e%3clinearGradient%20id='reapit-pm__a'%20x1='20.702'%20x2='20.702'%20y1='.351'%20y2='31.228'%20gradientUnits='userSpaceOnUse'%3e%3cstop%20stop-color='%235573FD'/%3e%3cstop%20offset='.575'%20stop-color='%234E56EA'/%3e%3c/linearGradient%3e%3c/defs%3e%3c/svg%3e)
Bulk Receipting
This article will walk you through how to use and manage payments via bulk receipting in Reapit PM. The processes in this article include: Setting up Tenant Rent References Processing Bulk Receipting
Bulk Receipting
Bulk receipting allows you to receipt all of your tenant rent payments by using your bank download file. Payments from your upload will automatically match references in Reapit PM.
Acceptable upload files are: .OFX, .PAY, .QIF, .TXN, .BRF, .TXT.
Reapit PM can also be configured to automatically process part payments via the Settings > Banking > Bulk Receipting section.
The processes in this article include:
- Setting up Tenant Rent References
- Processing Bulk Receipting
- Duplicate Transactions
Setting up Tenant Rent References
Tenant rent references are required so that Reapit PM can identify and match transactions via the unique reference. These can be changed at any time.
For Console Pay users, this reference will set automatically and should not be modified.
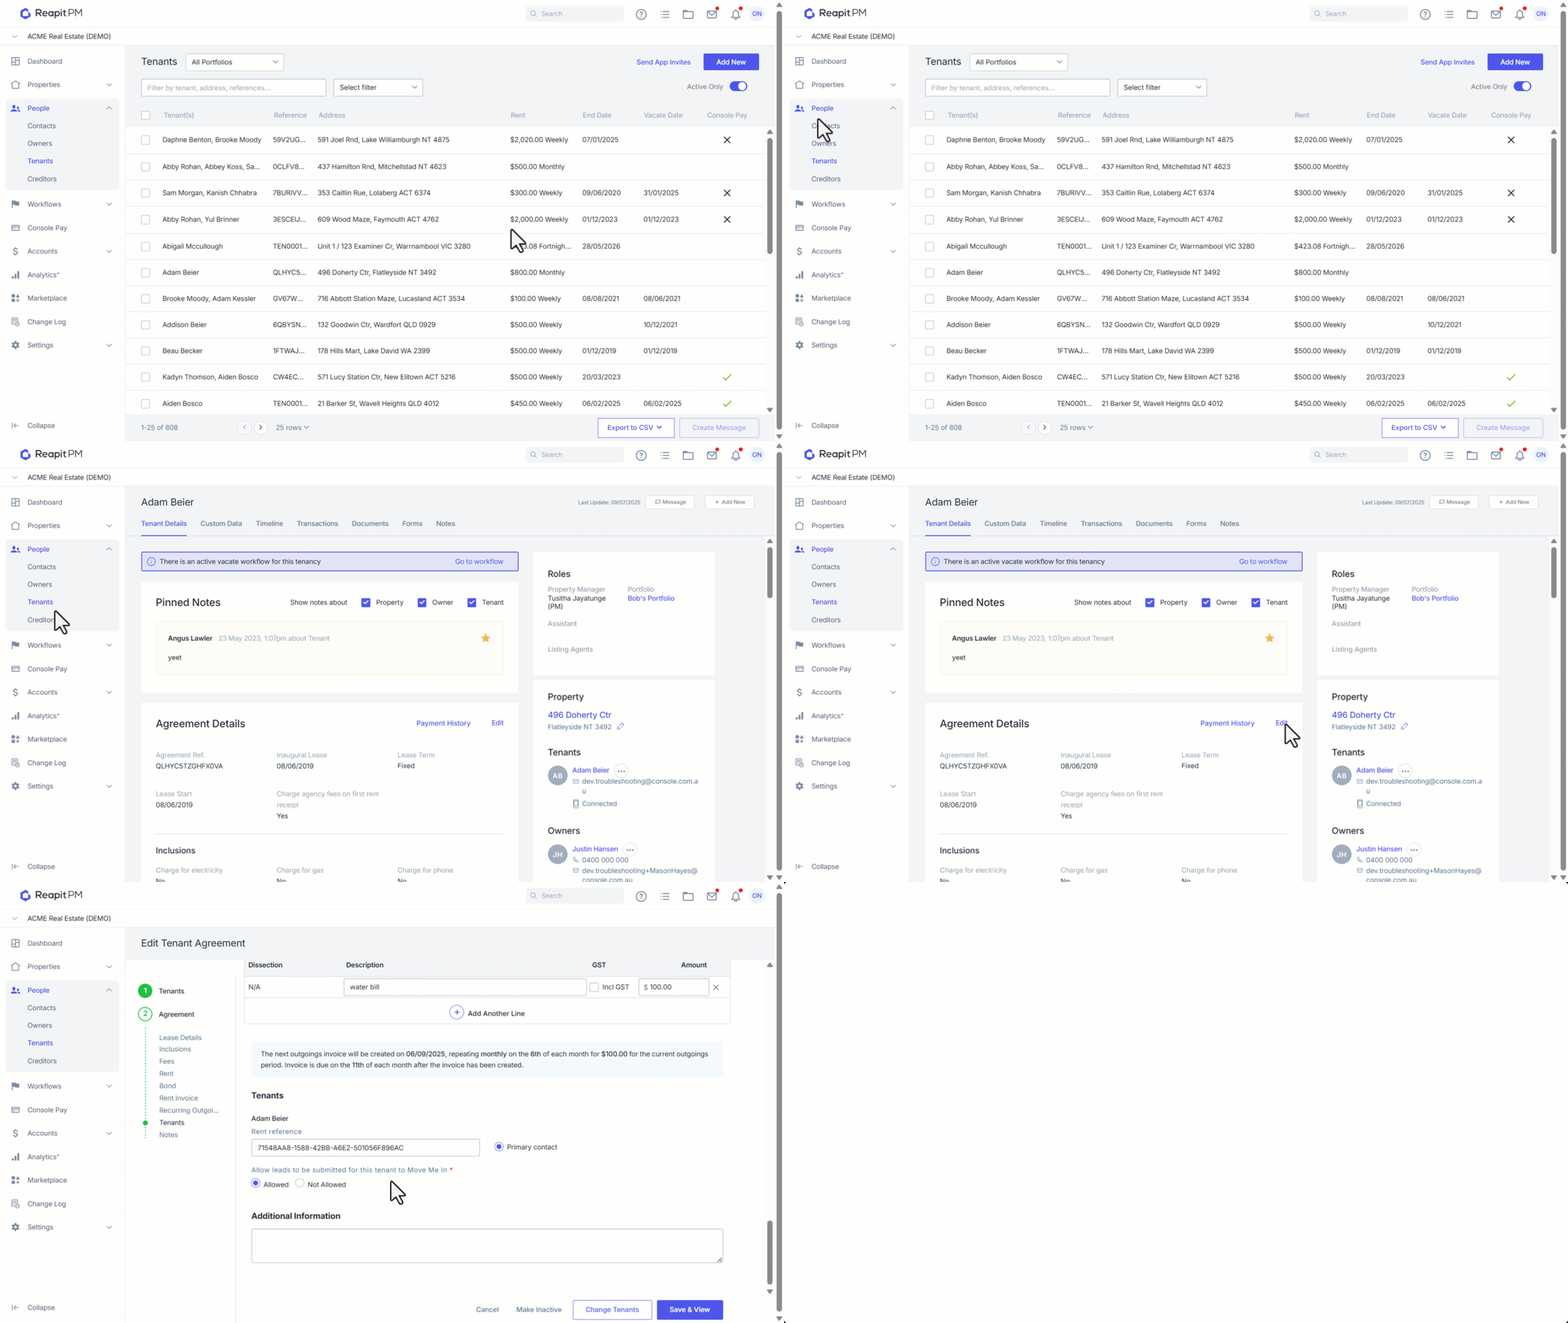
- Click on People.
- Click on Tenants.
- Search and Select the Tenant.
- Navigate to Agreement Details and click Edit.
- Navigate to Tenants and enter the Rent Reference for each tenant.
- Click Save & View.
Processing Bulk Receipting
- We recommend not opening upload files prior to upload as this can change file information.
- Black payments will indicate that payments have been matched and will be automatically ticked.
- Red payments will need to be matched manually.
- The system will always match payments which equal a whole rent period or multiples of a whole rent period. It will not match odd payment amounts or those less than the scheduled rent amount.
- A Console Pay integration rule applies for bulk receipting. Bulk receipting will not be allowed if either the bond is not full paid or the rent has not been receipted at the start of the tenancy, This prevents the incorrect receipting of bond as rent at the beginning of a tenancy.
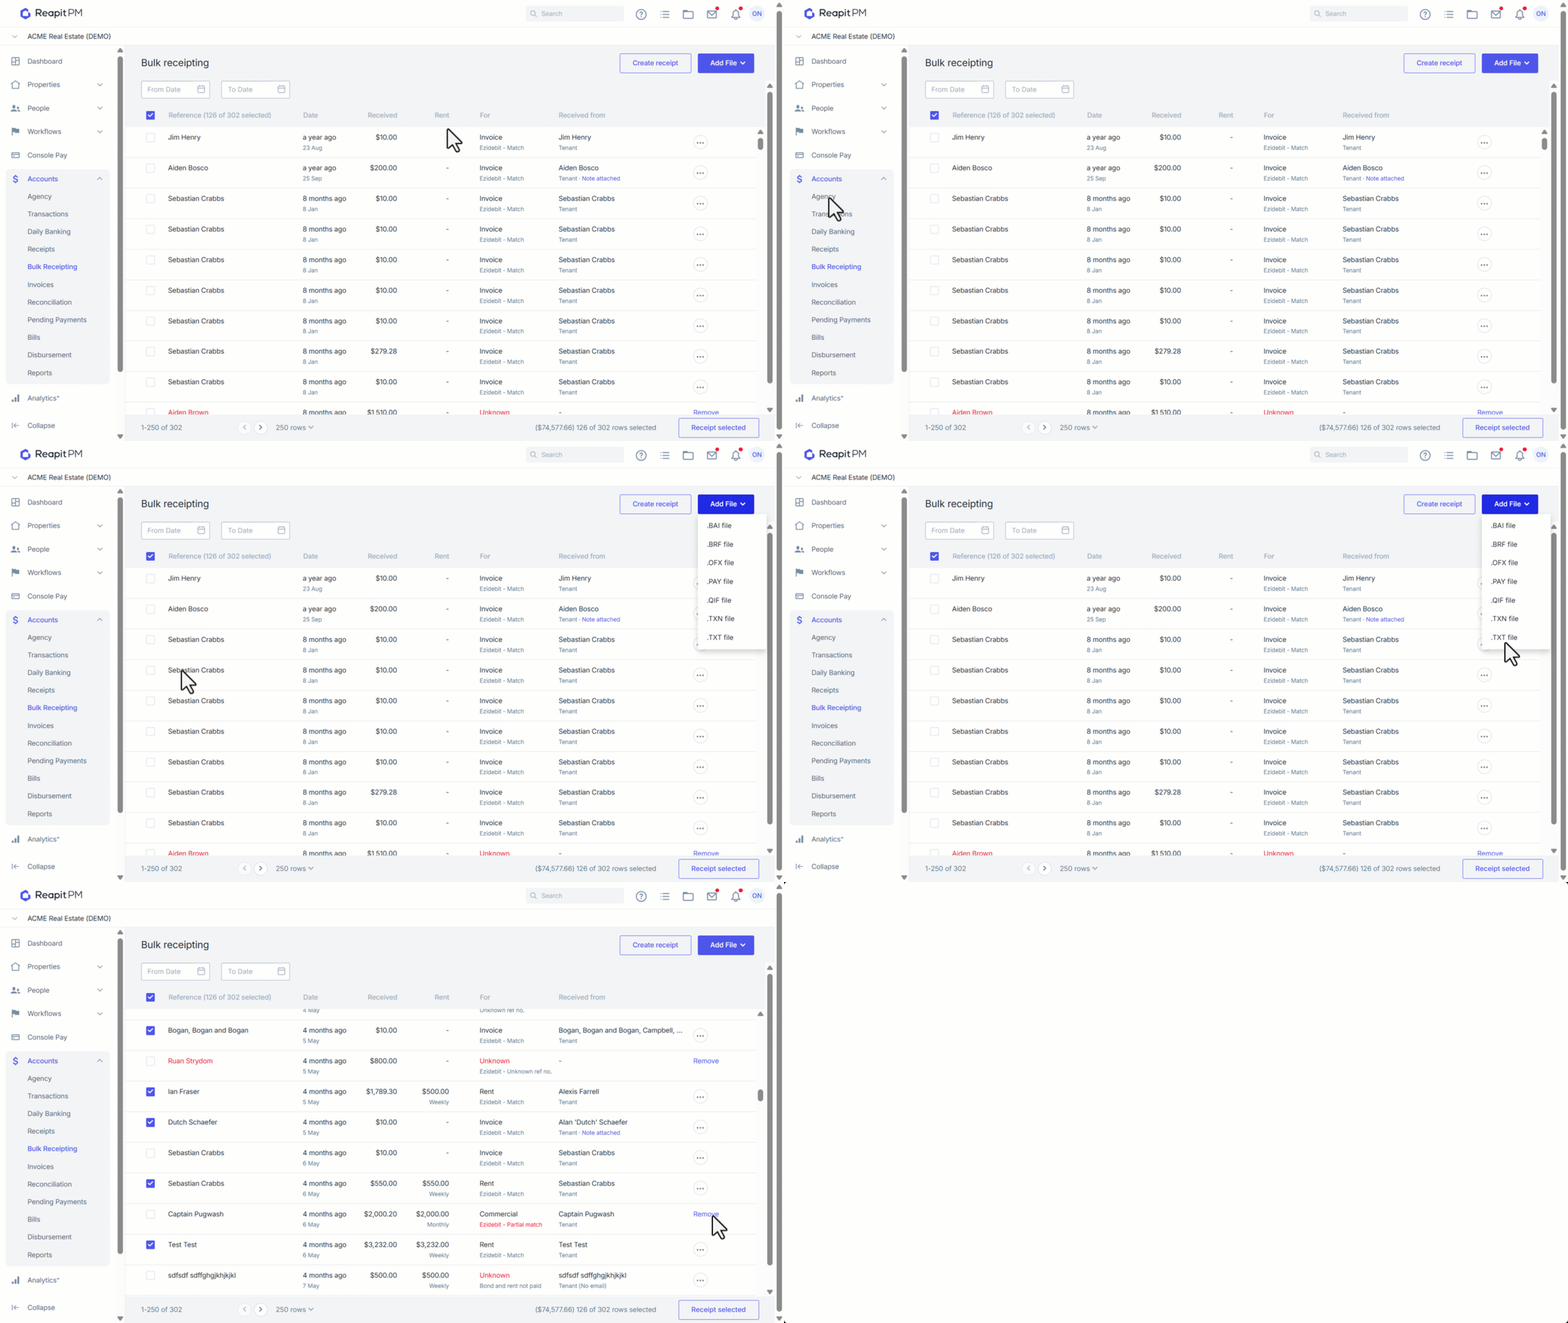
- Click on Accounts.
- Click on Bulk Receipting.
- Click on Add File.
- Select the File Type and upload from your computer. Payments will appear for receipting.
- Click Receipt selected to process all matched payments.
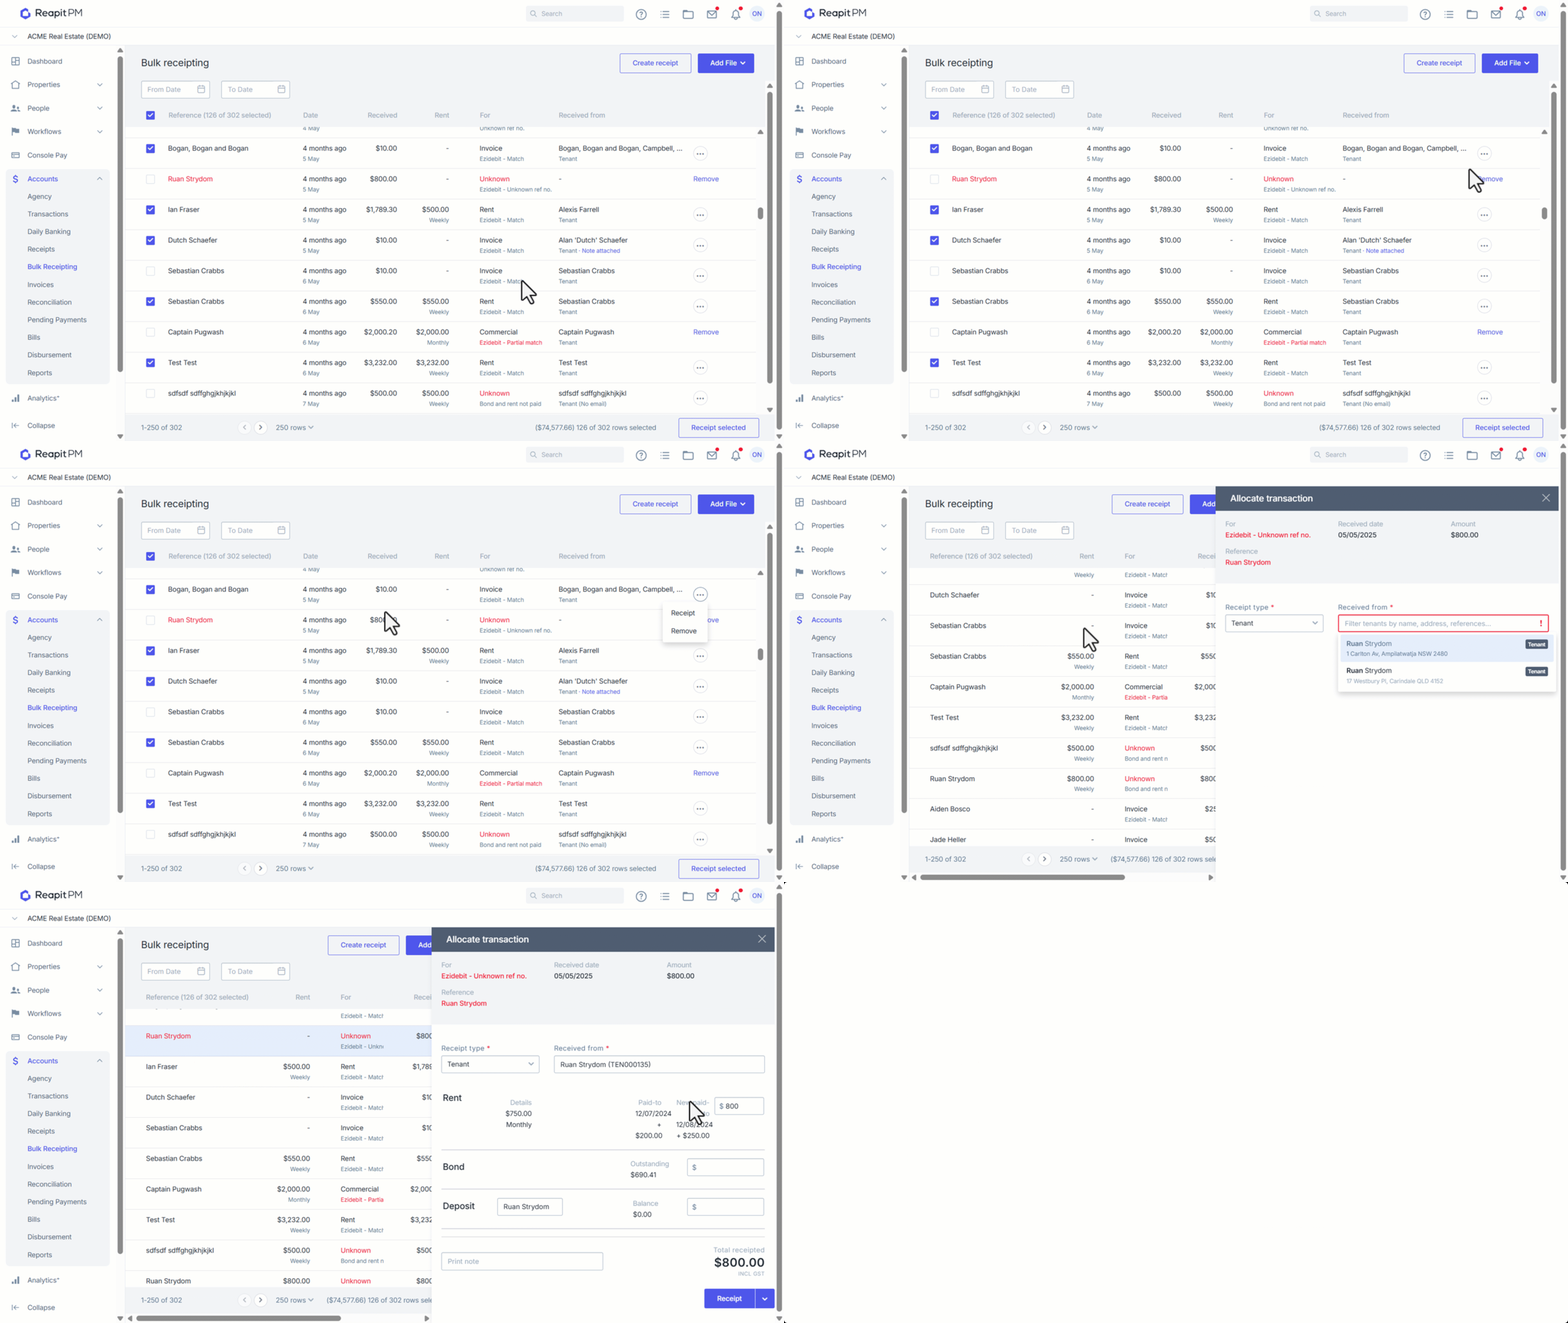
- Click on the three dots and select to Receipt or Remove to update individual payments.
- Unmatched payments can be removed, or manually receipted by clicking on the payment.
- Search and Select the relevant Tenant.
- Allocate the received funds and click Receipt.
- Repeat this process for all unmatched payments.
Duplicate Transactions
The Bulk Receipting section under the Banking Settings includes a toggle to Warn before importing duplicate transactions, helping prevent accidental double-processing when uploading bank statements.
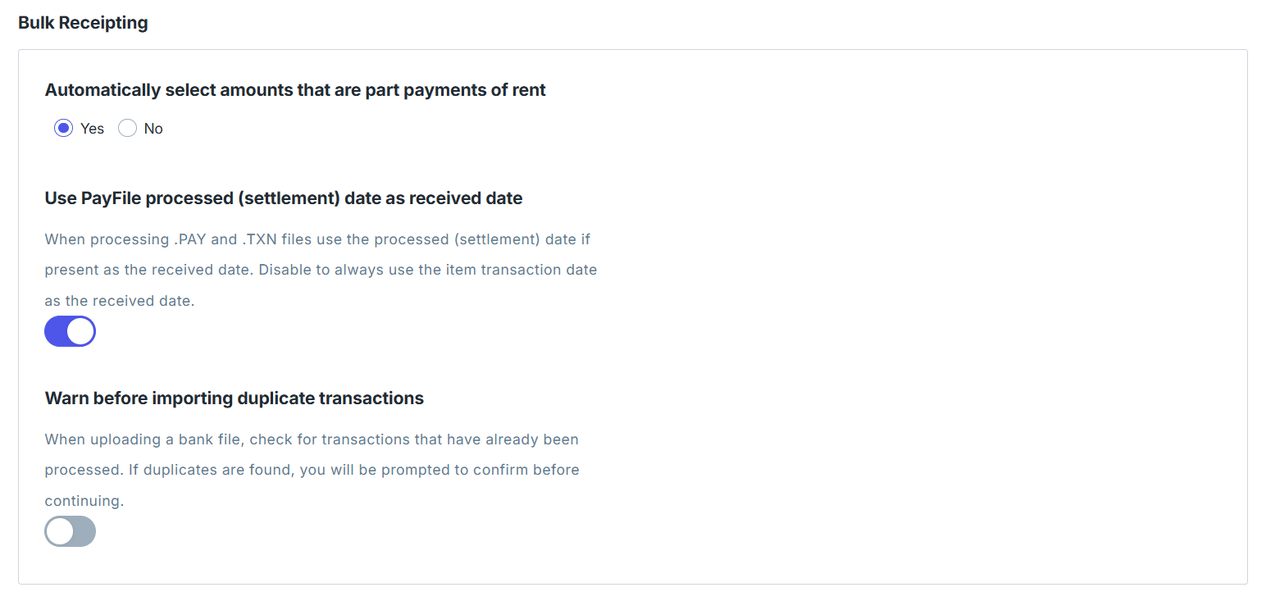
When enabled, the system will check uploaded bank statements for potential duplicate transactions using the transaction date, type, amount, reference number and description.
If a possible duplicate is detected, users will be prompted to review and confirm the transaction before continuing.
Note: Warn before importing duplicate transactions only checks duplicates from the point it is enabled onward. It does not evaluate historic transactions.
Office Administrator permission is required to access the settings.