'%20d='M0%208a8%208%200%200%201%208-8h24a8%208%200%200%201%208%208v24a8%208%200%200%201-8%208H8a8%208%200%200%201-8-8V8Z'/%3e%3cpath%20fill='%23fff'%20d='M8.375%2013v14L20.5%2034l12.124-7v-7.737l-1.687-.975-2.806-1.62-1.082-.624v4.83l-.002%204.83H13.95V16.07l3.275-1.89%202.192-1.265%201.082-.625%203.275%201.877%202.192%201.256%201.083.62V9.782L20.5%206%208.376%2013Z'/%3e%3cdefs%3e%3clinearGradient%20id='reapit-pm__a'%20x1='20.702'%20x2='20.702'%20y1='.351'%20y2='31.228'%20gradientUnits='userSpaceOnUse'%3e%3cstop%20stop-color='%235573FD'/%3e%3cstop%20offset='.575'%20stop-color='%234E56EA'/%3e%3c/linearGradient%3e%3c/defs%3e%3c/svg%3e)
Creating a Commercial Tenant Agreement
This article is a guide on creating commercial tenant agreements in Reapit PM.
Overview
Creating a Commercial Tenant Agreement
This article is a guide on creating commercial tenant agreements in Reapit PM.
How to Add a Commercial Agreement
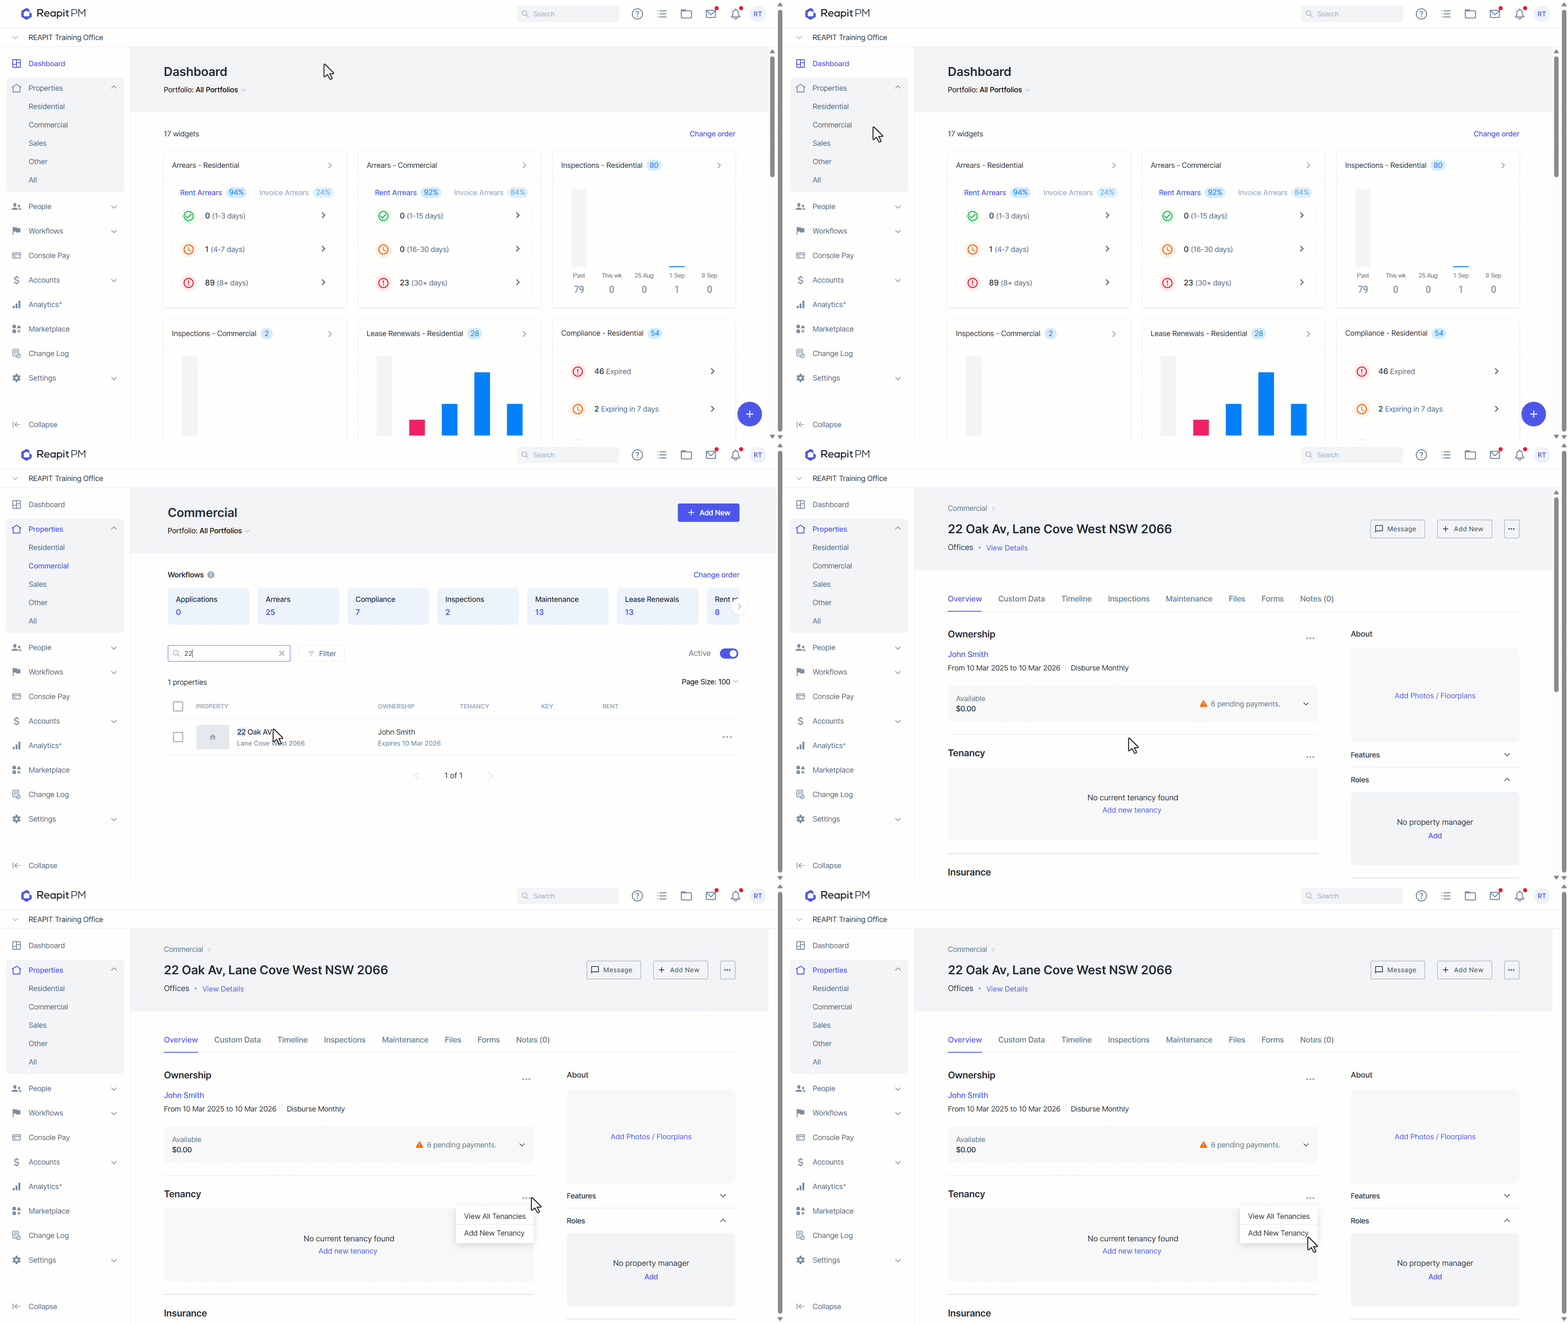
Navigate to Property > Commercial. Open the Property File.
To add a tenancy agreement, open the Property, within the Tenancy section, click the 3 Action Dots and then choose Add New Tenancy.
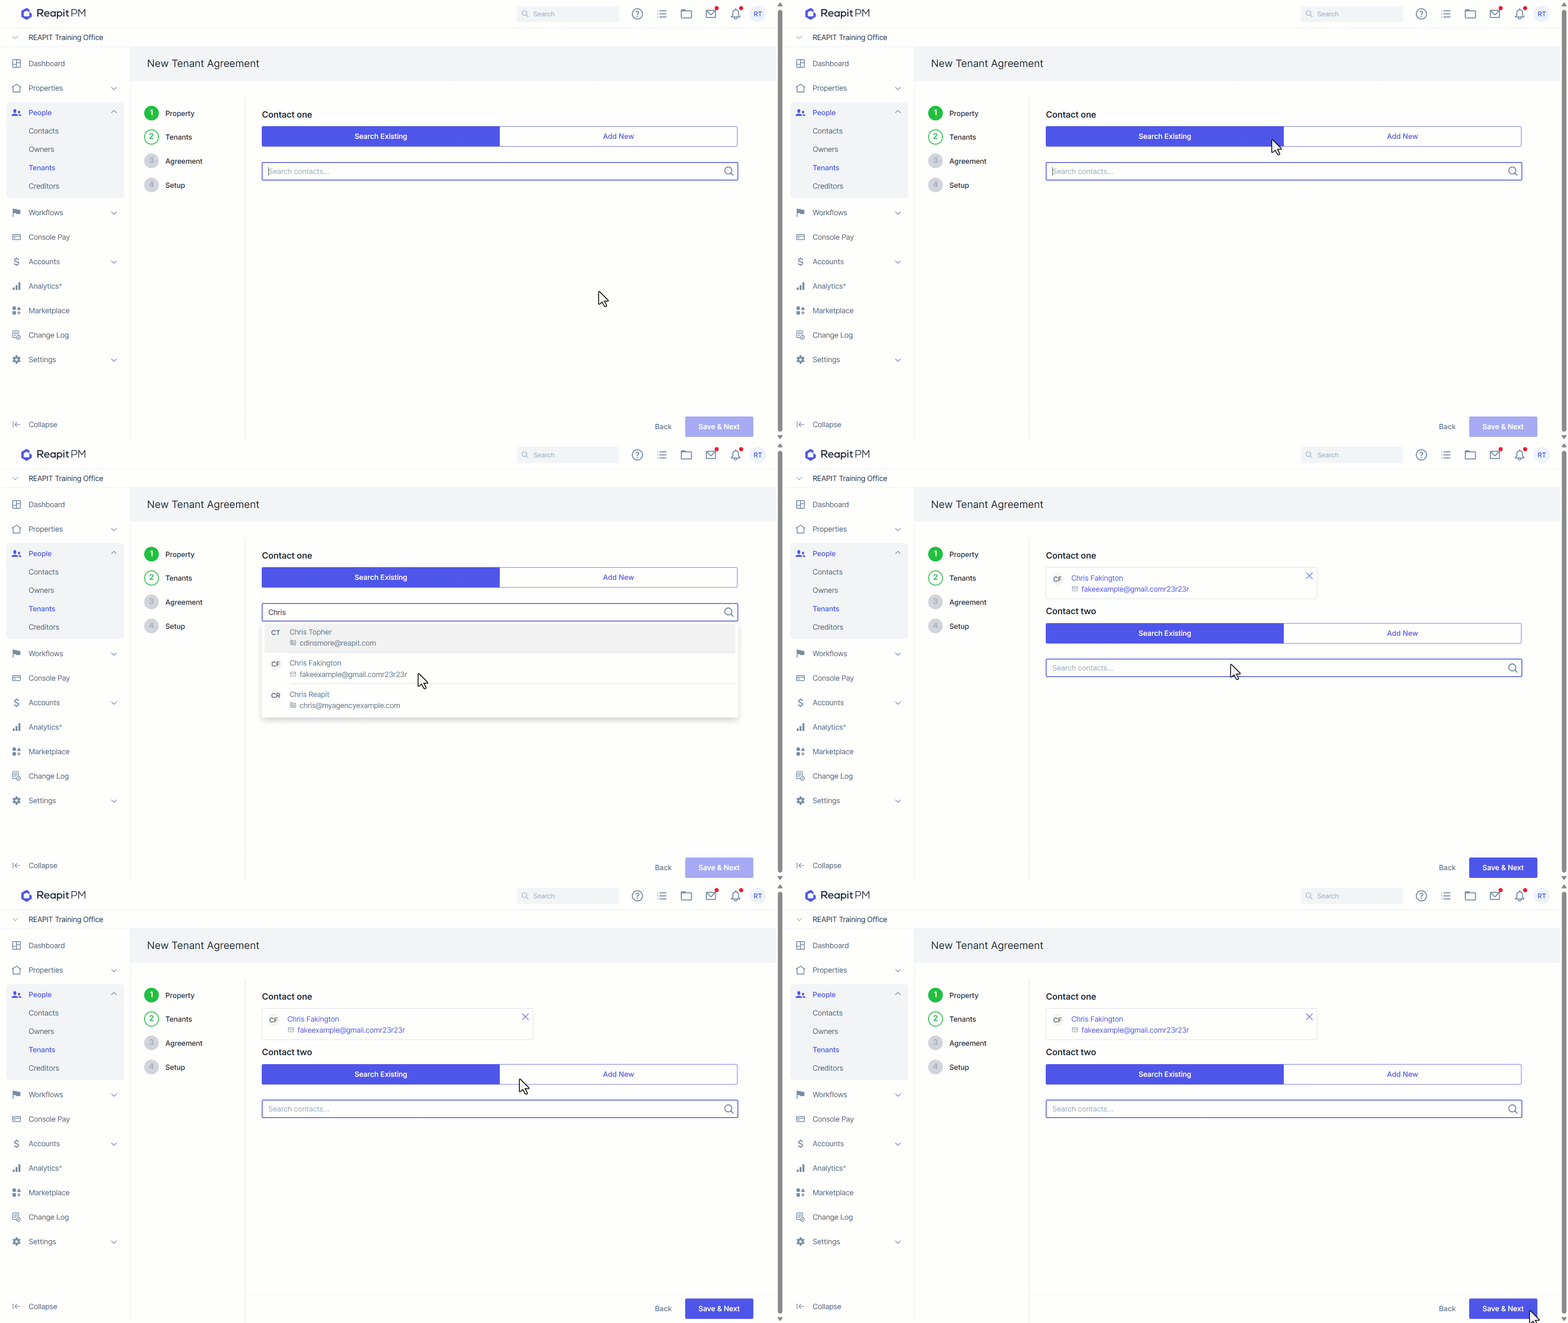
Select from the list an existing contact, or select Add New if required. Note: Once you’ve created your primary tenant, additional tenants can be added by searching or adding new.
Select Save and Next once done.
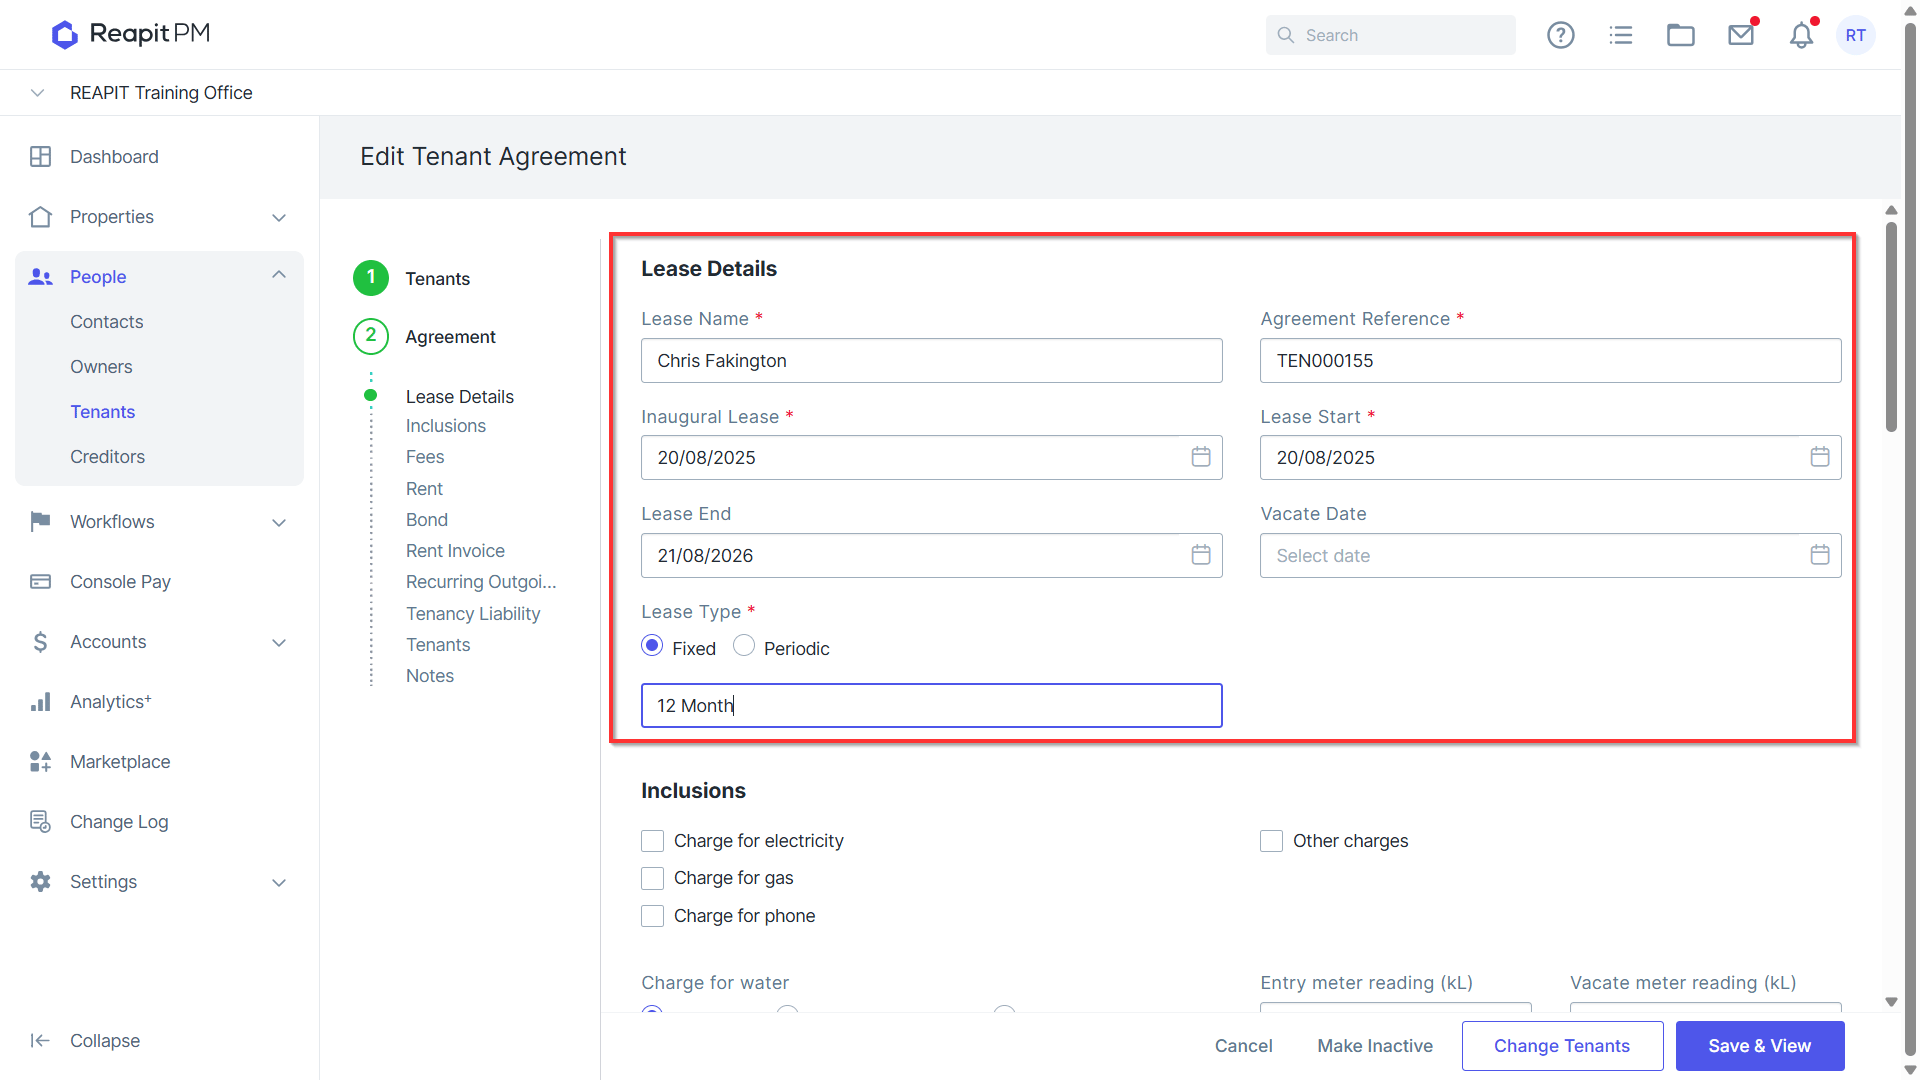
Enter the lease details.
- When entering rent, select if the lease includes or excludes GST, select if rent is a Net or Gross Value, enter the annual Net Rent, select period and amount.
Note: When you put a figure in the Annual Gross Rent field, a blue box will appear with the Annual Rent Calculations. It will include the annual net rent, GST and the annual invoiced rent. The annual invoiced rent and the annual gross rent are different because it will note any difference between invoiced and actual. This may be due to invoicing periods, lease start dates or rounding. 7. Select if you’d like to create recurring rental invoices, select the checkbox then choose the date to send the next invoice on and the Invoice due date.
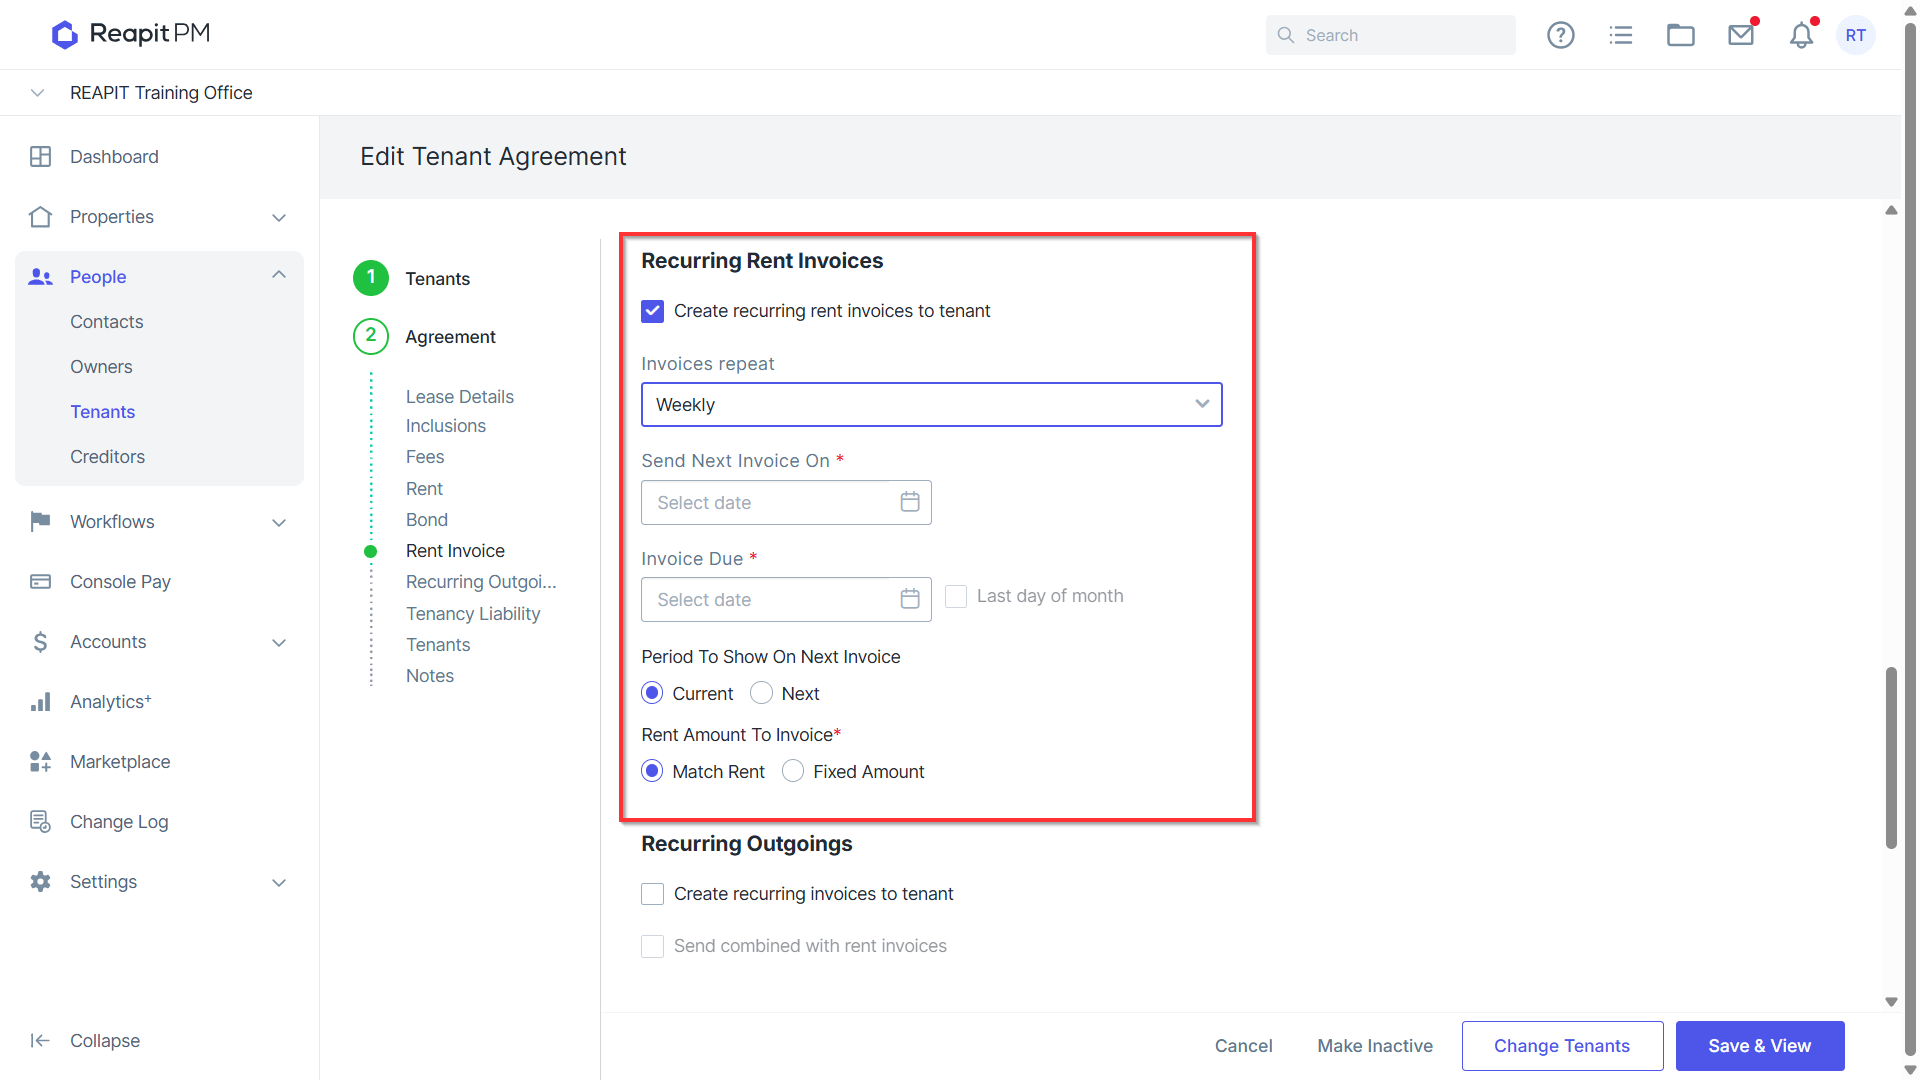
Note: If there is a gap between the paid to date and the due date, a warning will appear under the amount due section. This may be because you started a rent period halfway through the month. In this situation, you would manually invoice the tenant via Accounts then select Invoices, for this period.
- A summary of what will happen will display in blue, please check this and all information before saving.
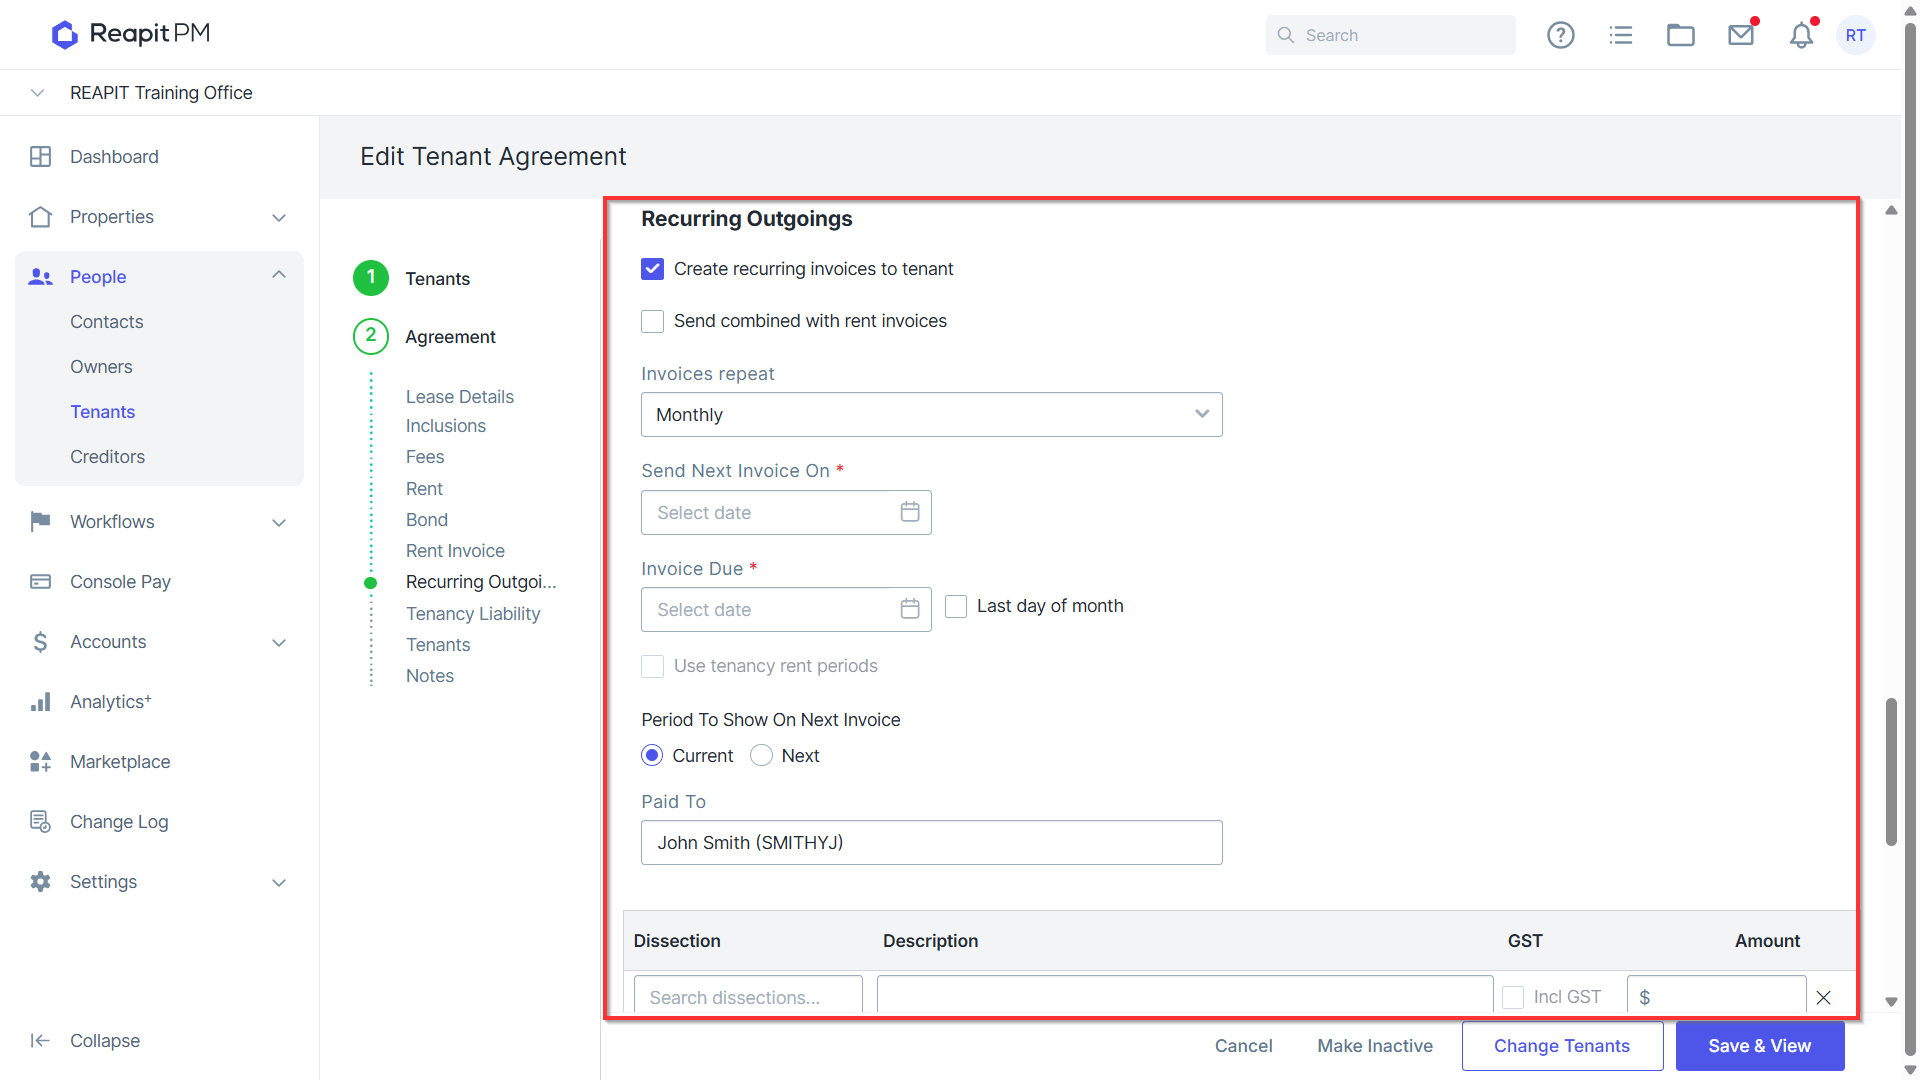
- You can then add a recurring outgoing invoice, once again select the dates and the period to show on the next invoice, you can also choose to Use Tenancy Rent Periods by selecting the checkbox.
- Select the dissection, enter the description and enter the amount.
Note: When entering a bond, you have the option to select held in trust or held externally.
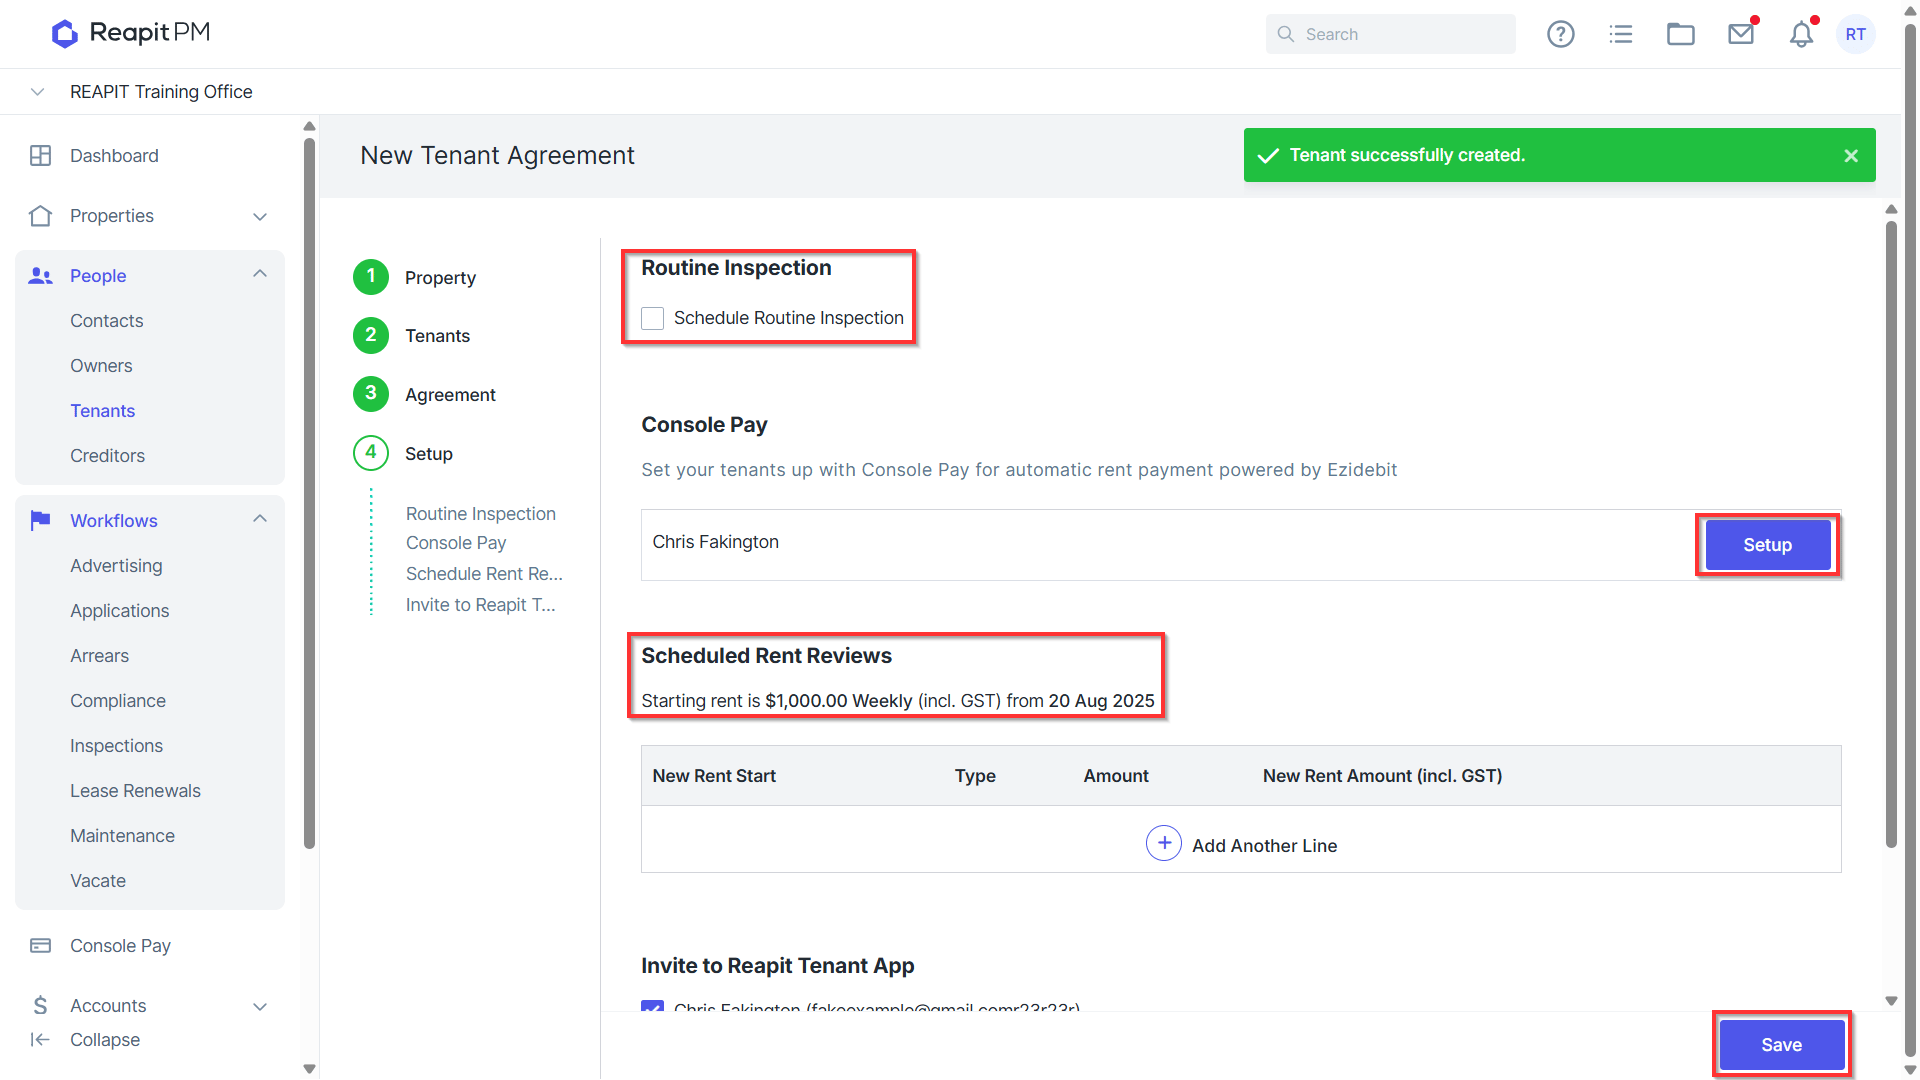
- In the final screen, you can then schedule a Routine Inspection. If your office is with Console Pay, you can then setup your tenant's payment schedule from this screen. 17. Finally, enter any rent reviews for the lease by selecting Add Another Line. 18. Choose the type of rent review and enter the amount accordingly.
- Once done select Save, or skip the step if you’re not yet ready to enter this information. You’ll then be presented with the Tenants Agreement view where you can see all information relevant to the tenancy.
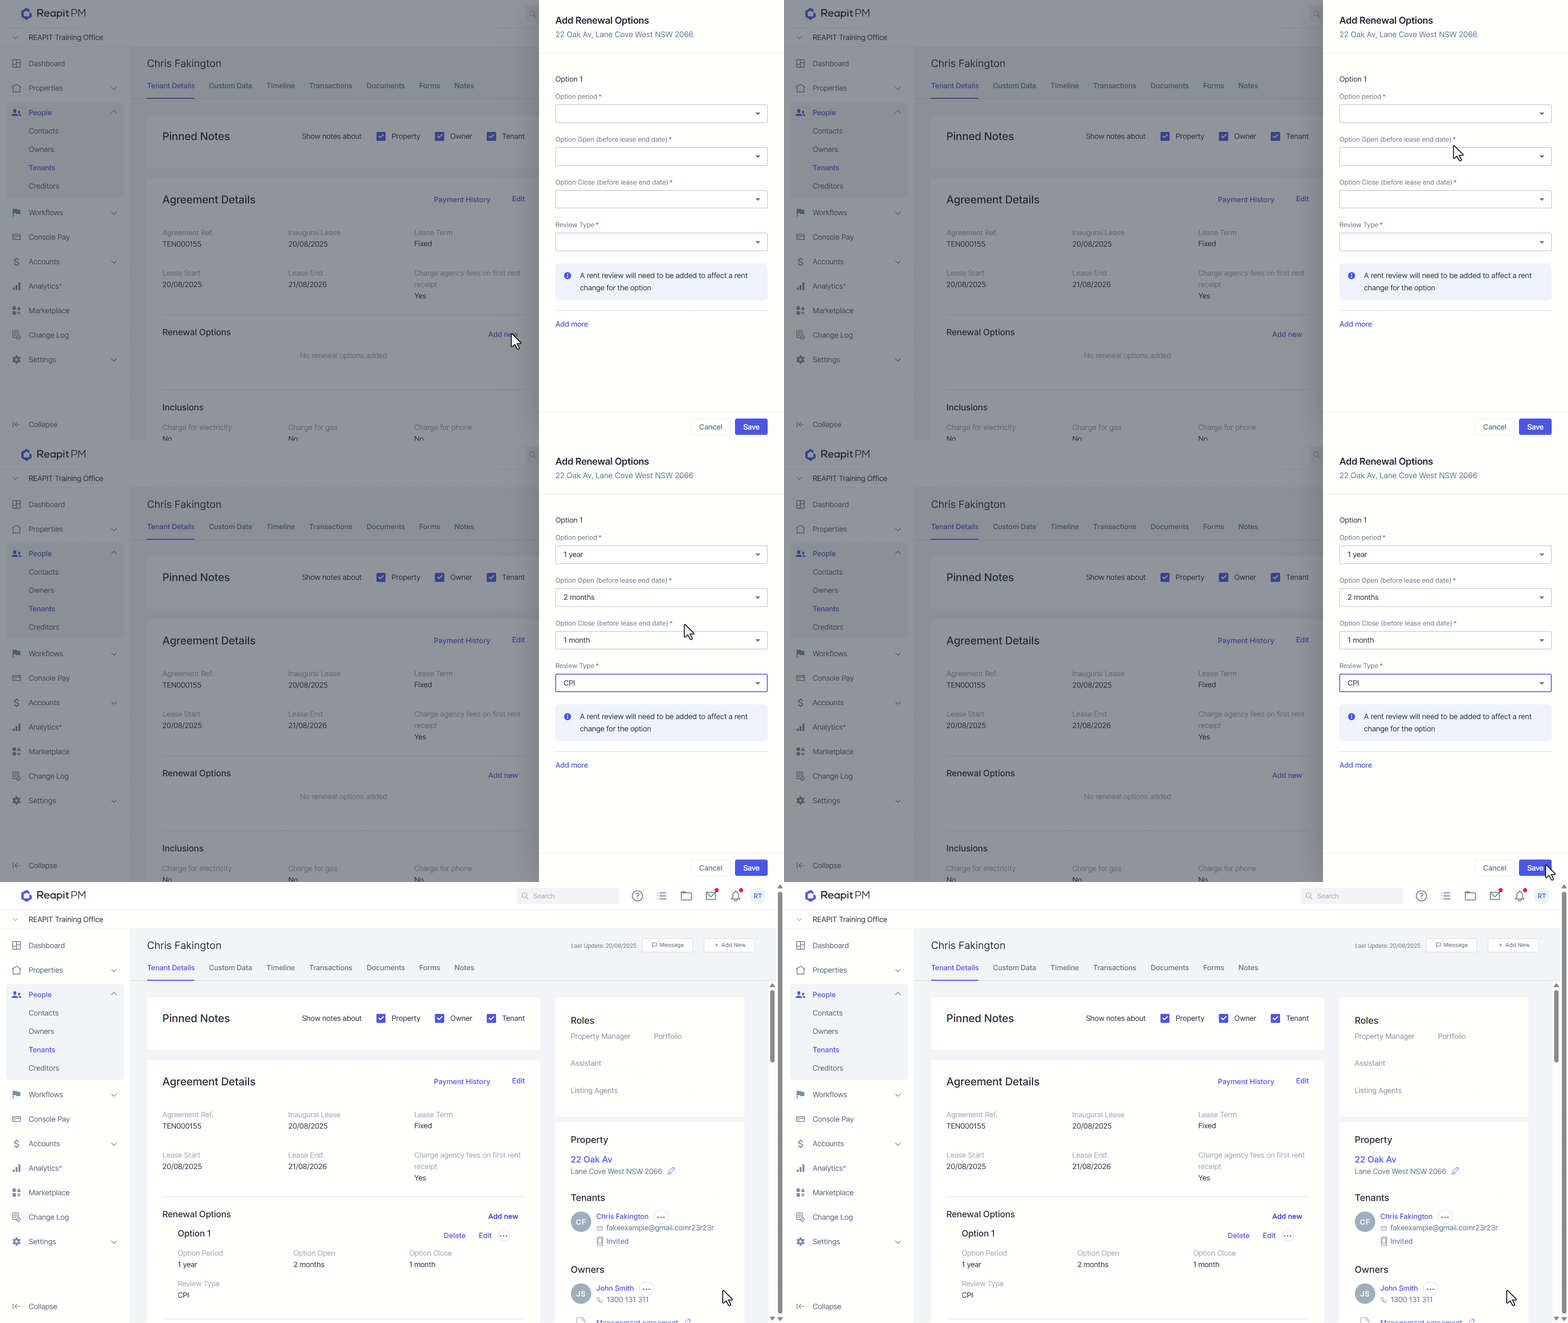
Click Add New.
Select the option period, option open, option close and review type. Click Save.