'%20d='M0%208a8%208%200%200%201%208-8h24a8%208%200%200%201%208%208v24a8%208%200%200%201-8%208H8a8%208%200%200%201-8-8V8Z'/%3e%3cpath%20fill='%23fff'%20d='M8.375%2013v14L20.5%2034l12.124-7v-7.737l-1.687-.975-2.806-1.62-1.082-.624v4.83l-.002%204.83H13.95V16.07l3.275-1.89%202.192-1.265%201.082-.625%203.275%201.877%202.192%201.256%201.083.62V9.782L20.5%206%208.376%2013Z'/%3e%3cdefs%3e%3clinearGradient%20id='reapit-pm__a'%20x1='20.702'%20x2='20.702'%20y1='.351'%20y2='31.228'%20gradientUnits='userSpaceOnUse'%3e%3cstop%20stop-color='%235573FD'/%3e%3cstop%20offset='.575'%20stop-color='%234E56EA'/%3e%3c/linearGradient%3e%3c/defs%3e%3c/svg%3e)
Managing Invoice Payments with Console Pay
This article will take you through how to manage invoices with Console Pay.
Overview
Console Pay Managing Invoice Payments
Invoices can be set to debit with Console Pay at the point of entry, or via the Tenancy file.
The process in this article include:
- Manual Invoice Payment
- Setting Invoice Preference
- Invoice Preference as shown on Invoice Create screen
- Console Pay Tenant Invoice Message
- Access & Edit the Console Pay Customisable Message
Manual Invoice Payments
- Click on People.
- Click on Tenants.
- Search and Select the Tenant.
- Click on the three dots.
- Click Manage Console Pay.
- From the overview tab, you will see any outstanding invoices for the tenancy that do not have a payment associated with them.
- Click on the invoice you want to add a payment for. Confirm the Amount and Debit Date and click Create.
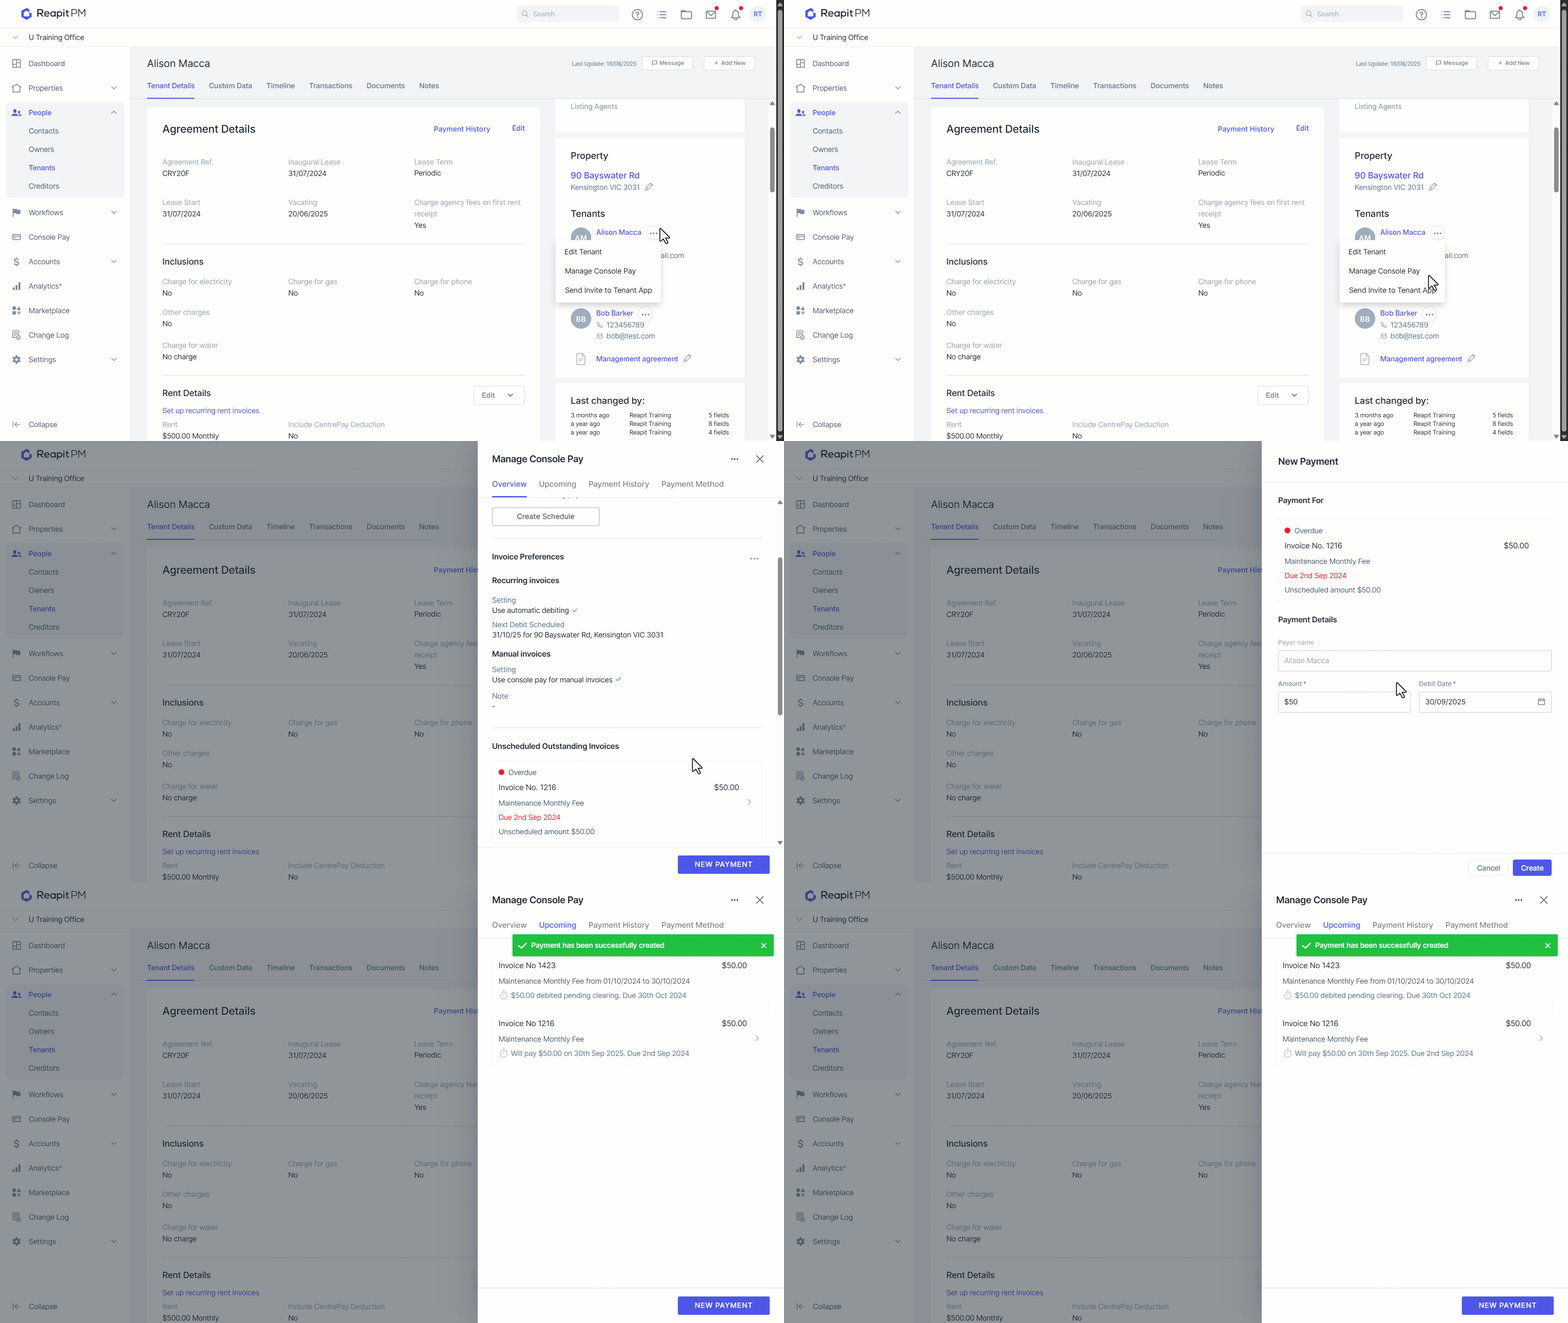
The payment will now show on the Upcoming tab in the Manage Console Pay drawer.
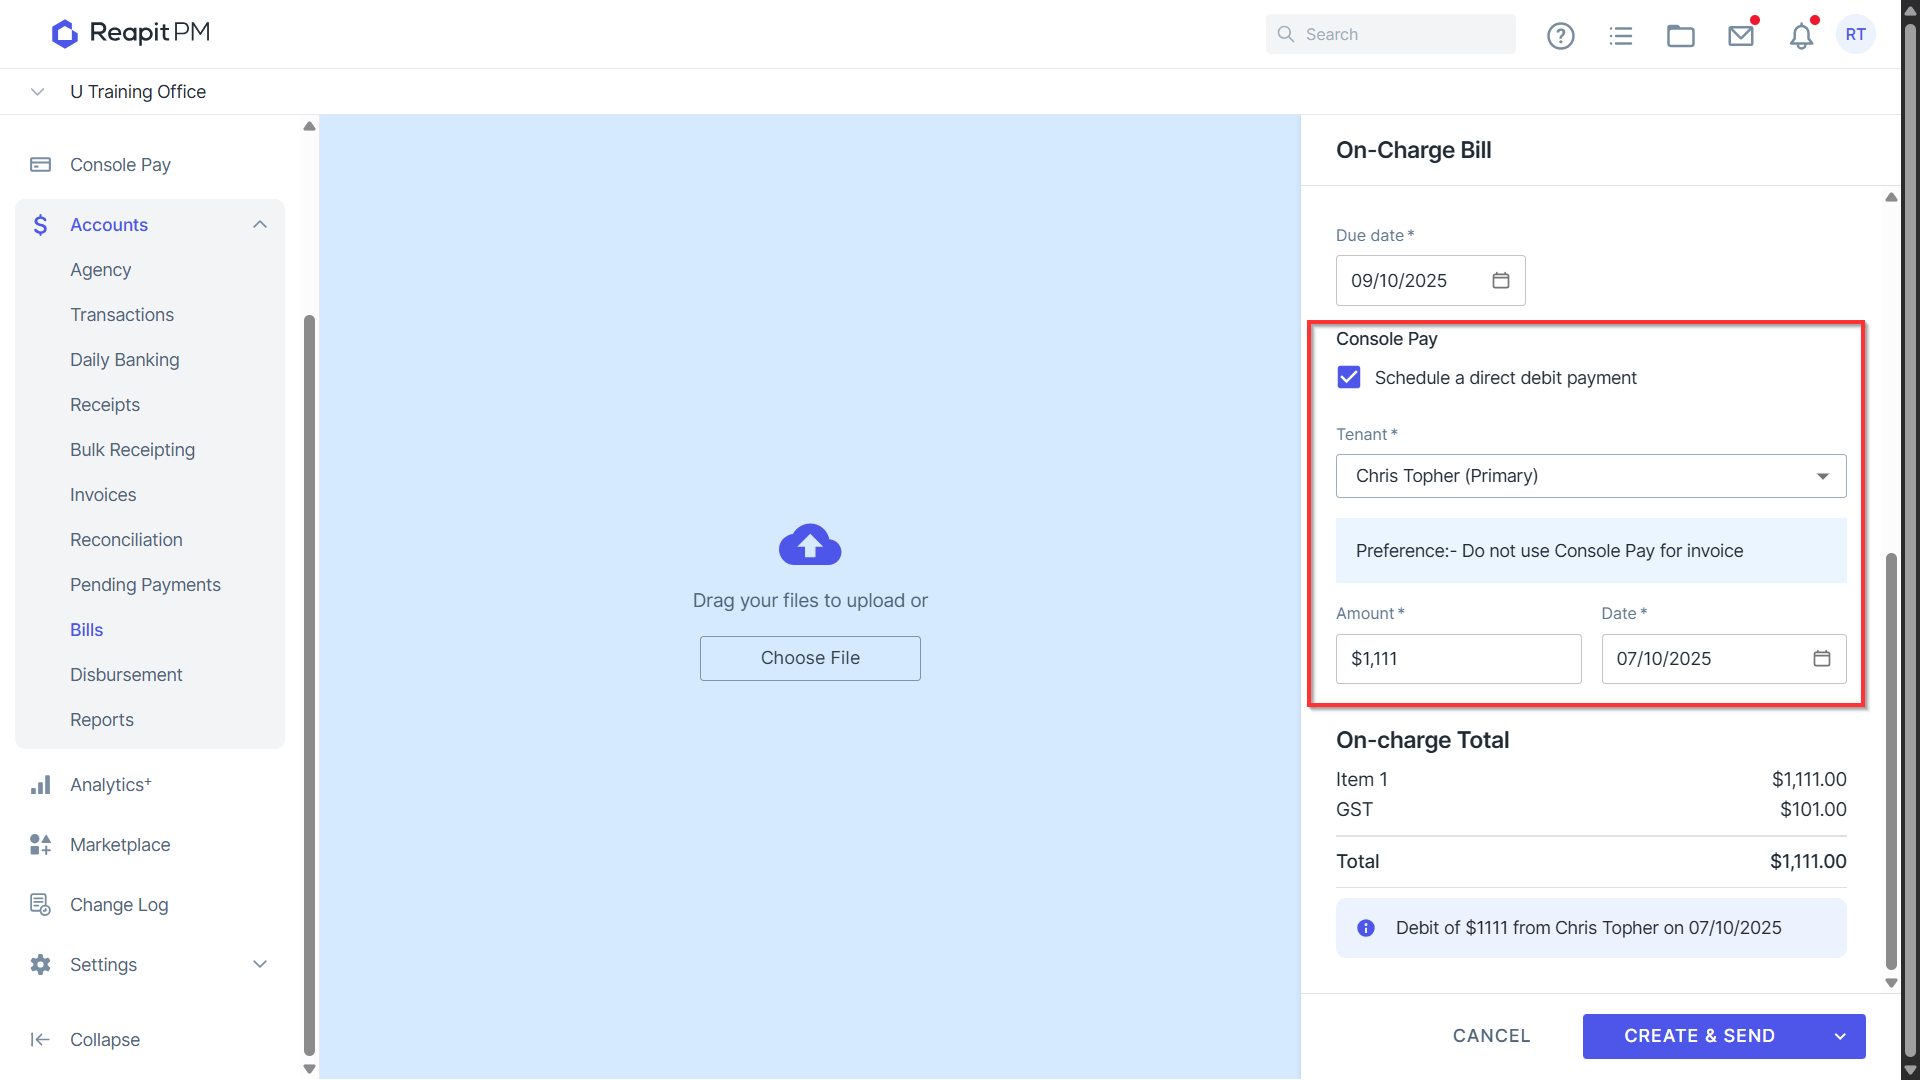
- When adding a Bill and selecting On-Charge to Tenant, there will be an option to schedule a direct debit payment shown in the screenshot below. The Date will default to 2 business days prior to due date to ensure clearance.
Setting Invoice Preference
For a tenant who is signed up with Console Pay, you can elect their invoice payment preference to use Console Pay.
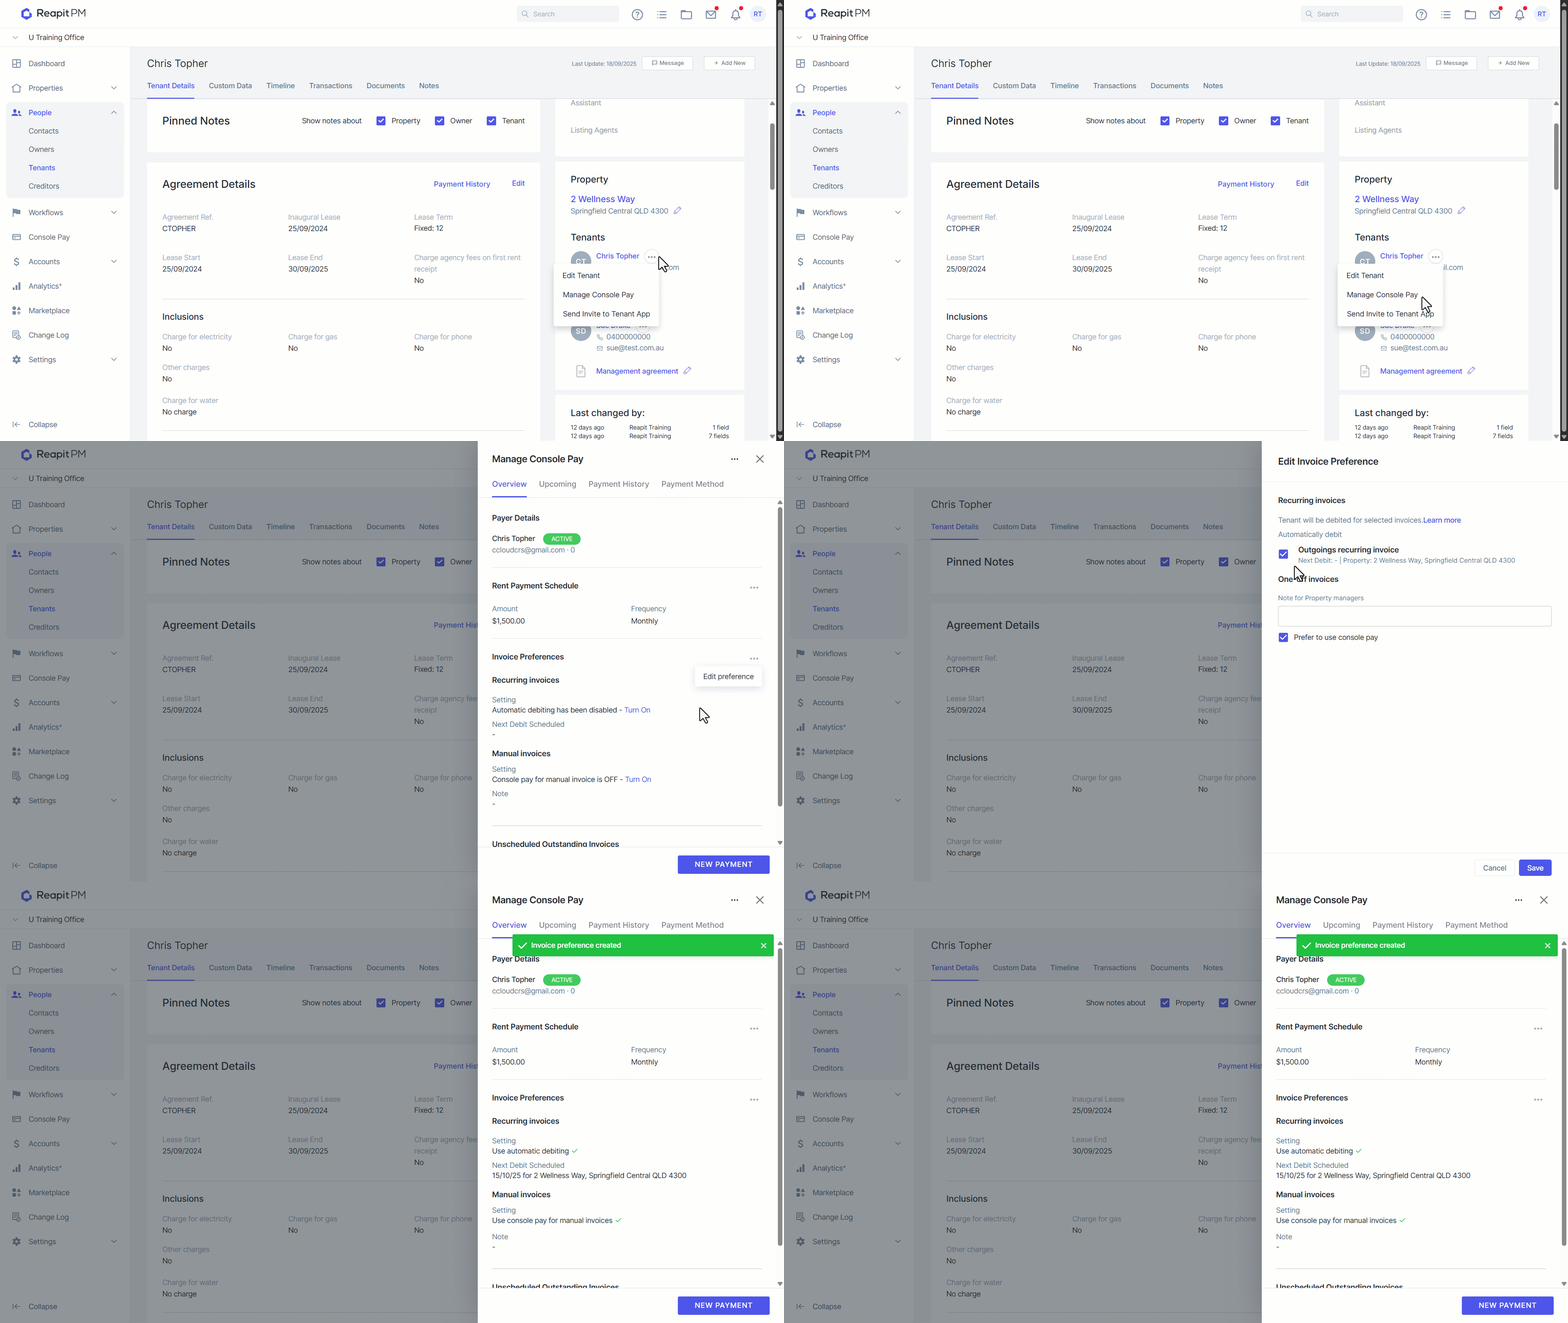
- Click on People.
- Click on Tenants.
- Search and Select the Tenant
- Click the three dots.
- Click Manage Console Pay.
- Click the three dots next to Invoice Preferences.
- Click Edit Preference.
- Select either to Use Console Pay for recurring invoices, or Prefer to use Console Pay for one-off invoices, depending on the tenant’s preferred payment method.
- This preference can also be set when setting up Console Pay on the tenant.
Invoice Preference as shown on Invoice Create Screen
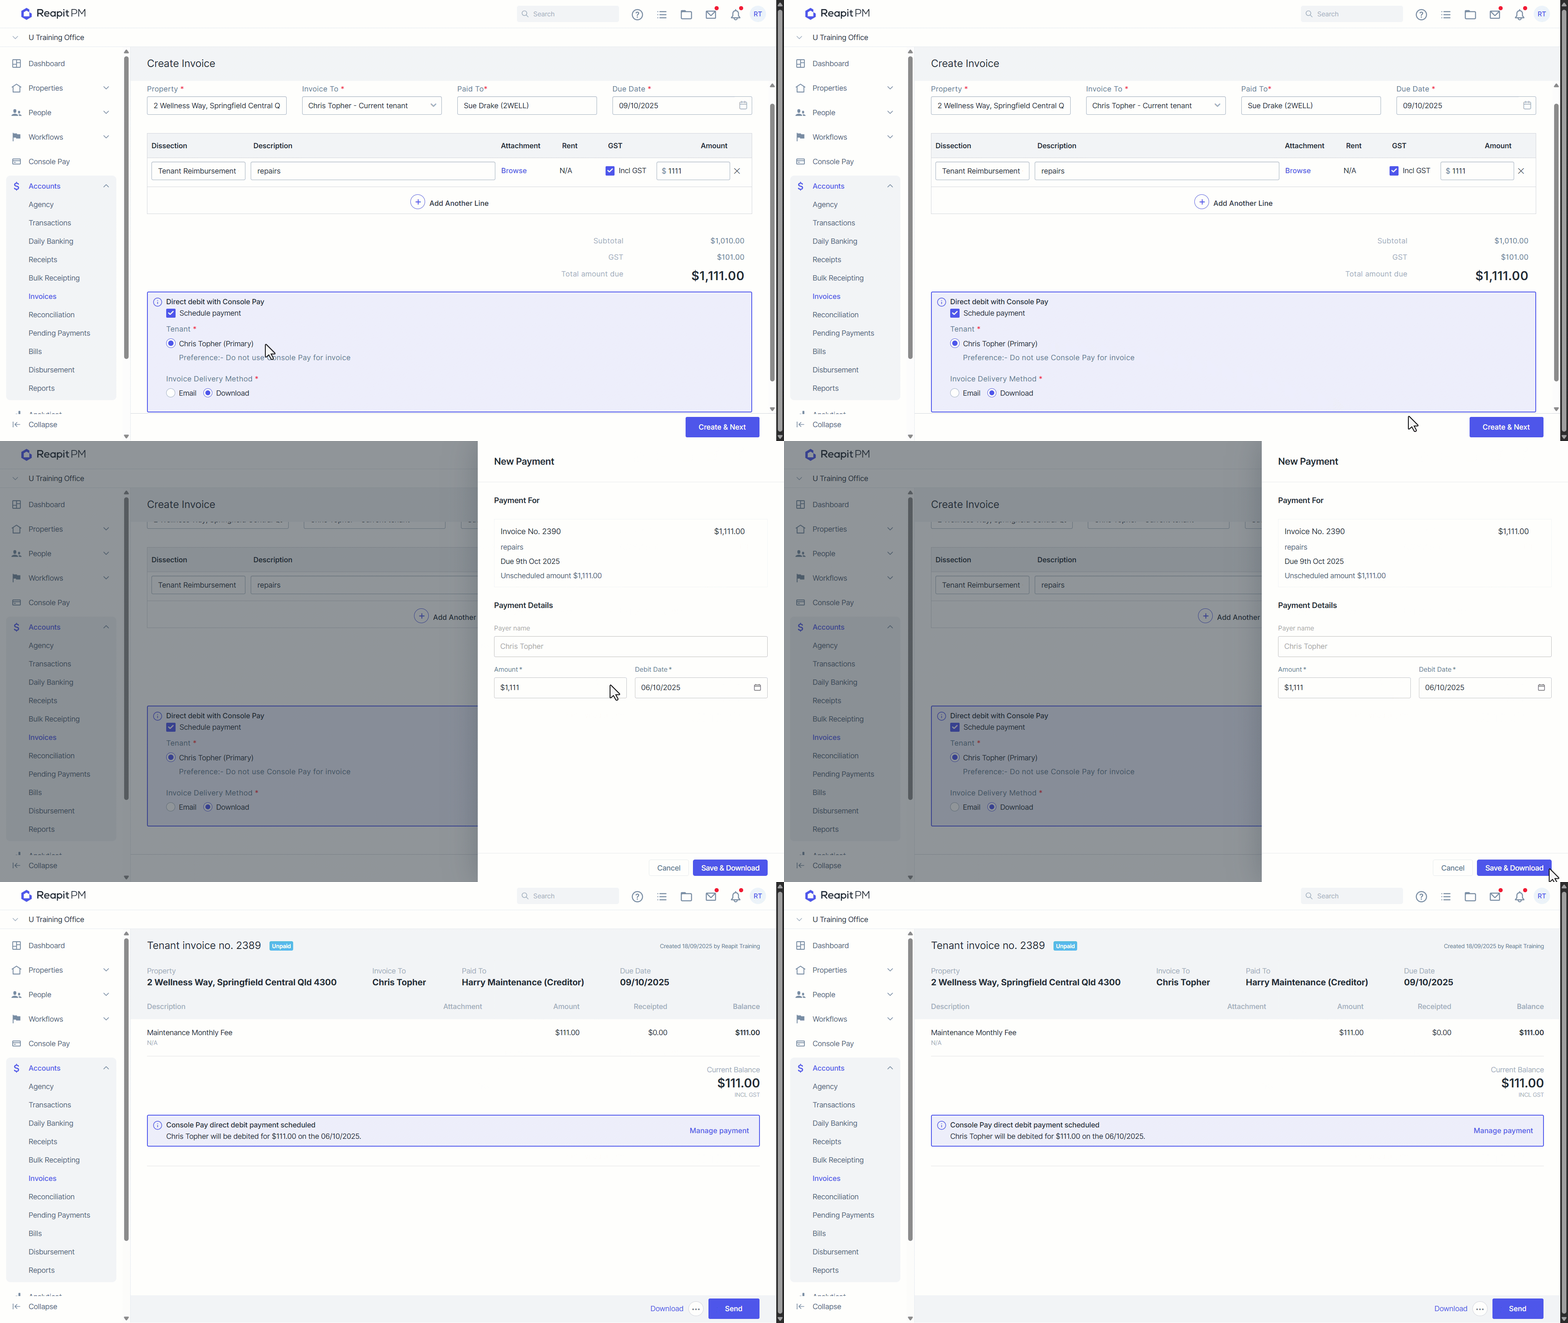
When creating an invoice against a tenant with their preference set to Console Pay for invoices, you will see a blue window at the bottom of the invoice create screen with an option to Schedule Payment. You will also get the option on this screen to email the invoice, or download the invoice if you do not wish to send a copy to the tenants via email. By default, the payment will be scheduled three business days prior to the invoice due date, to allow for clearance of funds prior to due date. You can edit the amount or date for the invoice to be debited.
- From within the Create invoice screen, click Create & Next.
- Edit the amount or date for the invoice to be debited as required from the New Payment Drawer.
- Click Save & Send (or Save & Download).
- Edit the debit details for the invoice by opening the invoice in Reapit PM and selecting Manage Payment.
- Download the invoice from this screen to see your office's Invoice PDF message.
Console Pay Tenant Invoice Message
- When you schedule an invoice in Console Pay the tenant's invoice PDF will automatically display a customisable message.
- The agency's trust account information will also be removed.
Access & Edit the Console Pay Customisable Message
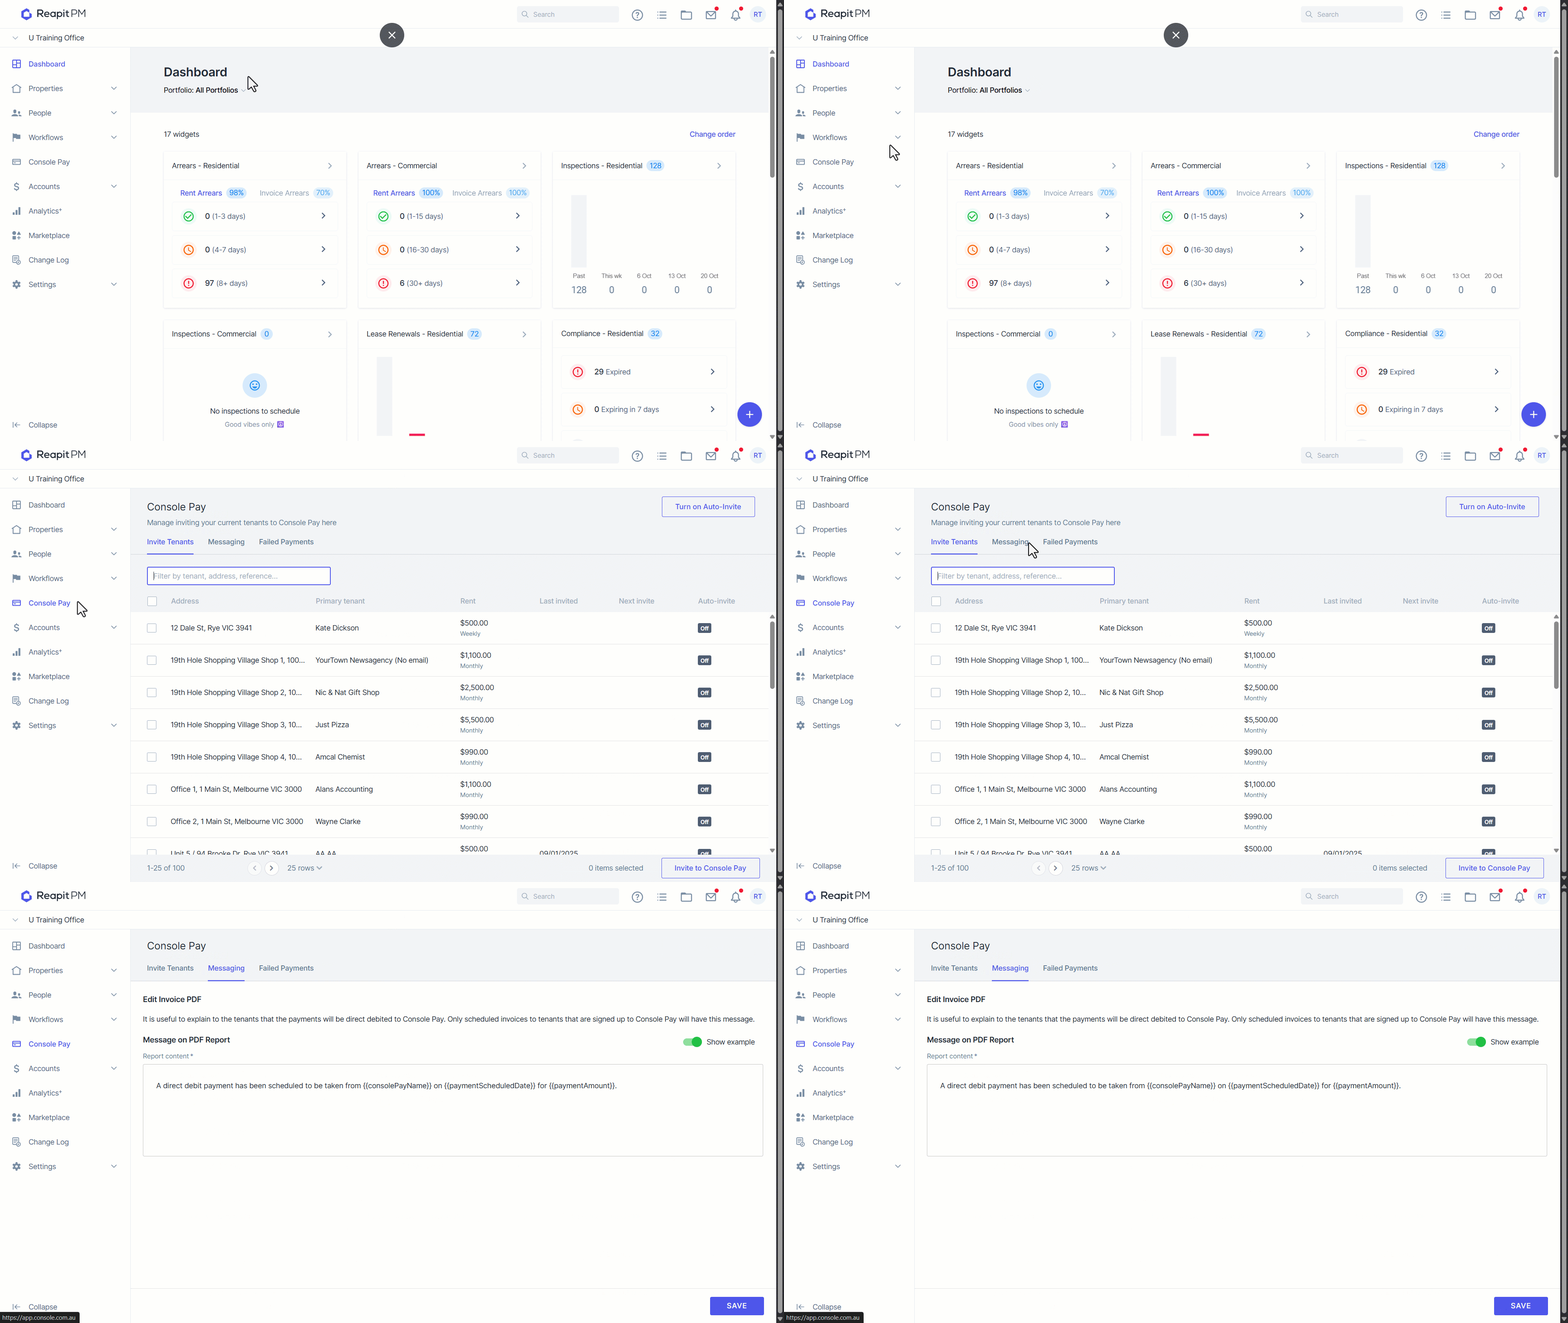
- Click the Console Pay menu.
- Click Messaging.
- You are then able to customise the message and use dynamic fields to ensure your tenants have full visibility about the payment.