'%20d='M0%208a8%208%200%200%201%208-8h24a8%208%200%200%201%208%208v24a8%208%200%200%201-8%208H8a8%208%200%200%201-8-8V8Z'/%3e%3cpath%20fill='%23fff'%20d='M8.375%2013v14L20.5%2034l12.124-7v-7.737l-1.687-.975-2.806-1.62-1.082-.624v4.83l-.002%204.83H13.95V16.07l3.275-1.89%202.192-1.265%201.082-.625%203.275%201.877%202.192%201.256%201.083.62V9.782L20.5%206%208.376%2013Z'/%3e%3cdefs%3e%3clinearGradient%20id='reapit-pm__a'%20x1='20.702'%20x2='20.702'%20y1='.351'%20y2='31.228'%20gradientUnits='userSpaceOnUse'%3e%3cstop%20stop-color='%235573FD'/%3e%3cstop%20offset='.575'%20stop-color='%234E56EA'/%3e%3c/linearGradient%3e%3c/defs%3e%3c/svg%3e)
Edit and Send Inspection Notice
This article will guide users on editing and sending inspection notices in Reapit PM.
Edit and Send Inspection Notices
The processes in this article include:
- How to Edit the Inspection Notice
- How to Send Single Inspection Notices
- How to Send Bulk Inspection Notices
The Inspection notice can be edited in the templates section of Reapit PM .
Note: You need to have office administrator access to be able to edit templates.
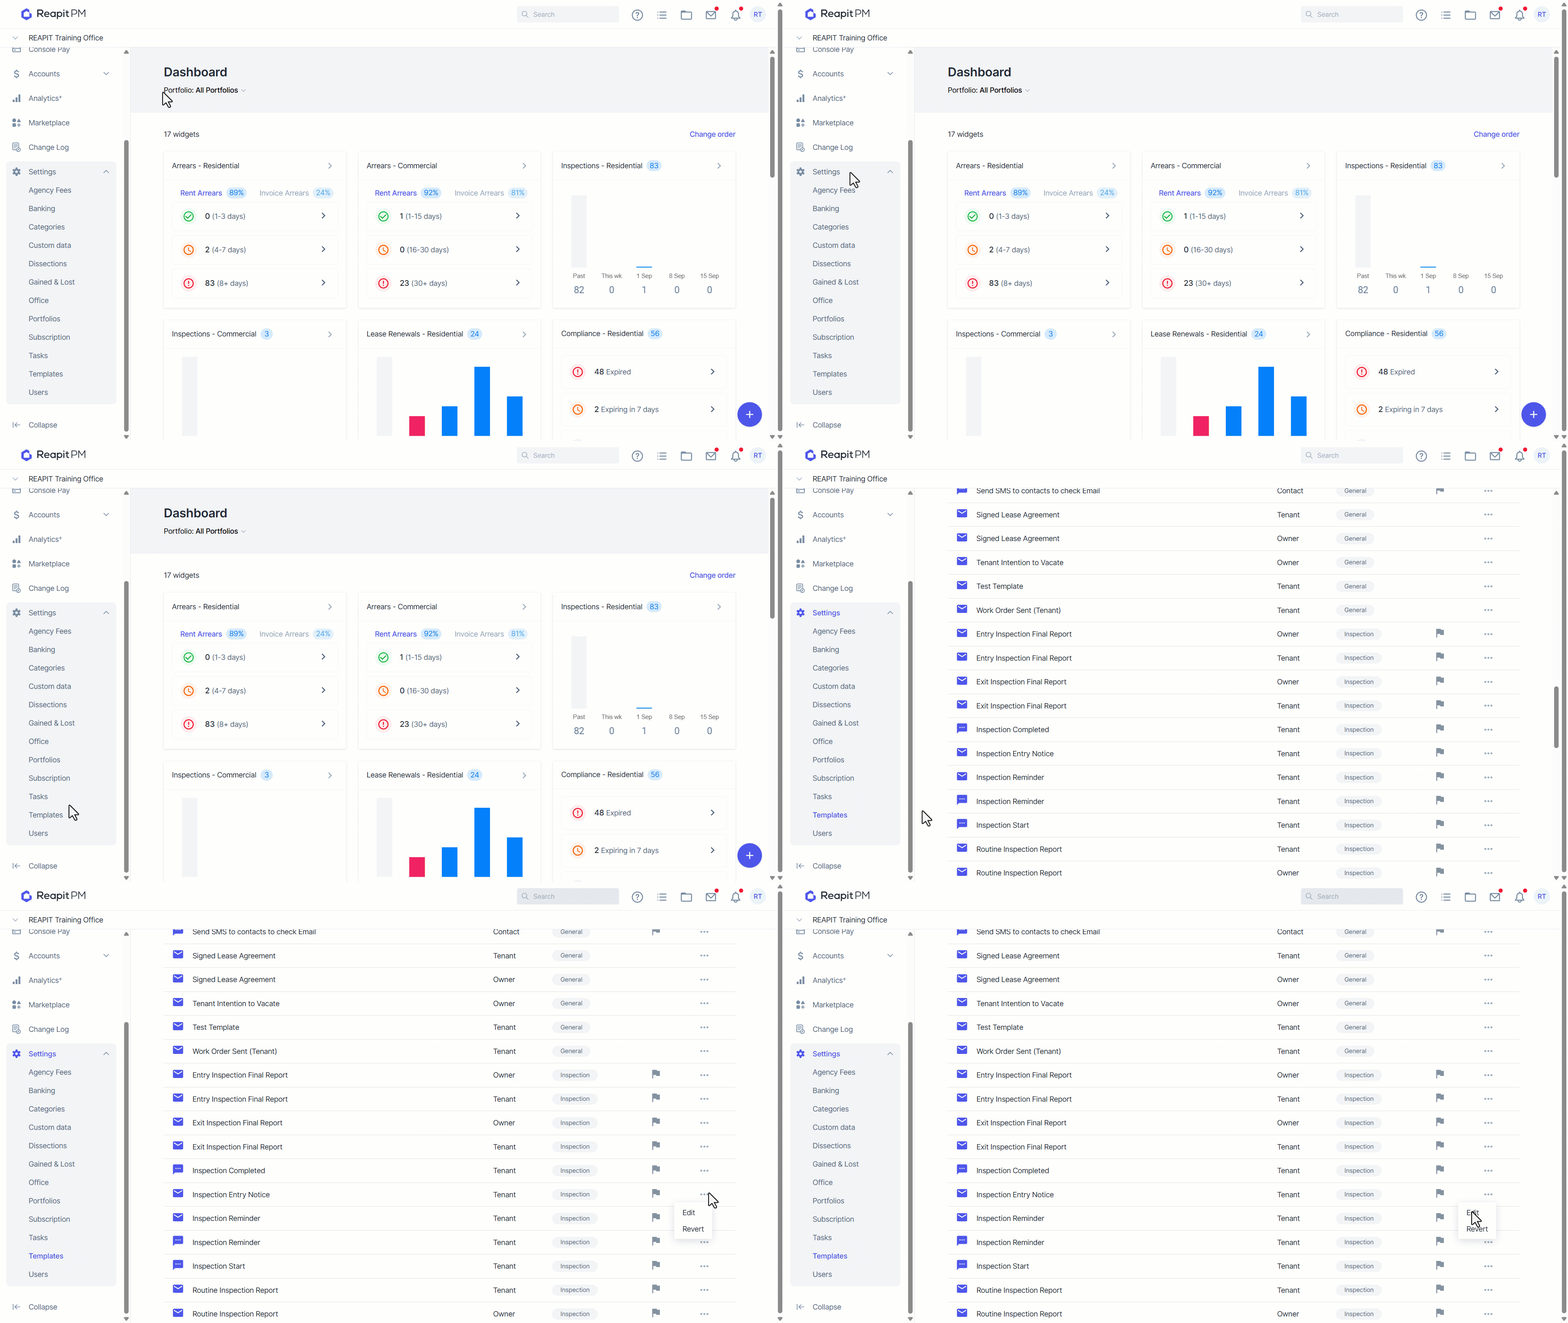
- Navigate to the drawer on the left hand side and select Settings > Templates.
- All of the Console Cloud templates will appear.
- Find the Inspection Notice template.
- Select the three dots, then click Edit.
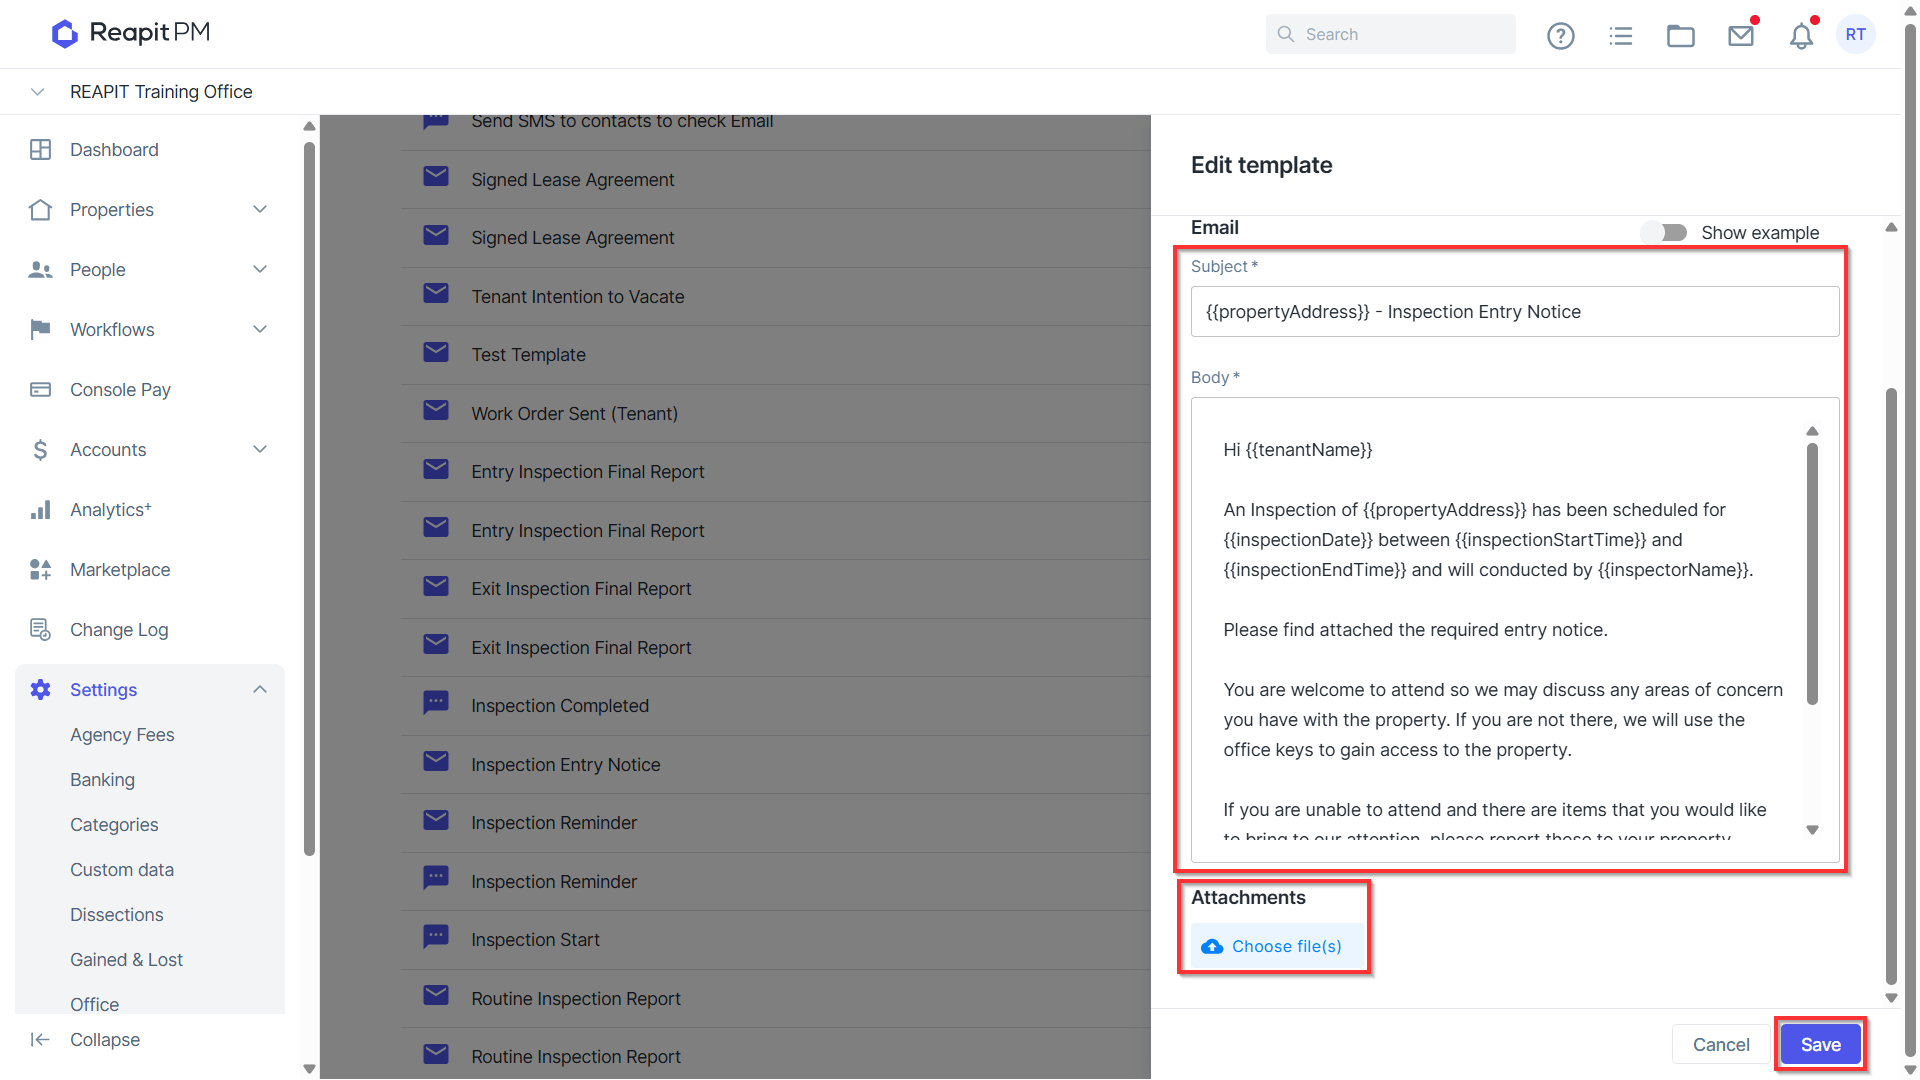
- Edit/add text, including any merge fields you require.
Note: Merge fields will appear only when you click into the body or subject areas.
- Add any attachments that you would like to go out with the inspection entry notice.
Note: The entry inspection notice will be automatically attached to the message when you send for QLD/NT/WA.
- Click Save.
Sending Single Inspection Notices
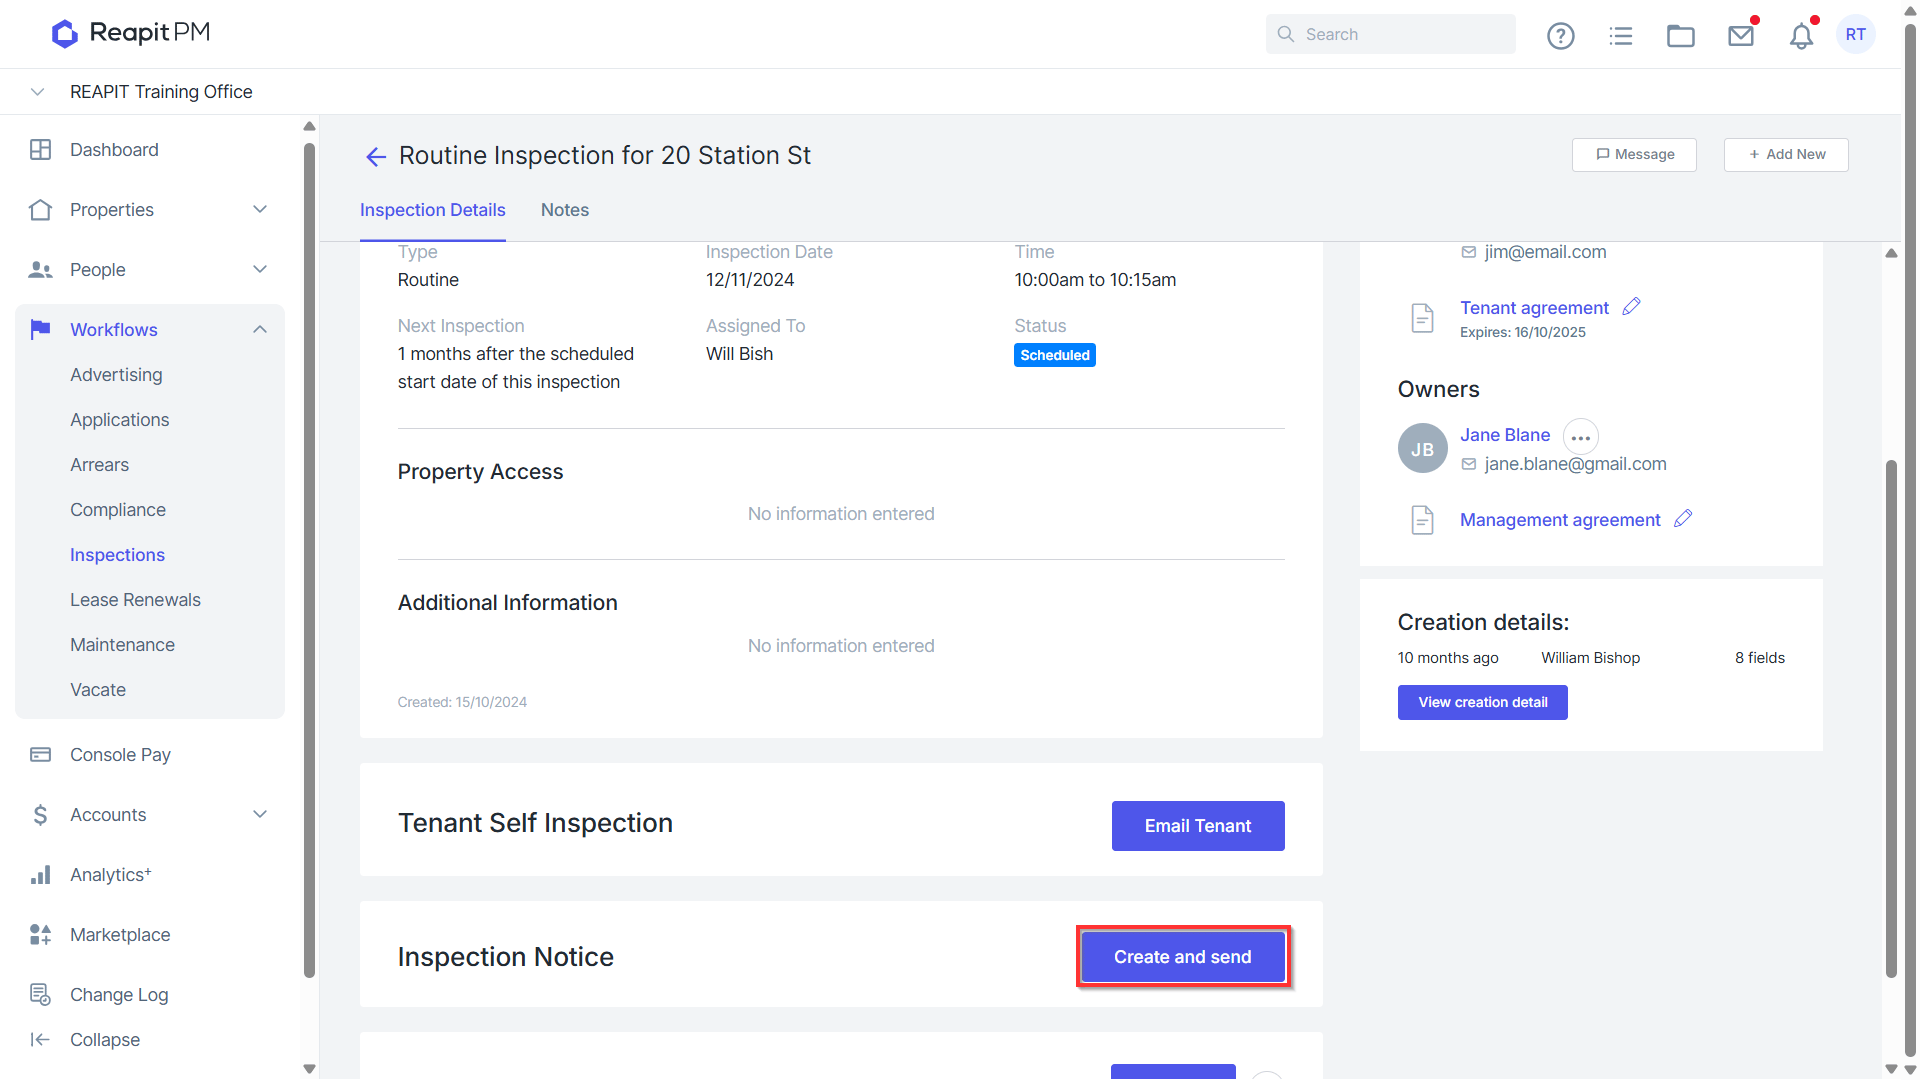
- Open the relevant Inspection in the Inspection workflow.
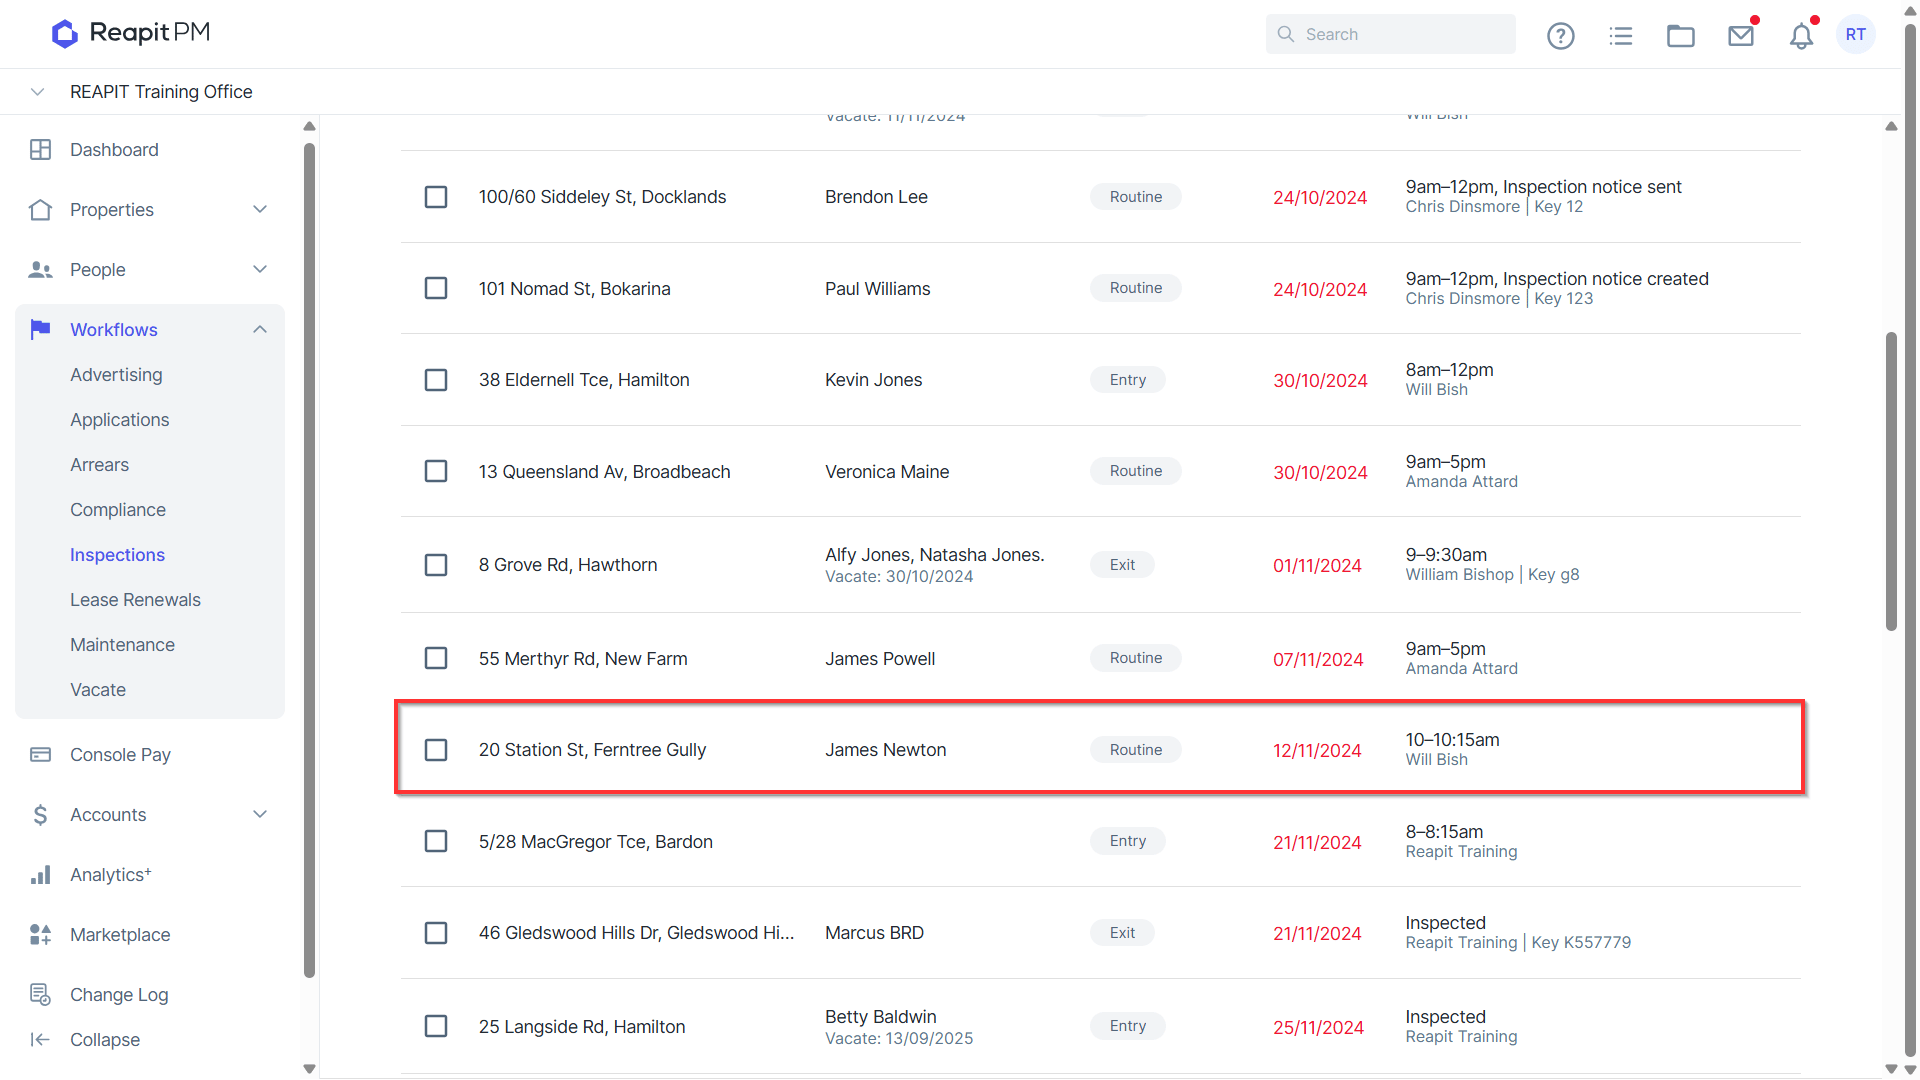
- Click Create and Send.
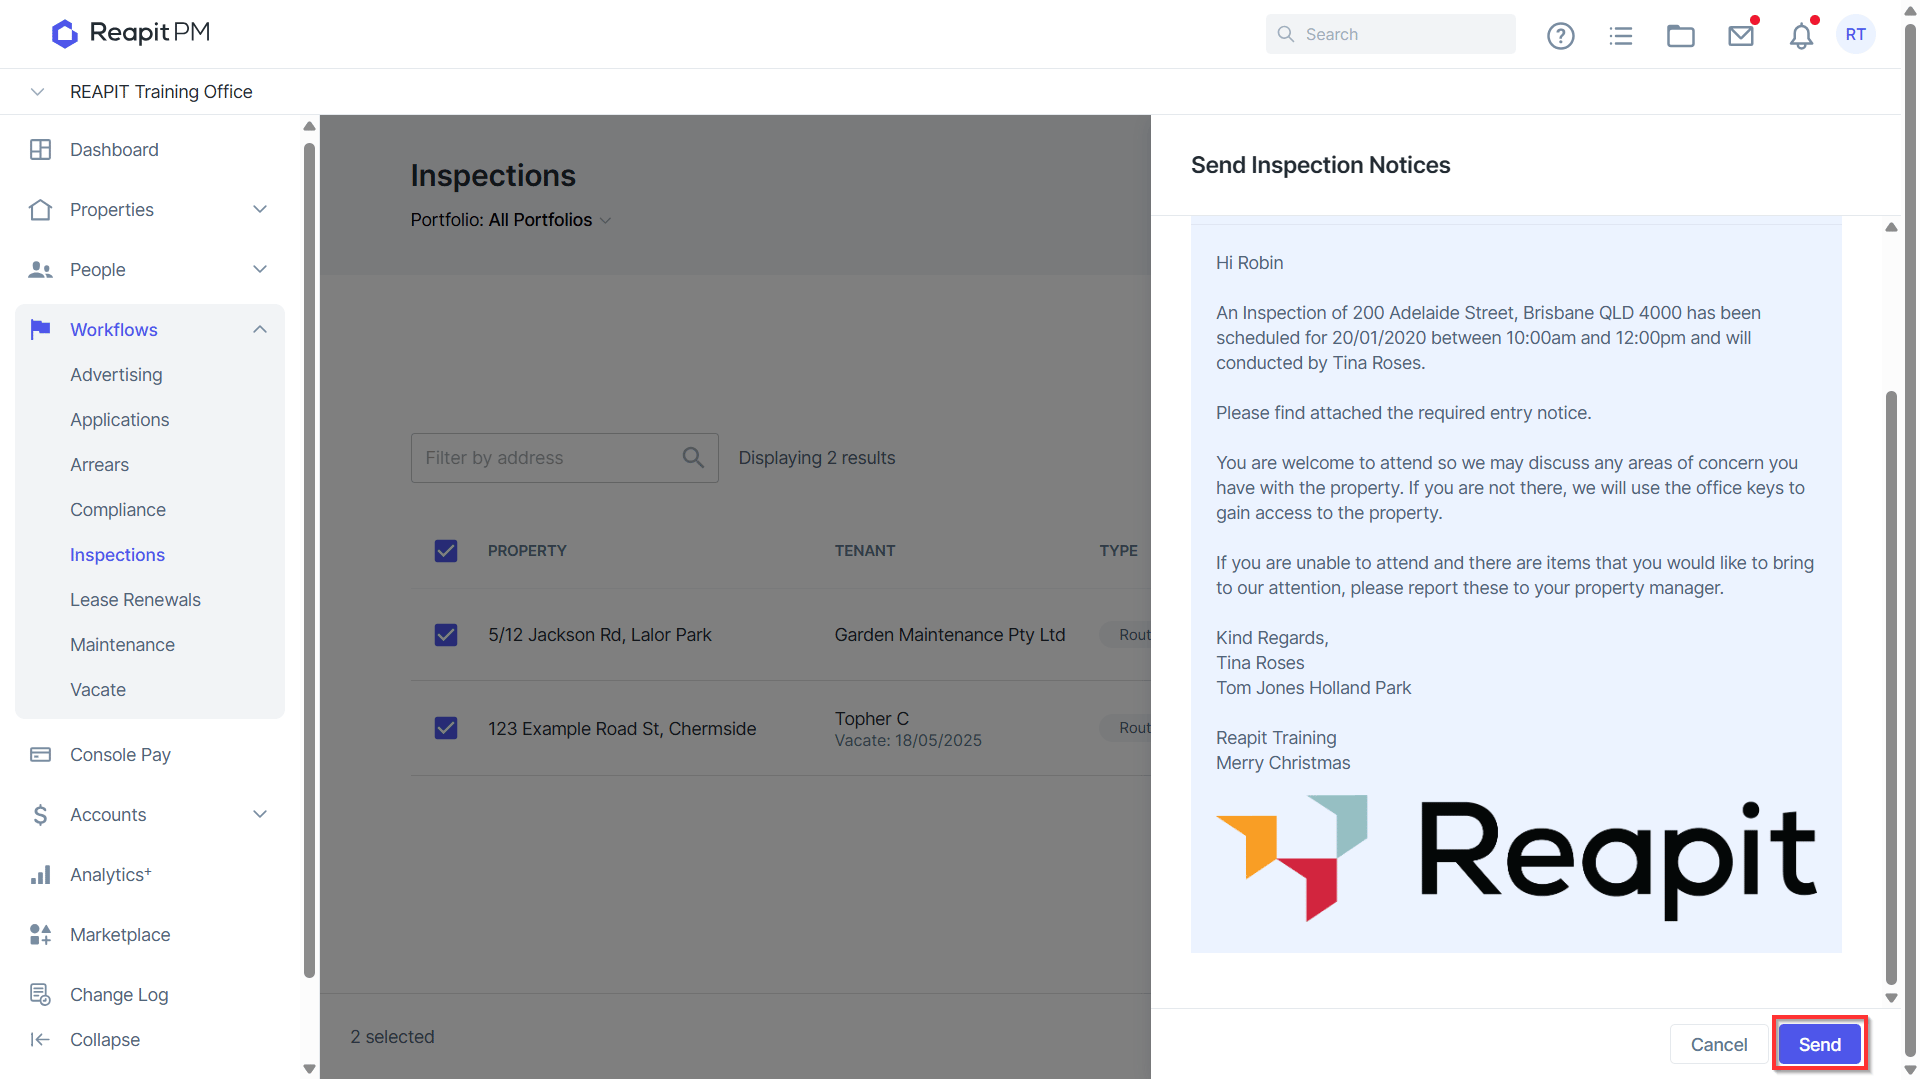
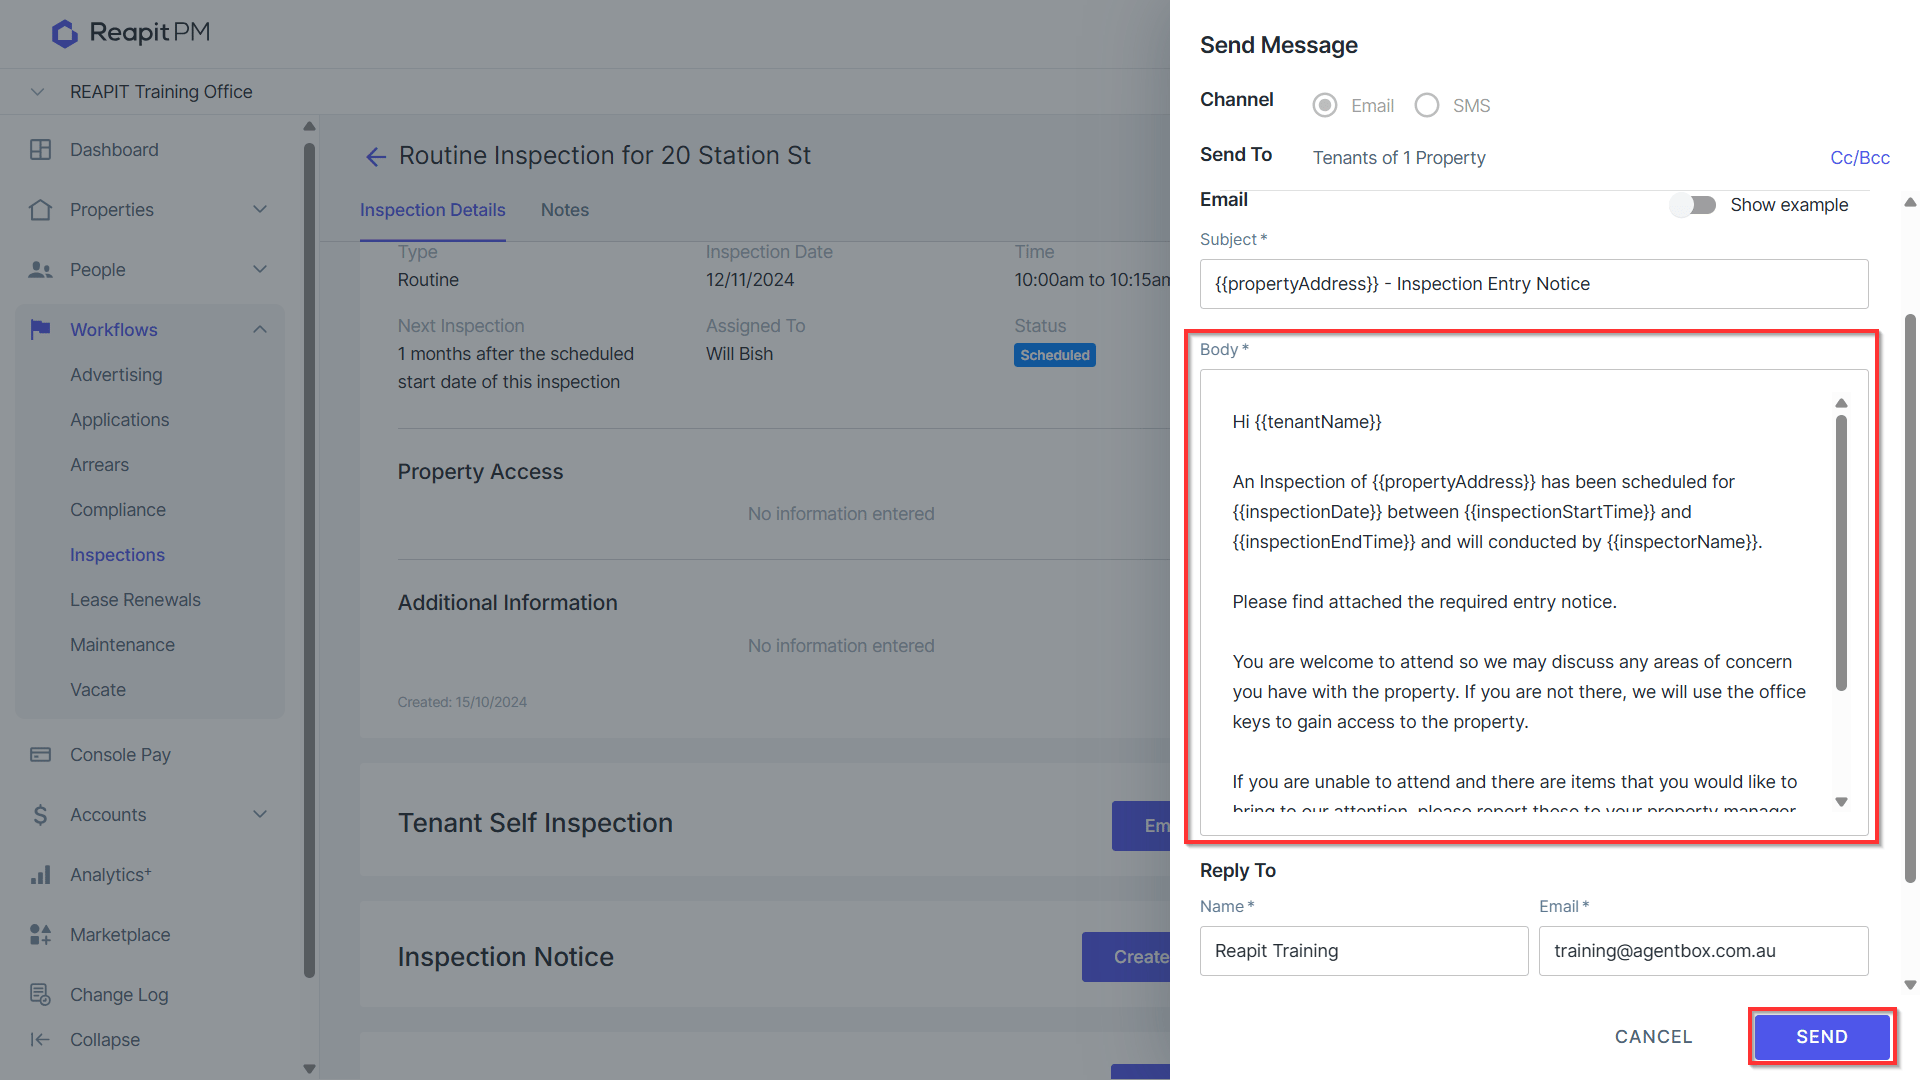
The send message drawer will appear. Edit the subject or body if required (individual send only).
Click Send.
Sending Bulk Inspection Notices
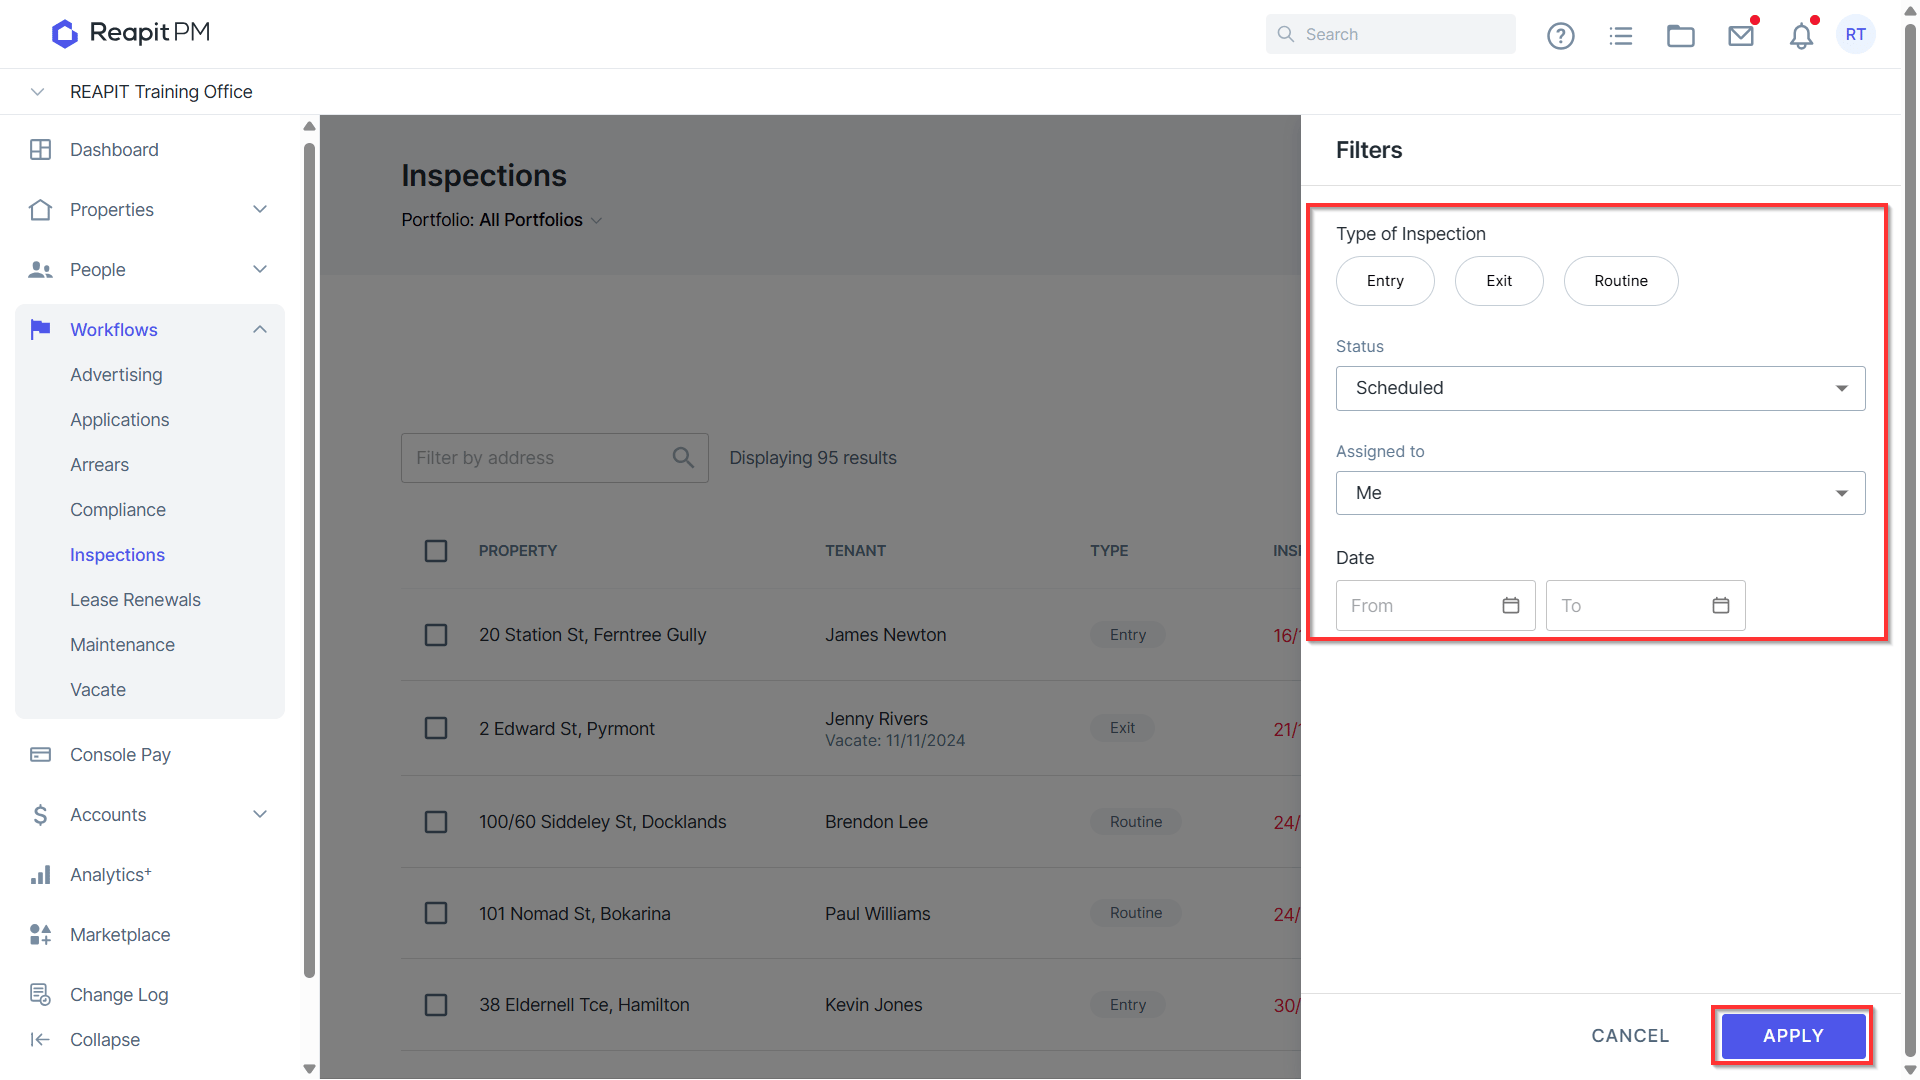
- Navigate to the Filters tab and apply ‘Routine’, ‘Scheduled’ and assign to ‘Me’. Click Apply.
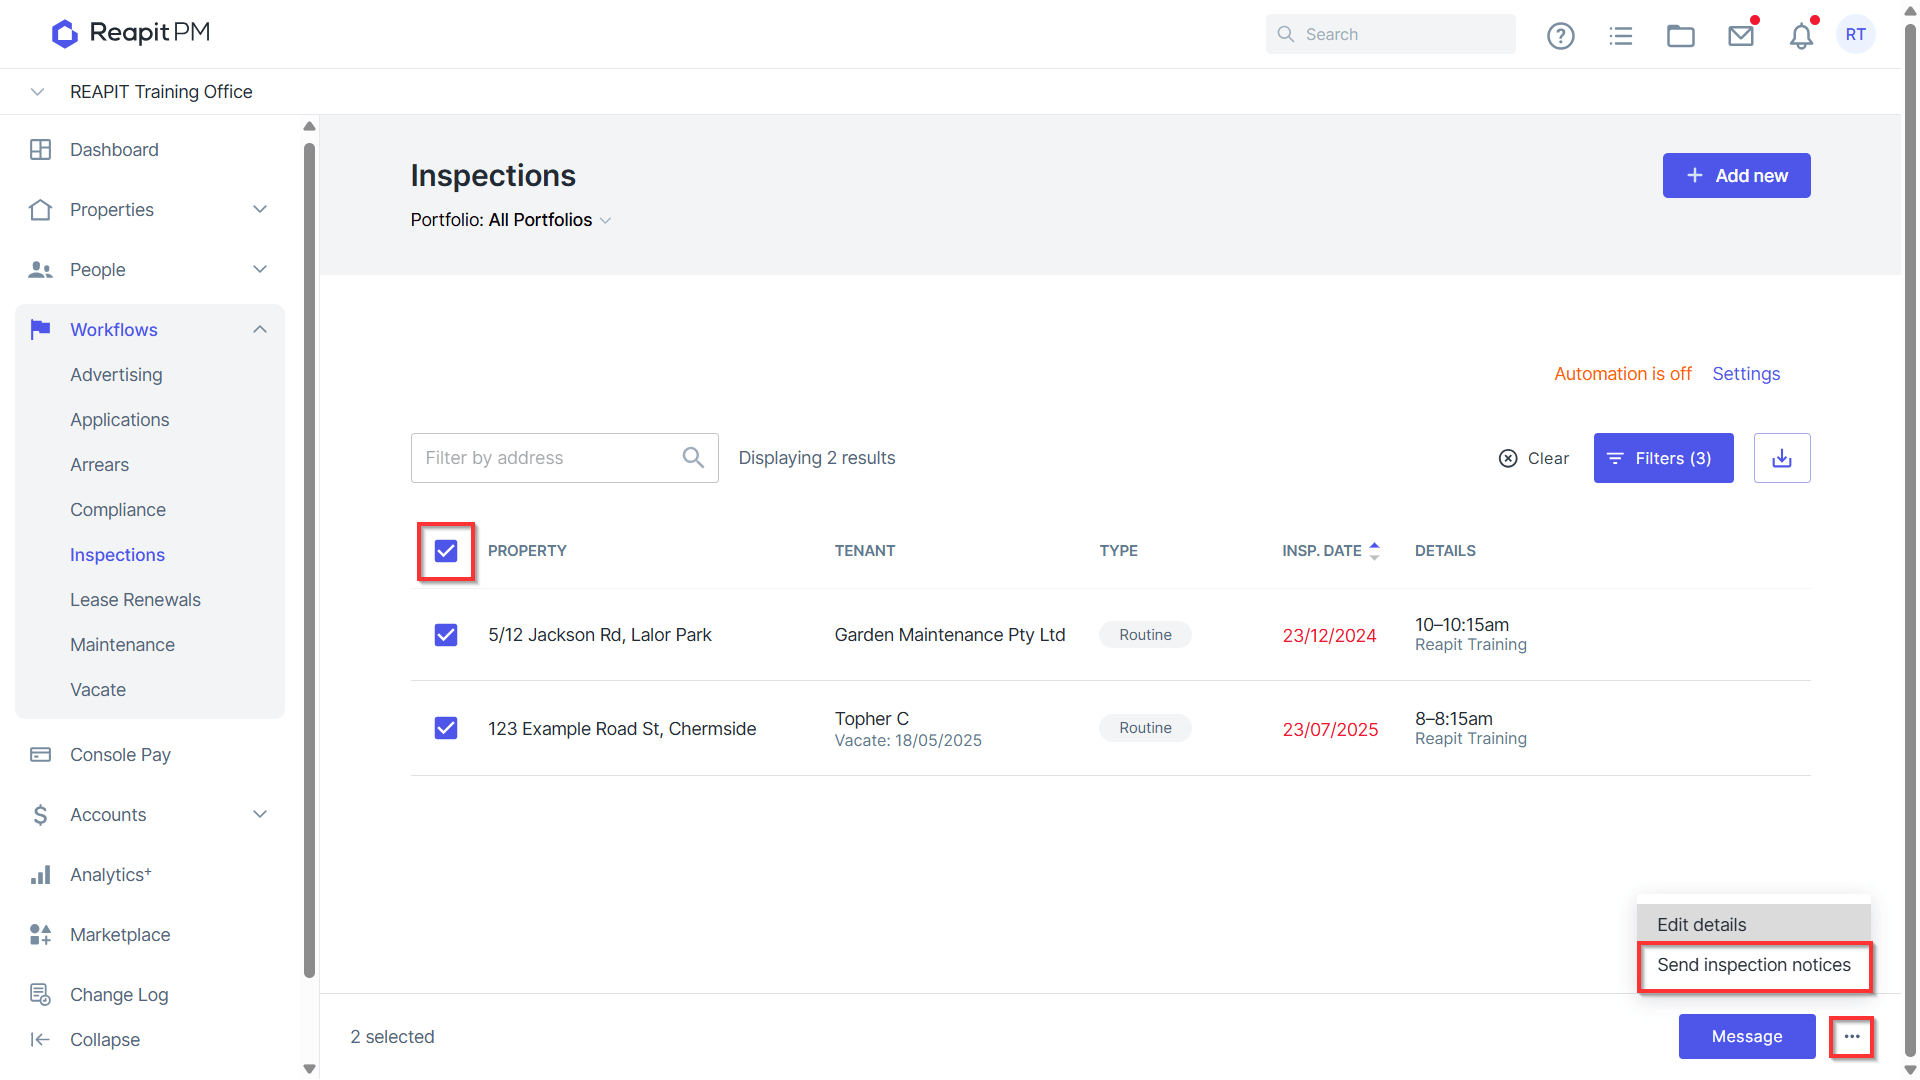
- Tick the checkbox next to Property and then navigate to the 3 dots next to the message icon in the bottom right hand corner. Click Send Inspection Notice.
- Click Send.