'%20d='M0%208a8%208%200%200%201%208-8h24a8%208%200%200%201%208%208v24a8%208%200%200%201-8%208H8a8%208%200%200%201-8-8V8Z'/%3e%3cpath%20fill='%23fff'%20d='M8.375%2013v14L20.5%2034l12.124-7v-7.737l-1.687-.975-2.806-1.62-1.082-.624v4.83l-.002%204.83H13.95V16.07l3.275-1.89%202.192-1.265%201.082-.625%203.275%201.877%202.192%201.256%201.083.62V9.782L20.5%206%208.376%2013Z'/%3e%3cdefs%3e%3clinearGradient%20id='reapit-pm__a'%20x1='20.702'%20x2='20.702'%20y1='.351'%20y2='31.228'%20gradientUnits='userSpaceOnUse'%3e%3cstop%20stop-color='%235573FD'/%3e%3cstop%20offset='.575'%20stop-color='%234E56EA'/%3e%3c/linearGradient%3e%3c/defs%3e%3c/svg%3e)
Invoice Automate Integration
This article is a guide on how the Invoice Automate integration works, and how to set it up in Reapit PM.
Activating the Invoice Automate Integration
You will need to have an account with Invoice Automate to be able to complete the set up of the integration.
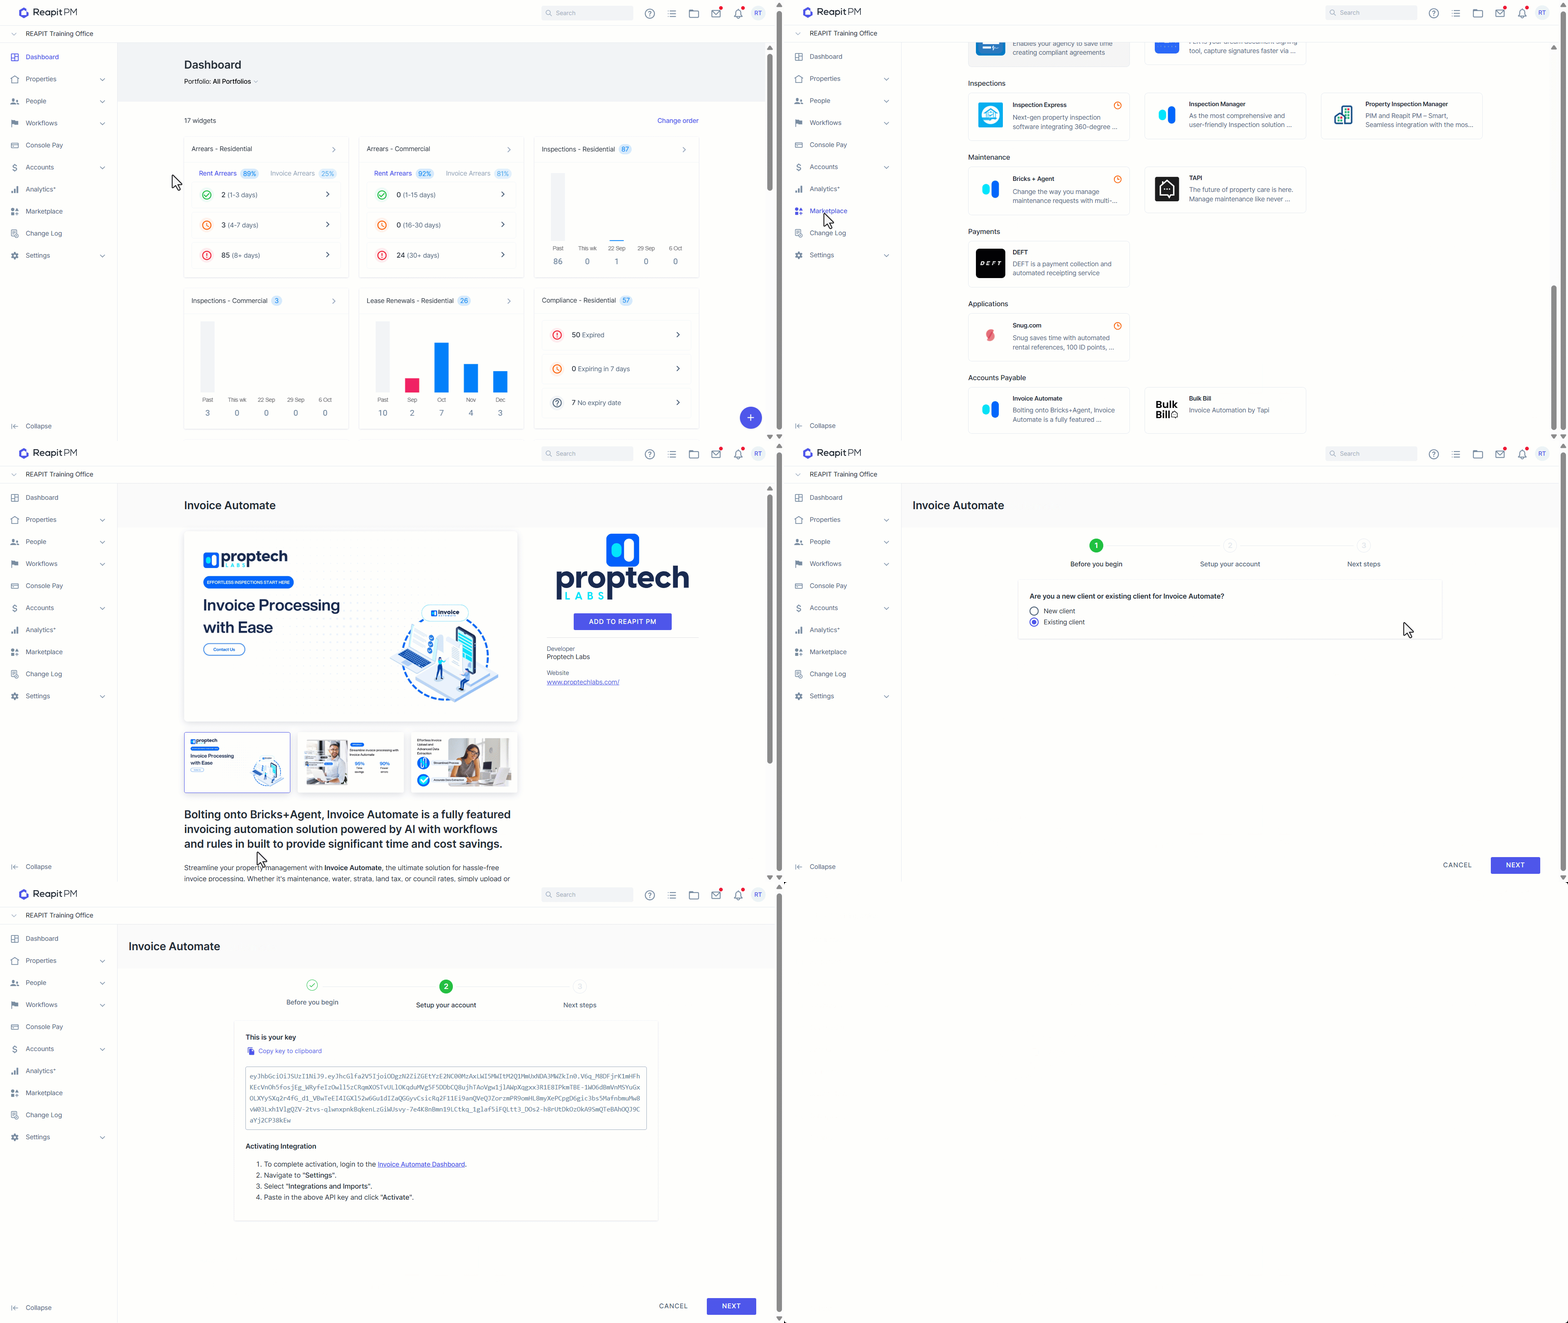
1. Click on Marketplace.
2. Navigate to Accounts Payable and Click on Invoice Automate.
3. Click Add to Reapit PM.
4. Select if you are a New client or Existing client. Click Next to proceed.
5. Your API Key will be shown with the ability to Copy key to clipboard. Once the key has been copied, you will need to sign in to the Invoice Automate dashboard, navigate to Settings and select Integrations and Imports.
This will display the option to enter the API Key copied into the section for Reapit PM. Once done, click Activate.
Once the integration has been connected, a green confirmation tick will appear on the Invoice Automate tile in the Marketplace tab.
When Bills are redirected to the Office assigned email inbox for Invoice Automate, they will appear in the list ready for you to process. Please follow the Invoice Automate steps for processing these invoices.
You will receive prompts similar to Reapit PM that will let you know if any invoices need to be on-charged to the relevant tenancies. This uses the same triggers as PM (water or dissection based on liability).
The integration will share the creditor/property and tenant information required in order for a seamless Bill processing workflow.
Bills (and associated tenant invoices) that are added via Invoice Automate will appear within the Bills workflow in PM within a few seconds after creation.