'%20d='M0%208a8%208%200%200%201%208-8h24a8%208%200%200%201%208%208v24a8%208%200%200%201-8%208H8a8%208%200%200%201-8-8V8Z'/%3e%3cpath%20fill='%23fff'%20d='M8.375%2013v14L20.5%2034l12.124-7v-7.737l-1.687-.975-2.806-1.62-1.082-.624v4.83l-.002%204.83H13.95V16.07l3.275-1.89%202.192-1.265%201.082-.625%203.275%201.877%202.192%201.256%201.083.62V9.782L20.5%206%208.376%2013Z'/%3e%3cdefs%3e%3clinearGradient%20id='reapit-pm__a'%20x1='20.702'%20x2='20.702'%20y1='.351'%20y2='31.228'%20gradientUnits='userSpaceOnUse'%3e%3cstop%20stop-color='%235573FD'/%3e%3cstop%20offset='.575'%20stop-color='%234E56EA'/%3e%3c/linearGradient%3e%3c/defs%3e%3c/svg%3e)
Conversations - Connecting your Gmail Account to Reapit PM
This article will guide you through connecting your Gmail account to Reapit PM.
Conversations - Connecting your Gmail Account to Reapit PM
This article will guide you through connecting your Gmail account to Reapit PM.
The process in this article include:
- Connect your Gmail Account to Reapit PM
- Navigate to Conversations.
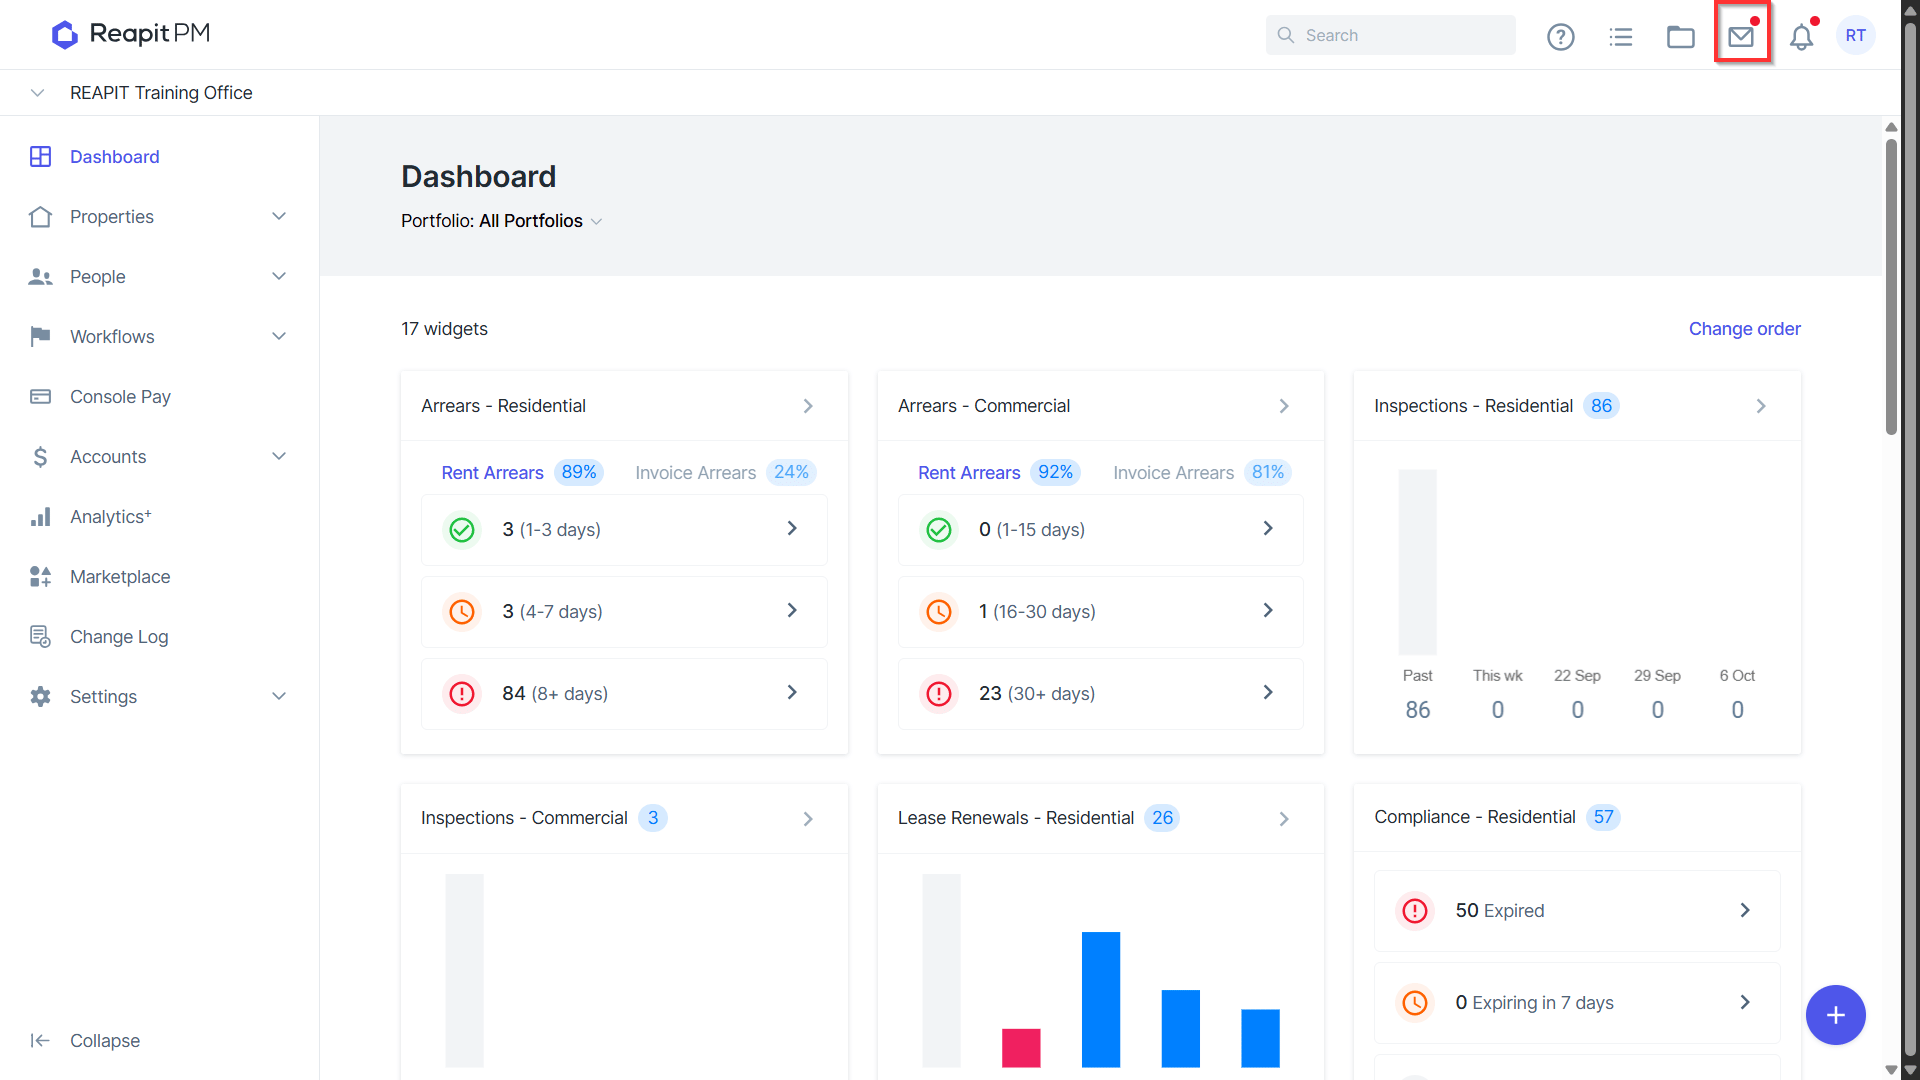
- Conversations will now display a welcome to conversations email, which provides guidance on getting started. It also explains how recognised emails from Contacts, Creditors, Tenants, and Owners are brought into Conversations.
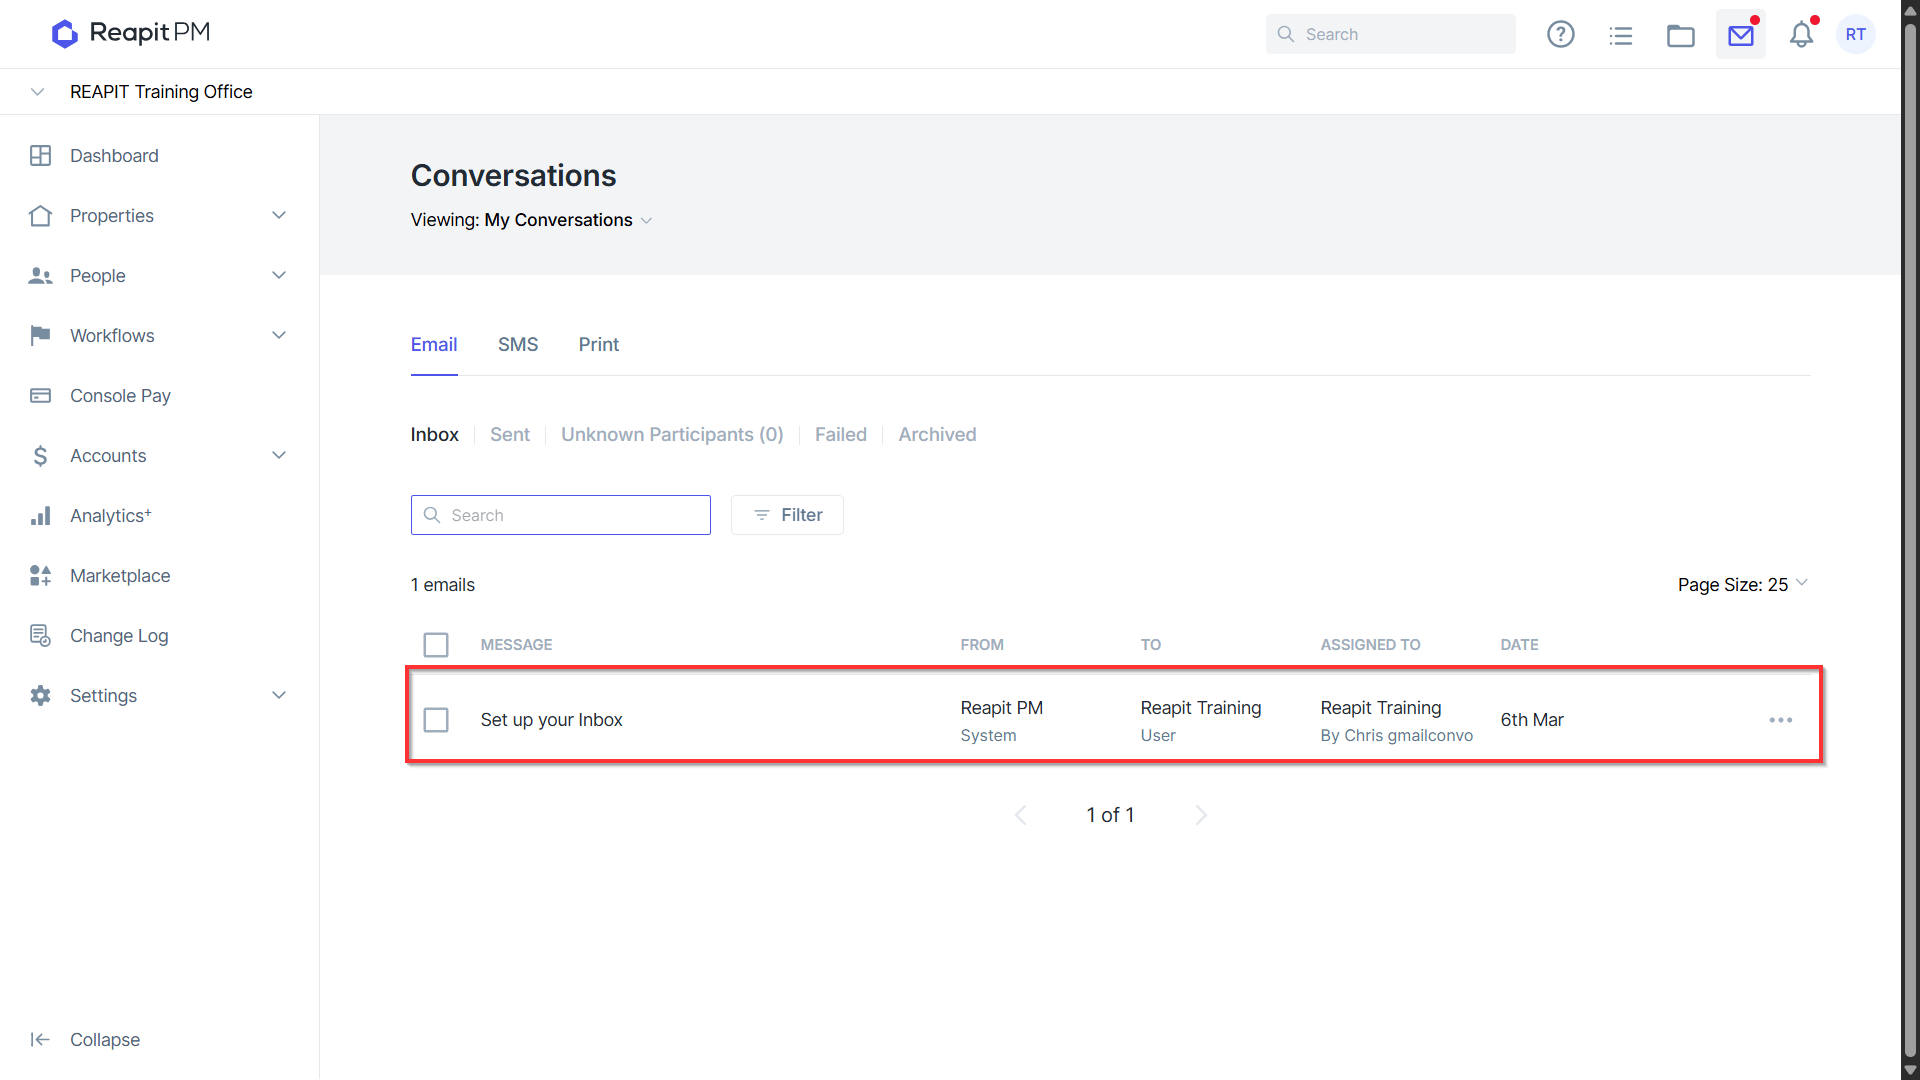
Note: The welcome email received is from a noreply address. When viewing the email, clicking the Reply, or Reply All buttons will appear as functioning but will not send an email out.
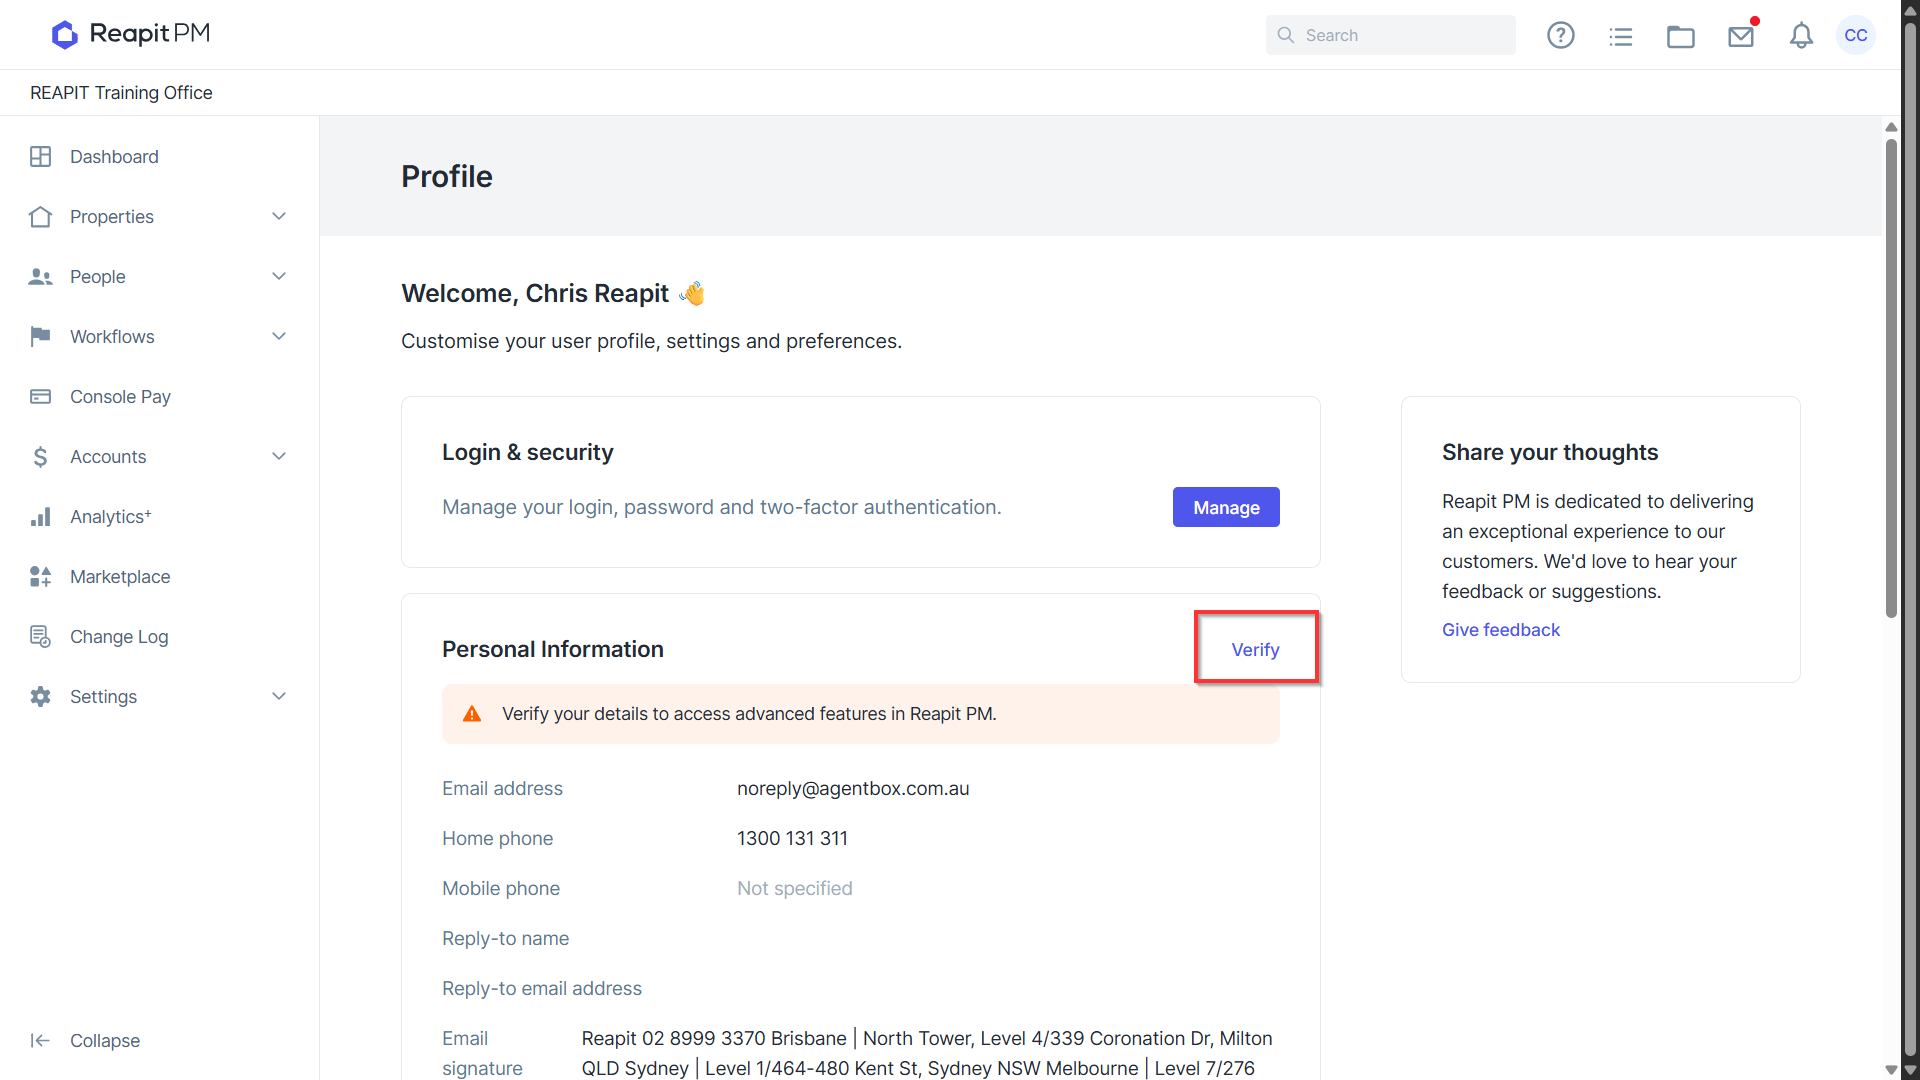
- Navigate to the User Profile on the top right of the page and scroll down to the Verify button under personal information.
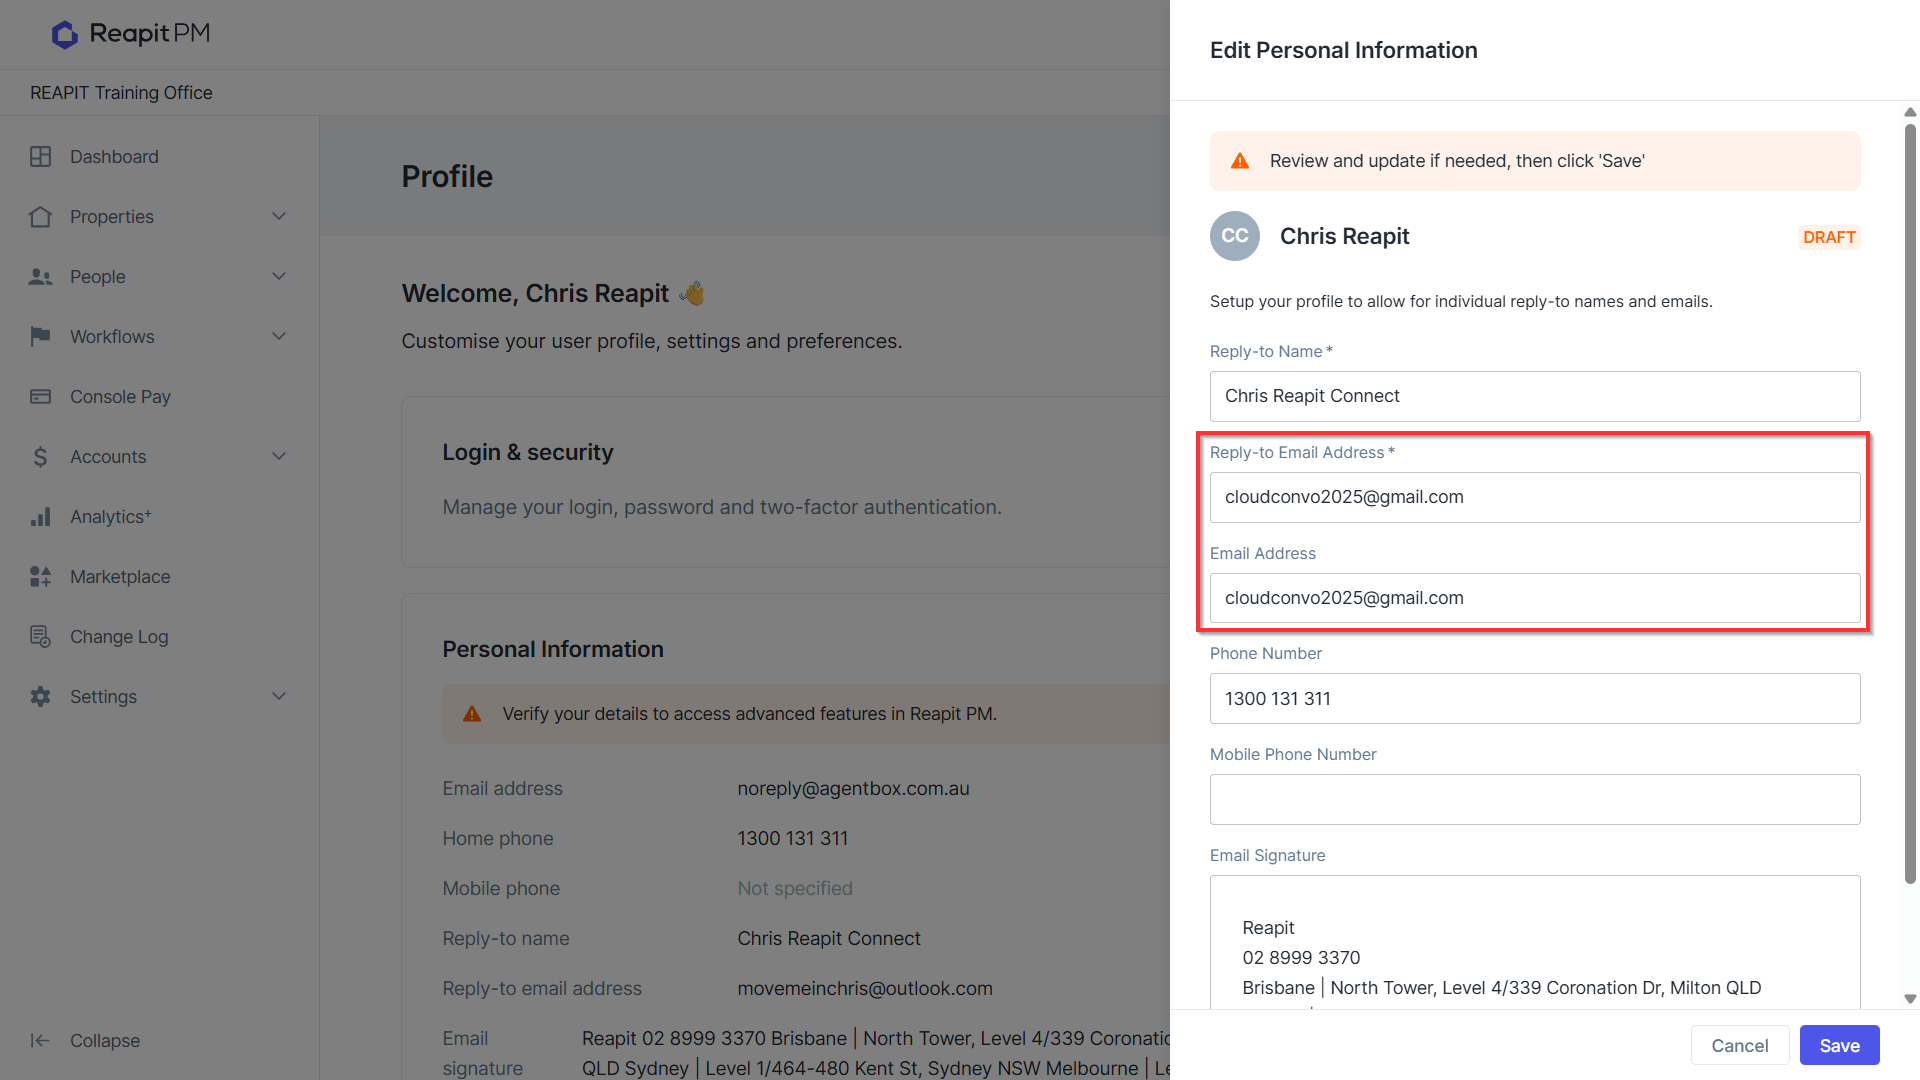
- Verify will now display and ask for you to confirm the email address. For Gmail syncing, the reply to email address will need to be the same as the Gmail account used to log into Reapit PM. Press Save to ****update the changes.
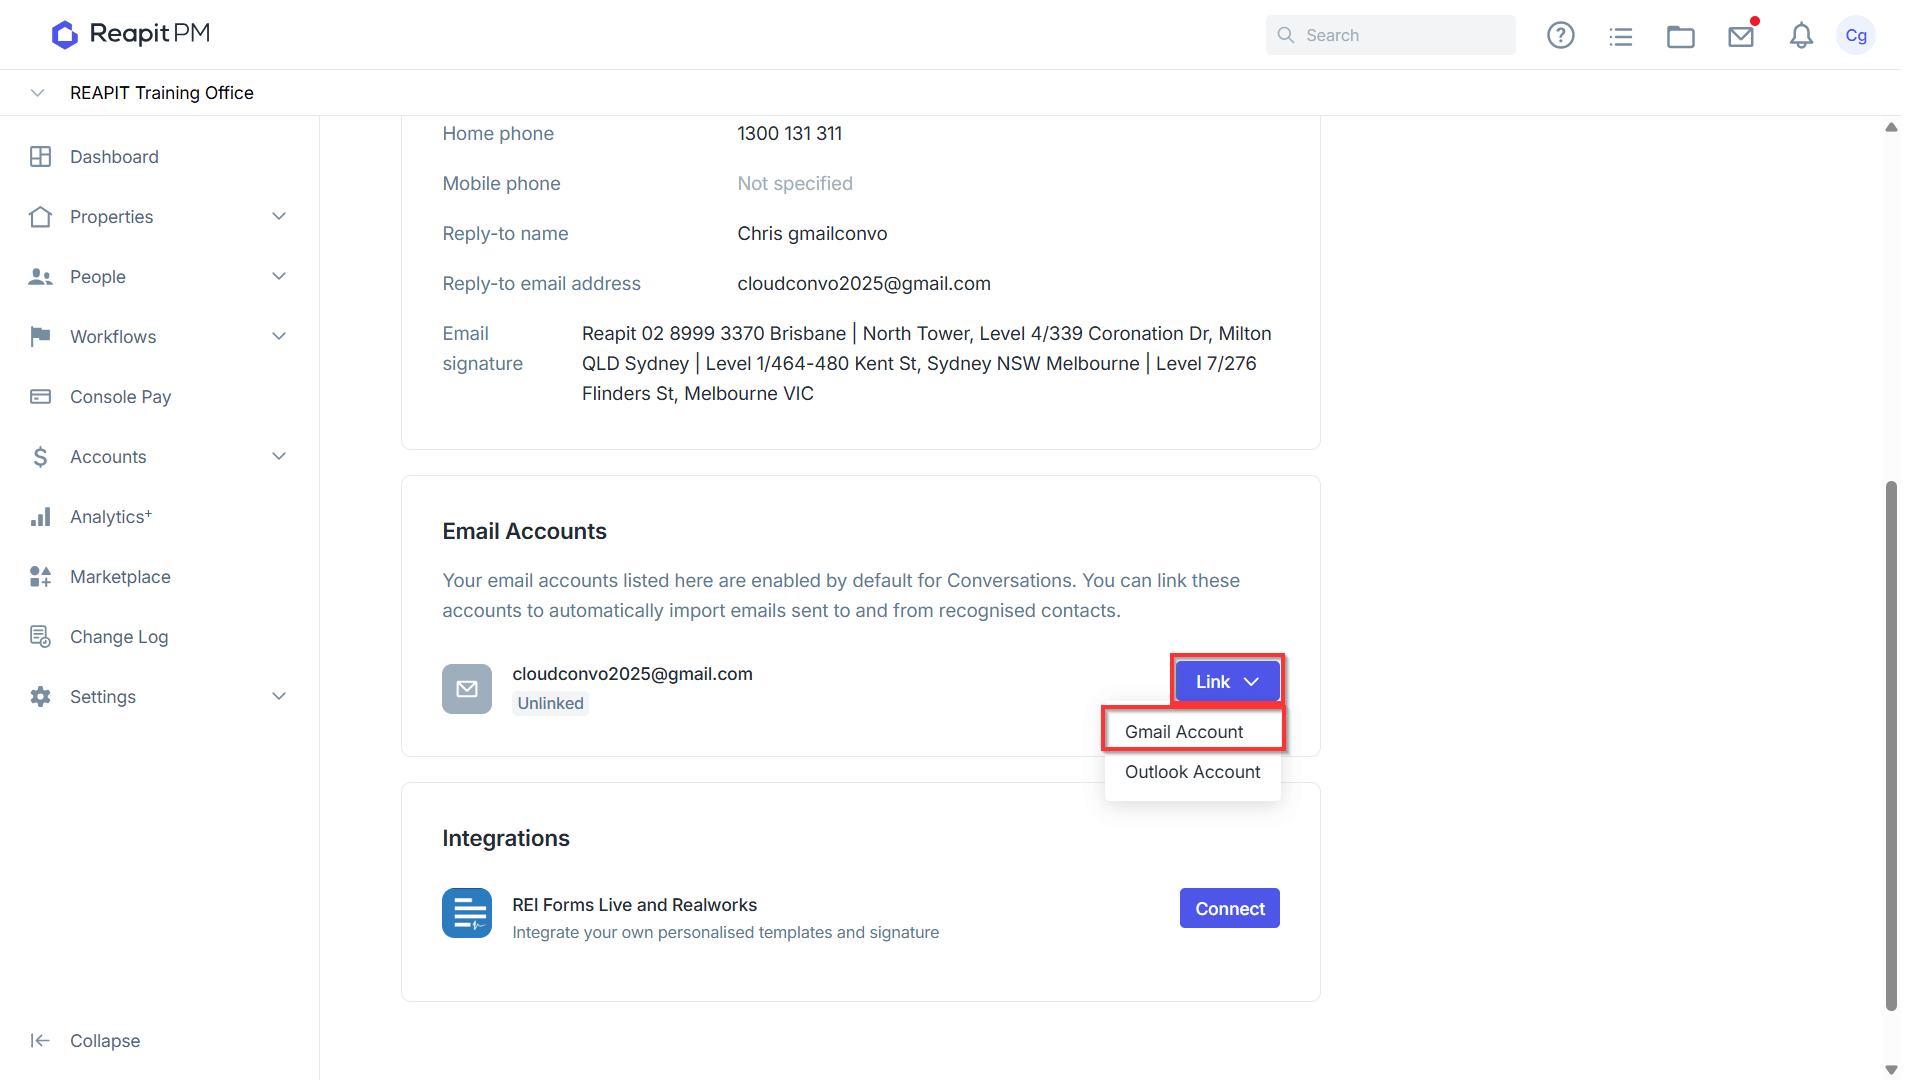
- With the account now verified, scroll down to the Email Accounts field and select Link > Gmail Account.
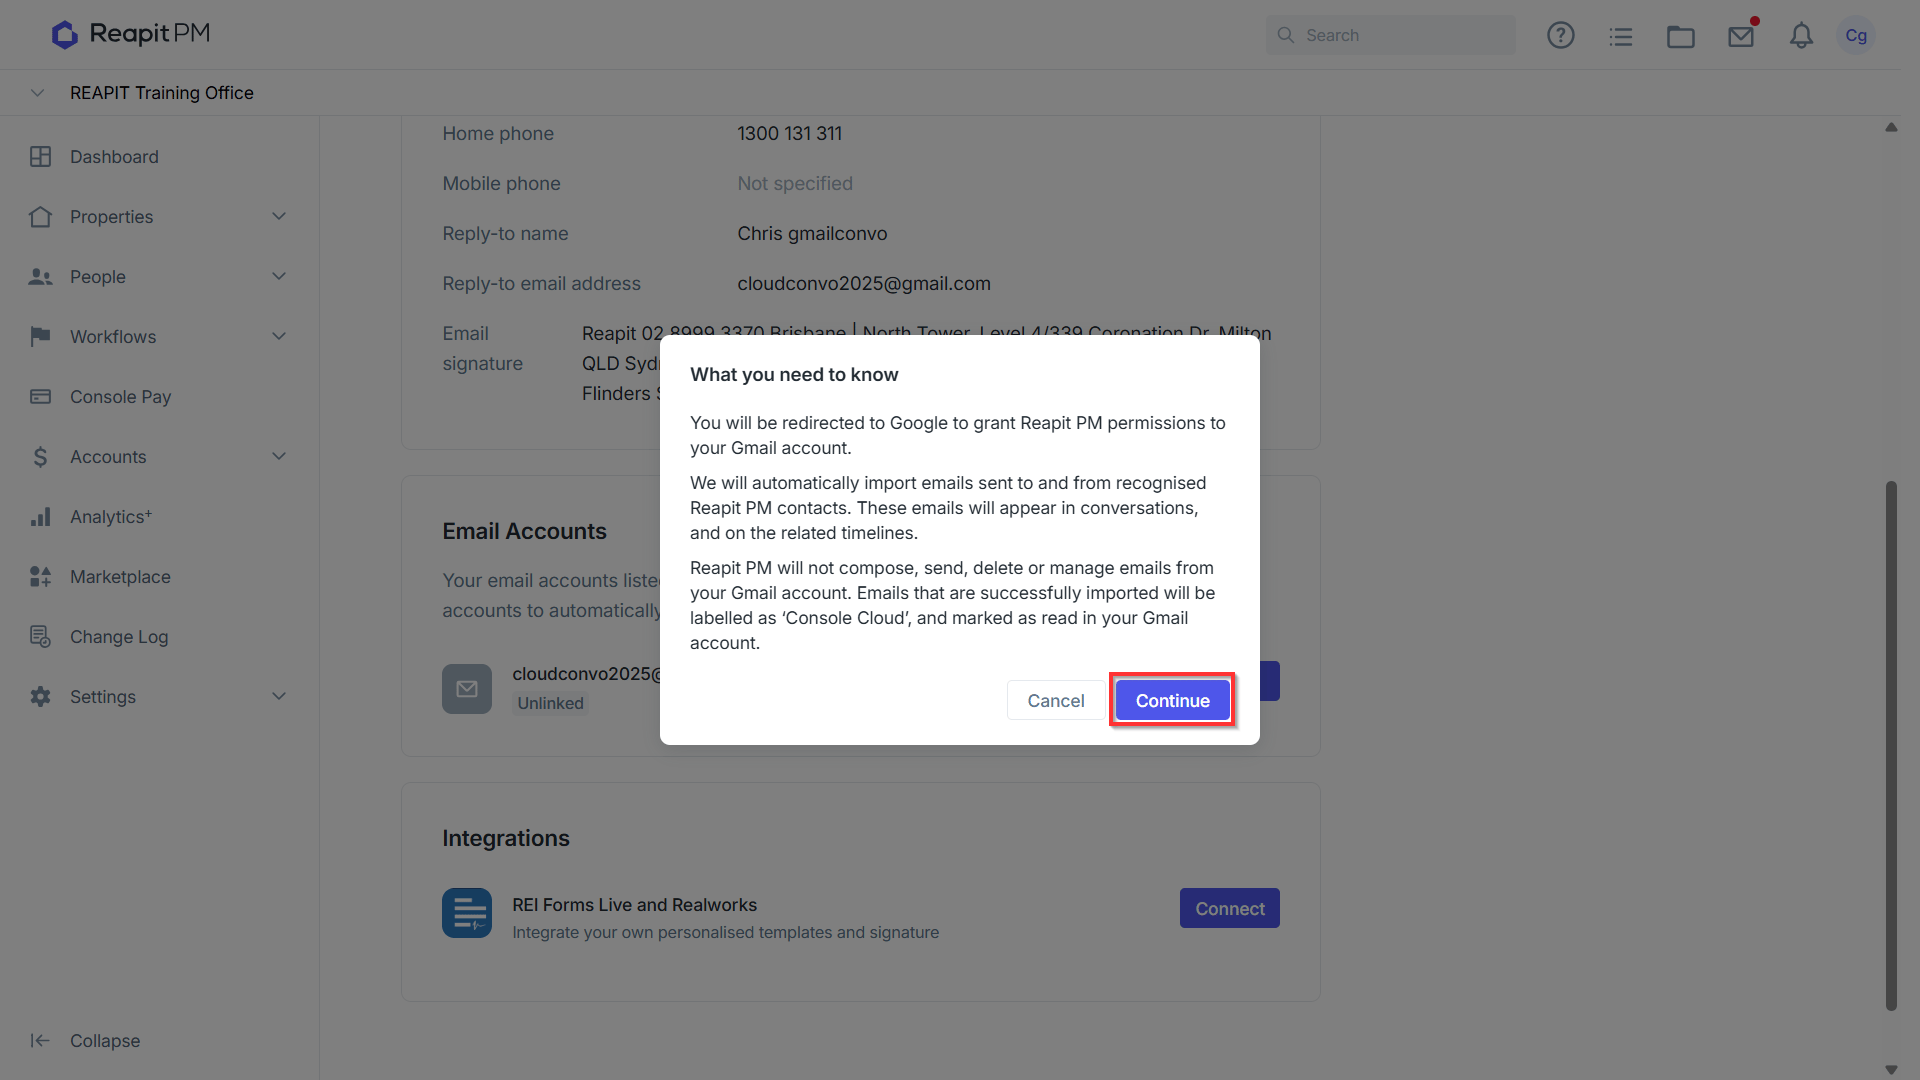
- Reapit PM will display a notification on what will happen with permissions being granted to your Gmail account. By granting permission, it will automatically import emails sent to and from recognised Reapit PM contacts. These emails will appear in conversations and on the related timelines. Reapit PM will not compose, send, delete or manage emails from your Gmail account. Emails that are successfully imported will be labelled as 'Reapit PM', and marked as read in your Gmail account. Select Continue to proceed.
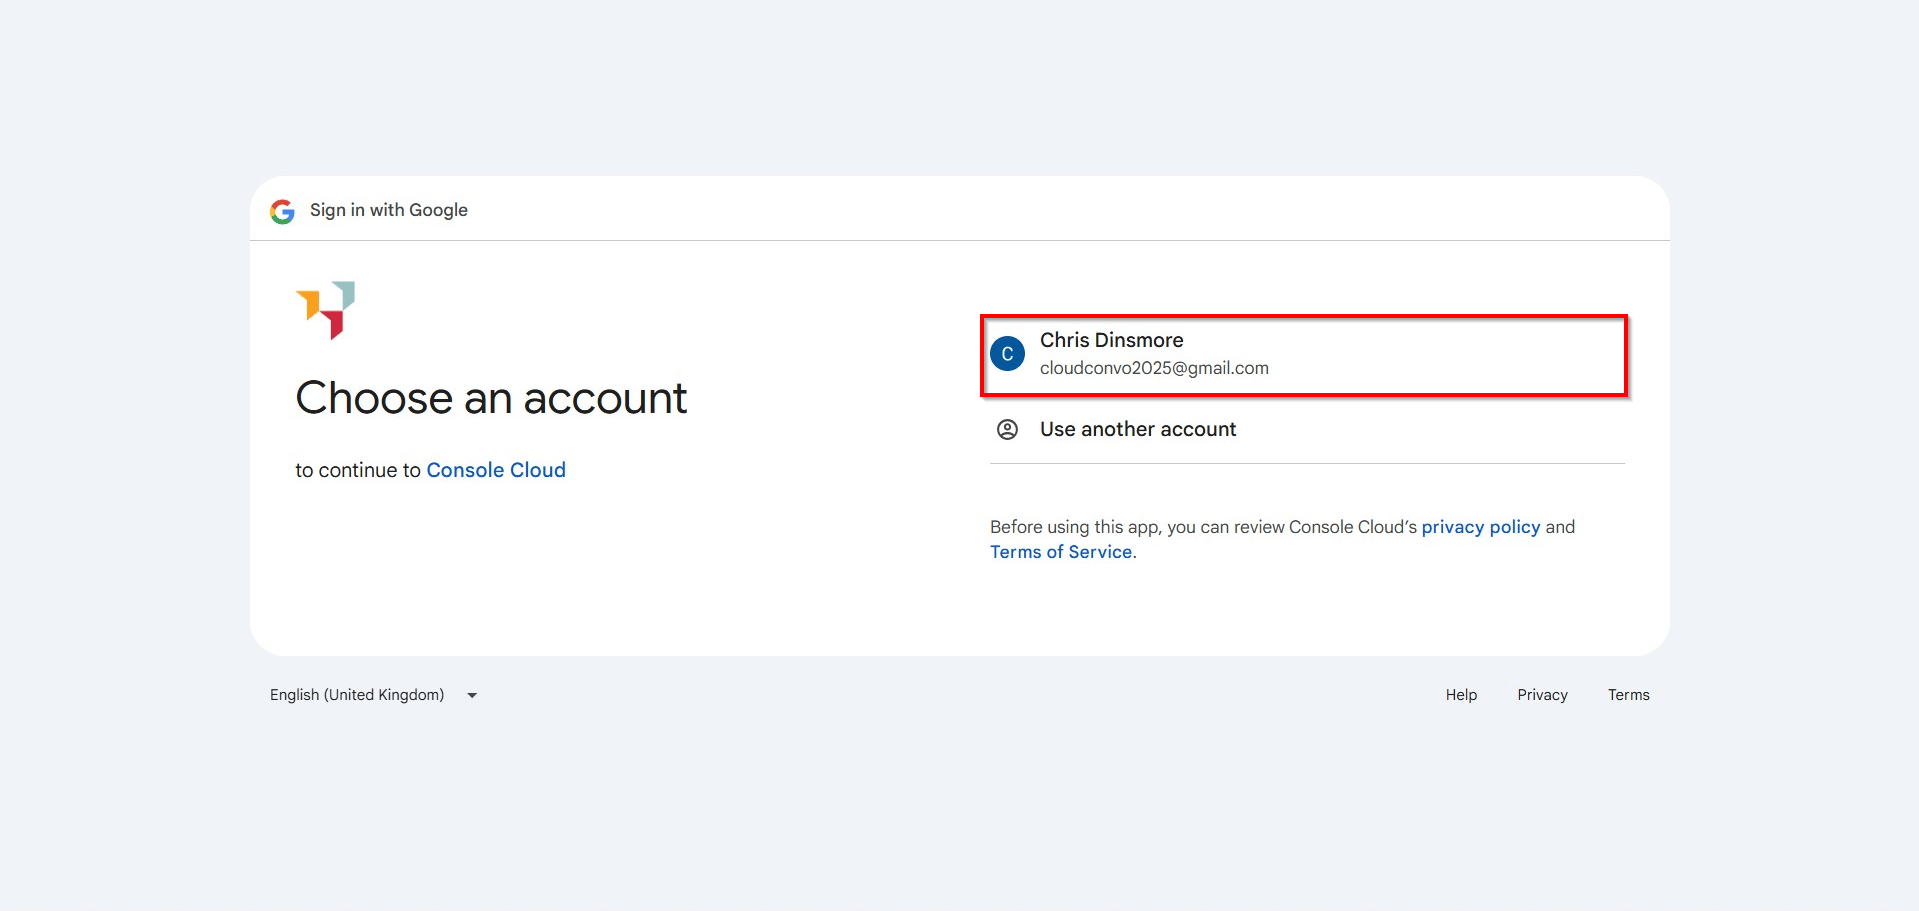
- You will be re-directed through to the Gmail log in screen to select your account
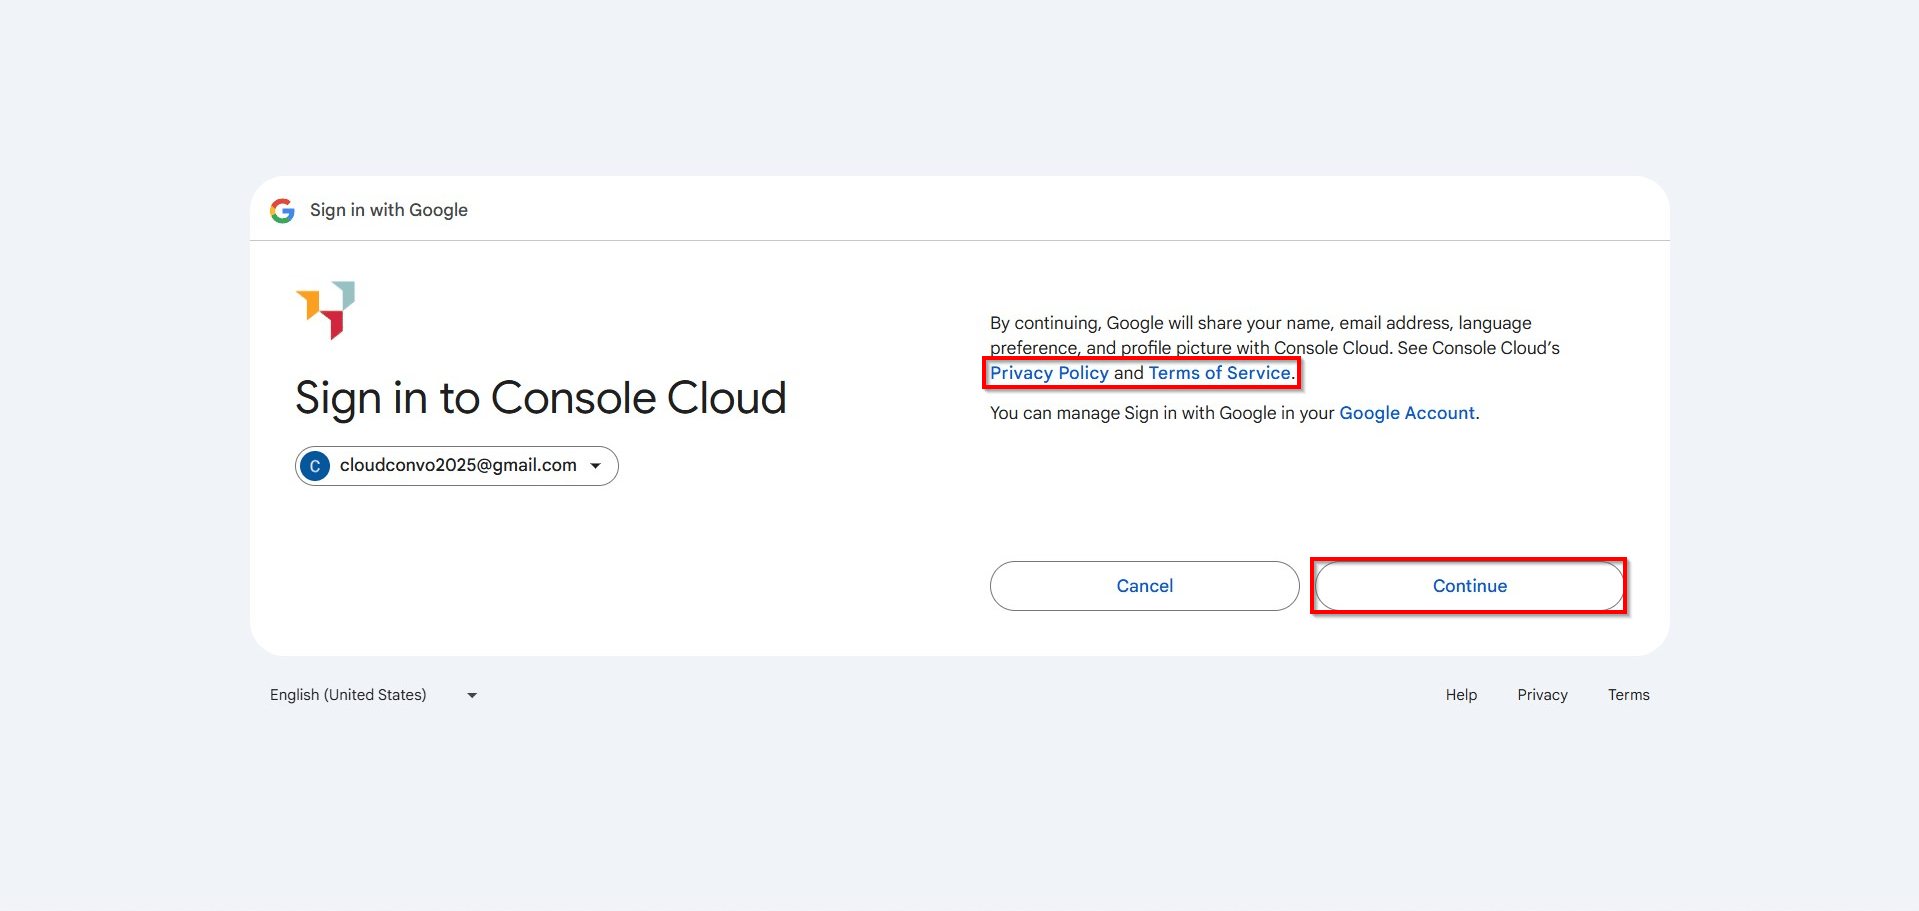
- Google will now confirm what will be shared with Reapit PM (Console Cloud). You can view the Privacy Policy and Terms Of Service from this page. Select Continue to proceed.
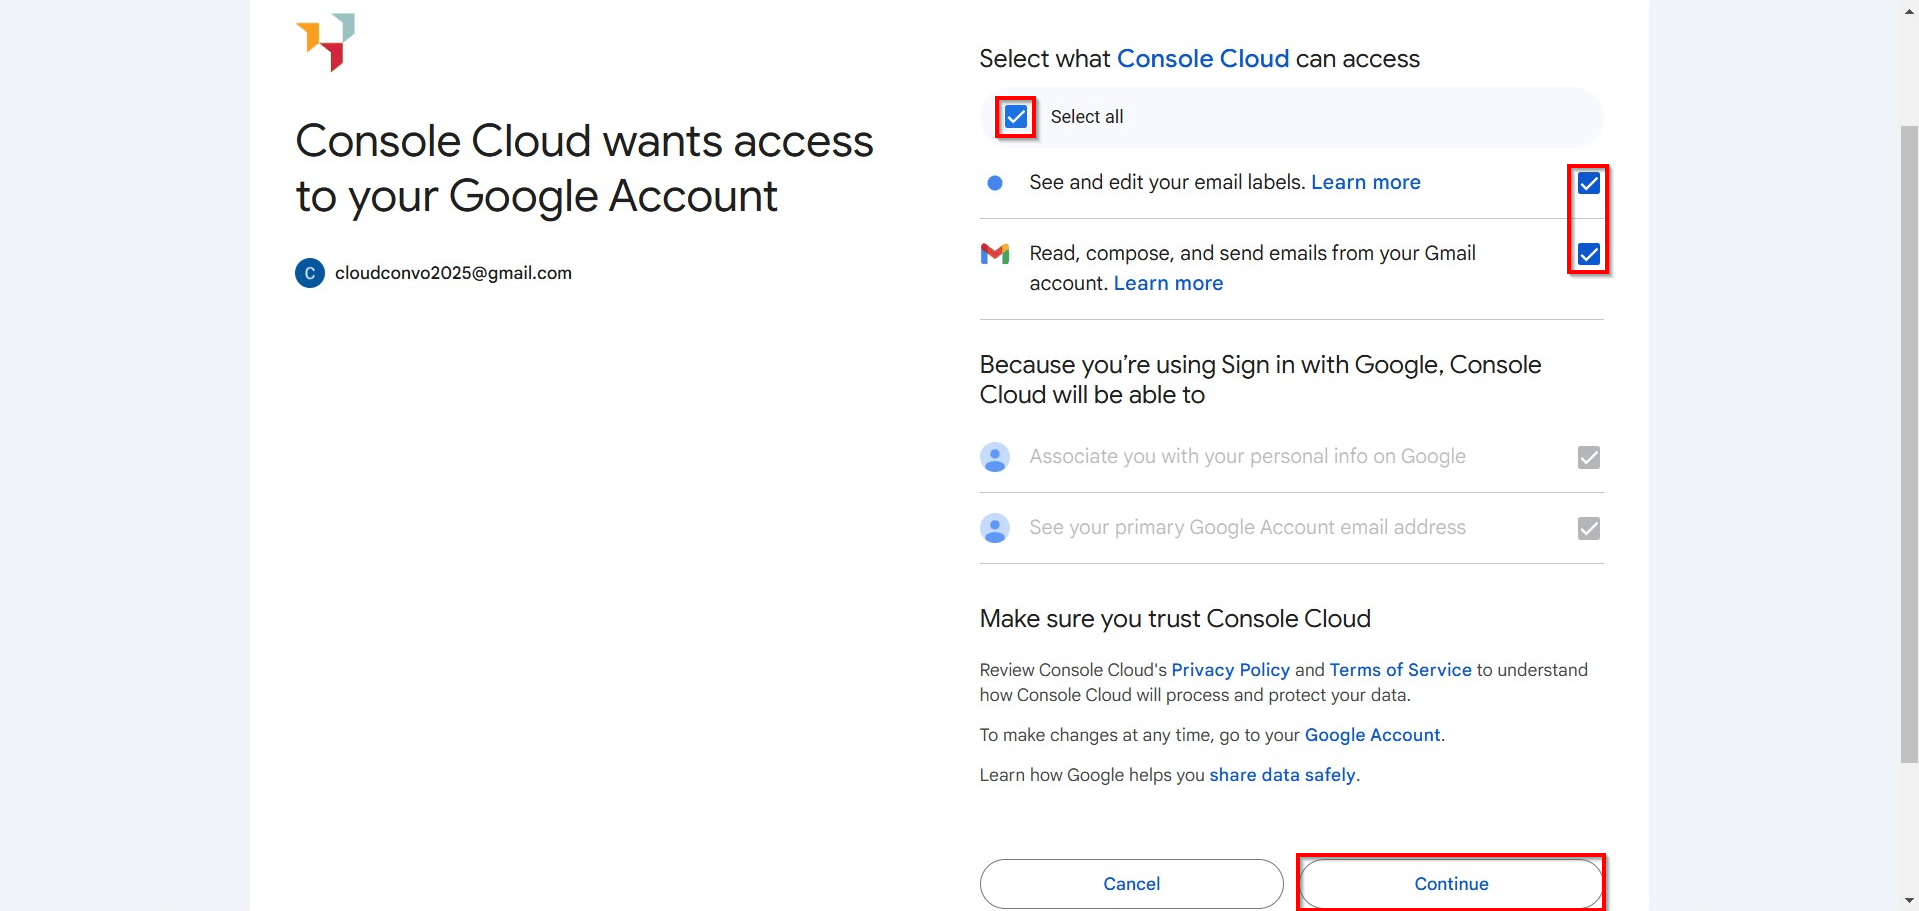
- The access permissions page will now appear. Click Select All to allow Reapit PM(Console) to see and edit your email labels and to read, compose, and send emails from your Gmail account. Select Continue to proceed.
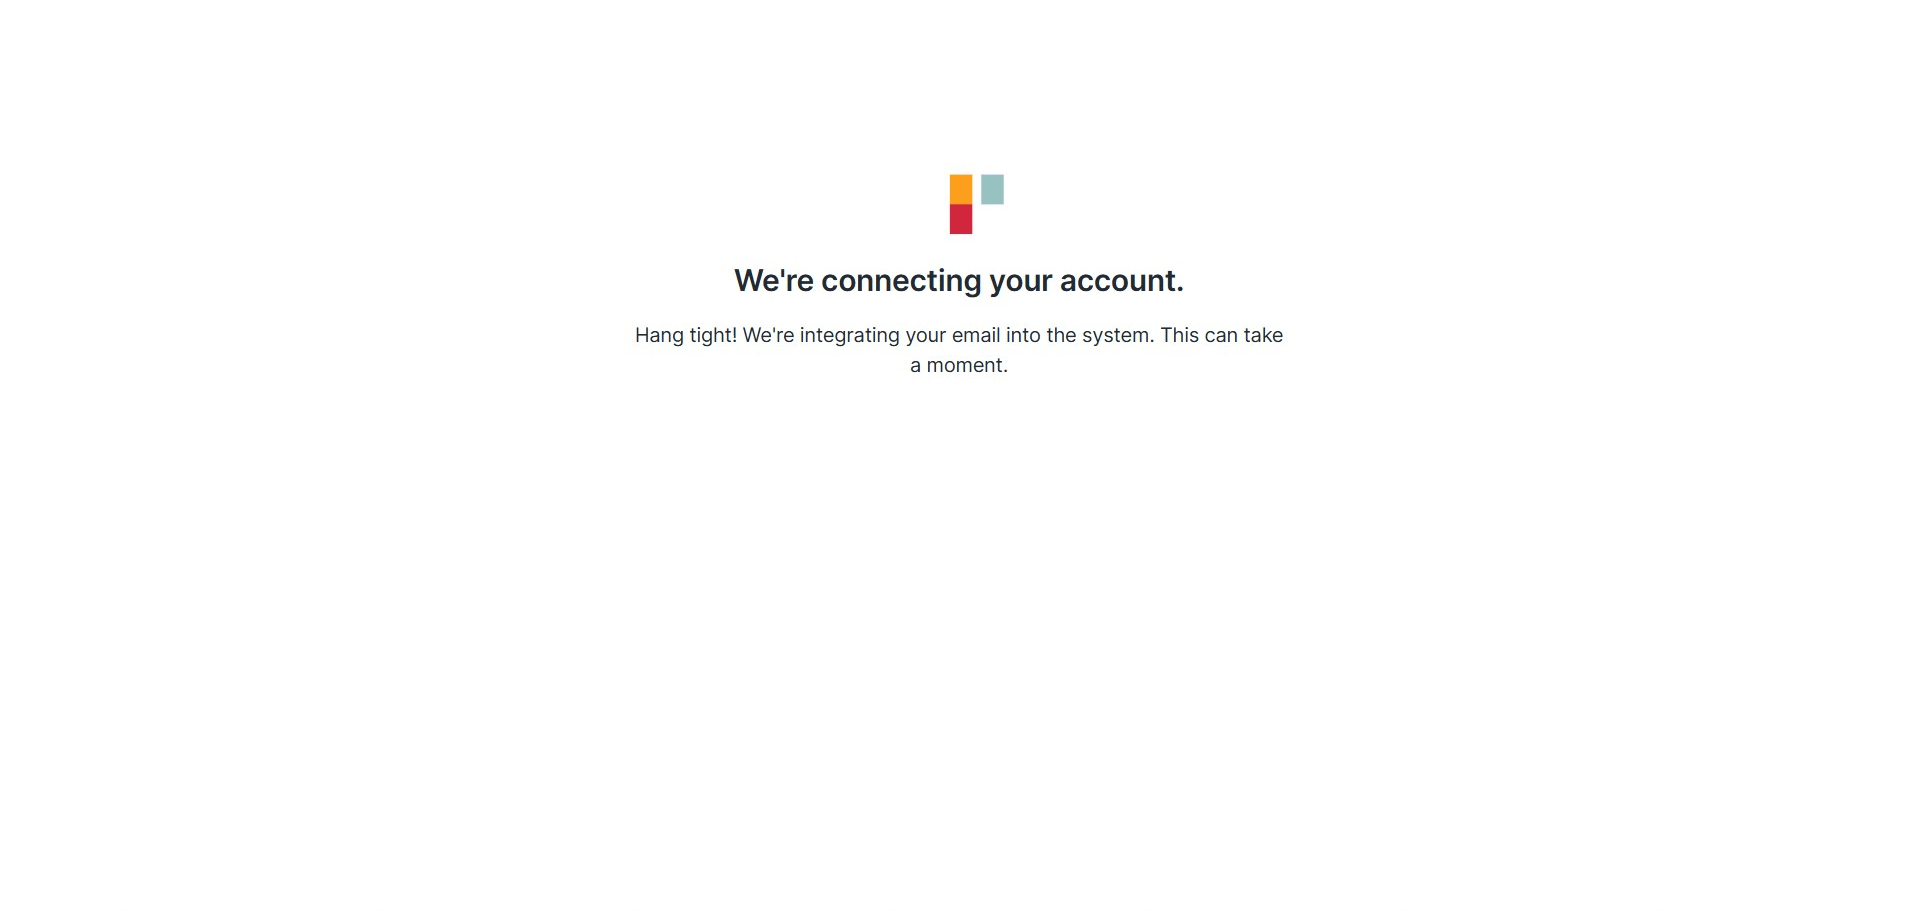
- A connecting screen will be displayed while the integration completes the setup.
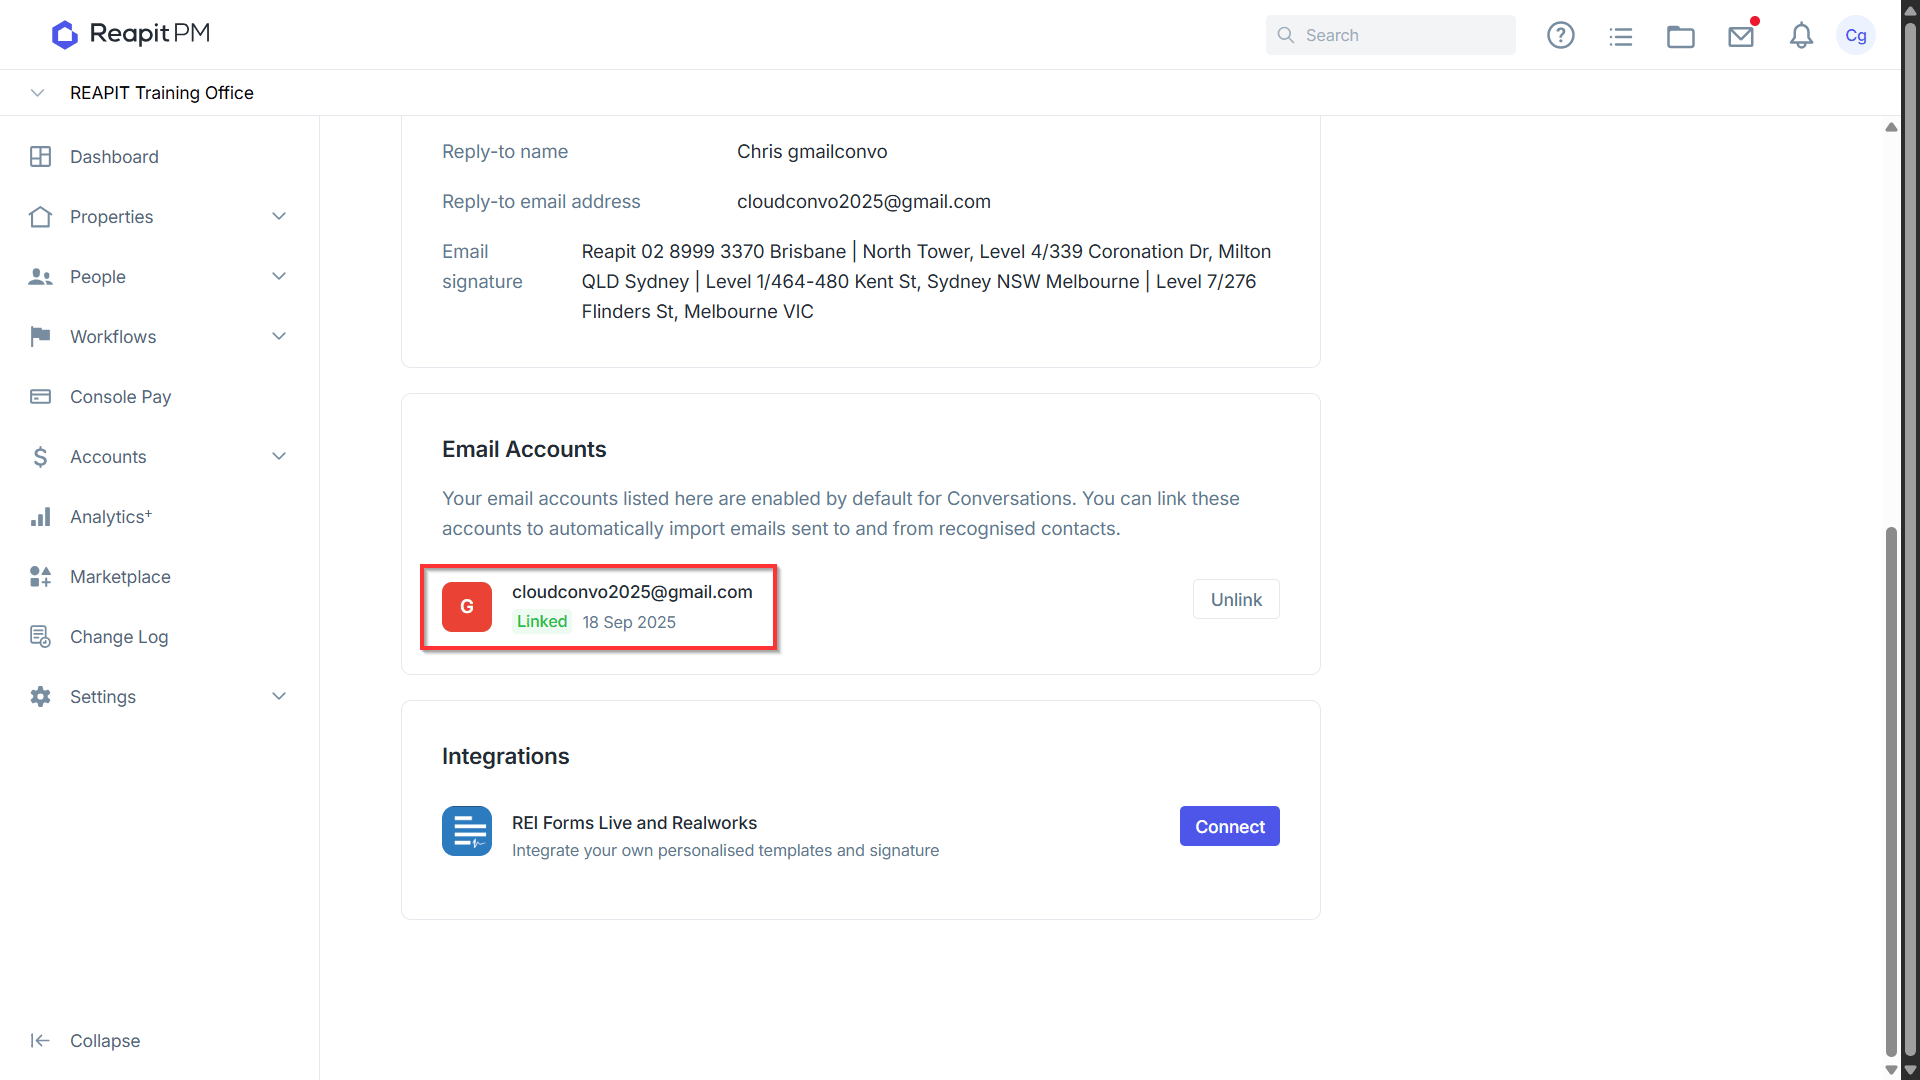
- You will be returned to the user profile page where a successfully linked Gmail account will now display.
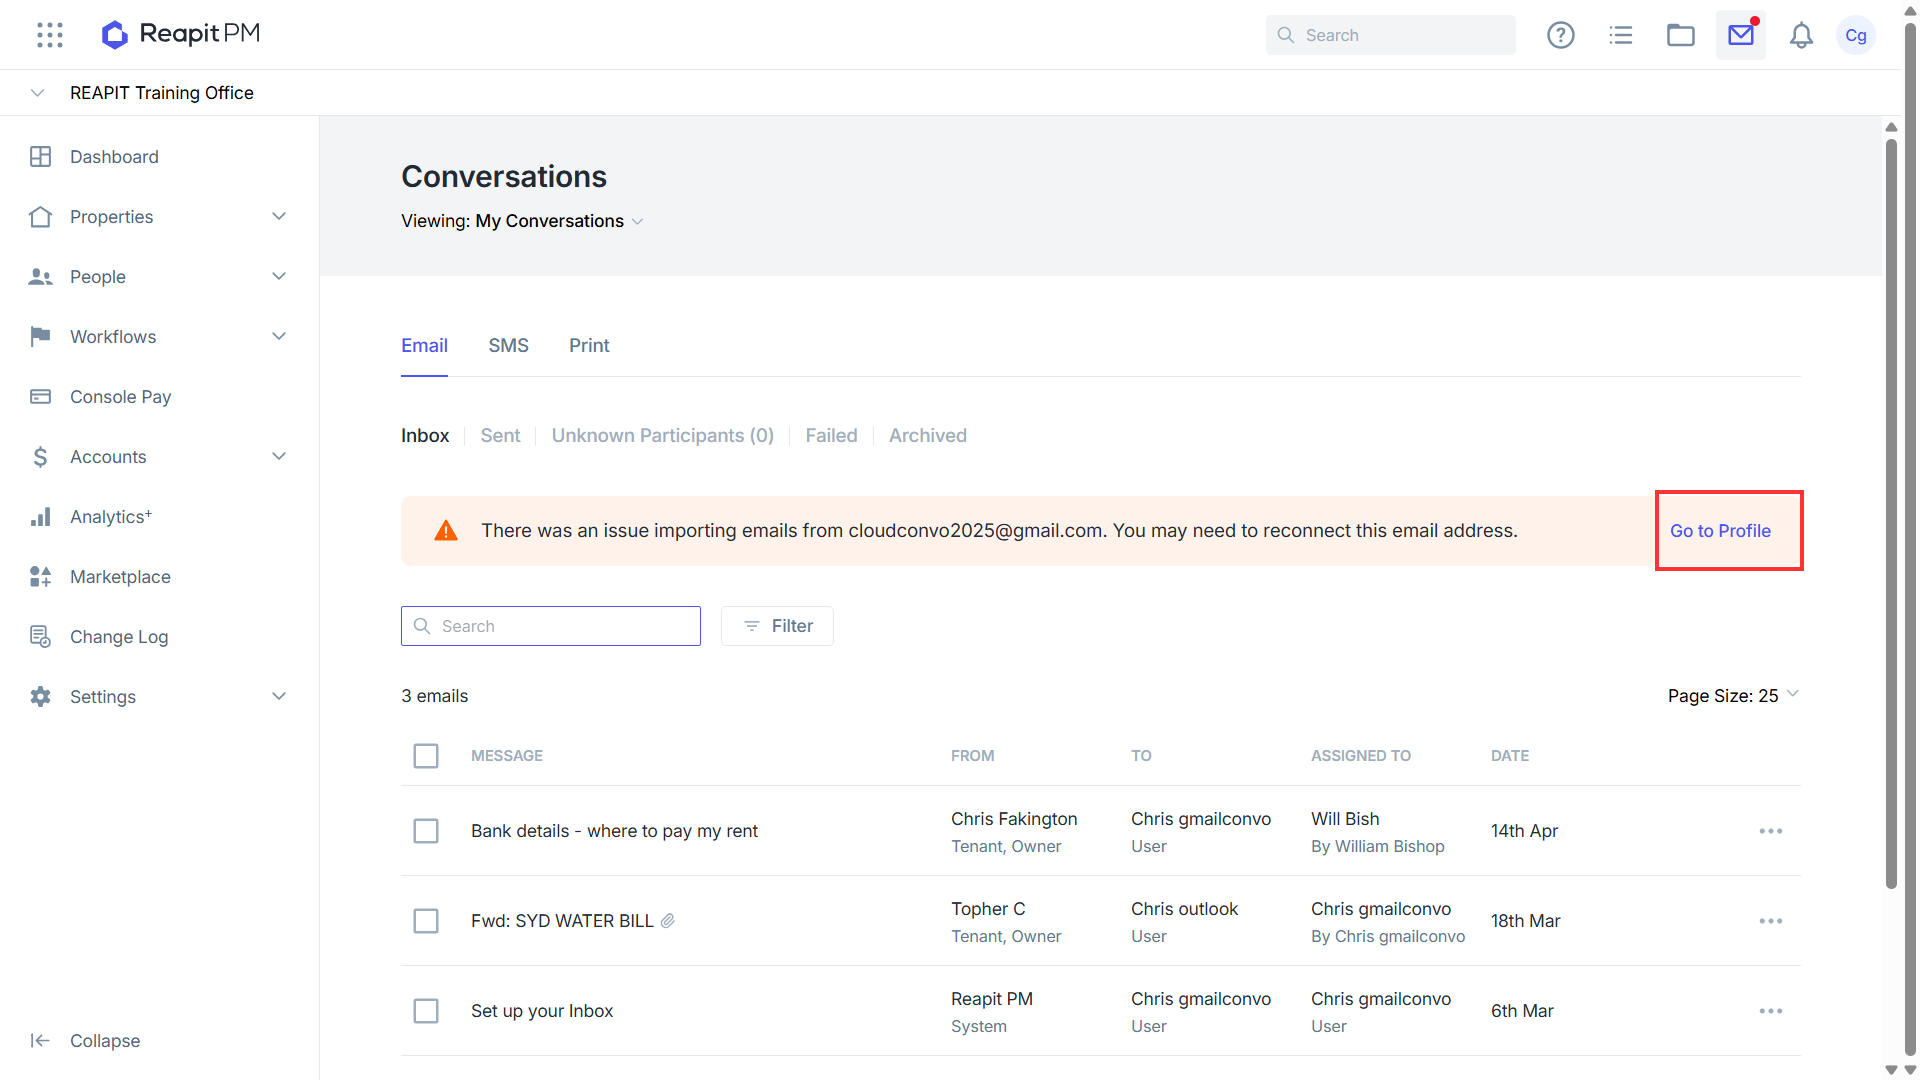
Please Note: If you reset your Gmail password while Conversations is connected, the link between Conversations and Gmail will be disconnected due to the login credentials changing, and you will be notified through Conversations that there's an issue with importing the emails, and that you need to reconnect. Click Go to Profile to restore the connection. You will need to reconnect your Gmail account to Conversations with your updated password.
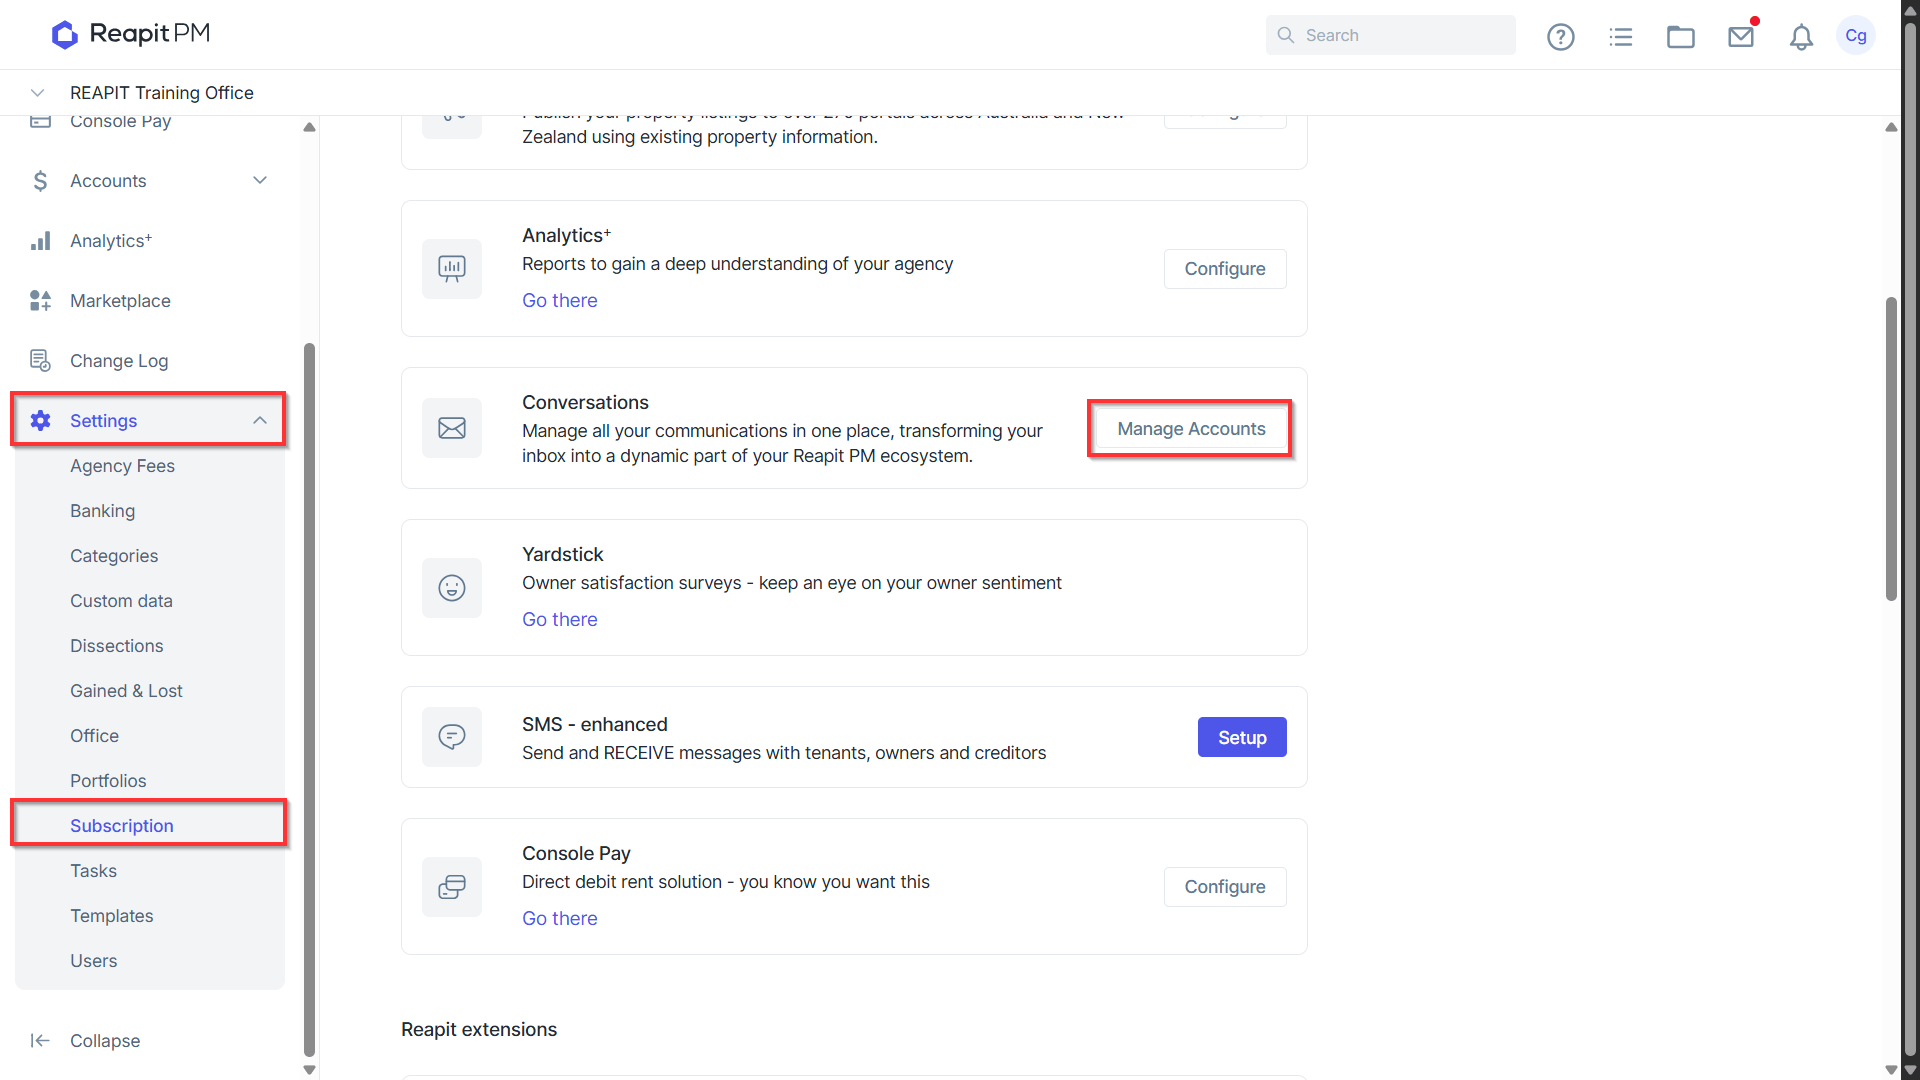
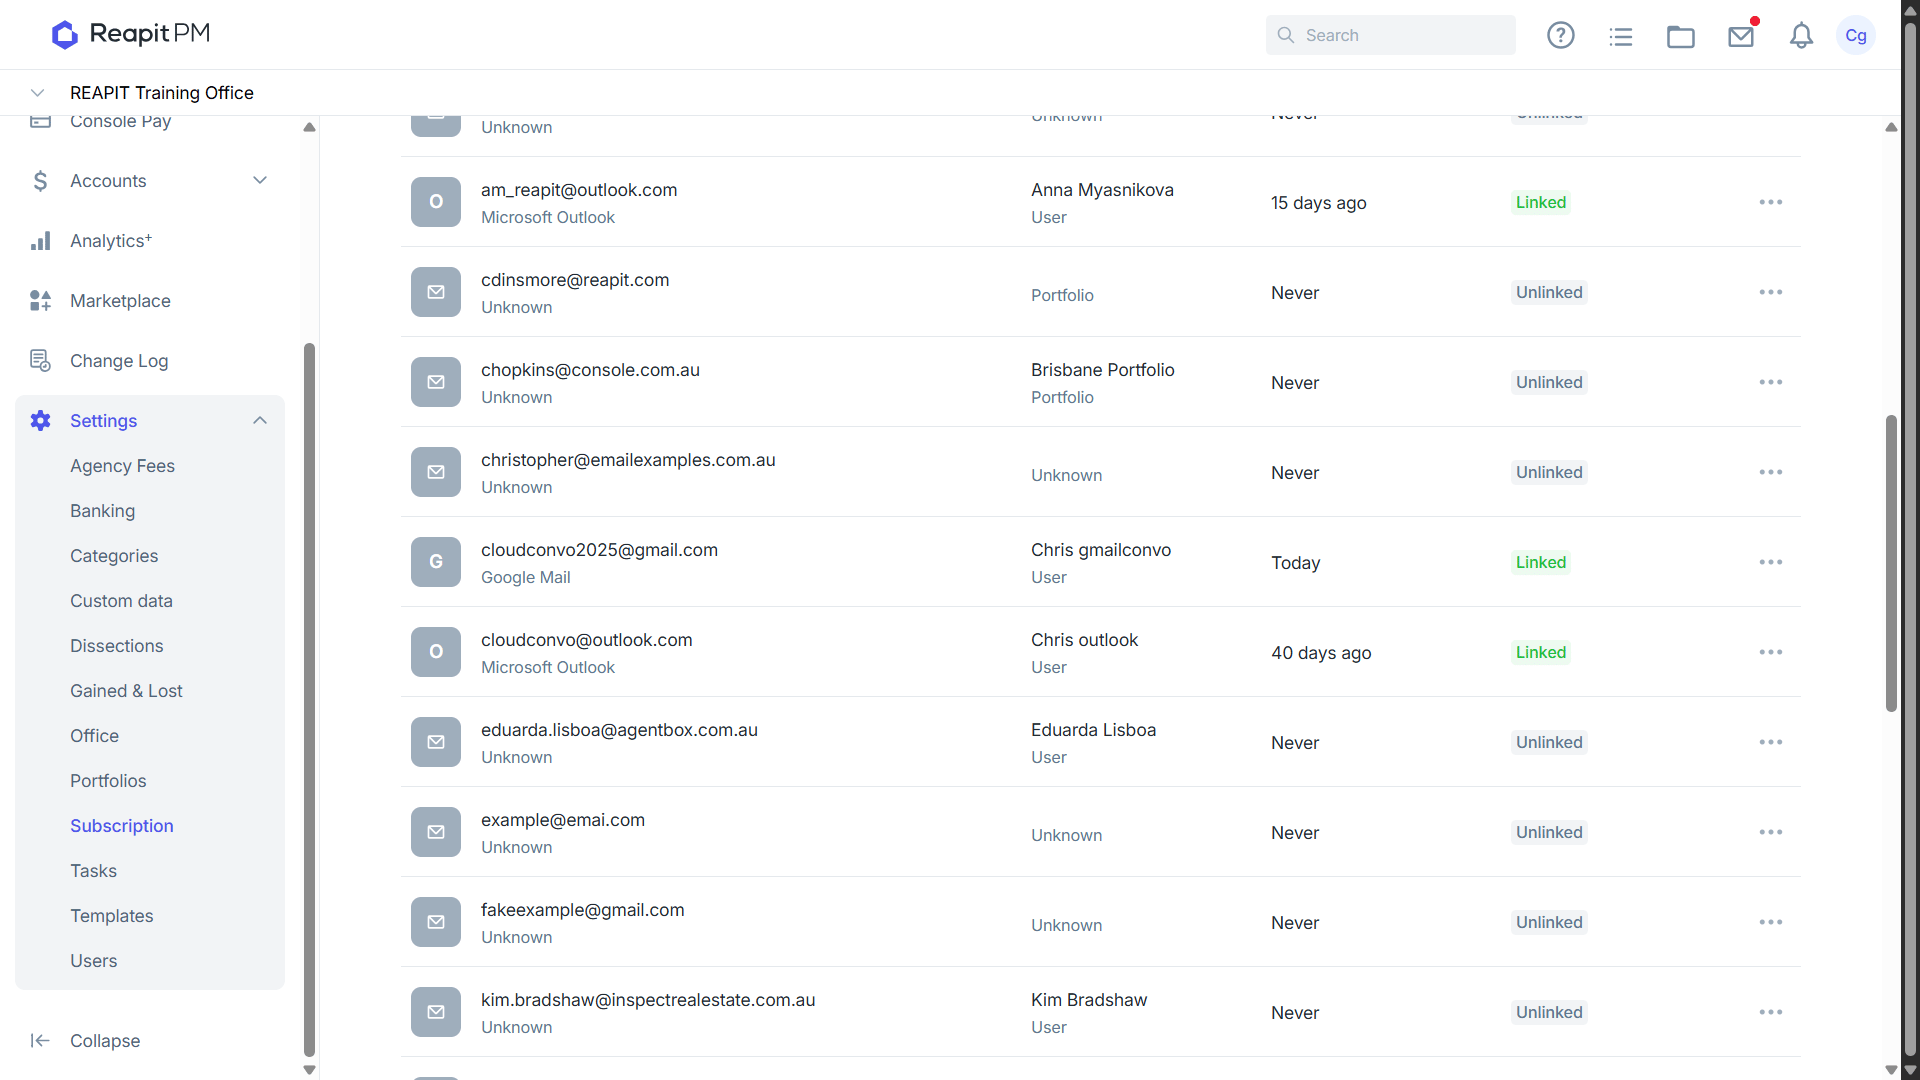
- By navigating to Settings > Subscription > Manage Accounts this will display any linked email accounts including who the account was added by, last import and the status of the connection.
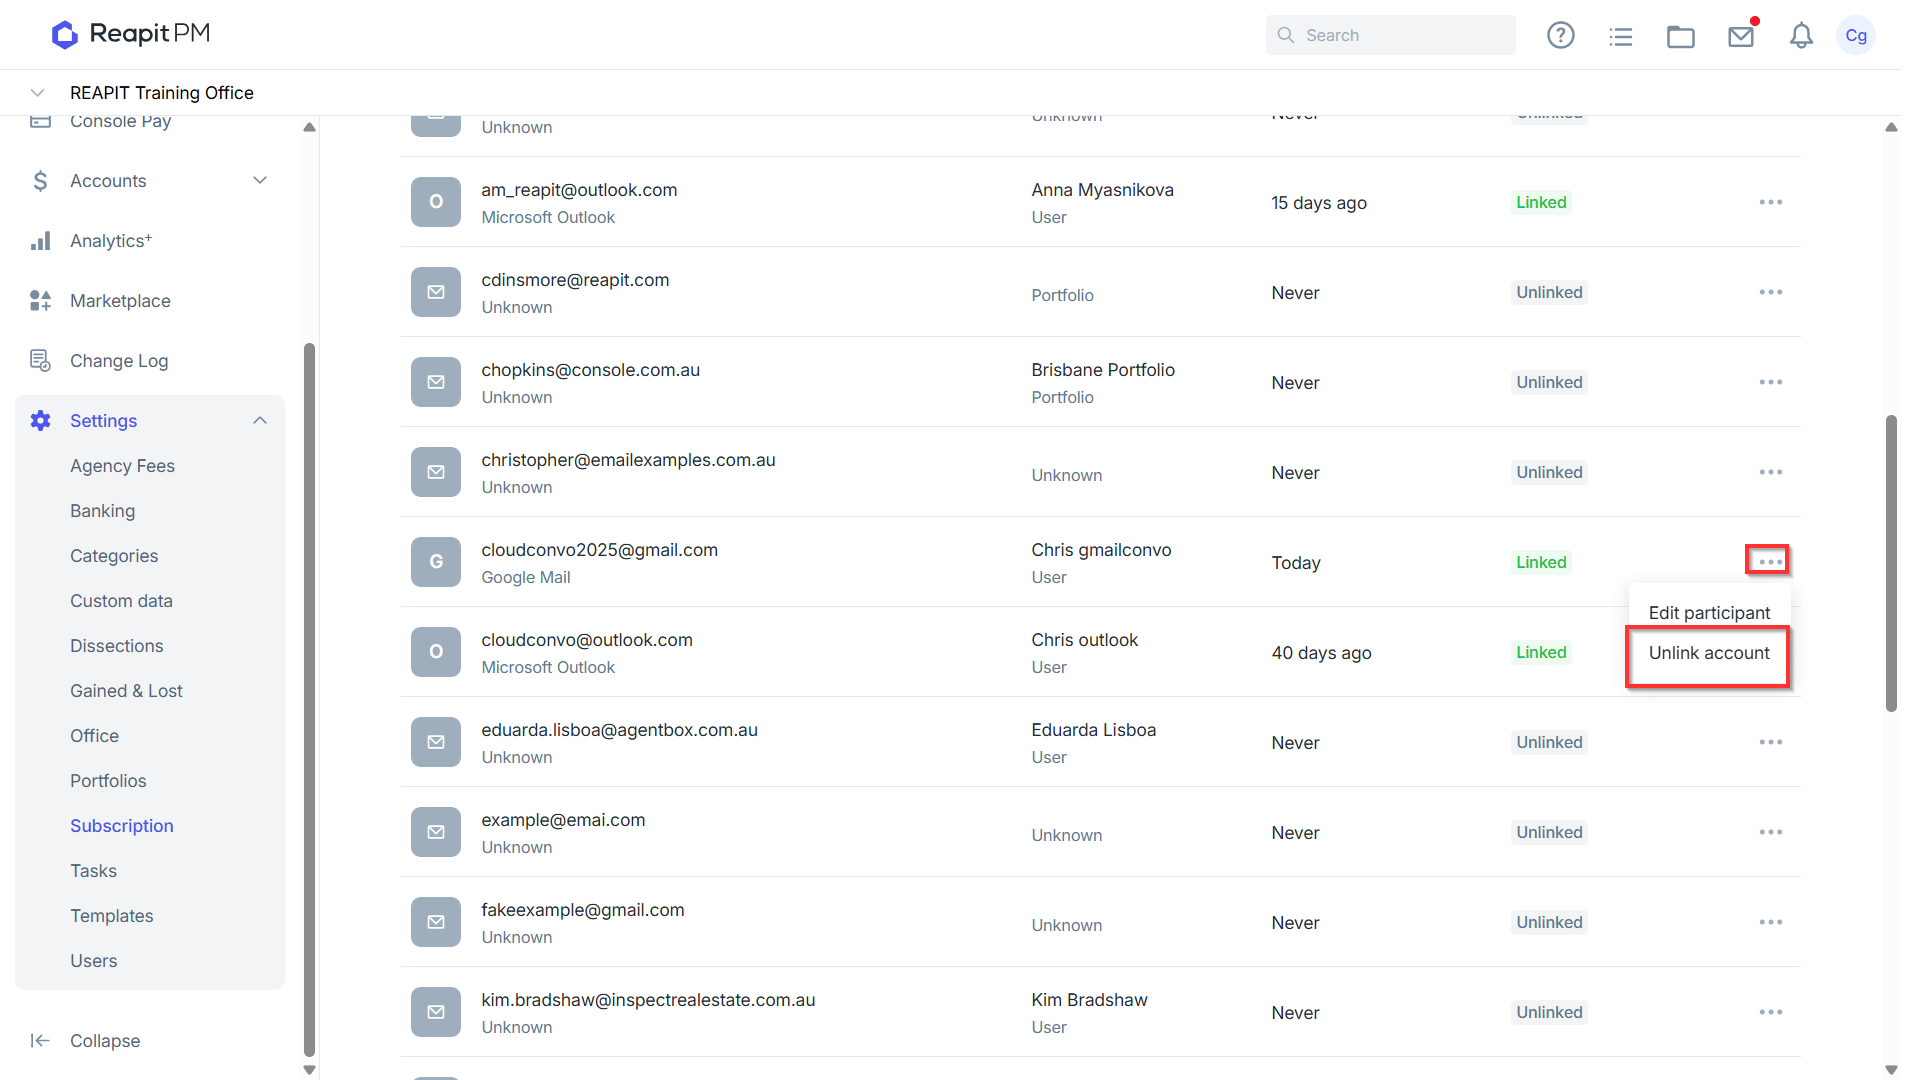
- If you need to remove the link between Gmail and Reapit PM, select the three action dots to the right of the account and select Unlink account.
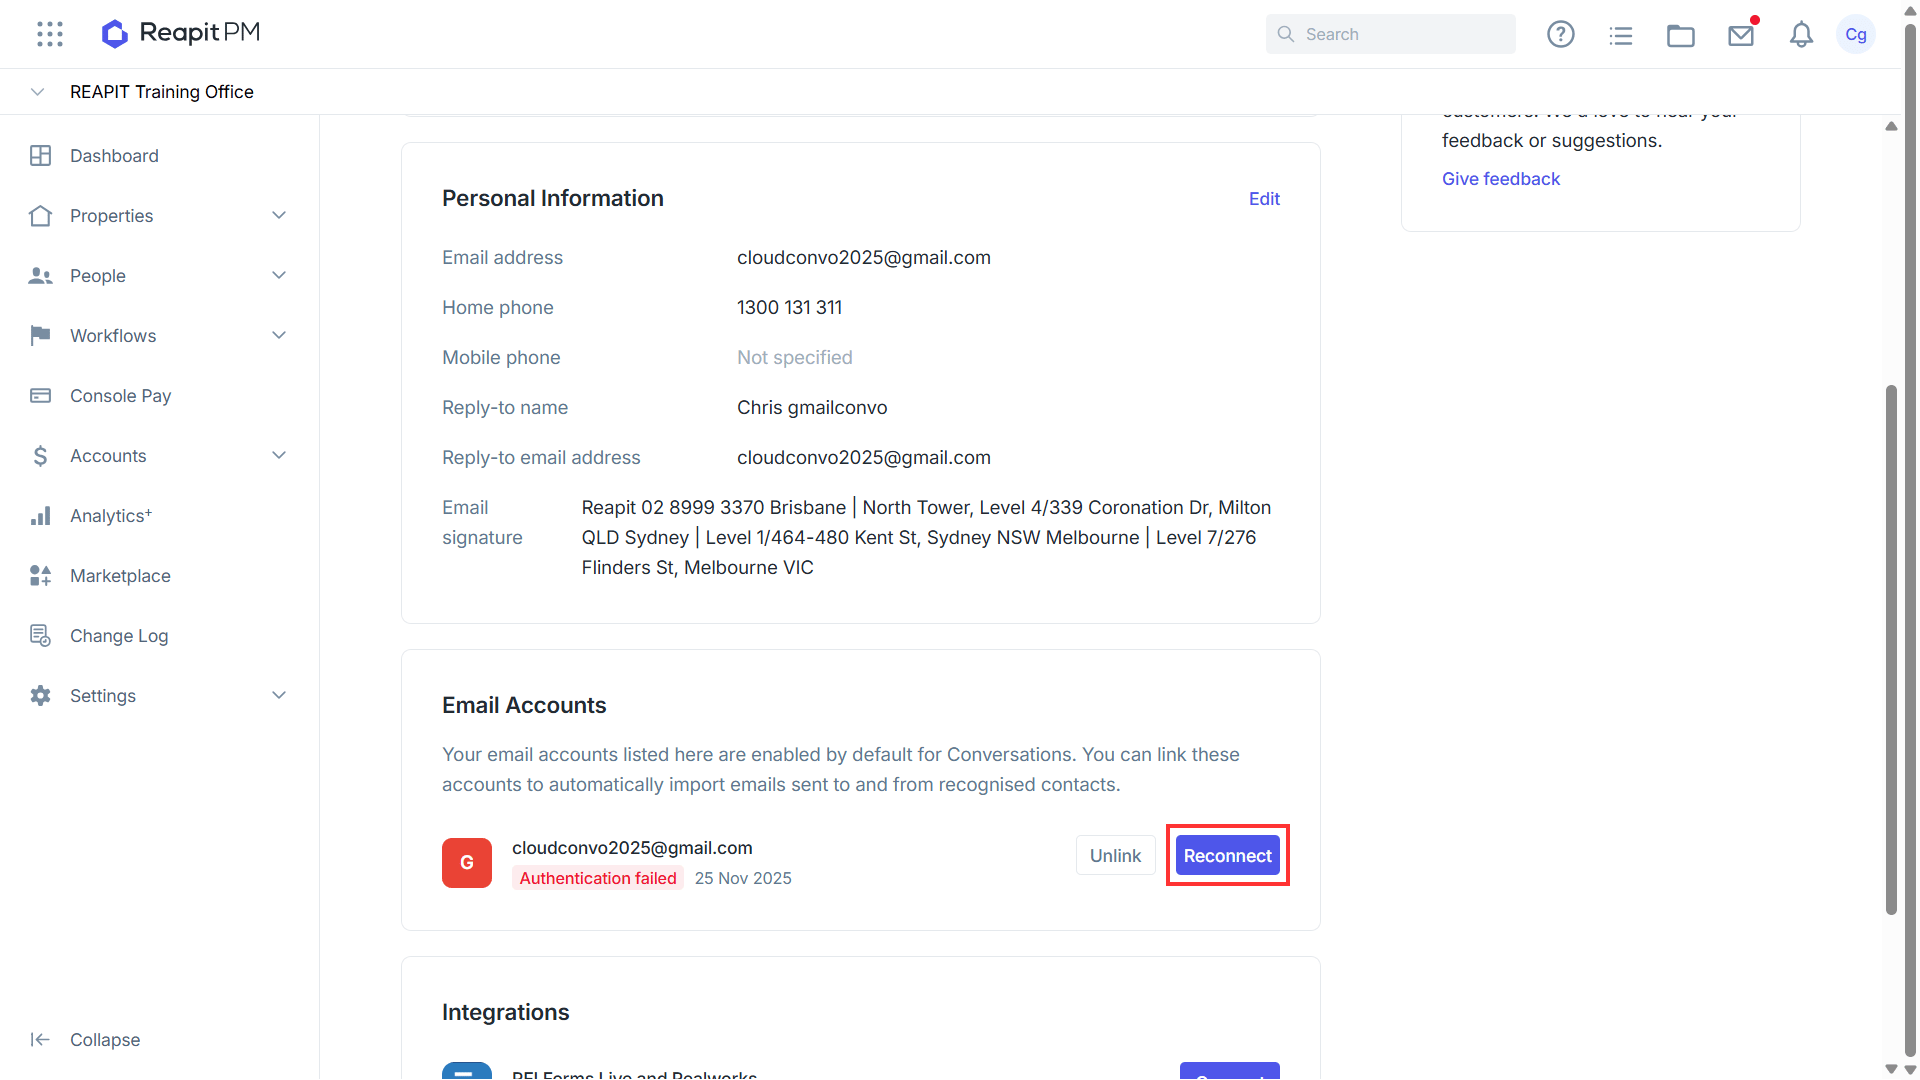
Note: If you experience any syncing issues between Gmail and Reapit PM such as emails not syncing or importing, we recommend removing the account and re-syncing it. To do this, navigate to the user initials on the top right of the page and use the Link Email option.
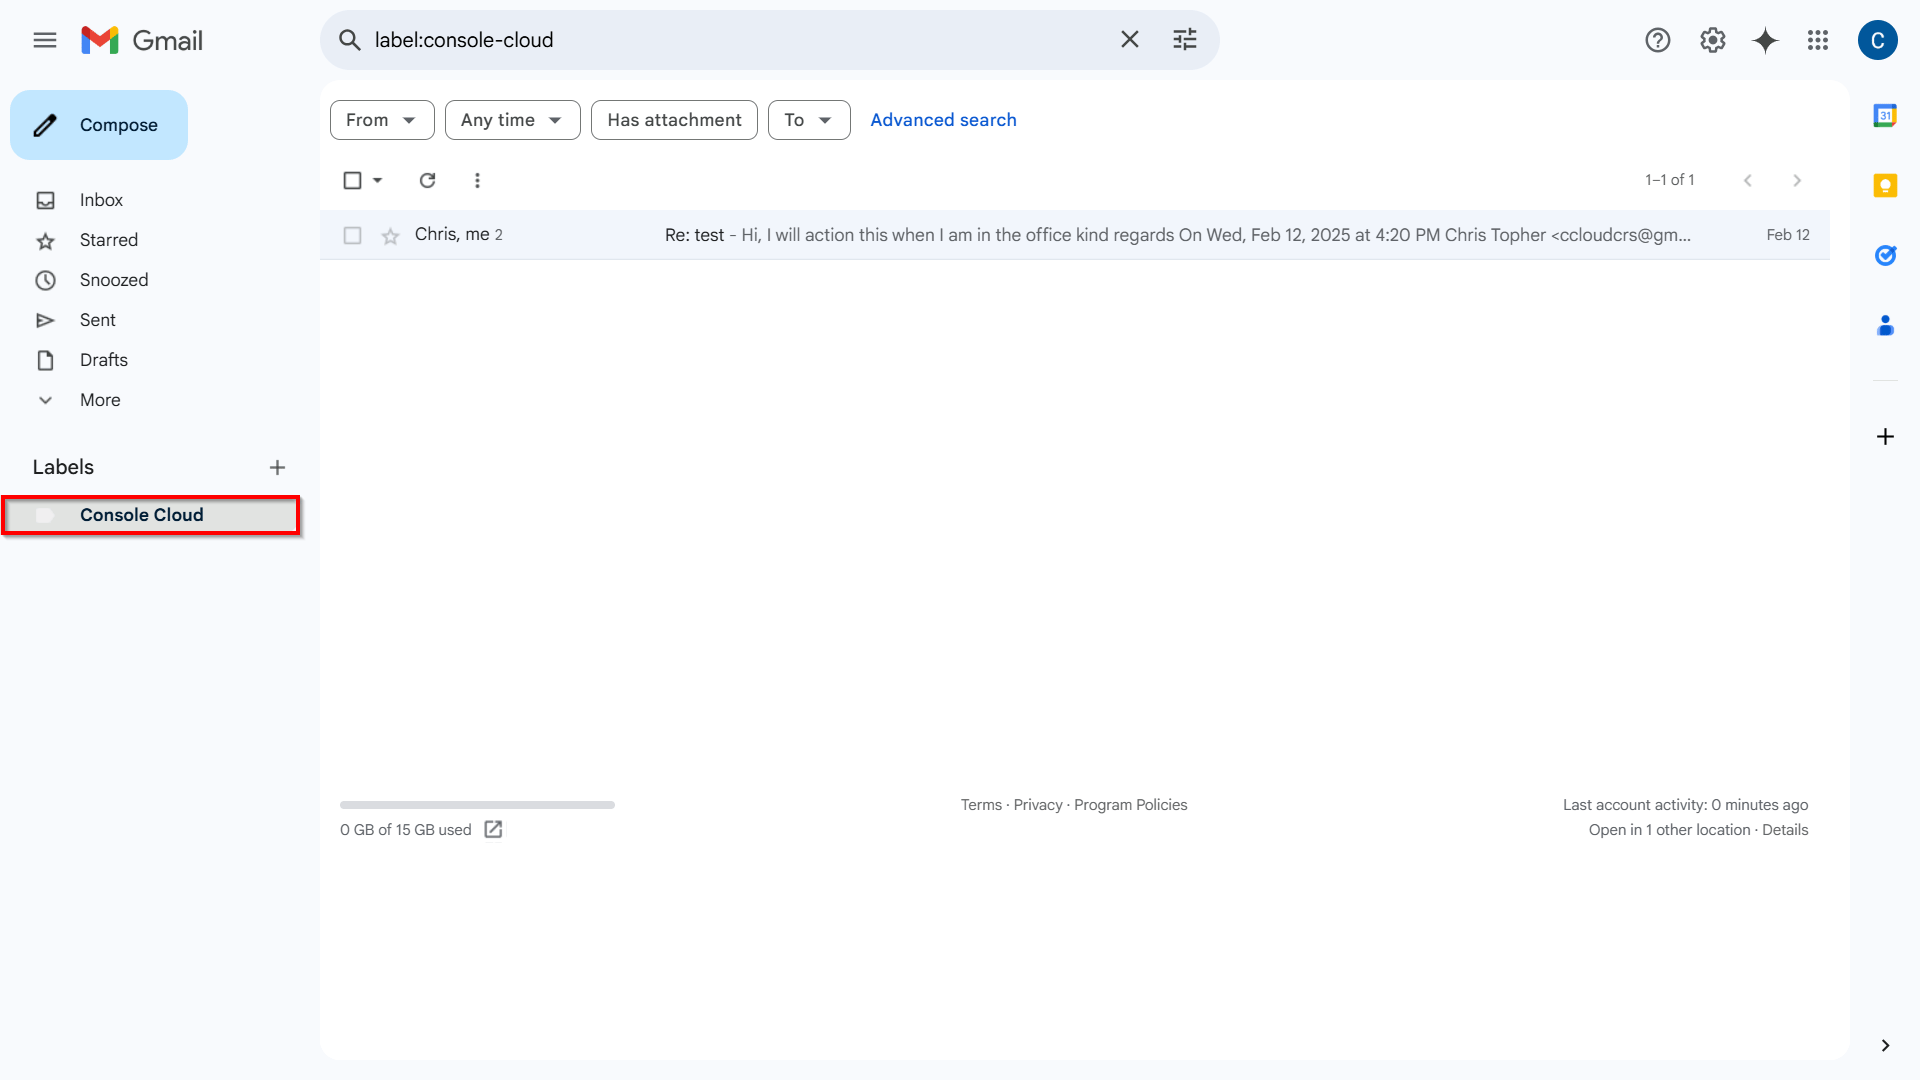
- With the integration between Gmail and Reapit PM now enabled, when viewing your Gmail inbox, you will see a new label for Console Cloud created. Emails received by contacts in your office to this account will be tagged as Reapit PM and appear under the Label.
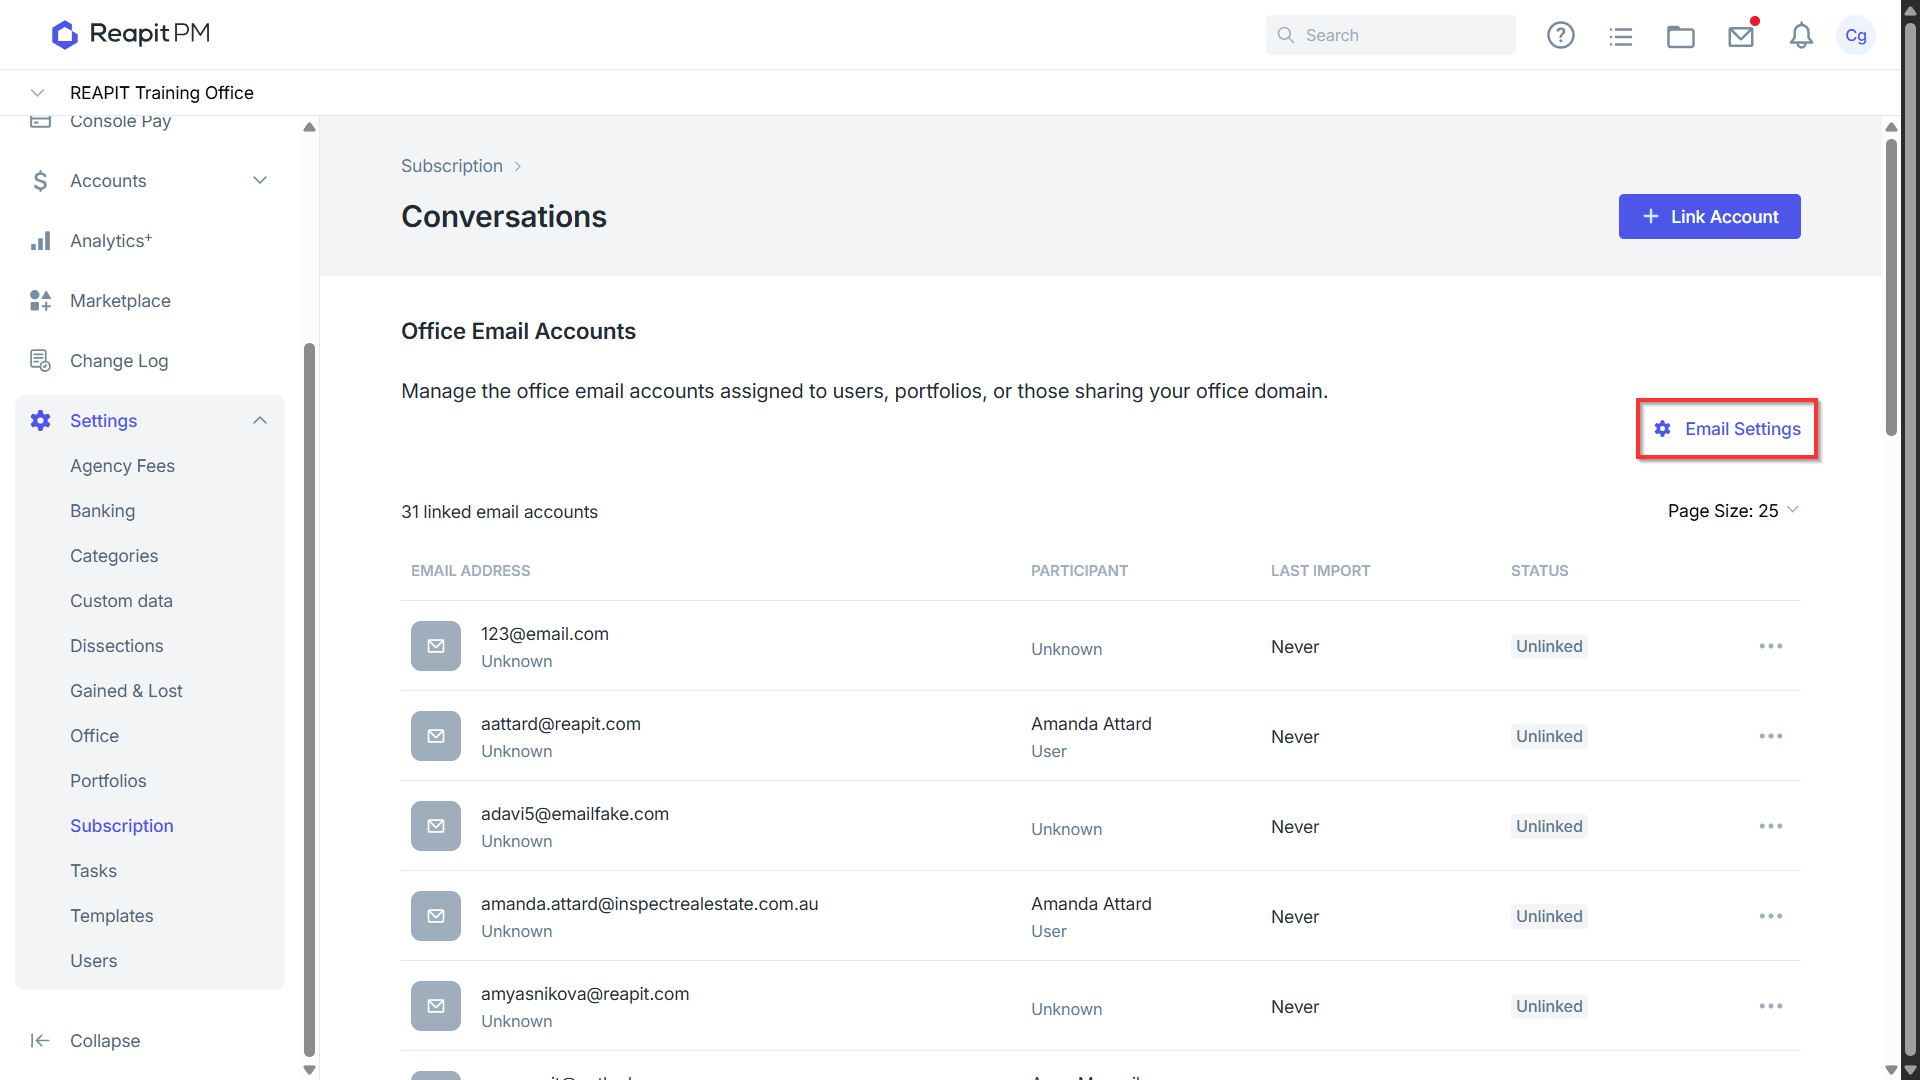
- If you prefer that emails received from your Gmail account continue displaying in the Inbox rather than being moved to the Reapit PM label, navigate to Email Settings.
- Untick 'Move emails to Reapit PM folder'
- To block incoming emails from certain email domains, enter the domain address to apply the rule. Multiple domains can be added to the block rule.
- Click Save.
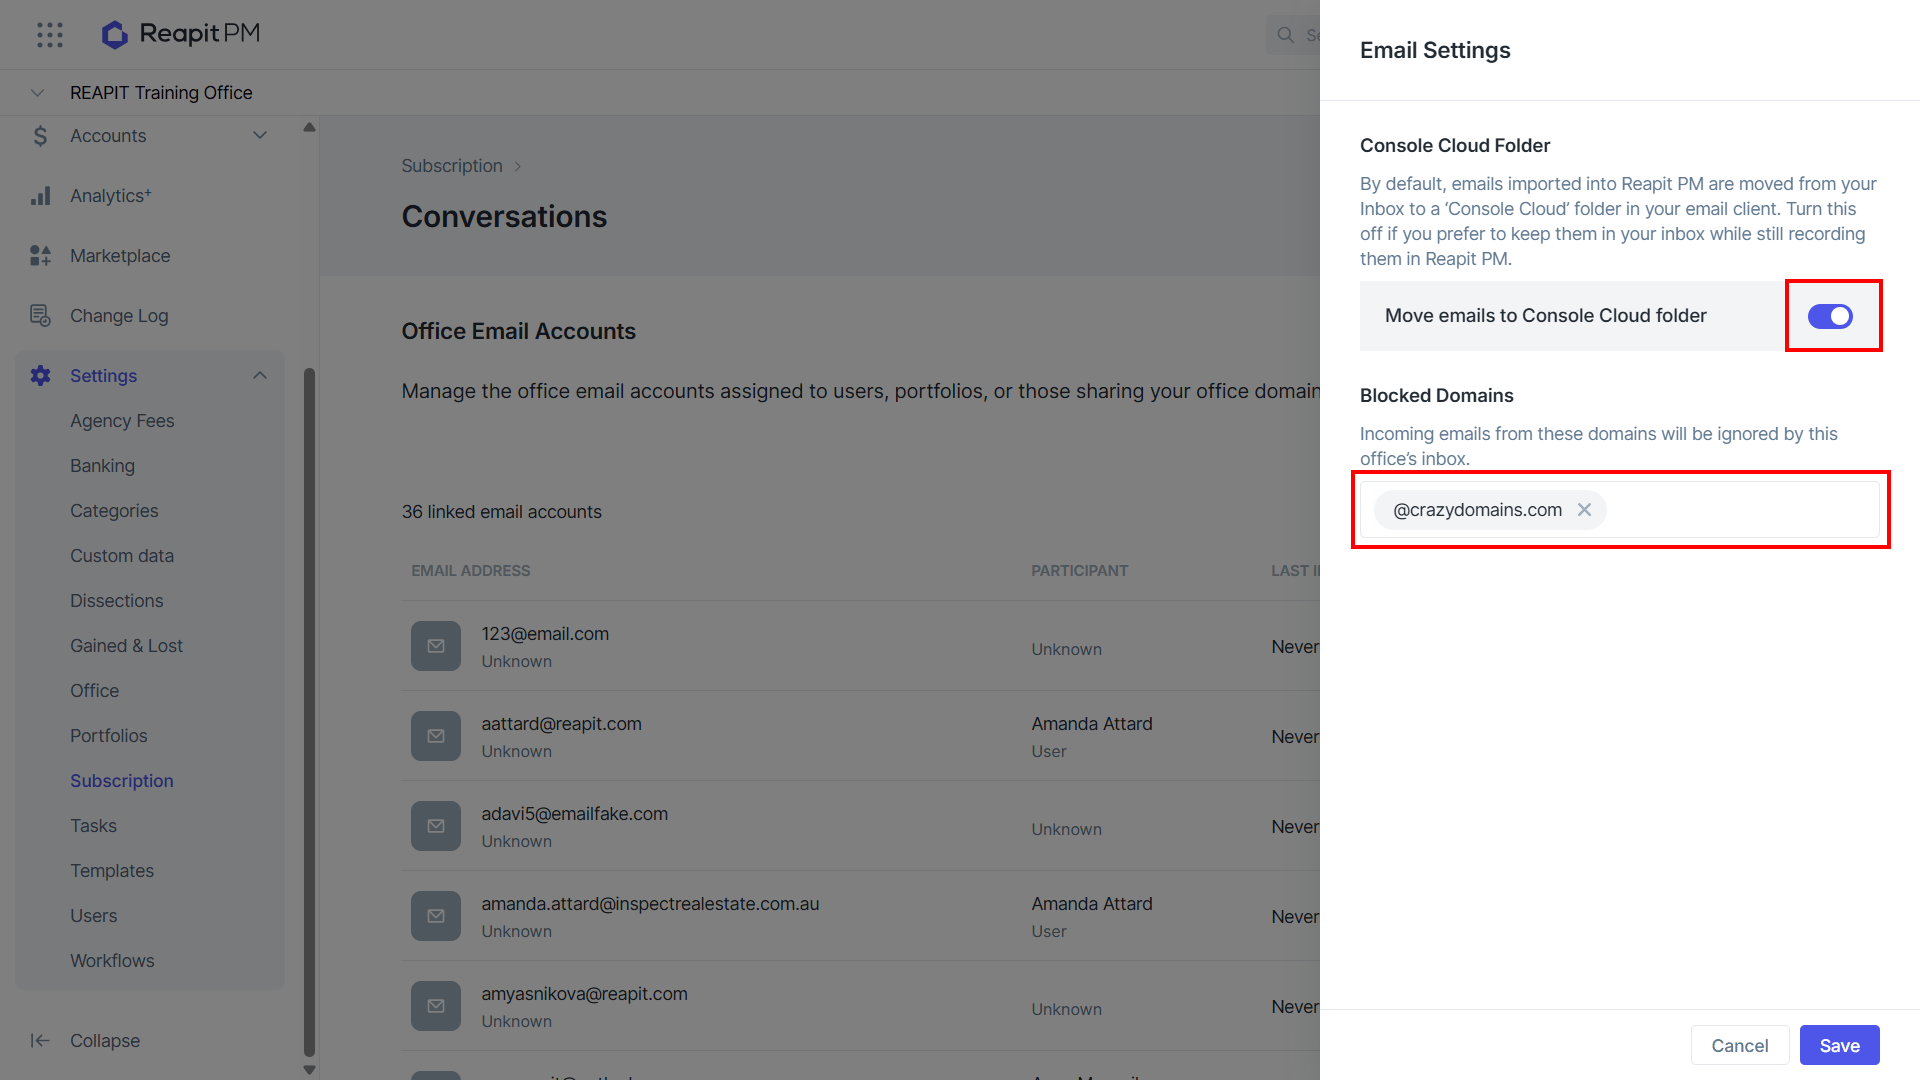
Note: Move emails to Console Cloud folder is enabled by default. This is a global setting so if any user switches it off, it will apply to the whole office and linked email accounts.