'%20d='M0%208a8%208%200%200%201%208-8h24a8%208%200%200%201%208%208v24a8%208%200%200%201-8%208H8a8%208%200%200%201-8-8V8Z'/%3e%3cpath%20fill='%23fff'%20d='M8.375%2013v14L20.5%2034l12.124-7v-7.737l-1.687-.975-2.806-1.62-1.082-.624v4.83l-.002%204.83H13.95V16.07l3.275-1.89%202.192-1.265%201.082-.625%203.275%201.877%202.192%201.256%201.083.62V9.782L20.5%206%208.376%2013Z'/%3e%3cdefs%3e%3clinearGradient%20id='reapit-pm__a'%20x1='20.702'%20x2='20.702'%20y1='.351'%20y2='31.228'%20gradientUnits='userSpaceOnUse'%3e%3cstop%20stop-color='%235573FD'/%3e%3cstop%20offset='.575'%20stop-color='%234E56EA'/%3e%3c/linearGradient%3e%3c/defs%3e%3c/svg%3e)
Console Pay Tenancy Invitation and Setup
This article will take you through how to invite and set up tenant contacts with Console Pay.
Console Pay Sending Invites and Setting up Tenancies
Existing Tenancies can be invited to Console Pay via the main menu Console Pay > Invite, or within the Tenancy Profile, where rent, bond and invoice payments can also be configured.
The processes in this article include:
- Sending Invites
- Set up Console Pay
Sending Invites
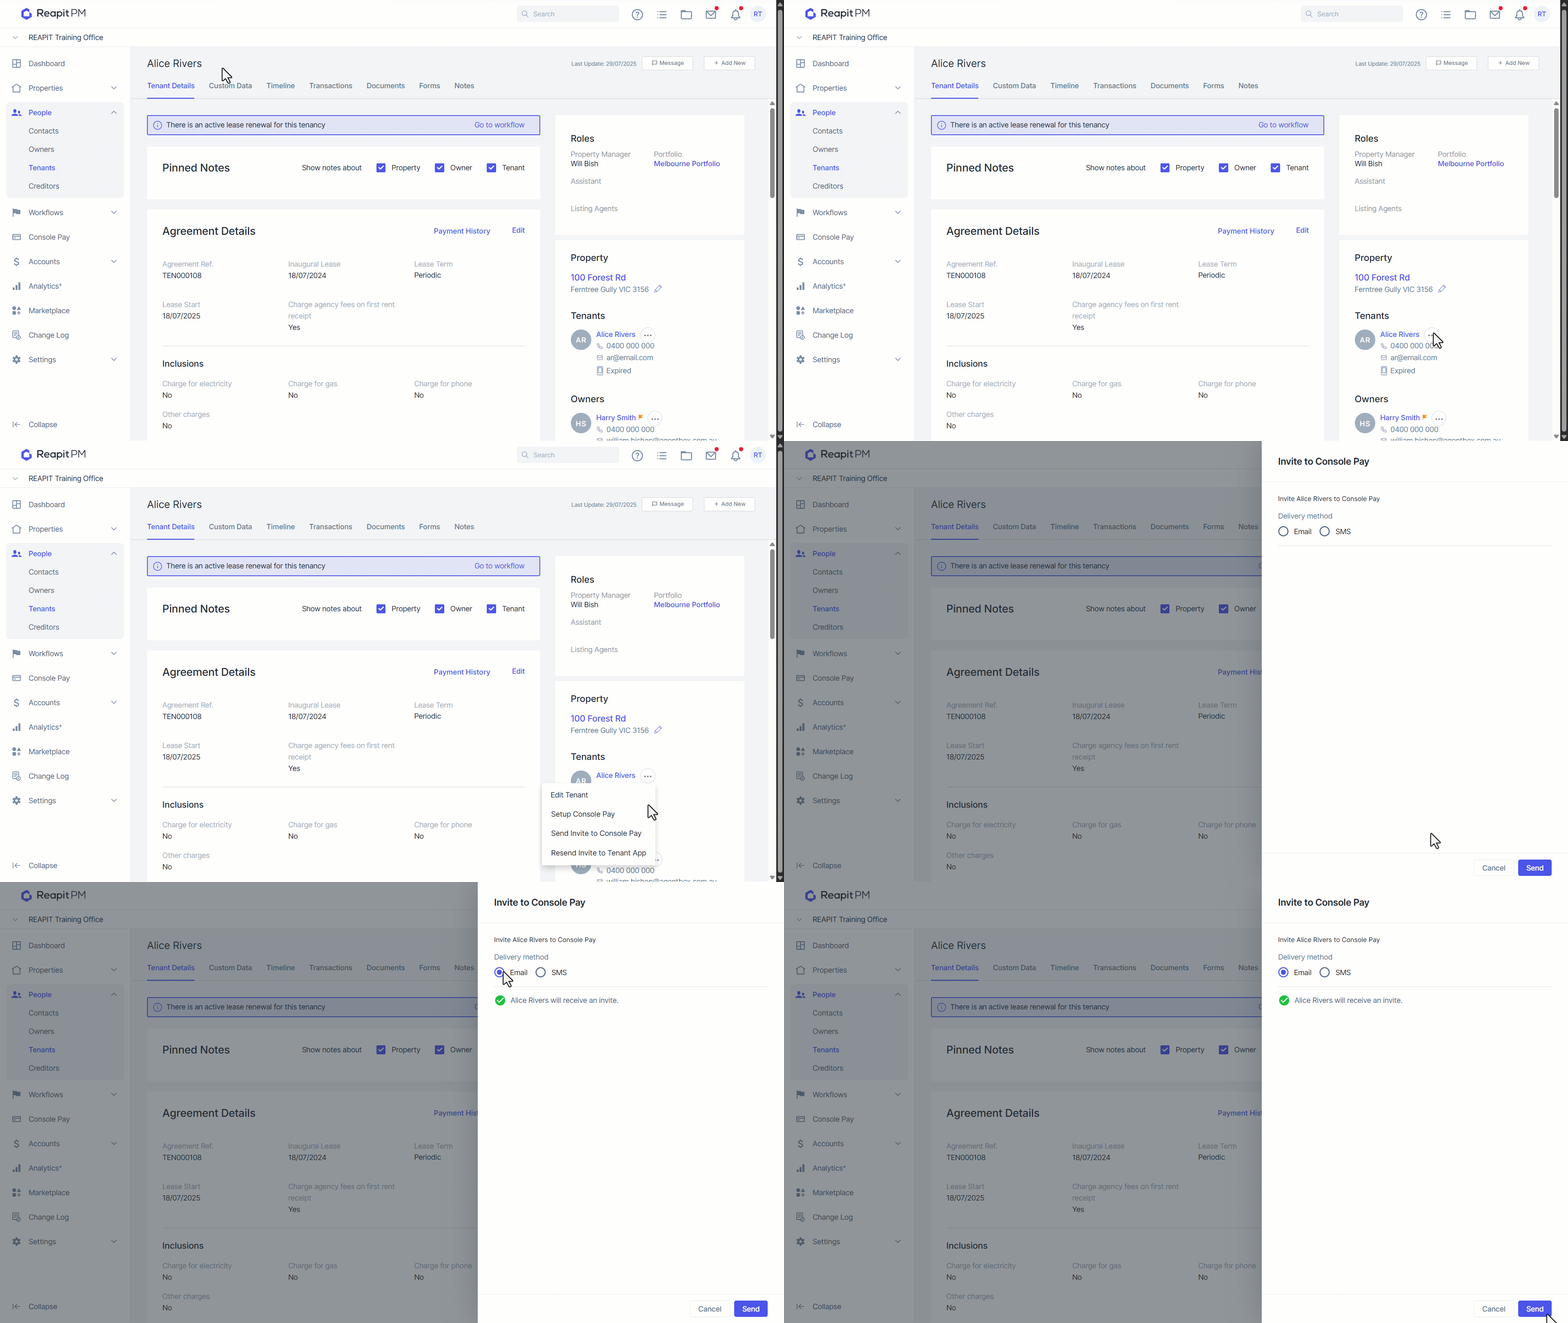
- Click on People.
- Click on Tenants.
- Search and Select the Tenant.
- Click the three dots.
- Click Send Invite to Console Pay.
- Select the Delivery method.
- Click Send.
Set up Console Pay
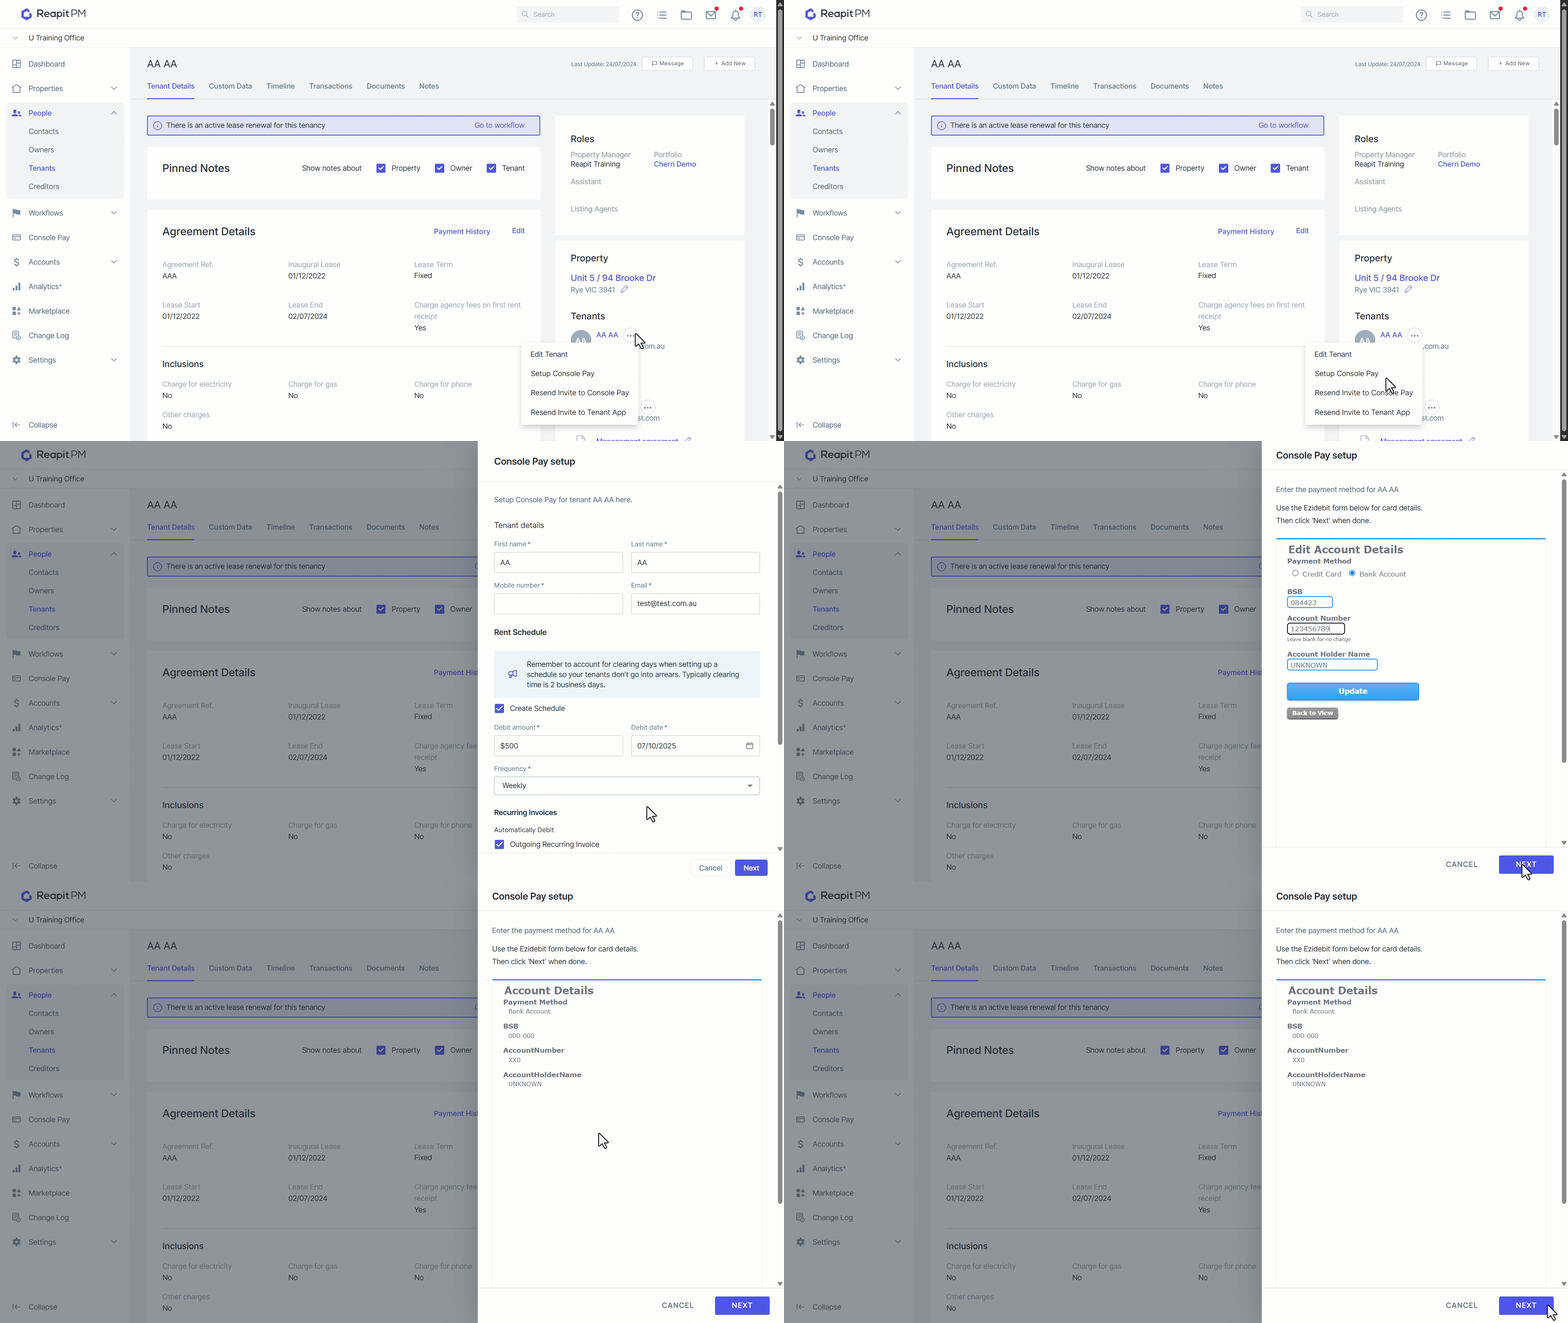
- Click on People.
- Click on Tenant.
- Search and Select the Tenant.
- Click the three dots.
- Click Set Up Console Pay.
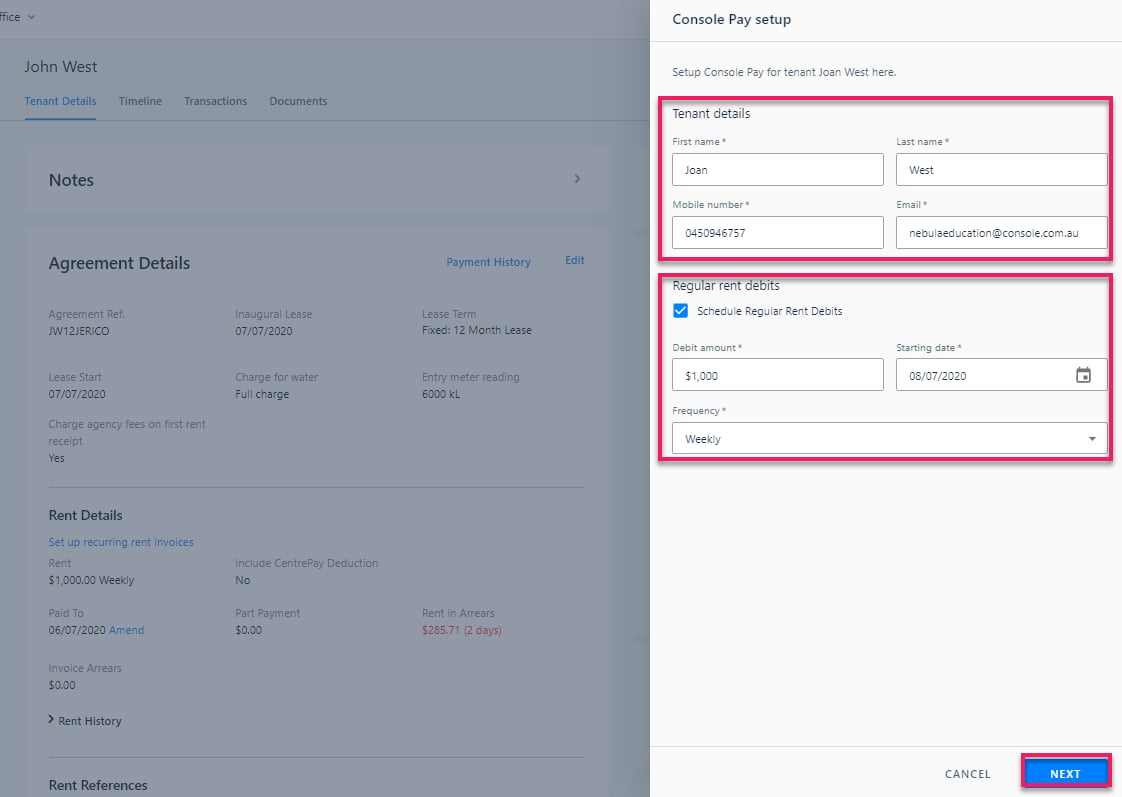
- Enter Tenant details.
- Confirm Rent Schedule Frequency and set Debit Date.
- Click to use Console Pay for one-off Invoices.
- Click Next.
- Select Payment Method of Credit Card or Bank Account. N.B. A Tenancy has the ability to do this when invited to Console Pay so this step may be unneccessary.
- Enter Payment details. Click Update to save the details.
- Click Next.
- Select to Schedule Bond Payment and Initial Rent if applicable, enter amount and select debit date.
- Once updated, click the three dots.
- Click Manage Console Pay.
- Click the three dots.
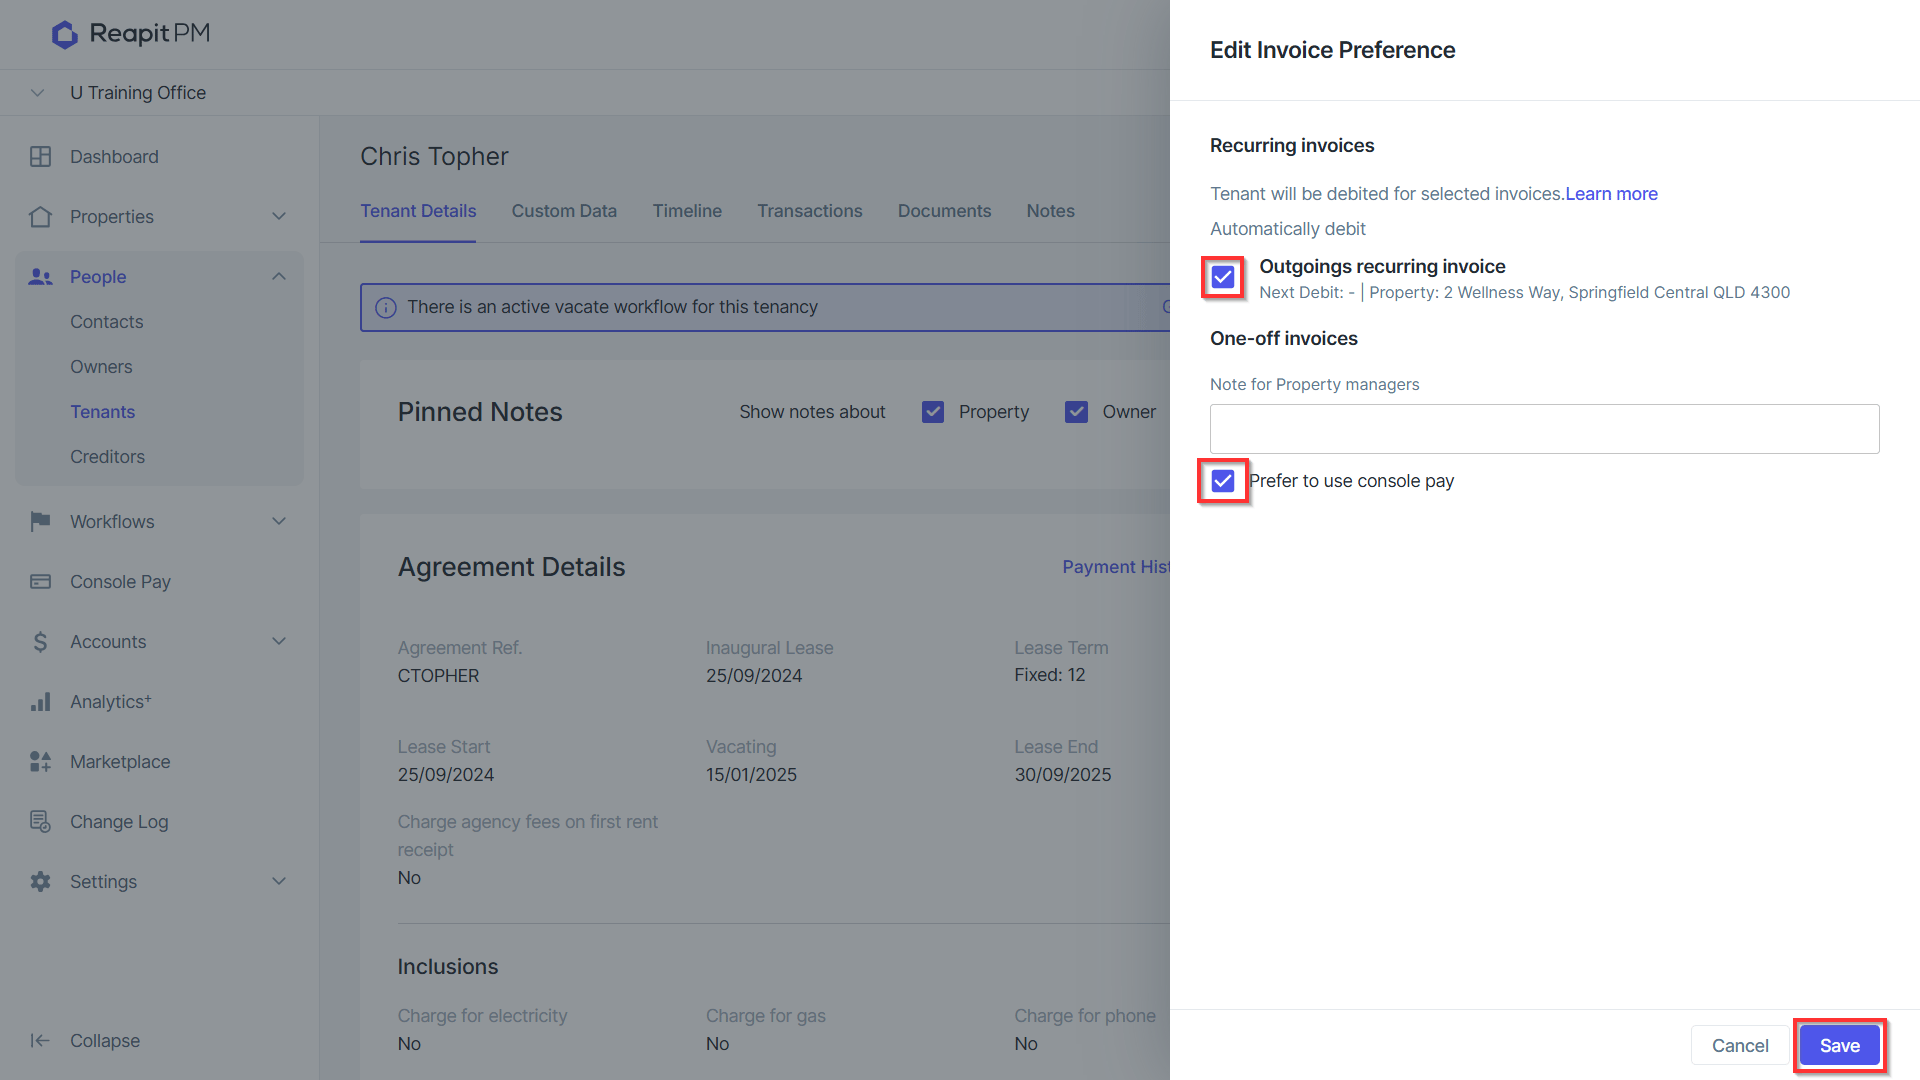
- Click Edit Preference.
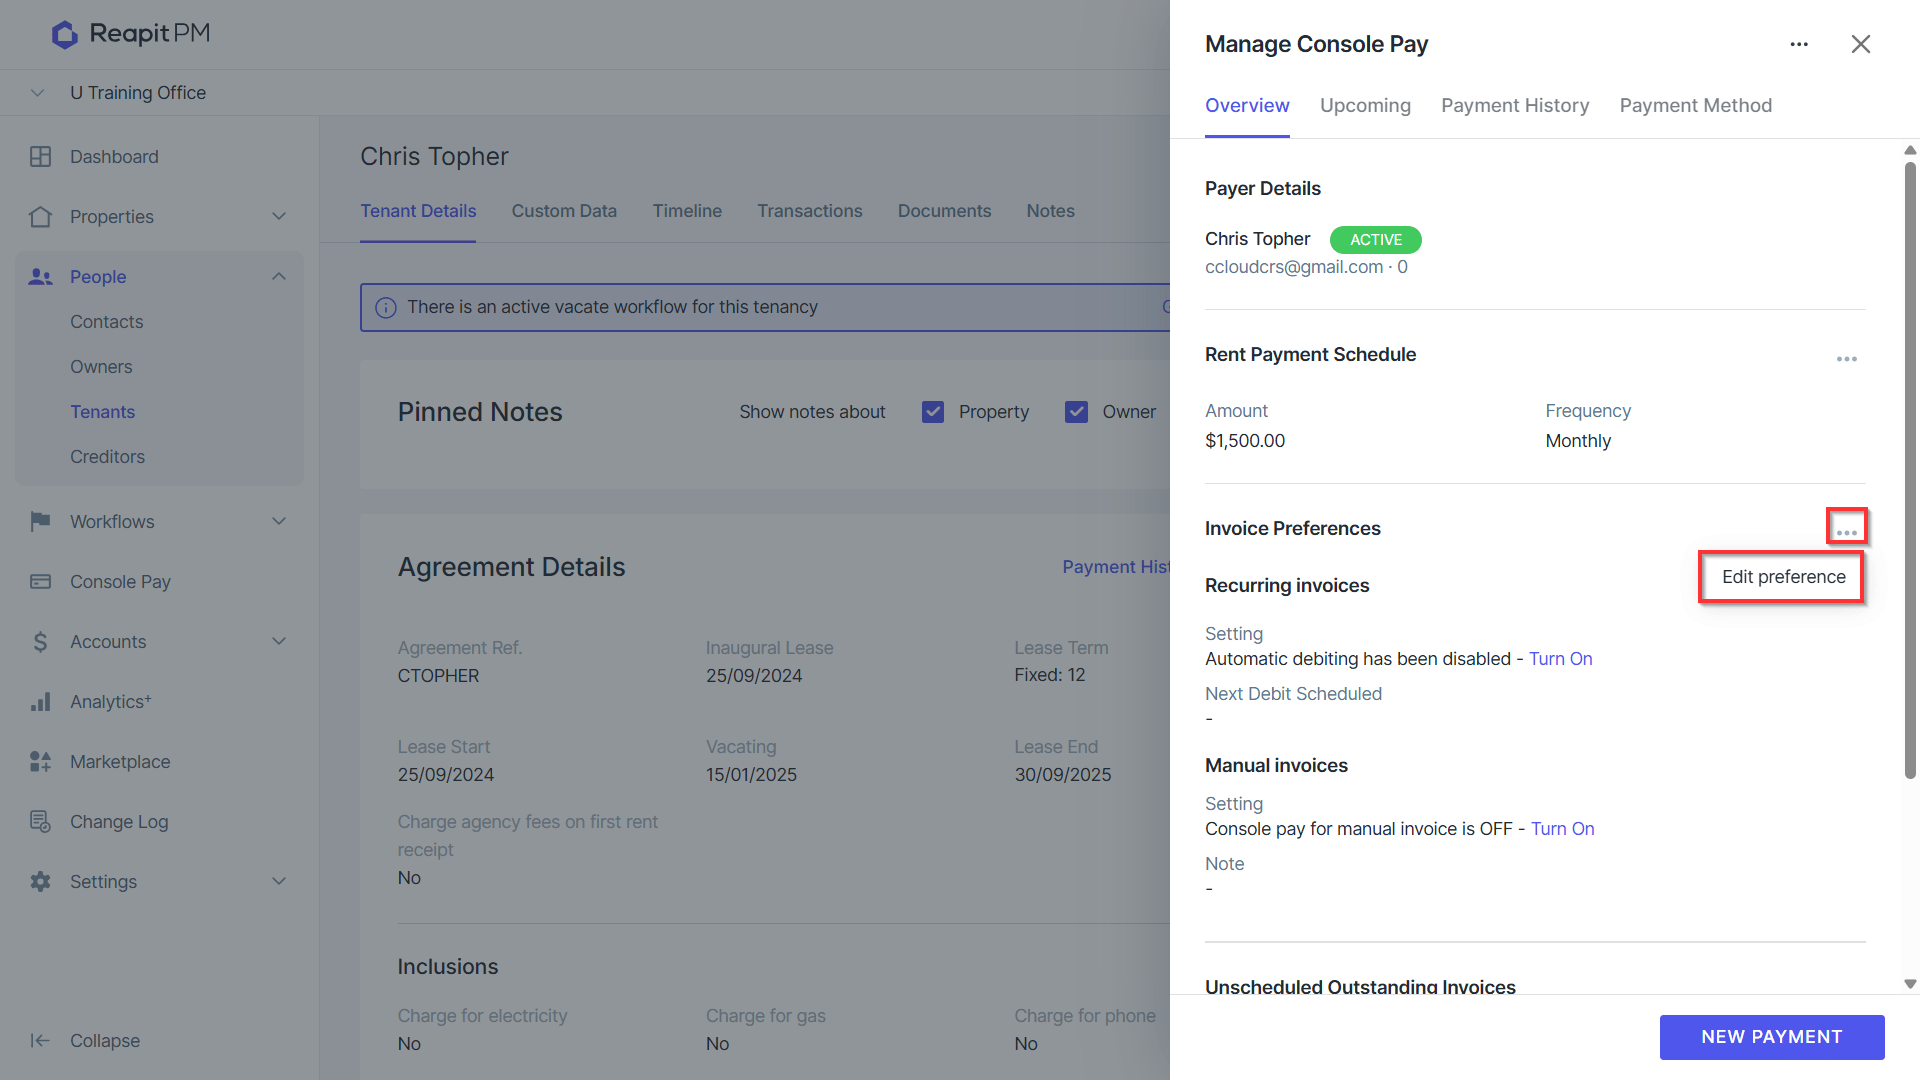
- Invoice Preferences section allows a preference for utilising Console Pay for direct debit transactions, including the option to schedule a direct debit for the same day and consolidate these into a single payment.
- Select the Outgoings recurring invoice and Perfer to use Console Pay checkbox.
- Click Save.