'%20d='M0%208a8%208%200%200%201%208-8h24a8%208%200%200%201%208%208v24a8%208%200%200%201-8%208H8a8%208%200%200%201-8-8V8Z'/%3e%3cpath%20fill='%23fff'%20d='M8.375%2013v14L20.5%2034l12.124-7v-7.737l-1.687-.975-2.806-1.62-1.082-.624v4.83l-.002%204.83H13.95V16.07l3.275-1.89%202.192-1.265%201.082-.625%203.275%201.877%202.192%201.256%201.083.62V9.782L20.5%206%208.376%2013Z'/%3e%3cdefs%3e%3clinearGradient%20id='reapit-pm__a'%20x1='20.702'%20x2='20.702'%20y1='.351'%20y2='31.228'%20gradientUnits='userSpaceOnUse'%3e%3cstop%20stop-color='%235573FD'/%3e%3cstop%20offset='.575'%20stop-color='%234E56EA'/%3e%3c/linearGradient%3e%3c/defs%3e%3c/svg%3e)
Adding and Managing Bills
This article will guide you through the processes of adding and managing Bills in Reapit PM. The processes in this article include: Adding a Bill Bulk Update Notes Reading the Bills Screen and Bills Settings Add Bill Fields On-Charge Bill Fields Adding and Managing Bills for Building and Commercial Properties
Overview
Adding and Managing Bills
This article will guide you through the processes of adding and managing Bills in Reapit PM.
Bills are a list of all owner expense invoices that need to be processed and disbursed (paid to a creditor). Admin and Trust Account users can access and configure Bills settings in the Bills page and the Banking Settings page.
The process outlined below can also be applied to $0 Bills. For more information, click here - $0 Bills Additional Information
The processes in this article include:
- Adding a Bill
- Bulk Update Notes
- Reading the Bills Screen and Bills Settings
- Add Bill Fields
- On-Charge Bill Fields
- Adding and Managing Bills for Building and Commercial Properties
Adding a Bill
For further information on Bills see our articles on processing bills, editing, write offs and deleting bills and bill settings.
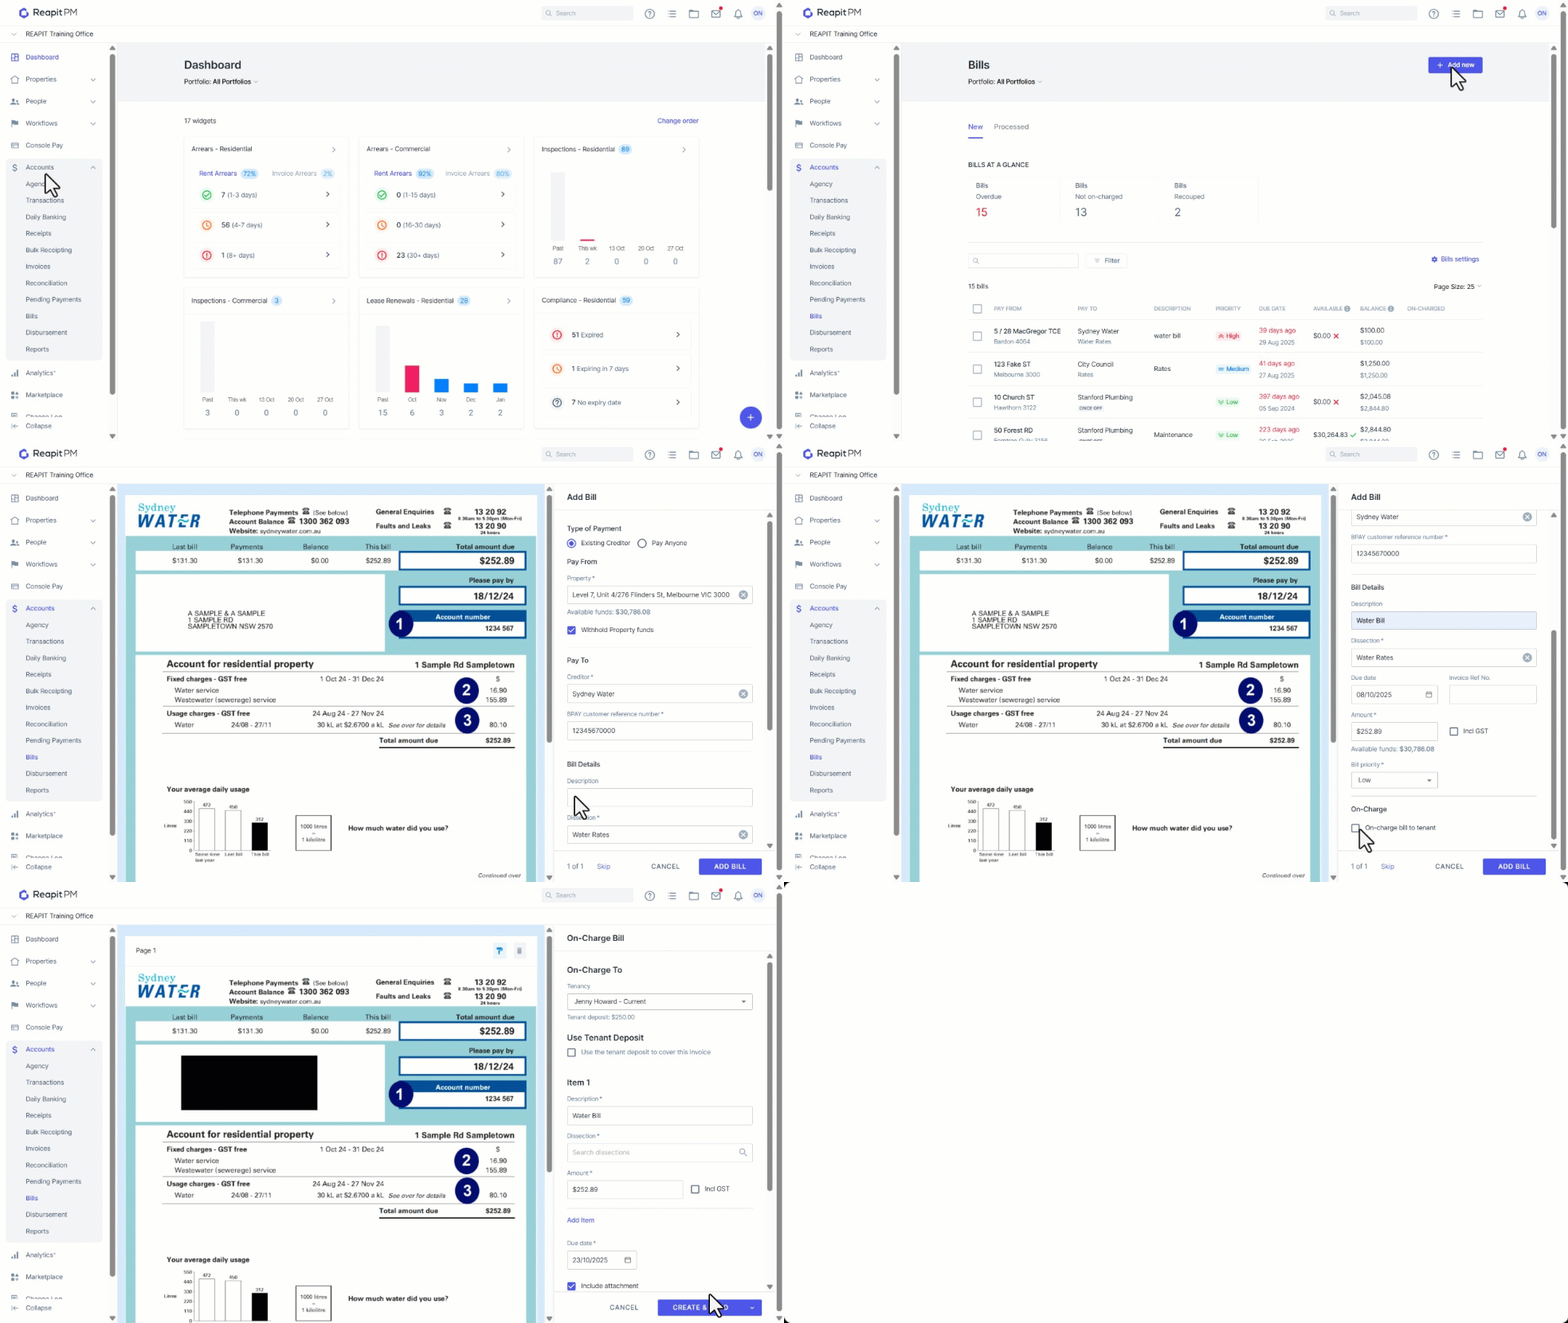
- Click on Accounts.
- Click on Bills.
- Click Add New.
- Drag and drop or select Choose File to upload one or multiple files.
- Reapit PM will read relevant Bill information and prefill details in the Add Bill drawer. Review all generated information and adjust as required.
- Complete the required Add Bill fields.
- Click on Add Bill.
- If On-Charge, was selected. Review and complete the On-Charge Bill fields.
- Click on Create and Send.
Bulk Upload Notes
When uploading multiple files to the Bills, this will allow for you to tick the box for bulk processing which will "Keep creditor, description, dissection and GST details" for adding multiple items.
Bills must be scanned and saved individually to be read correctly when uploaded in bulk. When adding an invoice into the Bills screen, smart scan will read the file and start to learn which Property and Creditor the bill is starting to relate to so that when the system starts to see more of these invoices come through it will know which information to populate the bill screen with.
Reading the Bills Screen and Bills Settings
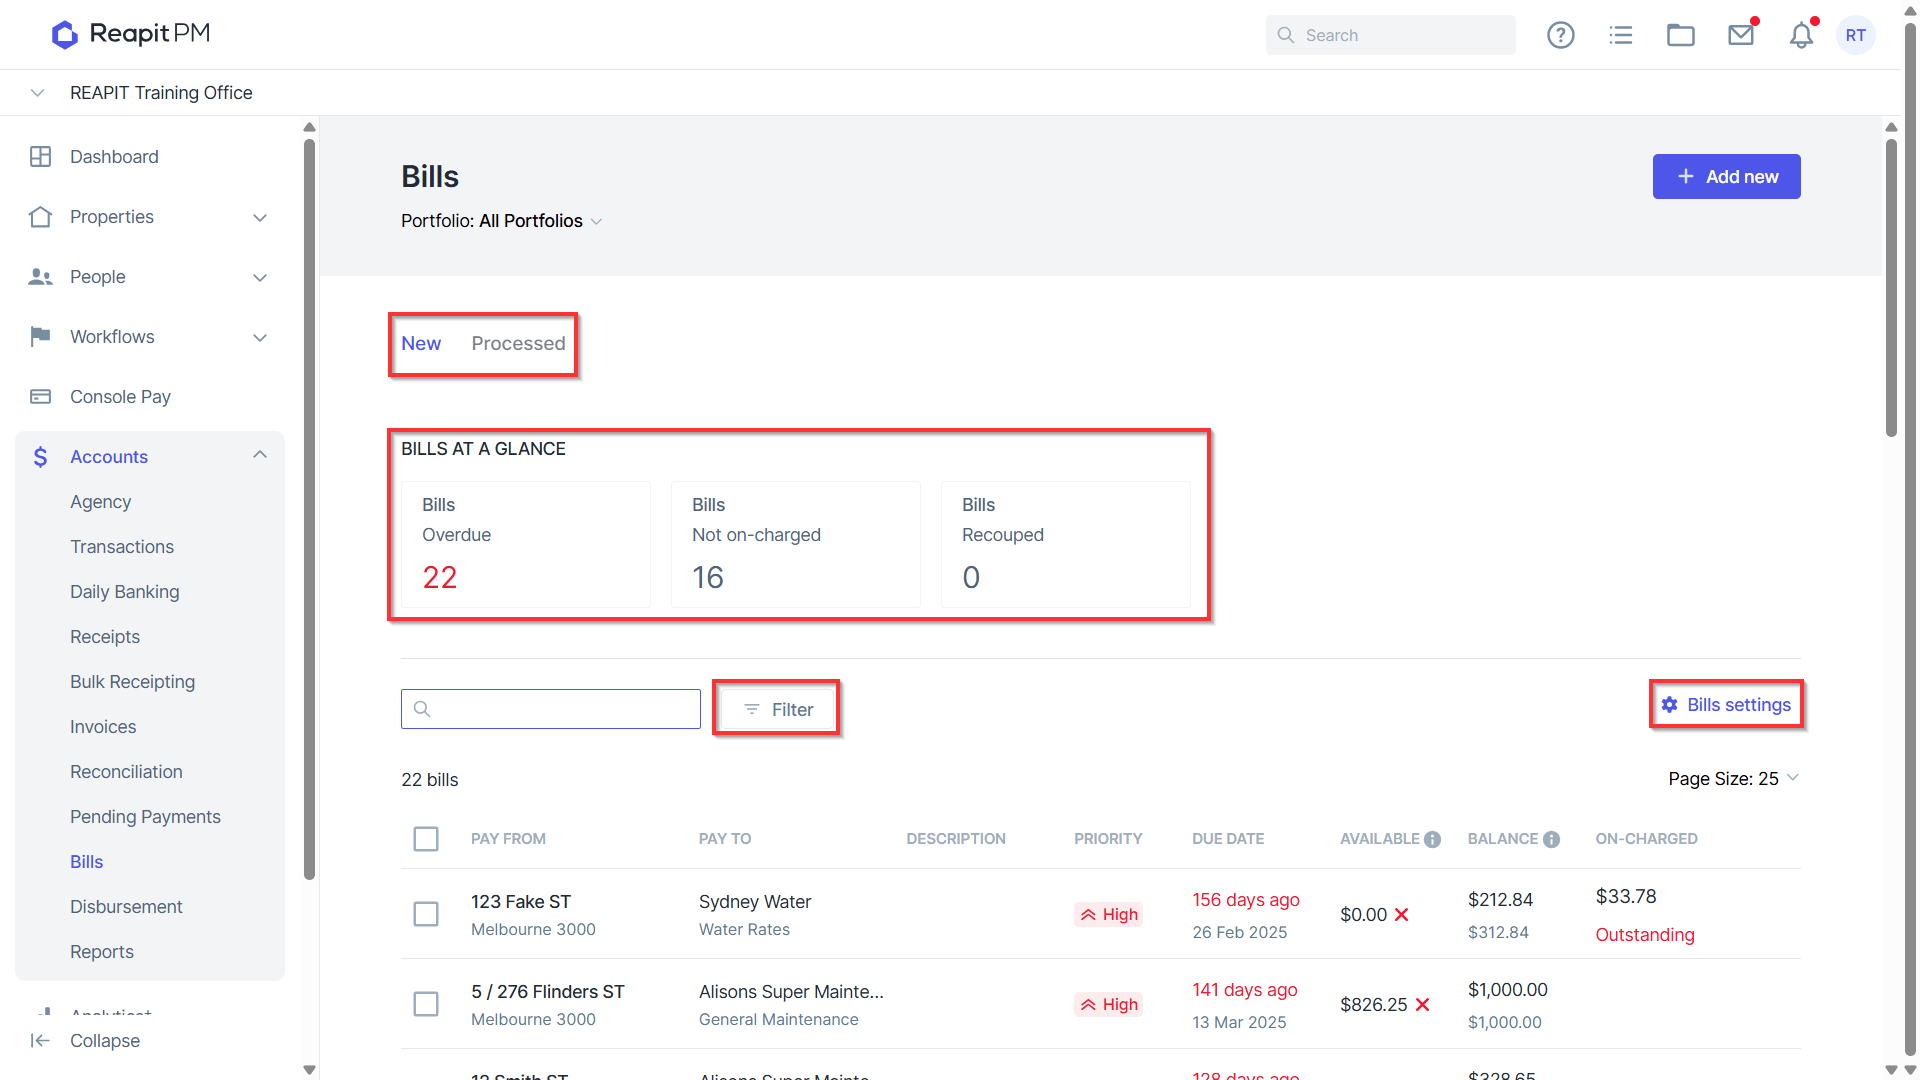
- Within the Bills area, you can view New or Processed Bills, utilise Quick View filters, or apply Due Date, Amount, or Bill Priority level (Premium and Enterprise Clients Only) filters via the Filter button.
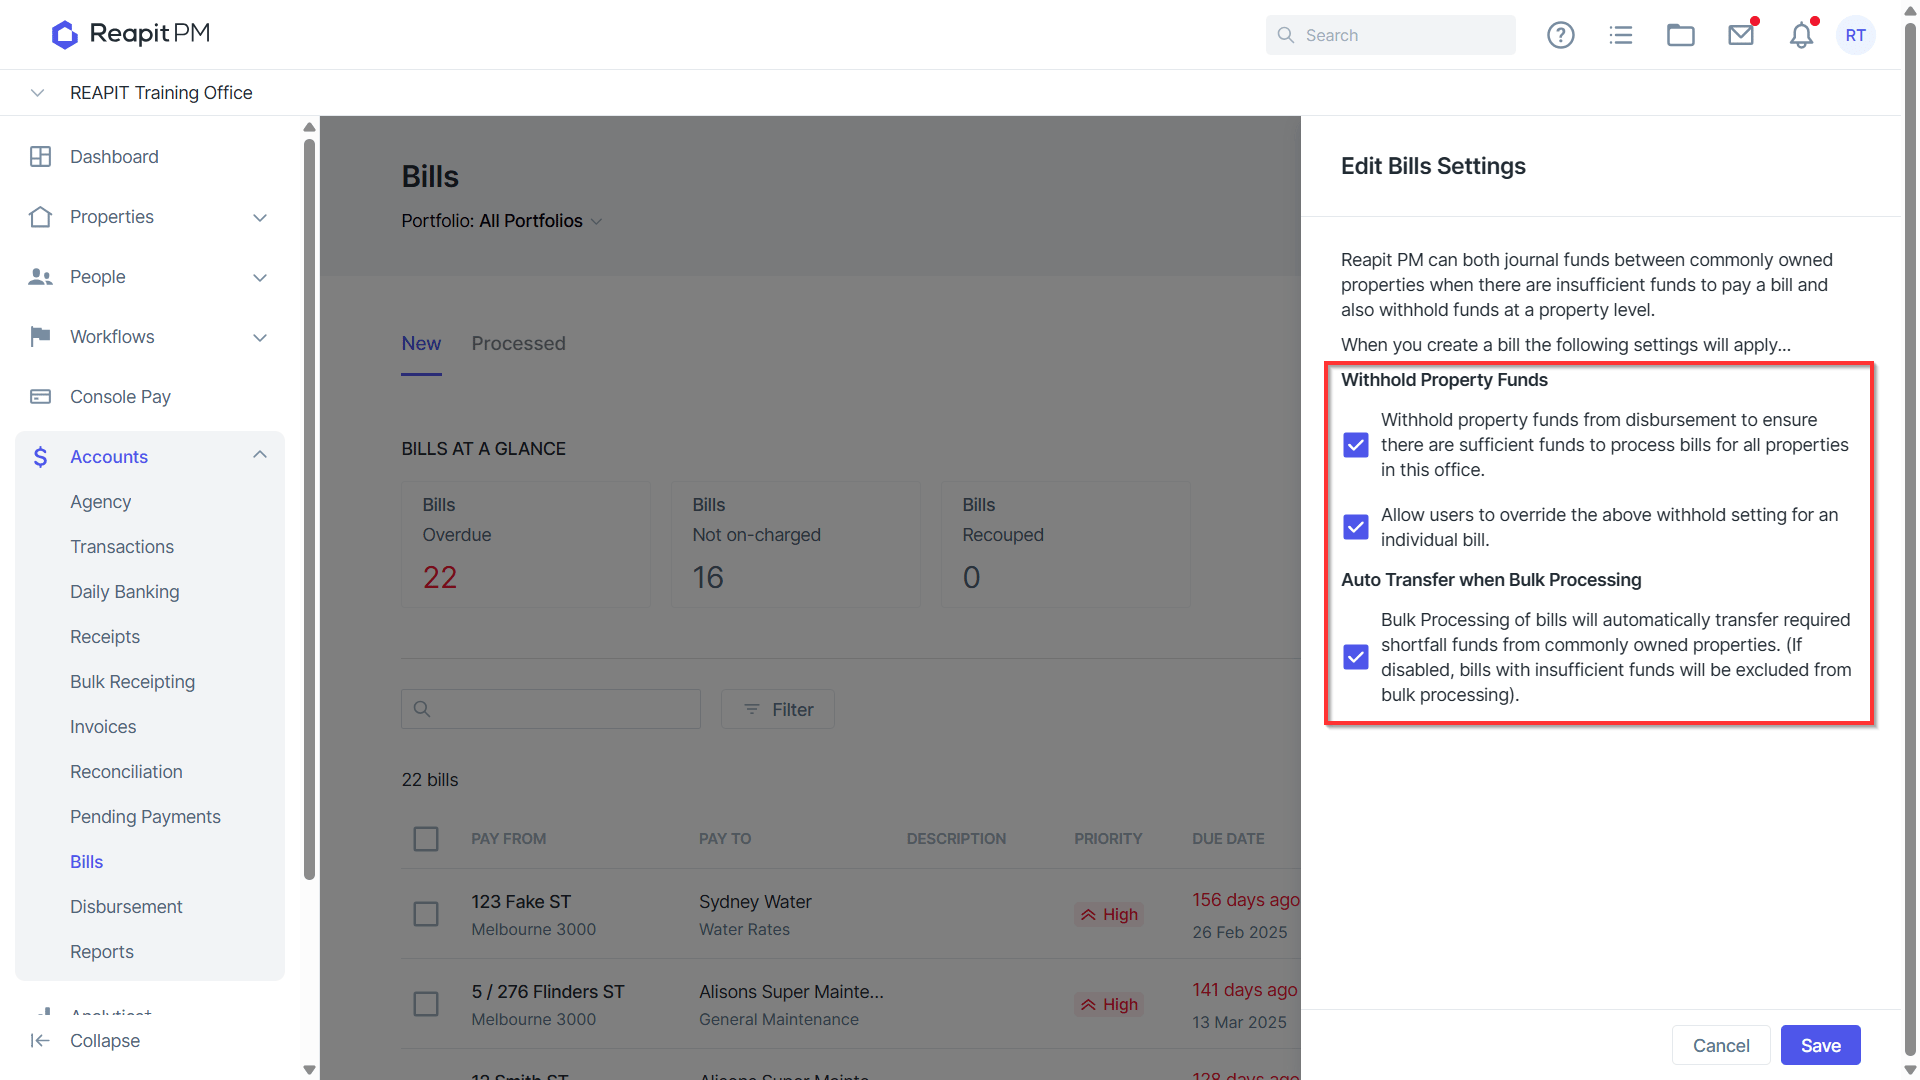
- Clicking Bill Settings will allow Admin and Trust Account users to configure settings for Withholding Property Funds and Auto Transferring Ownership Funds when bulk processing.
Add Bill Fields
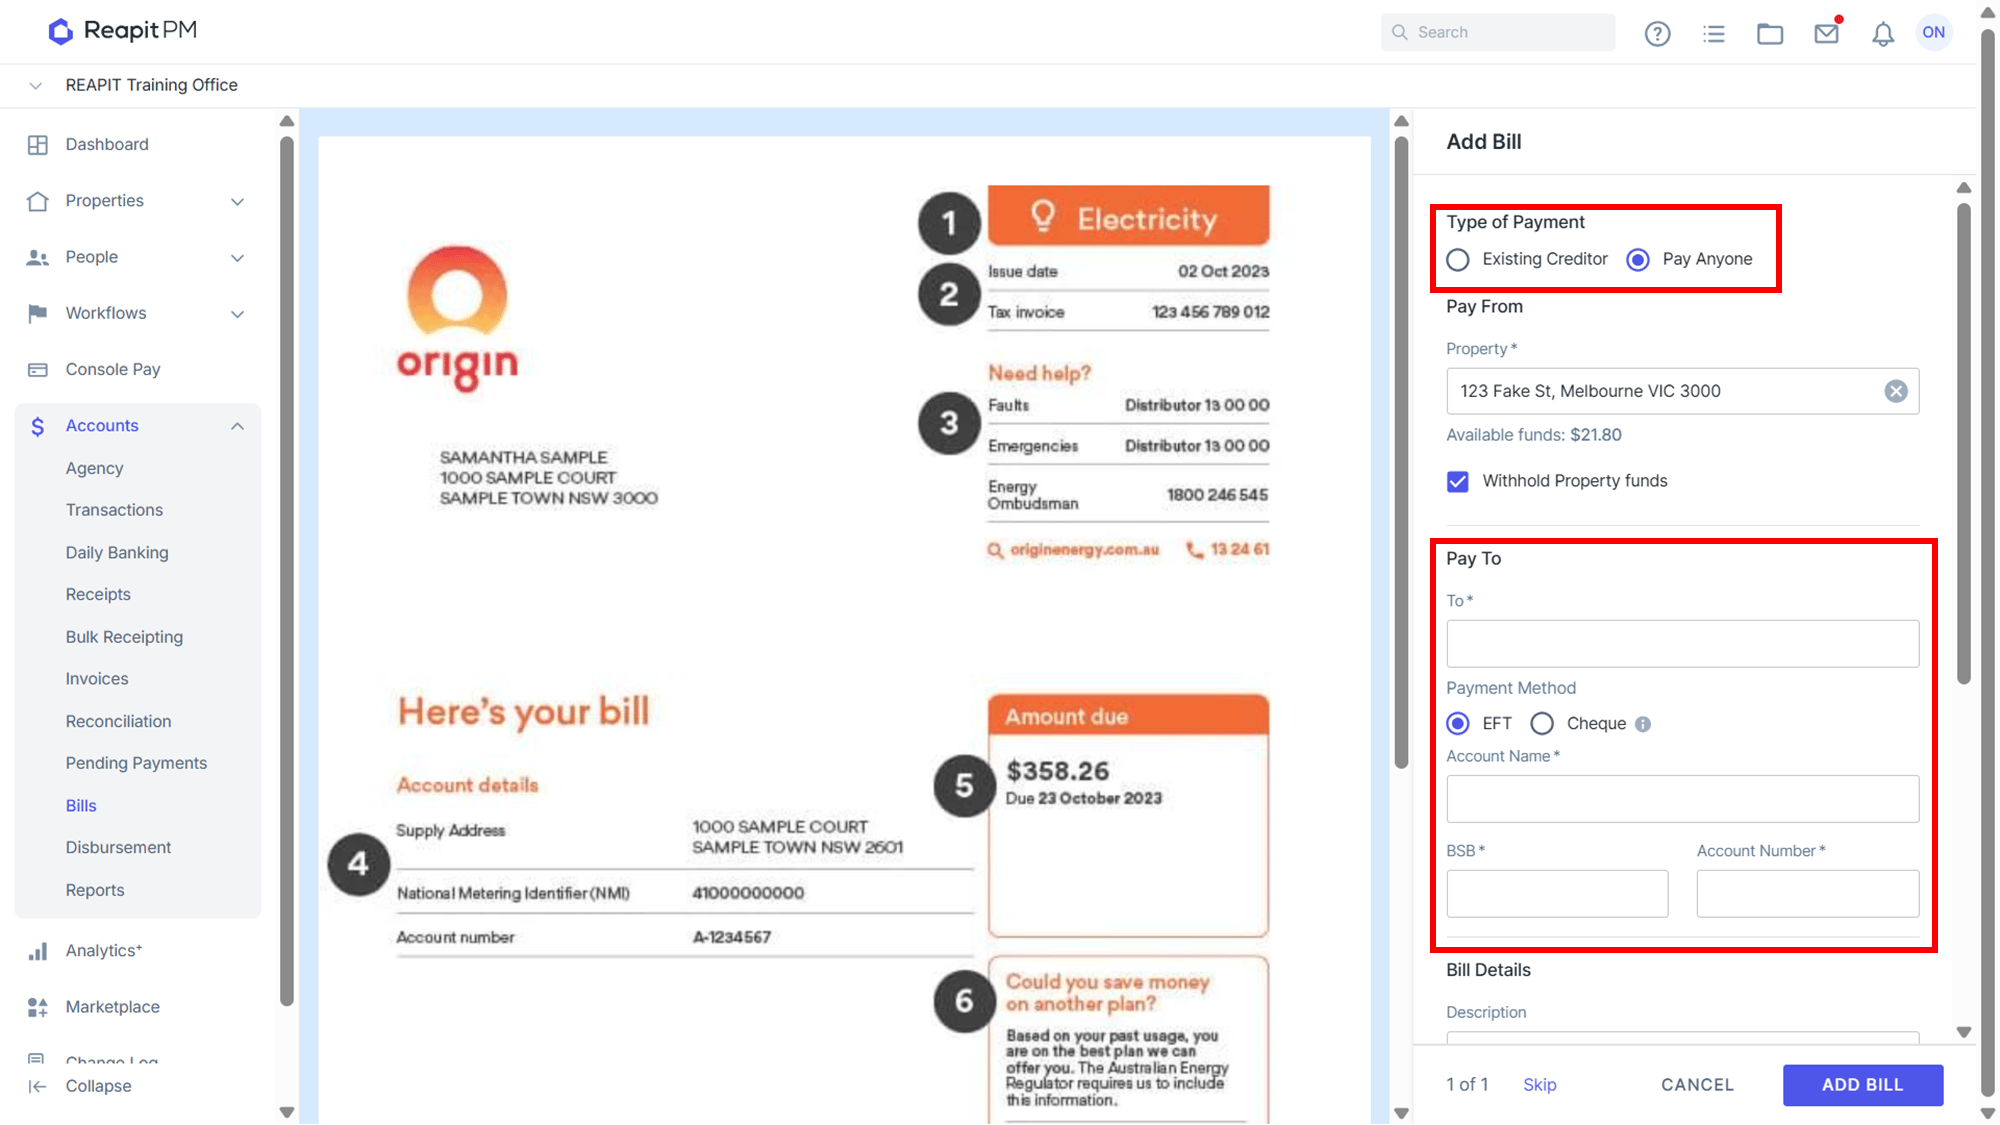
| Pay Anyone | Enables you to create a one off payment by entering the payment details. This will not add a creditor to Reapit PM. |
| Pay To | In addition to adding in who will be paid, you will be able to enter a payment method of either EFT details of Account Name, BSB and Account Number; or Cheque. |
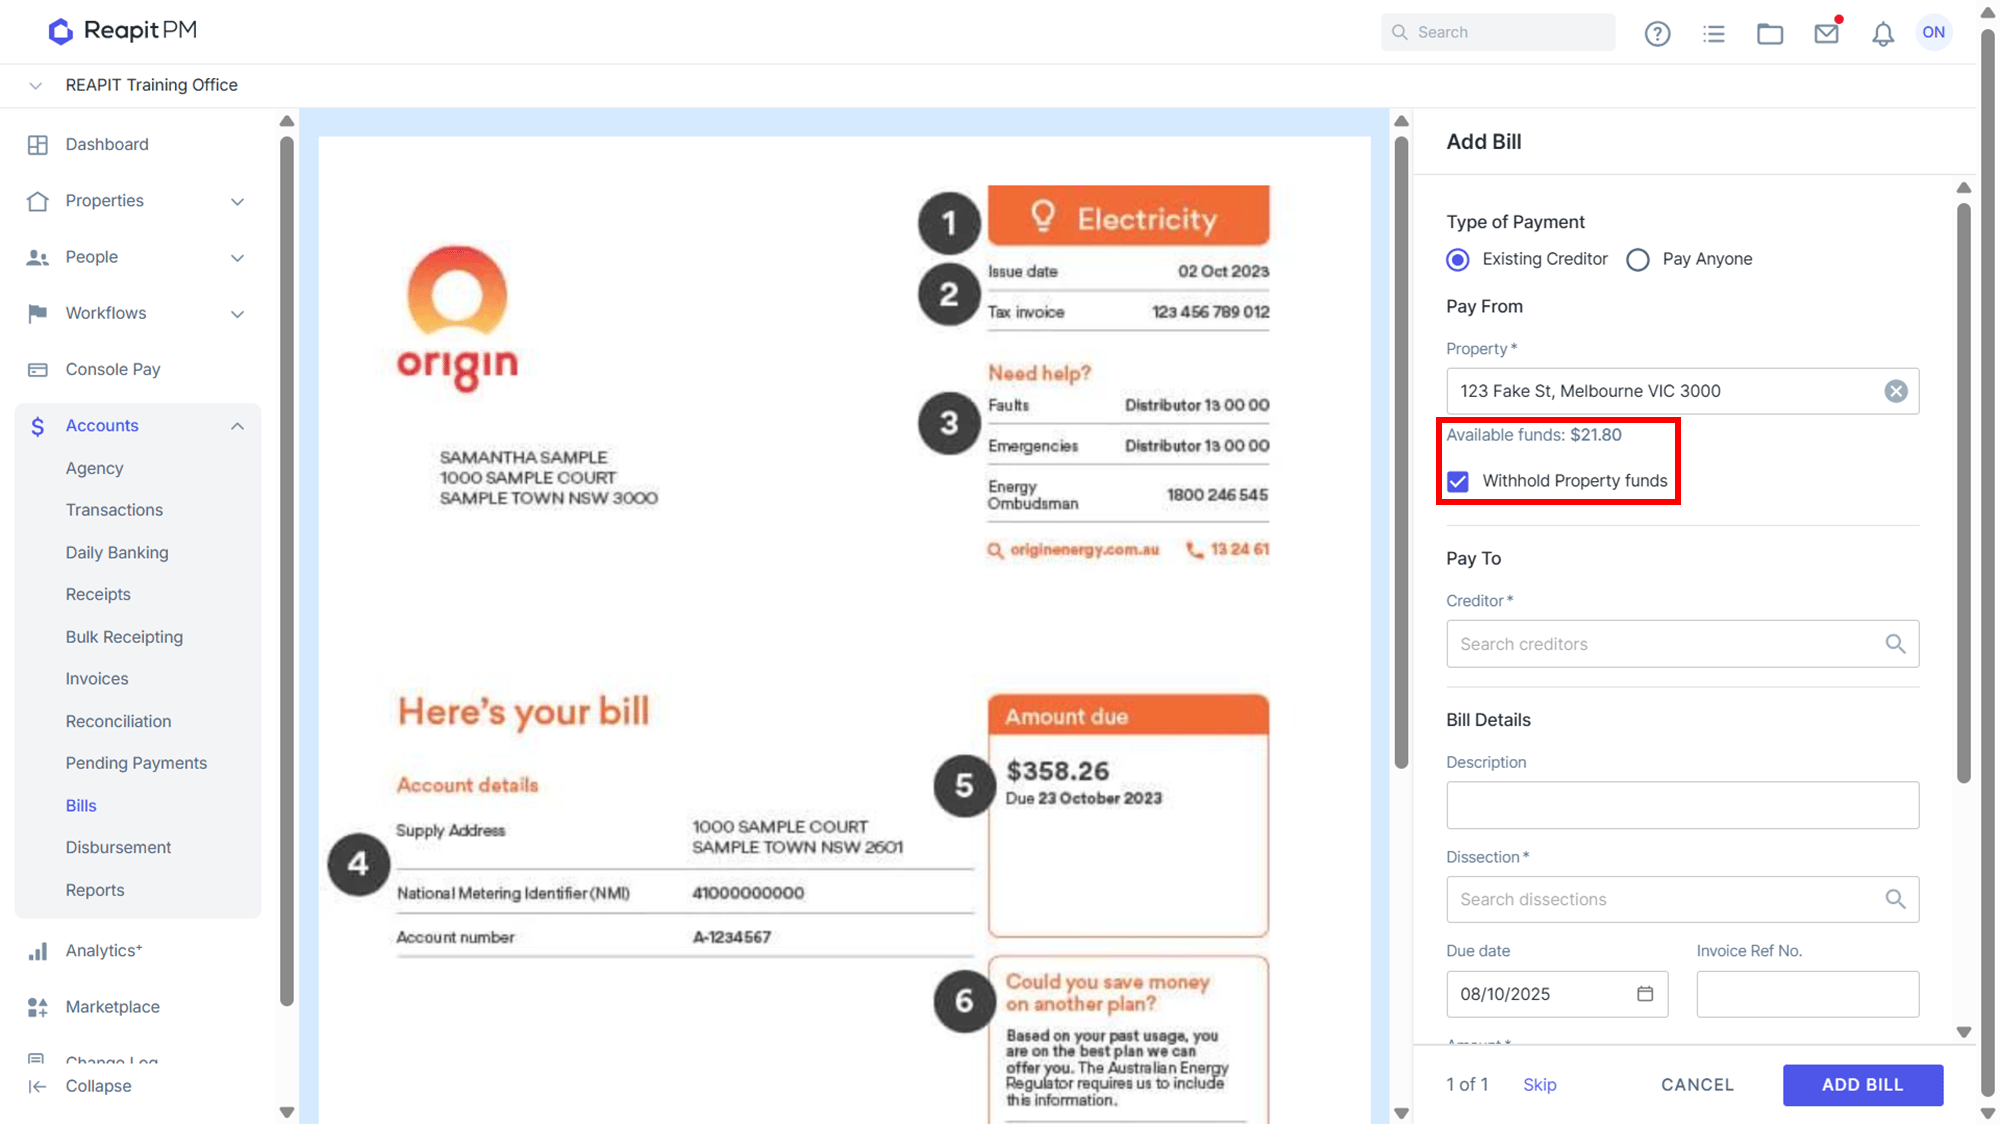
| Property | Confirm correctly populated, search and select a property if required. |
| Withhold Property funds | Tick if bill amount is to be withheld from Property Funds. |
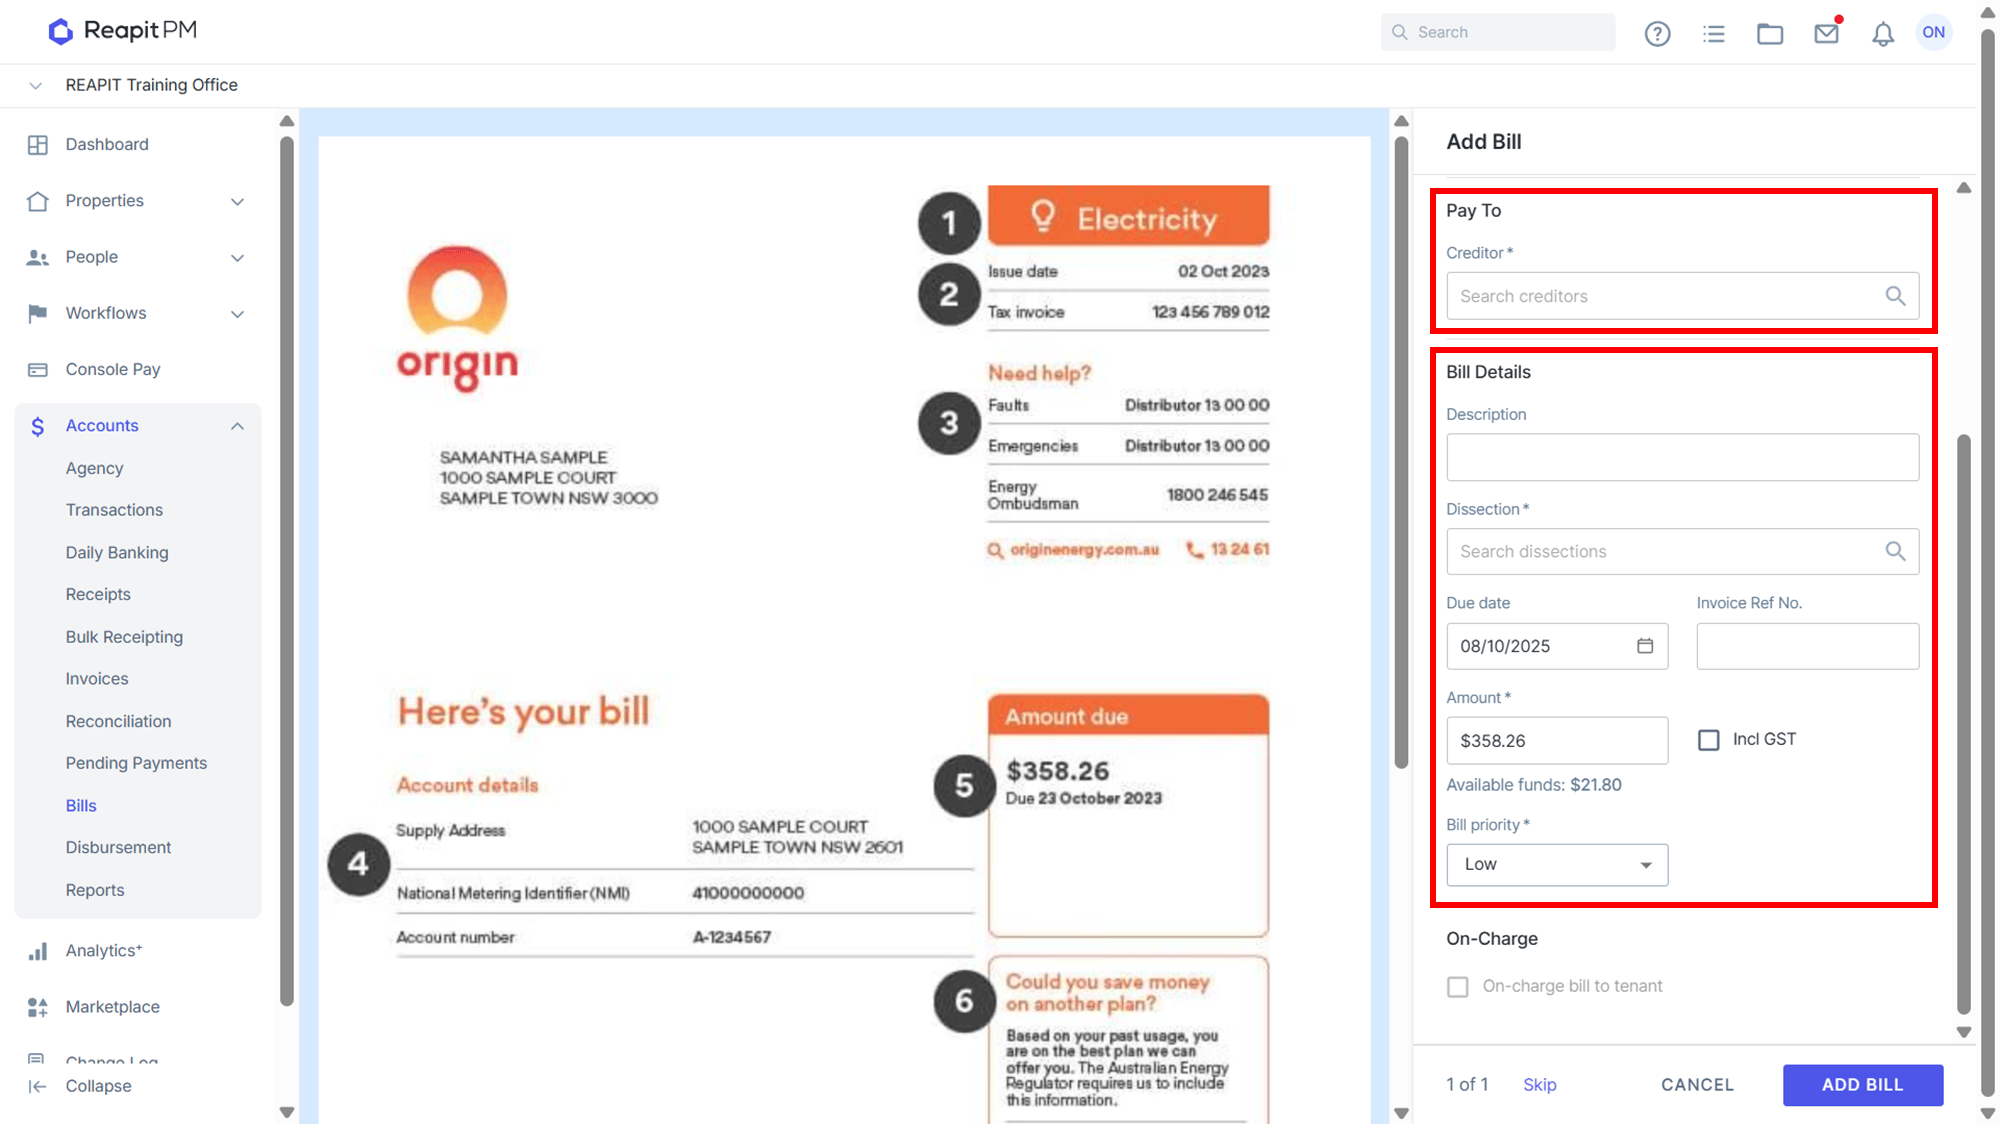
| Pay To | Search for and select the creditor and enter a reference number if applicable. |
| Bill Details | Select the dissection and update the due date, Ref No, or amount as needed. Set the bill priority level if it needs to be different from the default setting for that creditor. |
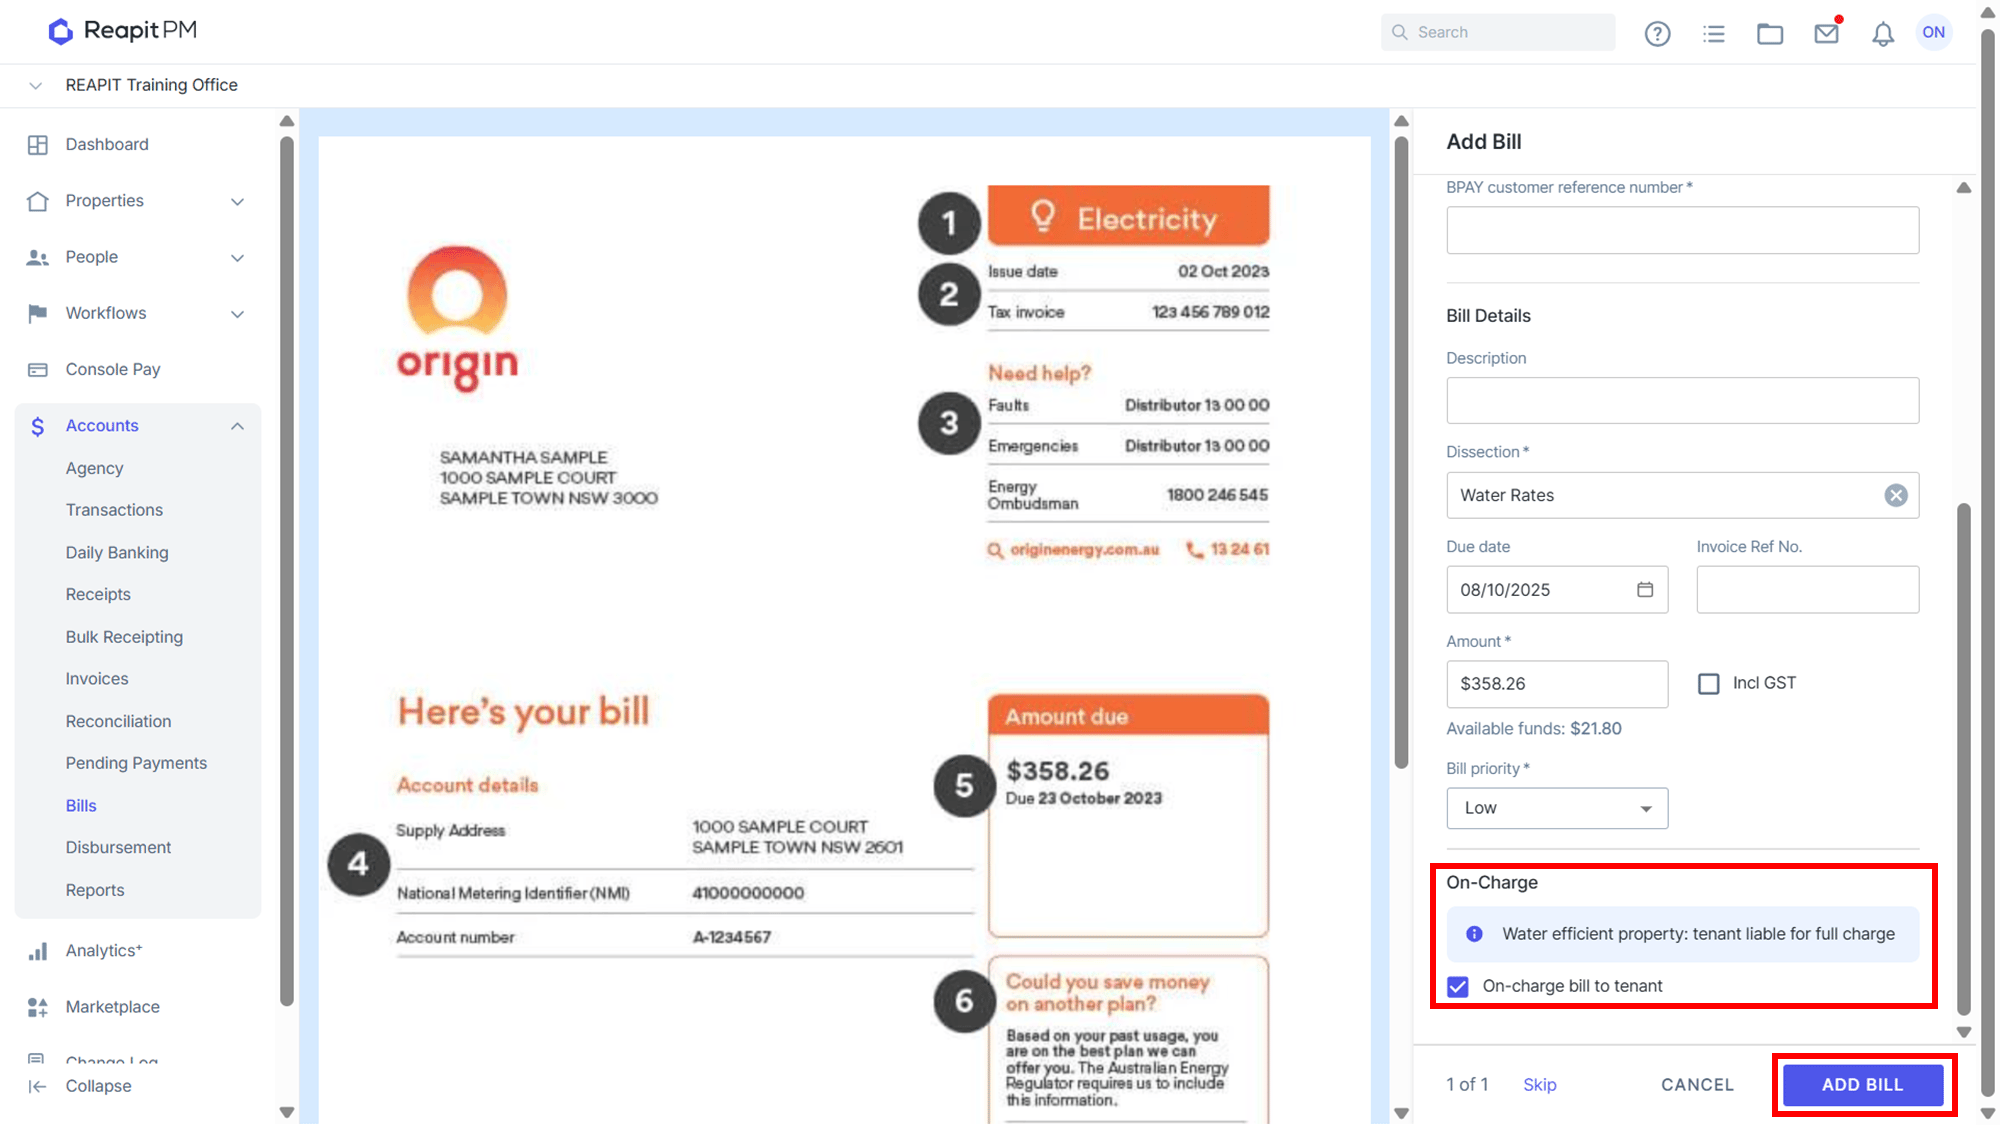
| On-Charge | If part or all of the Bill is to be on charged to the Tenant, select On-Charge bill to tenant, |
| Add Bill | When an owner has registered for GST enabled from their Management Agreement, on-charging a tenant for reimbursement it will auto populate with inclusive of GST on the invoice to be generated. |
On-Charge Bill Fields
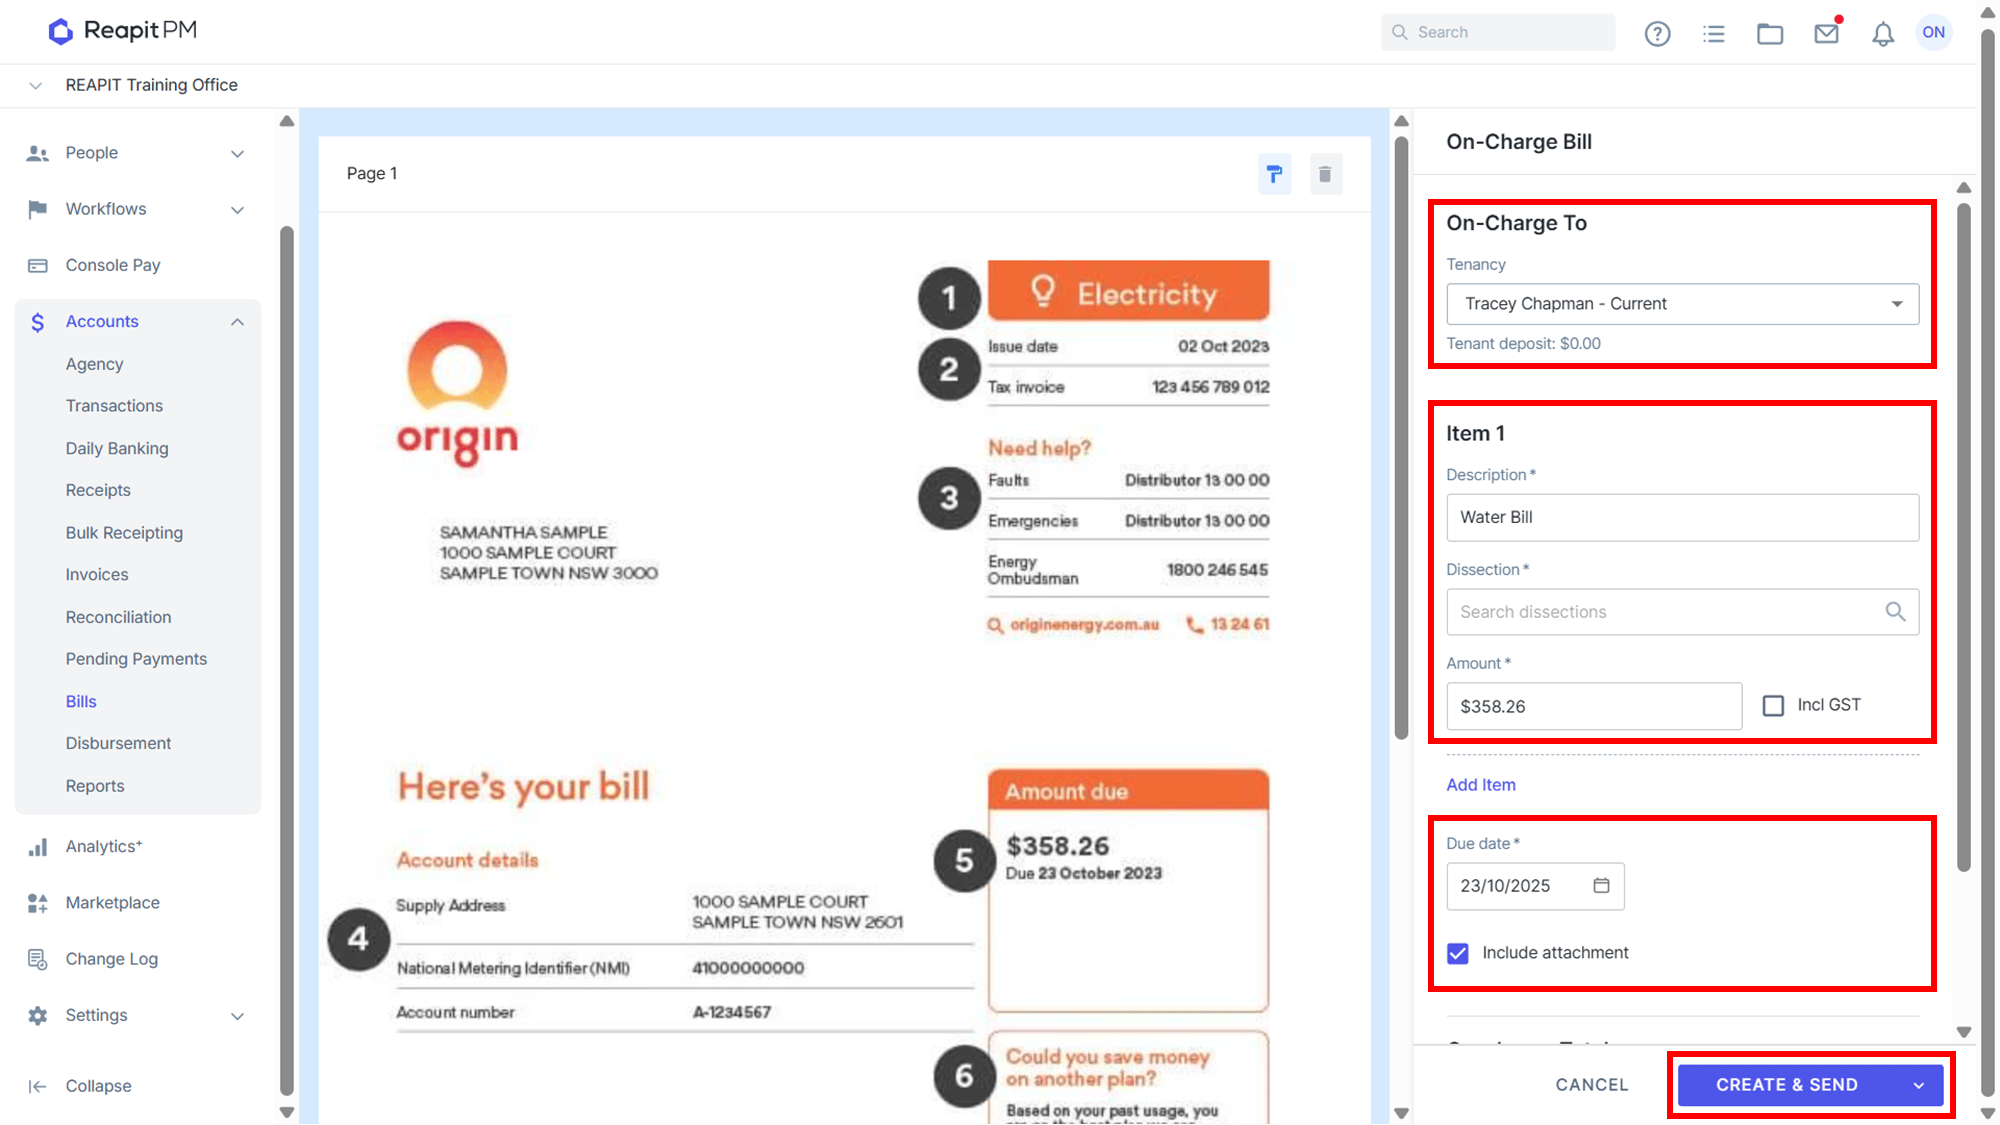
| On-Charge To | Confirm the populated tenancy is correct, view alternatives within the Tenancy drop down. If a Tenant Deposit is available, you are able to select to pay from this amount. |
| Item | Include a Description, Dissection and confirm the amount to be charged to the tenant. |
| Due Date | Set the date payment is required to be made by the tenant. Tick to include the bill as an attachment. |
| Create & Send | Click to create the bill and send to the tenant. Select the dropdown to create the bill and download, enabling you to send the to tenant via alternative methods. |
Note: for information about on-charging water consumption click here.
Adding and Managing Bills for Buildings and Commercial Properties 1. The steps for adding and managing bills for buildings and commercial properties follow the same procedure outlined above.
- When Bills are assigned to a building for payment processing, if there are no funds available on the building, the balance can be journaled from a commonly owned property attached to the building using the following methods:
- Owner to Owner Funds Transfer - https://help.console.com.au/s/article/Owner-to-Owner-Transfer
- Processing Bills - https://help.console.com.au/s/article/Processing-Bills
Note: The articles mentioned will cover the steps on journaling funds from a commonly owned property to the building (Owner to Owner) and Processing Bills for a property with insufficient funds but with commonly owned properties attached (Processing Bills).