'%20d='M0%208a8%208%200%200%201%208-8h24a8%208%200%200%201%208%208v24a8%208%200%200%201-8%208H8a8%208%200%200%201-8-8V8Z'/%3e%3cpath%20fill='%23fff'%20d='M8.375%2013v14L20.5%2034l12.124-7v-7.737l-1.687-.975-2.806-1.62-1.082-.624v4.83l-.002%204.83H13.95V16.07l3.275-1.89%202.192-1.265%201.082-.625%203.275%201.877%202.192%201.256%201.083.62V9.782L20.5%206%208.376%2013Z'/%3e%3cdefs%3e%3clinearGradient%20id='reapit-pm__a'%20x1='20.702'%20x2='20.702'%20y1='.351'%20y2='31.228'%20gradientUnits='userSpaceOnUse'%3e%3cstop%20stop-color='%235573FD'/%3e%3cstop%20offset='.575'%20stop-color='%234E56EA'/%3e%3c/linearGradient%3e%3c/defs%3e%3c/svg%3e)
Recurring Rent and Outgoings for Commercial
This article is a guide to learn how to set up recurring rent and outgoings for Commercial tenancies in Reapit PM. The process in this article include: Recurring Rent and Outgoings
Overview
Recurring Outgoings for Commercial
This article is a guide to learn how to set up recurring rent and outgoings for Commercial tenancies in Reapit PM.
The process in this article include:
- Recurring Rent and Outgoings
Recurring Rent and Outgoings
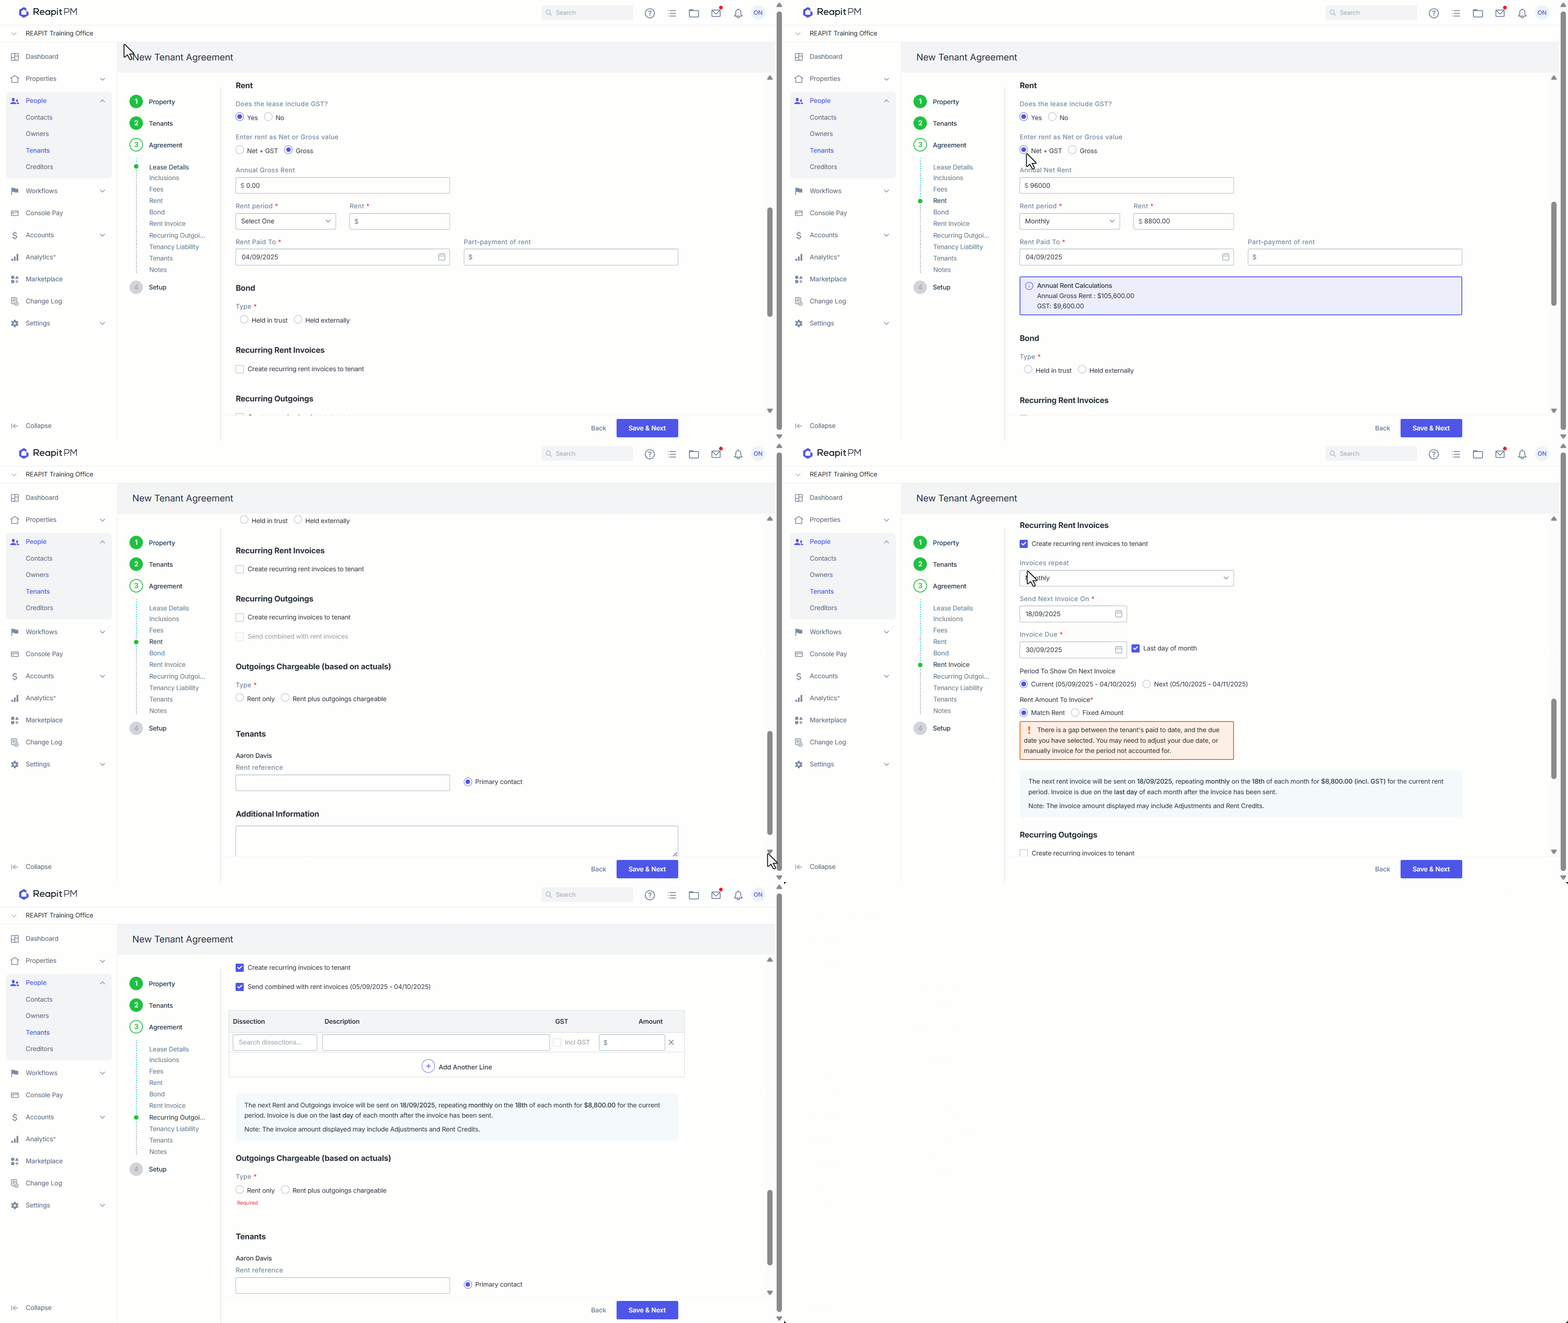
- When entering rent, select if the lease includes or excludes GST, select if rent is a Net or Gross Value, enter the annual Net Rent, select period and amount.
- To create recurring rental invoices, select the checkbox then choose the date to send the next invoice on and the Invoice due date. Reapit PM will display a warning if there are any issues with any of these dates.
- Select the period to show on the next invoice. This can be the current period or next period if you invoice further in advance.
- Enter the amount due excluding GST. Select if you would like to add GST or not. This will be greyed out if you have not enabled GST on rent in the rent section of the Tenant agreement. If there is a gap between the paid to date and the due date, a warning will appear under the amount due section. This may be because you started a rent period halfway through the month. In this situation, you would manually invoice the tenant via Accounts then select Invoices, for this period.
- A summary of what will happen will display in blue, please check this and all information before saving.
- You can then add a recurring outgoing invoice, once again select the dates and the period to show on the next invoice, you can also choose to Use Tenancy Rent Periods by selecting the check box.
- By selecting Send Combined with Rent Invoices, the rent and outgoings will appear on the one invoice.
- Select the dissection, enter the description and enter the amount
- Select Save and Next once done.