'%20d='M0%208a8%208%200%200%201%208-8h24a8%208%200%200%201%208%208v24a8%208%200%200%201-8%208H8a8%208%200%200%201-8-8V8Z'/%3e%3cpath%20fill='%23fff'%20d='M8.375%2013v14L20.5%2034l12.124-7v-7.737l-1.687-.975-2.806-1.62-1.082-.624v4.83l-.002%204.83H13.95V16.07l3.275-1.89%202.192-1.265%201.082-.625%203.275%201.877%202.192%201.256%201.083.62V9.782L20.5%206%208.376%2013Z'/%3e%3cdefs%3e%3clinearGradient%20id='reapit-pm__a'%20x1='20.702'%20x2='20.702'%20y1='.351'%20y2='31.228'%20gradientUnits='userSpaceOnUse'%3e%3cstop%20stop-color='%235573FD'/%3e%3cstop%20offset='.575'%20stop-color='%234E56EA'/%3e%3c/linearGradient%3e%3c/defs%3e%3c/svg%3e)
Fraud Detection
This article runs through how to set up Fraud Detection and the process following the detection of a potentially fraudulent transaction in Reapit PM.
Overview
Fraud Detection
You have the ability to enable fraud detection for your Reapit PM office. When fraud detection is enabled, you will receive a report when the system flags items that may require further investigation.
This article runs through how to set up Fraud Detection and the process following the detection of a potentially fraudulent transaction in Reapit PM.
How does Reapit PM Fraud Detection Work?
Reapit PM Fraud detection is run when a disbursement is run and will look at all payments to owners and creditors in the disbursement.
The following rules are applied when identifying potential fraud:
- if this is the first time that a creditor or owner is being paid since their account details were added
- if the account details for the creditor or owner have changed since the last disbursement
If a disbursement is identified as being potentially fraudulent, an email will be sent to the nominated email with a list of payments and links to those payments in Reapit PM for review of the change that triggered fraud detection.
Setting up Fraud Detection
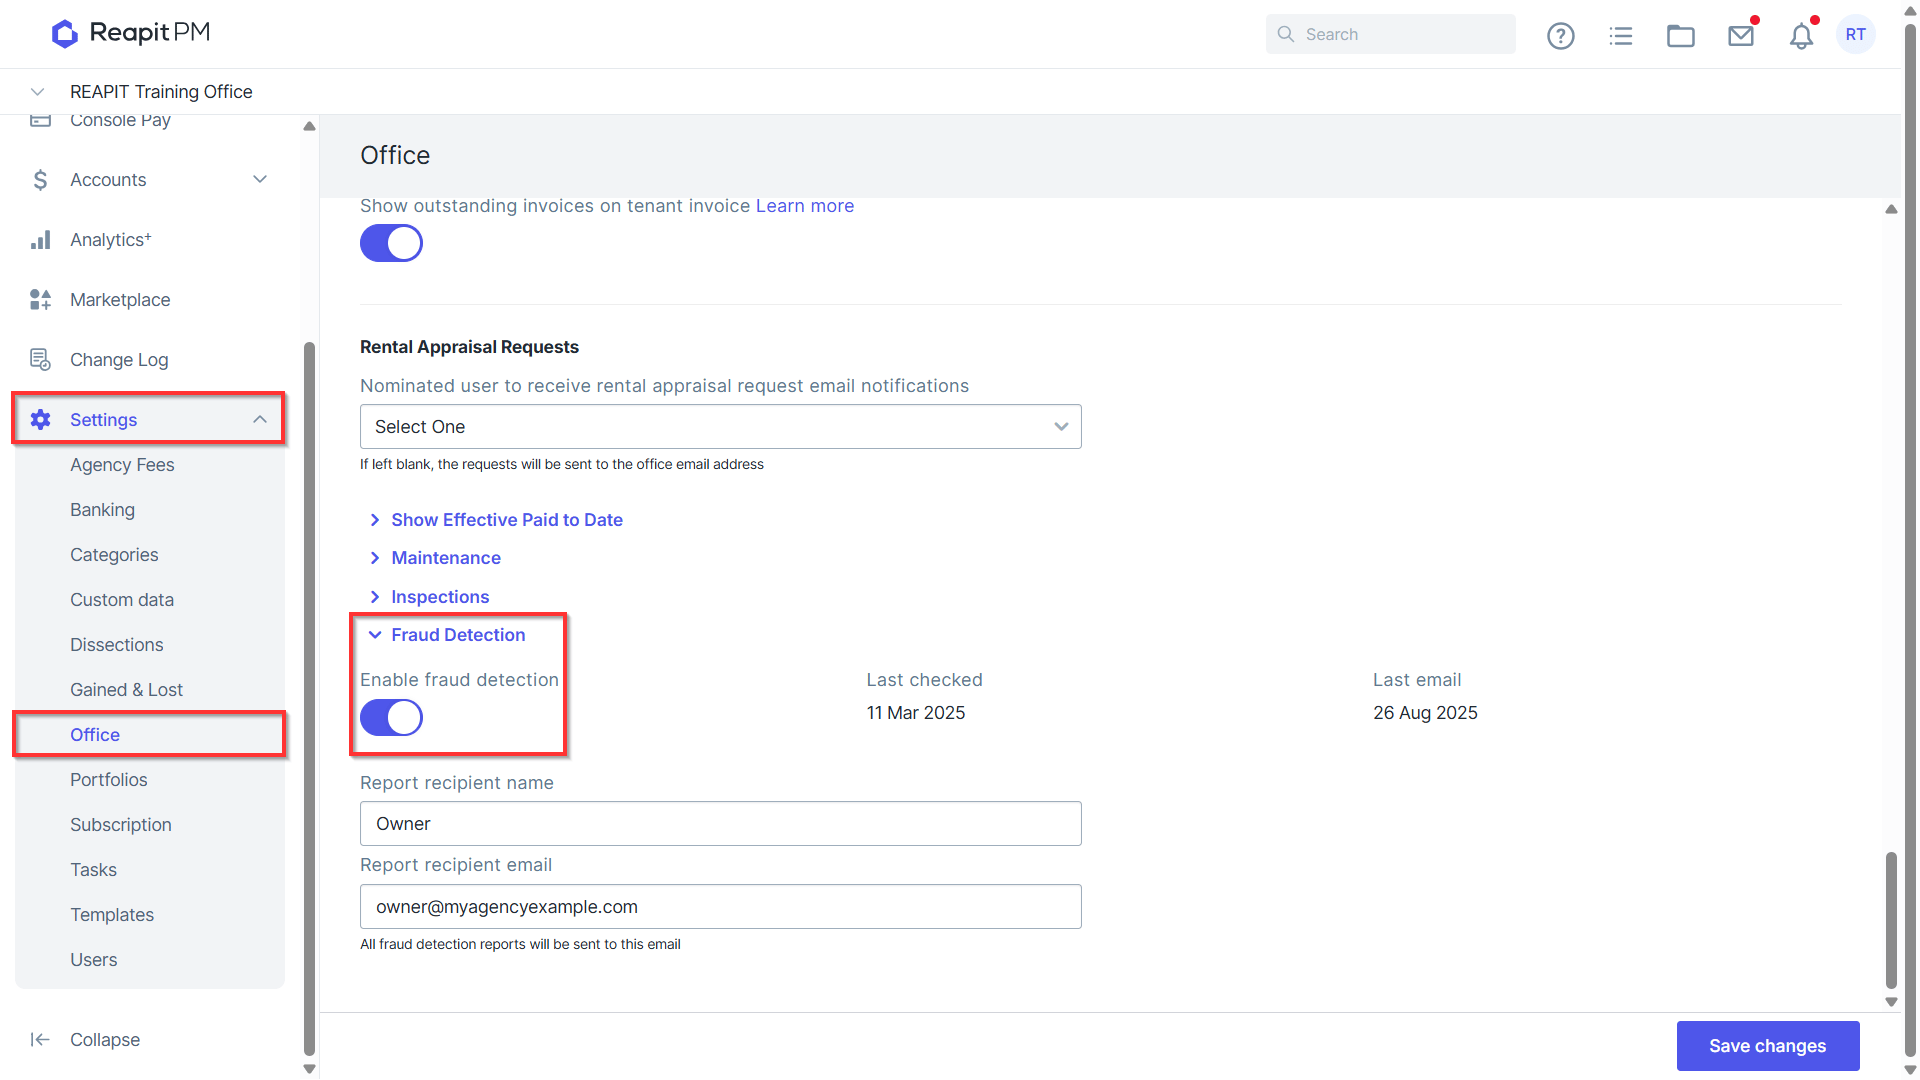
- Navigate to Settings > Office and scroll down to Fraud Detection. Click Enable fraud detection.
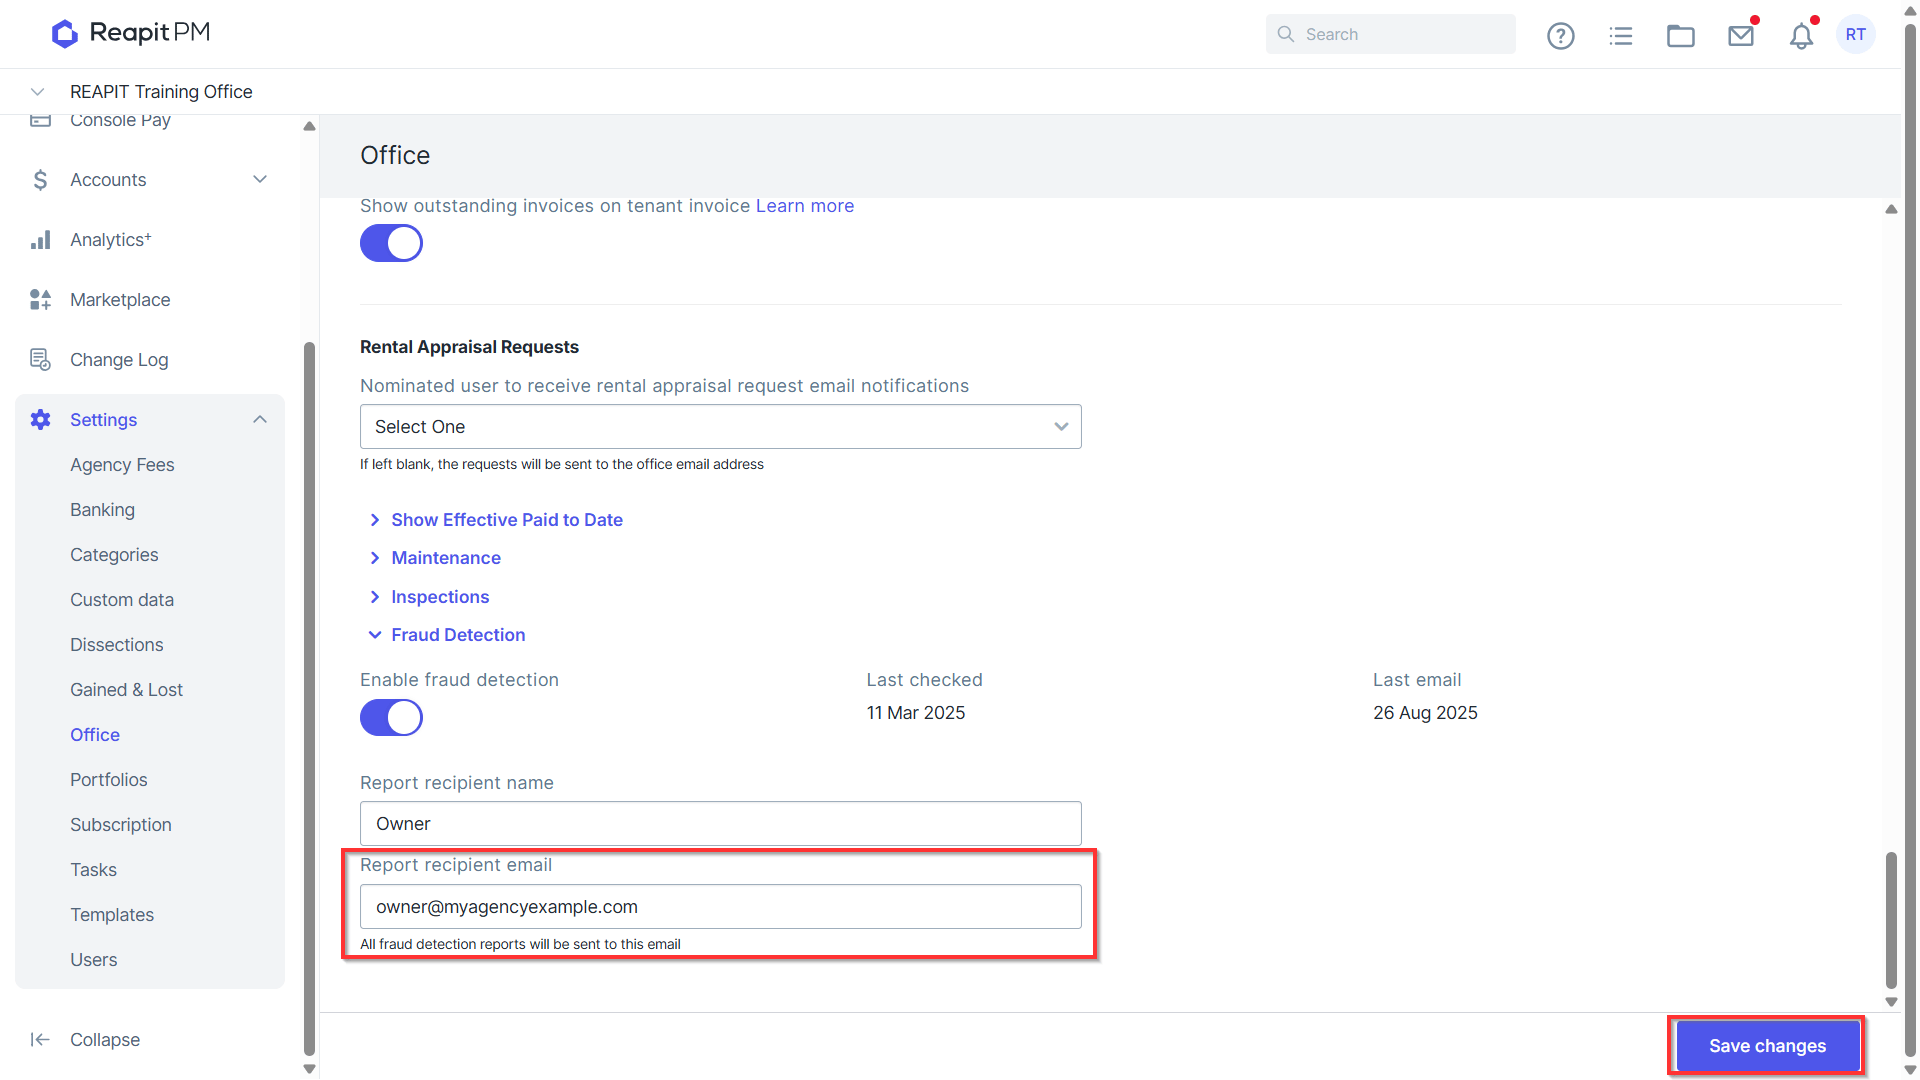
- Enter the Report recipient's name and email. Click Save changes to complete.
- Fraud detection is now active on your system and the below email will be sent as a confirmation to the nominated report recipient.
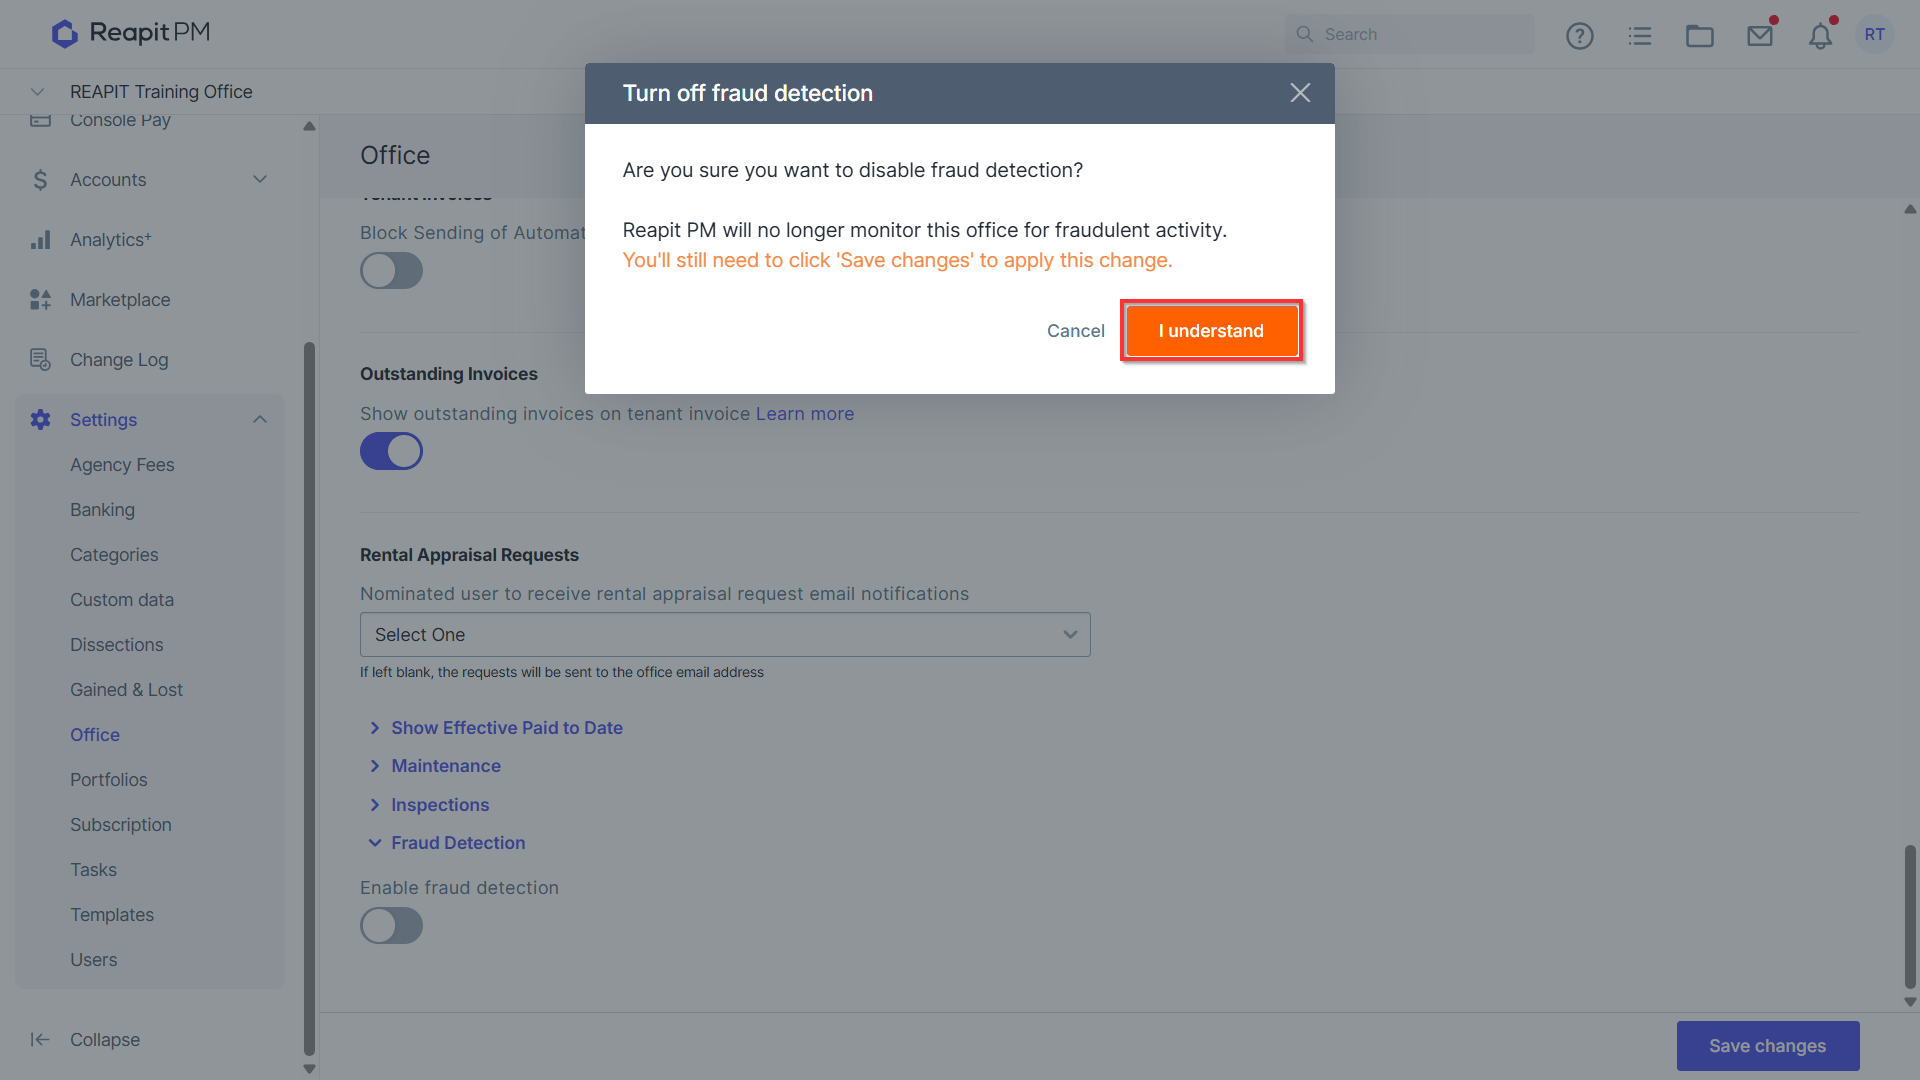
- To turn Fraud detection off, simply untick the Fraud detection switch and click I Understand from the pop-up window. A notification will be sent to the most recent email recipient notifying them of the change.
Investigating Payments
- If Reapit PM identifies a possible fraudulent payment an email will be sent the to nominated email.
To investigate why click Review Change and View payment.
- Clicking Review Change you will be taken to the Change log item that relates to the payment in question.
- Clicking View Payment from the email will take you to the specific payment to the transactions screen. From here you can view the change and if necessary reverse the payment.