'%20d='M0%208a8%208%200%200%201%208-8h24a8%208%200%200%201%208%208v24a8%208%200%200%201-8%208H8a8%208%200%200%201-8-8V8Z'/%3e%3cpath%20fill='%23fff'%20d='M8.375%2013v14L20.5%2034l12.124-7v-7.737l-1.687-.975-2.806-1.62-1.082-.624v4.83l-.002%204.83H13.95V16.07l3.275-1.89%202.192-1.265%201.082-.625%203.275%201.877%202.192%201.256%201.083.62V9.782L20.5%206%208.376%2013Z'/%3e%3cdefs%3e%3clinearGradient%20id='reapit-pm__a'%20x1='20.702'%20x2='20.702'%20y1='.351'%20y2='31.228'%20gradientUnits='userSpaceOnUse'%3e%3cstop%20stop-color='%235573FD'/%3e%3cstop%20offset='.575'%20stop-color='%234E56EA'/%3e%3c/linearGradient%3e%3c/defs%3e%3c/svg%3e)
Managing Contacts
This article will take you through how to add a contact, edit a contact, make a contact inactive and message a contact in Console Cloud.
In this article we will show you how to find, create, edit and make contacts inactive. You will also be shown on how to navigate the contact drawer and how to message contacts from Console Cloud.
Searching and Editing Contacts
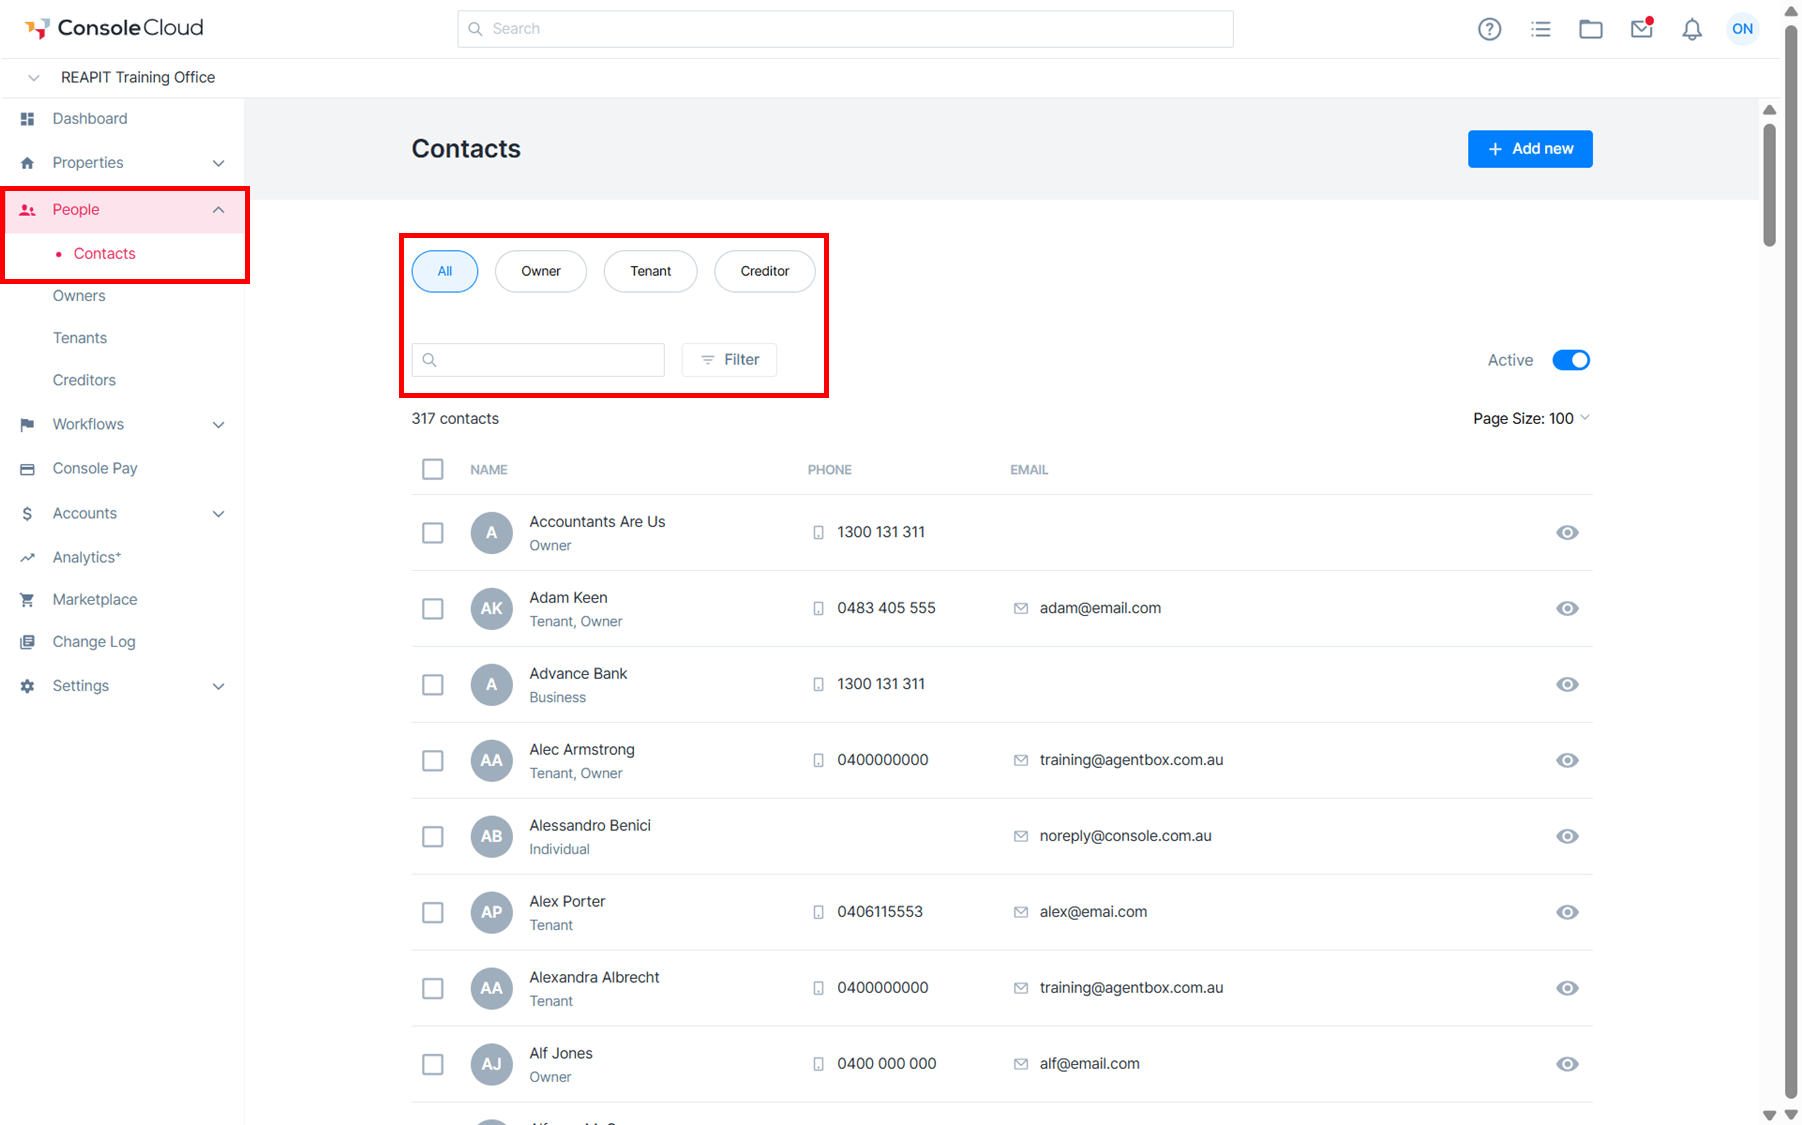
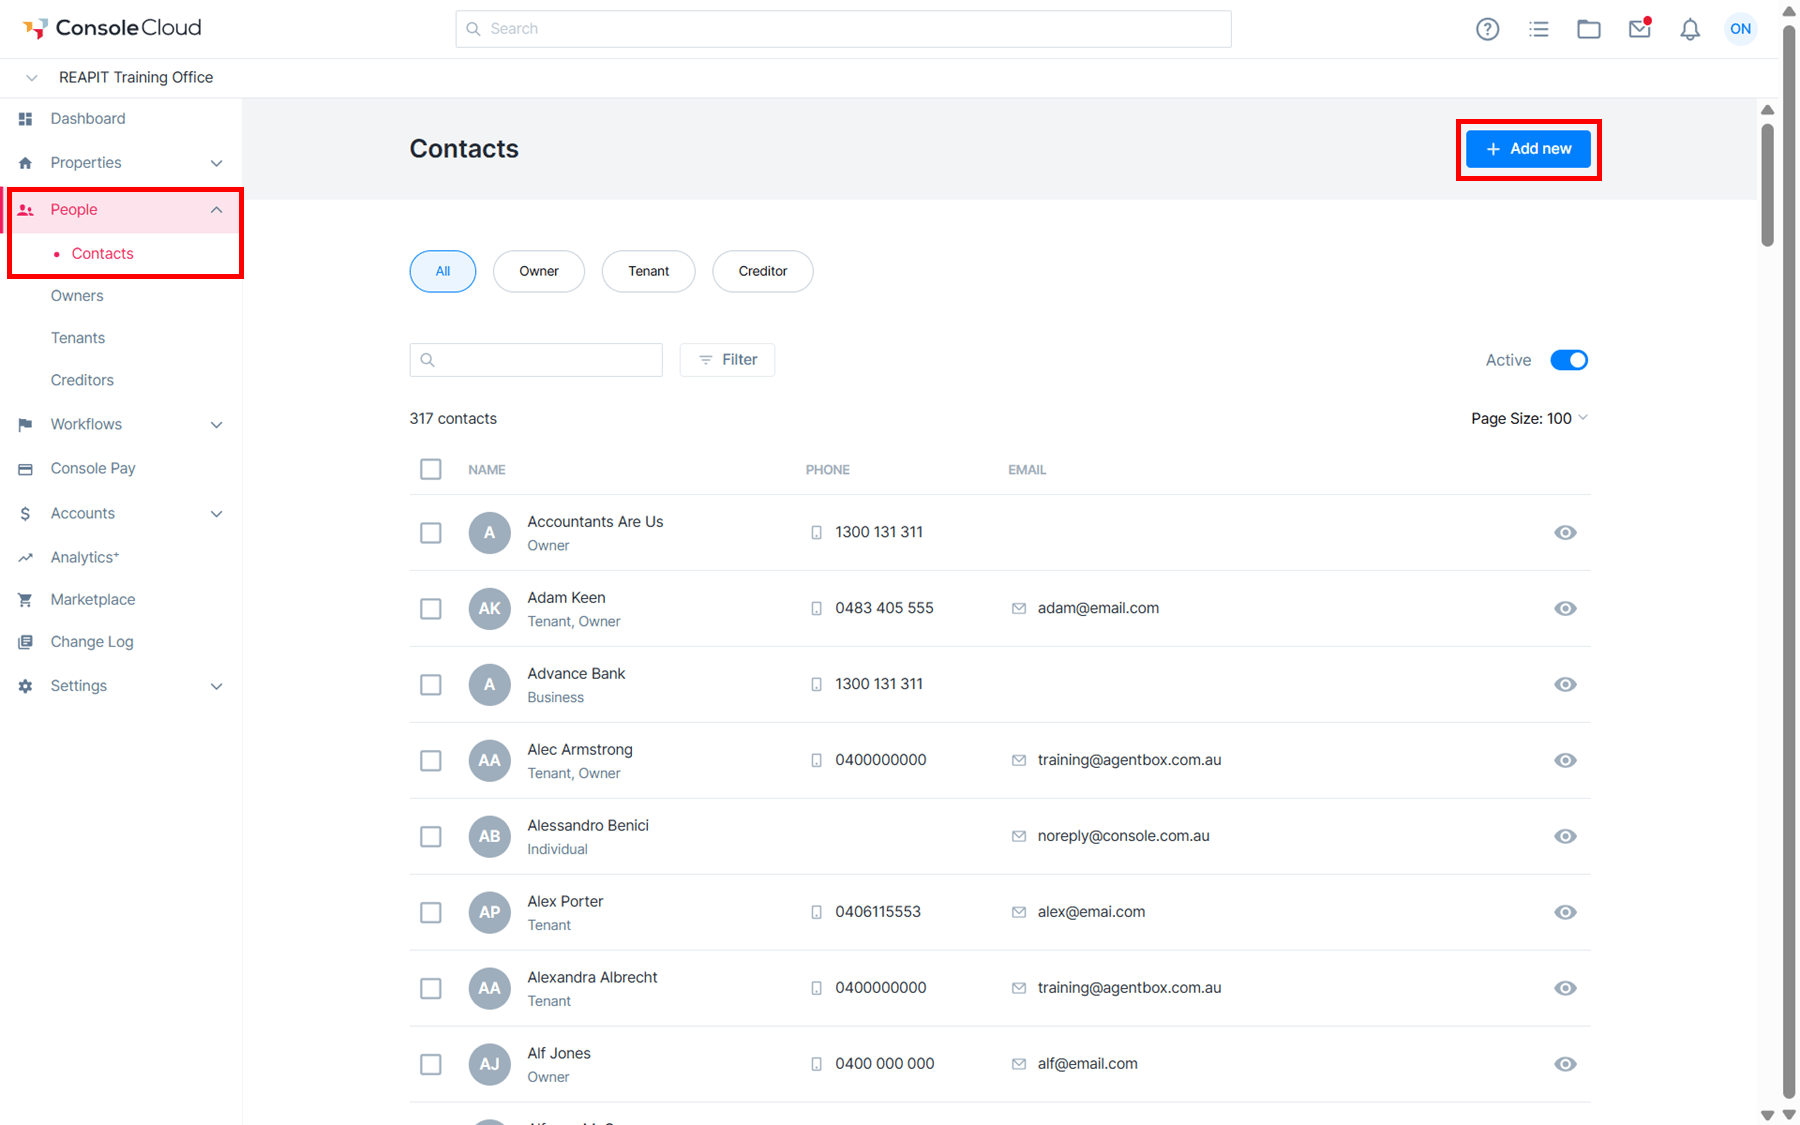
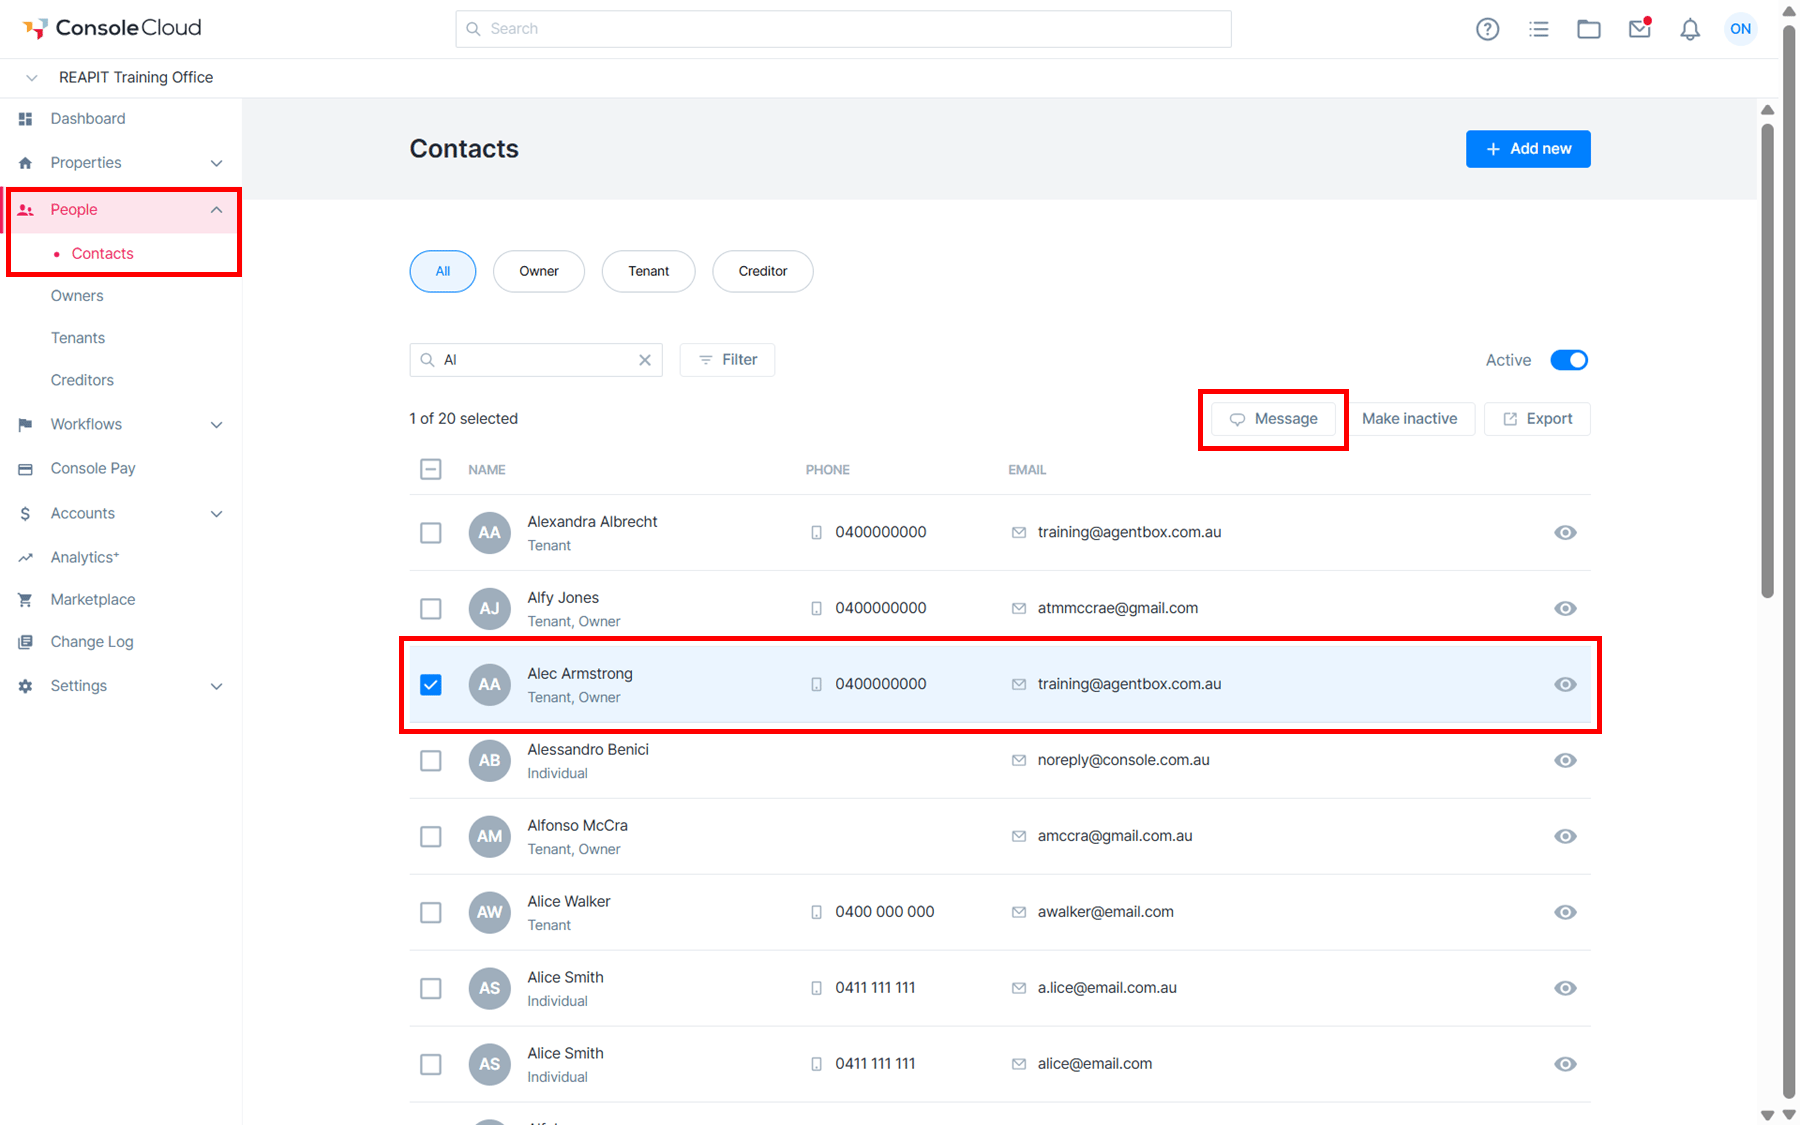
1. Navigate to the People > Contacts. The Contacts page allows you to find the contacts quickly by selecting All or filtering to Owner, Tenant or Creditors. Enter the contacts First / Last name in the search field and the results will update. Clicking on Filter will allow you to apply a category to the search results.
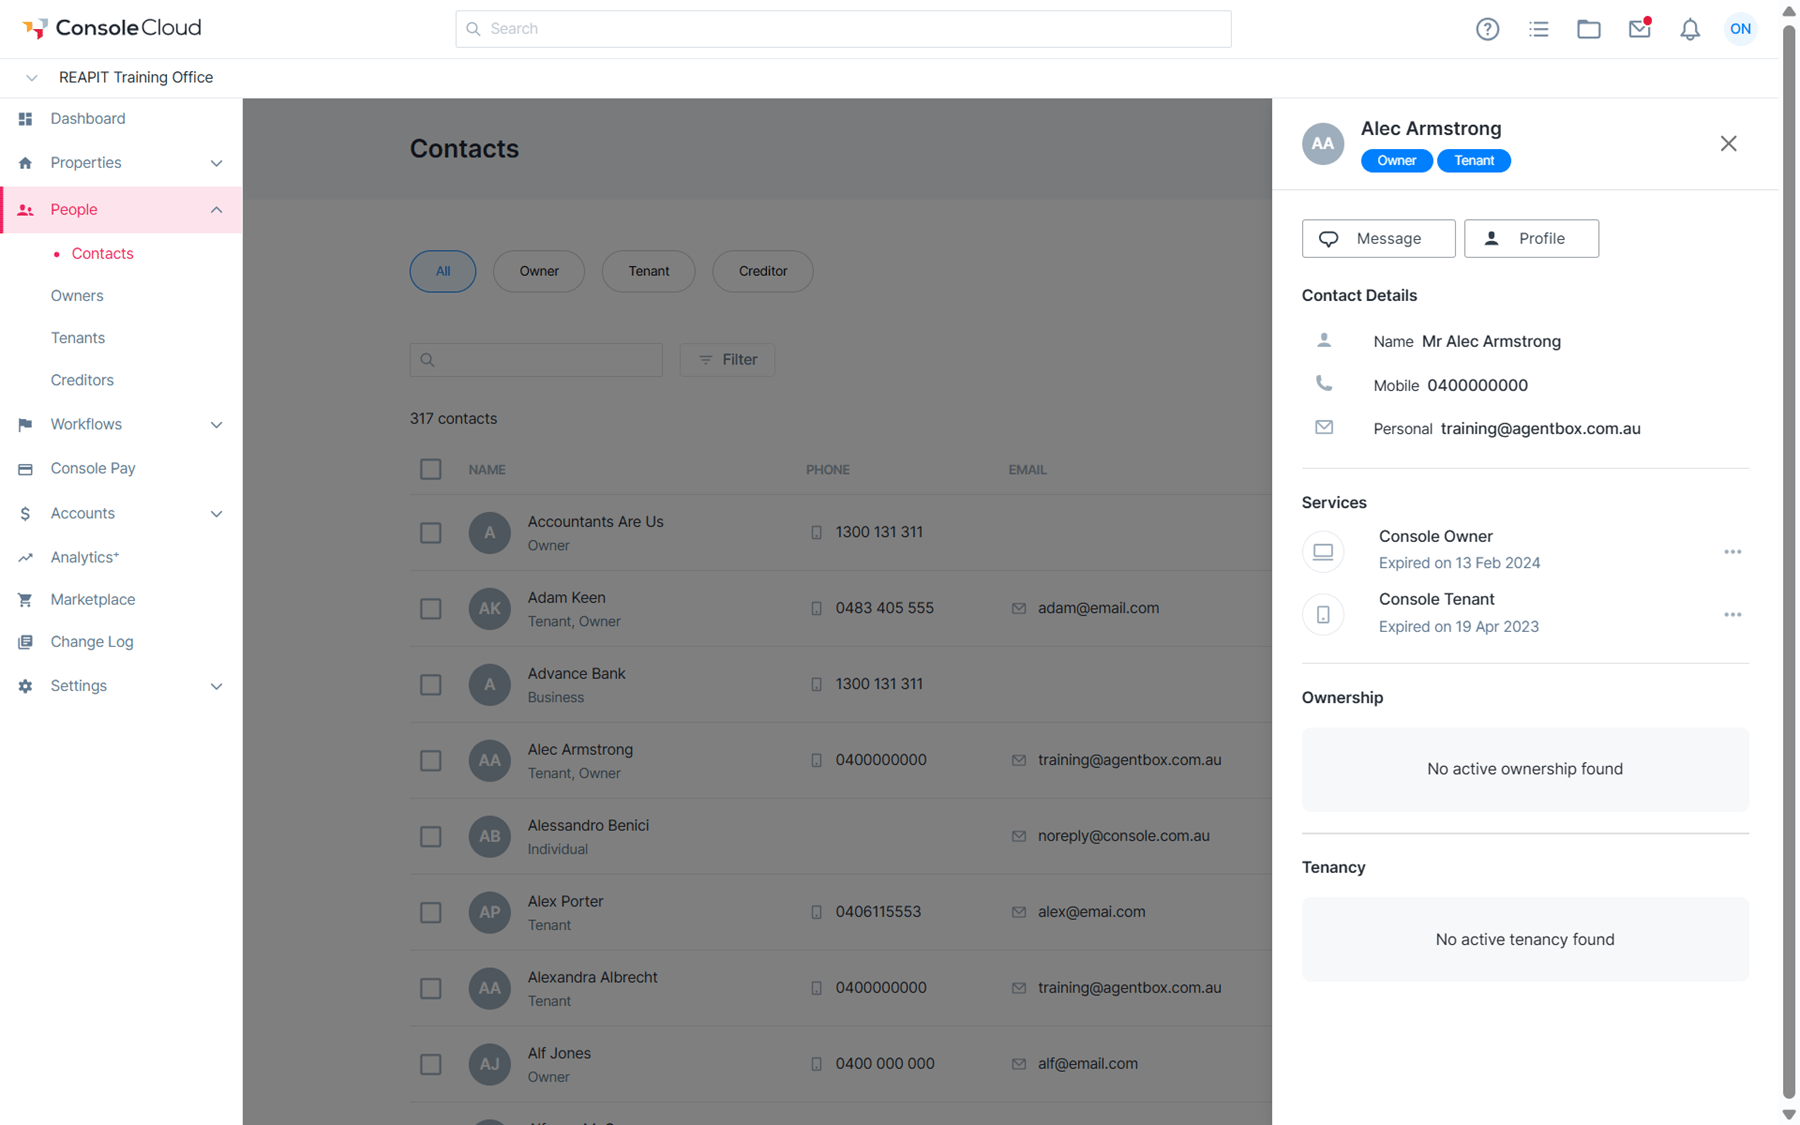
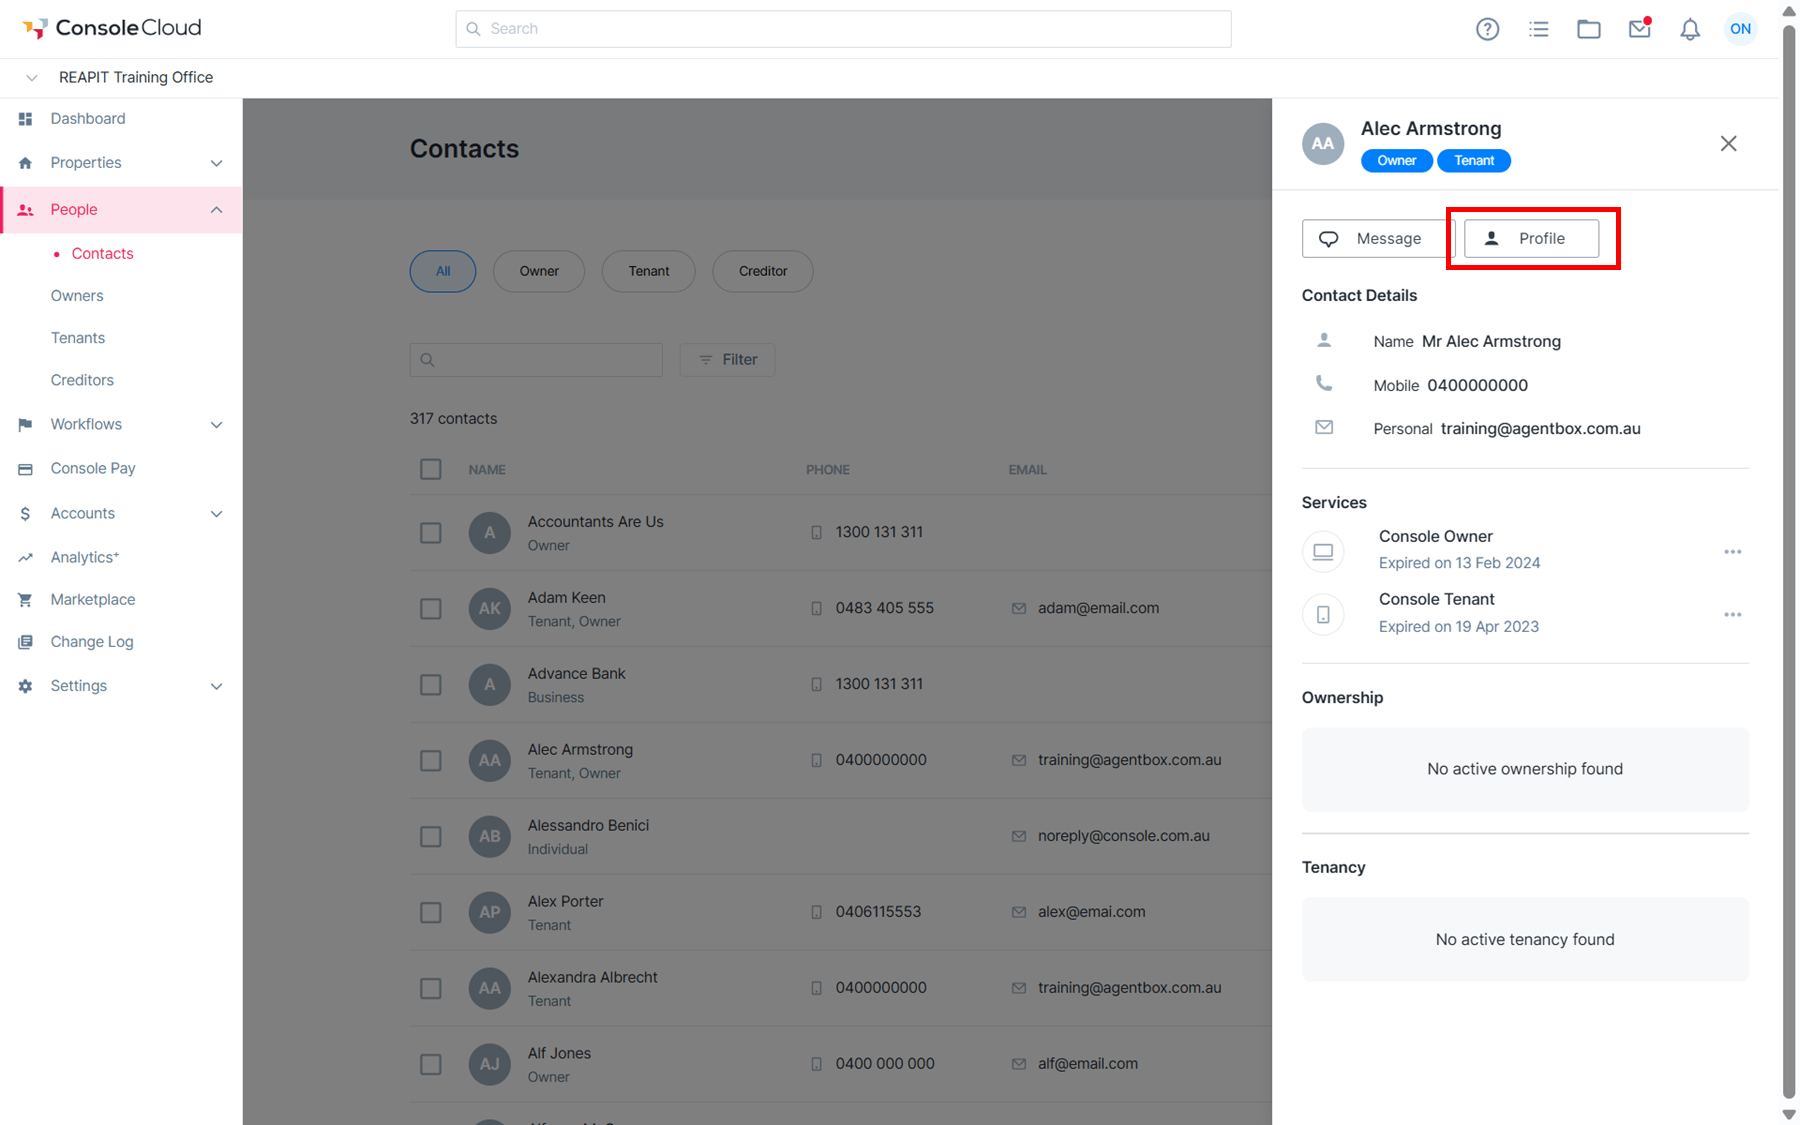
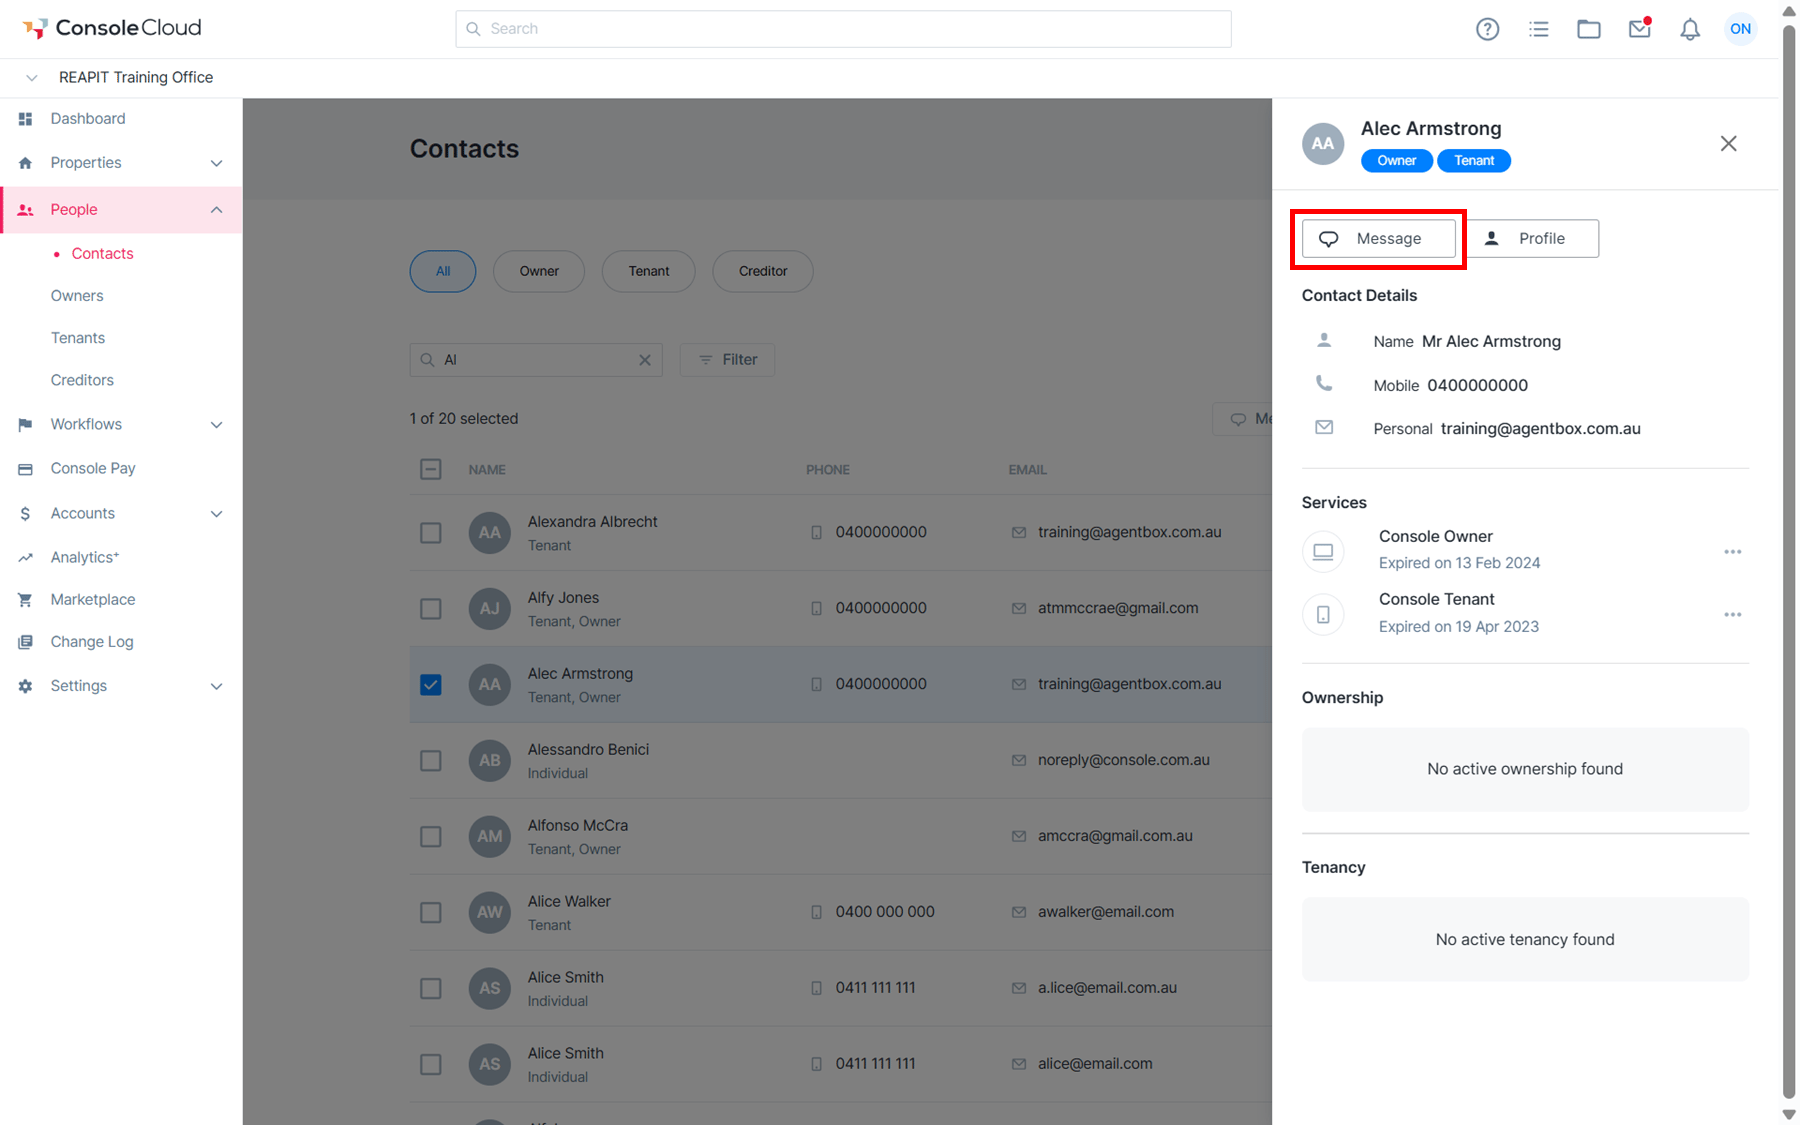
2. Click on a Contact. This will open the contact drawer. Inside the drawer you will see:
- The contacts details including primary contact number and email address.
- Their connection status to Console Owner or Console Tenant.
- A list of properties for which the contact is an owner.
- A list of properties for which the contact is a tenant.
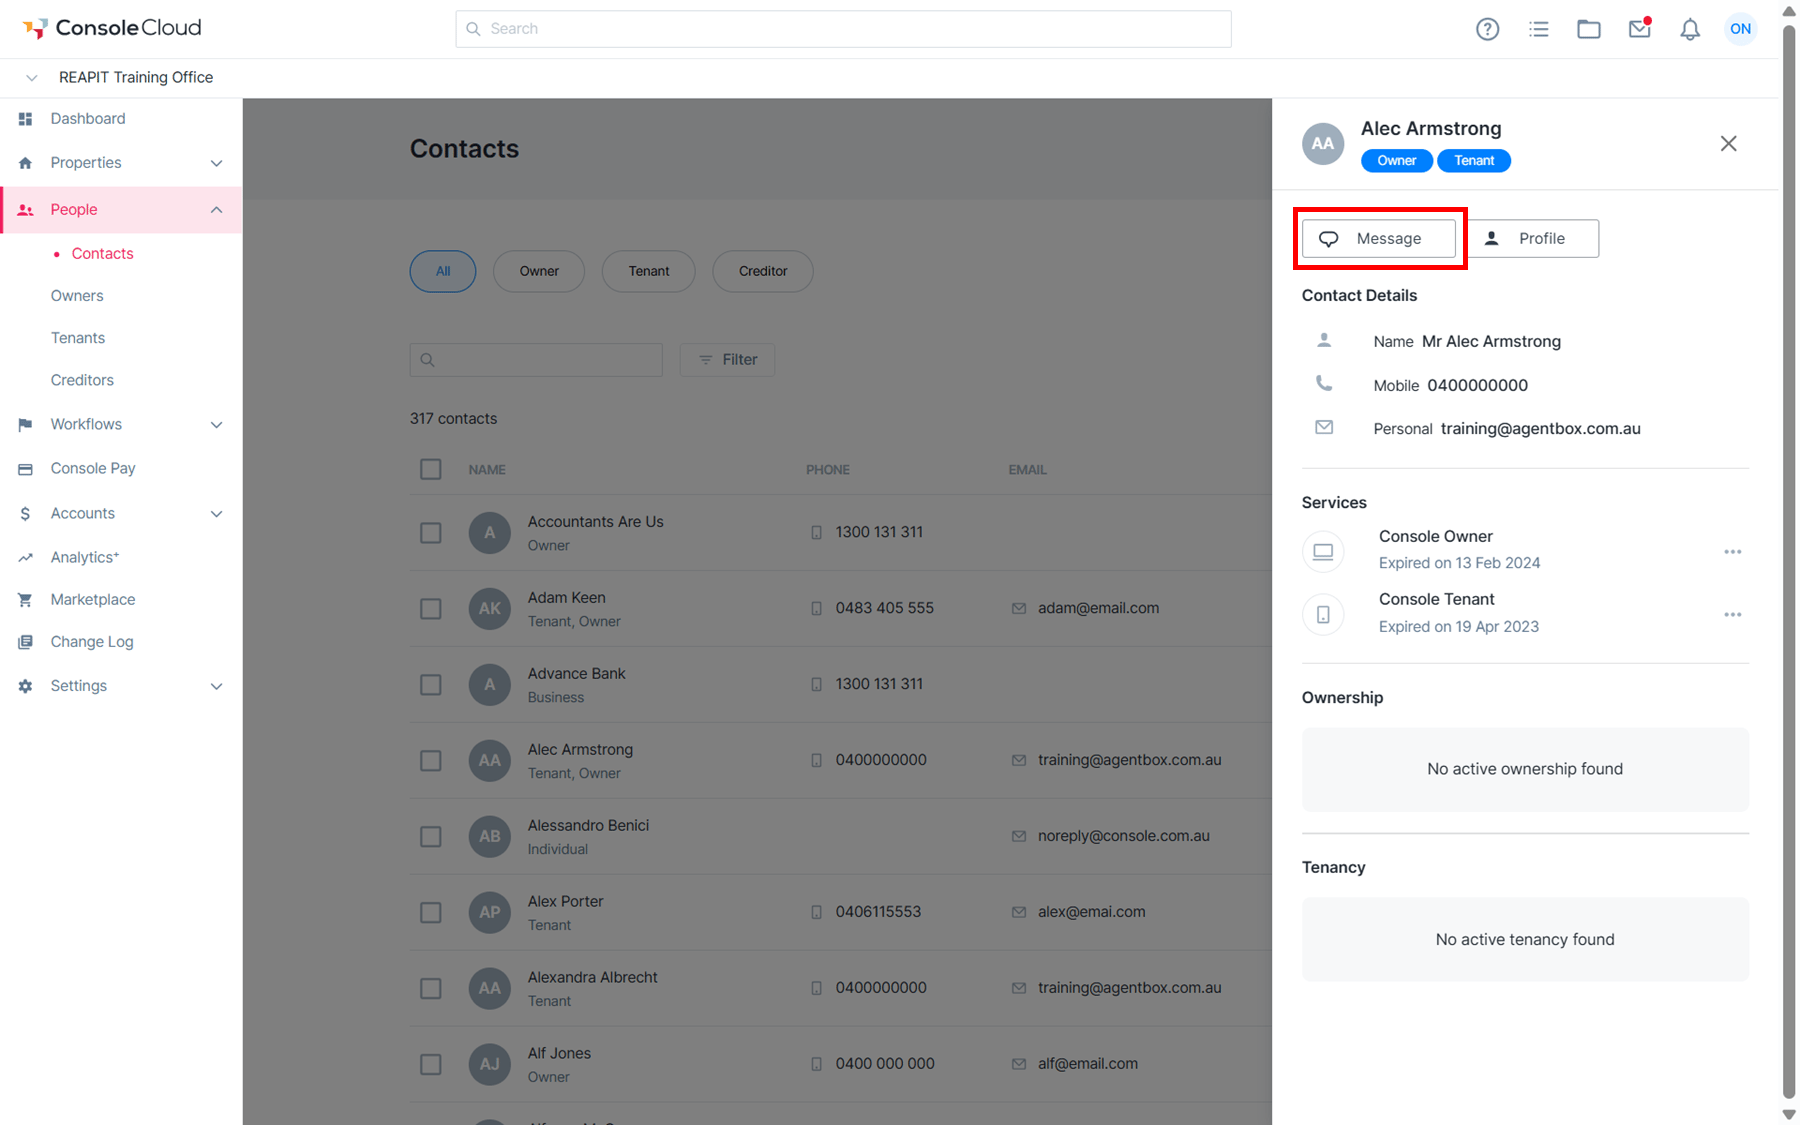
3. Click the Message button to send a message to an individual tenant.
4. To Edit the contact or view the full contact details page, click the Profile button in the drawer.
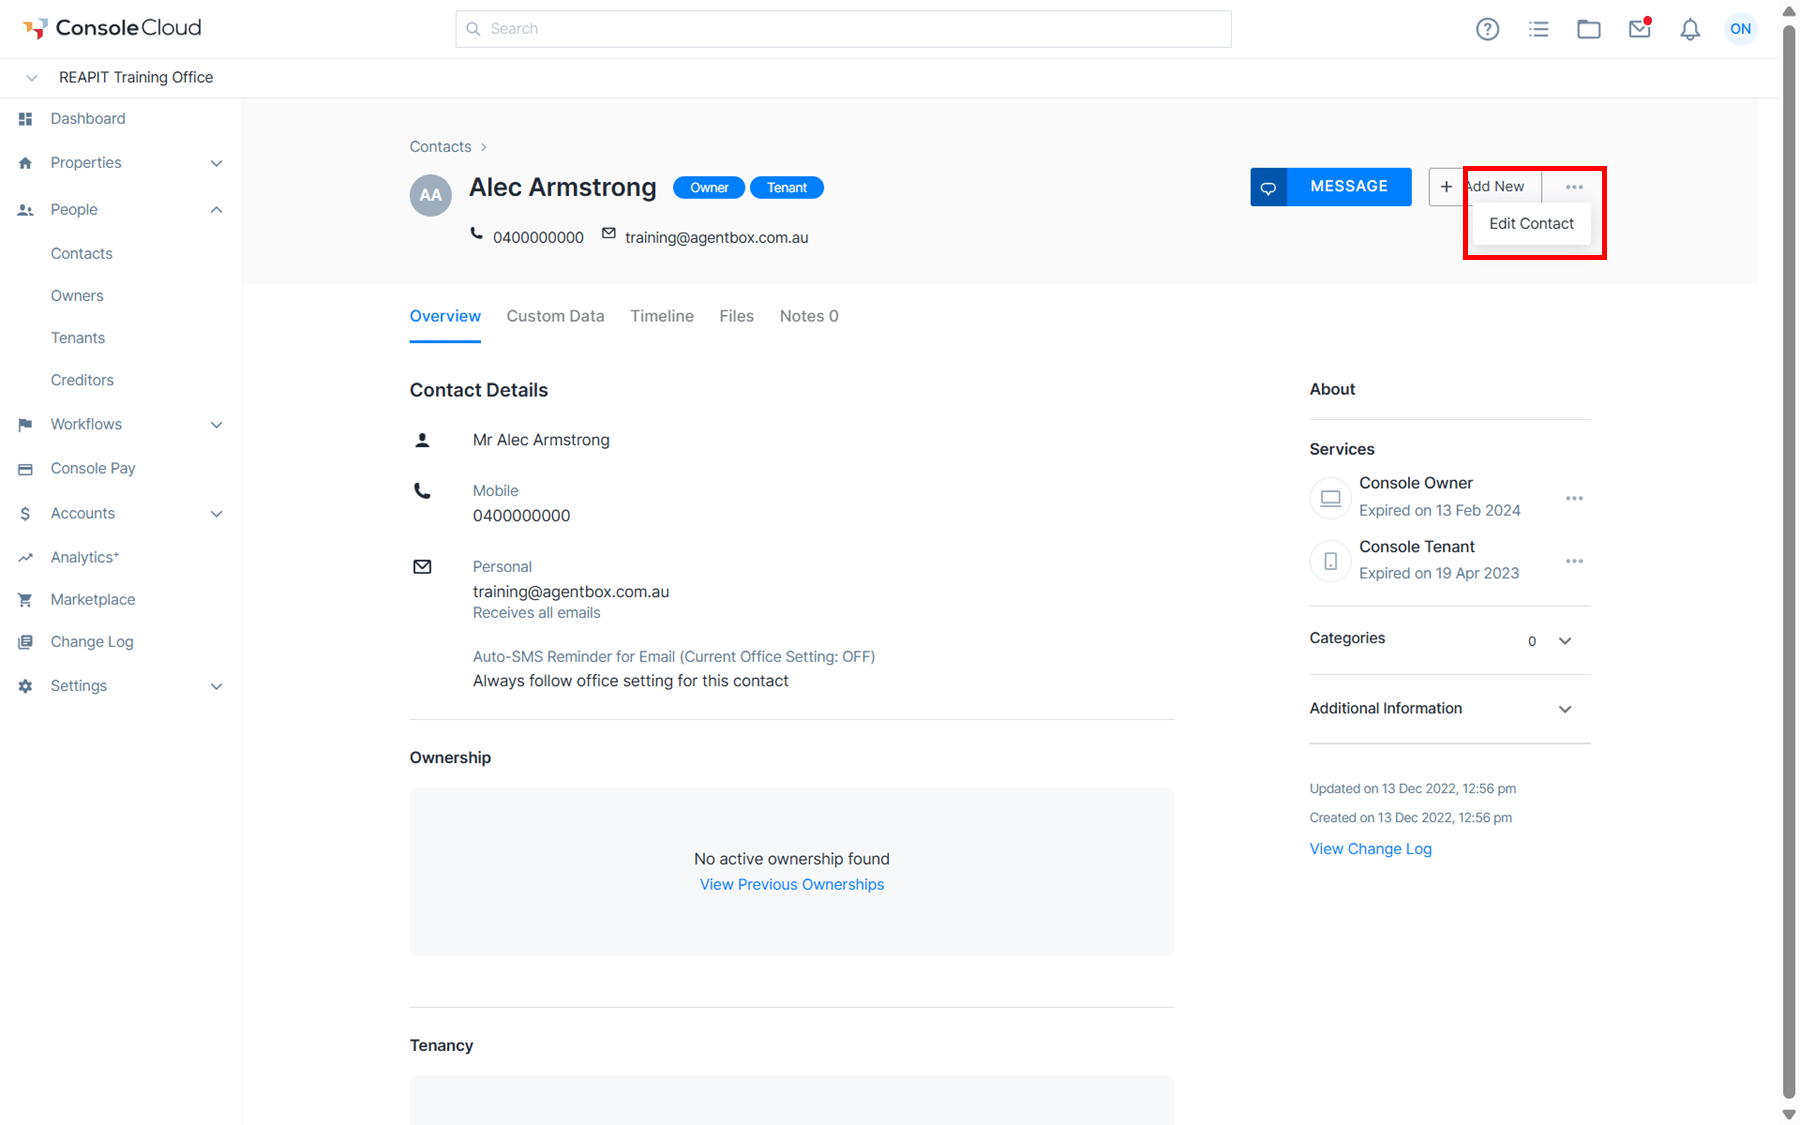
5. Click the three dot icon to open the Edit Contact Drawer.
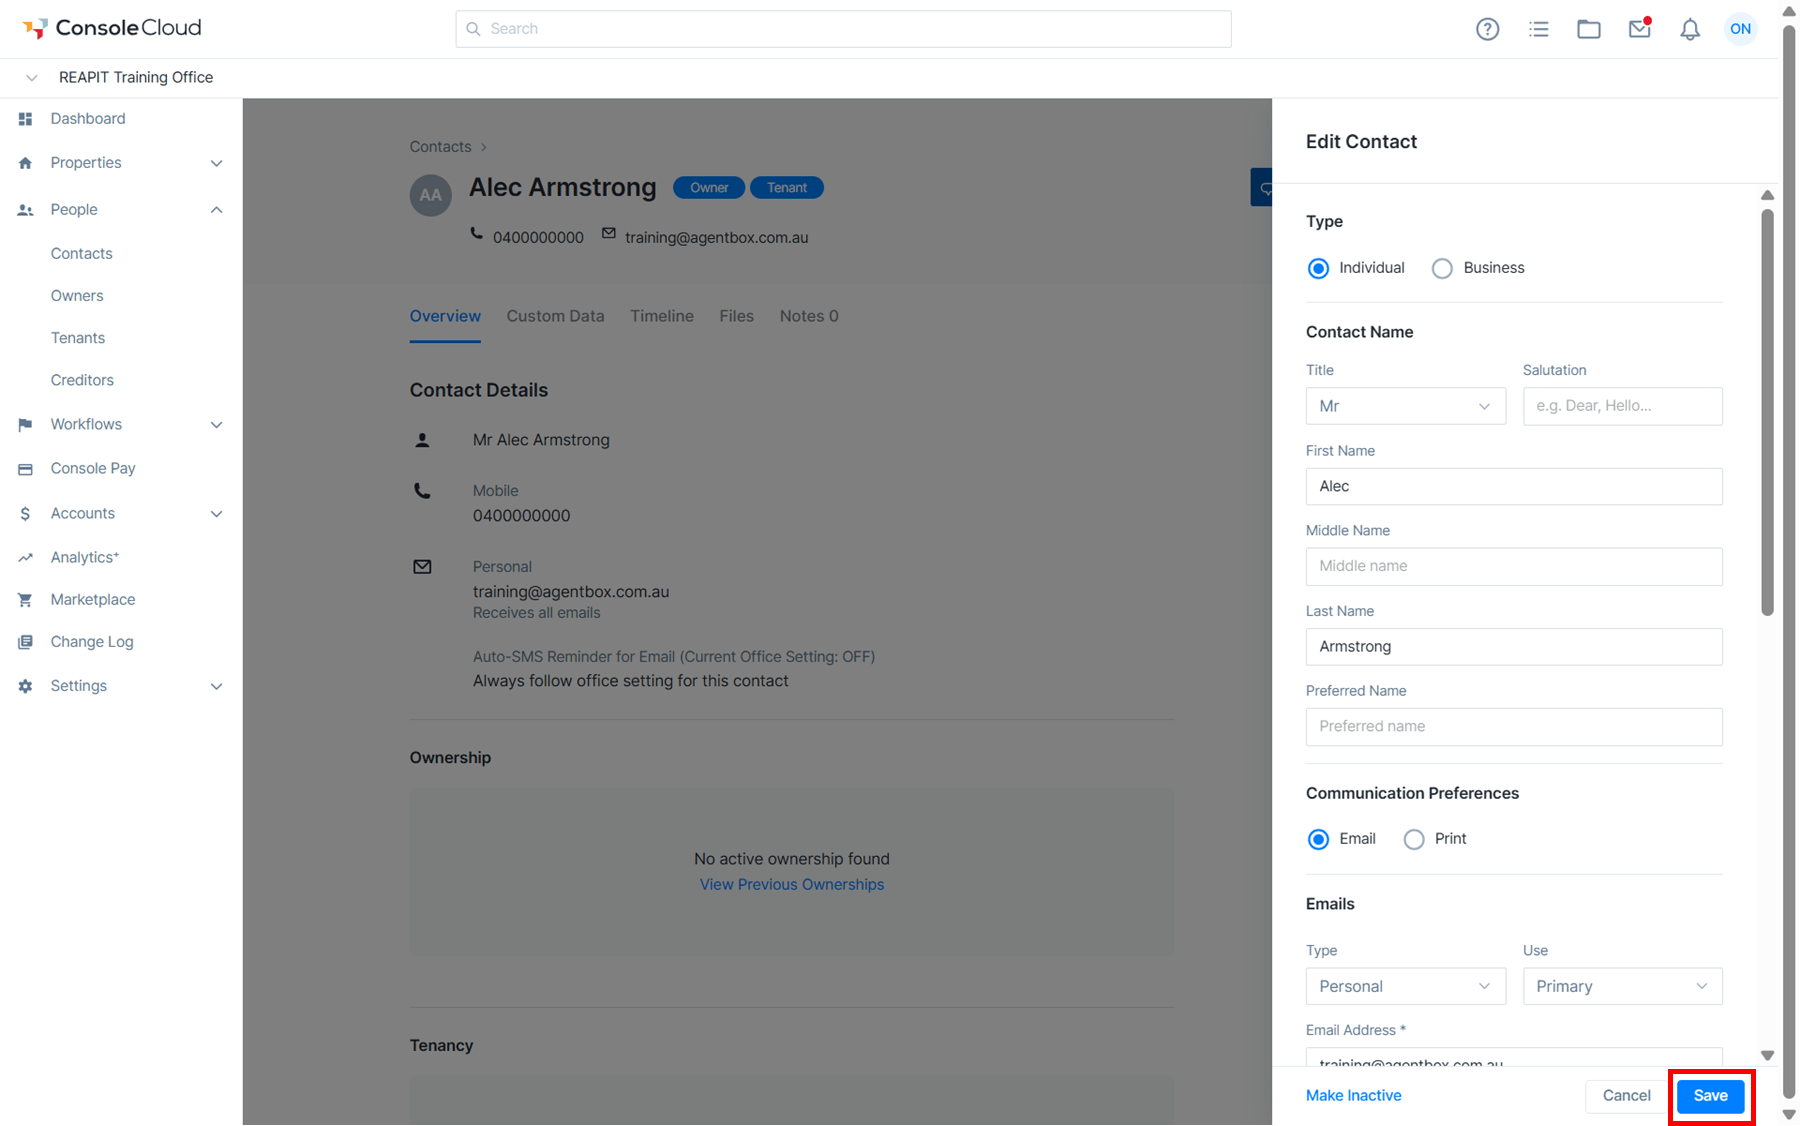
6. Update the required contact details then click Save.
Creating Contacts
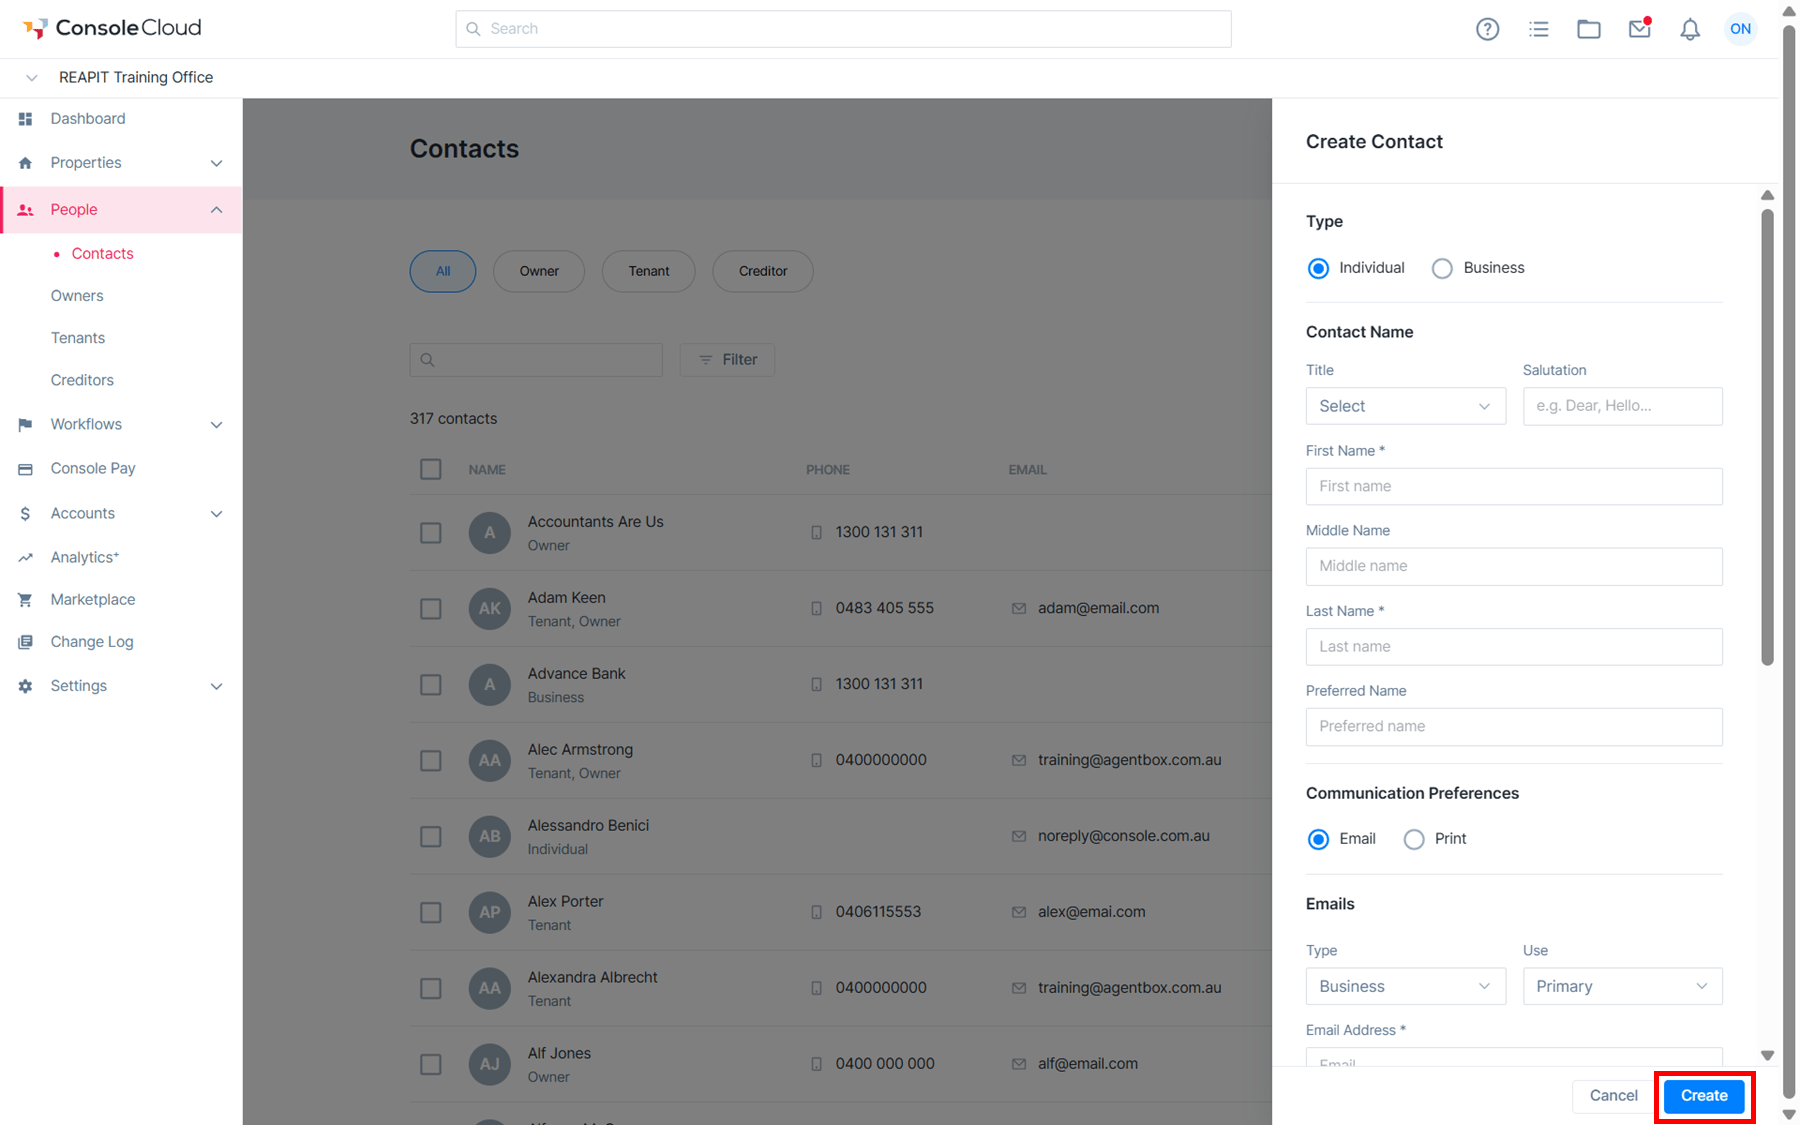
1. From the sidebar, click People > Contacts. Click the Add New button located at the top right of the page.
2. Select the contact Type, Individual or Business then enter the contacts details into the Contact drawer as required, ensuring all mandatory (*) are completed.
Note: Each selection will have different options. If not including a contacts Email Address, select Remove as it is marked as a mandatory (*) field.
Show more will display the Addition Information fields, including Emergency Contact.
Click on Create to finalise and add the contact.
How to Message Contacts
1. Click on People> Contacts. search for and Select the Contact and click on Message.
2. Alternatively, click into the contact to open the drawer and select Message.
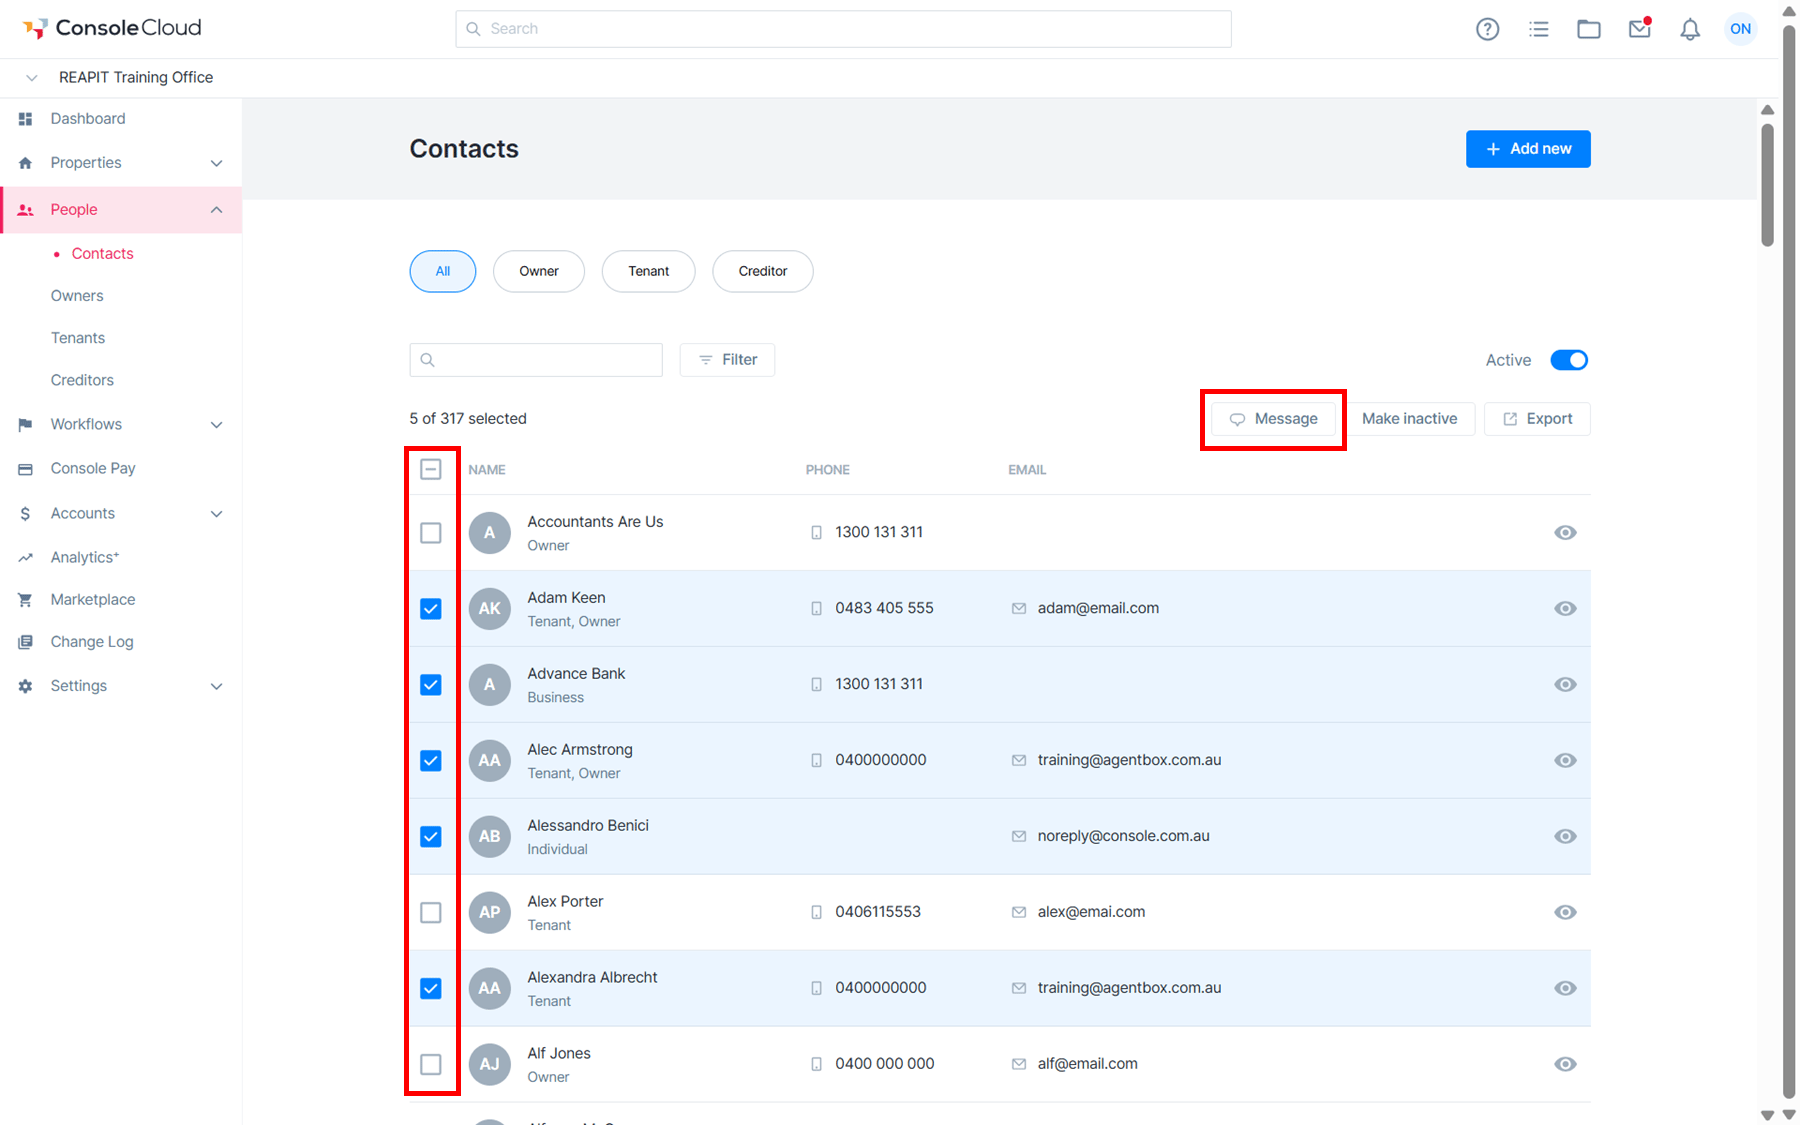
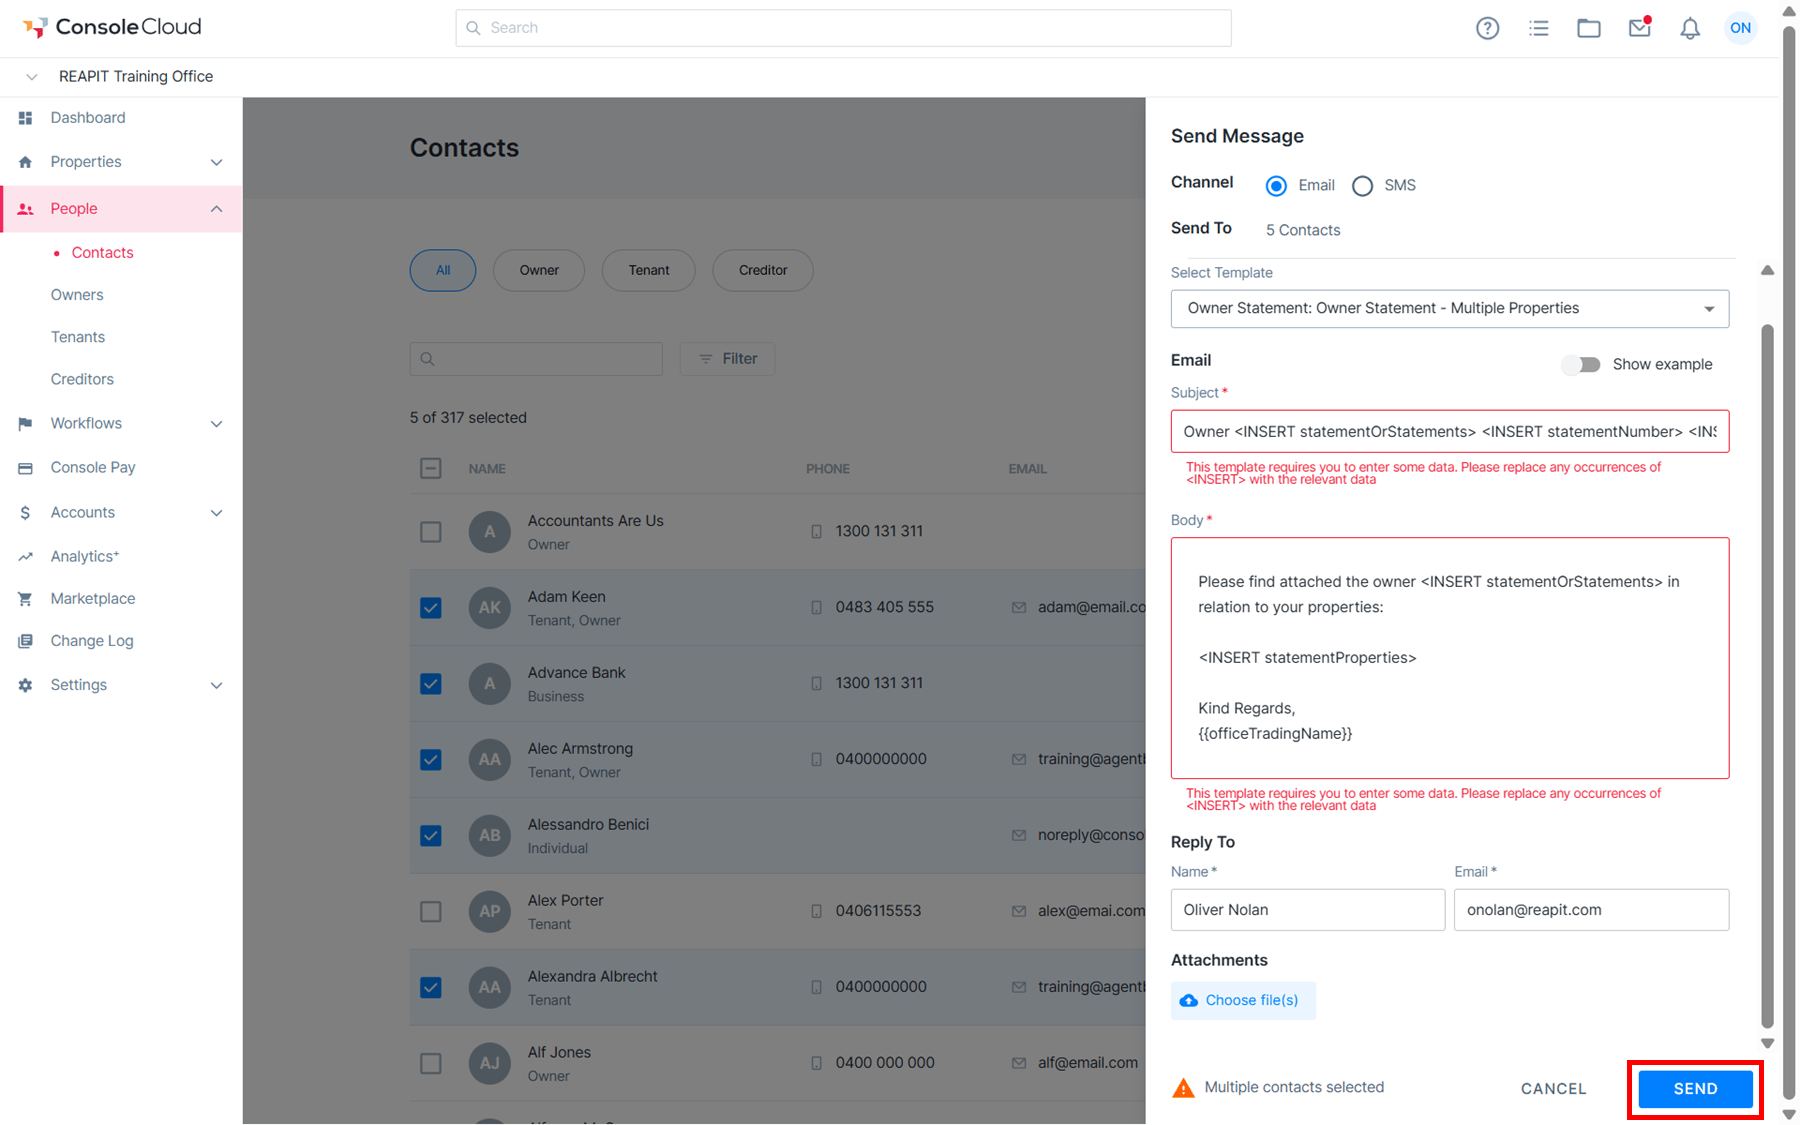
3. To bulk message, Tick theSelect all or tick multiple contacts then click on Message.
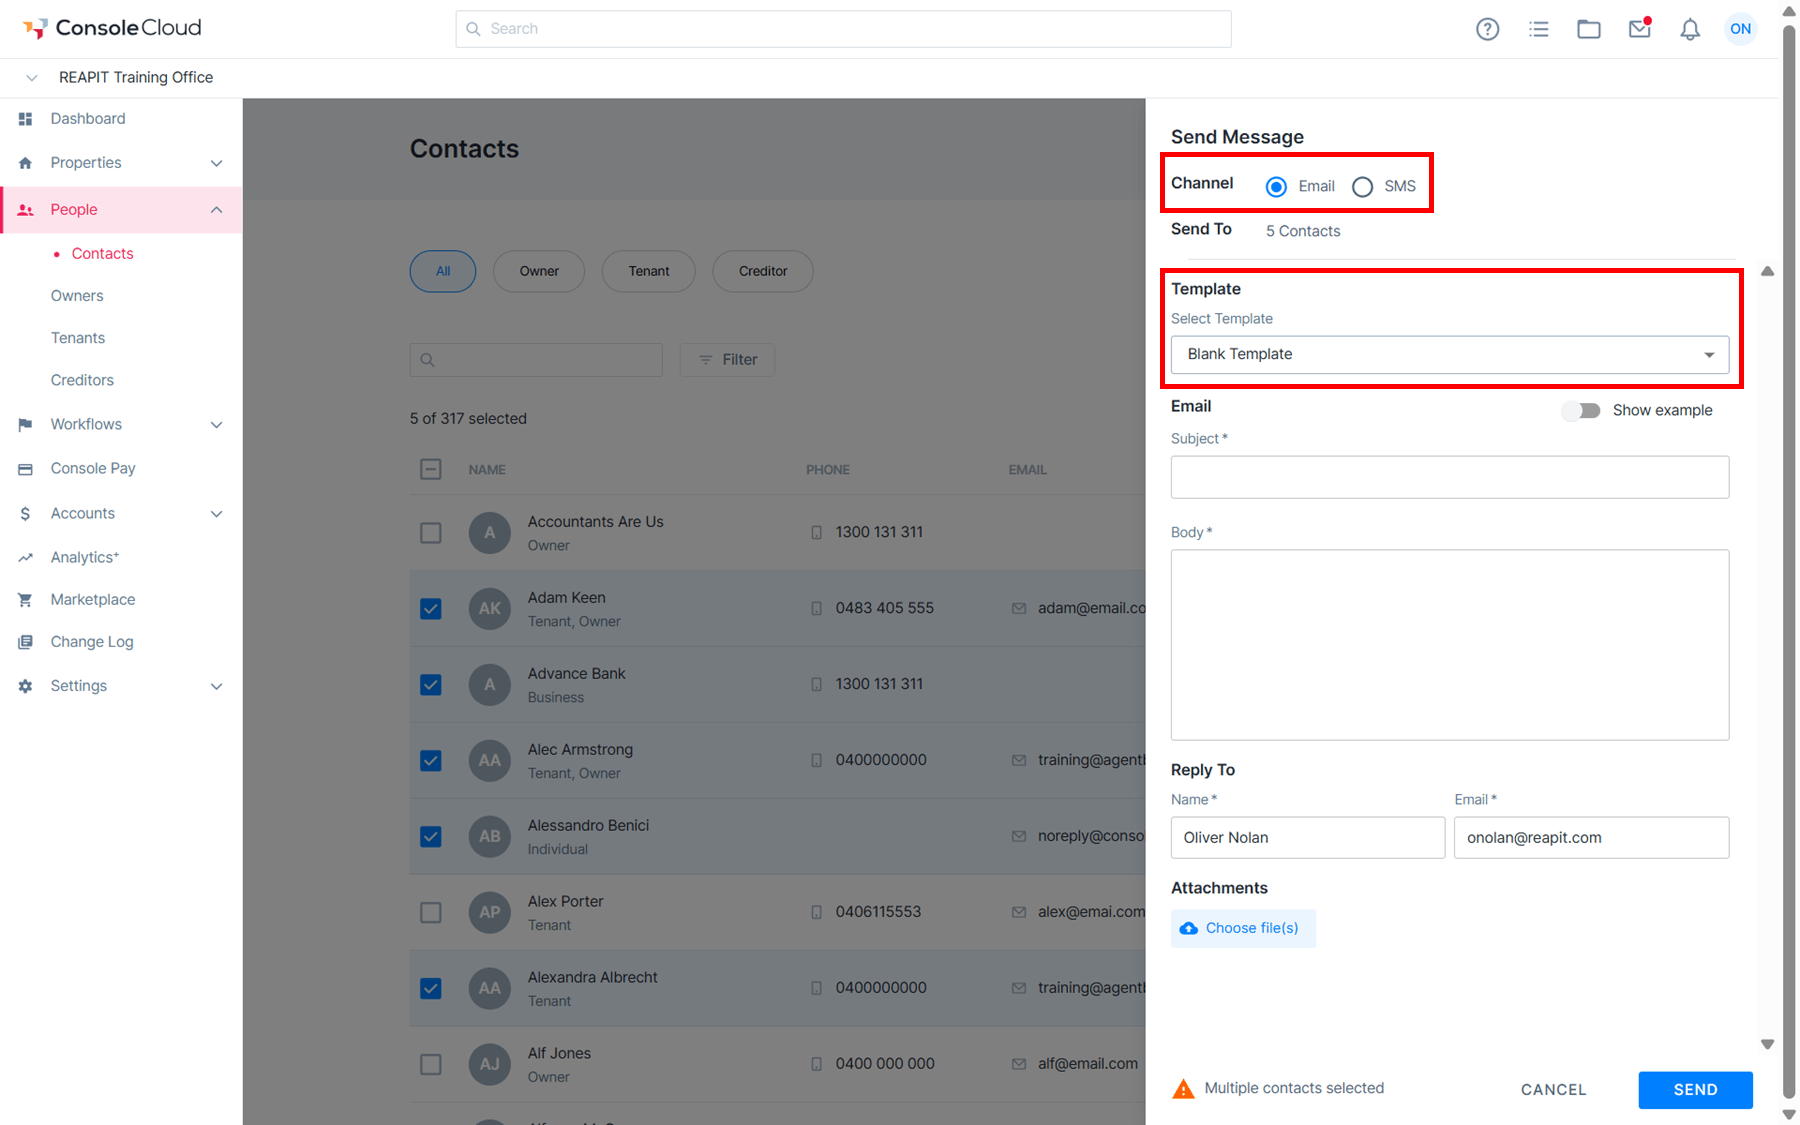
4. The Message draw will appear on the right side. Select Email or SMS and choose a template, Selecting Blank Template will allow you to type a message into interface.
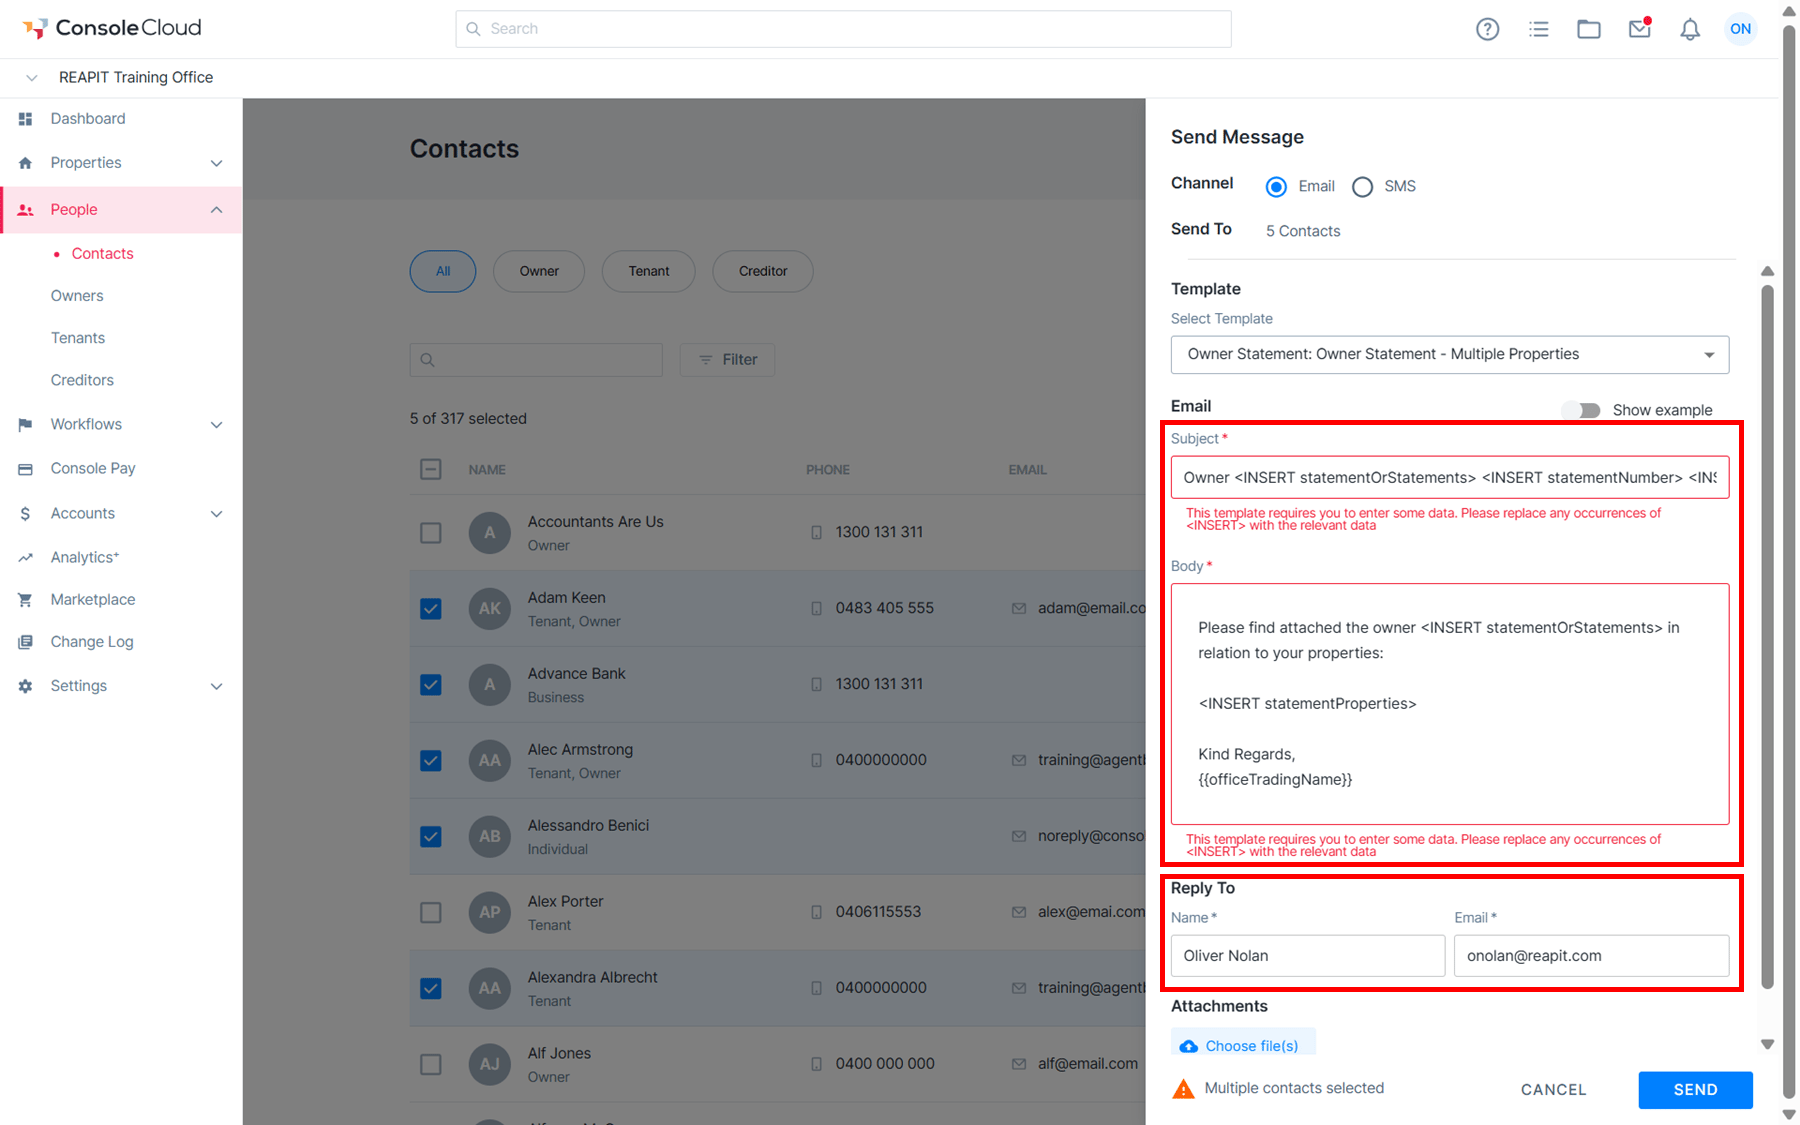
5. Review and edit (if required) the template. Please note that the reply-to address will default to the email address of the logged-in user.
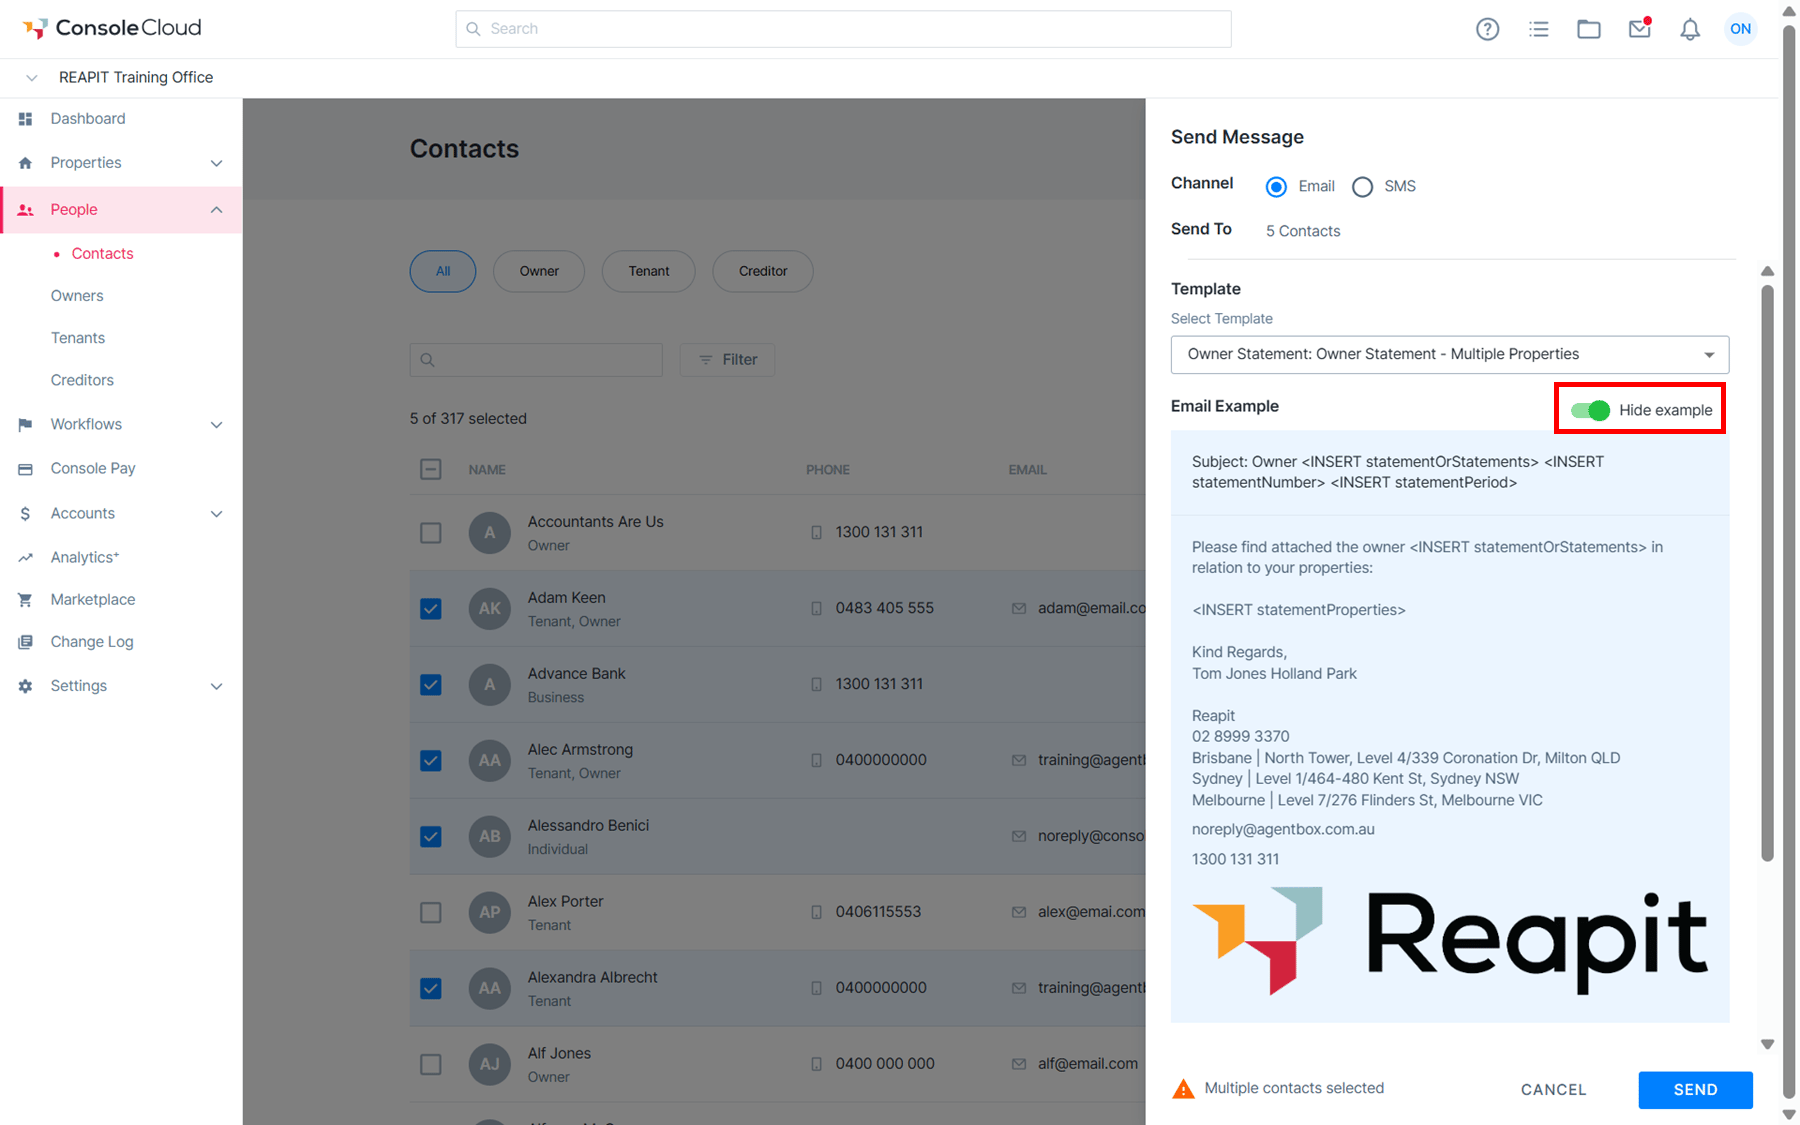
6. If you are creating the message via a template, you are able to view an example by toggling on the Show example button located below the Select Template dropdown.
7. Add any attachments (if required) by clicking on Choose File.
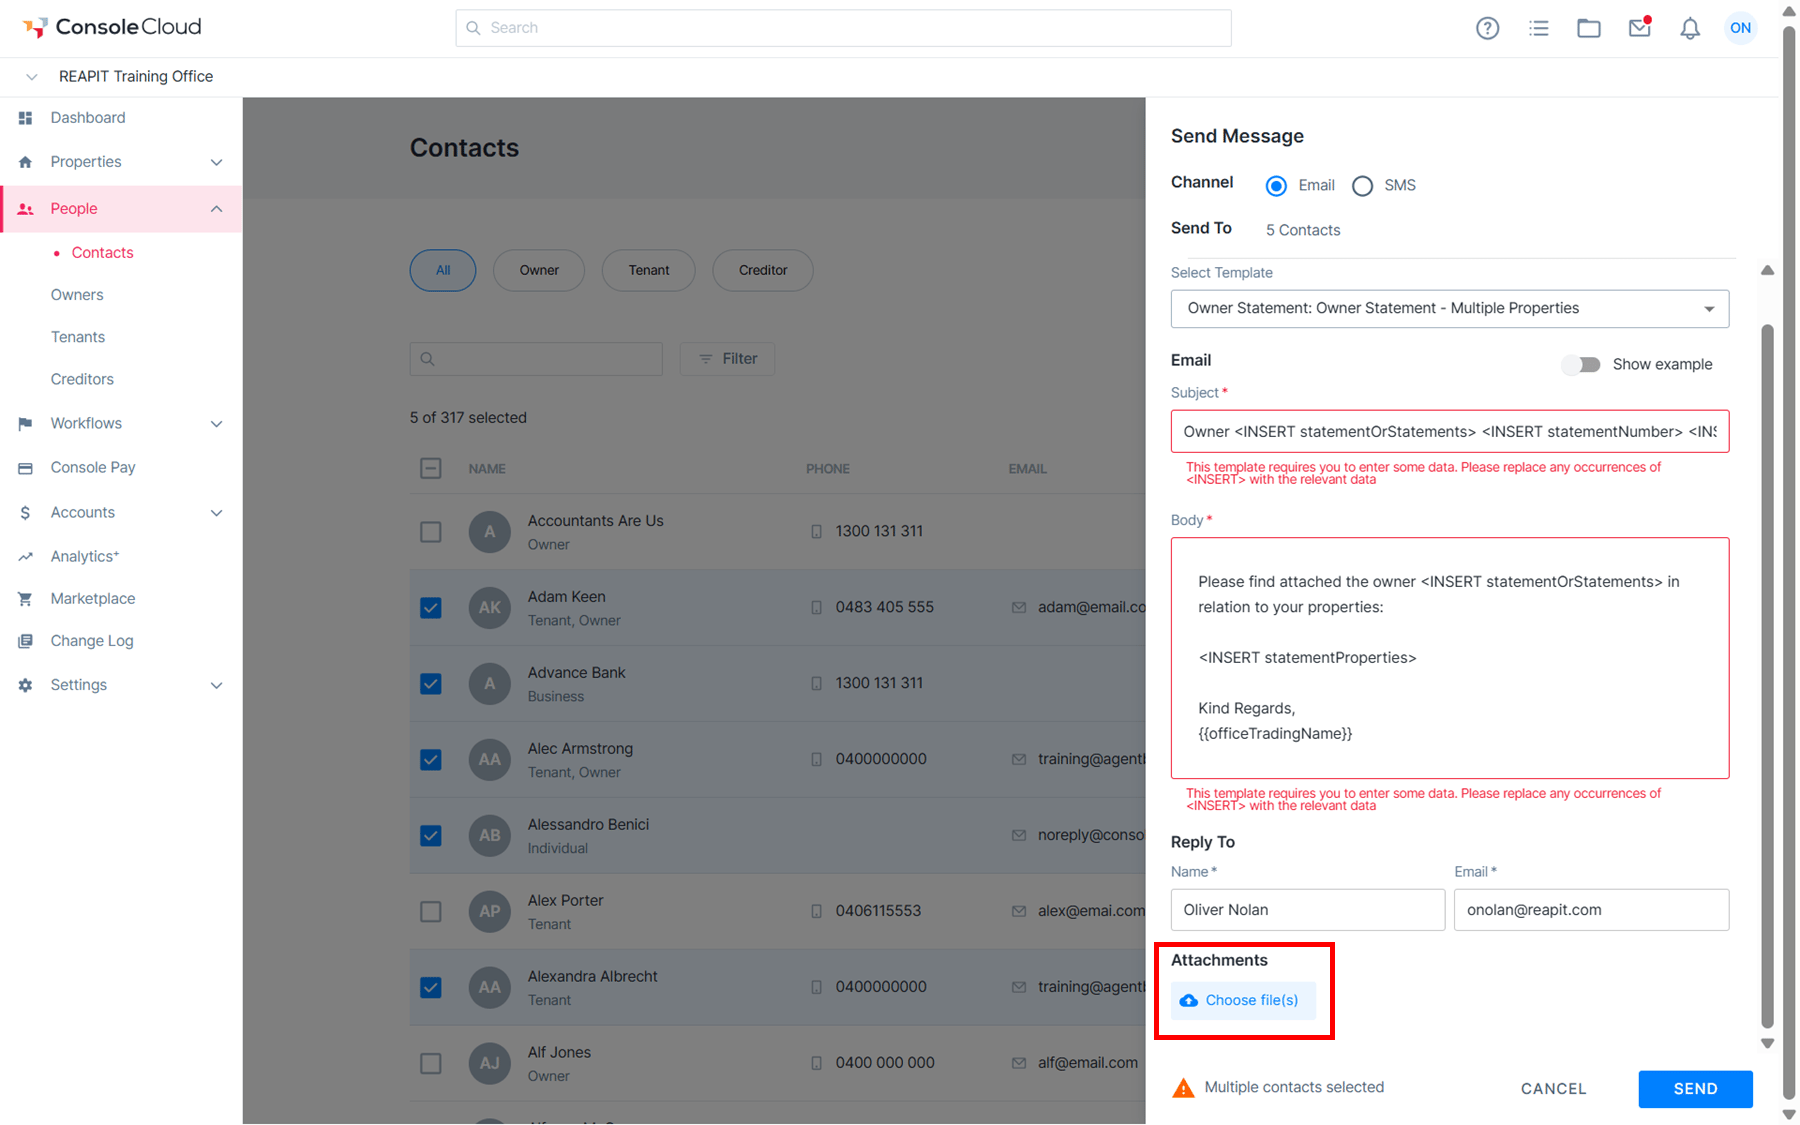
8. Click Send when you are ready to send the email.
How to Make Contacts Inactive
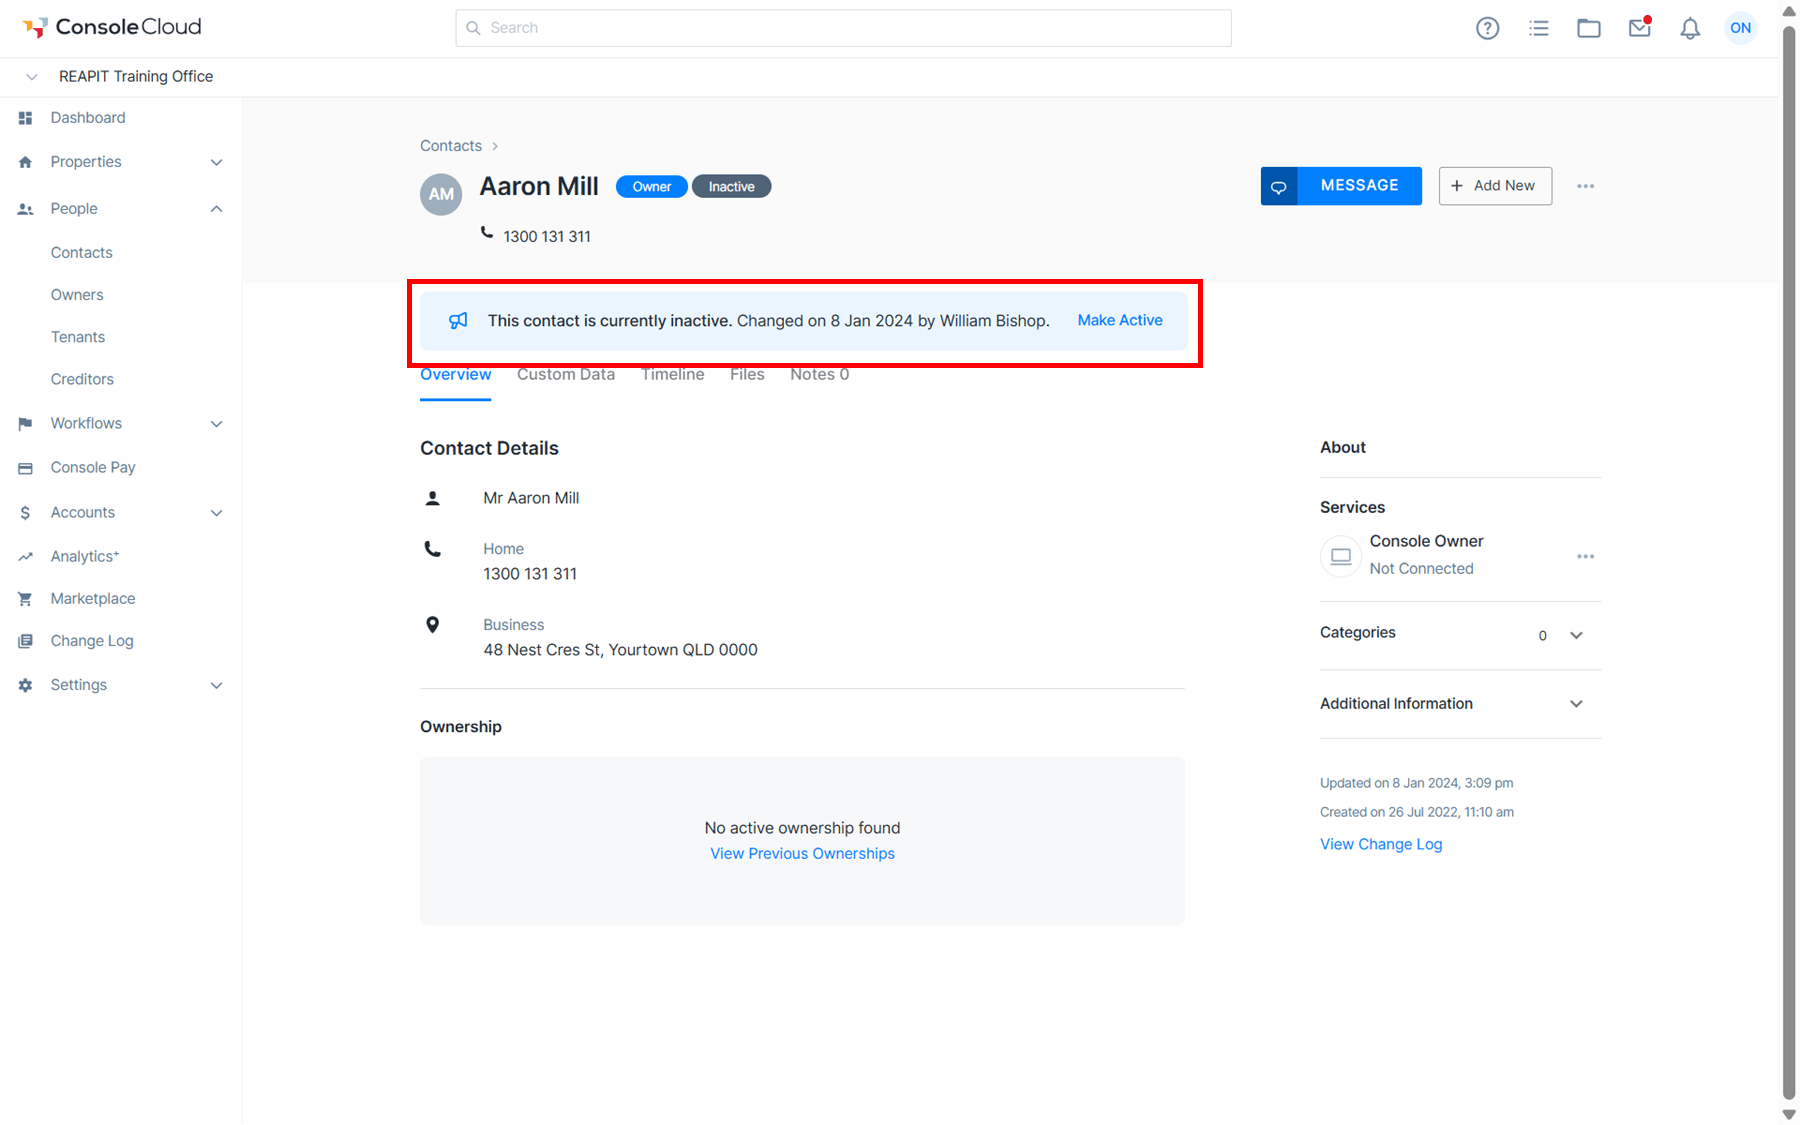
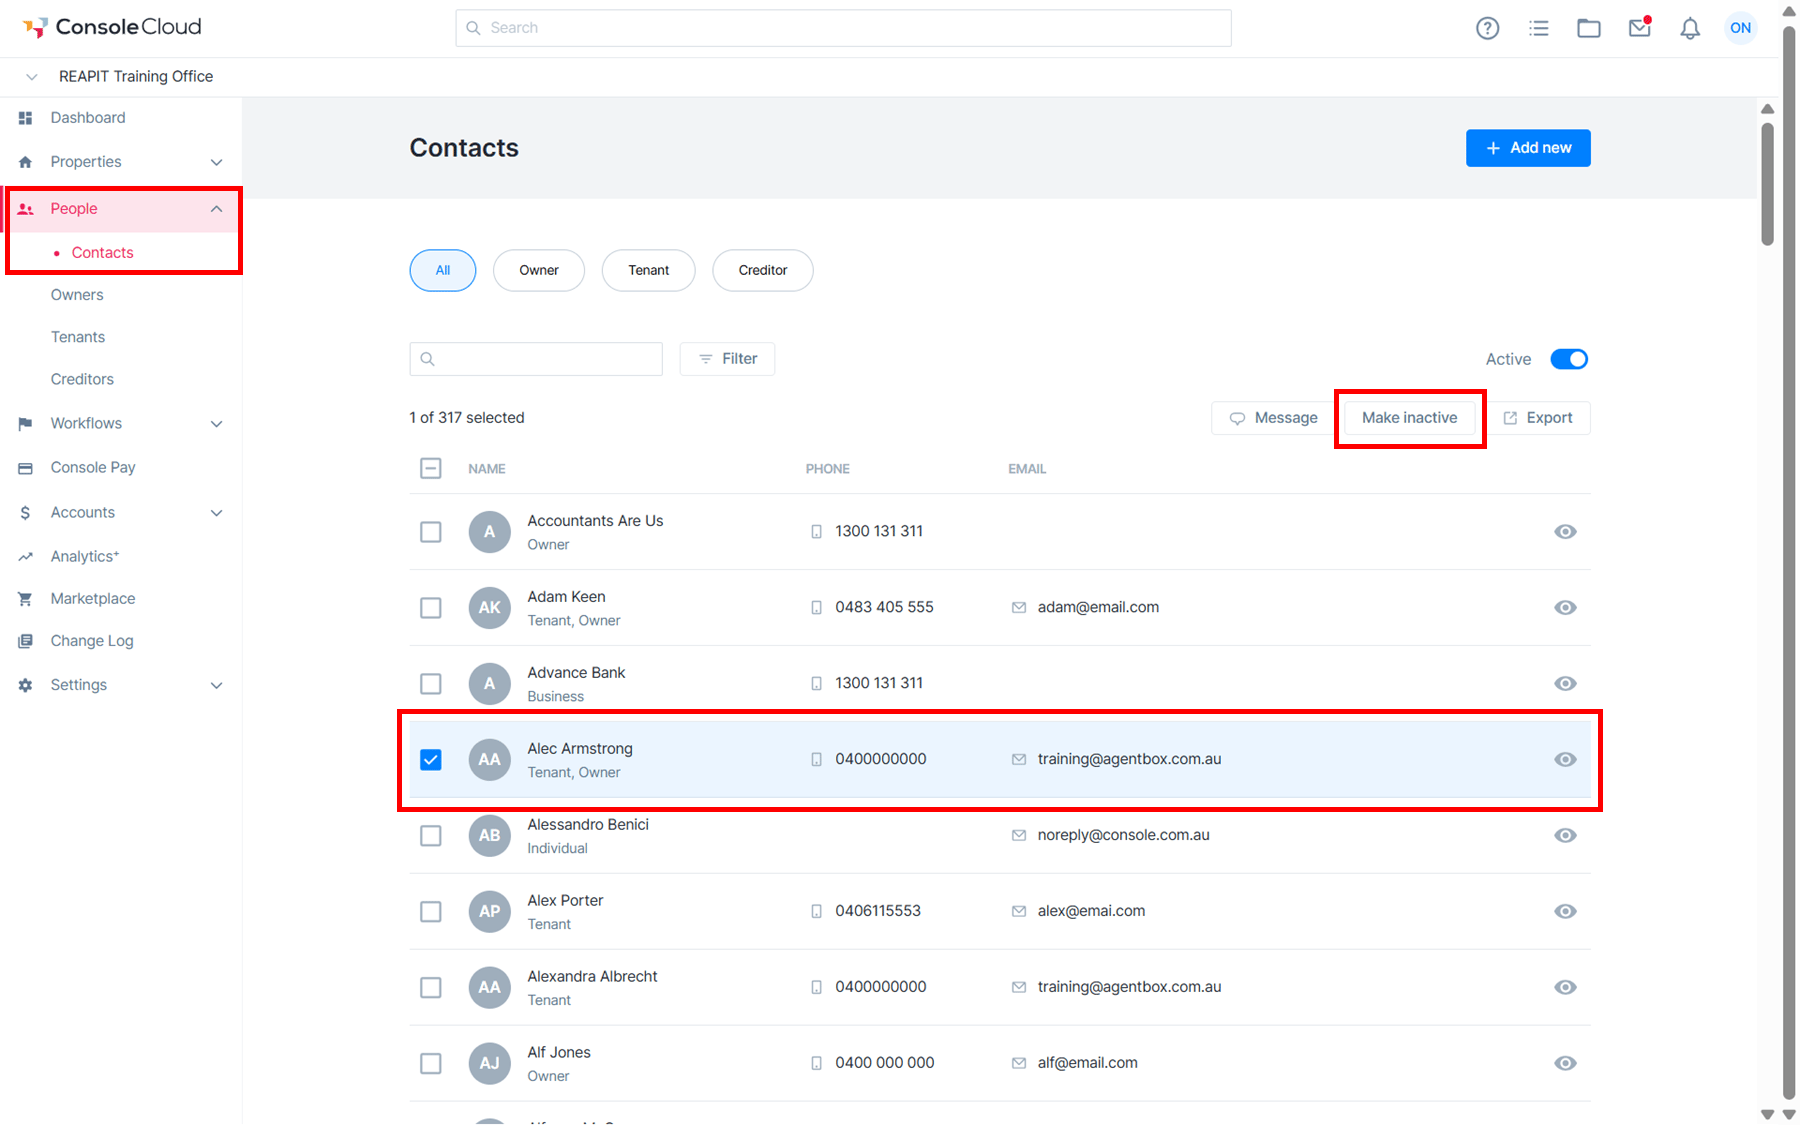
1. Navigate to People > Contacts. Select a contact and click Make Inactive.
2. To make a contact active again, navigate to People > Contacts, click on the Active toggle to change the list to show Inactive contacts.
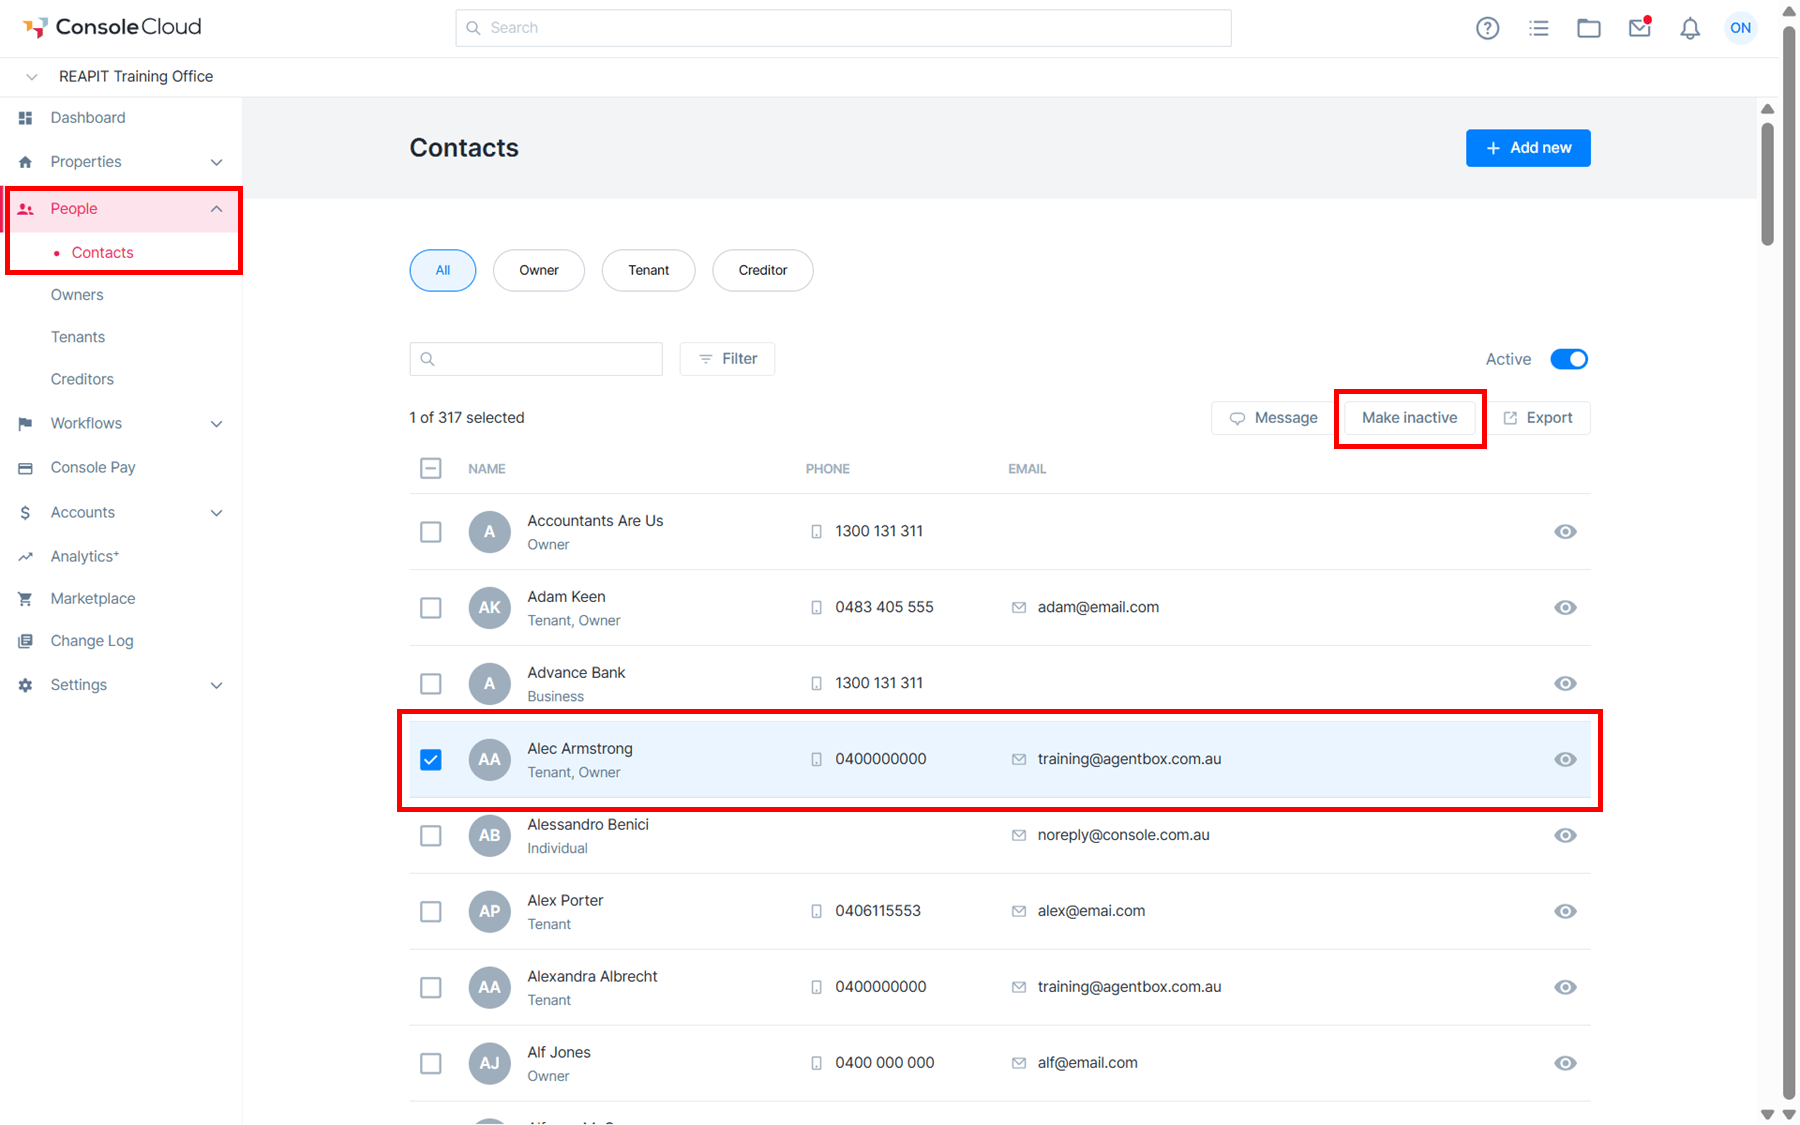
3. Select a contact then the Profile button. Click Make Active.