'%20d='M0%208a8%208%200%200%201%208-8h24a8%208%200%200%201%208%208v24a8%208%200%200%201-8%208H8a8%208%200%200%201-8-8V8Z'/%3e%3cpath%20fill='%23fff'%20d='M8.375%2013v14L20.5%2034l12.124-7v-7.737l-1.687-.975-2.806-1.62-1.082-.624v4.83l-.002%204.83H13.95V16.07l3.275-1.89%202.192-1.265%201.082-.625%203.275%201.877%202.192%201.256%201.083.62V9.782L20.5%206%208.376%2013Z'/%3e%3cdefs%3e%3clinearGradient%20id='reapit-pm__a'%20x1='20.702'%20x2='20.702'%20y1='.351'%20y2='31.228'%20gradientUnits='userSpaceOnUse'%3e%3cstop%20stop-color='%235573FD'/%3e%3cstop%20offset='.575'%20stop-color='%234E56EA'/%3e%3c/linearGradient%3e%3c/defs%3e%3c/svg%3e)
Creating and Sending Inspection Reports
Follow this guide to create, upload, download and send inspection reports with Reapit PM.
Overview
Creating and Sending Inspection Reports
Follow this guide to create, upload, download and send inspection reports with Reapit PM.
How to Create an Inspection Report
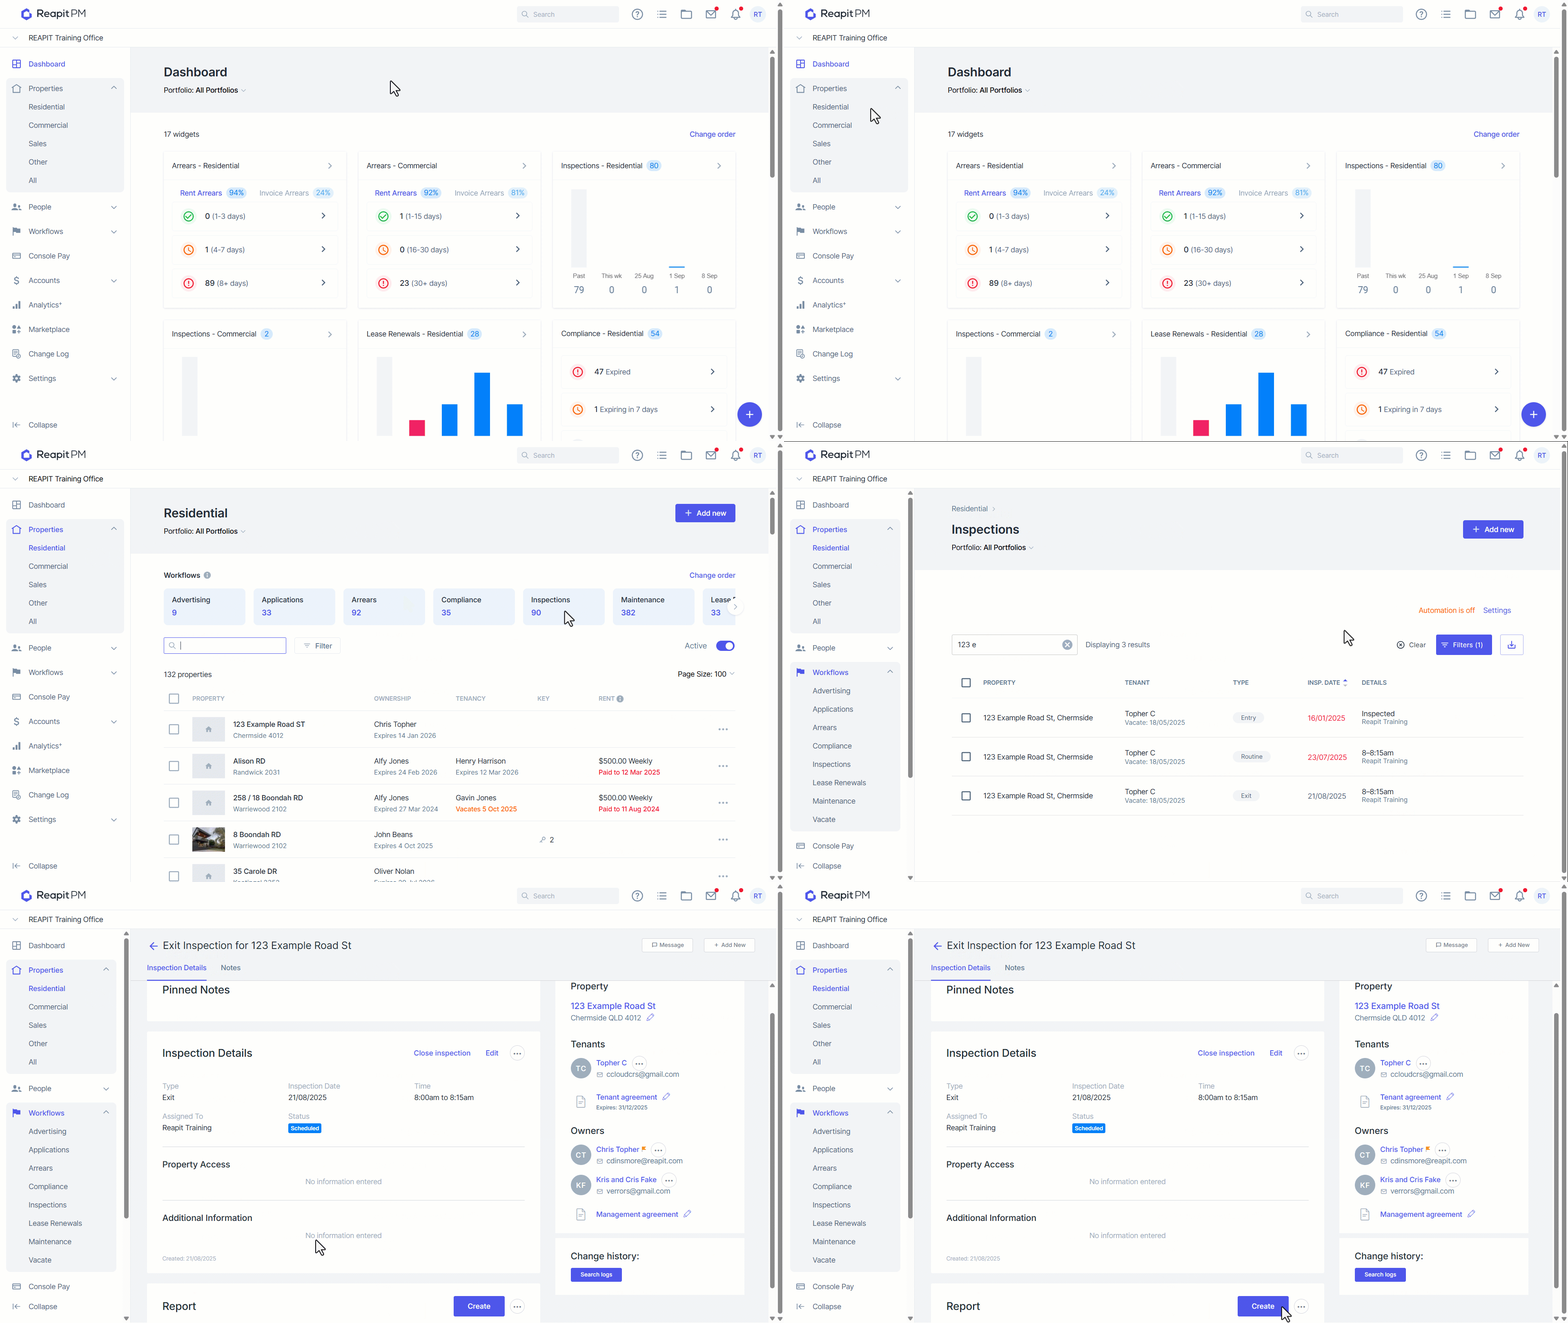
- Navigate to the drawer on the left-hand side and click Properties > Residential.
- Select Inspections.
- Select your inspection.
- Click Create.
- If you have not done a report for this property yet, you will get a report preparation notice. Click Prepare Report.
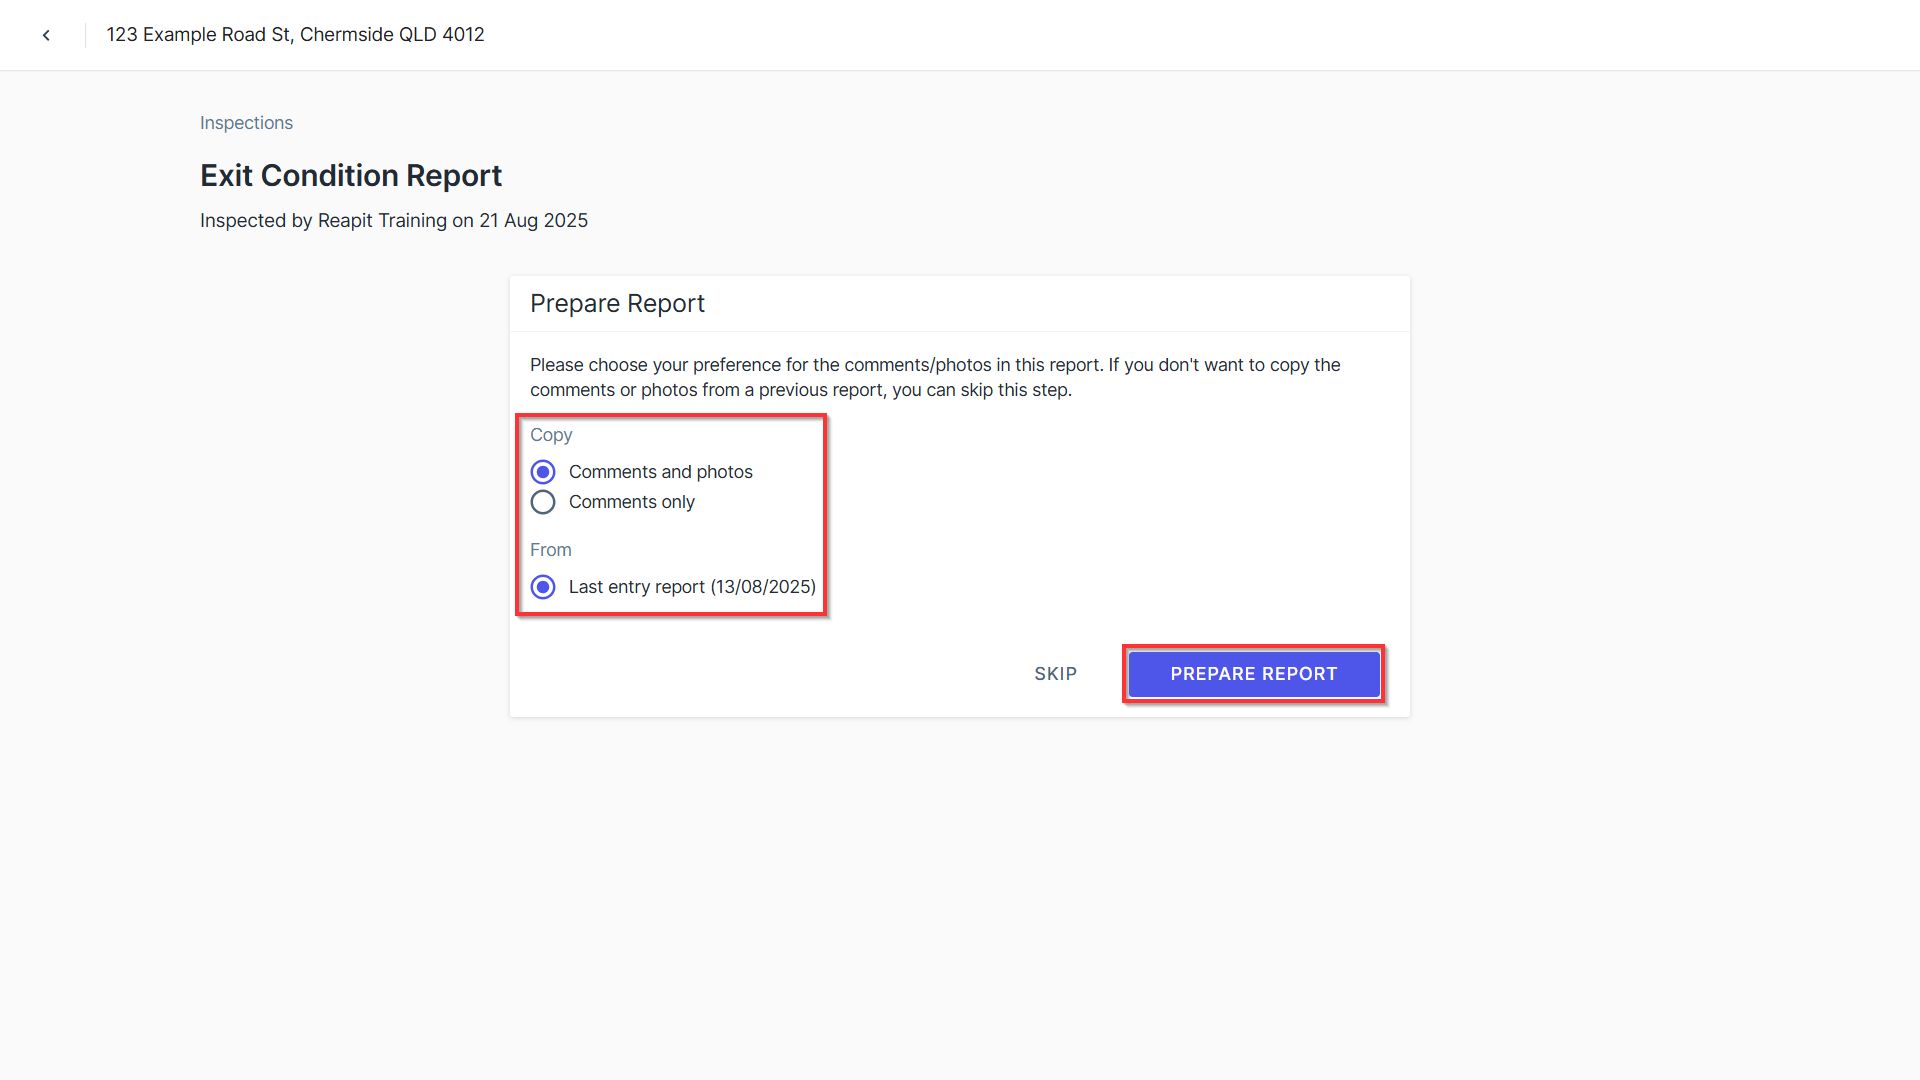
Note: Select whether or not to copy Comments and photos, or Comment only when completing the report.
- To add a section, click Add.**
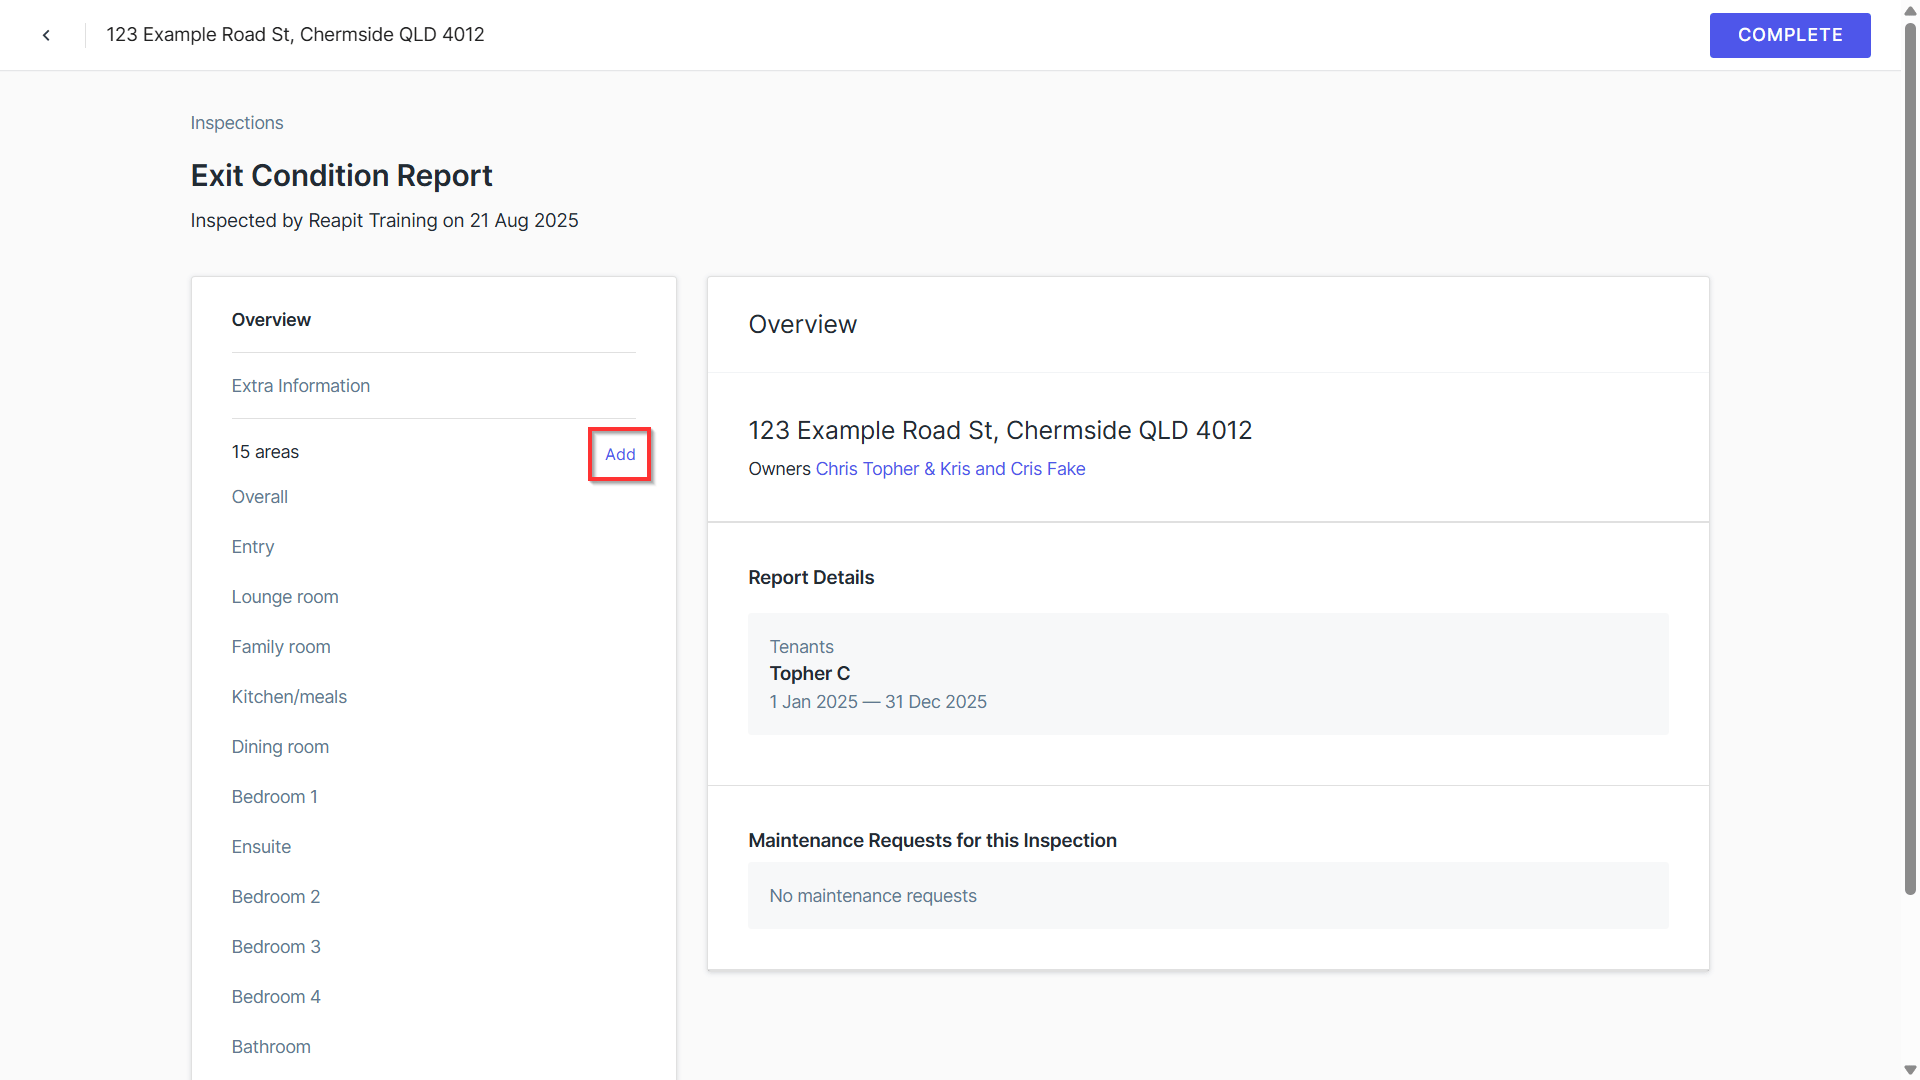
- Select the Area Type from the designated dropdown menu, and type the Area Name in the provided text field. Once completed, click Save.
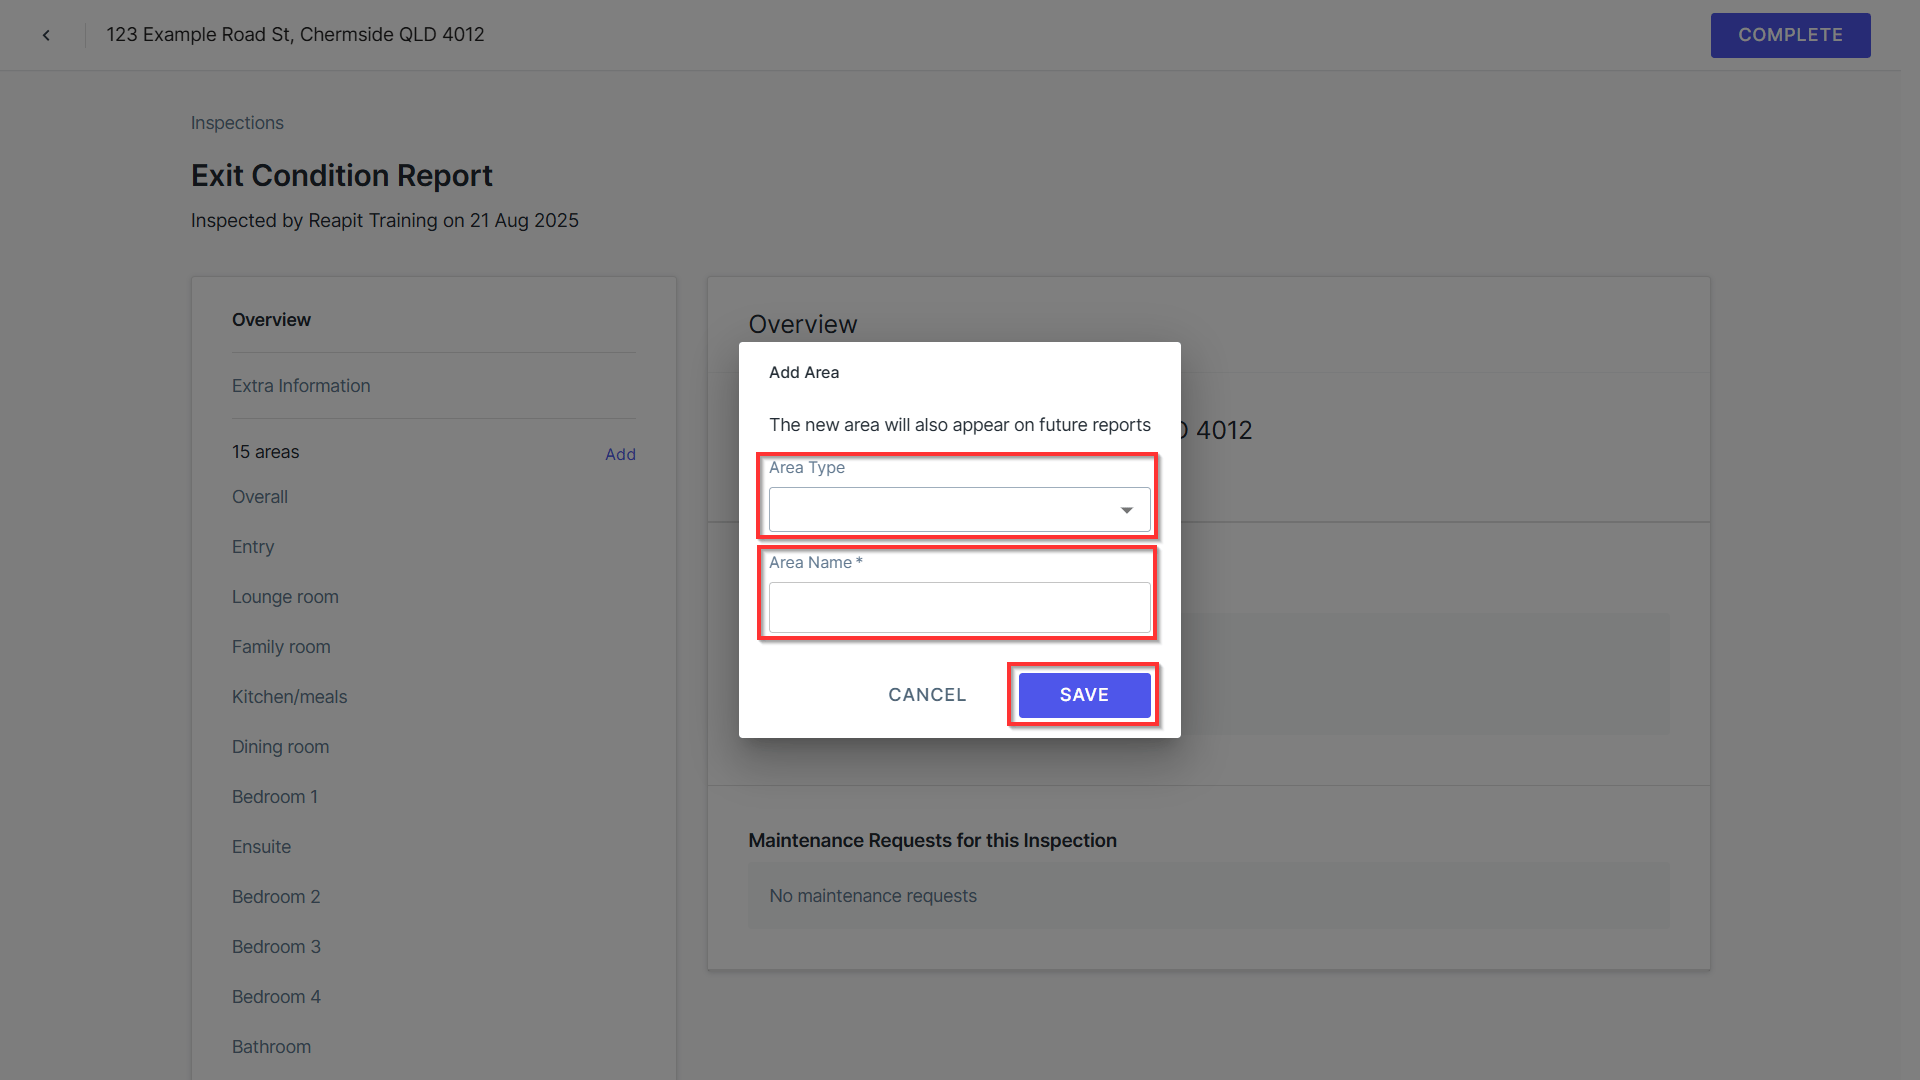
- Select an area from the drawer on the left hand side and select Edit.
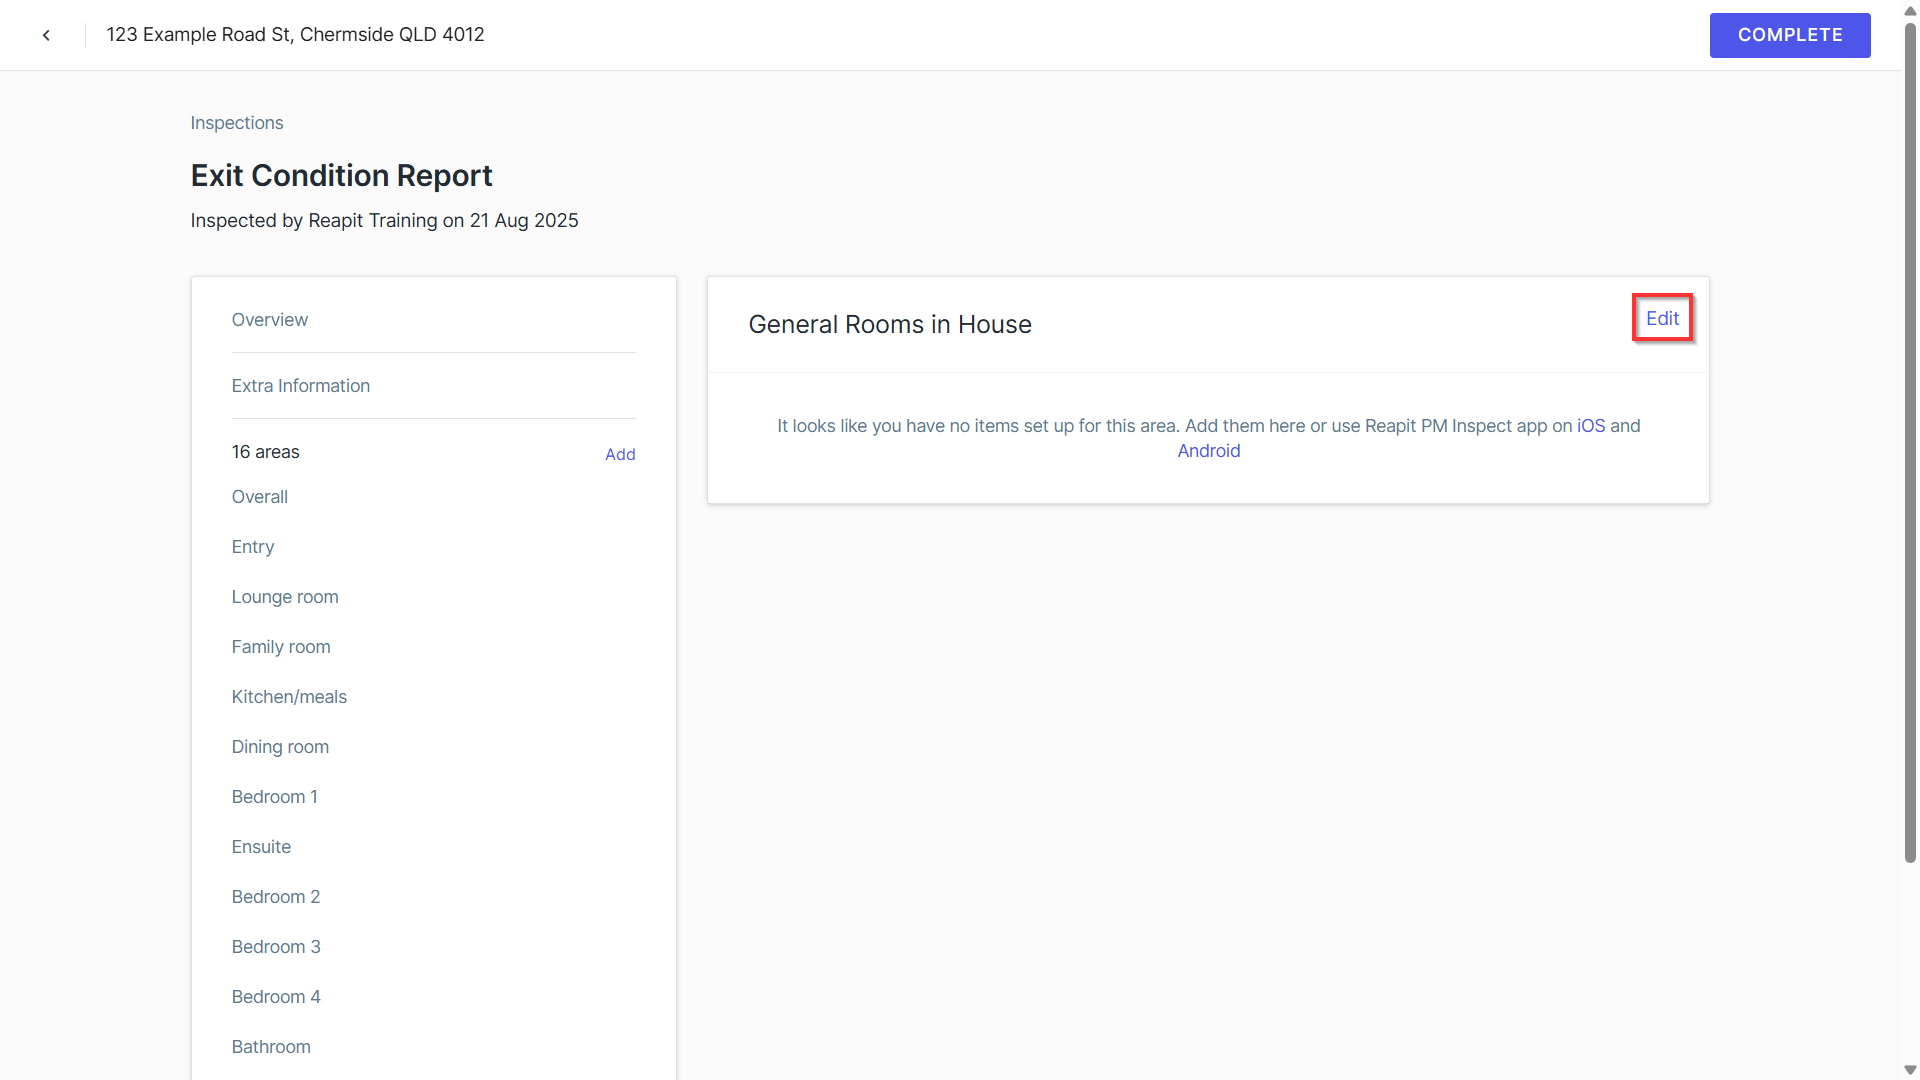
- To rename the area, click the designated text field, remove the existing name, enter the new name as required, and click Save***.*
- To remove a section, click on the 3 dots and select Remove Area.
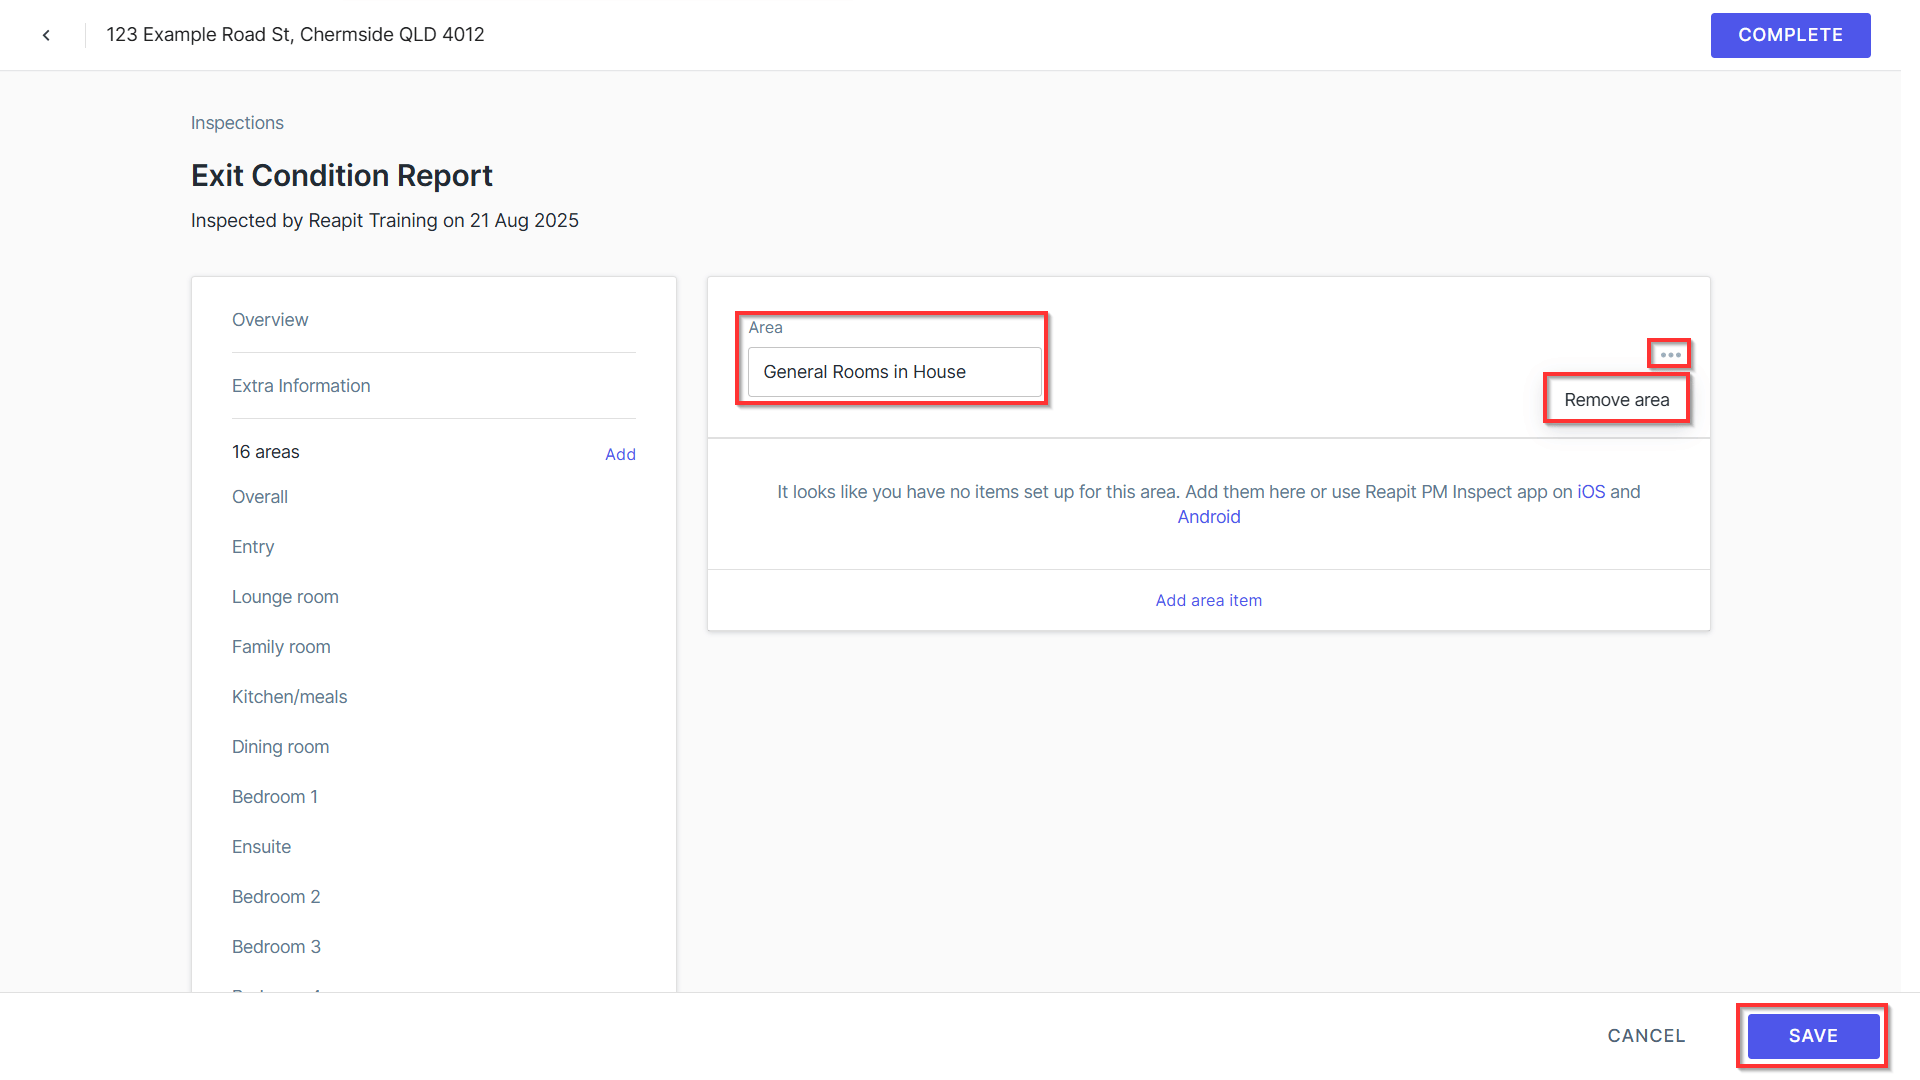
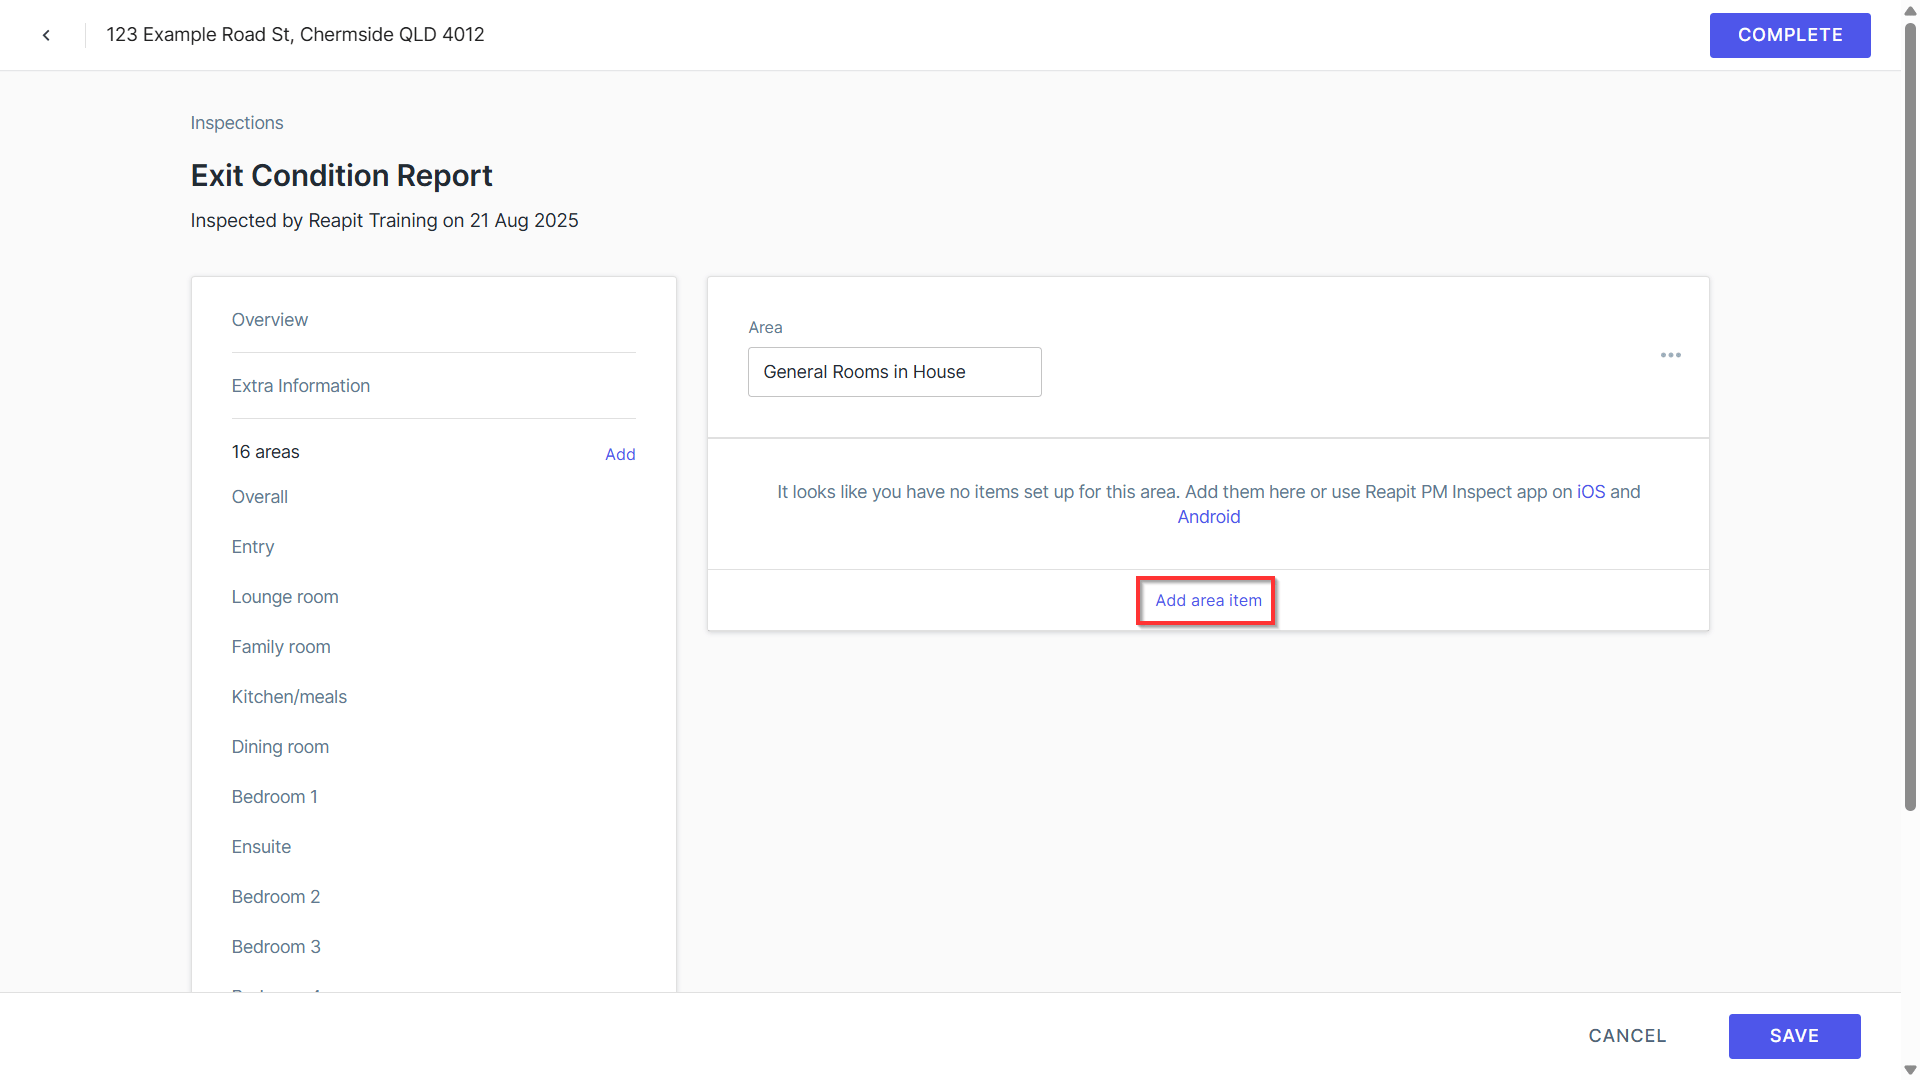
- Click Add area item** in order to add comments, images and rate the overall quality of the area being inspected. Click Save* to store your updates.
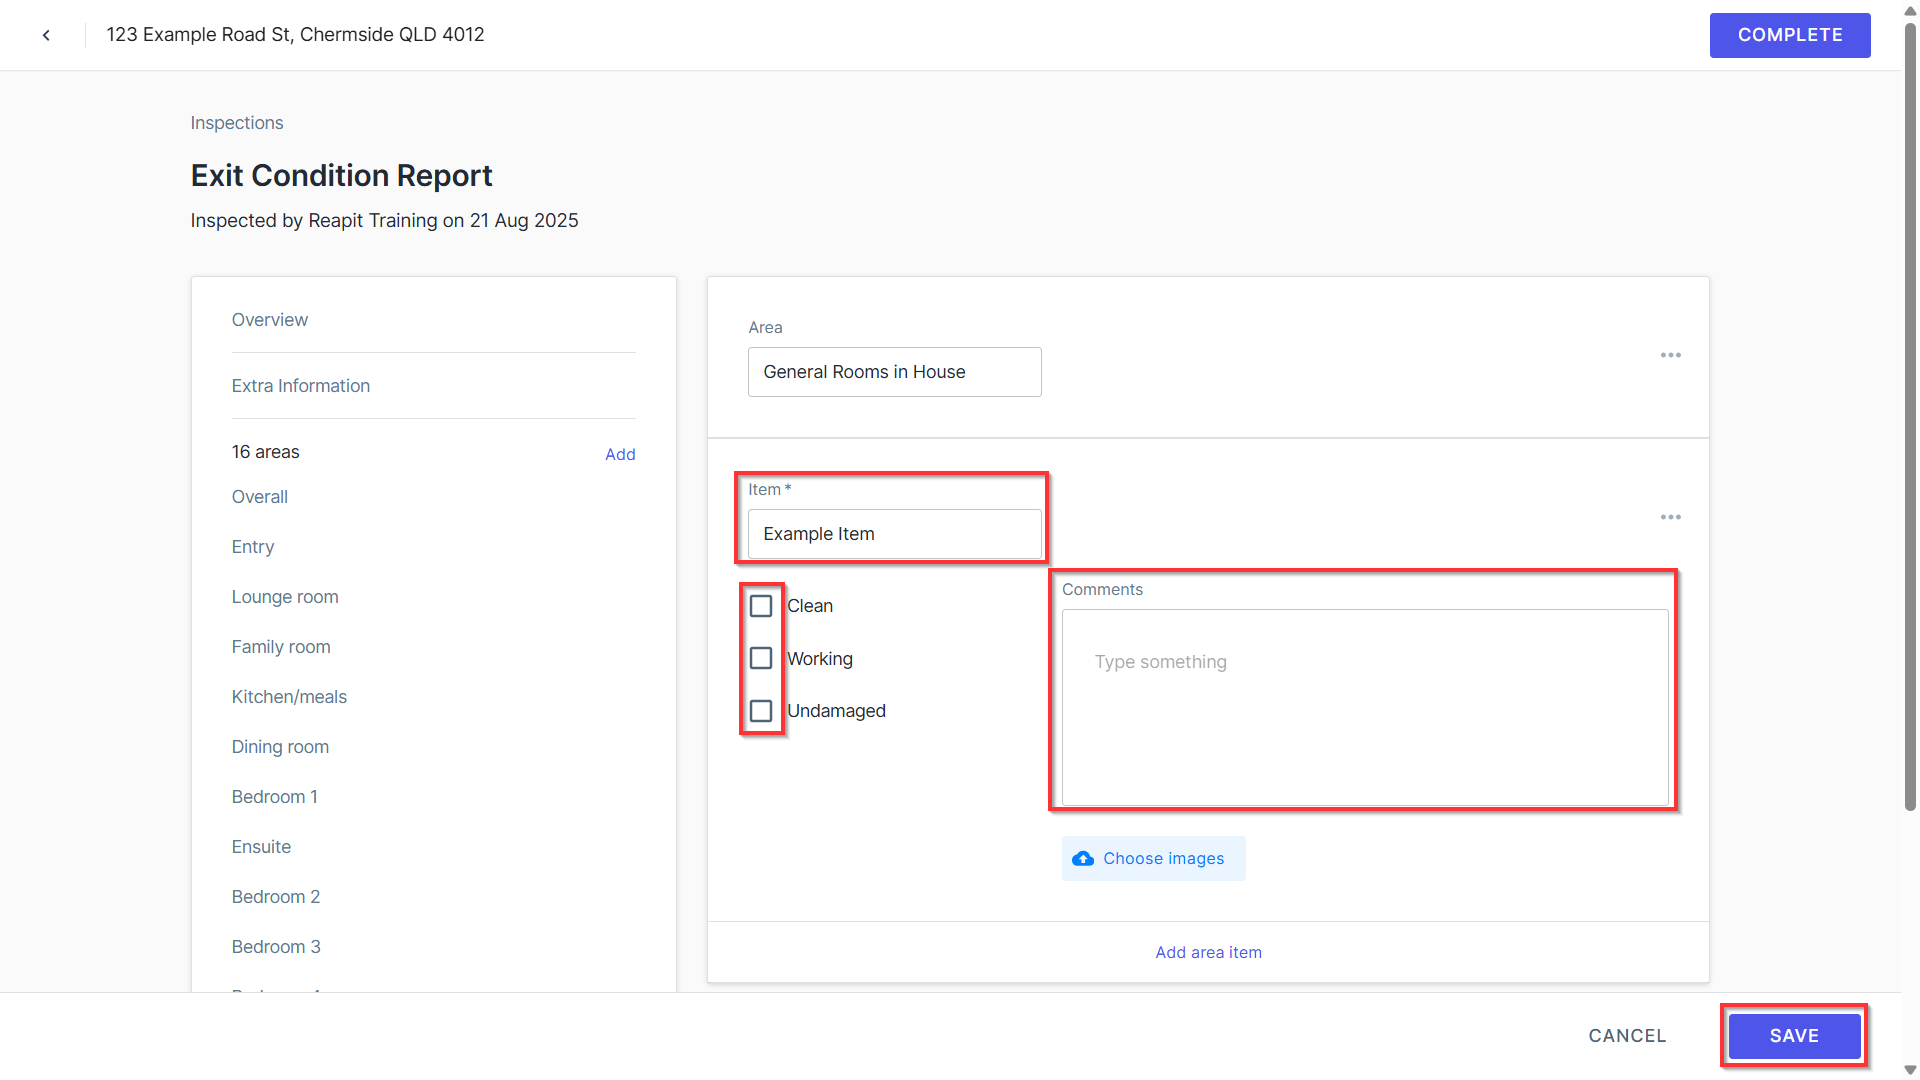
- Tick the boxes if Clean, Working and Undamaged. Add any comments and upload any images.
- Click Save.* Repeat this process for each item and each area.
How to Upload the Inspection Report
- Select the relevant inspection, then click Upload to attach the inspection report.
Note: the file must be a PDF to be saved.
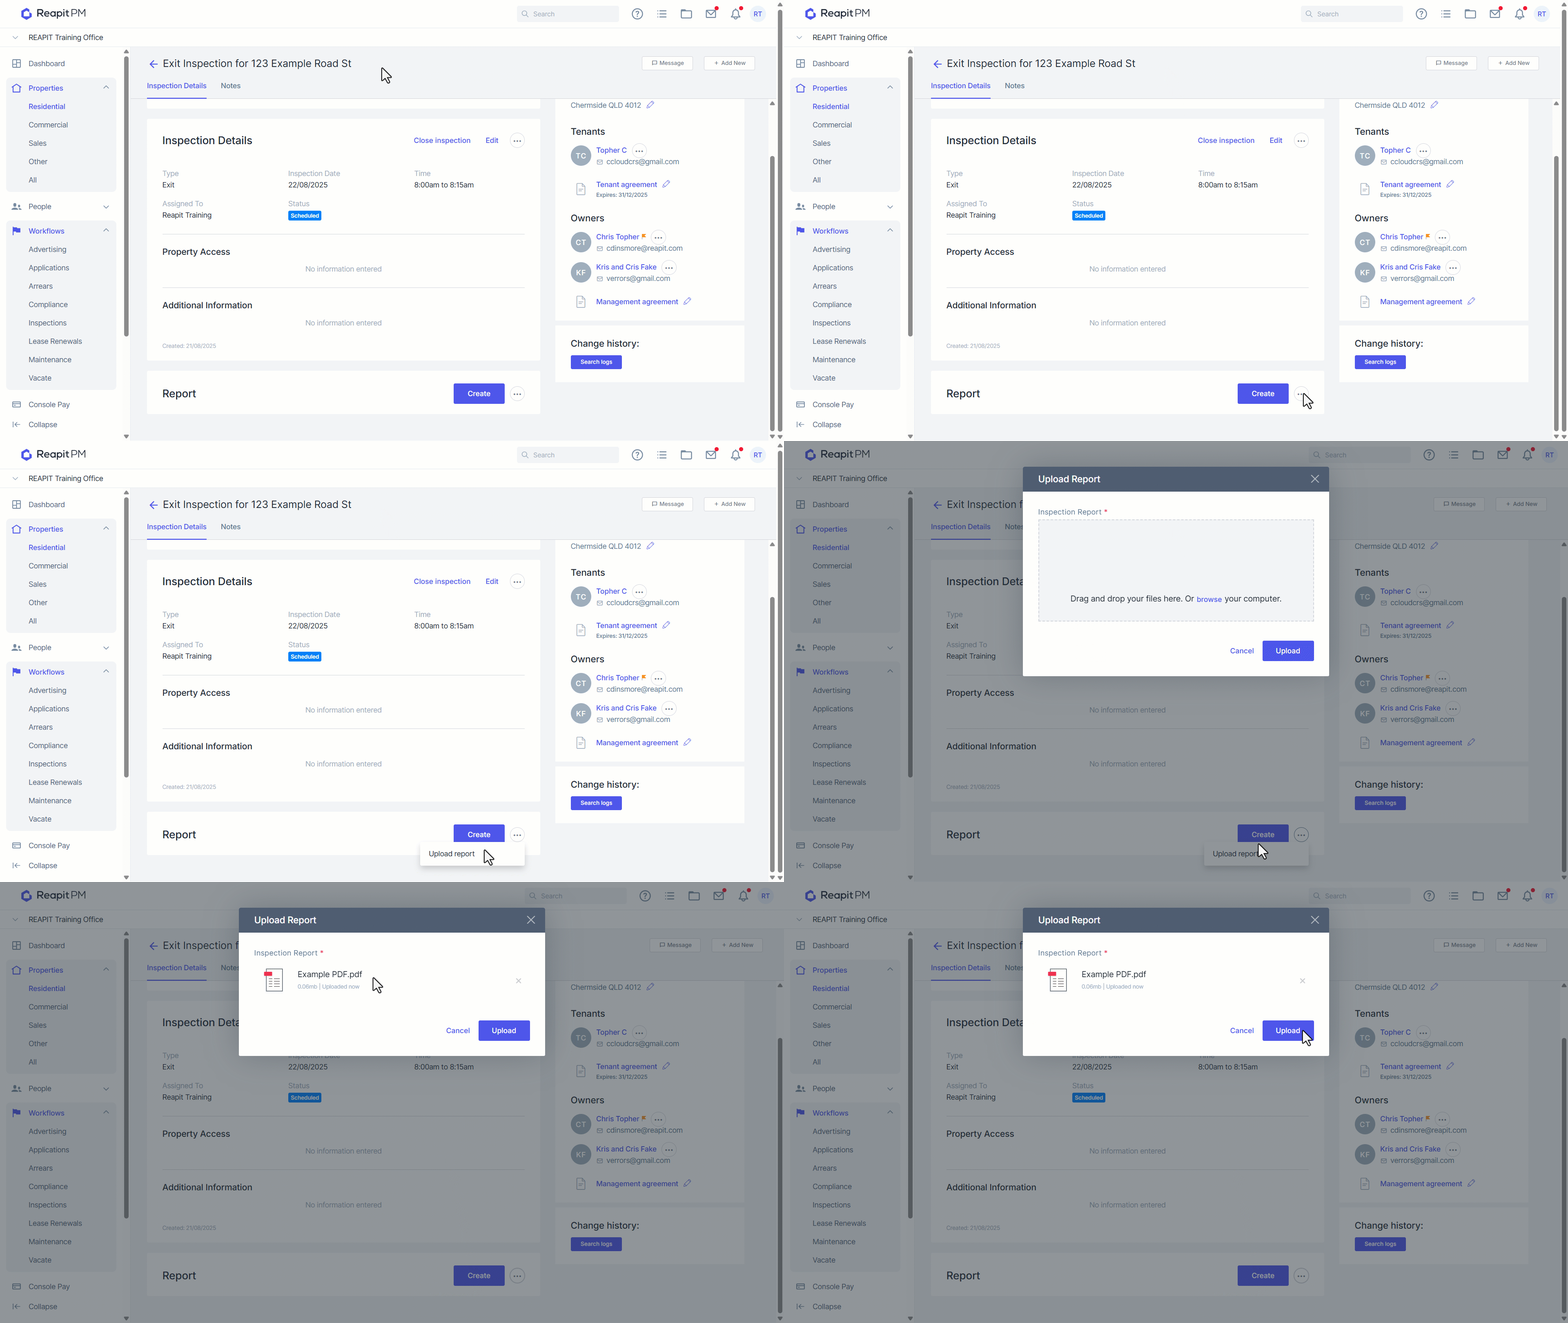
Note: An Inspection Report is automatically uploaded if completed using the Reapit PM App on an iOS or Android Device. Please see Reapit PM App article for Inspections.
Download and View the Last Sent Report
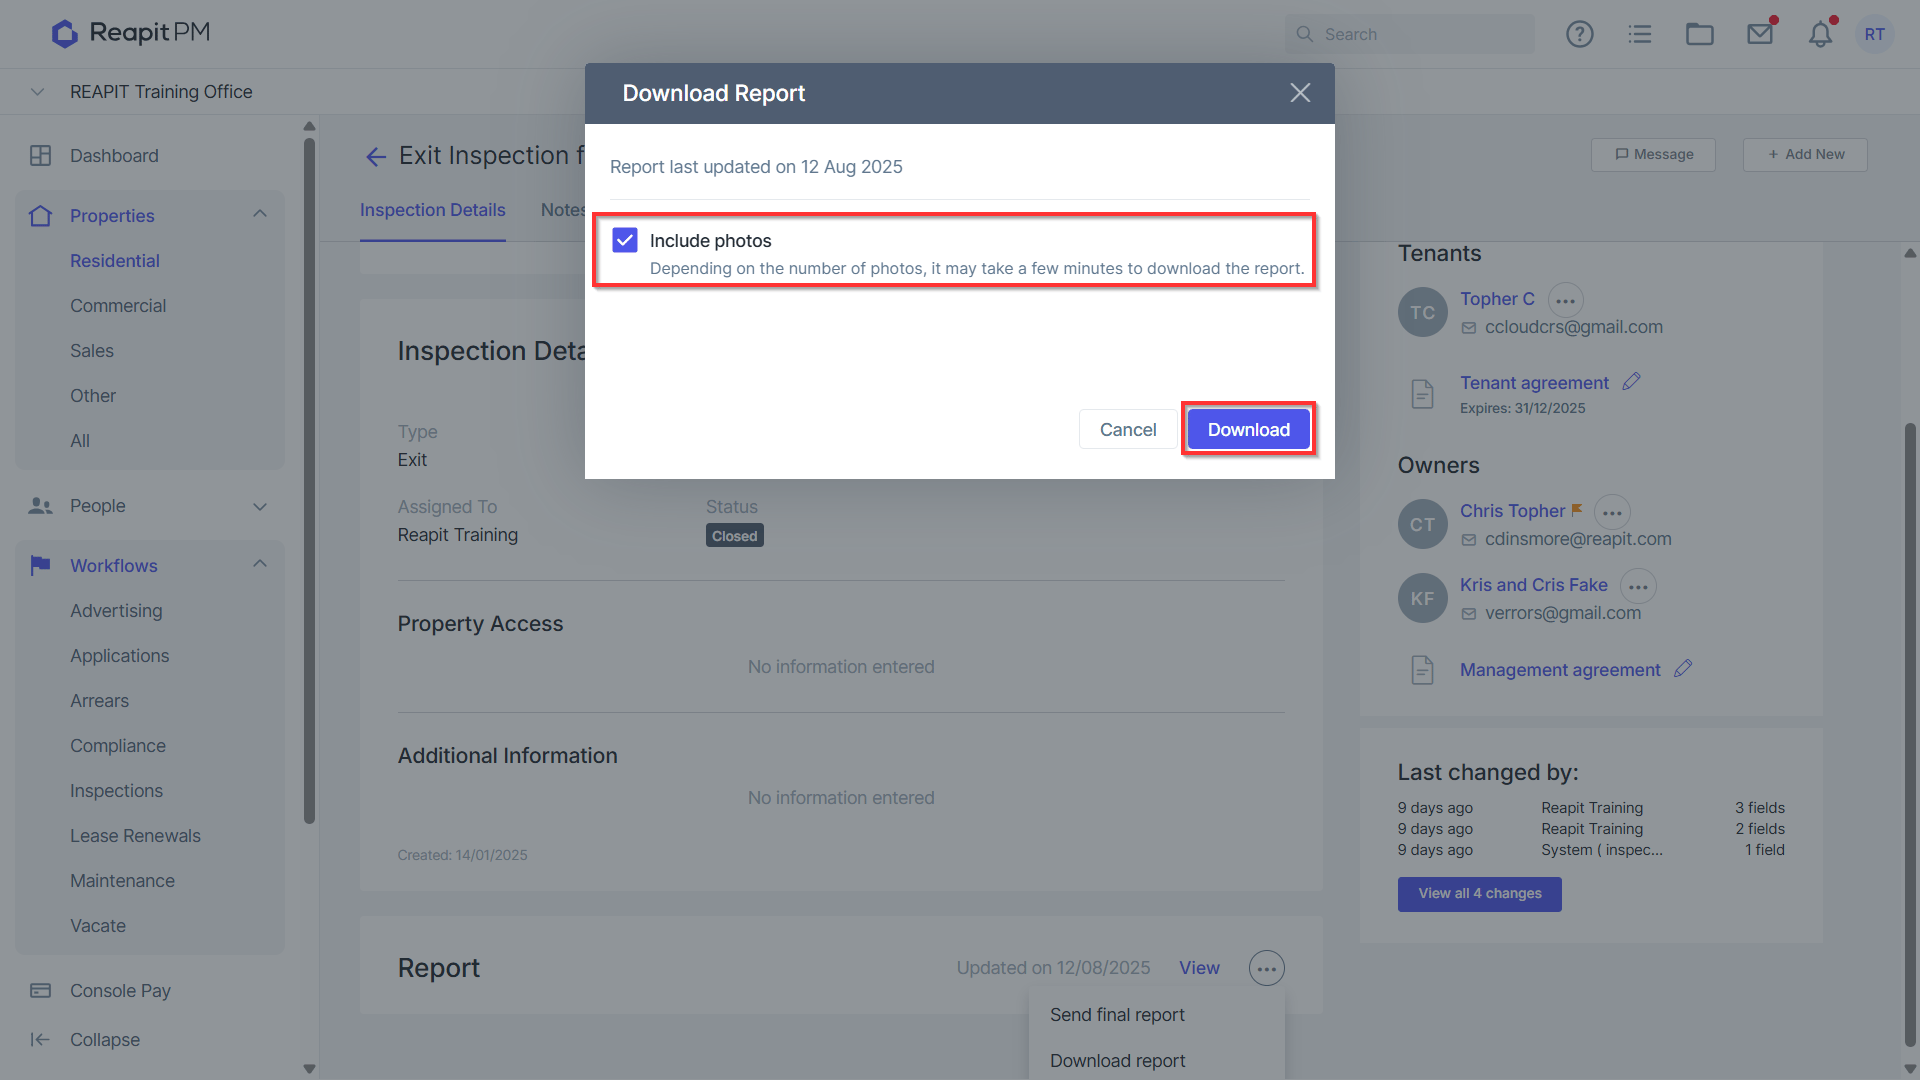
- Click Download Report to view the last sent report.
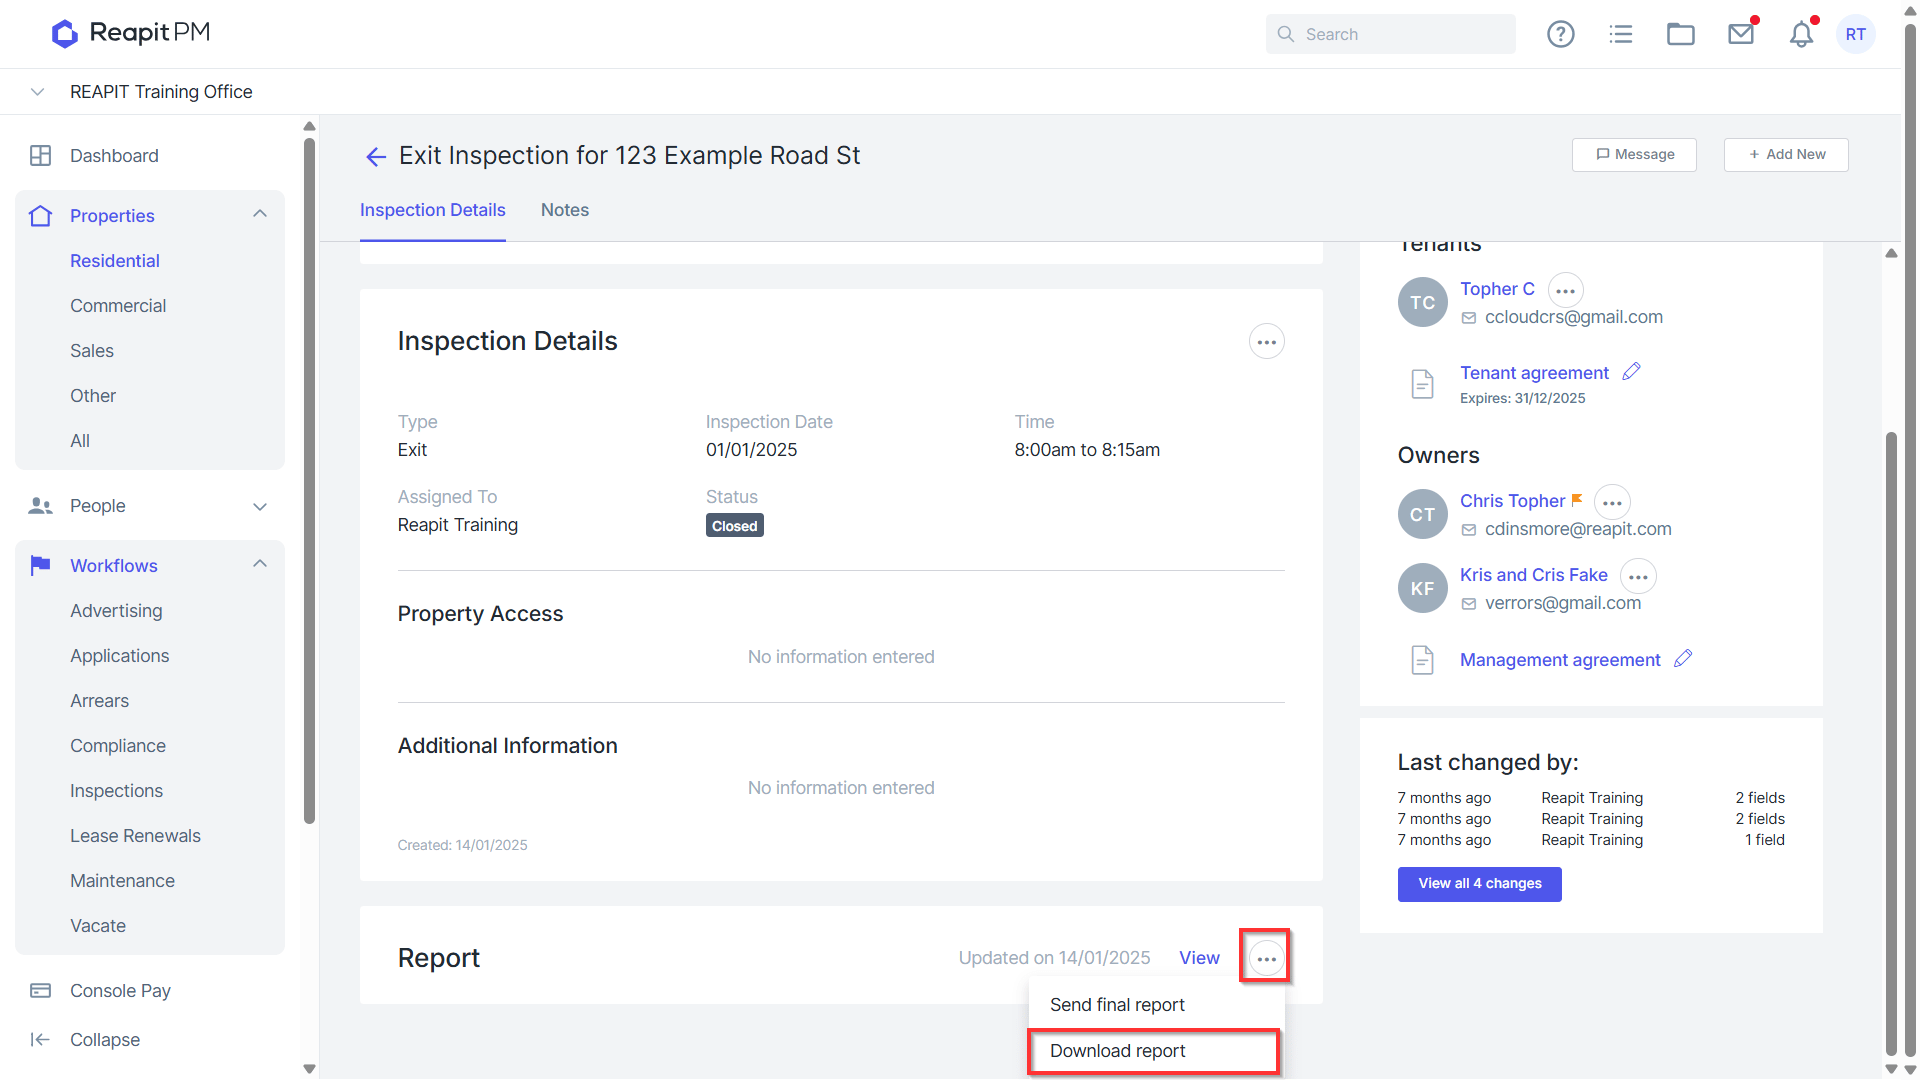
- Select whether you would like to include photos. Click Download. This will then download the report as a PDF.
How to email an inspection report to an owner
- Navigate to the drawer on the left hand side and click Properties > Residential.
- Select Inspections.
- Search or Select for your address.
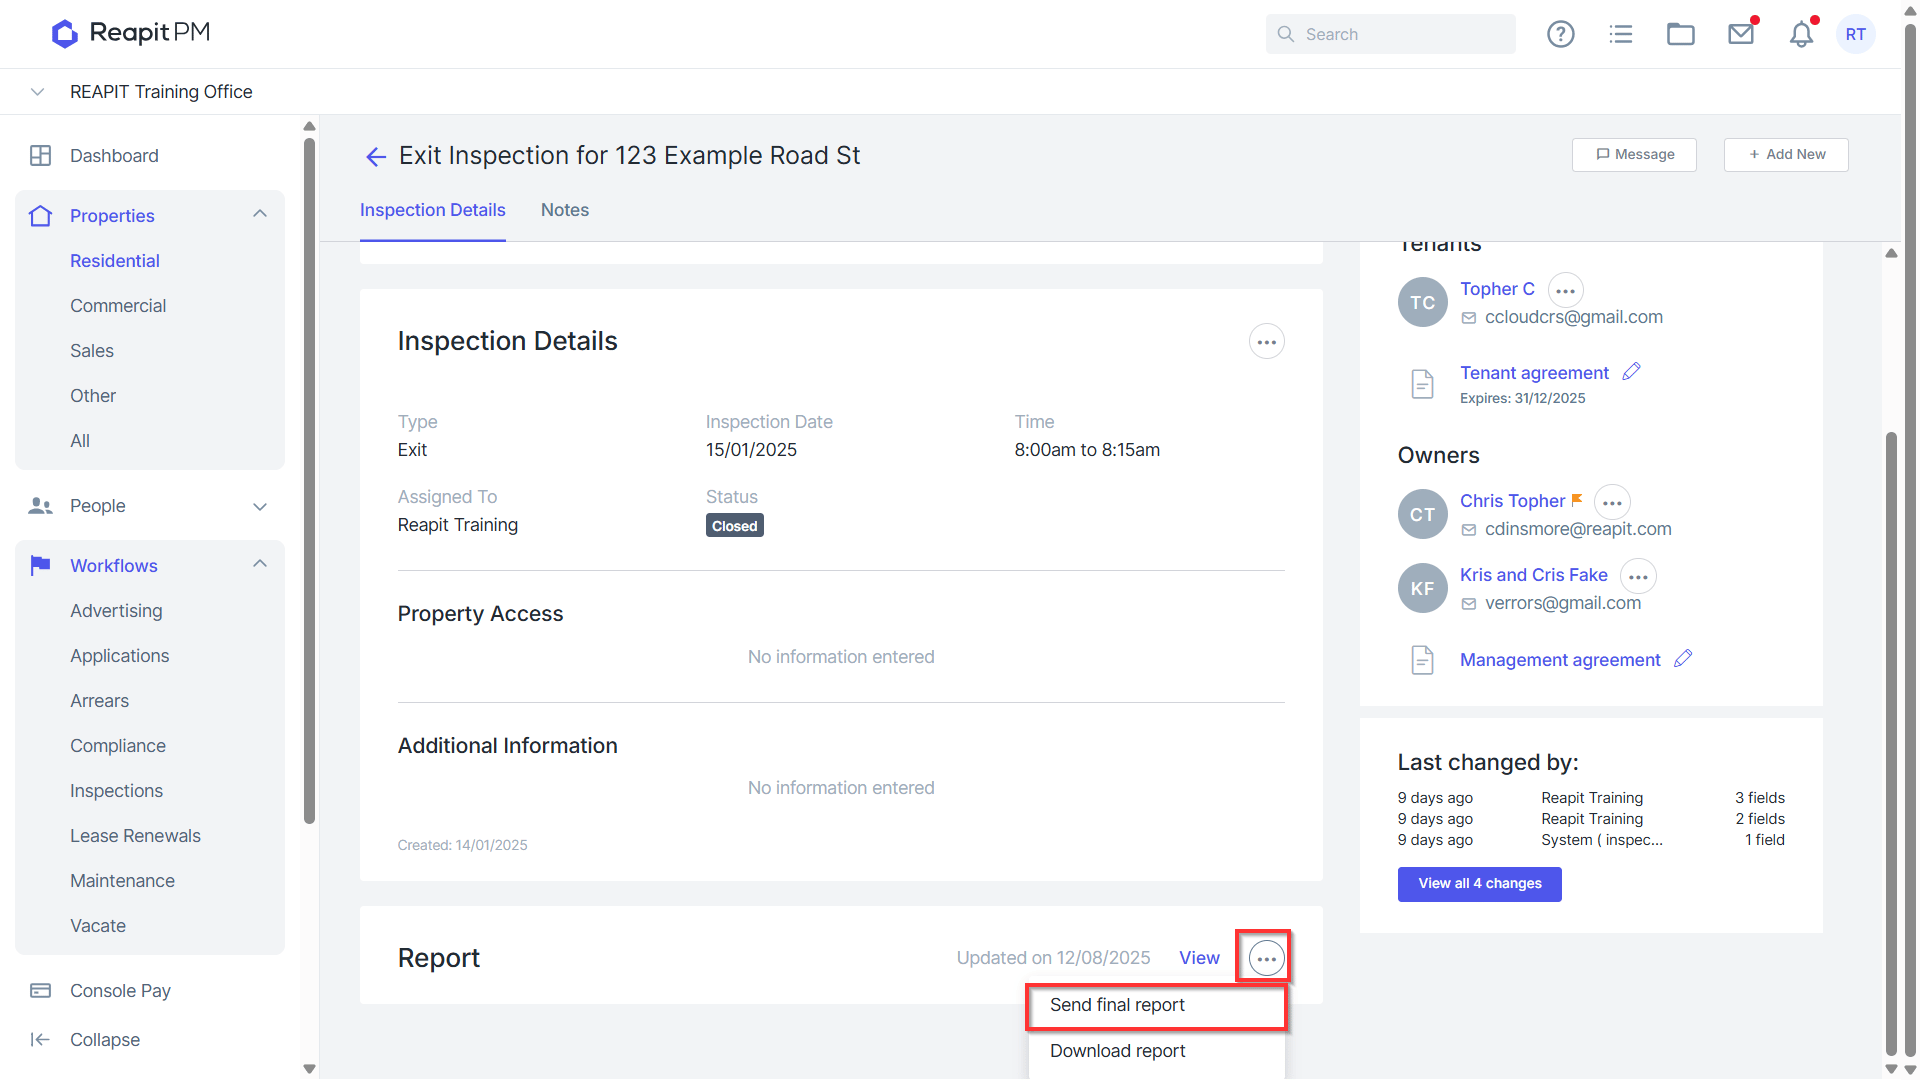
- Once you have selected your property navigate to the 3 dots and select ****Send Final Report.
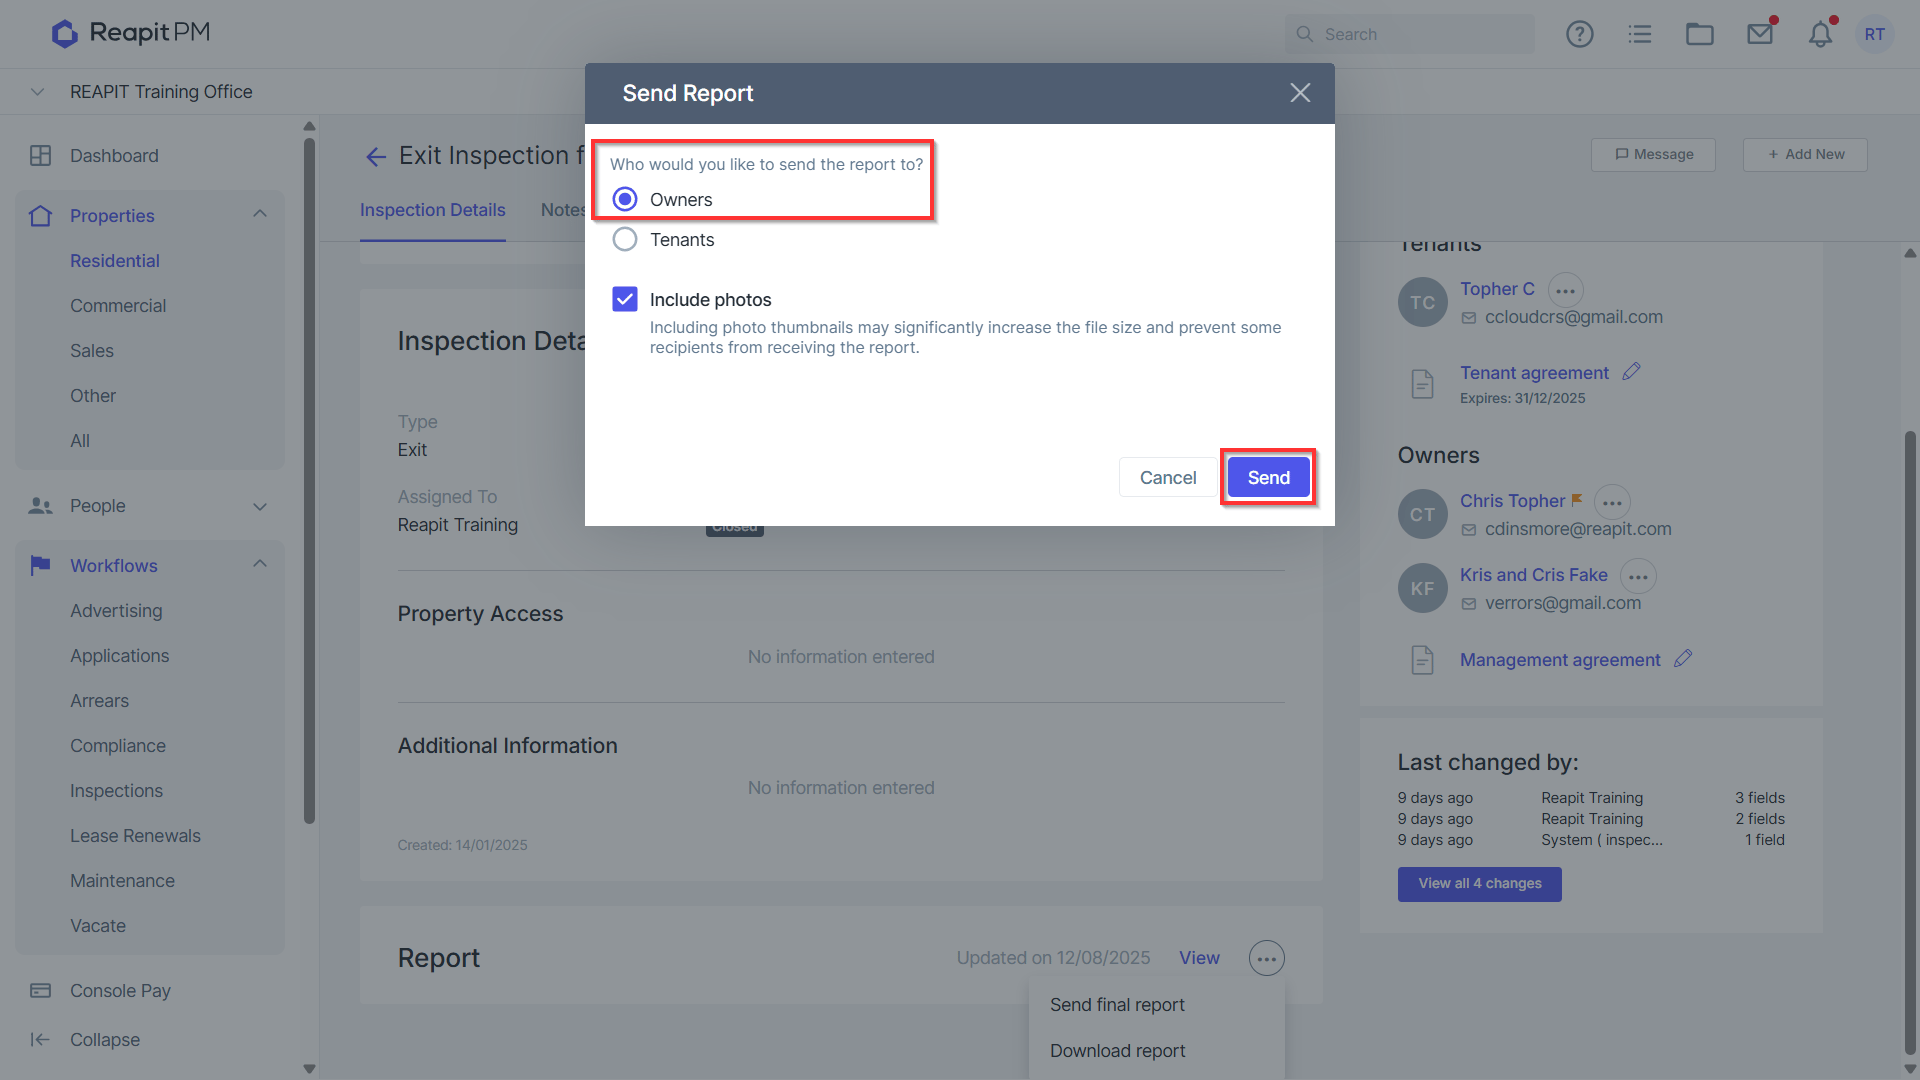
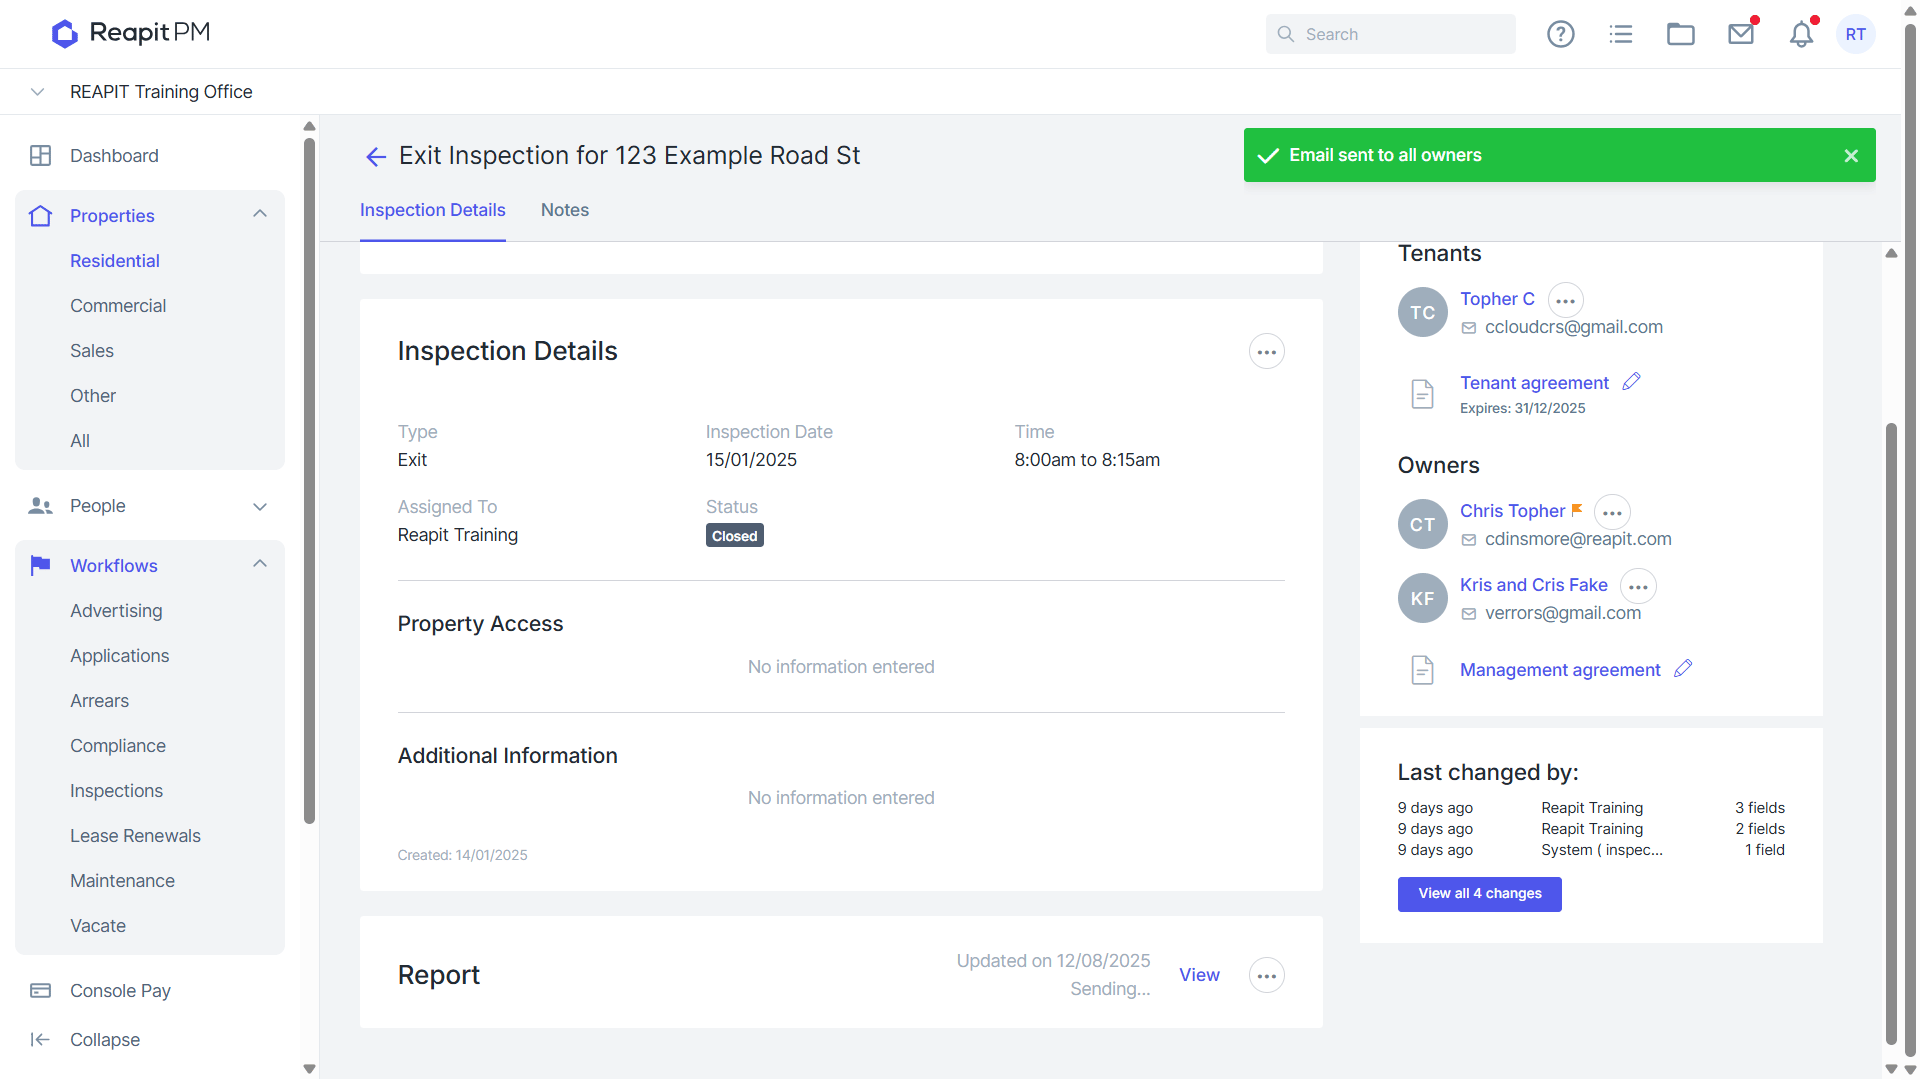
- Click Owners and then Send.
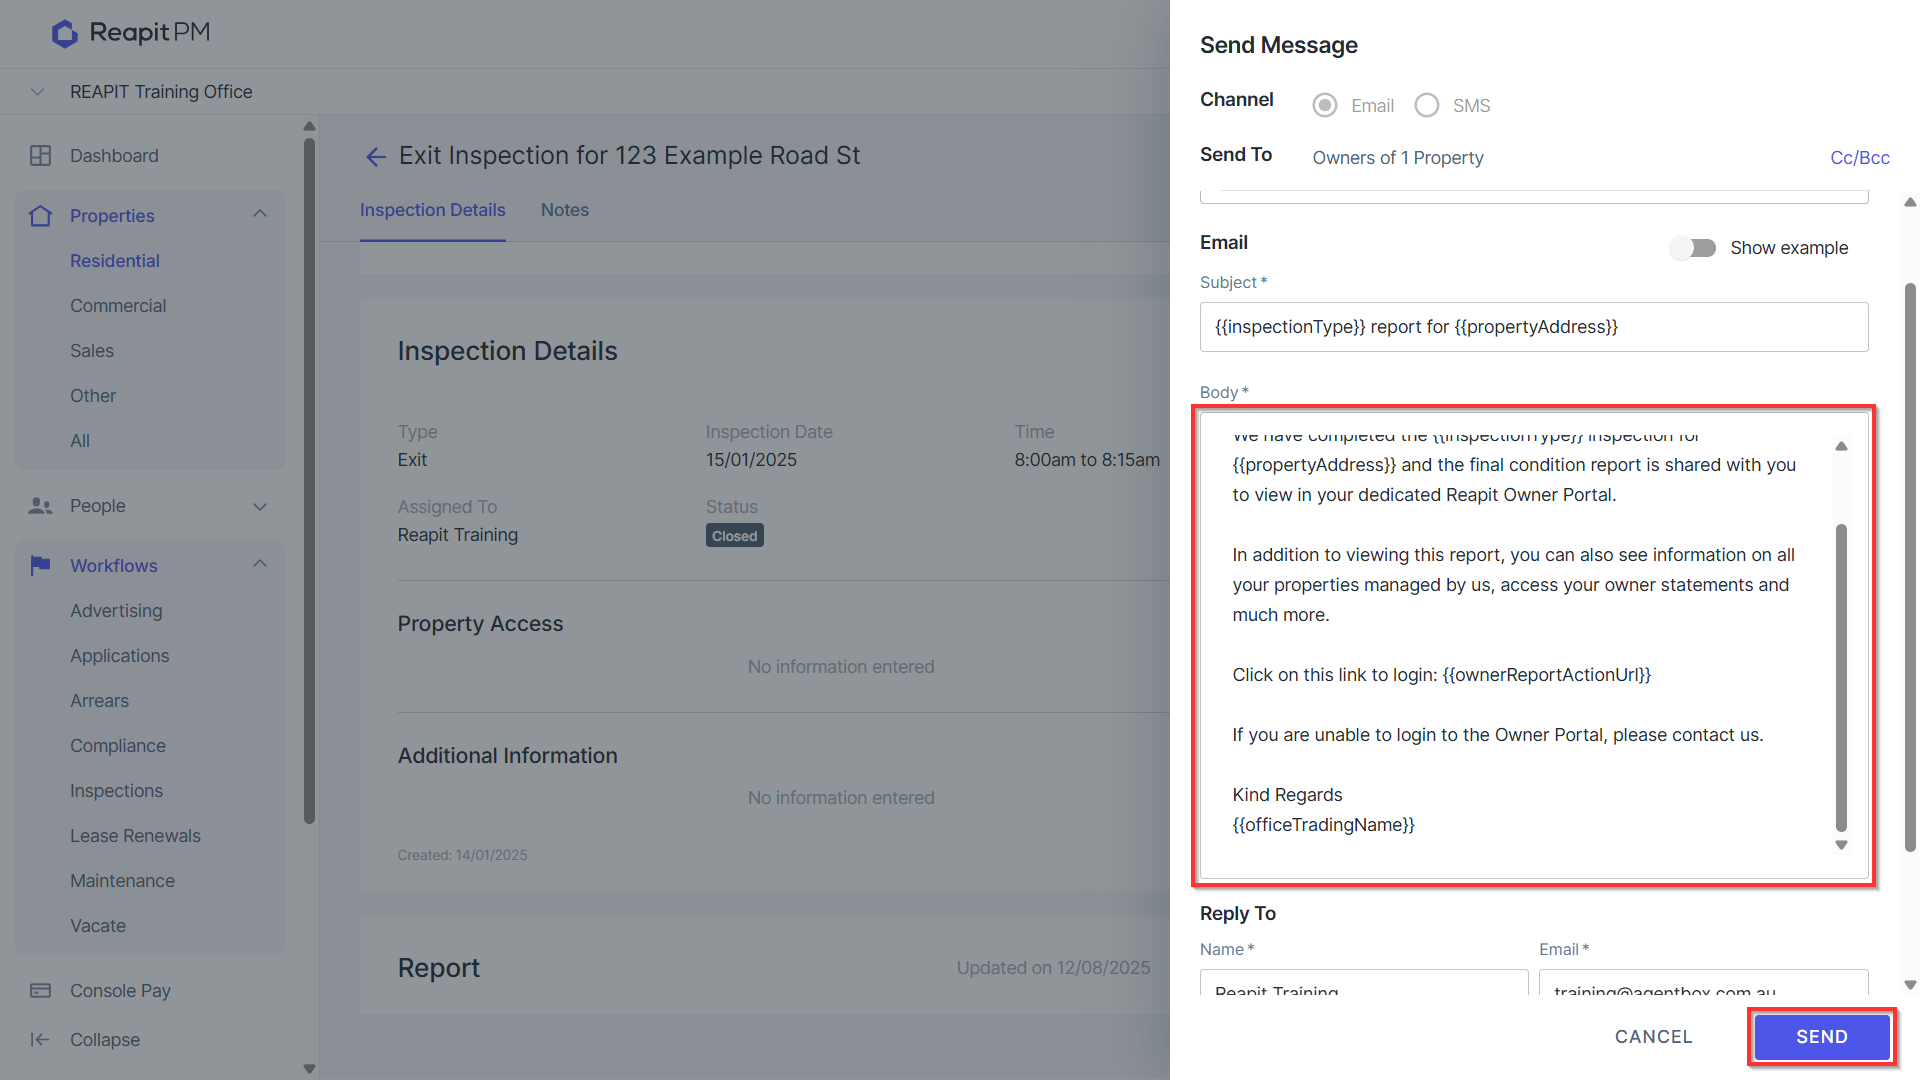
- Amend the body if required and click Send.
- A confirmation will appear at the top of your screen.
Note: When editing an Entry/Exit (since these share the same template) or a Routine Inspection Template, it's important to understand that if any historical inspections for the property were performed using this template, editing or deleting the template will affect those inspections if you need to regenerate copies of old report. Editing or deleting areas can result in the loss of comments and images from the original inspection. Once changes are made, this information cannot be restored. If changes have been made to the template and you require the original report with the original data, check if the inspection appears under the Property File > Files tab to see if there's a historic copy that exists with the original data. Alternatively, if the report was sent to the owner or tenant, navigate to the communication timeline, where the email sent will still display the original inspection report allowing you to download it. Image Limits for Inspection Reports To improve report processing times and reduce document failures, an image limit of 400 photos has been introduced for inspection reports.
1. Entry/Exit Reports
Include Photos option:
Disabled if there are 400 or more photos in the report.
Enabled if there are fewer than 400 photos.
2. Routine Reports
The Include Photos option is always available, regardless of the number of images.
3. Routine General Behaviour (All Reports)
Regardless of the number of images, all reports include a link to download a ZIP file containing full-sized images.
This method allows tenants and property managers to view or print full-sized images if needed.