'%20d='M0%208a8%208%200%200%201%208-8h24a8%208%200%200%201%208%208v24a8%208%200%200%201-8%208H8a8%208%200%200%201-8-8V8Z'/%3e%3cpath%20fill='%23fff'%20d='M8.375%2013v14L20.5%2034l12.124-7v-7.737l-1.687-.975-2.806-1.62-1.082-.624v4.83l-.002%204.83H13.95V16.07l3.275-1.89%202.192-1.265%201.082-.625%203.275%201.877%202.192%201.256%201.083.62V9.782L20.5%206%208.376%2013Z'/%3e%3cdefs%3e%3clinearGradient%20id='reapit-pm__a'%20x1='20.702'%20x2='20.702'%20y1='.351'%20y2='31.228'%20gradientUnits='userSpaceOnUse'%3e%3cstop%20stop-color='%235573FD'/%3e%3cstop%20offset='.575'%20stop-color='%234E56EA'/%3e%3c/linearGradient%3e%3c/defs%3e%3c/svg%3e)
Creating and Managing Sale/Sales agreements
This article will guide you through the steps on creating and managing Sales agreements in Reapit PM. The processes in this article include: How to Create a Sale Agreement How to Receipt Seller Expenses How to Create and Process Seller Expenses How to Add Files to Sale Agreements
Overview
Creating and Managing Sale/Sales Agreements
This article will guide you through the steps on creating and managing Sales agreements in Reapit PM.
The processes in this article include:
- How to Create a Sale Agreement
- How to Receipt Seller Expenses
- How to Create and Process Seller Expenses
- How to Add Files to Sale Agreements
Note: this option requires the Reapit PM Sales Extension add-on located in the Marketplace.
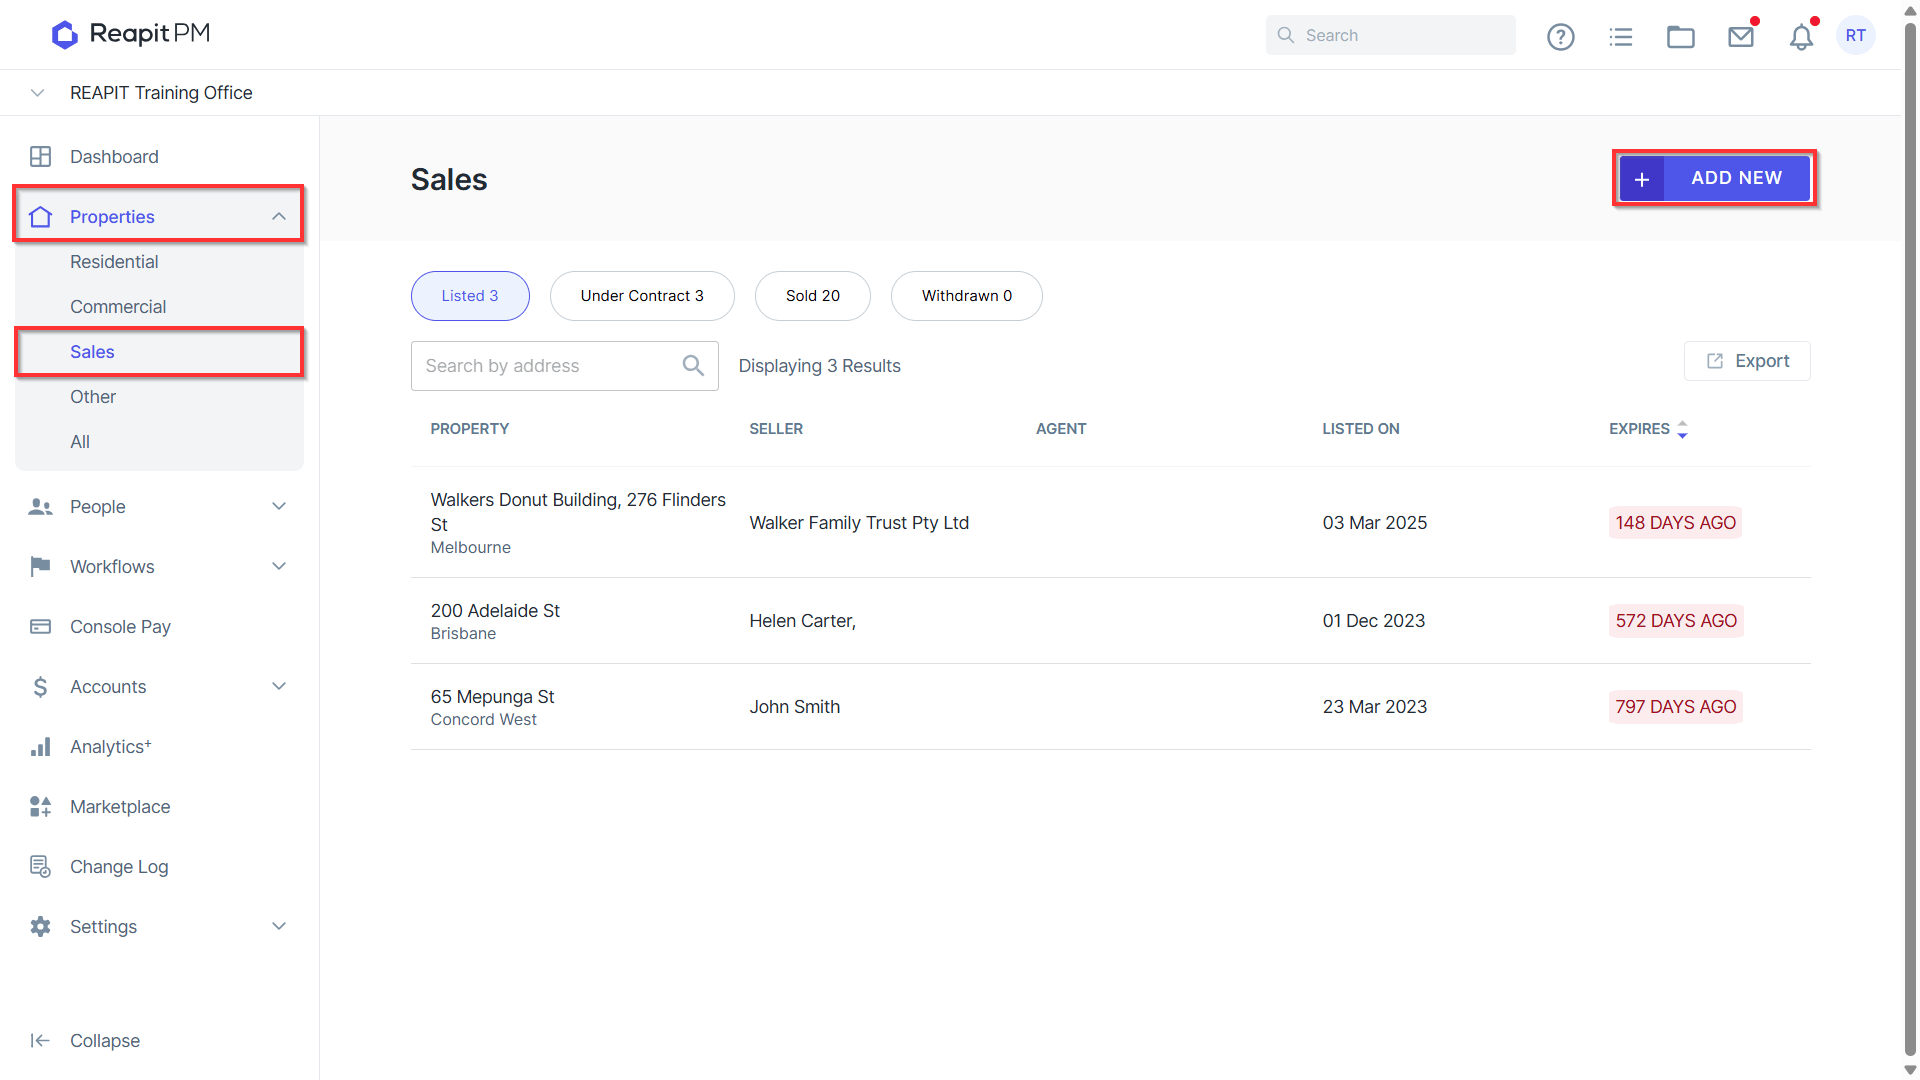
- Navigate to the Properties > Sales > select Add New on the top right of the screen.
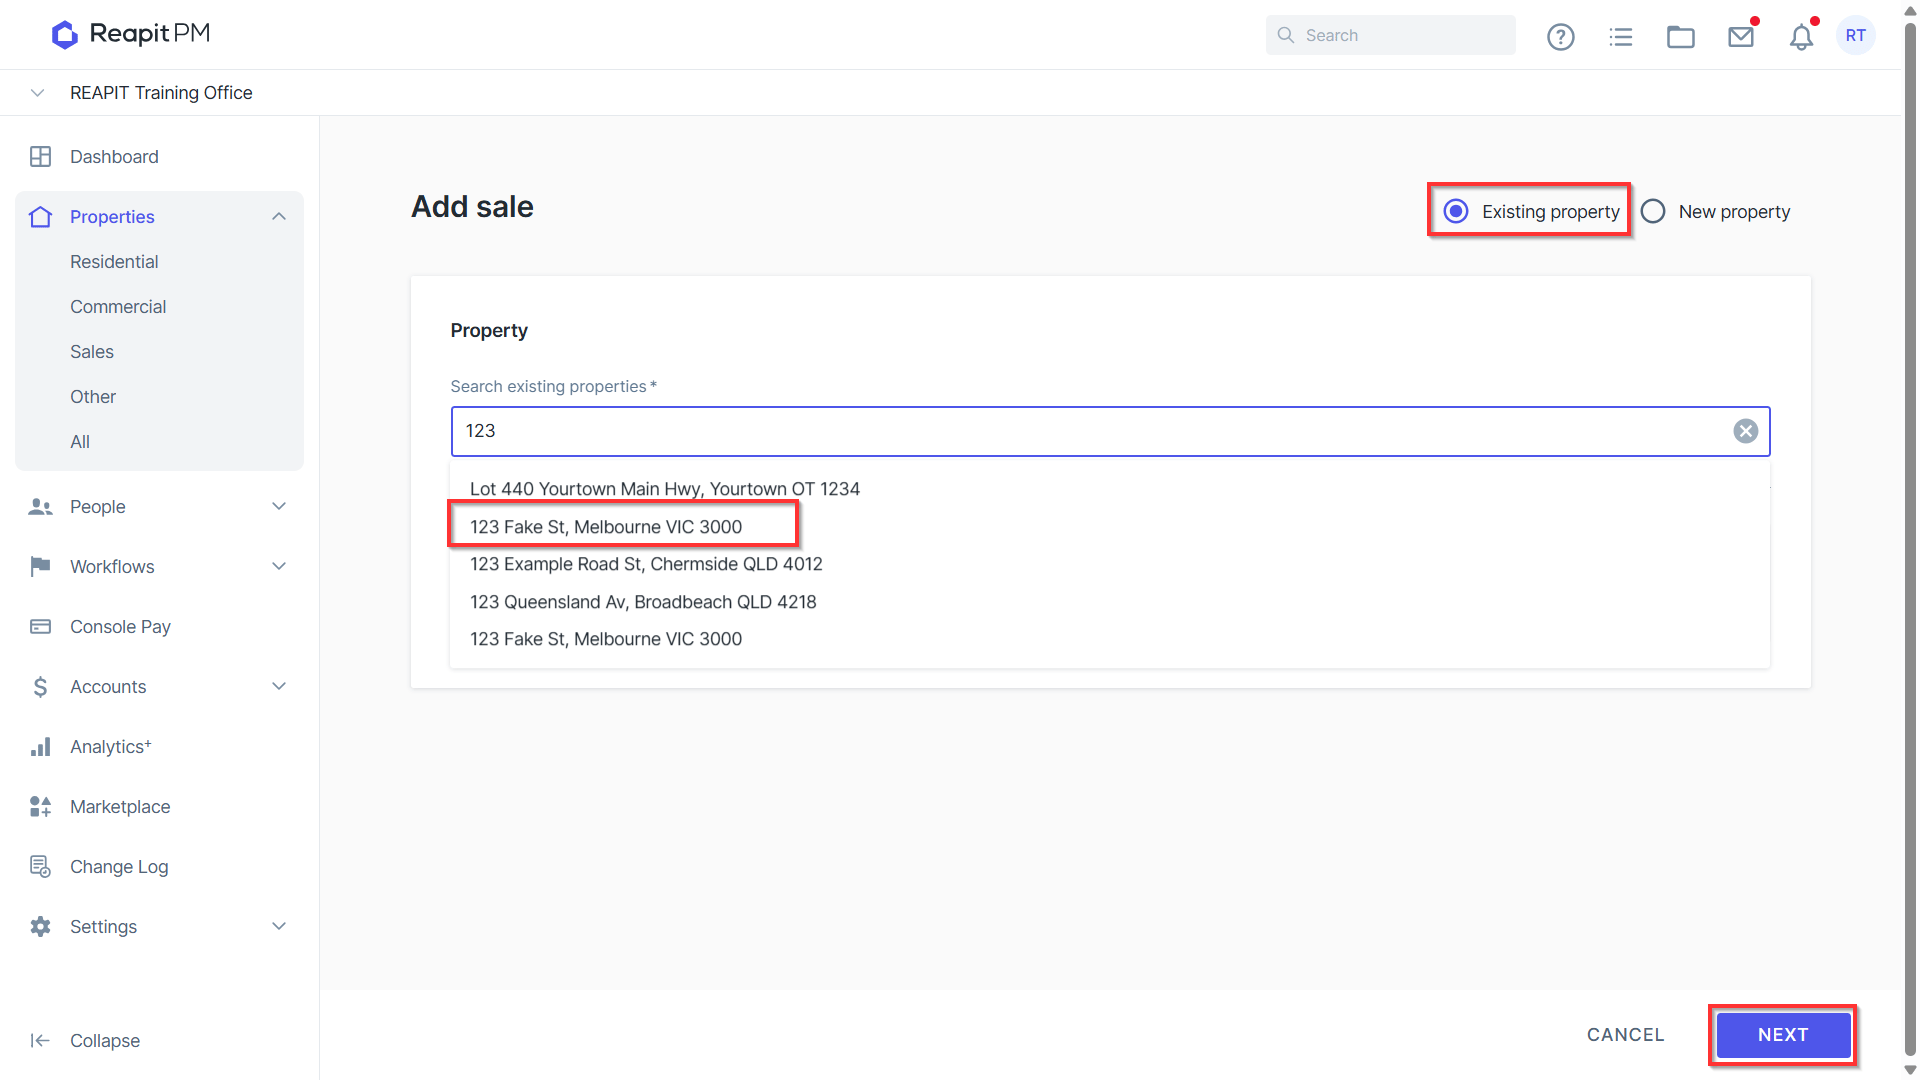
- Select “Existing property” on the top right of the page > Use the search bar to locate the Property if it already exists in the system. Select the Property and Press next to continue
If the Property does not exist in the system we will need to select New Property. Fill in the Property Use, Type and Reference. Look-up property address will provide suggestions based on Google Search engine results.
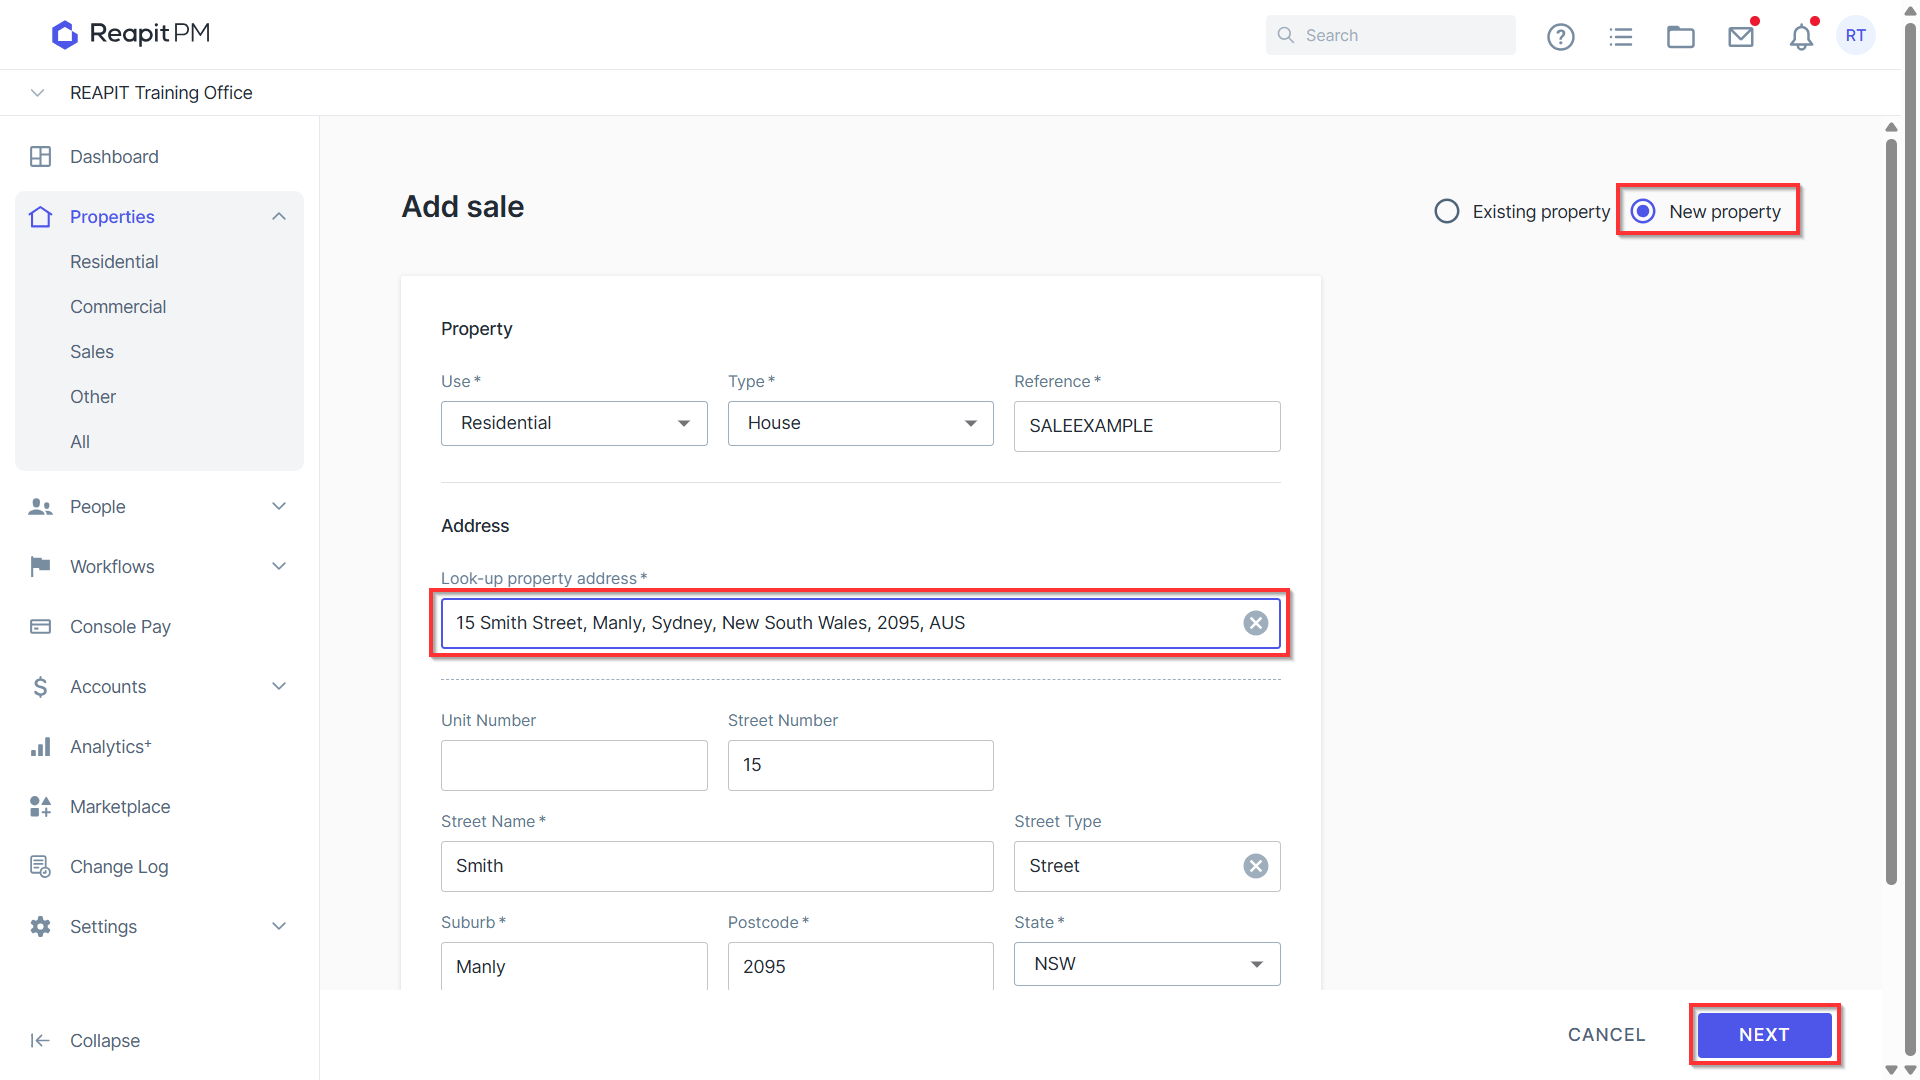
Select the Property from the search results > The information will populate in the boxes below > Fill in any additional information you might have and press Next.
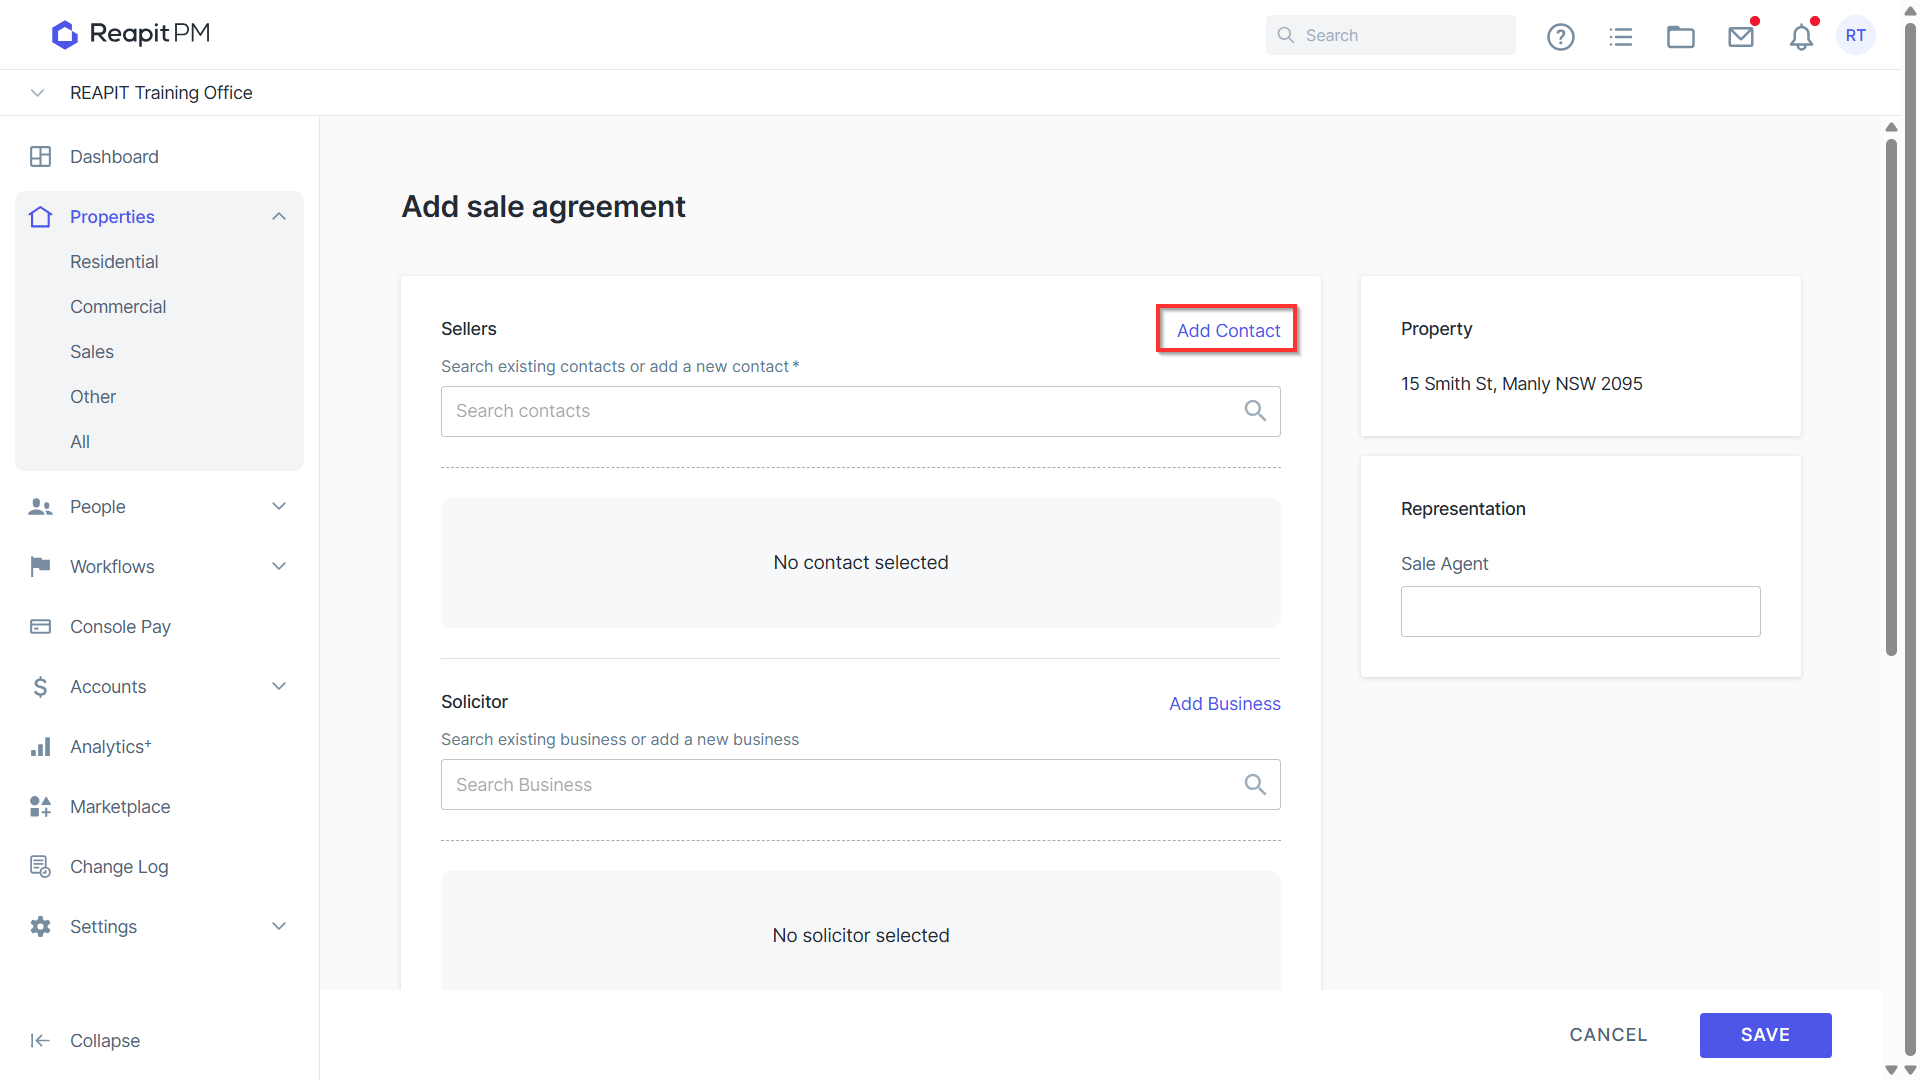
- Use the Add Contact button to create a new Contact for the sale agreement
Select if this is an Individual or Business > Fill in the Name > Phone Type > Email address and Save.
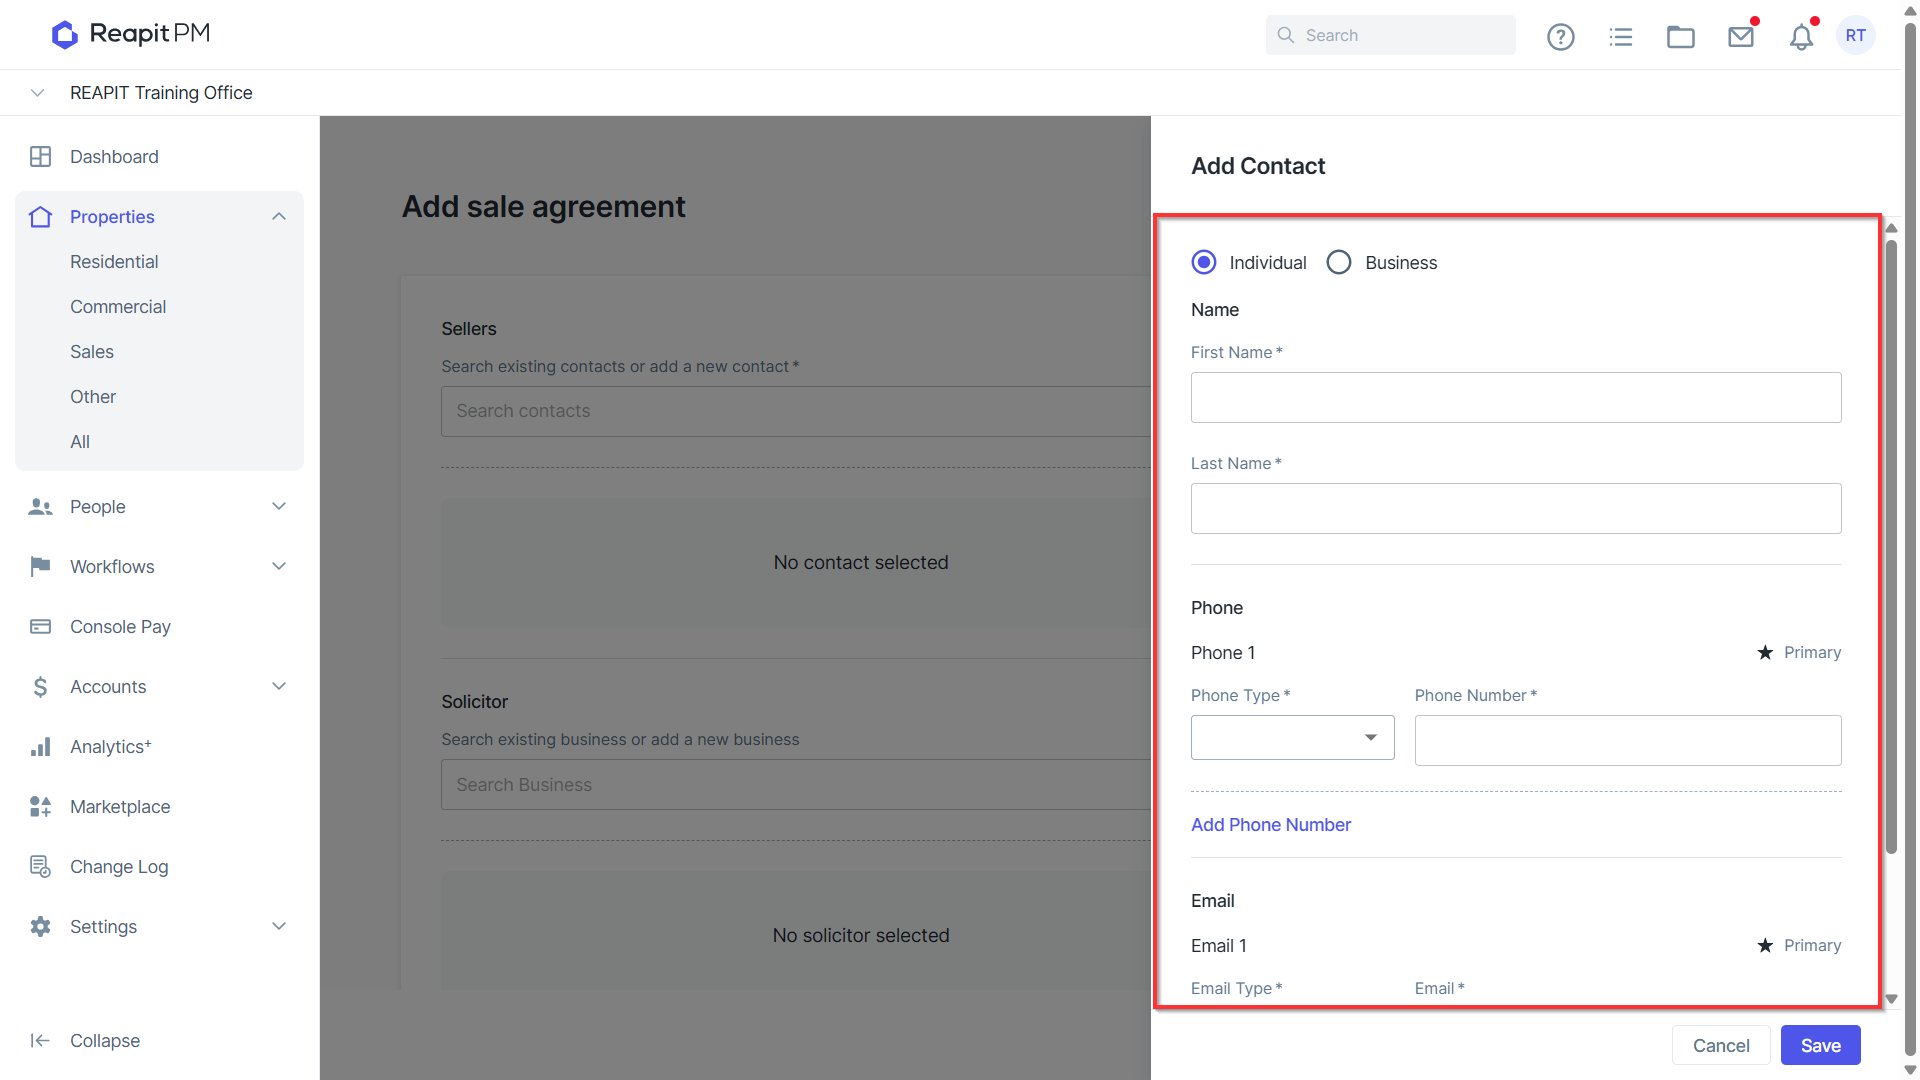
You can add additional email addresses or contact numbers if required. You will also have the option to add this information later through the Contact card directly.
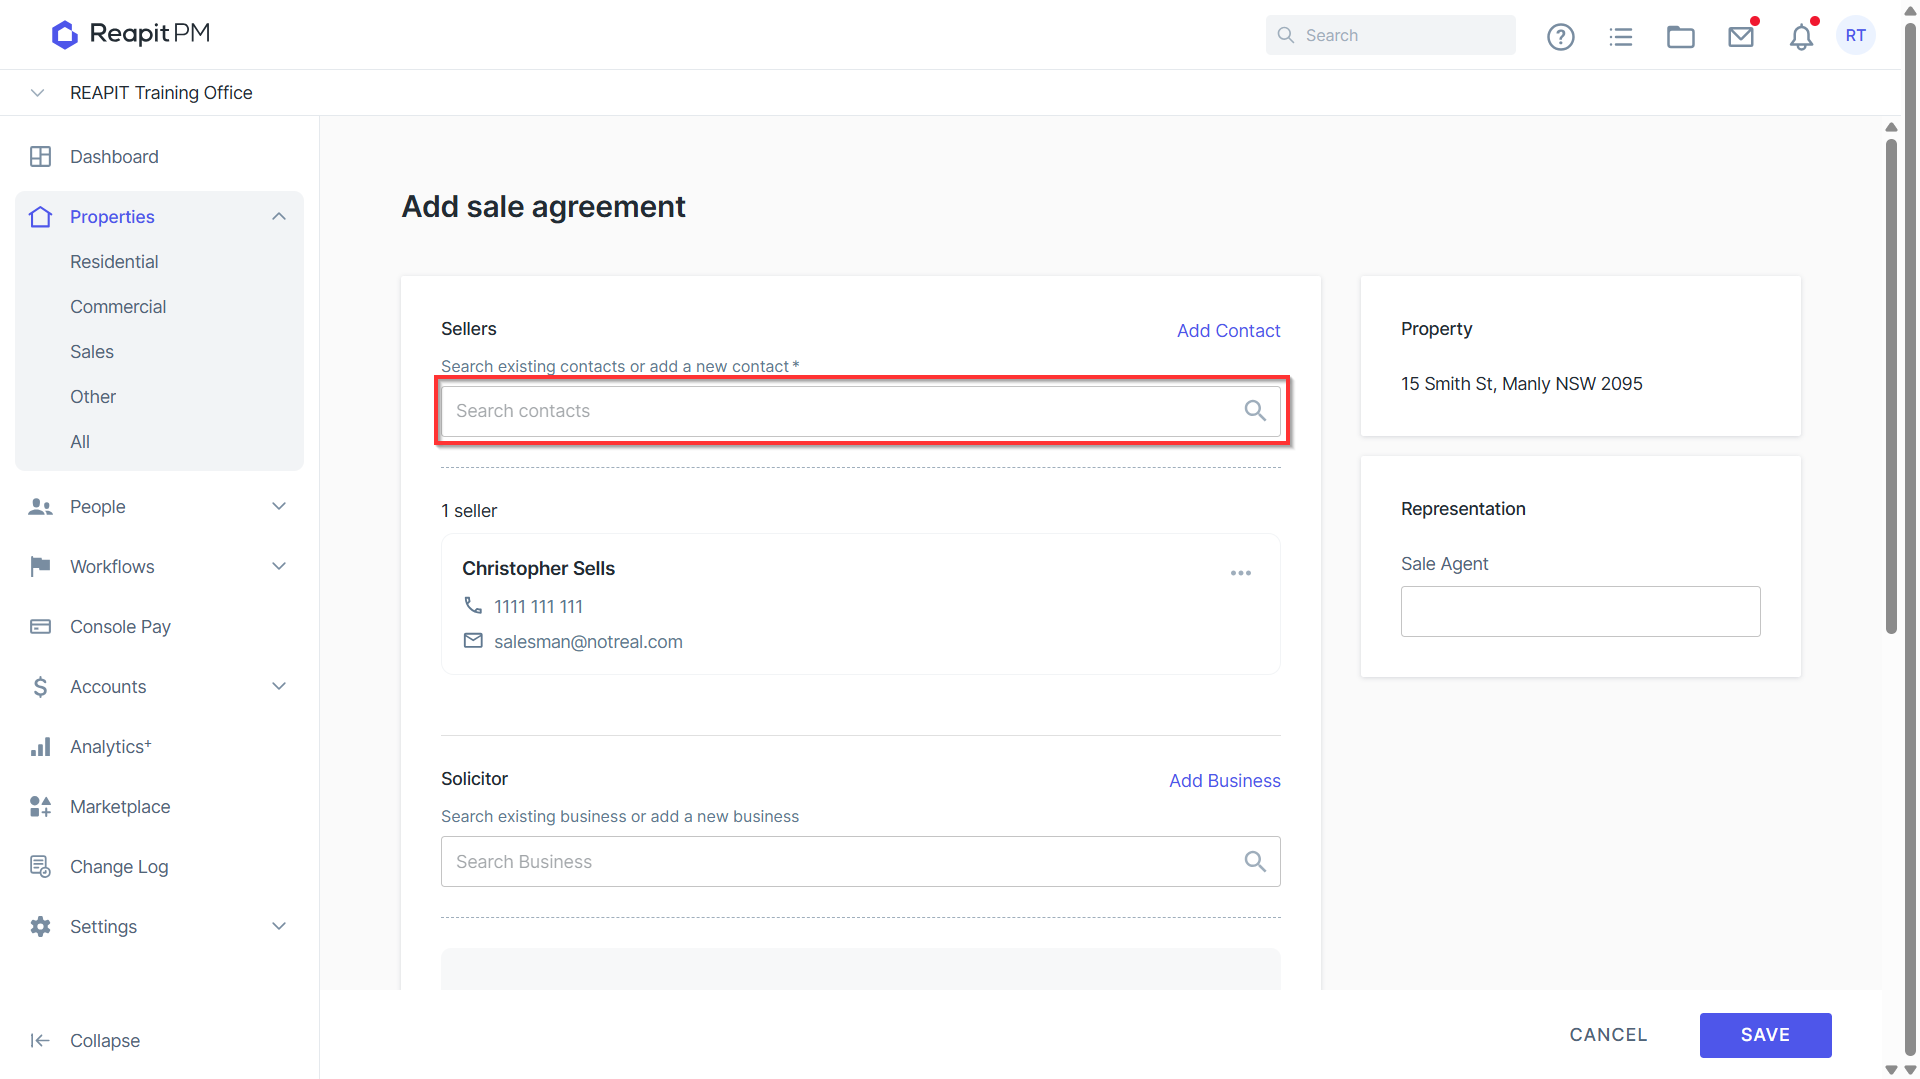
If the Seller already exists as a Contact in the system, you can use Search existing to locate and select the contact.
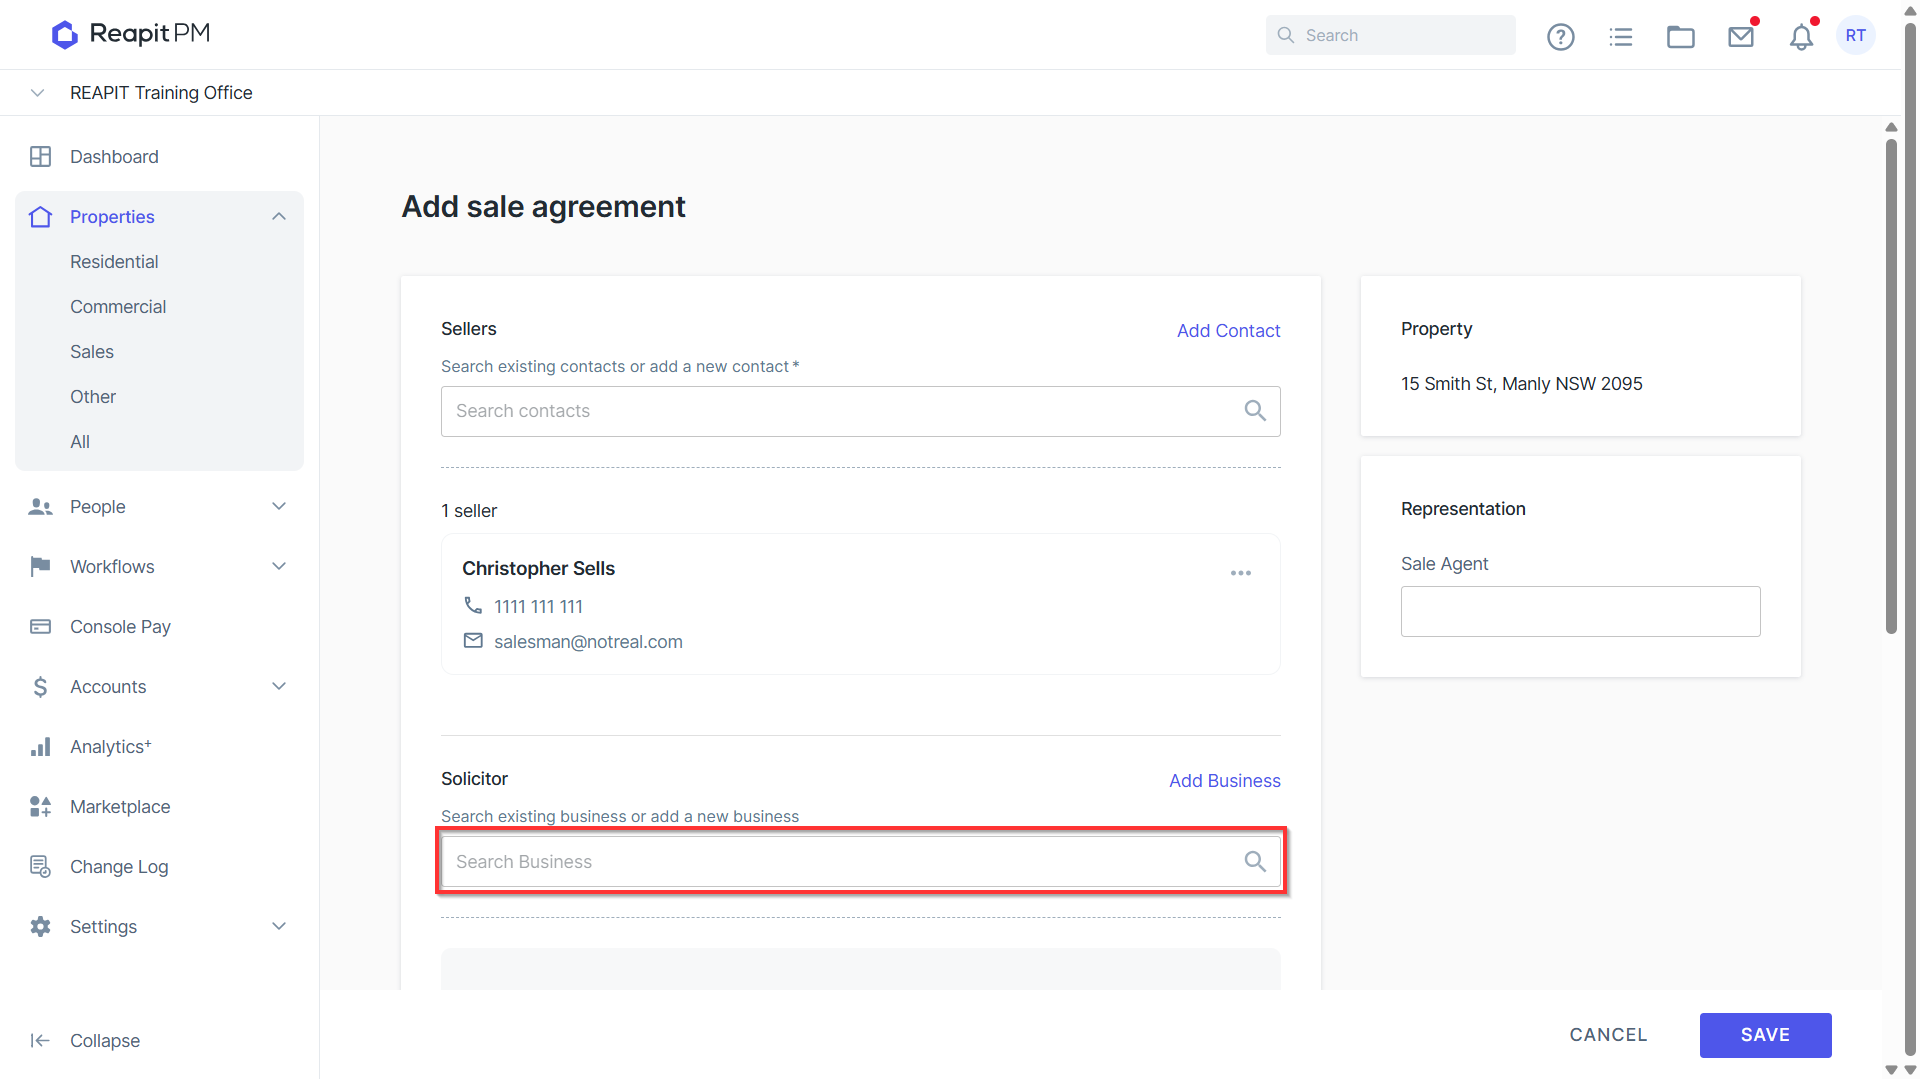
- Use the search existing business or add new business to locate or create the Solicitor to appear on the Sale Agreement. Fill out the Business Name > First & Last name for the point of contact for the business > Contact details and Save.
- Complete the Agreement details. Seller Contract Name and Listed date are the required fields but you can also provide information for Type of Sale > Expiry date > Authorised Spend > Listed Price.
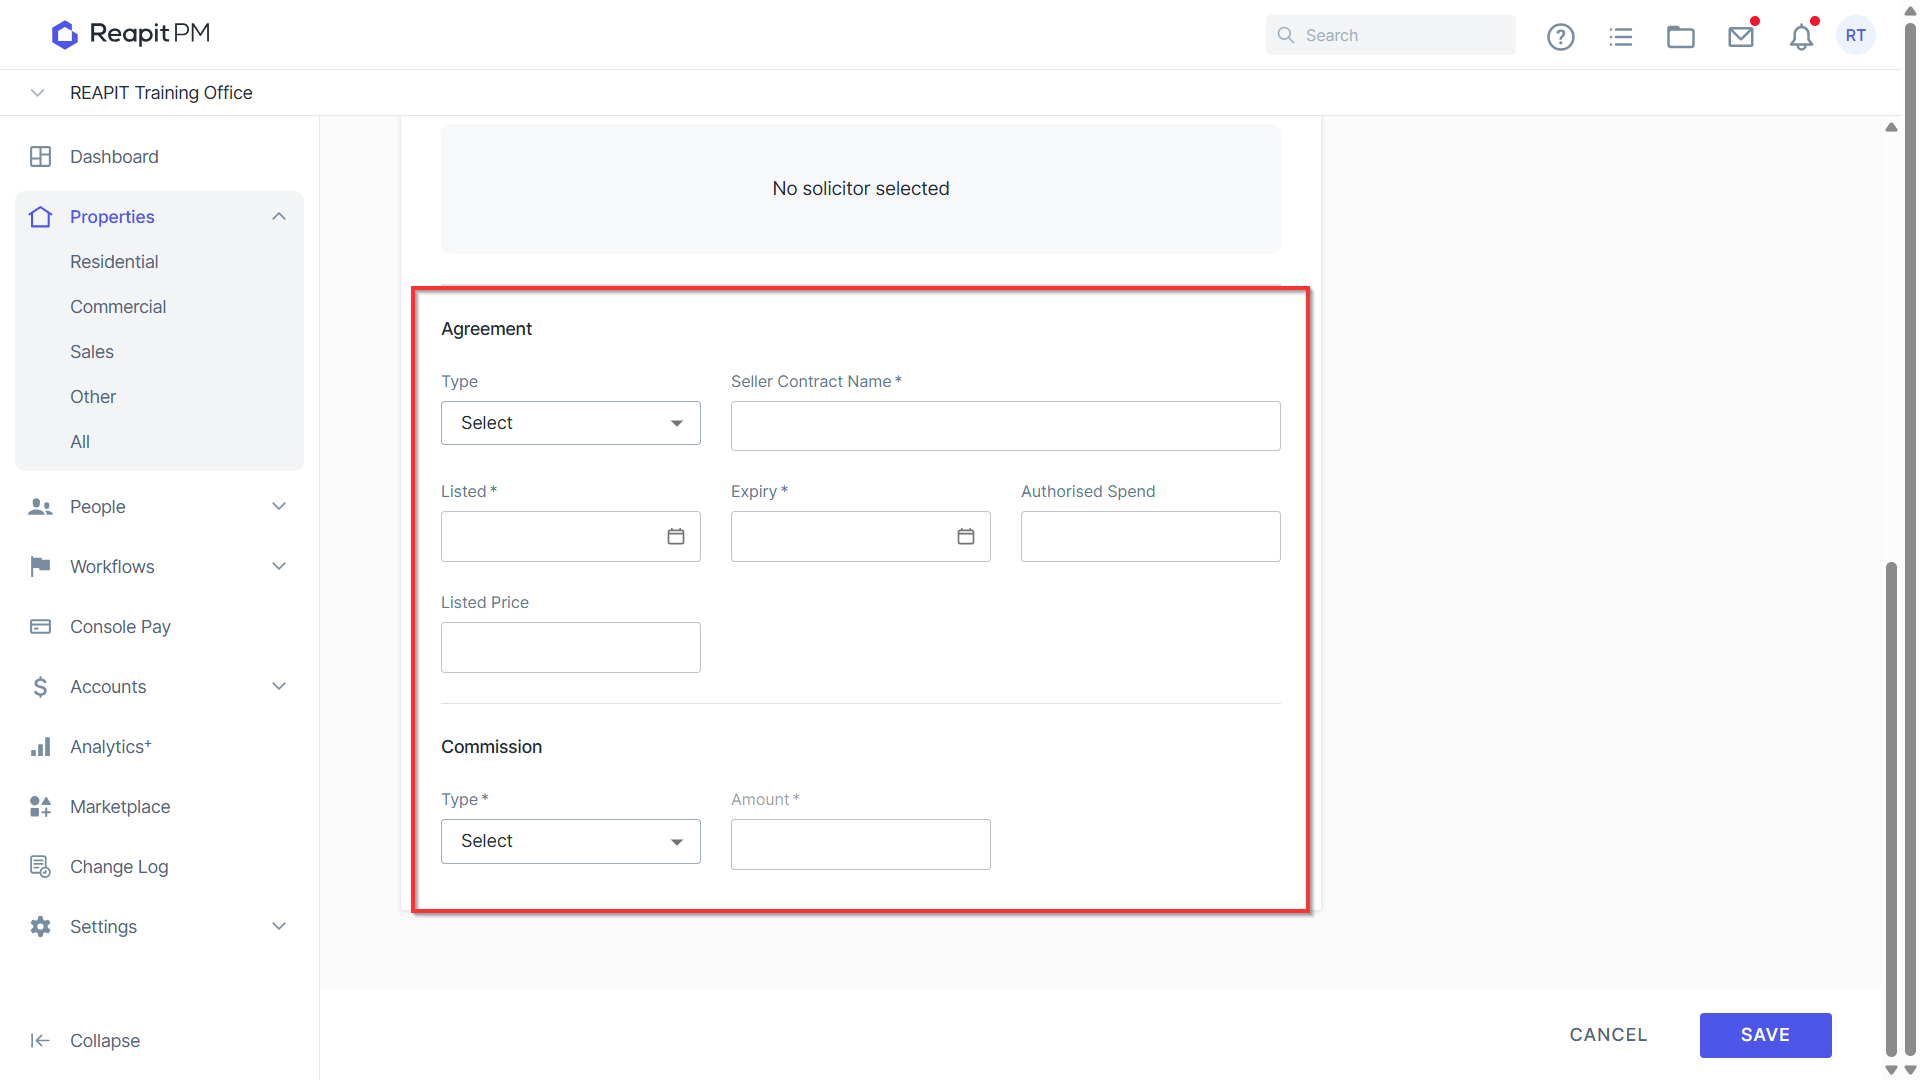
Select the Commission Type. You will have the option to select Fixed or Percentage > Fill in the amount for the Commission and press Save.
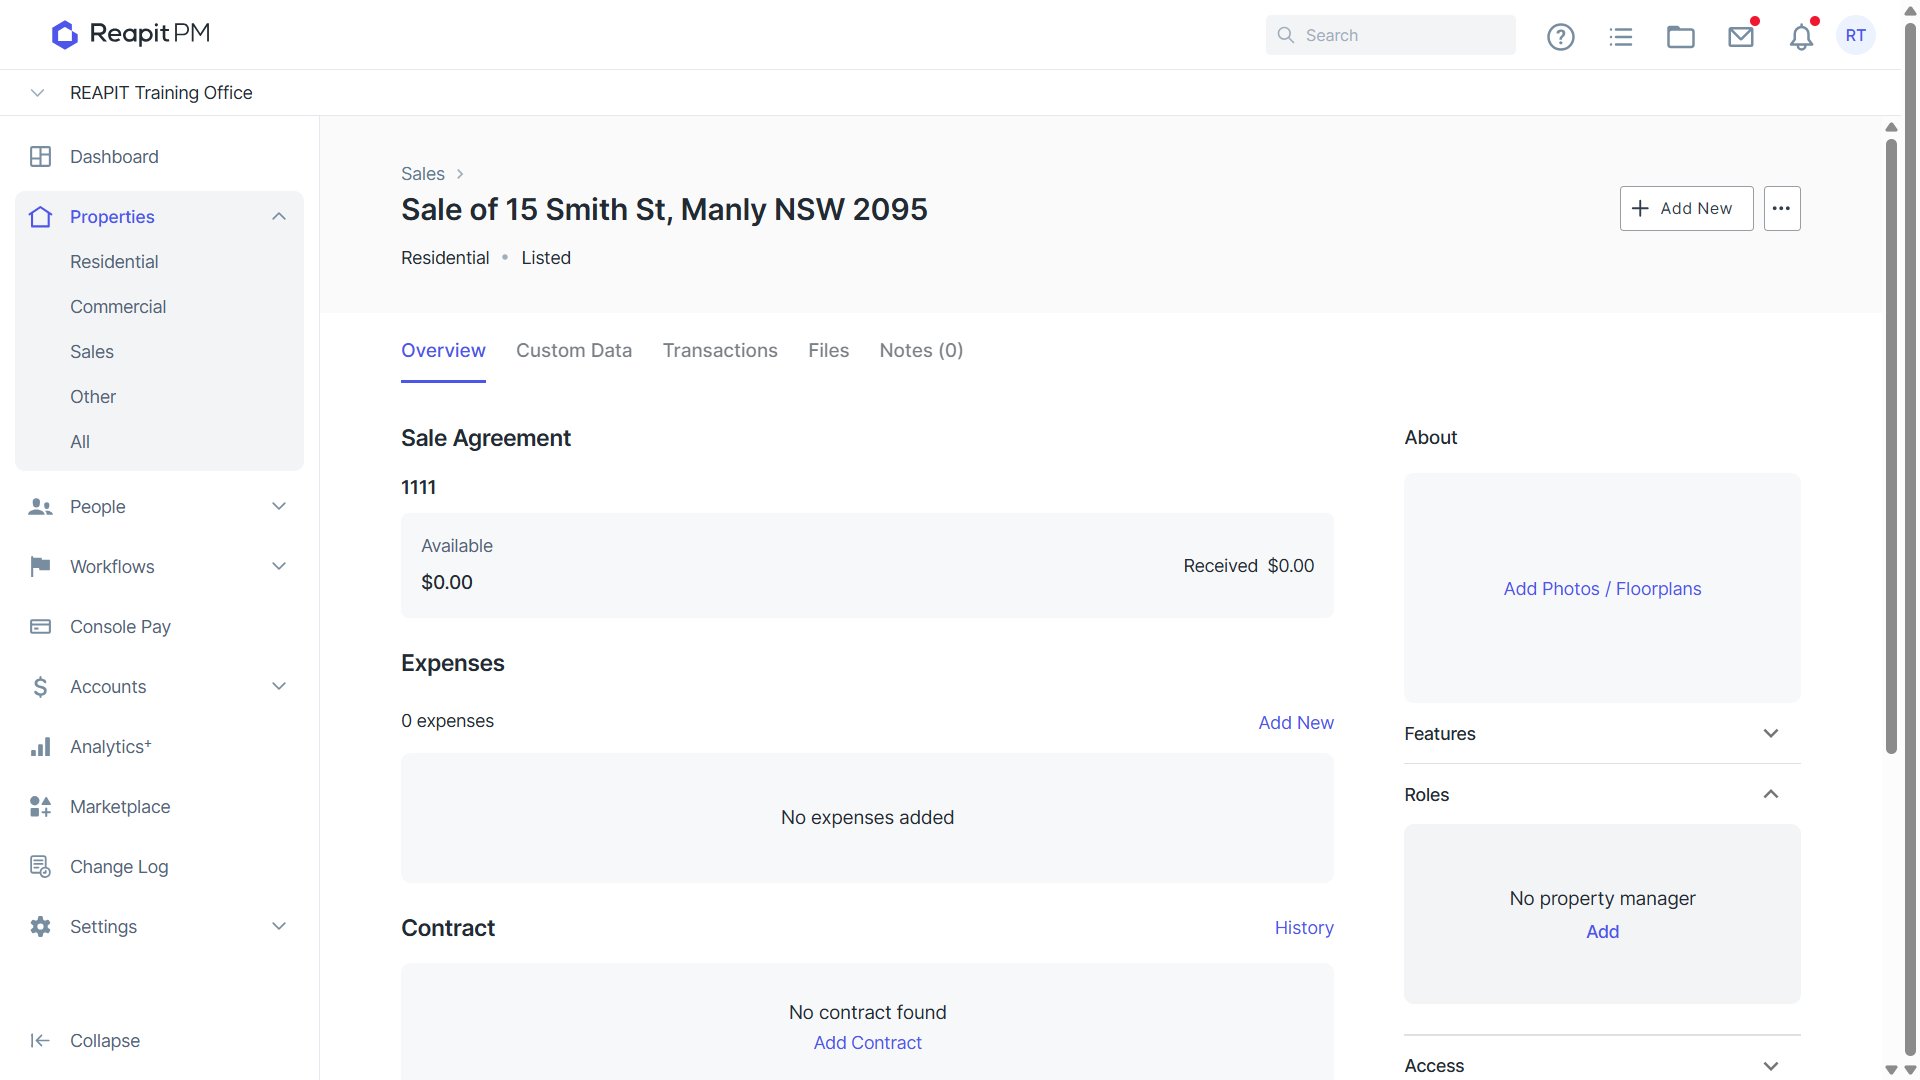
The Sale Agreement is now Created and under the status “Listed”
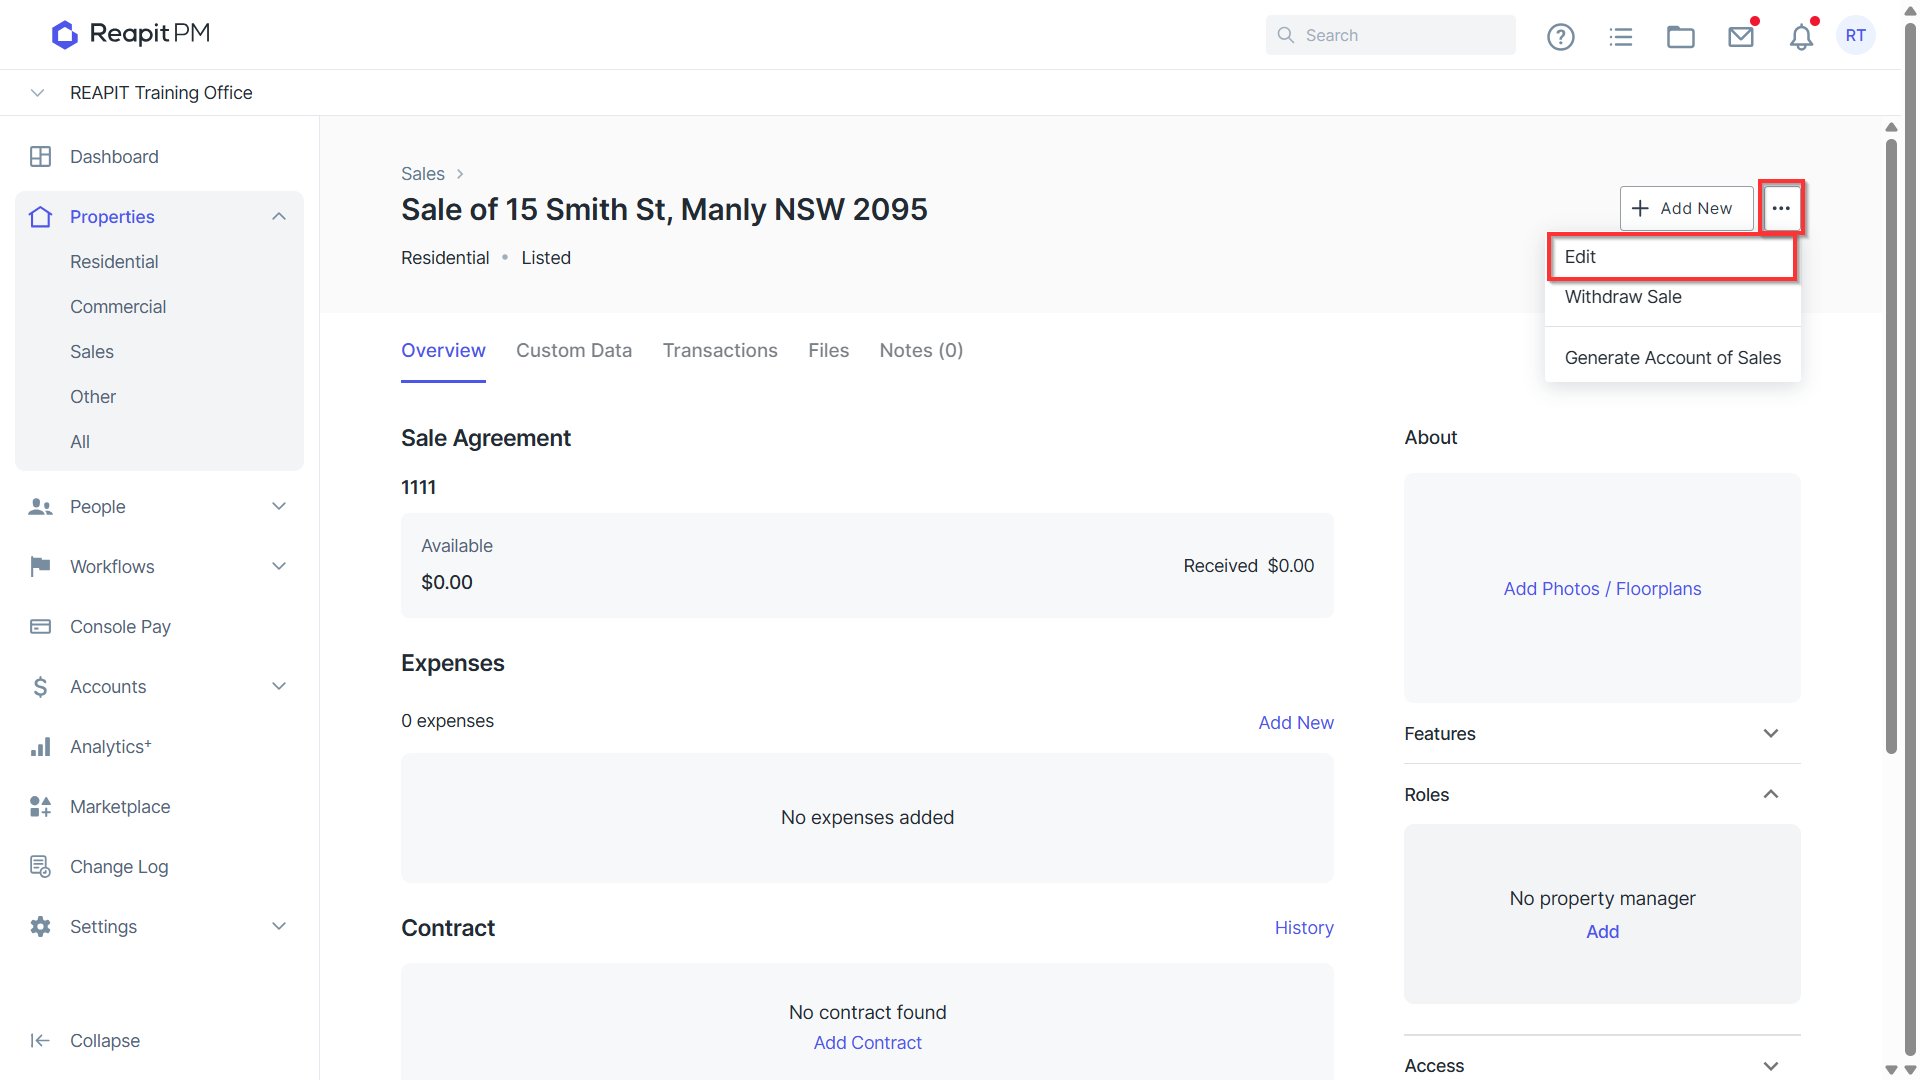
If any changes to the information used to create the Sale Agreement, navigate to 3-dots on the top right of the Sale Agreement and click Edit.
Receipting Seller Expenses
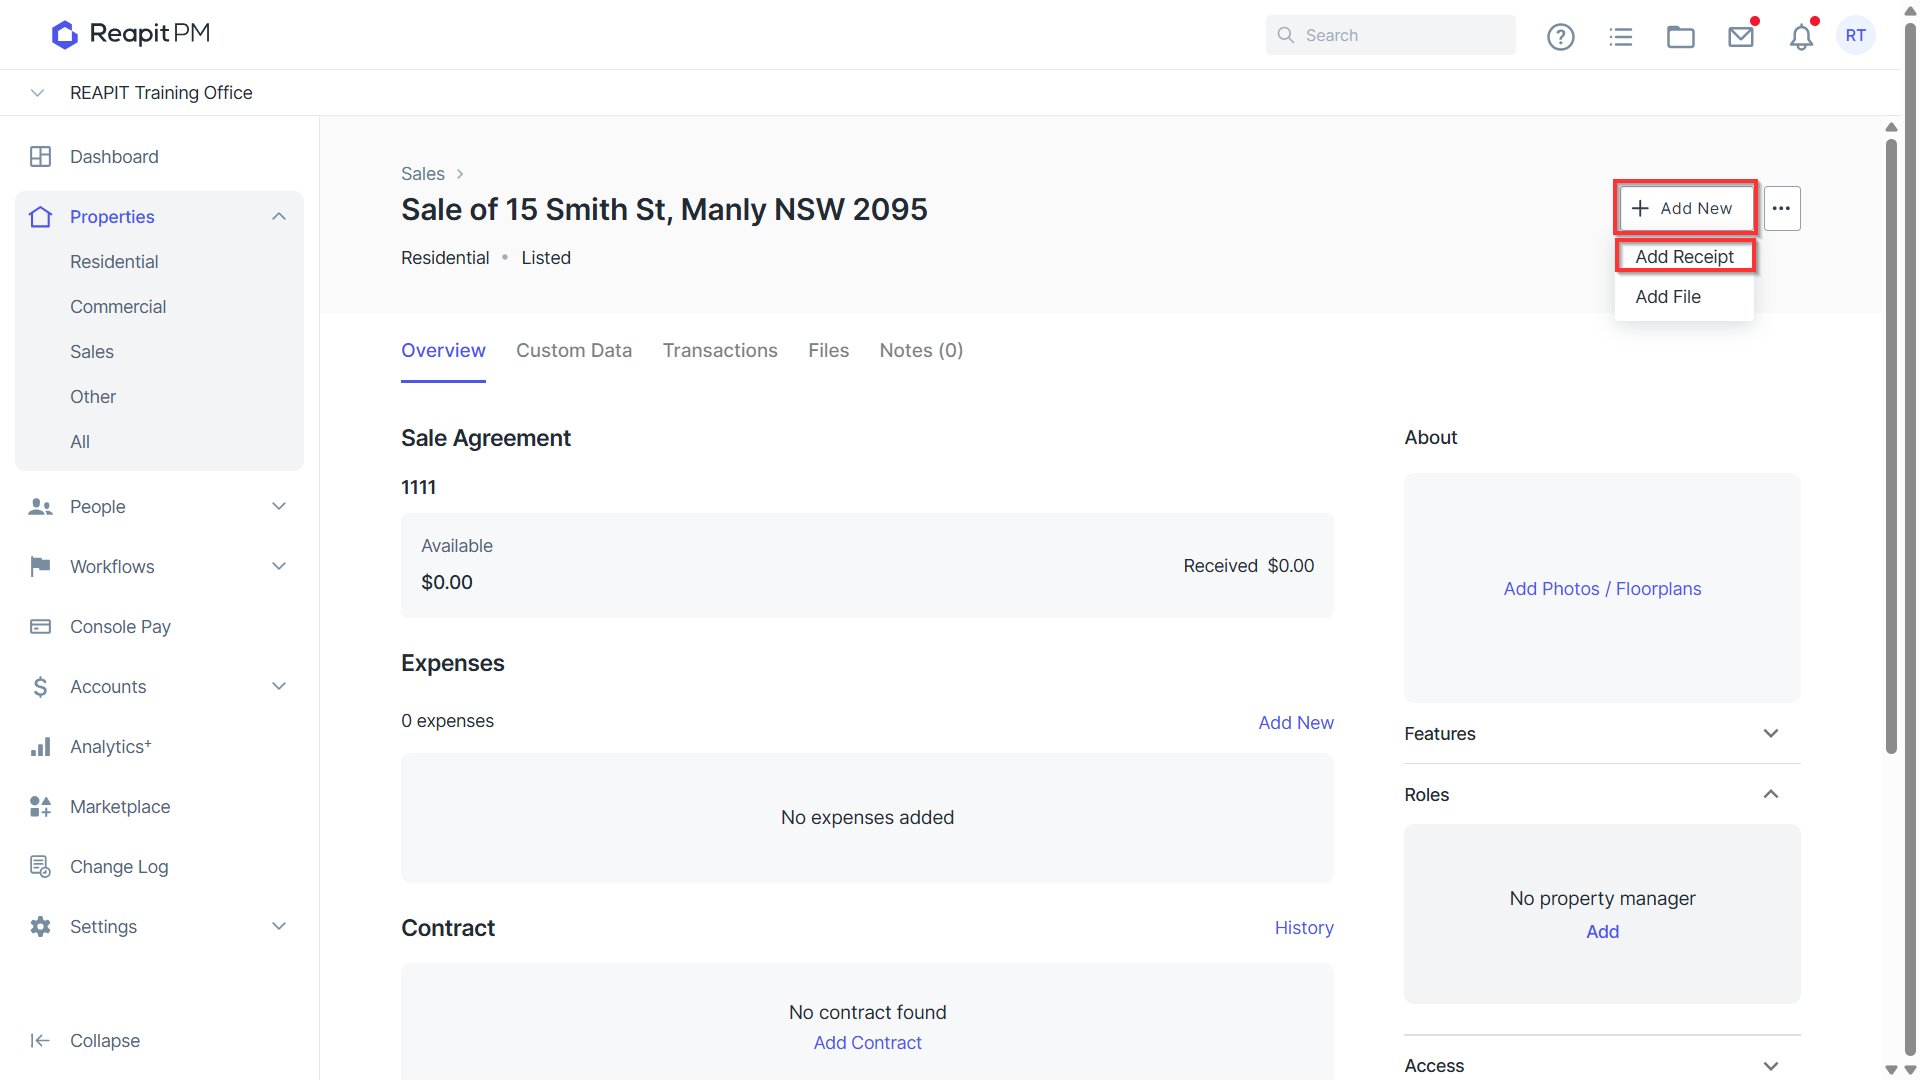
- If the seller deposits money in to the trust account to pay for expenses, you can receipt by selecting Add New > Add Receipt.
- Confirm the Type is set to Seller > Received Date for the balance > Description for the Sale receipt > Balance received and the Method of the balance > Press Receipt.
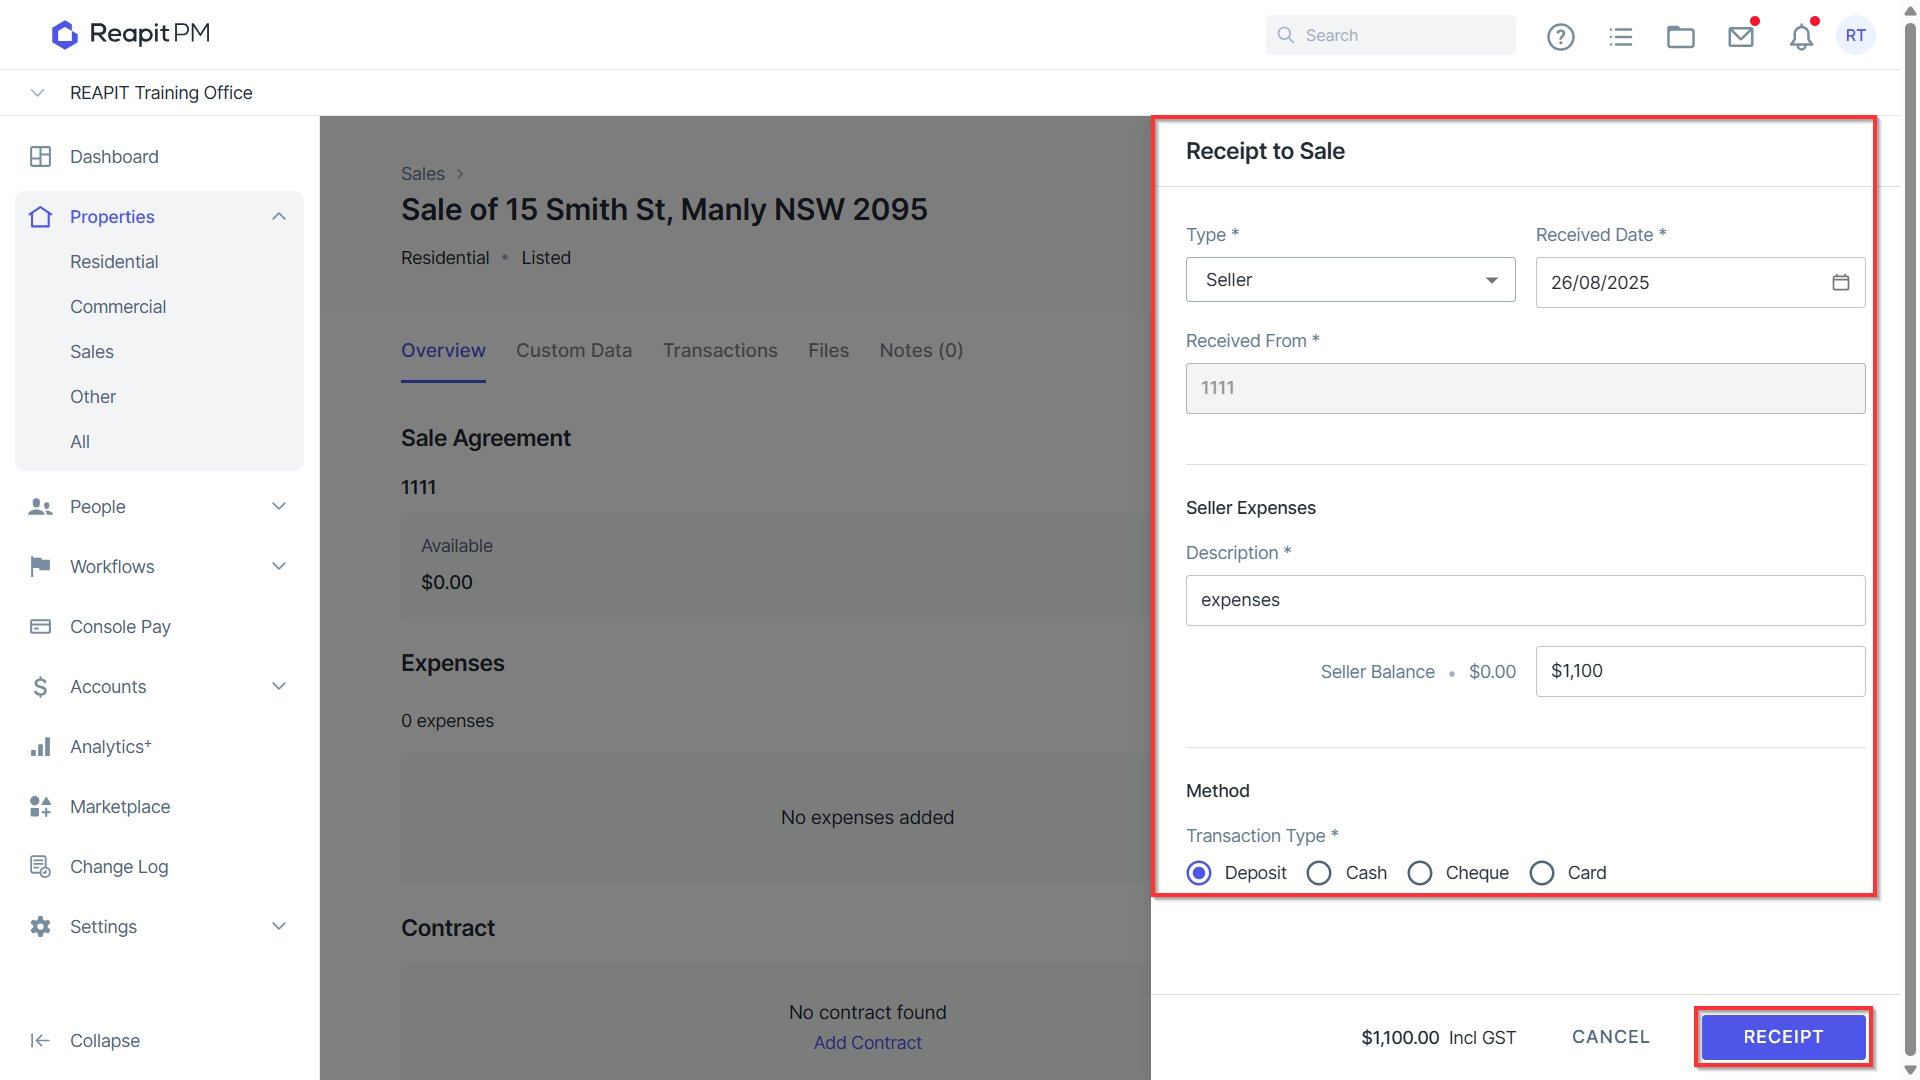
- The balance available will now appear under the Sale Agreement name.
Creating and Paying Seller Expenses
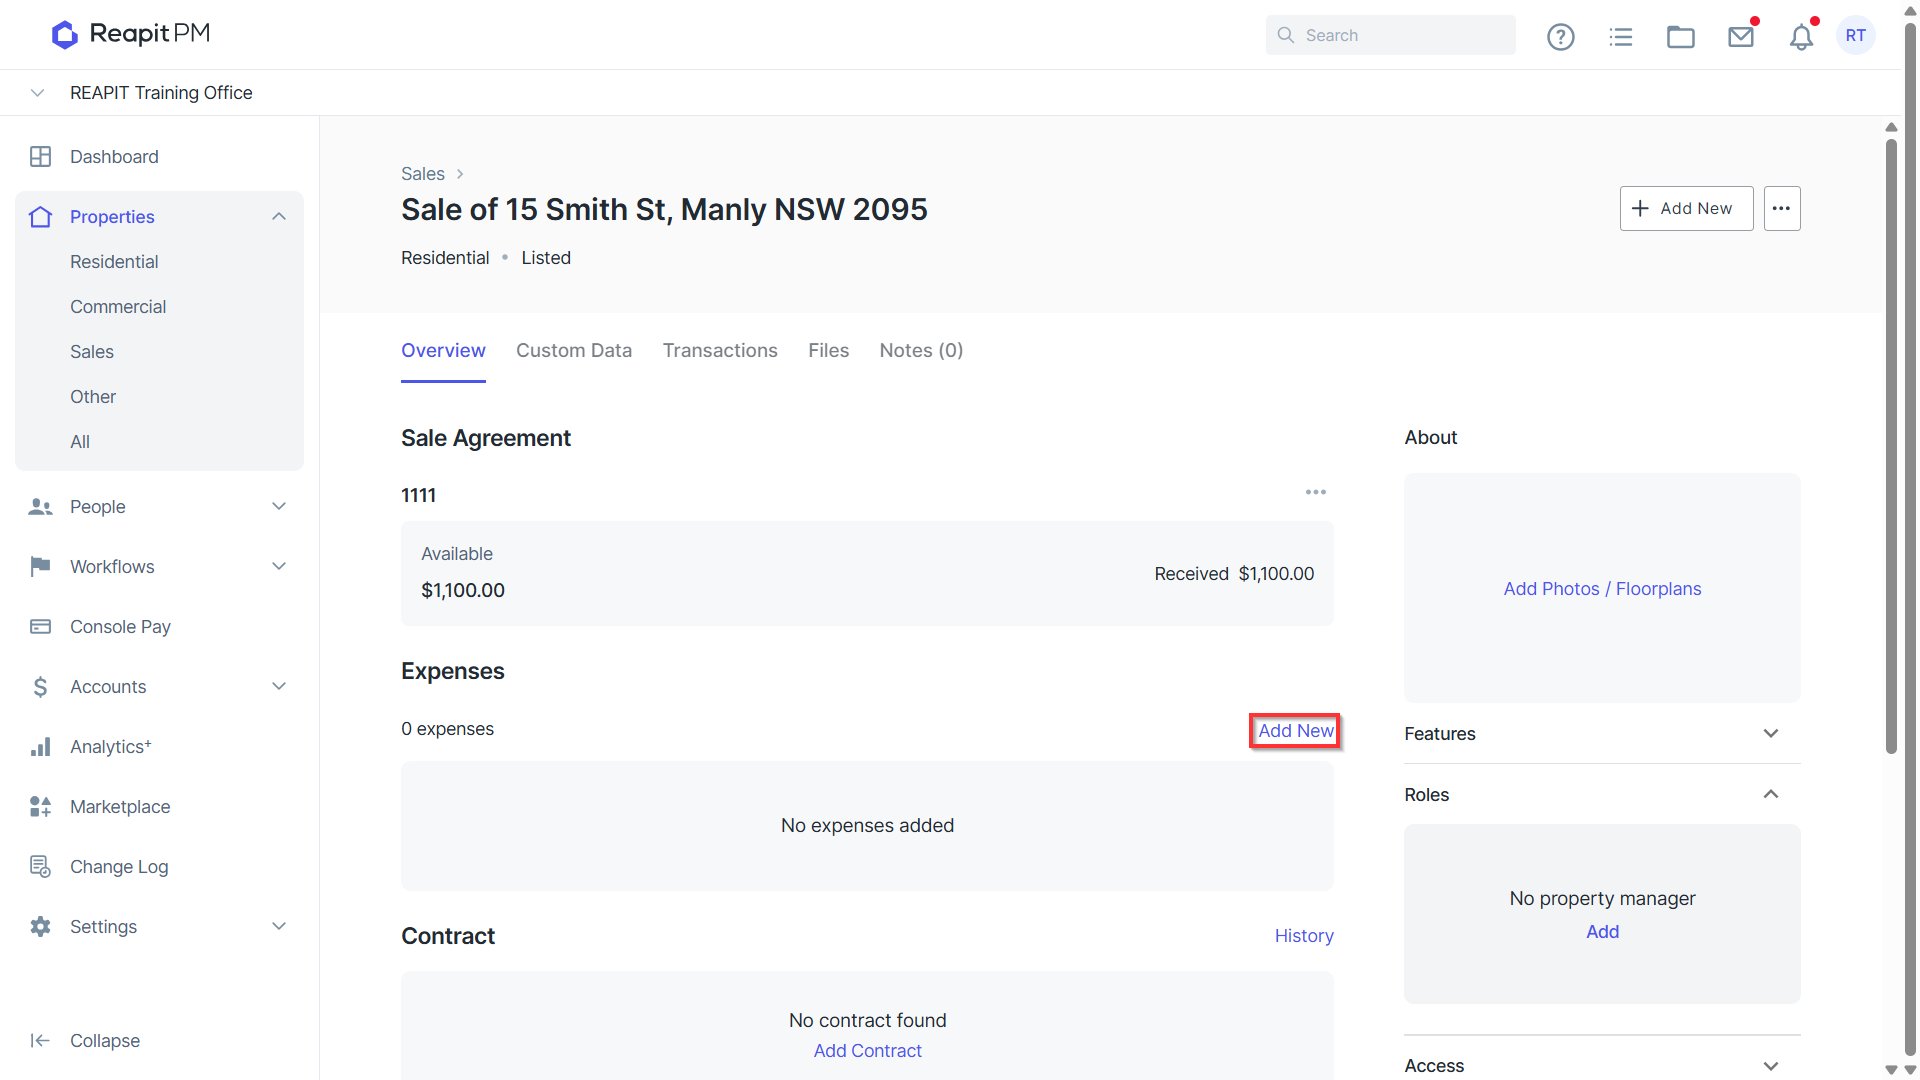
- Adding the Seller Expenses can be done from the Overview of the Sale agreement. Click Add New to bring up the Expense creation screen.
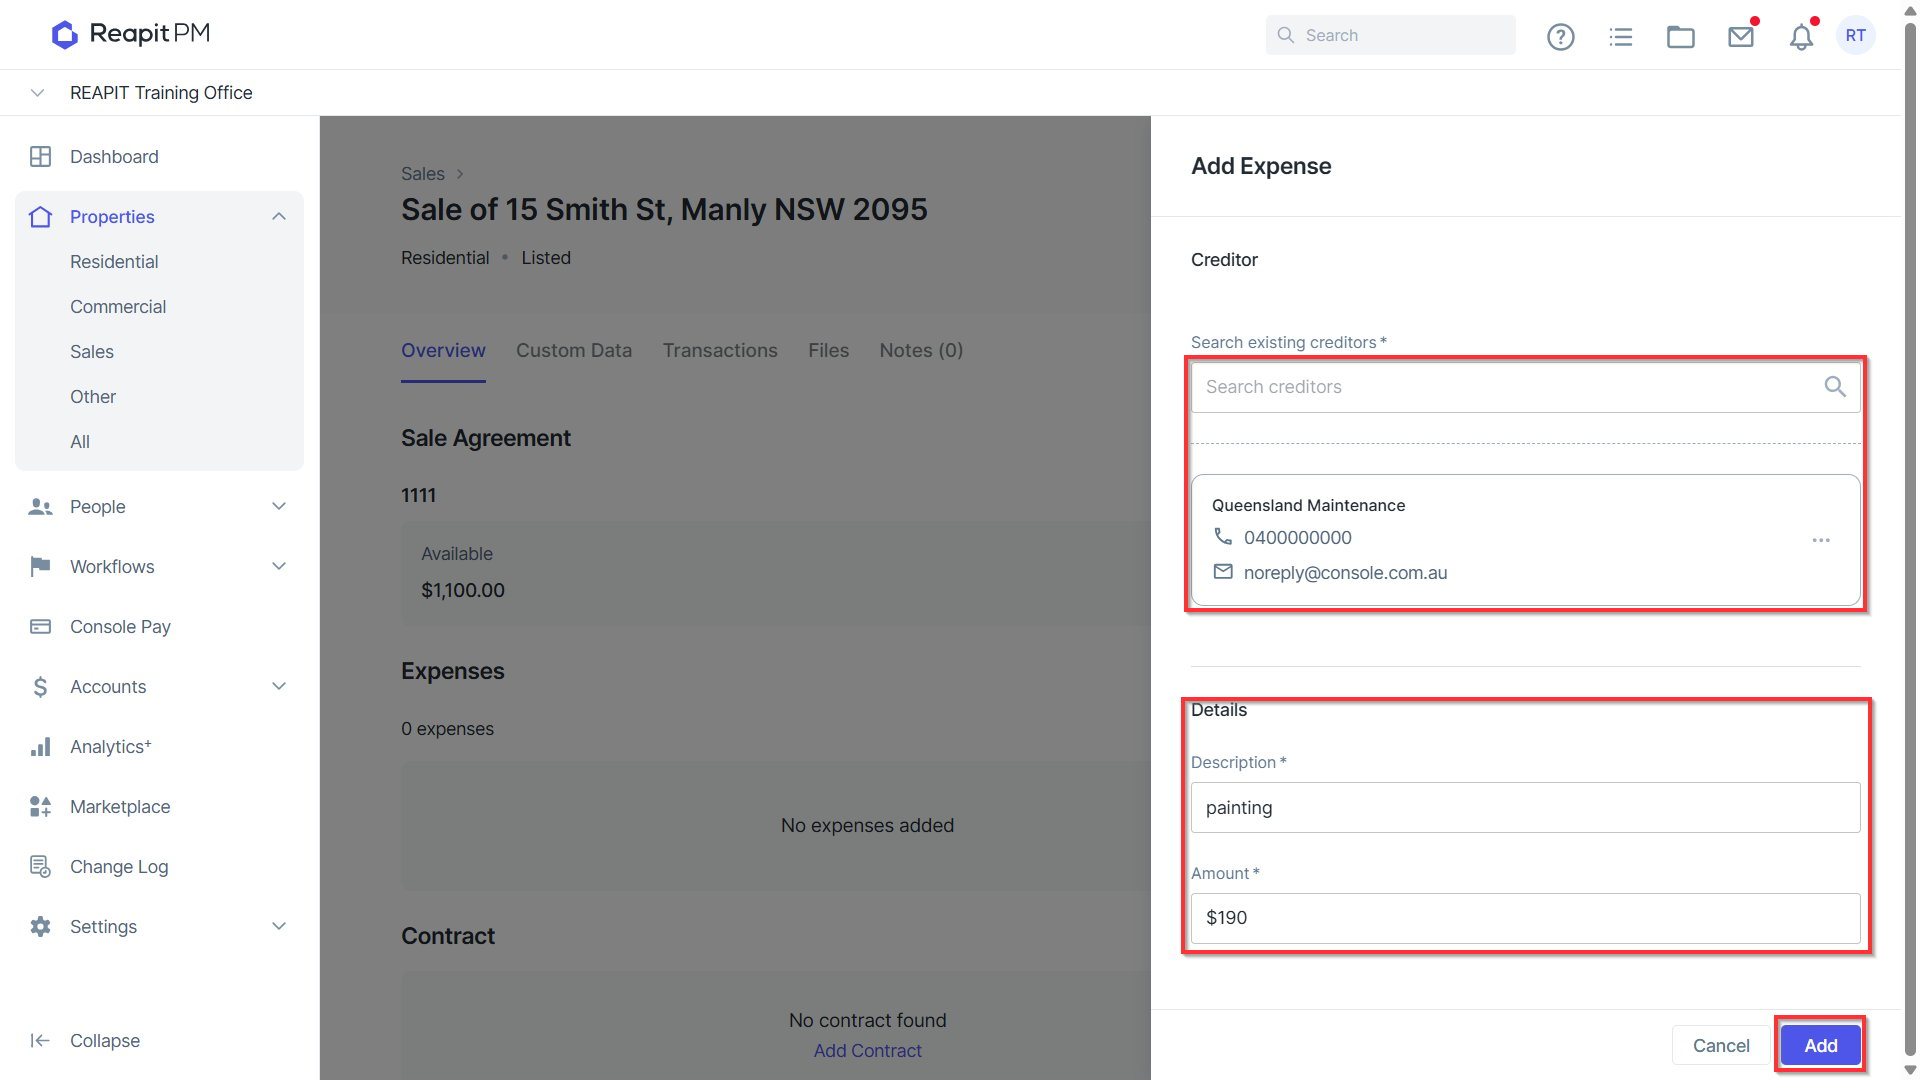
Use the search bar to find the Creditor suitable for the Expense.
Fill in the description for the Expense > Amount on the expense > Add.
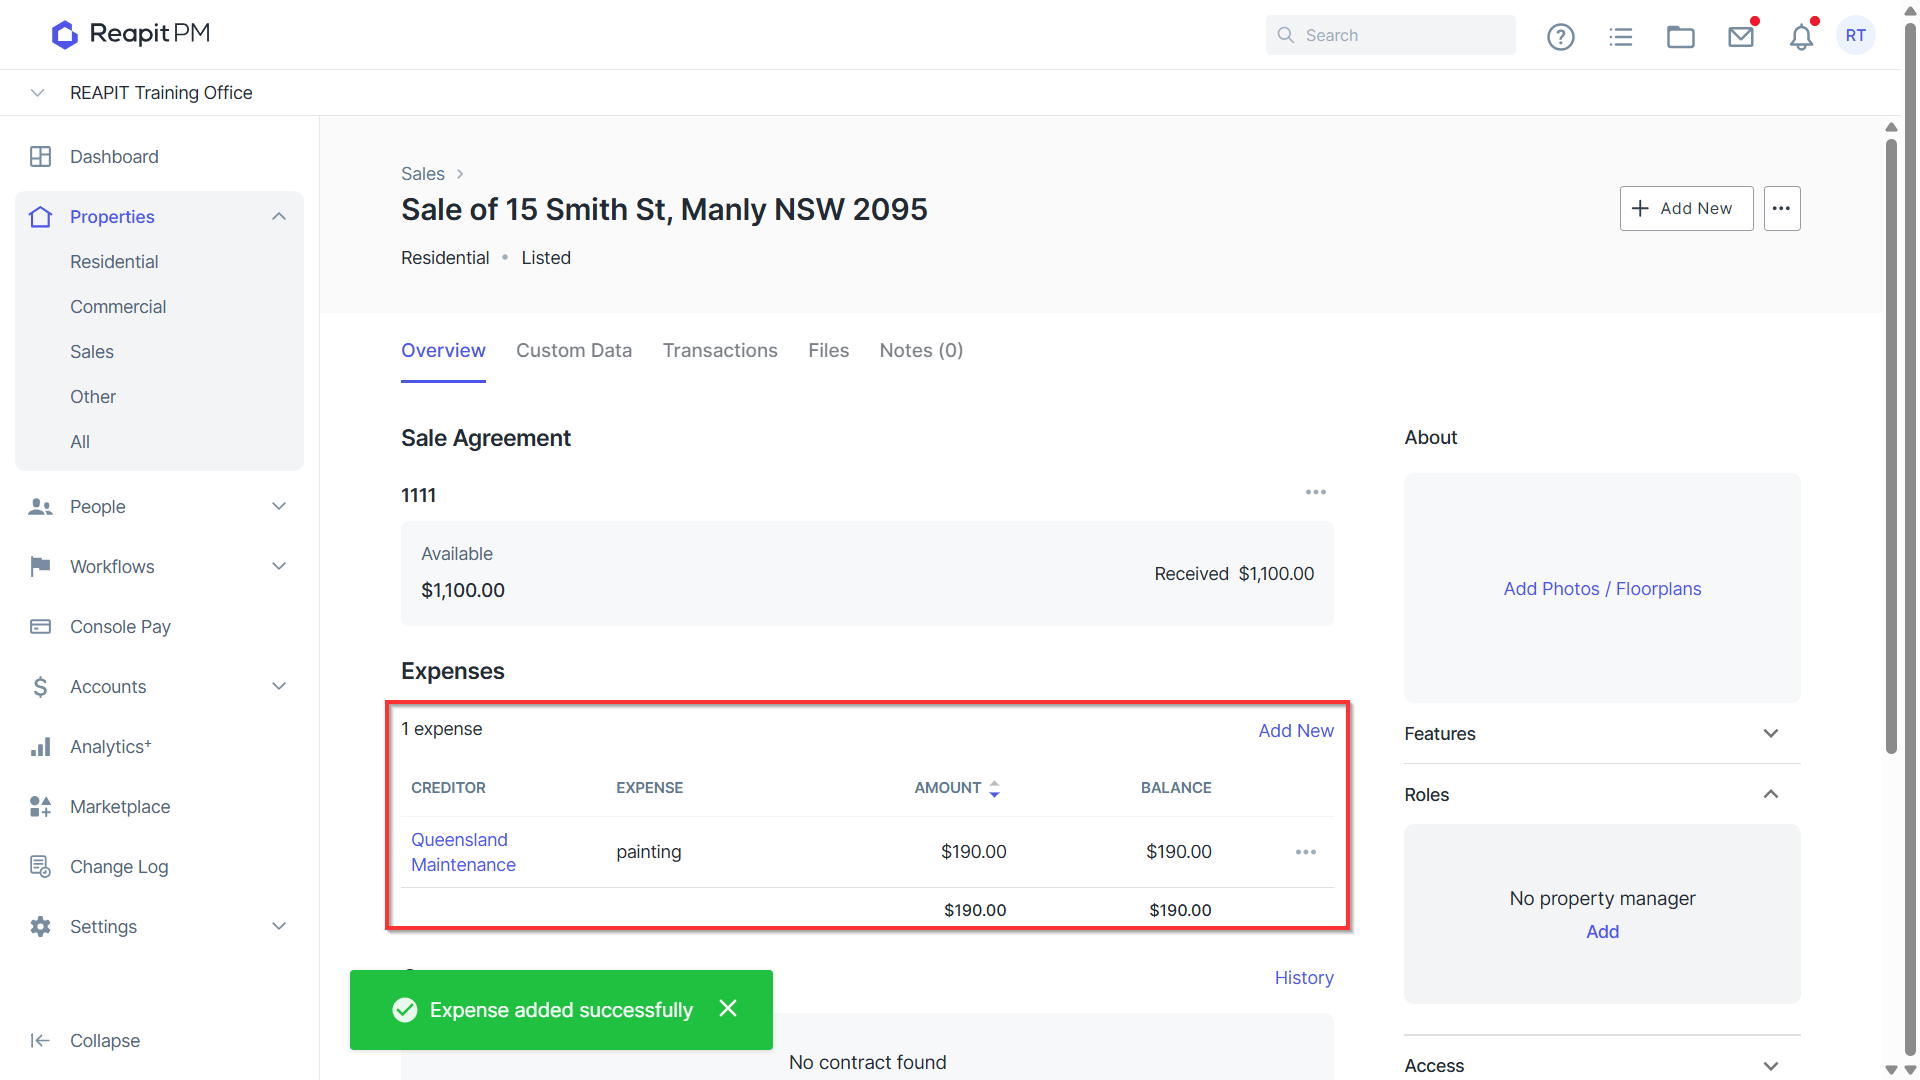
- The Expense will now appear on the Overview of the Sale file showing the total amount of the Expense and the Balance remaining to pay.
- To pay the balance of the expense, click on the ellipses tool to the right of the Expense and click Pay.
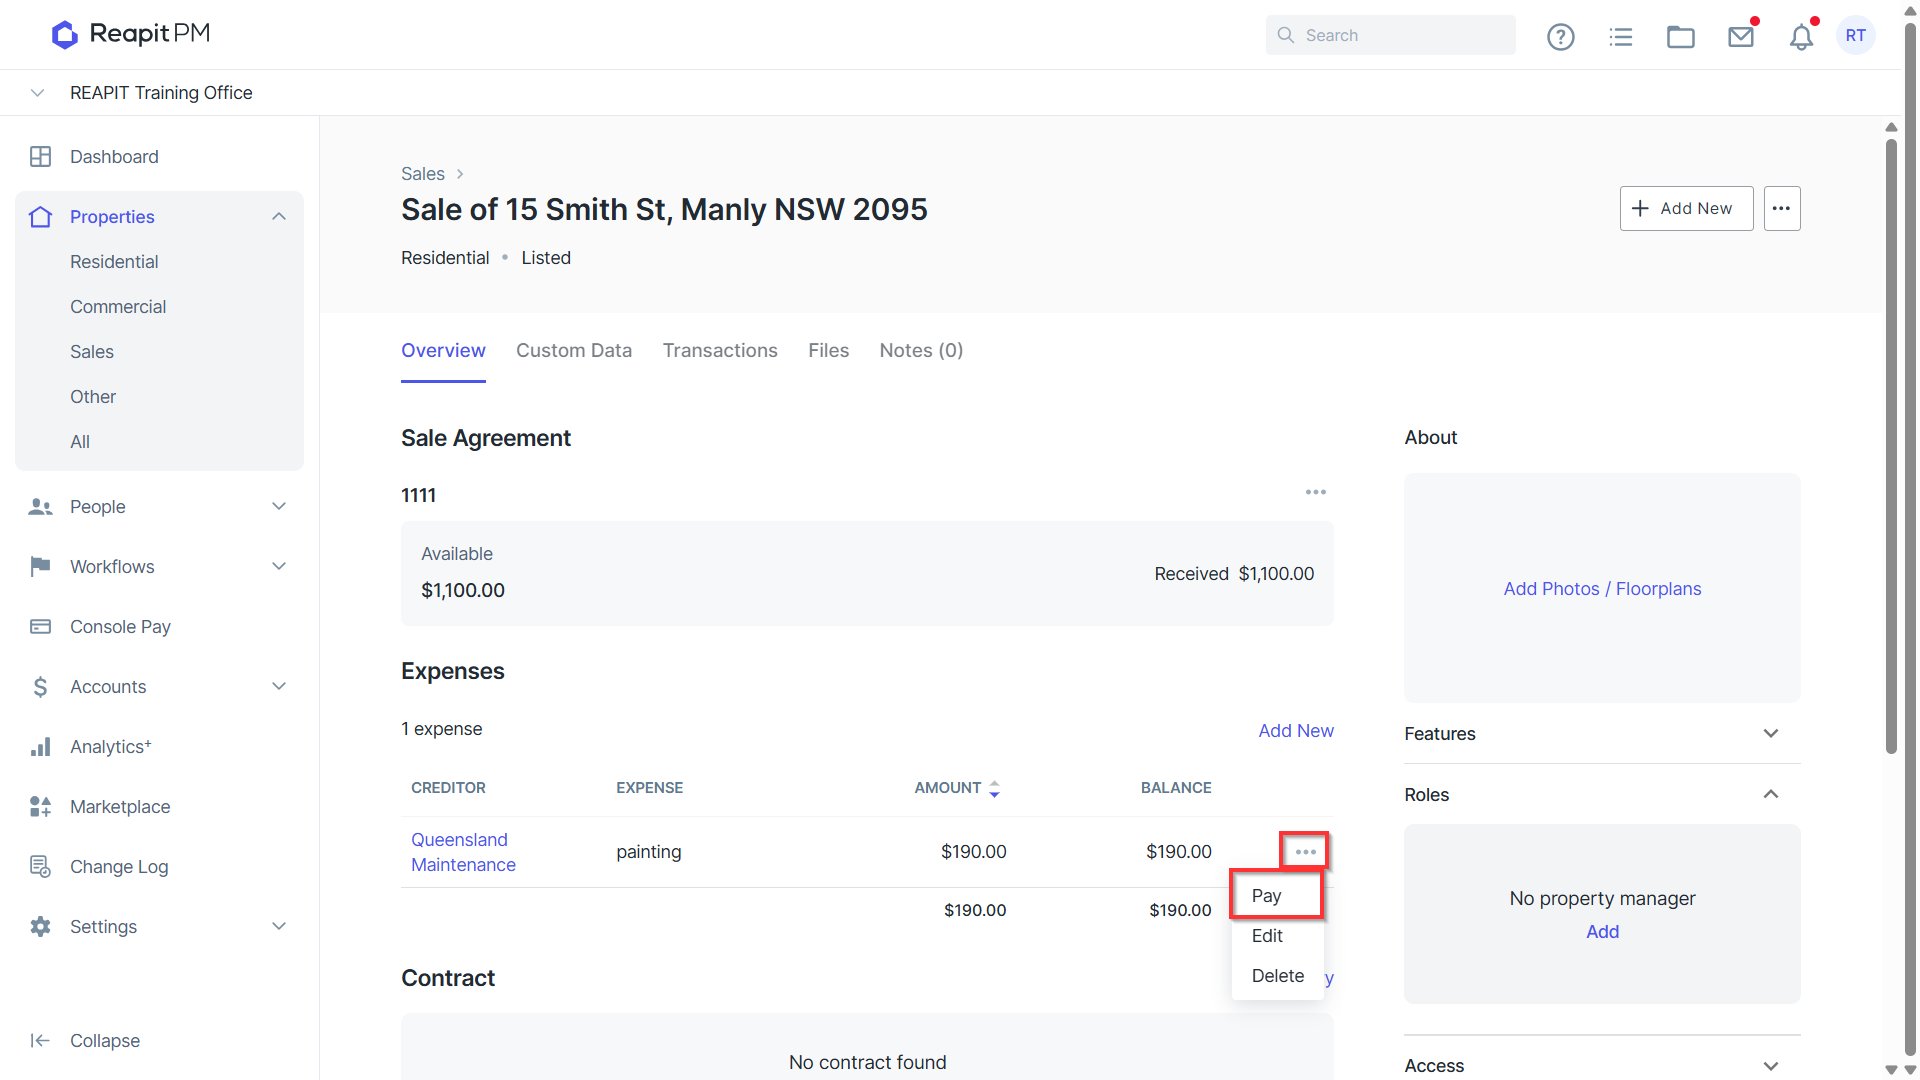
- The description of the expense and balance will prefill > Click Pay to process the journal payment to the Creditor selected.
- The payment confirmation will appear on the bottom of the screen and the remaining balance on the expense will update.
Adding files to Sale Agreements
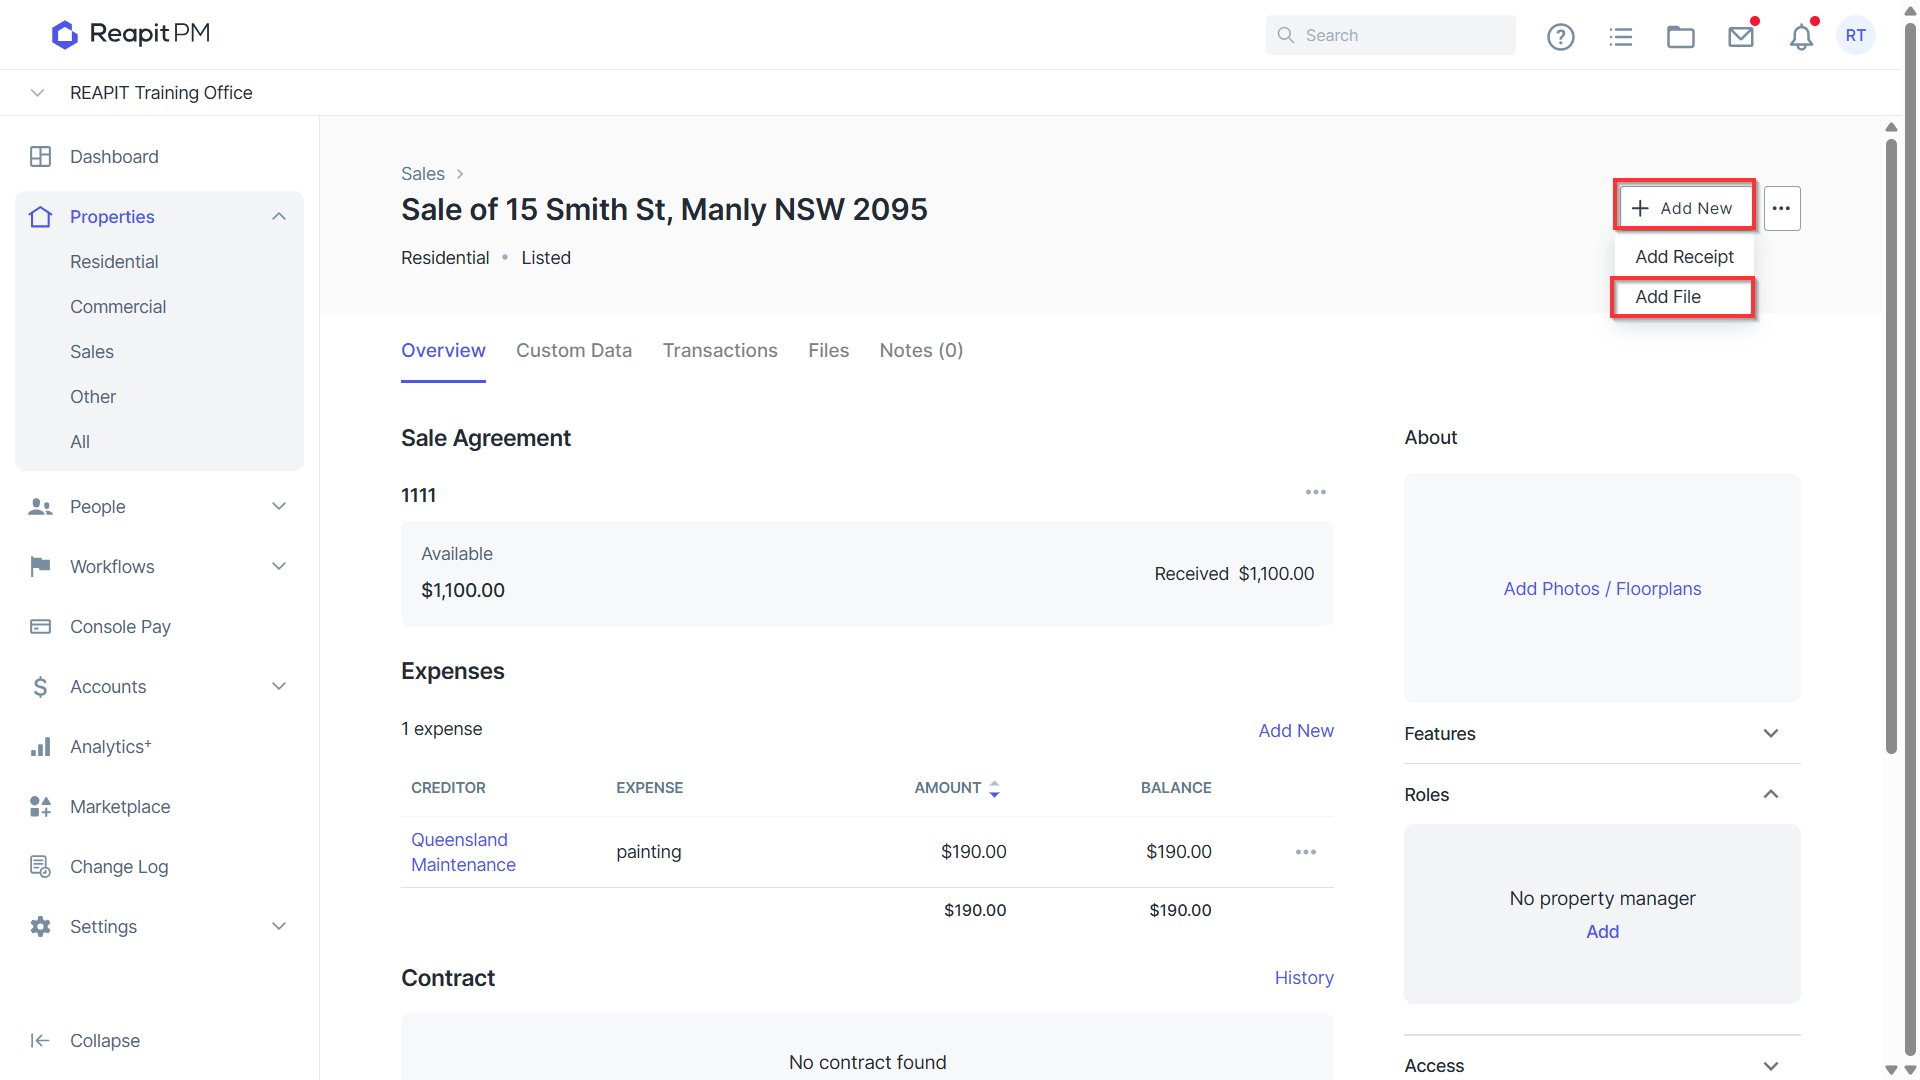
- Adding any documents or files related to the Sale Agreement can be added through the Add New button > Add file.
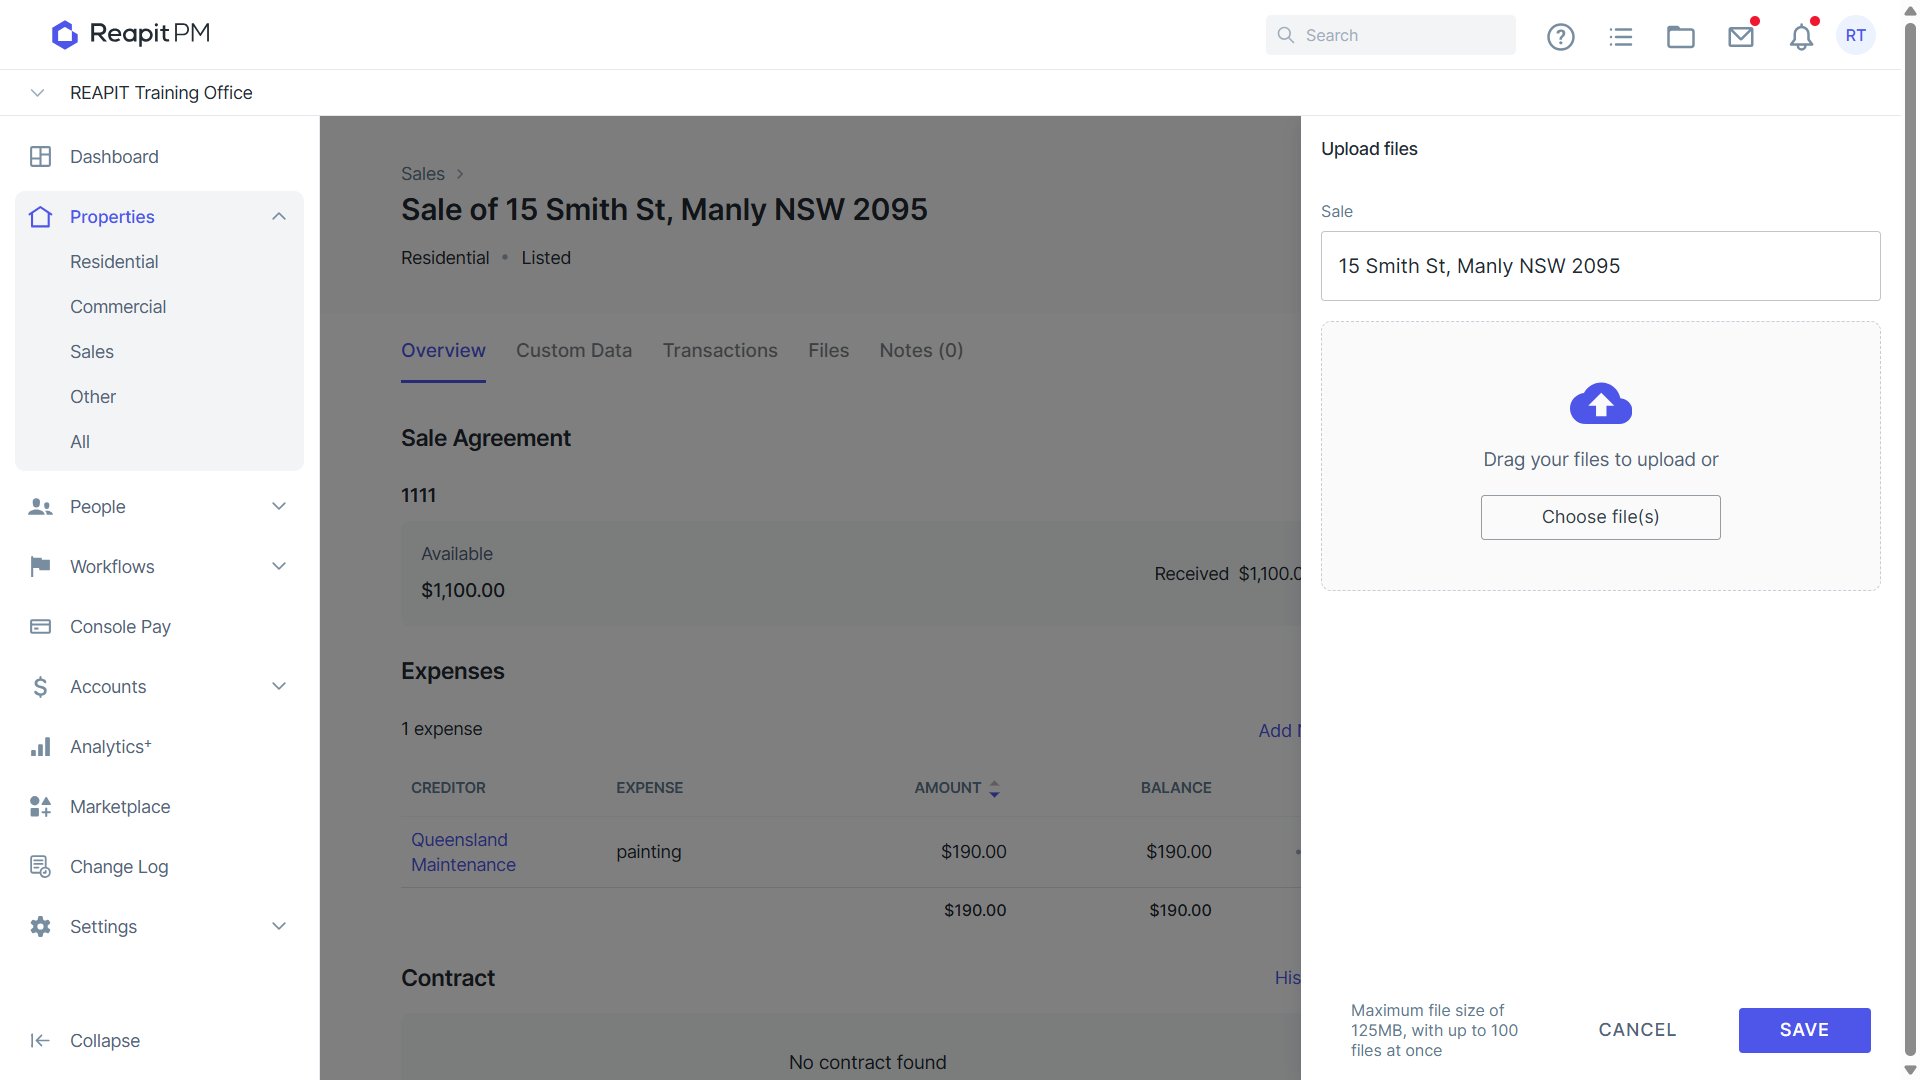
- The Add File side drawer will appear. Drag and drop the PDF file into the upload box or select Choose Files > Locate the file in the Windows browse search that appears and select Open.
- Upload any additional files and once all documents have been uploaded save Save to attach to the Agreement.
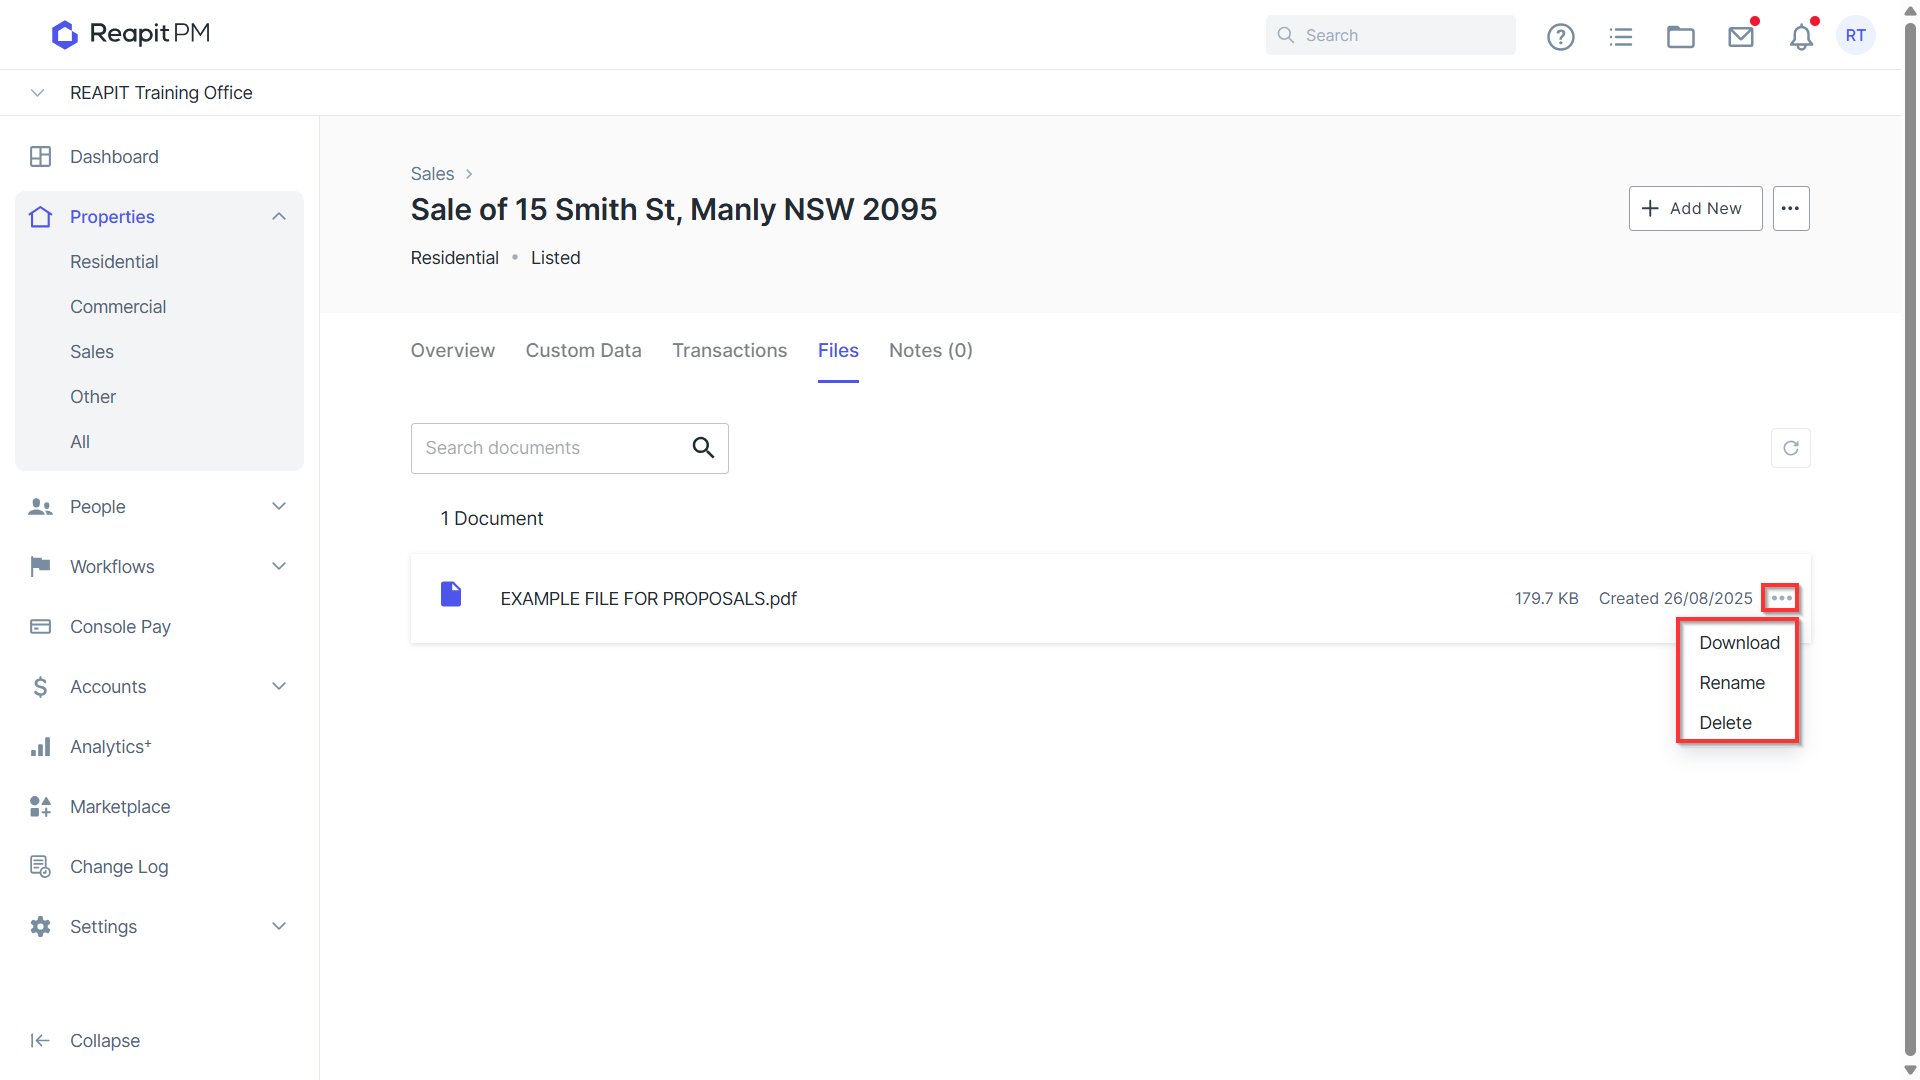
- Select Files from the top of the Sale to view any documents attached to the Agreement.
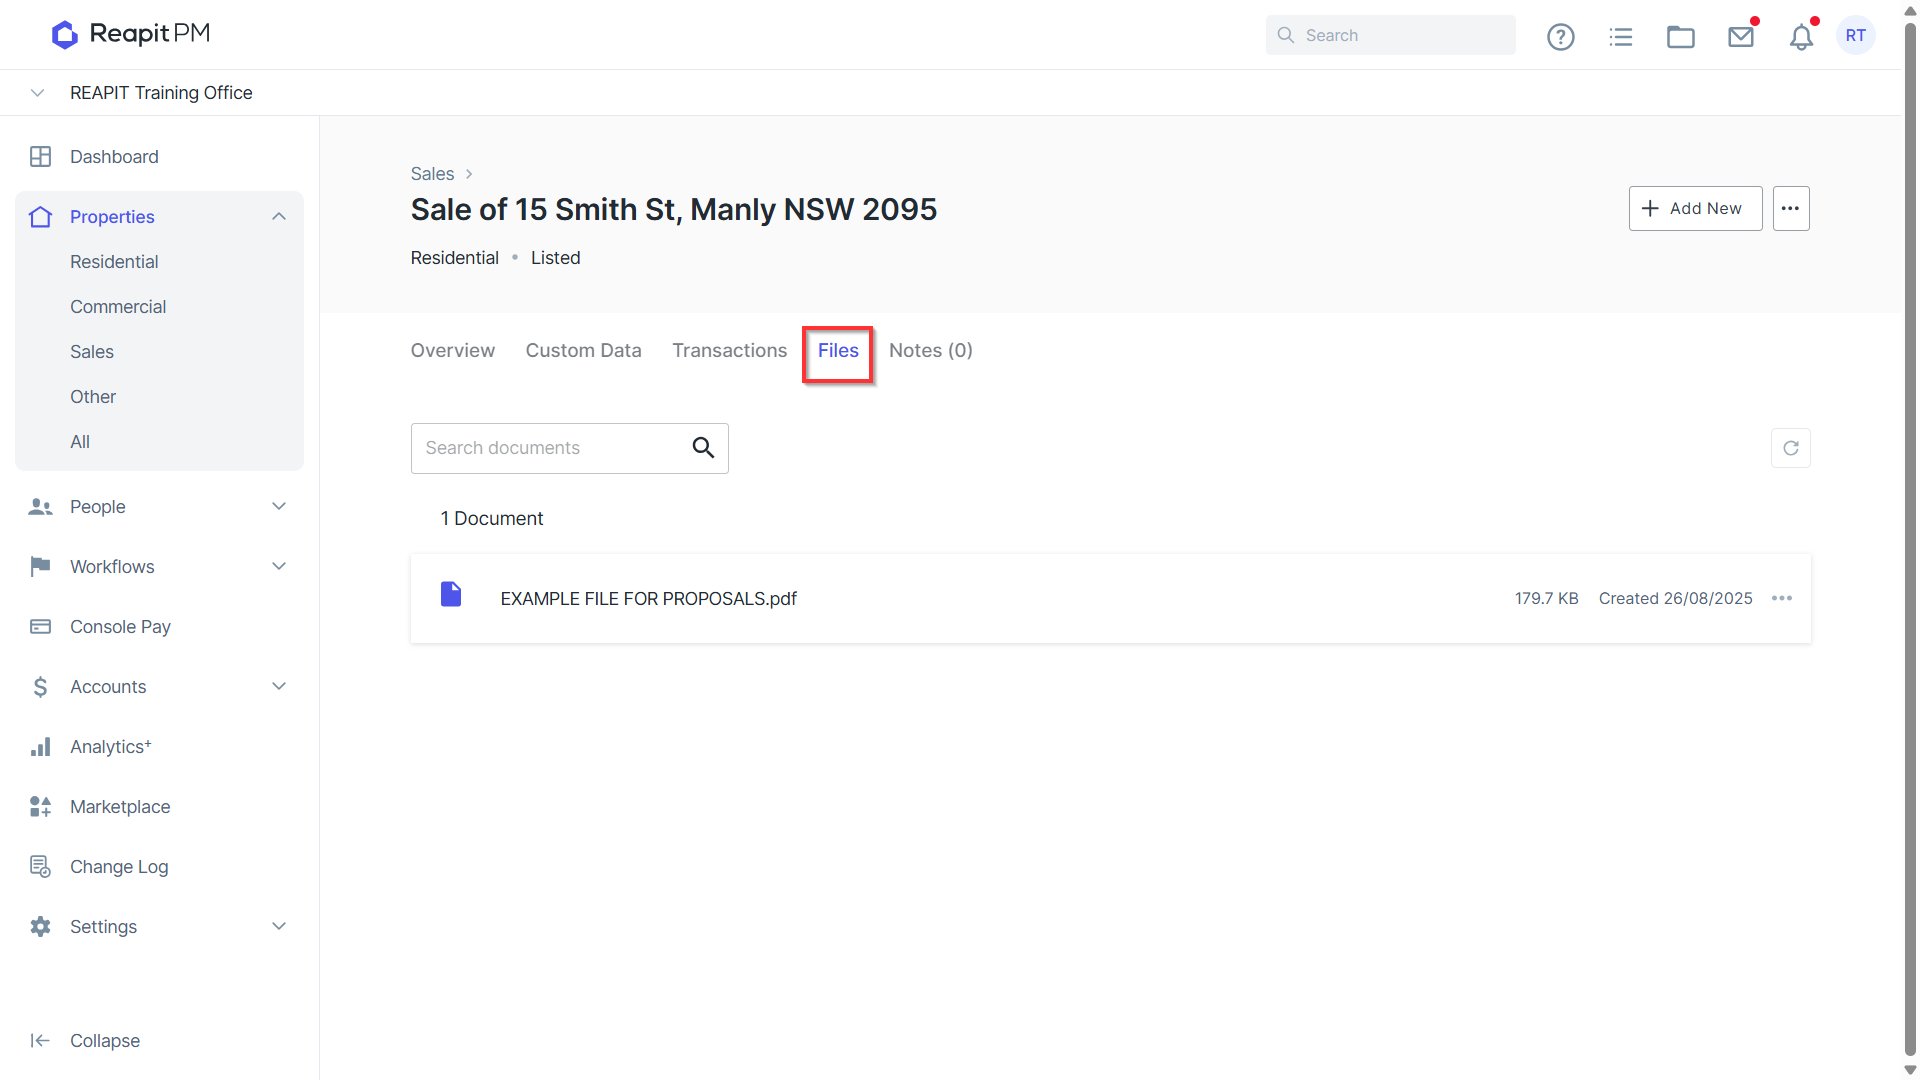
- If you need to make any changes to the Files uploaded, you can click on the ellipses tool to Download, Rename the Document or Delete.