'%20d='M0%208a8%208%200%200%201%208-8h24a8%208%200%200%201%208%208v24a8%208%200%200%201-8%208H8a8%208%200%200%201-8-8V8Z'/%3e%3cpath%20fill='%23fff'%20d='M10.41%206v3.779h15.048v19.537h4.132V6H10.41Z'/%3e%3cpath%20fill='%23fff'%20d='M20.967%2034V13.837L10.41%209.78v20.166L20.967%2034Z'/%3e%3cdefs%3e%3clinearGradient%20id='reapit-sales__a'%20x1='20.702'%20x2='20.702'%20y1='.351'%20y2='31.228'%20gradientUnits='userSpaceOnUse'%3e%3cstop%20stop-color='%235573FD'/%3e%3cstop%20offset='.575'%20stop-color='%234E56EA'/%3e%3c/linearGradient%3e%3c/defs%3e%3c/svg%3e)
Add New Listing
This article demonstrates how to Add a New Listing using the Add a Listing feature within Properties in Reapit Sales.
Overview
Add New Listing
This article demonstrates how to Add a New Listing using the Add a Listing feature within Properties in Reapit Sales.
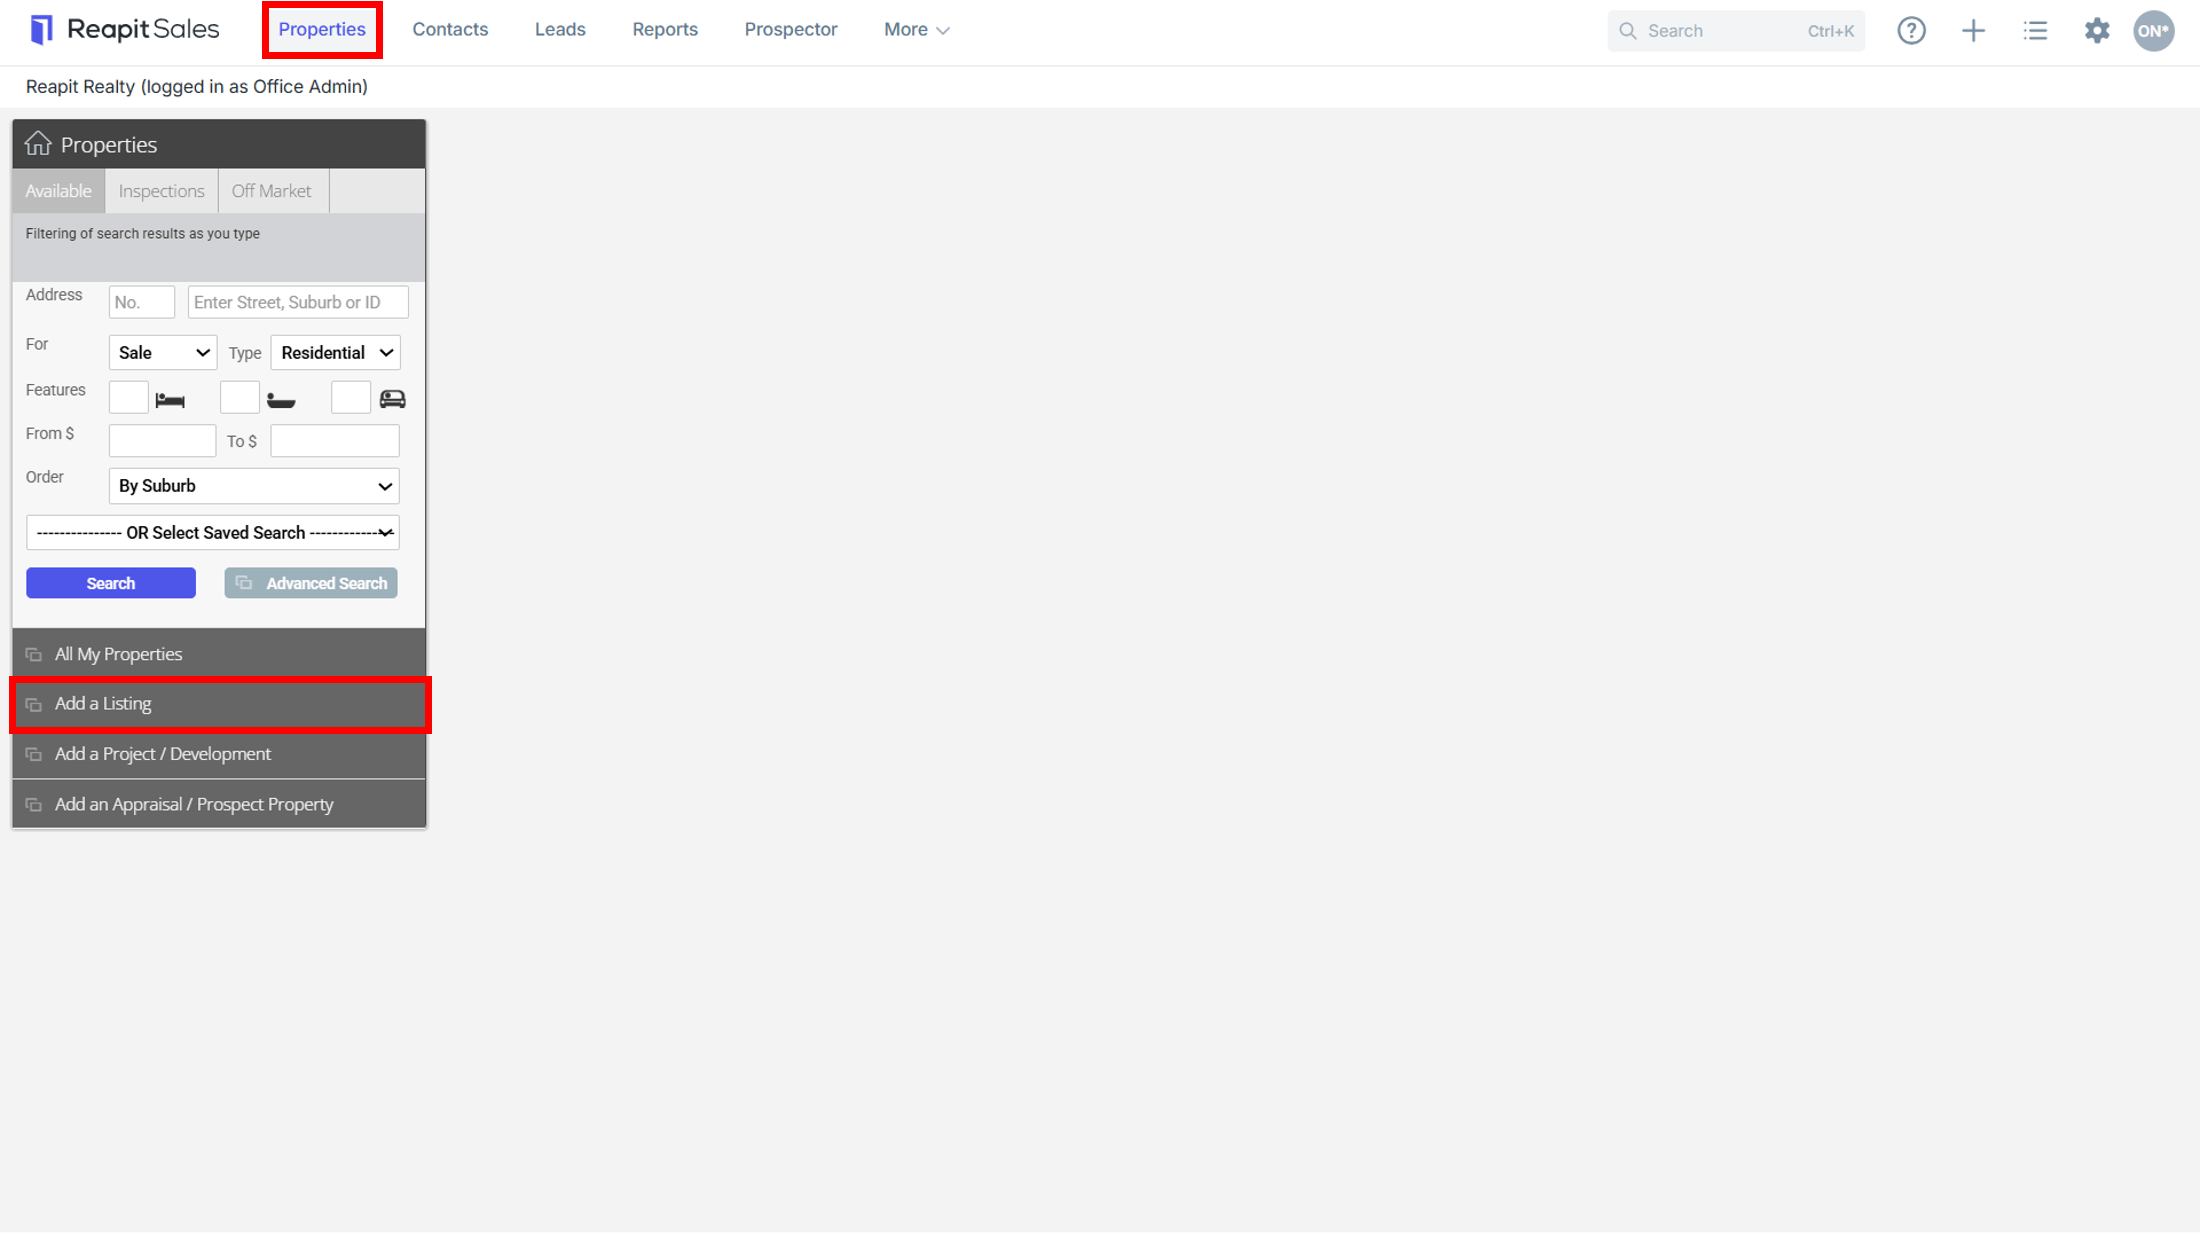
*** Note:** If the appraisal property already exists with this address in your database then you need toconvert the appraisal property to a listing. To create a NEW listing, regular Sales users will need to create a Prospect Property or Appraisal first. "Property Manager", "Admin" & "Master" Users will be able to skip this step and create New Listings directly. 1. Go to Properties from the main menu 2. Click Add a Listing on the left property panel.
*Note: if you are unable to see this button please contact a Master user in your office and get them to check your permissions.

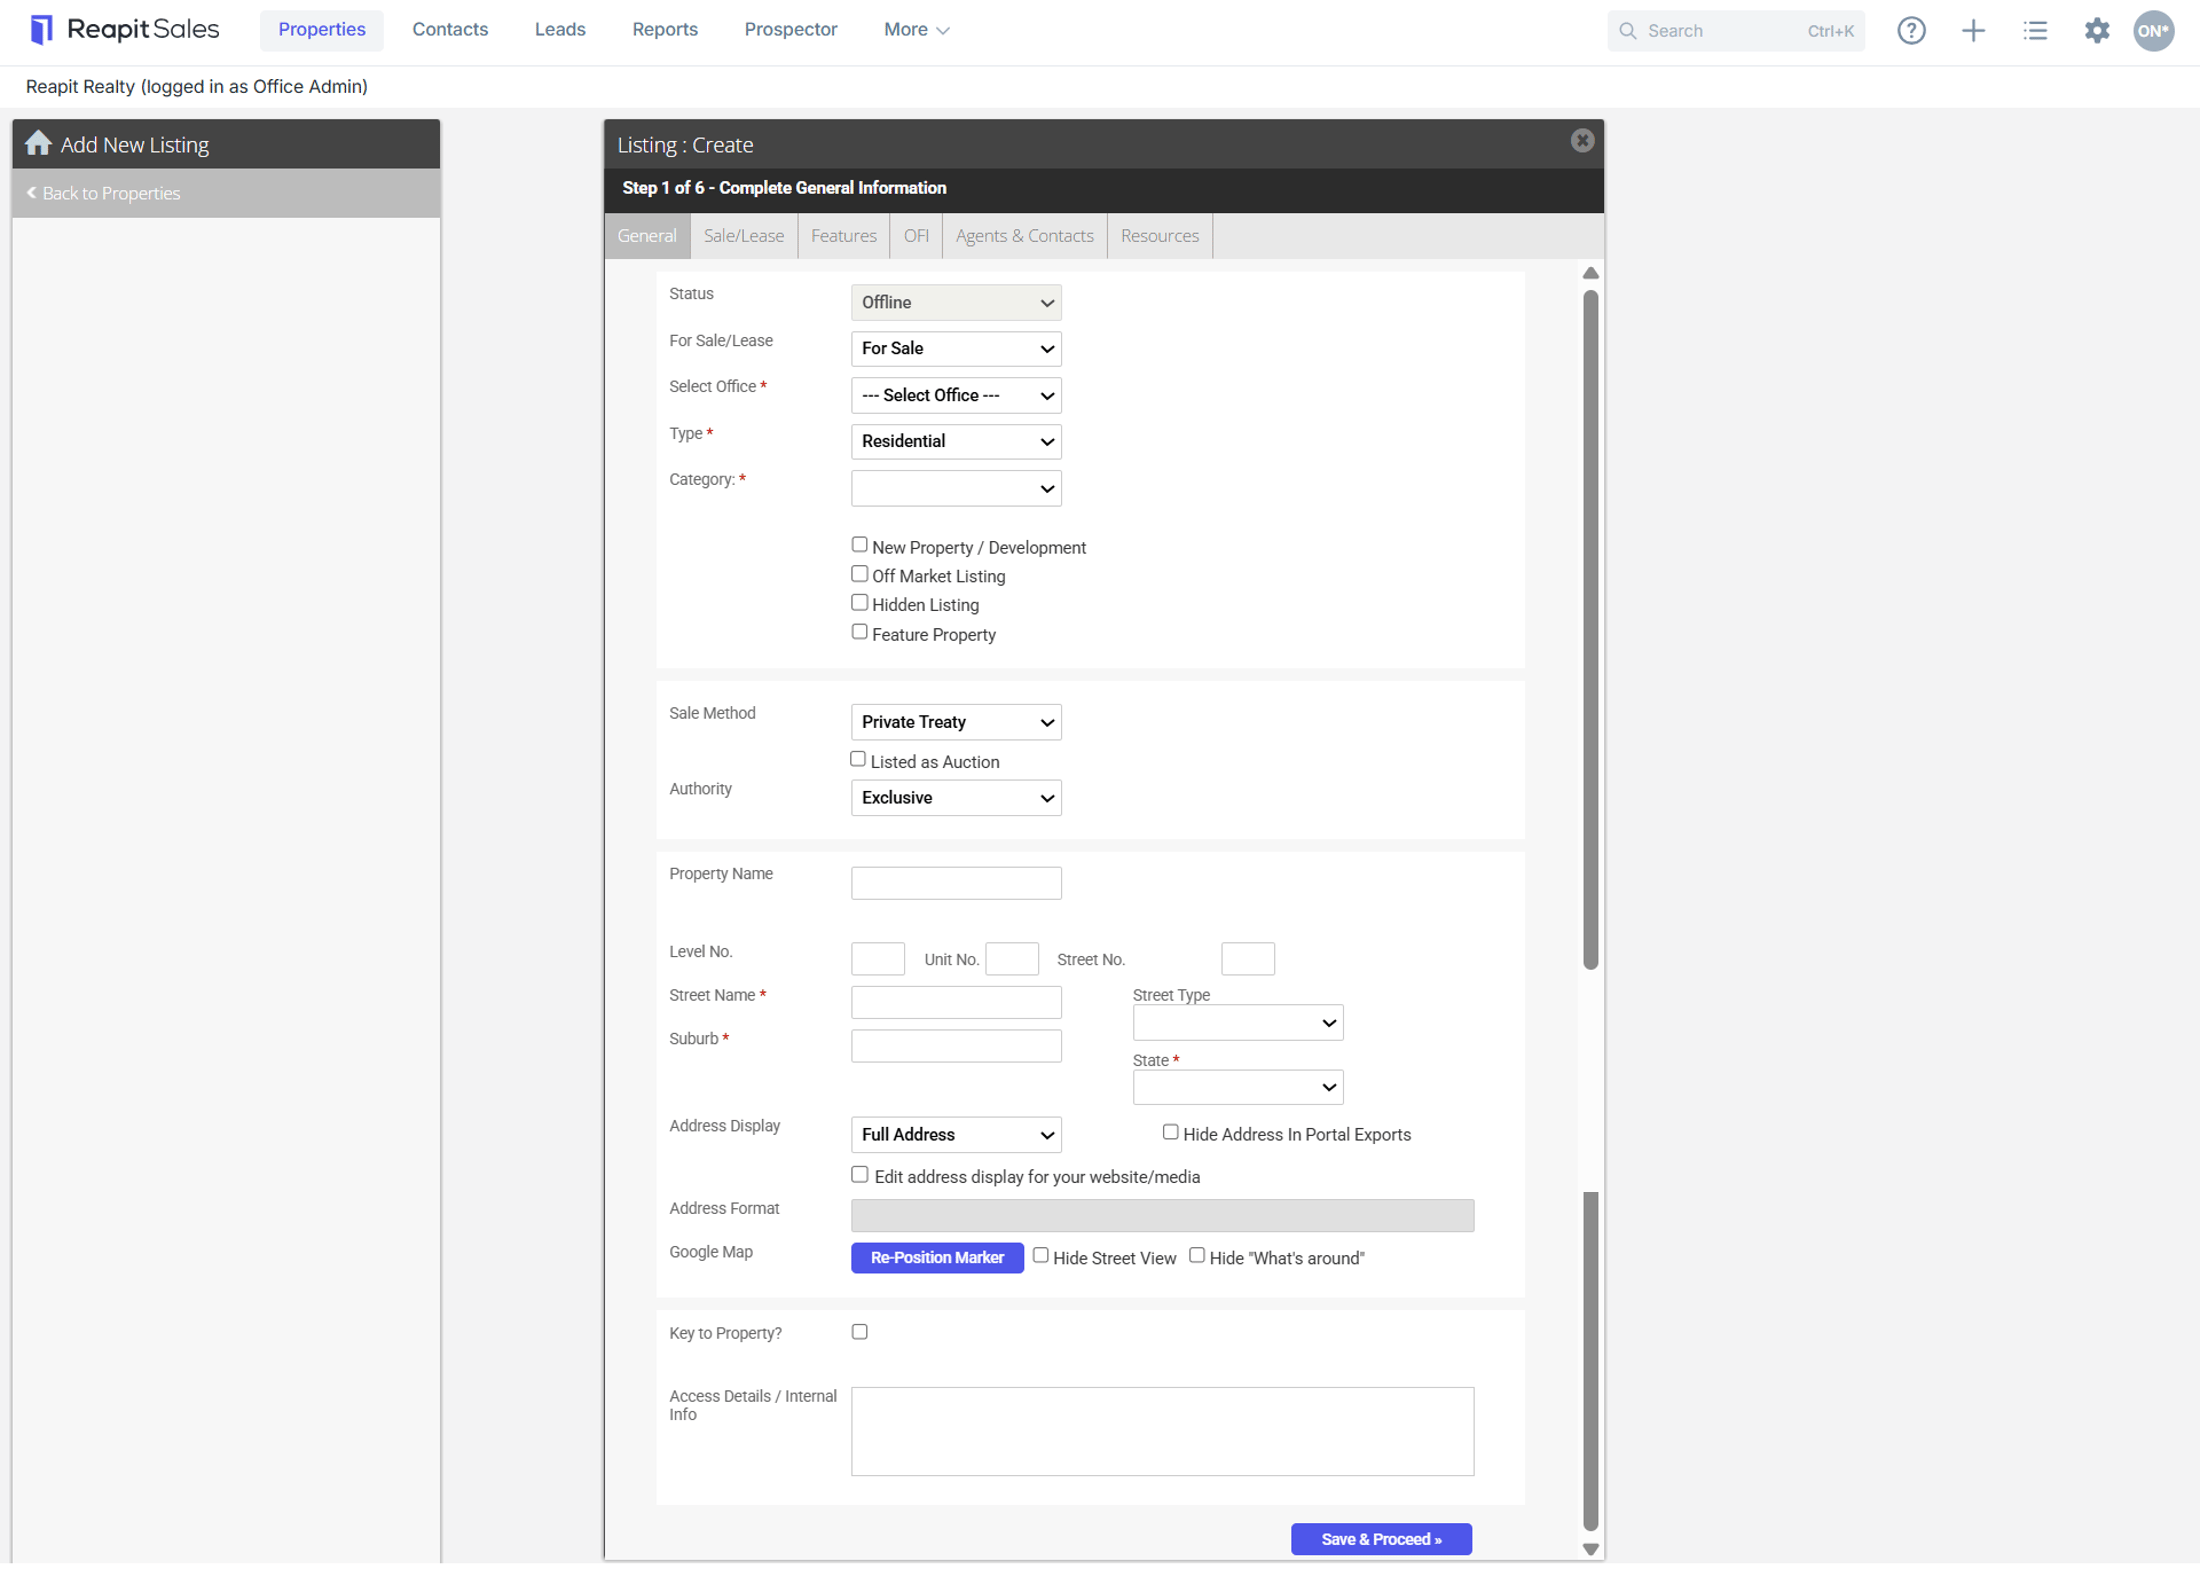
- Complete the General Property Information.
- Status: - Will default as offline - not ready for public display. You will need to upload all resources before changing the status to available
- For Sale/Rental: - Select the type of property, the form fields will update based on your selection.
- Type: * - E.g. Residential, Commercial - Select the type of sale or rental and the category fields will update based on your selection.
- The Property Type (i.e. Residential, Commercial etc.) cannot be changed while a listing is Available or has progressed further (i.e. Leased, Conditional, Unconditional, Settled, etc.) As an example, an Available listing must first be changed to Offline prior to changing the Property Type. The Property Type for Offline, Appraisal and Listing Presentation listings can be changed during these statuses.
- Business listings cannot be set For Lease because a business cannot be leased. The assets in the business can be leased such as land, buildings and equipment, but not the business itself. Status would need to be Commercial/Land.
- Holiday listings in that they cannot be made For Sale as they are used for renting holiday locations. If the Holiday listing needs to be sold, then it would no longer be a Holiday listing and would need to be changed to Commercial, Residential or Rural.
- Category: * - Select category based on your type e.g. Commercial categories include Retail, Office, Warehouse etc. (If commercial you can select up to 3 categories to export to the portals and if business you can specify 3 categories and 3 sub categories for each business listing)
- New Property Development:- Domain portal only - For new property developments only
- Hidden Listing: - When ticked, the listing is hidden from display in Reapit Sales powered websites, automated property alerts, e-newsletters and stocklist reports (based on the search criteria. This allows you to change the status to Available so you can communicate the listing via e-newsletter however will hide the listing from your website/media until unticked.
- Investment?: - This is for internal reference only on sale properties
- Sale Method: - If a sale property, you will need to specify the sales method e.g. Auction. Once selected you will be able to enter additional information for this method e.g. dates, times, location etc.
- Property Name: - Enter the name of the property if applicable
- Municipality: - Business listing only
- Level No.: Unit No.: Street No.: - All address fields are to be entered separately. You can change the display of the address or hide from public display later.
- Street Name: *
- Street Type: *
- Suburb: * - Start typing the Suburb then select from the drop-down. This will copy if converted to a listing.
- State: * - This will auto generate if Suburb is selected. This will copy if converted to a listing.
- Address Display: - This allows you to specify how the address will display on your website and the portals e.g. realestate.com.au
- Tick to edit address for your web display format. - This will adjust the display of the address on your website, digital prints and e-newsletters only. * Note - this does not adjust the address on the Portals.
- Google Map: Hide Street View Hide "What's around"
- Key to Property?: - Internal reference only
- Property Key No.: - Internal reference only
- Access Details.: - Internal reference only
- Click Save & Proceed
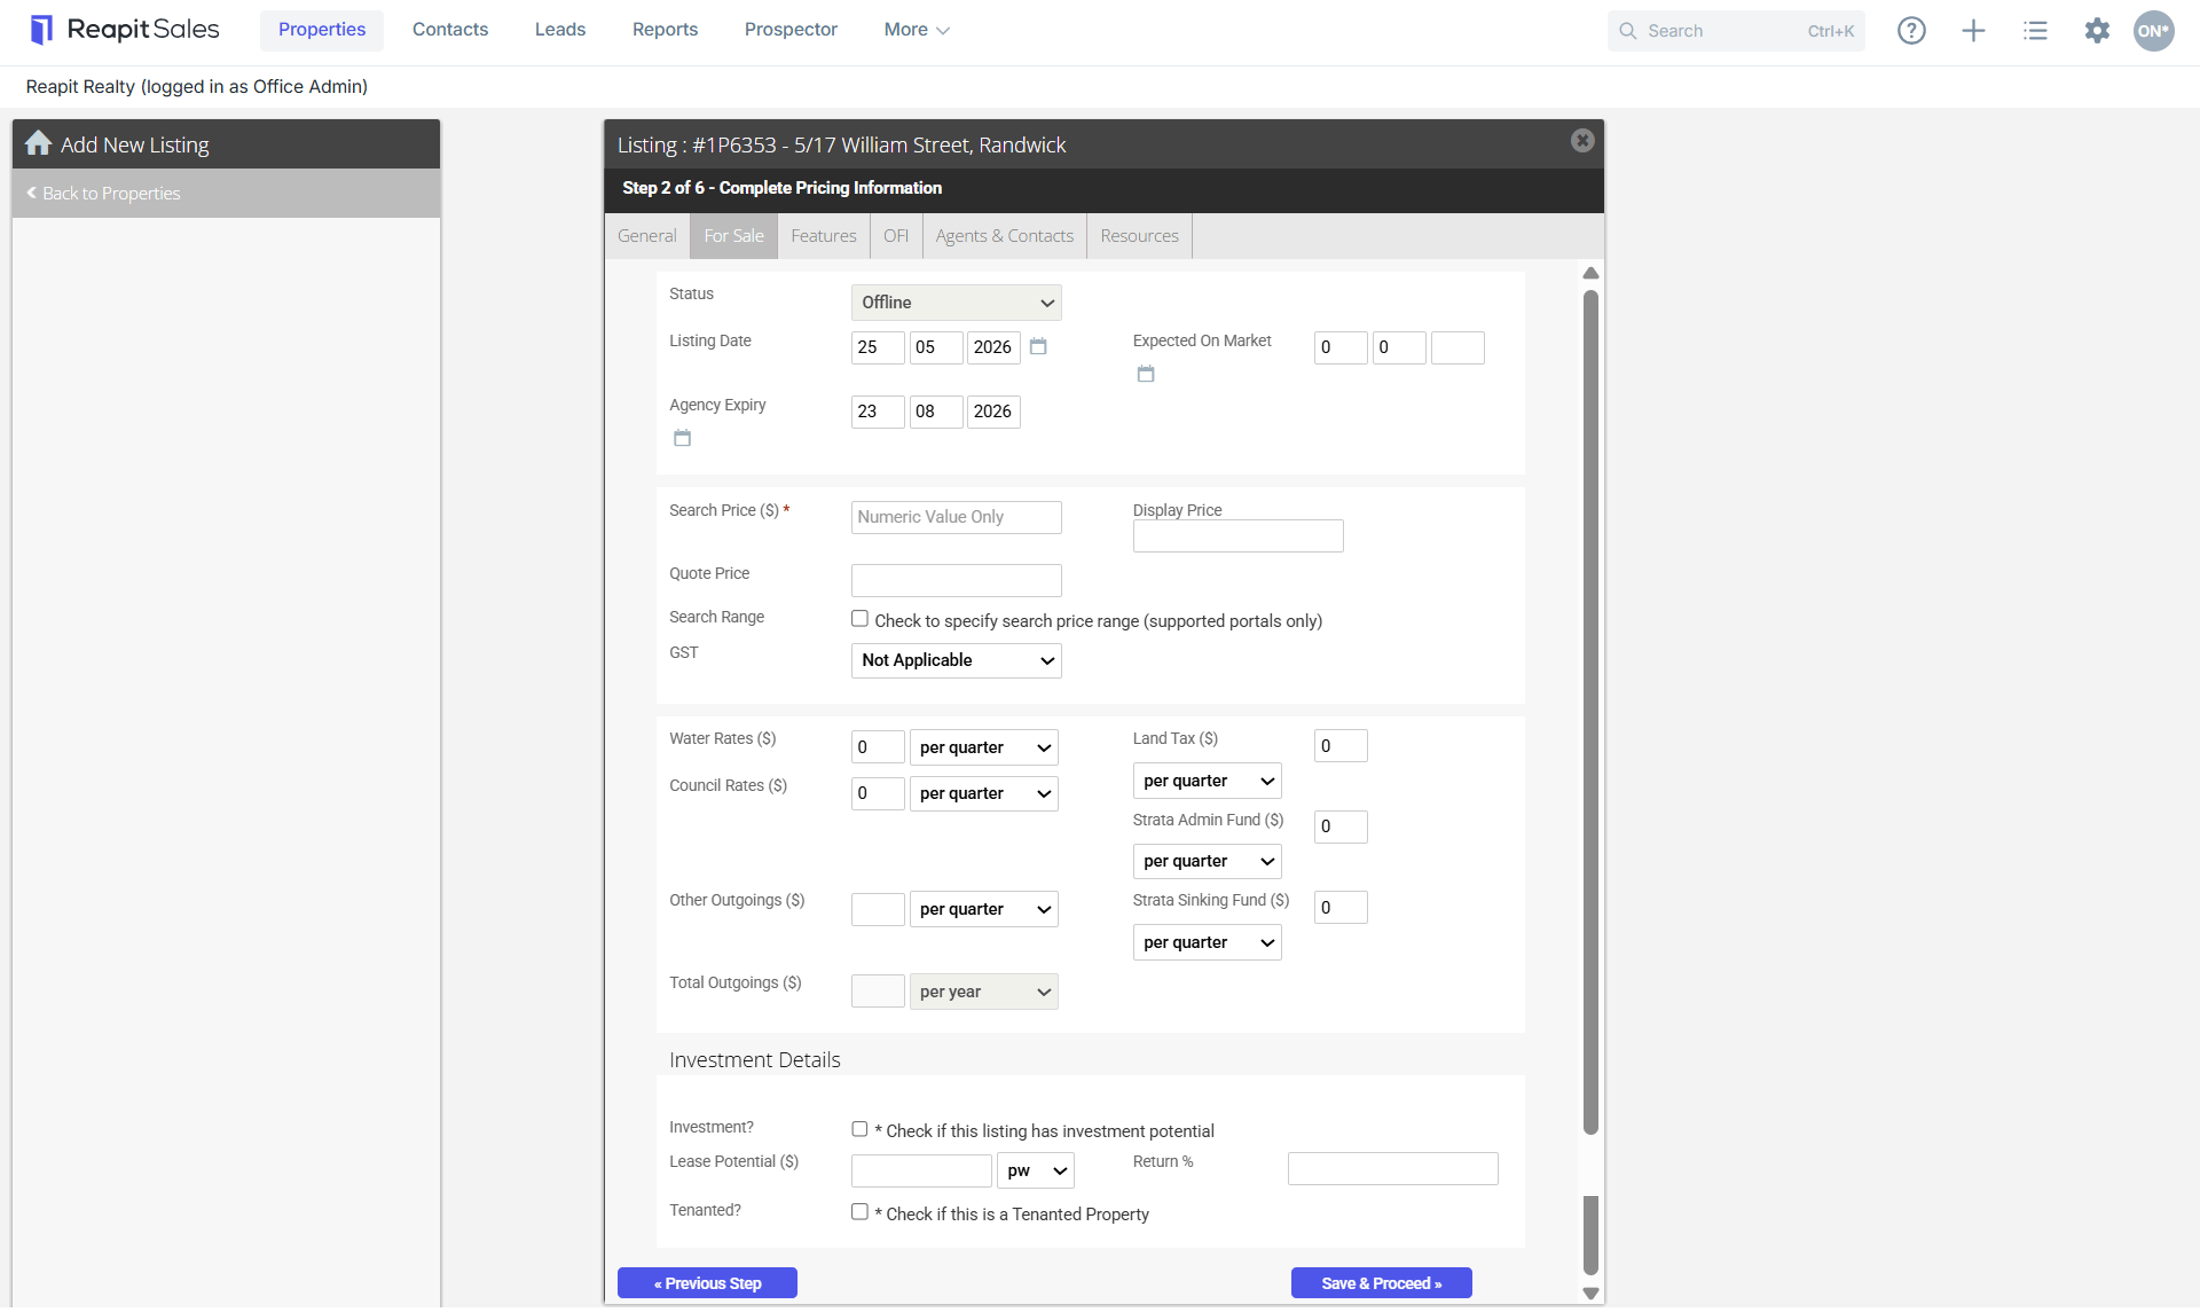
- Enter Sale or Lease details, the form fields will change depending on the property type.
- Search Price - Numeric value only that is hidden to the public, used to determine the search range on your website and the various portals
- Search Price Range - Ability to add / edit a Search Price Range for residential listings when exporting to portals (currently only domain.com.au supports price ranges)
- Display Price - This is the advertised price and can include all characters and symbols. Maximum 50 characters permitted if exporting to realestate.com.au
- Quote Price - This is for Internal visibility only and will show on the Standard Internal Stocklist
- Rates and Outgoings - All rates information will be advertised if entered
- GST (inc/exc/NA): - Business & Commercial listings only
- Stock (inc/exc): - Business listing only
- Financial Details ::
- Turnover ($): - Business listing only
- Return%: -
- Investment Details ::
- Investment?: * - Check if this listing has investment potential
- Lease Potential ($): - Numeric value only
- Return %: Numeric value only
- Tenanted?: * Check if this is a Tenanted Property
- Tenanted Property ::
- Type of Tenant: - Holiday, Long Term, Monthly...etc
- Current Rent:- Numeric Values only
- Lease Term: - Free text field
- Option Period:- Free text field
- Lease Start Date: - [Select Date]
- Lease End Date: - [Select Date]
- Return %: - Numeric Values only
- Annual Rent $: - Numeric Values only
- Lease Details (Business Listings Only) ::
- Specifics/Notes:
- Current Rent ($):
- Lease Term:
- Option Period:
- Lease Start Date: [Select Date]
- Lease End Date:
- Click Save & Proceed *Note: Ticking the retirement feature will send the listing to the retirement living page.
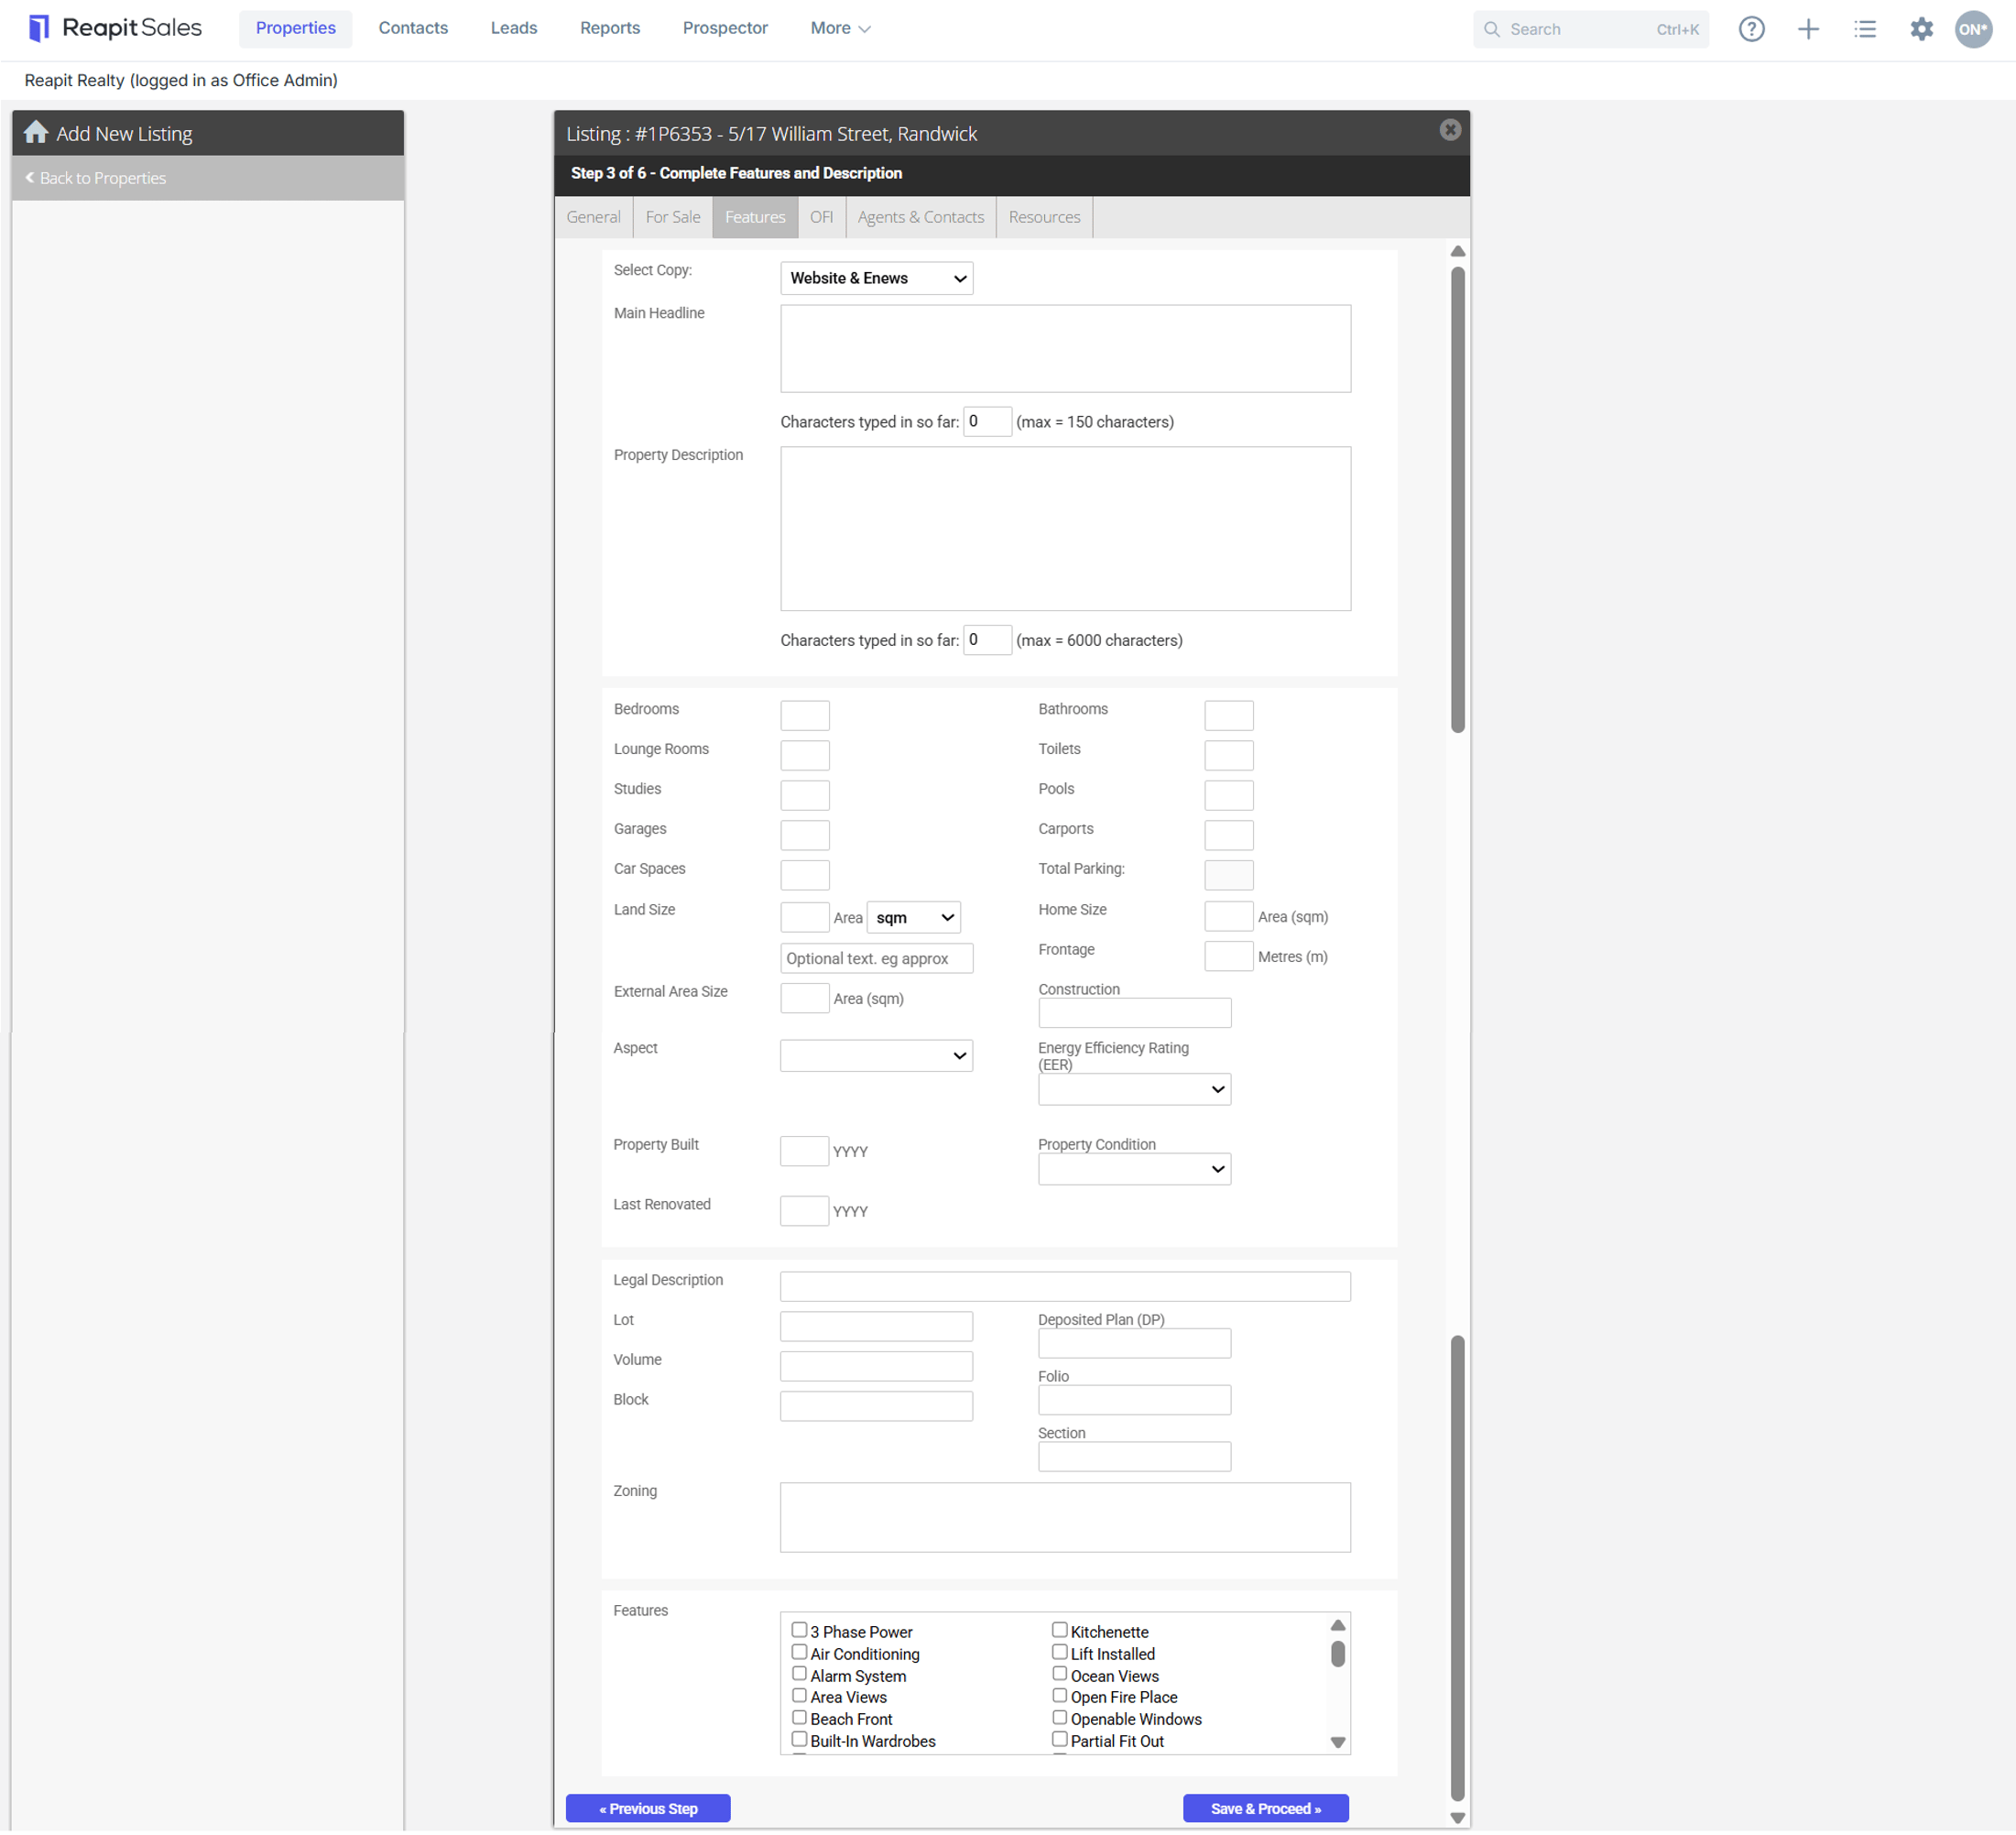
- Enter the property features and description.
- Property Details :: *All information will be advertised.
- Select Copy: Defaults to Web - if you use campaign management tools e.g. Campaign Track requires additional copy to be entered.
- Main Headline: Free text area with character count.
- Property Description: Free text area with character count.
- Bedrooms: - Single Numeric Values only no decimals e.g 1.5
- Bathrooms: - Single Numeric Values only no decimals e.g 1.5
- Lounge Rooms: - Single Numeric Values only no decimals e.g 1.5
- Toilets: - Single Numeric Values only no decimals e.g 1.5
- Studies: - Single Numeric Values only no decimals e.g 1.5
- Pools: - Single Numeric Values only no decimals e.g 1.5
- Garages: - Single Numeric Values only no decimals e.g 1.5
- Carports: - Single Numeric Values only no decimals e.g 1.5
- Car Spaces: - Single Numeric Values only no decimals e.g 1.5
- Total Parking: - Automatically calculated based on garages and car spaces entered, will be used to send to some portals
- Carports: - Single Numeric Values only no decimals e.g 1.5
- Land Size: Area (sqm, hectare or acre) - Numeric Values only
- External Area: Area (sqm) - Numeric Values only
- Home Size: Area (sqm) - Numeric Values only
- Building Size (sqm) - Numeric Values only (Commercial Properties Only)
- Frontage: Metres (m) - Numeric Values only
- Construction: e.g. Brick
- Aspect: - Select from drop down
- Energy Efficiency Rating (EER): - Select from drop down
- Property Built: YYYY
- Property Condition: - Select from drop down
- Last Renovated: YYYY
- Zoning: Free text area with character count.
- Features: - Check all that apply
*Note: The 'Select Copy' feature does not do anything. 8. Click Save and Proceed
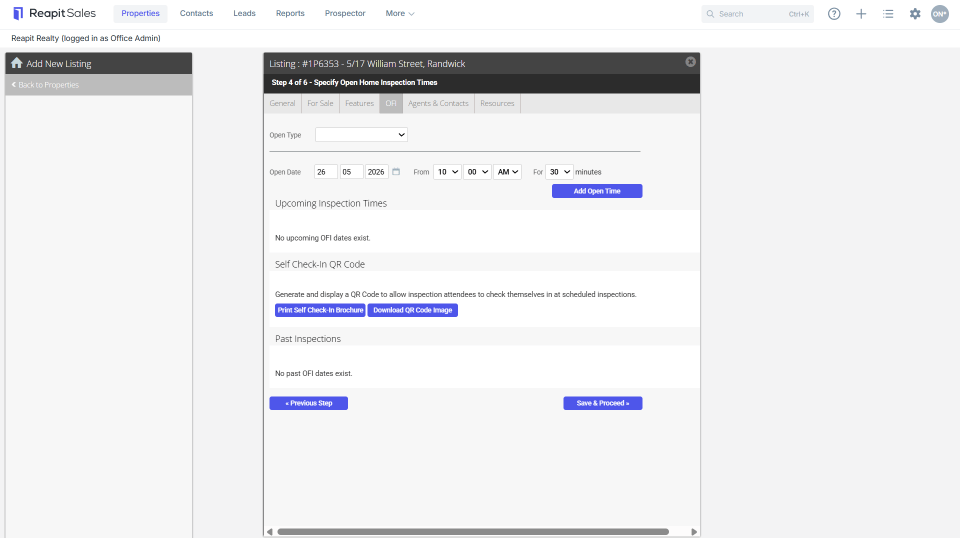
- Add in inspections times
- Select the Date and time and click Add Open Time or
- Select the Type from the Open Type drop-down
- Click Save and Proceed and
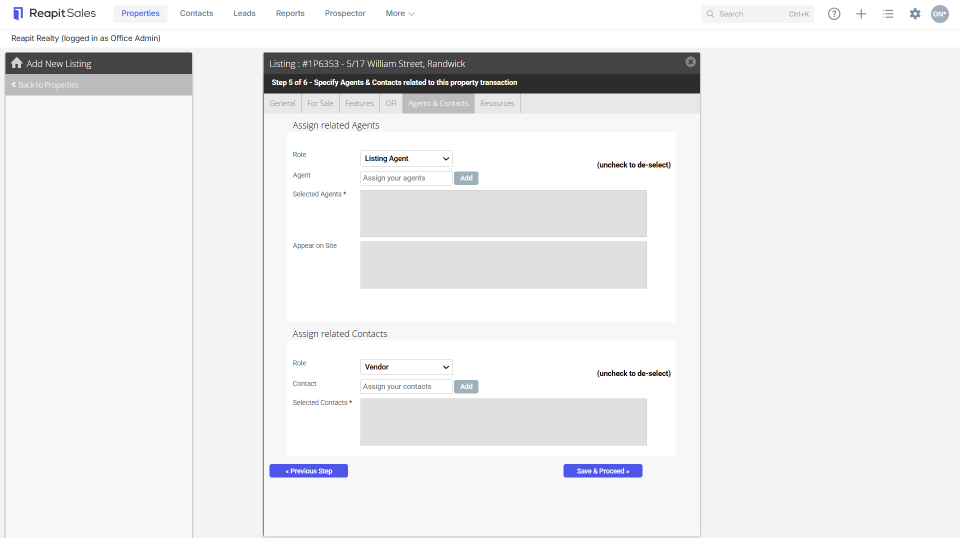
- Assign any related contacts or agents.
- Select role from drop-down
- Type Agent name and select from results
- Click Add, to insert as selected agent
- To hide an agent from the website, Un-tick the check box next to their name in the Appear on Site box and hit save
*Notes:
- For reporting and commissions it is important that all related agents are assigned to the property. The first Selected Agent box should contain an Appraisal Agent, Listing Agent, Selling Agent and any referral agents by the end of the sales process.
- To link contacts to properties and to populate the Sales Advice and letters it is important that all related contacts are assigned to the property. The Selected Contacts box should contain at least the Vendor, Vendor Solicitor, Buyer and Buyer Solicitor by the end of the sales process.

- Click Save & Proceed
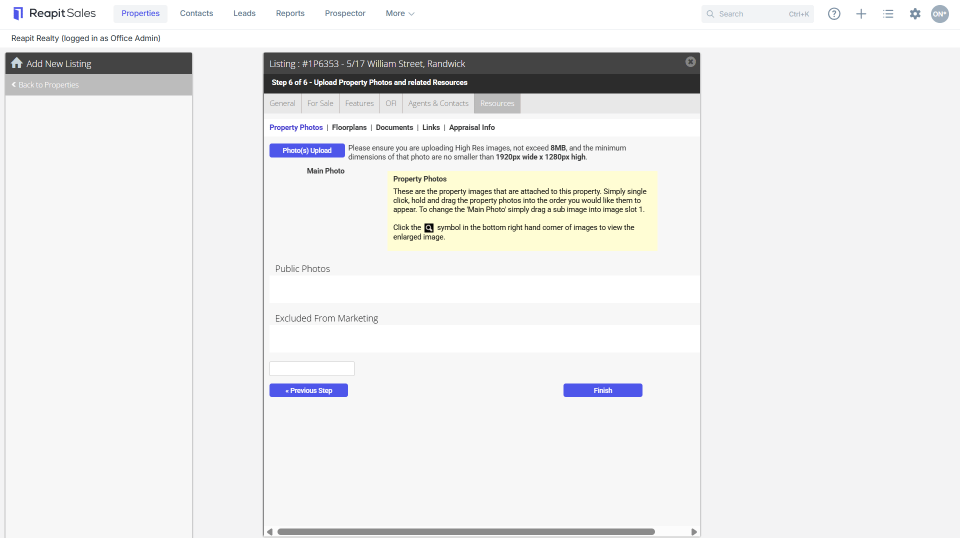
- Upload any Resources
 14. Click Finish