'%20d='M0%208a8%208%200%200%201%208-8h24a8%208%200%200%201%208%208v24a8%208%200%200%201-8%208H8a8%208%200%200%201-8-8V8Z'/%3e%3cpath%20fill='%23fff'%20d='M10.41%206v3.779h15.048v19.537h4.132V6H10.41Z'/%3e%3cpath%20fill='%23fff'%20d='M20.967%2034V13.837L10.41%209.78v20.166L20.967%2034Z'/%3e%3cdefs%3e%3clinearGradient%20id='reapit-sales__a'%20x1='20.702'%20x2='20.702'%20y1='.351'%20y2='31.228'%20gradientUnits='userSpaceOnUse'%3e%3cstop%20stop-color='%235573FD'/%3e%3cstop%20offset='.575'%20stop-color='%234E56EA'/%3e%3c/linearGradient%3e%3c/defs%3e%3c/svg%3e)
How to Insert a Logo/Image into an Email Signature
This article demonstrates how to add and edit a Logo within a staff members email signature within Reapit Sales. The processes in this article include: Insert a Logo/Image into an Email Signature Edit an existing Logo/Image
This article demonstrates how to add and edit a Logo within a staff members email signature within Reapit Sales.
*Note: Permissions may apply
The processes in this article include:
- Insert a Logo/Image into an Email Signature
- Edit an existing Logo/Image
Insert a Logo/Image into an Email Signature
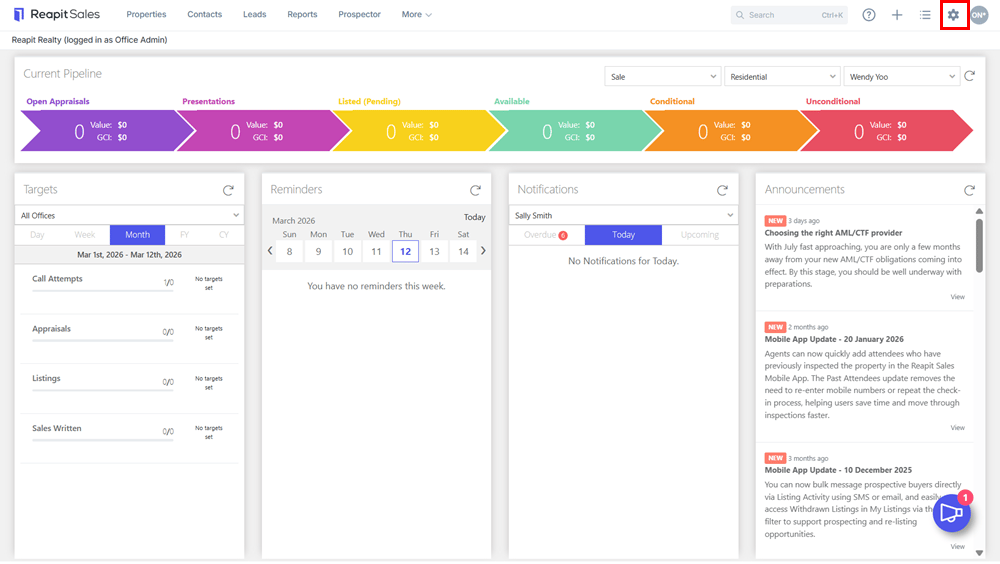
1. Click My Office from the Menu bar.
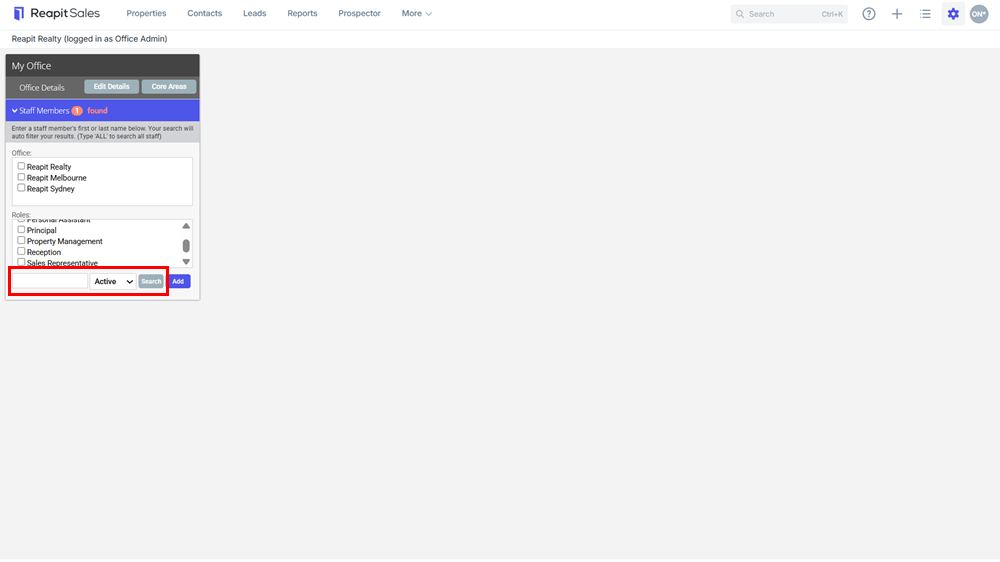
2. Type the staff member's name on the Left Panel and the staff member will appear on the staff results panel.
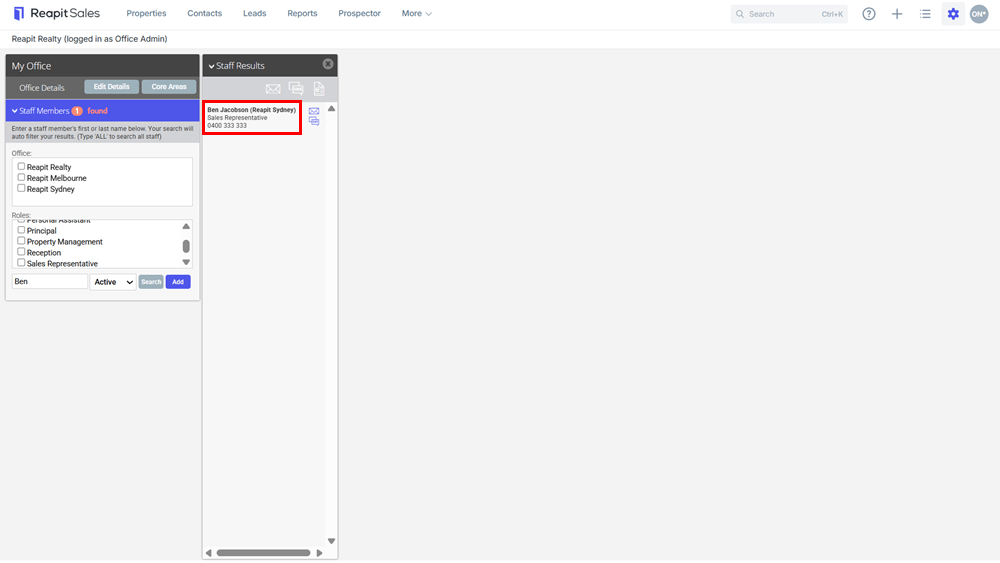
3. Click the staff members name to open their staff card.
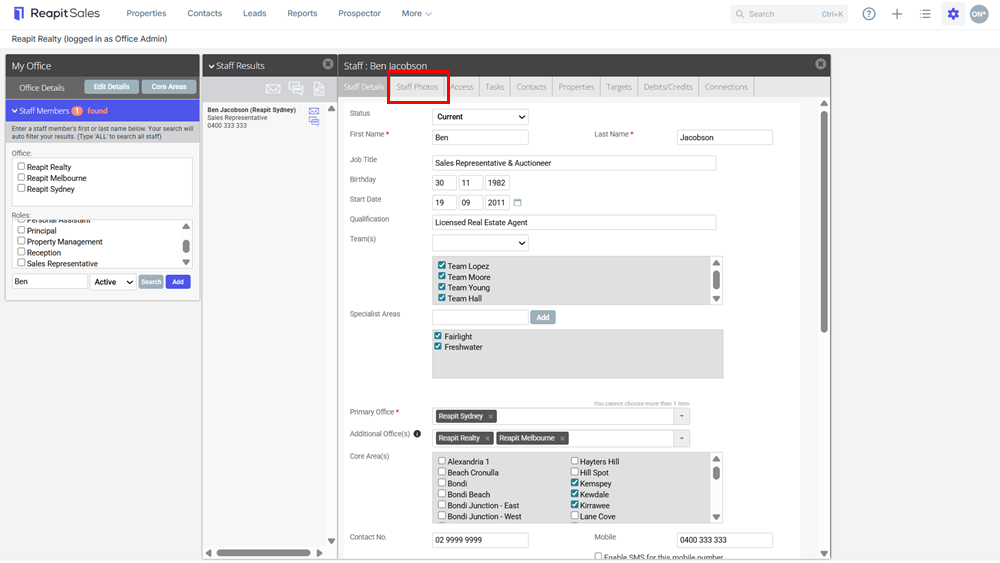
4. Click the Staff Photos tab and select 'Tick to customise signature'.
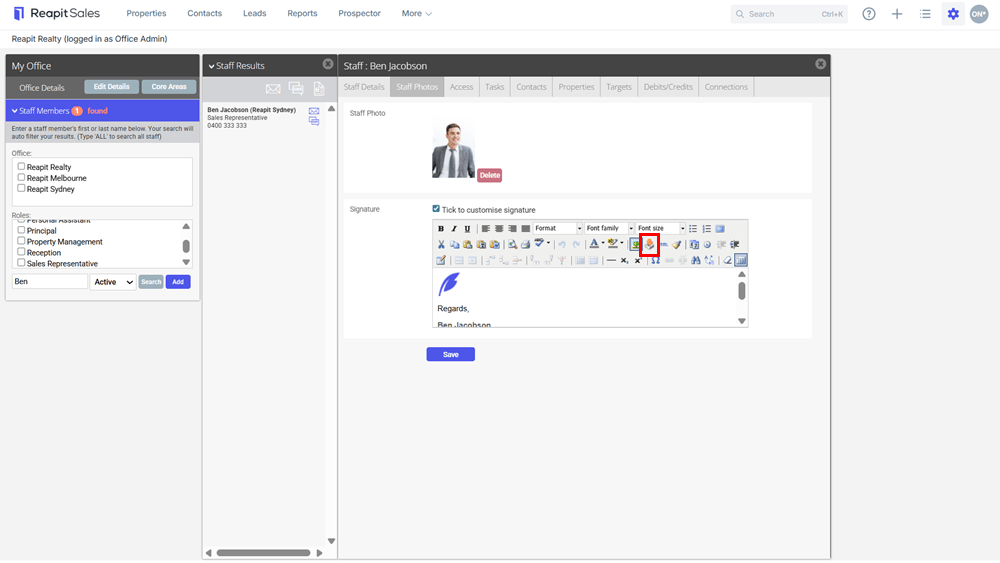
5. The edit box will appear.
6. To upload an image, click the orange arrow icon  to load your image into the system.
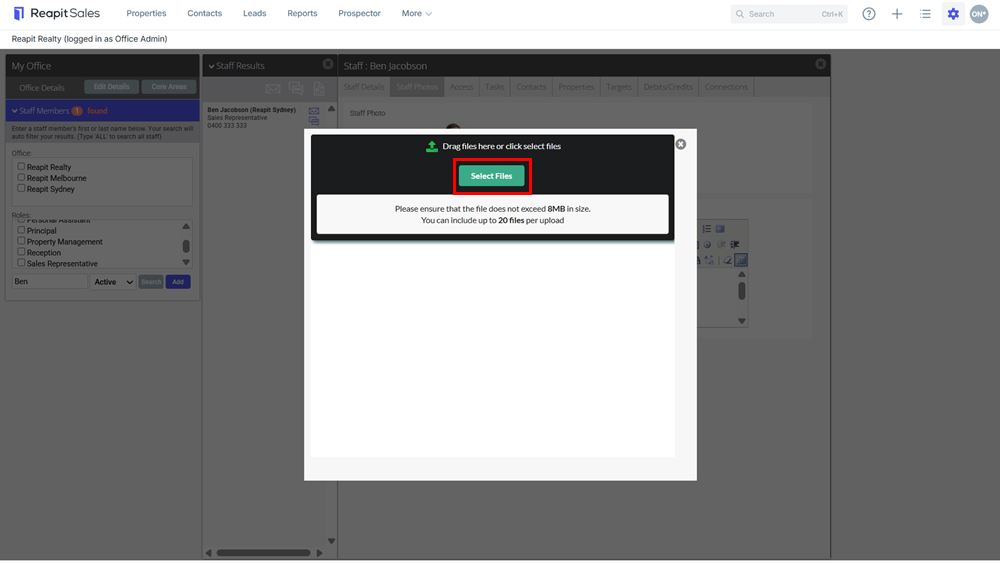
7. Select a file from your desktop or drag a file to the box.

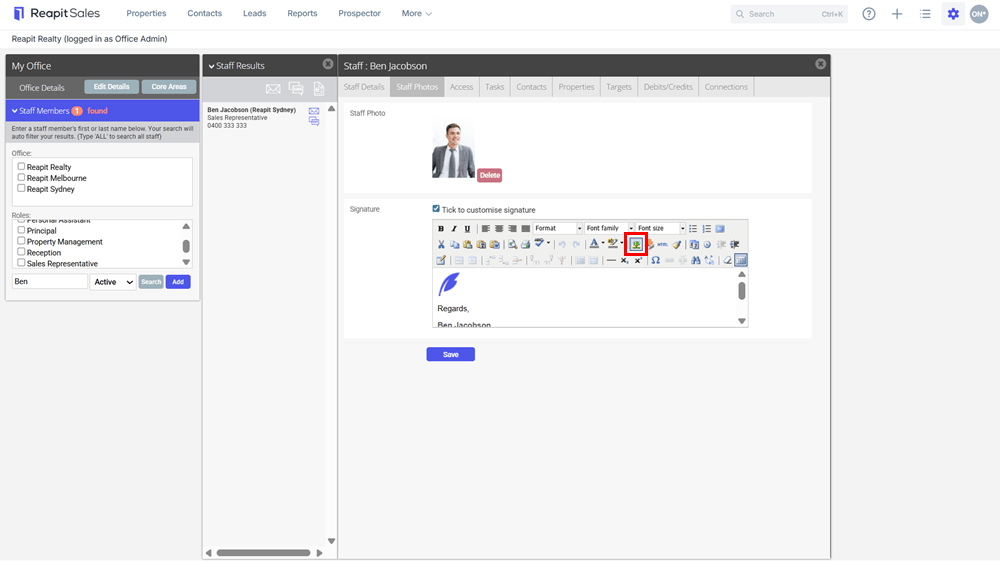
8. Once the image has loaded click where you would like to insert the image.
9. Click the tree icon to insert your image.
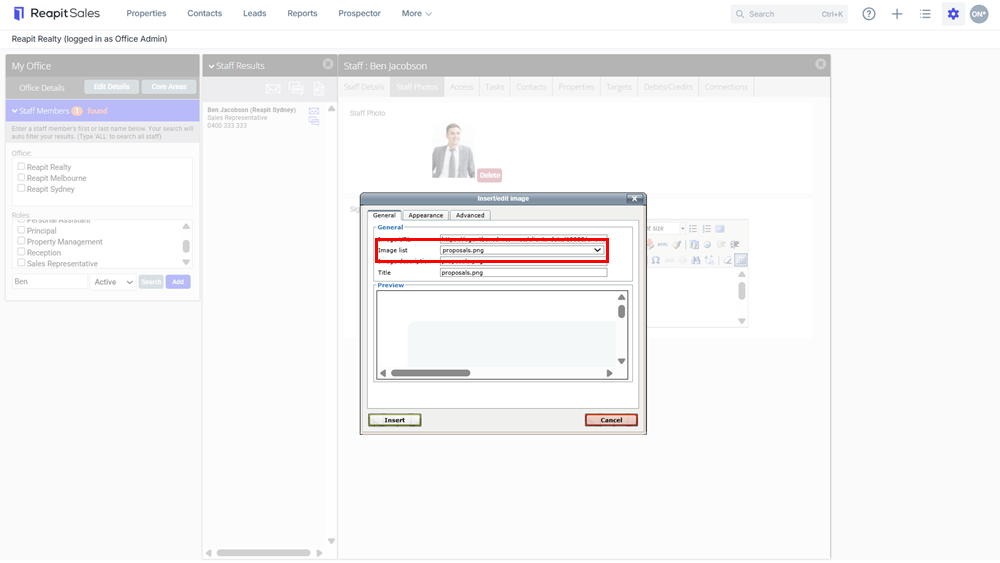
10. Select your image from the Image list drop down.
11. Image will appear in window.
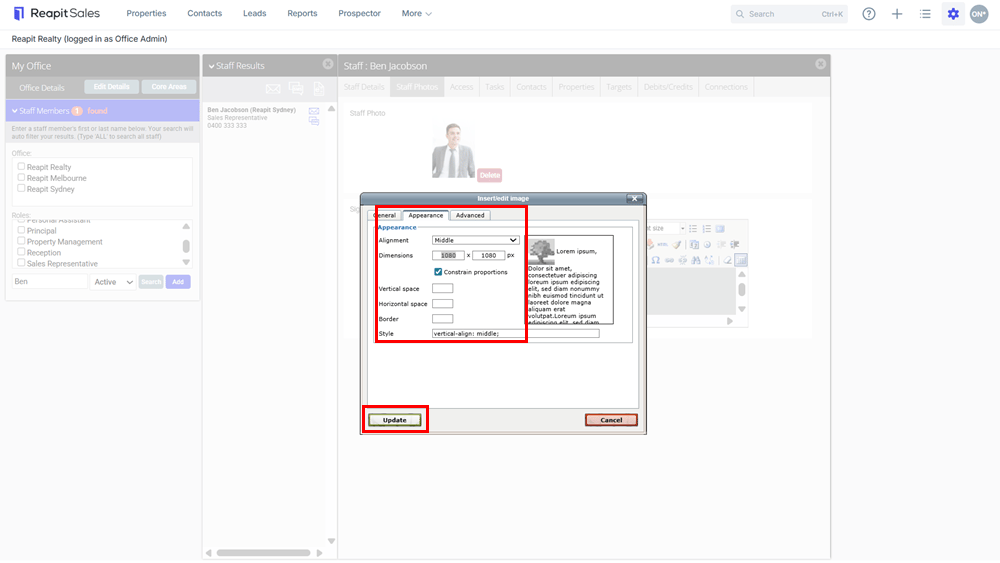
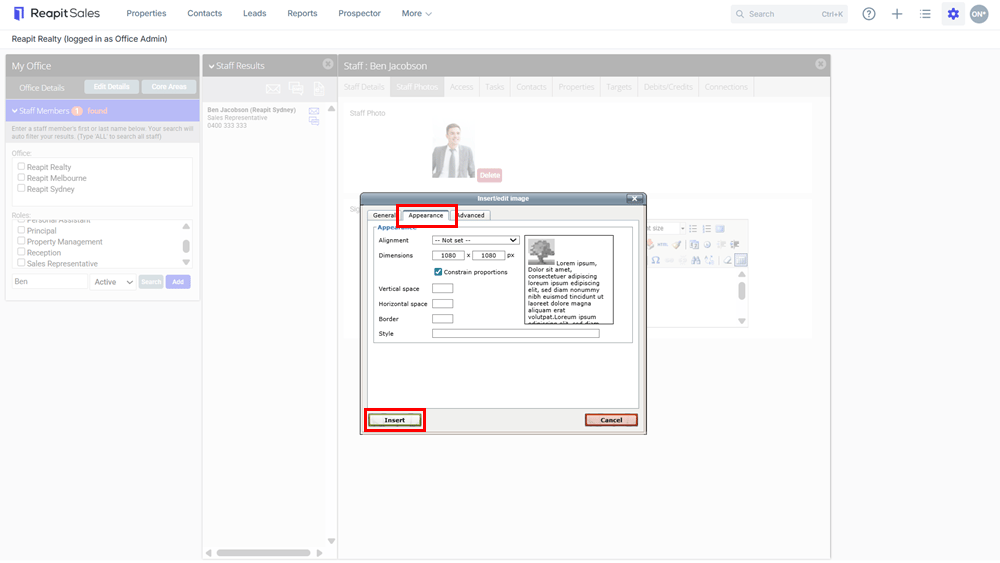
12. You can edit the positioning and dimensions of the image in the Appearance tab.
13. Click Insert

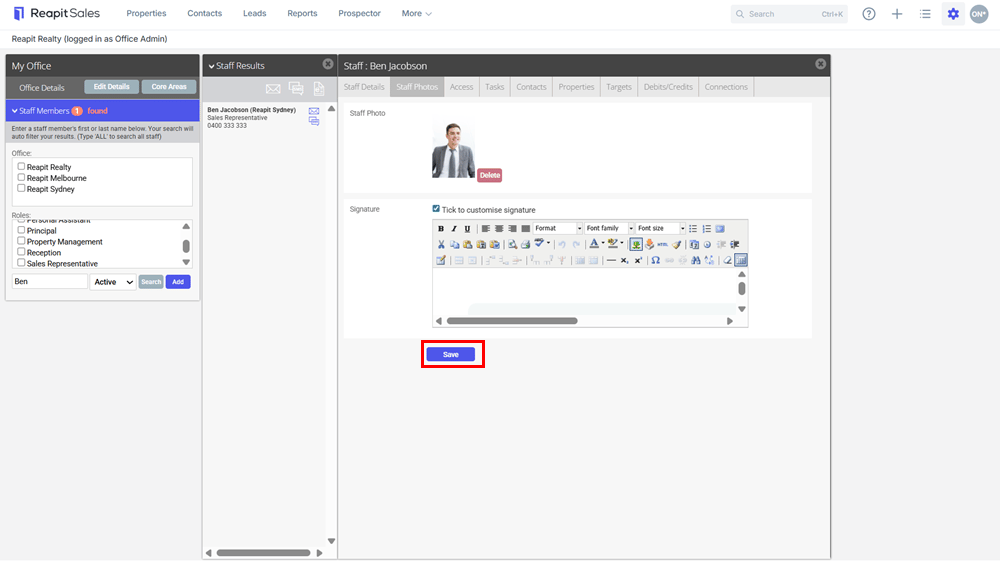
14. Click on Save
Edit an existing Logo/Image
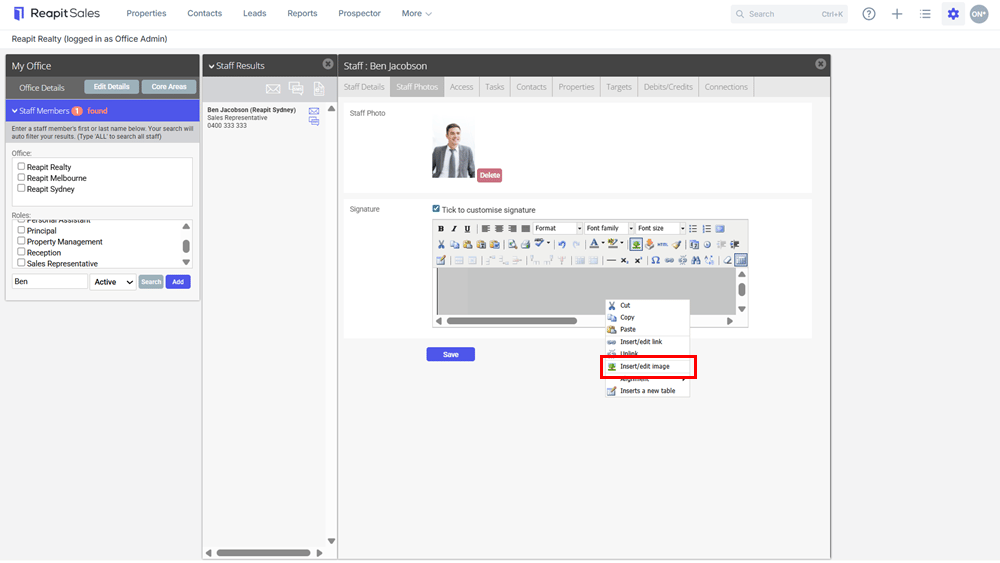
1. To edit the image, right click on the Logo/Image.
2. Select Edit Image.
3. Go to the Appearance Tab.