
Custom Agent Positioning (AP+)
This article will cover managing agent positioning on using Reapit Websites.
The processes in this article include:
- Access the Feature
- Option A - Manual Position Editing
- Option B - Move Rows Between Office Groups
- Next Step
- Additional Information
Note: Before using this feature, please ensure
- You have an access role of Website Admin
- You can access the Agent Position menu
- Agents are already synced and visible on the website
Access the Feature
1. Log in to the WordPress Admin.
2 Navigate to Agent Position.
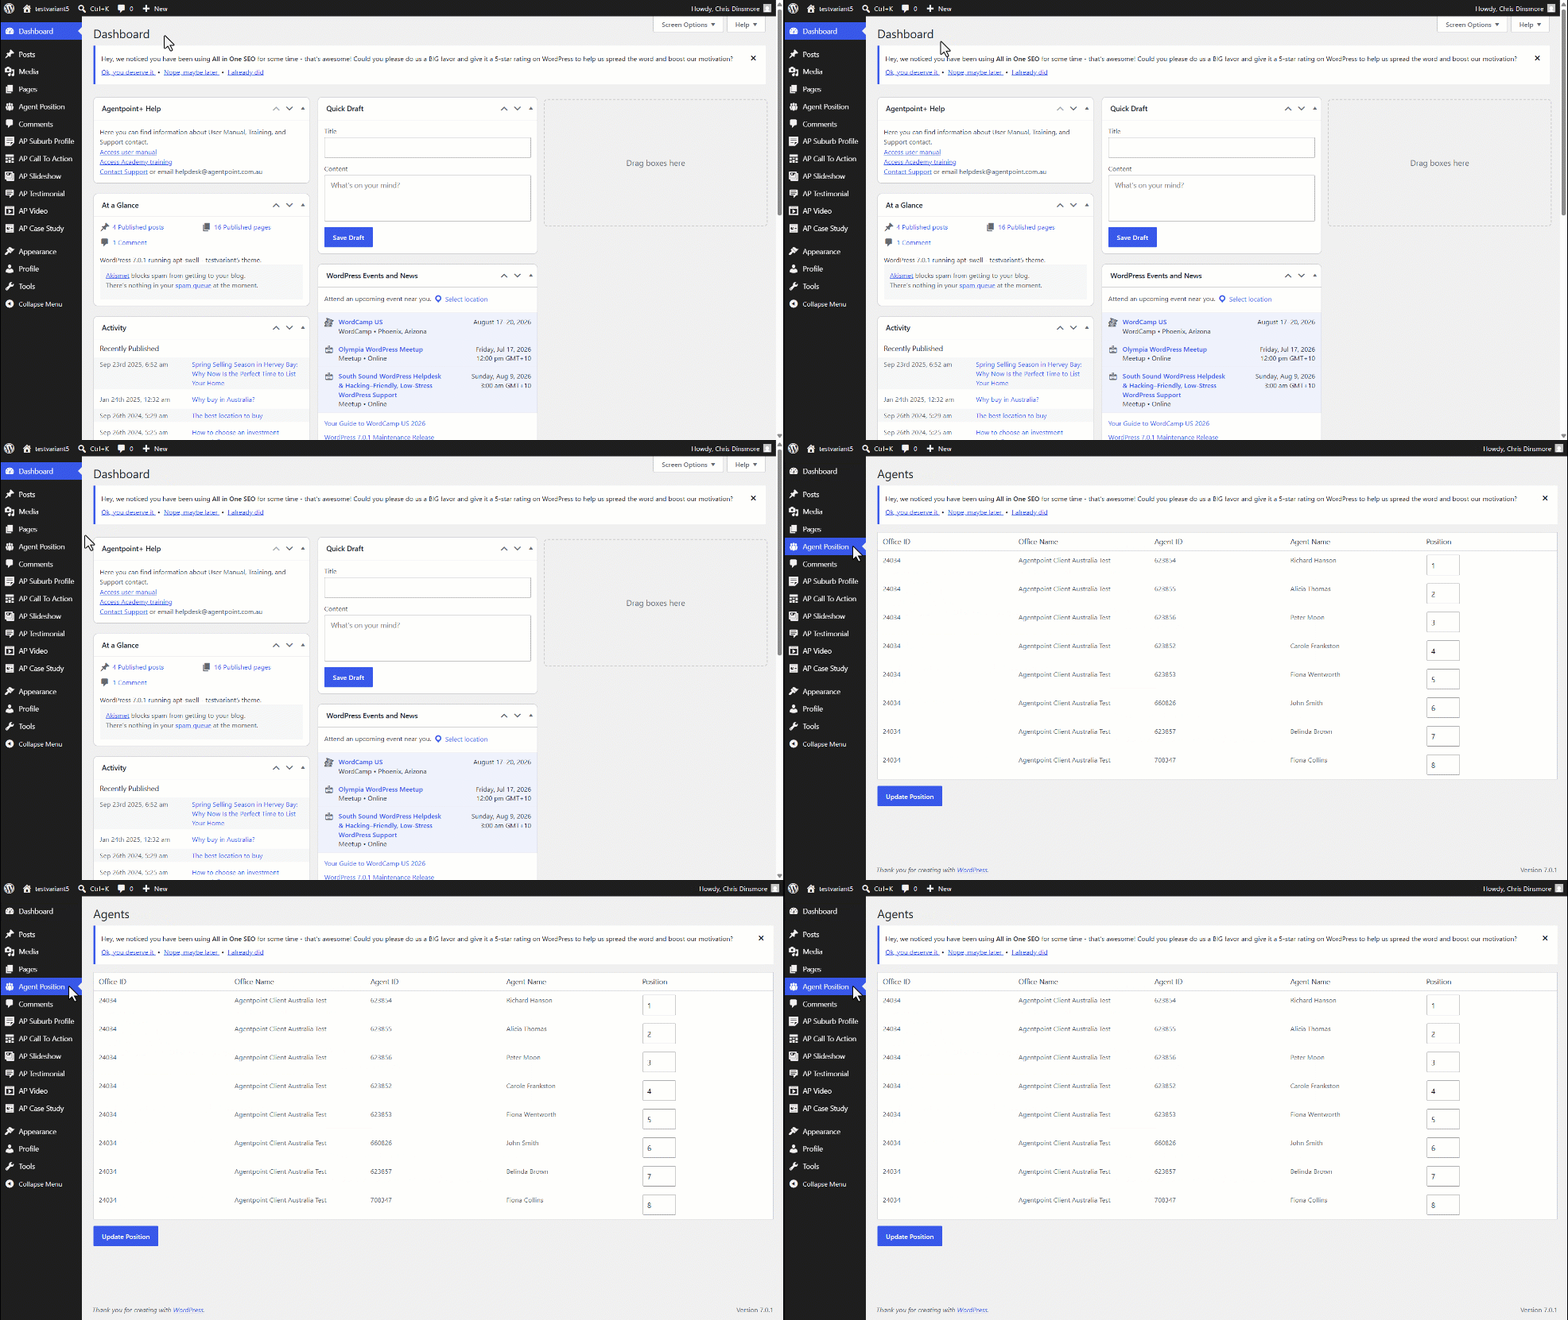
Option A - Manual Position Editing
1. Locate the Agent.
2. Update the value in the Position field.
4. Click Update Position.
5. A confirmation banner will appear to confirm the changes.
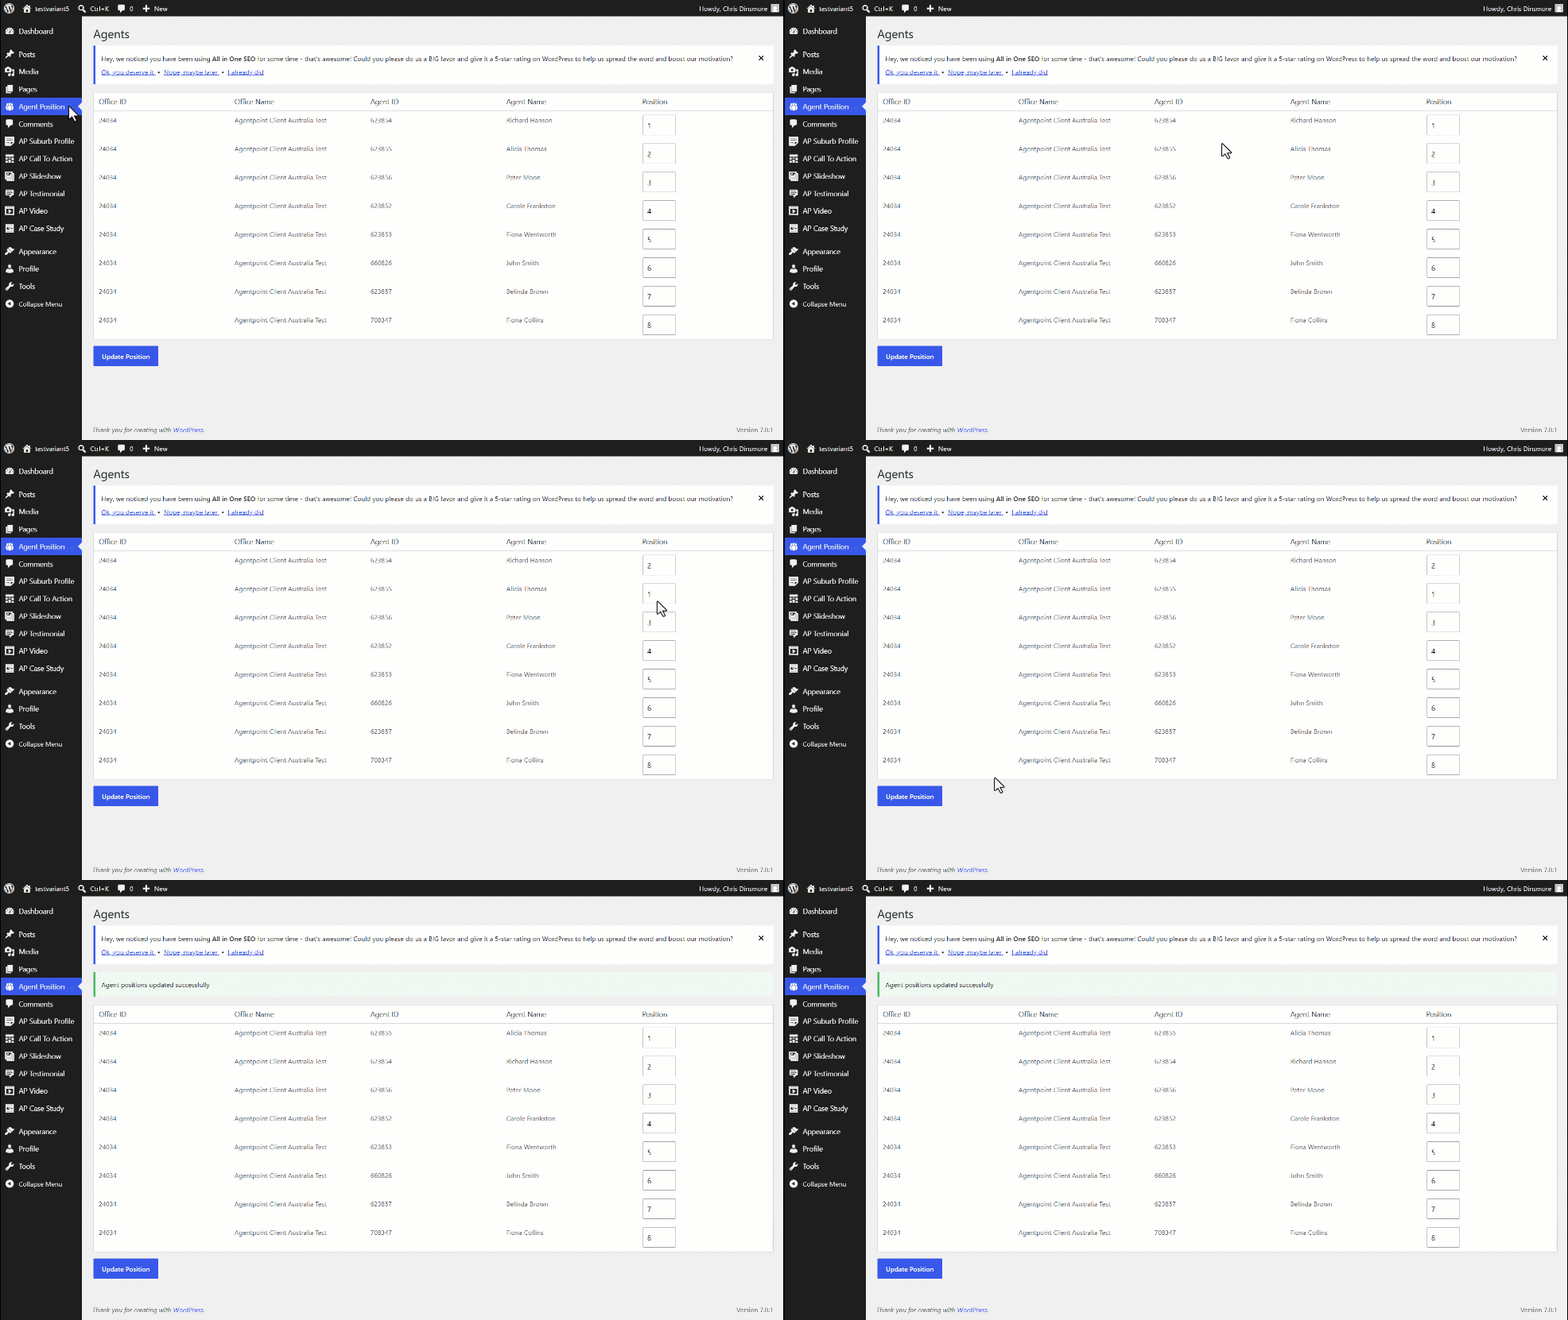
Manual position editing is best for precise position control.
Option B - Move Rows Between Office Groups
Note: Drag and drop between rows is only available for agencies with multiple offices using a single website.
1. Click and hold the agent or office row.
2. Drag a row between office groups.
3. A confirmation banner will appear to confirm the changes.
Next Steps
Once the order has been updated, go to your website; the agent position will have changed.

Additional Information
Position numbers can start from any value.
Gaps in numbering is acceptable.
Positioning cannot be disabled or managed through the CRM.
Duplicate positions are allowed across different Office Groups but should be unique within the same office.
Office Groups are based on the Office Name and manage positions. Independently.
Leaving blank does not remove an agent; it assigns a fallback value of 0 and position the agent at the top.
For reliable ordering, every agent should have a unique position number.