Reapit Verify in Reapit Sales
This article covers how to initiate, manage and trigger know your customer checks for a contact by creating a case from Reapit Sales. This is used when you need to verify a vendor, buyer or other related party against your AML/CTF requirements. The processes in this article include: • Creating a Case: Vendor Verification, Buyer Verification • Risk Assessments: How to Access, Complete or Update a Risk Assessment from Reapit Sales • Warning Pop-ups
This article covers how to initiate, manage and trigger know your customer checks for a contact by creating a case from Reapit Sales. This is used when you need to verify a vendor, buyer or other related party against your AML/CTF requirements.
The processes in this article include:
- Creating a Case: Vendor Verification, Buyer Verification
- Risk Assessments: How to Access, Complete or Update a Risk Assessment from Reapit Sales
- Warning Pop-ups
Creating a Case
Please Note: The type of verification, Simple or Advanced, sent to Vendors and Buyers from Reapit Sales is dictated by the default set in Reapit Verify Organisation Settings. You can still choose from Simple or Advanced if initiating a verification directly in Reapit Verify. Please refer to your on site Compliance Officer for your process on completing verification from Reapit Sales outside of you default settings.
Vendor Verification
This process outlines how to create a new Reapit Verify case from within Reapit Sales.
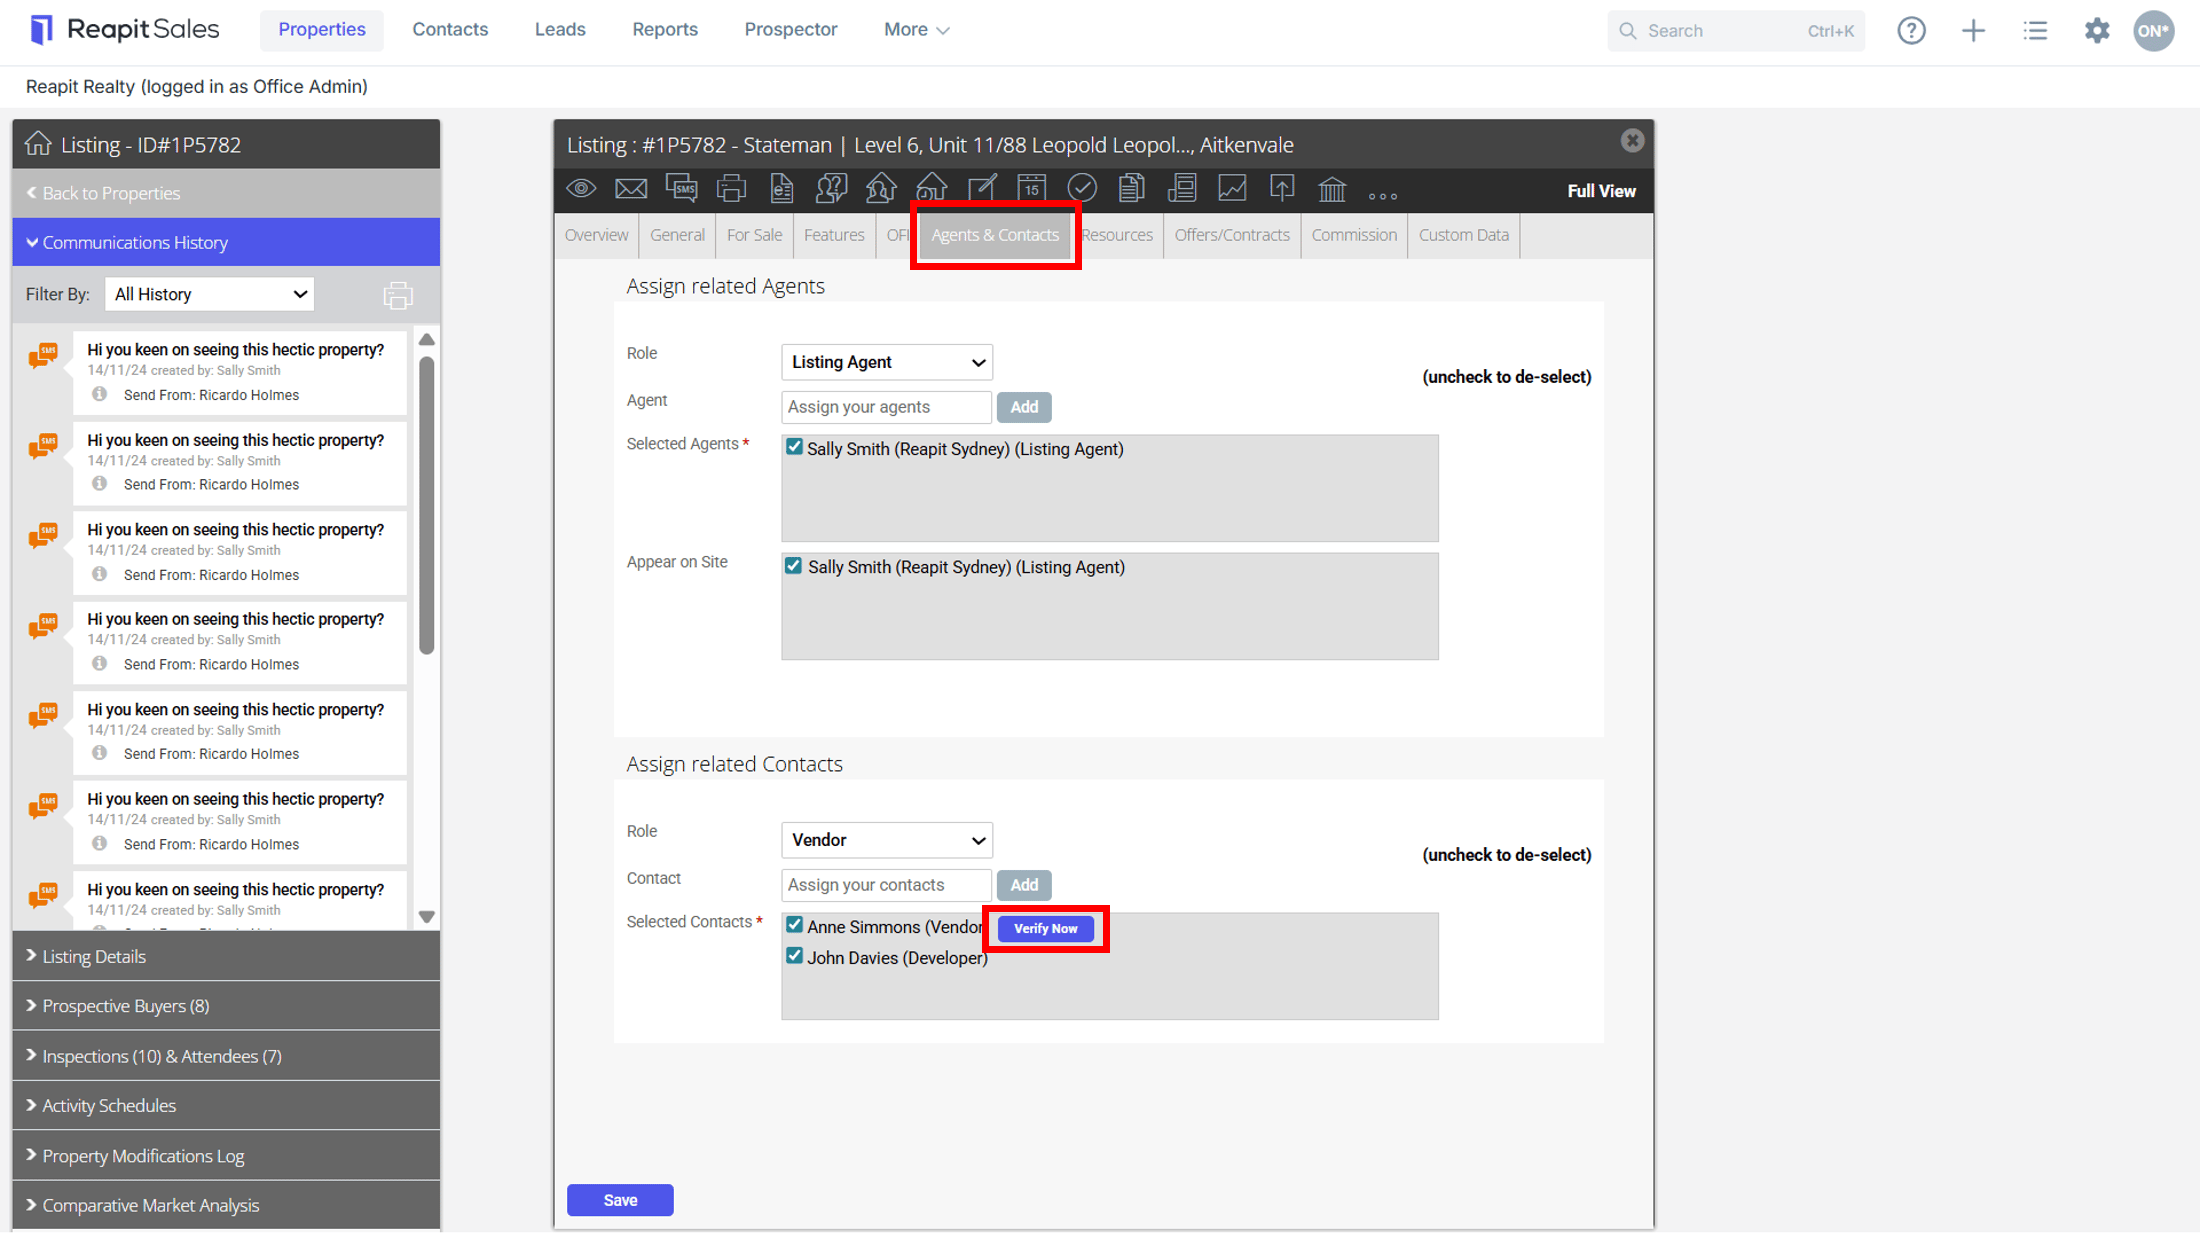
- Search for and open the property you want to verify in Reapit Sales.
- Select the Agents and Contacts tab.
- Navigate to Related Contacts.
- Find the relevant contact (for example, the vendor) and select Verify now.
- A case is created and an SMS is sent to the contact.
- Track the verification status on the case (for example, Waiting for customer → Completed).
- The case will be added to Reapit Verify.
- Open the case in Reapit Verify to view the verification(s) listed against the case.
Buyer Verification
This process outlines how to verify buyers at the Offers / Contractors stage of a listing once a buyer offer has been saved within the listing.
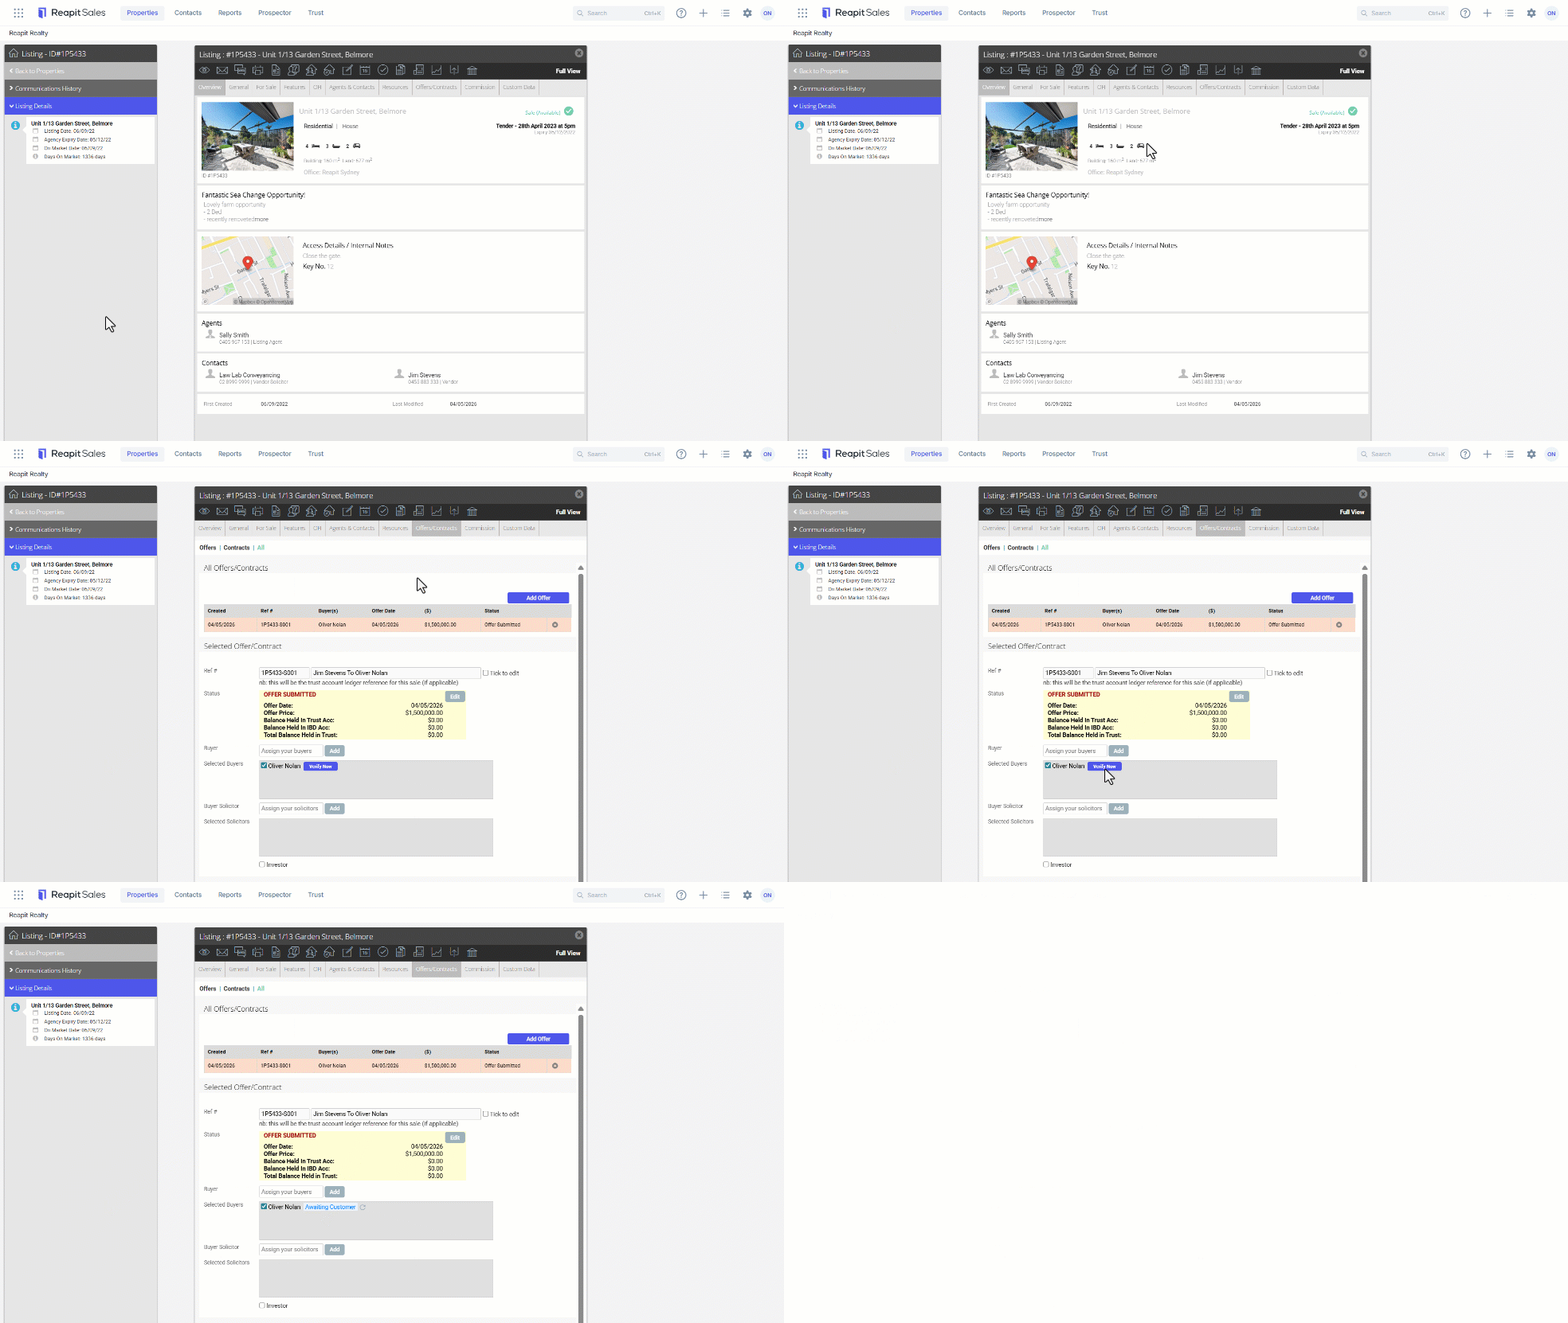
From within the property listing, Select the Offers/Contracts tab.
Navigate to the Selected Buyers section.
Click on Verify Now.
A case is created and an SMS is sent to the contact.
Track the verification status on the case (for example, Waiting for customer → Completed).
The case will be added to Reapit Verify.
Open the case in Reapit Verify to view the verification(s) listed against the case.
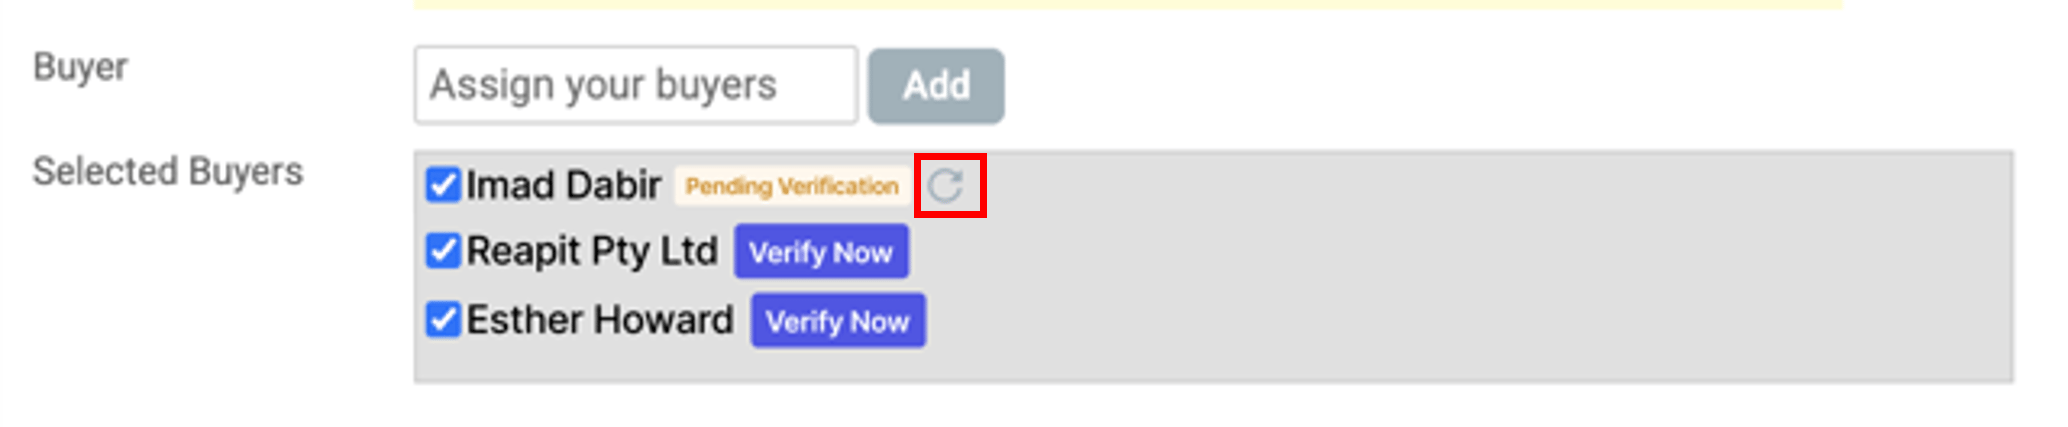
Note: When a verification is initiated, “Verify Now” is replaced with the verification status. A refresh icon is also displayed, allowing users to retrieve the latest verification status from the Reapit Verify platform.
Risk Assessments
A button to link through to Risk Assessments in Reapit Verify is available in the General tab of a listing. The Risk Assessment button will be greyed out if no verification has been initiated for that listing.
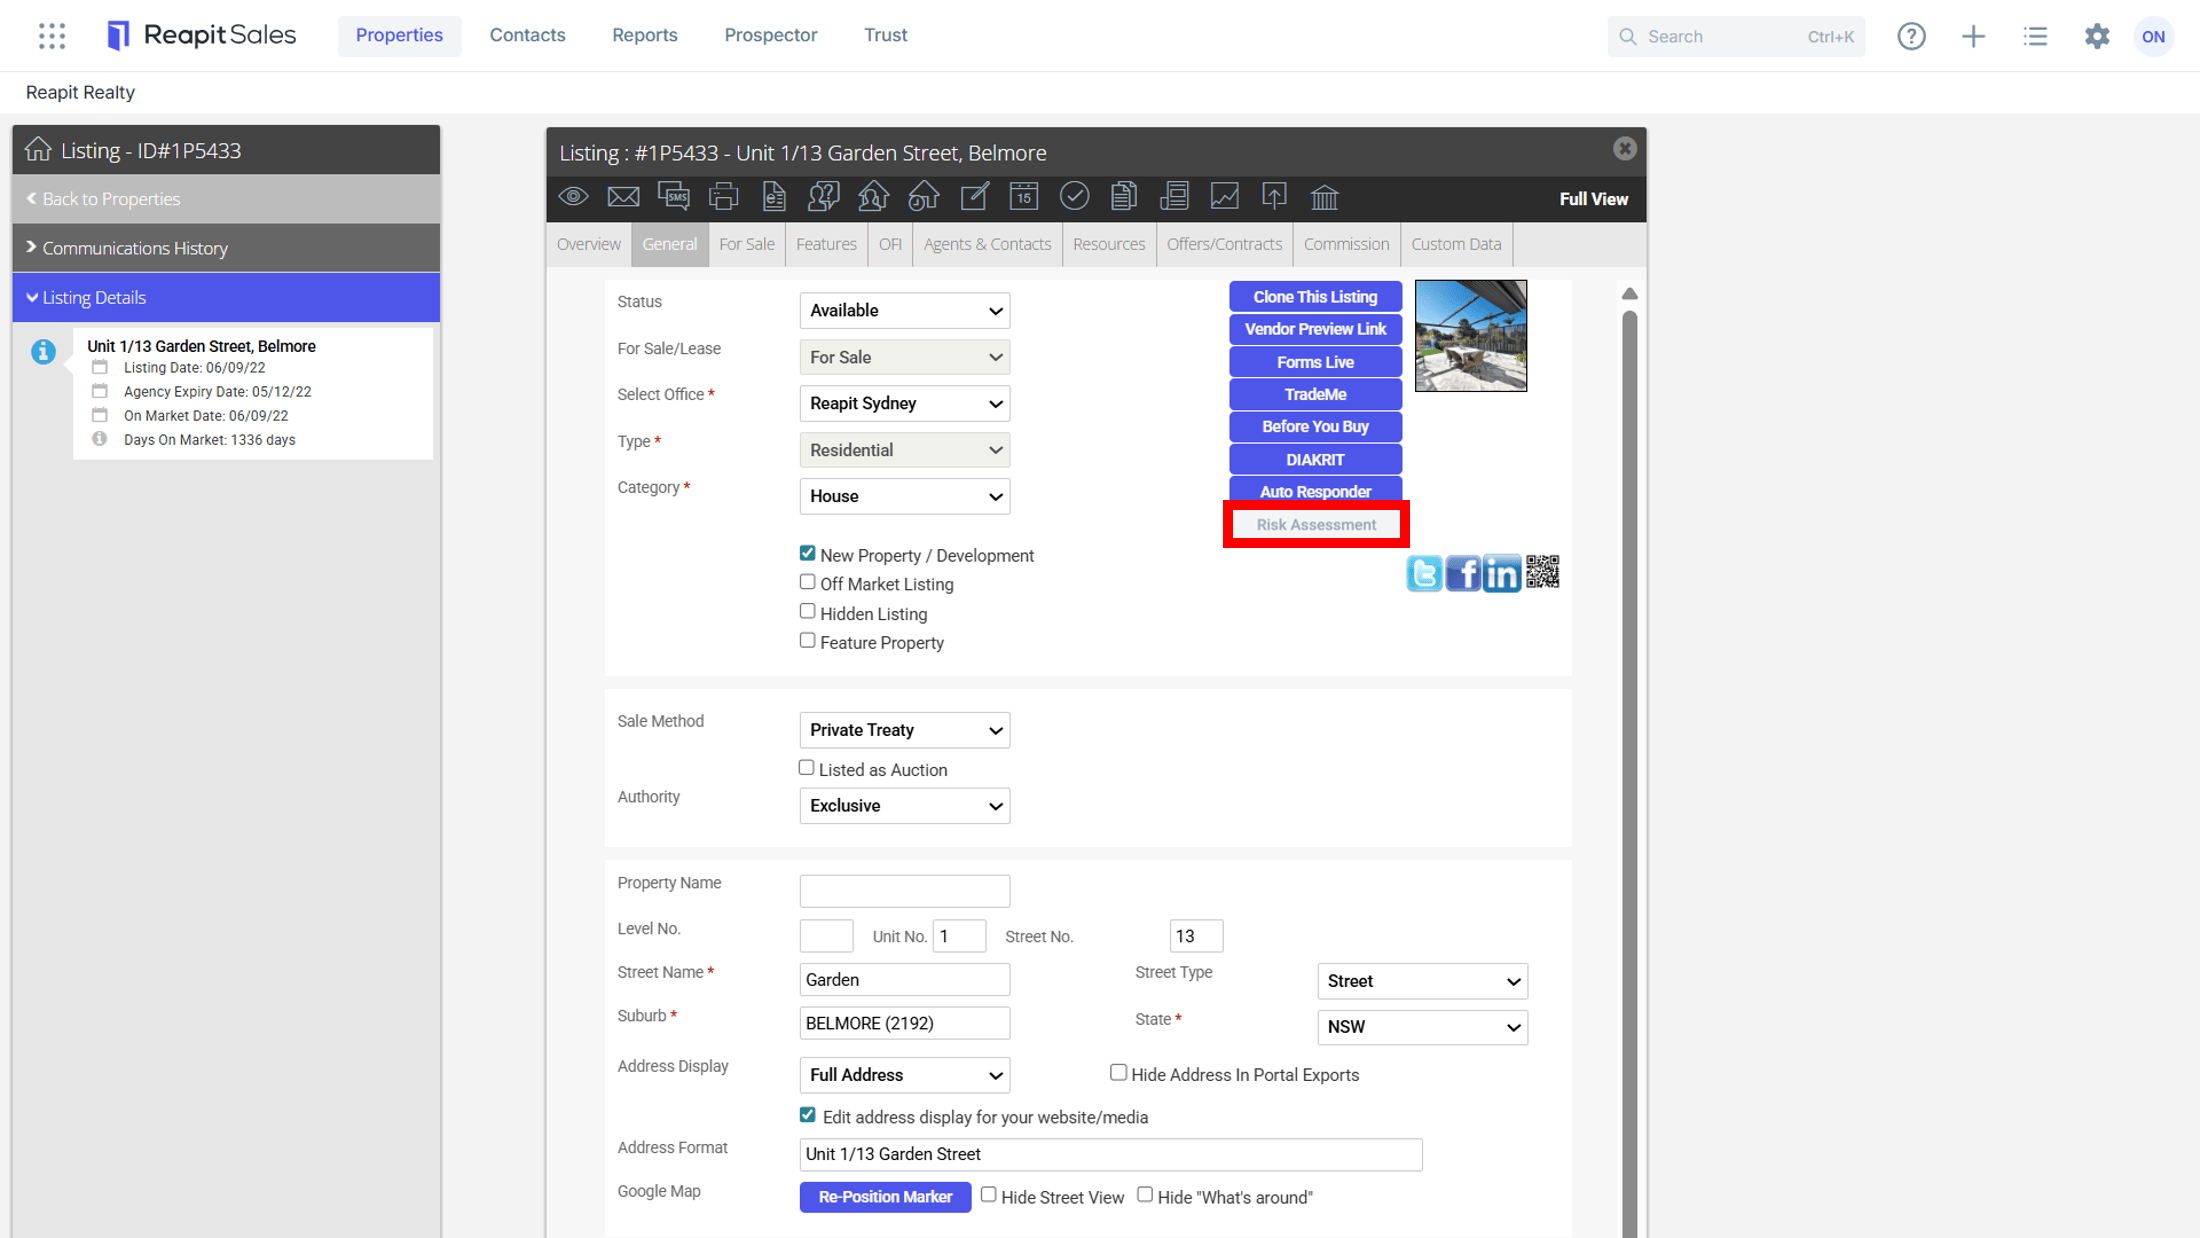
Once a verification has been initiated for a listing, the Risk Assessment button becomes enabled, allowing navigation direct to the Reapit Verify platform and complete the listing’s risk assessment.
How to Access, Complete or Update a Risk Assessment from Reapit Sales
- Search and select the property
- Navigate to the General Tab.
- Select Risk Assessment.
- You will be redirected to Reapit Verify.
If you wish to view or update the Risk Assessment answers, make the changes and click on Update.
If the Risk Assessment has not been completed,
- Answer all risk assessment questions.
- Click on Next.
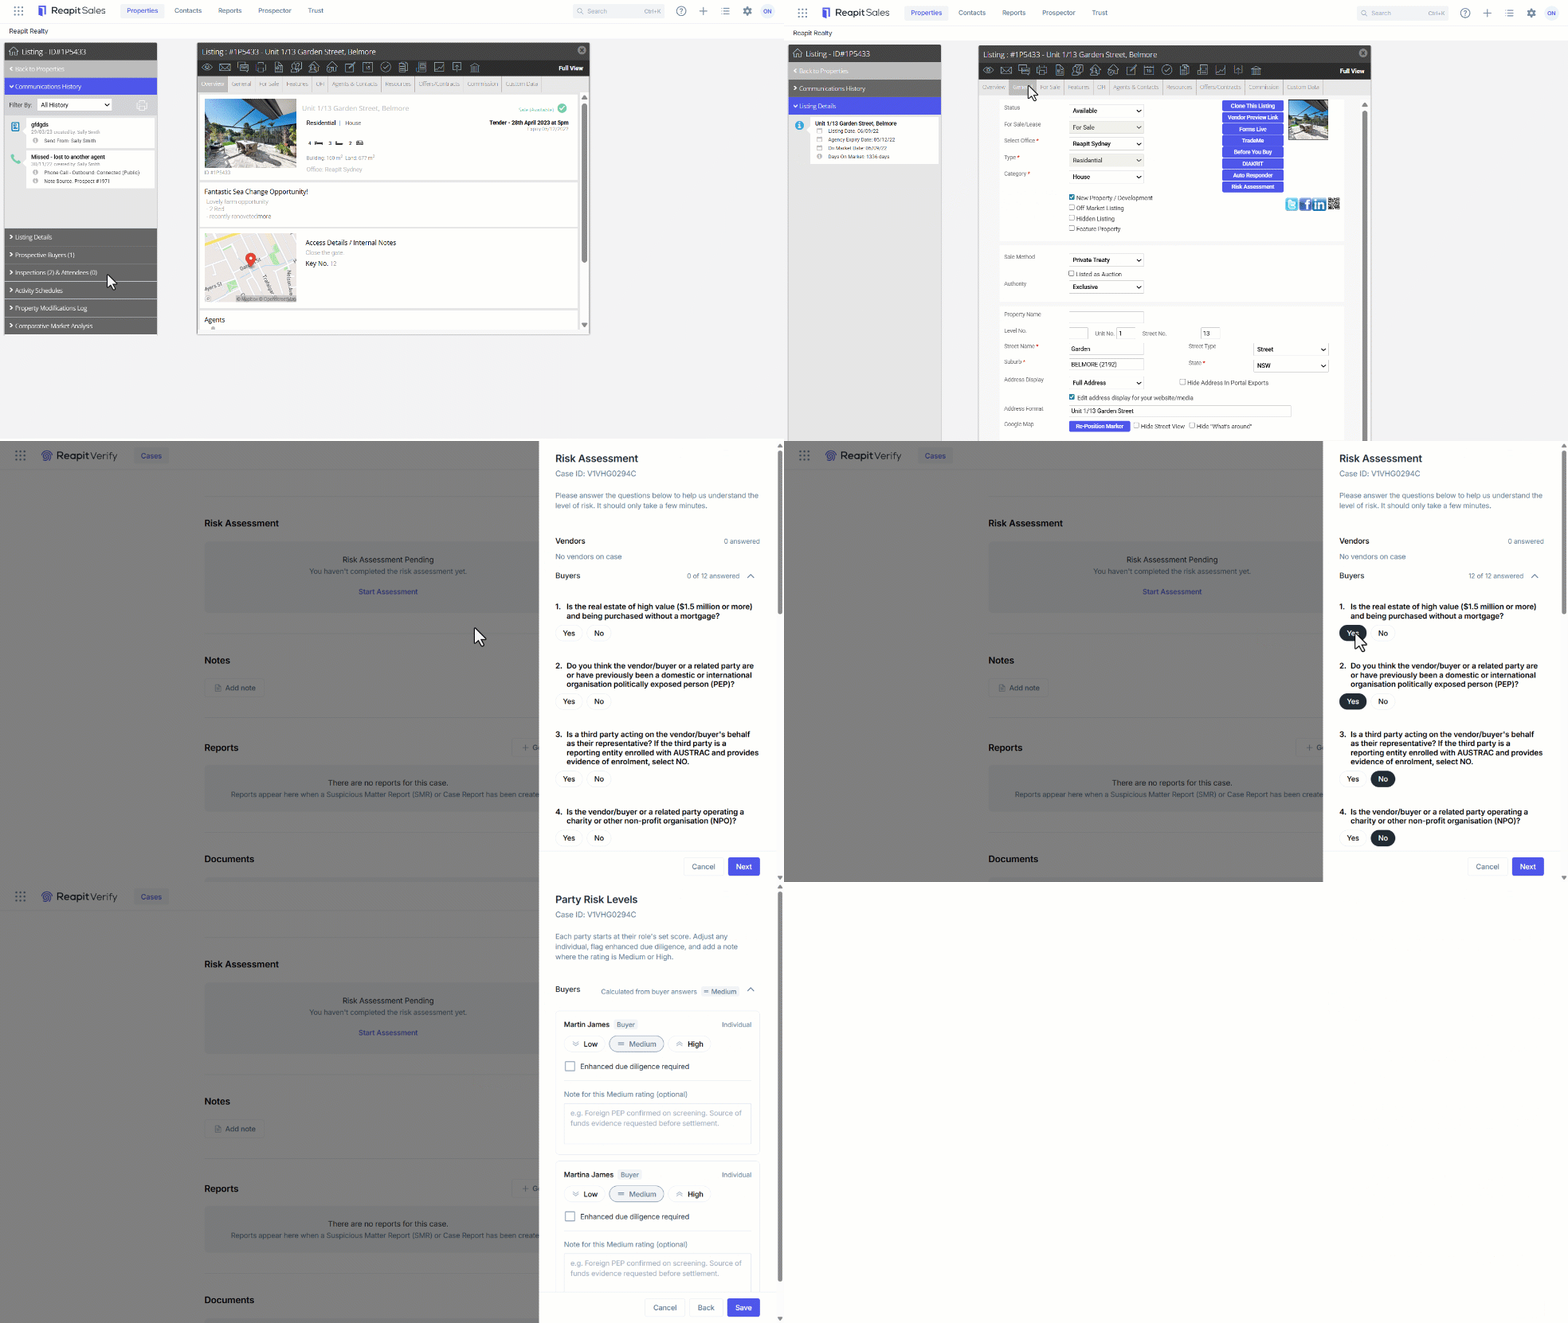
- Review the parties listed within the case.
- Confirm the automatically selected risk level for each party.
- Note: The initial Risk level is determined by the answeres provided during the risk assessment.
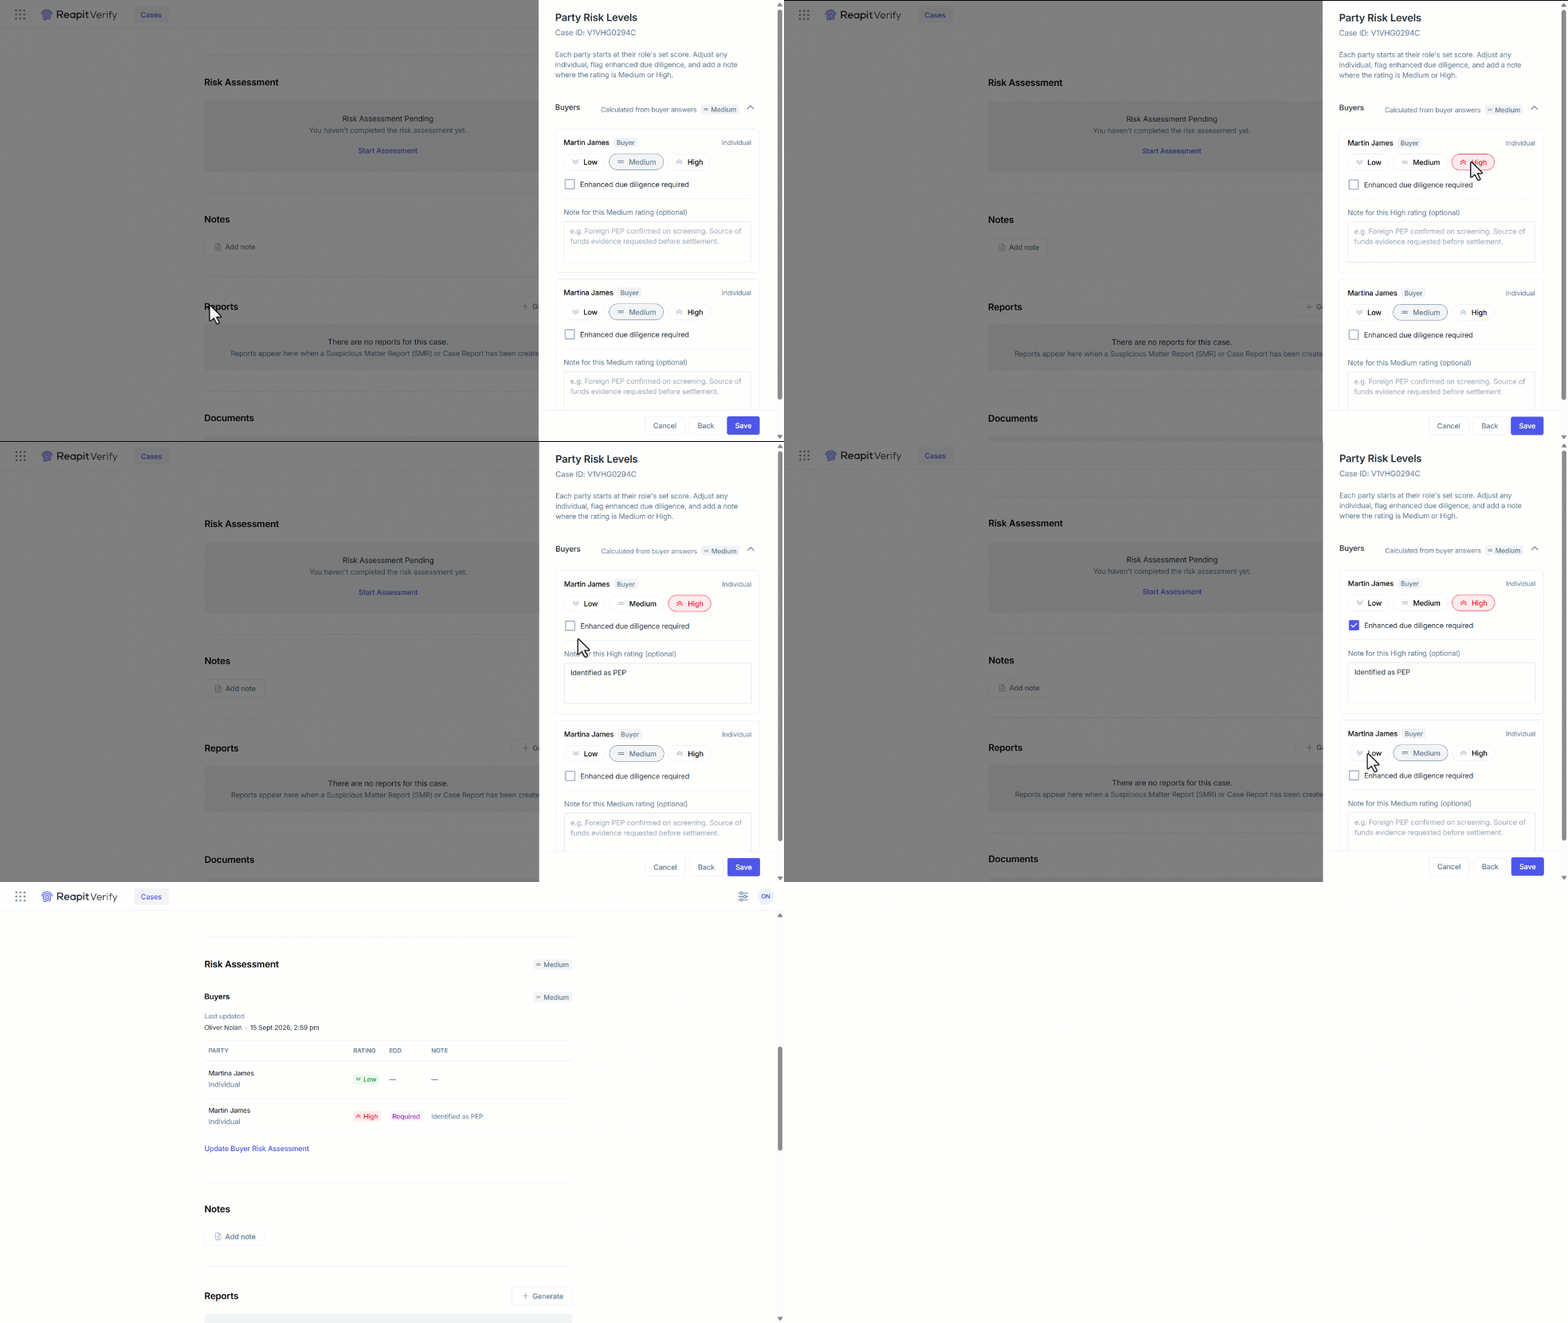
- For each party, update the risk level as required:
- Low
- Medium
- High
- If a party is assessed as High Risk, enter a Supporting Note explaining the reason for the rating. Example: "Flagged as Politically Exposed Person (PEP)" Note: If you change a party's risk rating to Low Risk, the notes field is removed is it is no longer required.
- Select the Enhanced Due Diligence Required checkbox where required. This setting records that it is required, but does not trigger any additional workflows in Reapit Verify.
- Repeat this process for all parties in the case.
- Click on Save.
- To update a completed Risk Assessment, Click on Update Buyer / Vendor Risk Assessment in the Buyers or Vendors section.
Warning Pop-ups
Vendor Warning
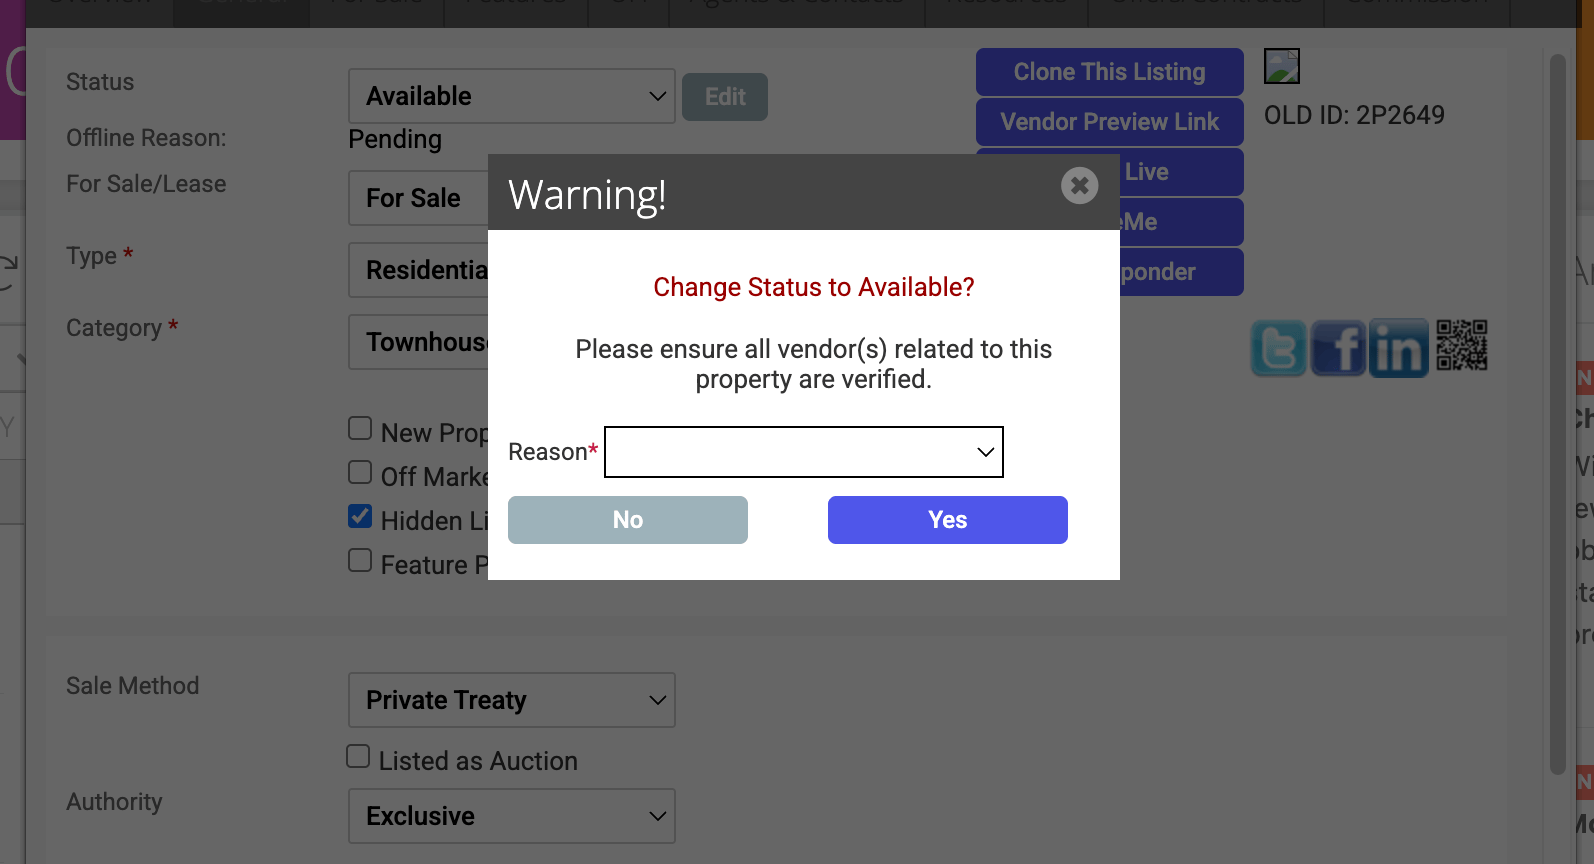
A warning pop-up will display when making a listing available states: Please ensure all vendor(s) related to this property are verified.
Buyer Warnings
A warning pop-up will display when changing a listing status to Under Contract states: Please ensure all buyer(s) related to this offer are verified.
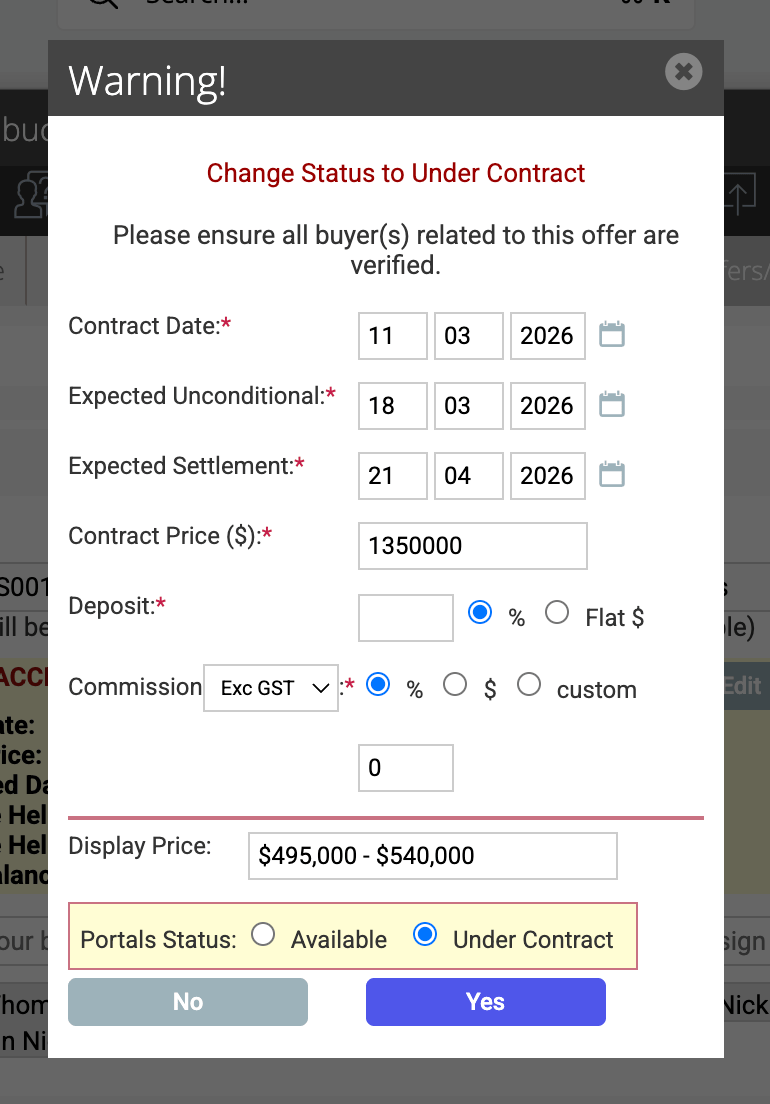
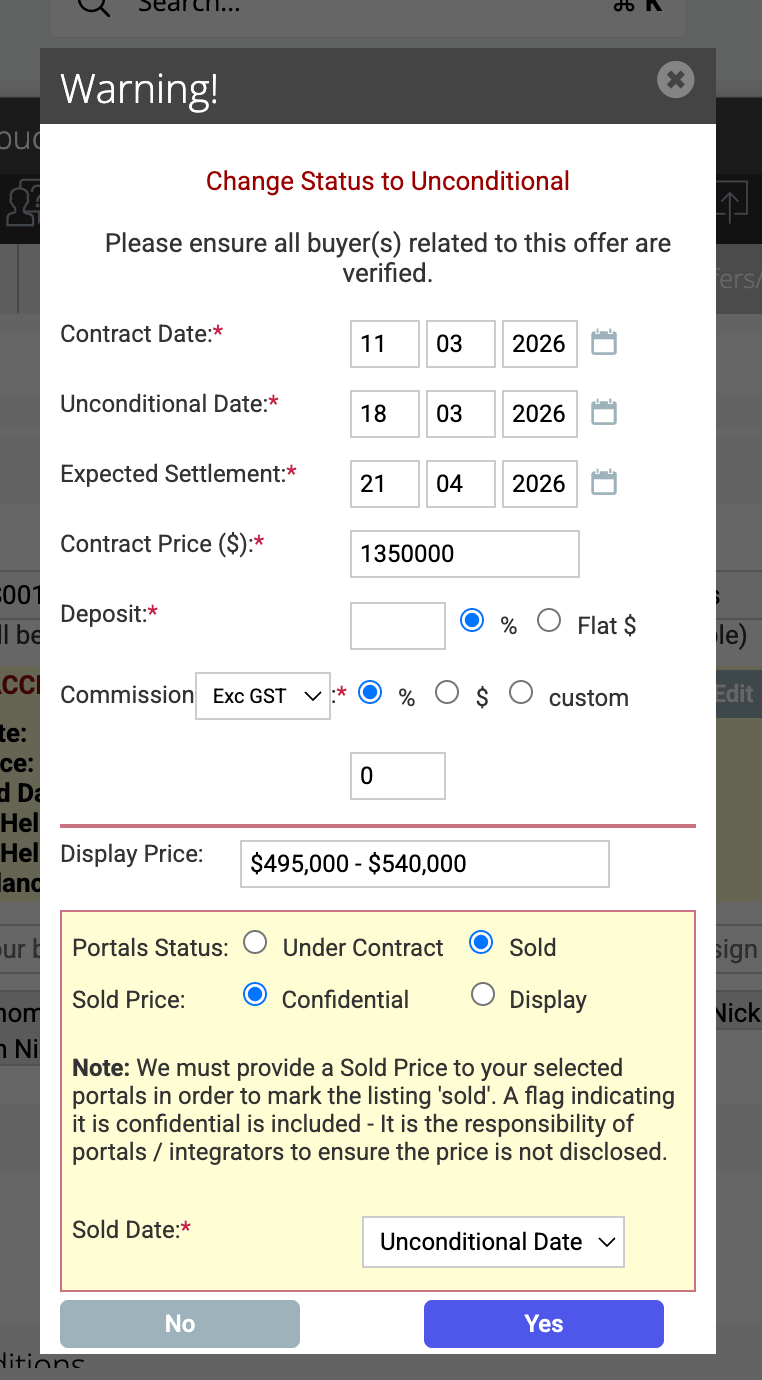
A warning pop-up will display when changing a listing status to Unconditional states: Please ensure all buyer(s) related to this offer are verified.