
Reapit Verify - Settings
This article covers the setup and configuration of office details for Reapit Verify. The processes in this article include: Setting Up Users User Management Organisation Settings Billing Settings
This article covers the setup and configuration of office details for Reapit Verify.
The processes in this article include:
- Setting Up Users
- User Management
- Organisation Settings
- Billing Settings
Note: This process does not include how to set-up or edit Risk Assessments. You can find this process here.
Setting Up Users
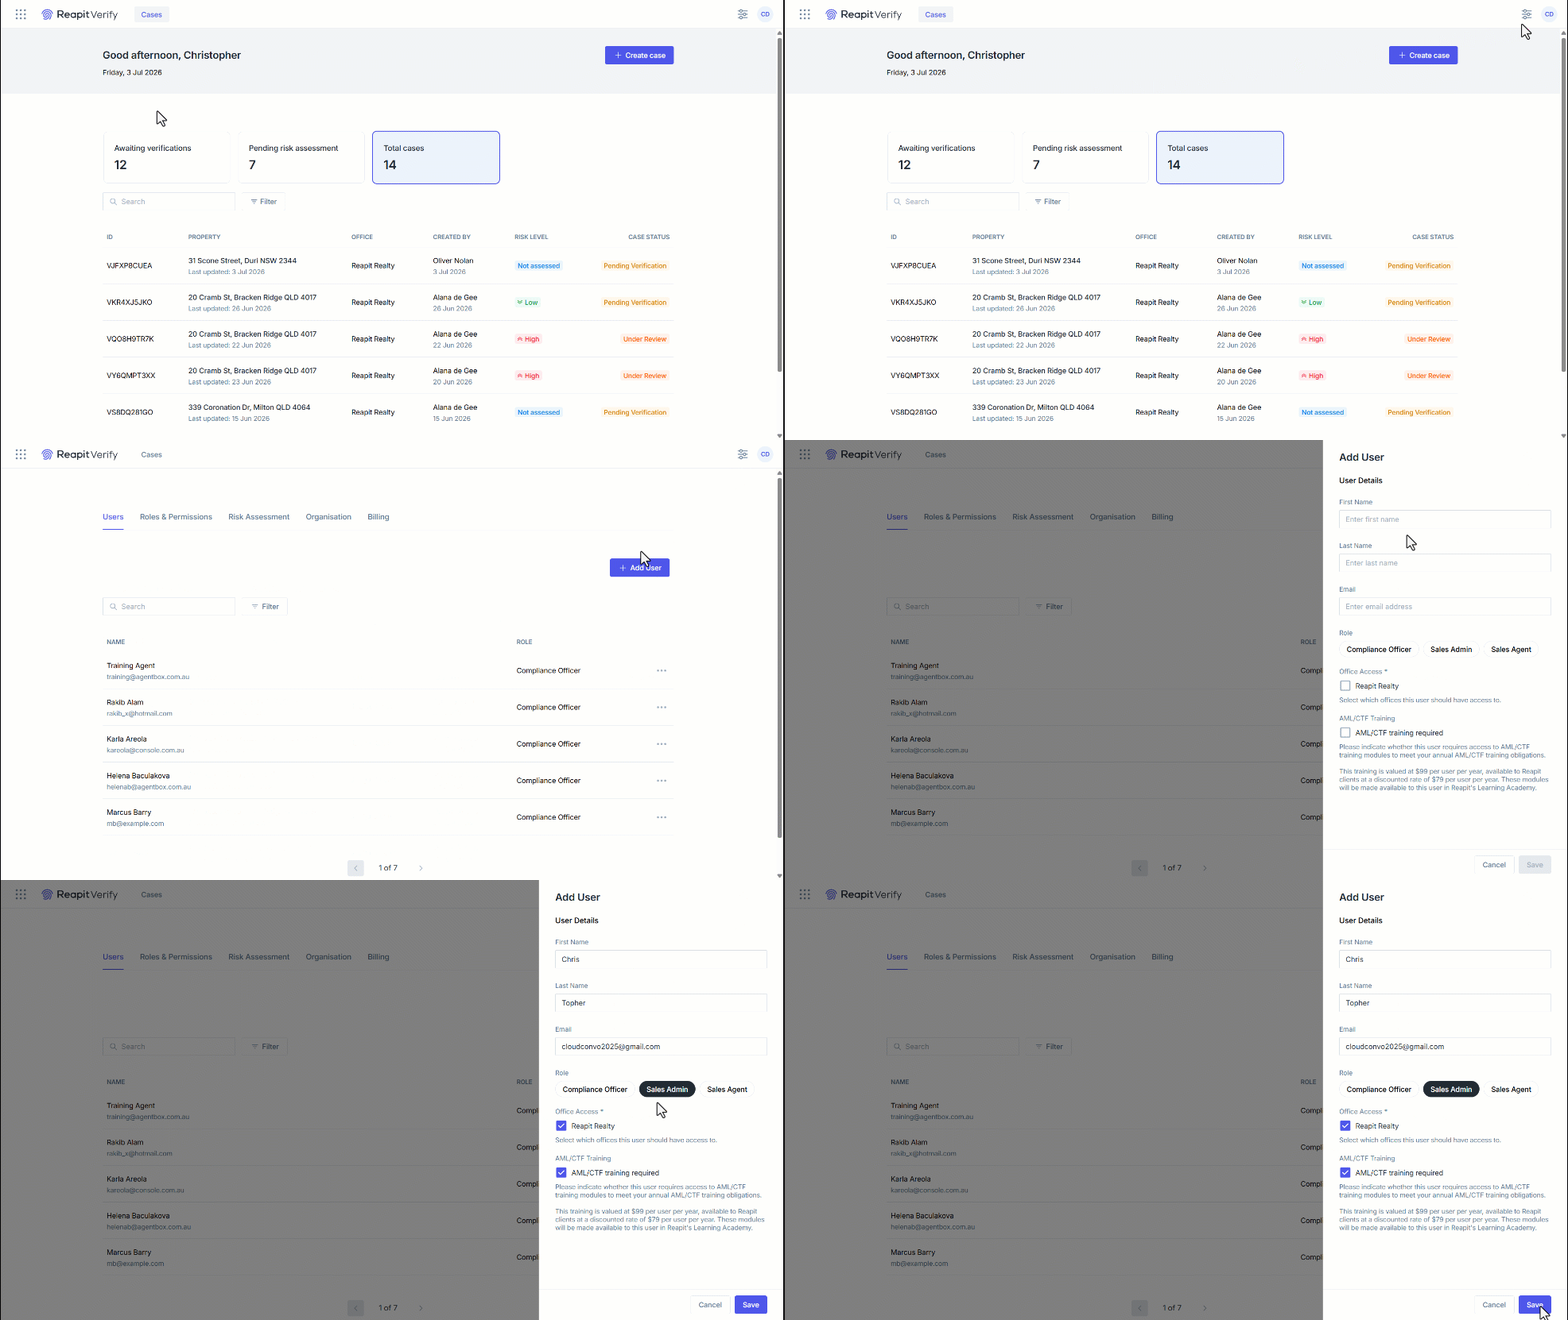
- In Reapit Verify, go to Settings.
- From the Users list, click Add User.
- Enter the First name, Last name and Email address.
Note: The Email address must be the same one used in other Reapit systems. - Select the Role access permission for the user
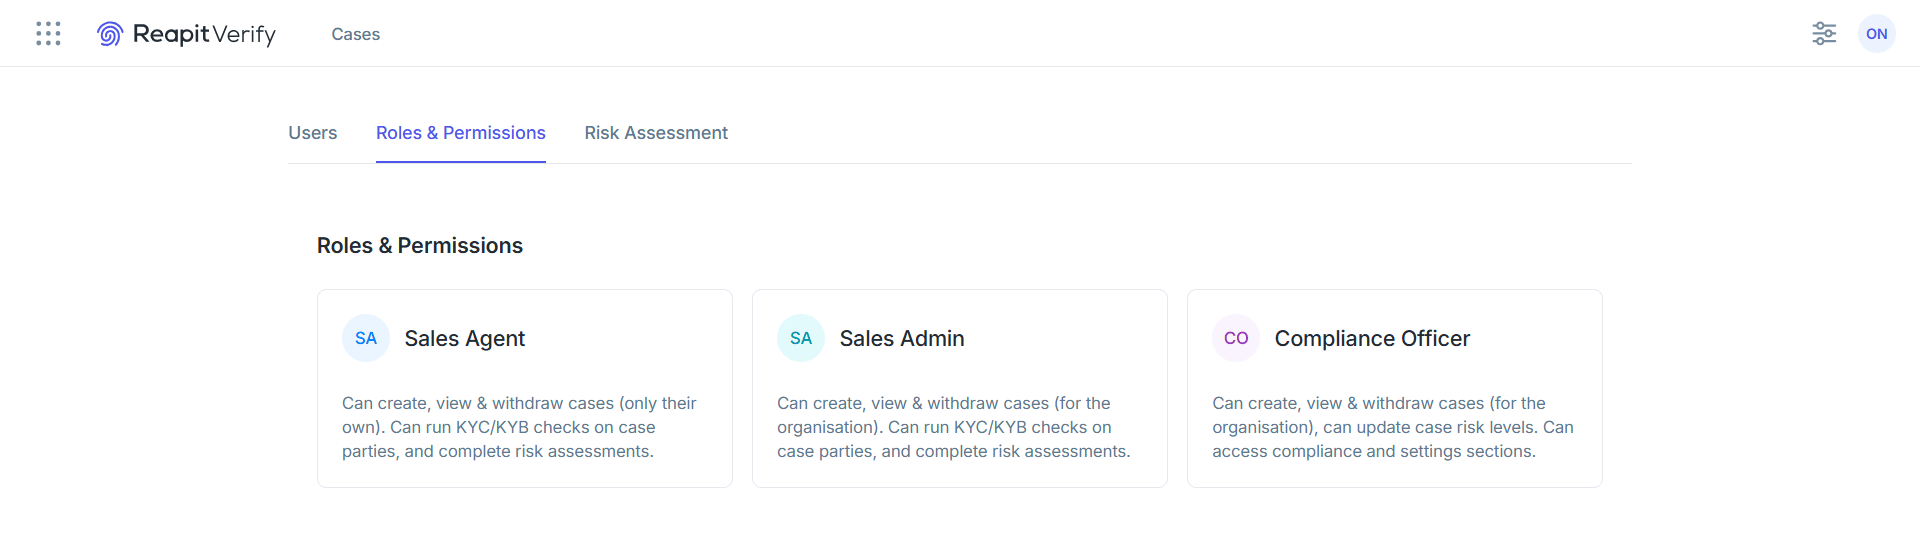
- Compliance Office - Admin user, they have access to all the system settings, user setup and cases.
- Sales Admin - Access to all cases with no access to settings.
- Sales Agent - Only access to their own cases.
- Select the office(s) the user should have access to.
- Tick if the user will require access to AML/CTF training for annual obligations.
- Click Save.
User Management
This process covers common user administration tasks in Reapit Verify, including adding users, editing user details, and assigning the correct role so users have the right level of access.
- In Reapit Verify, click on the Settings icon.
- Open the relevant area (typically Users and/or User roles).
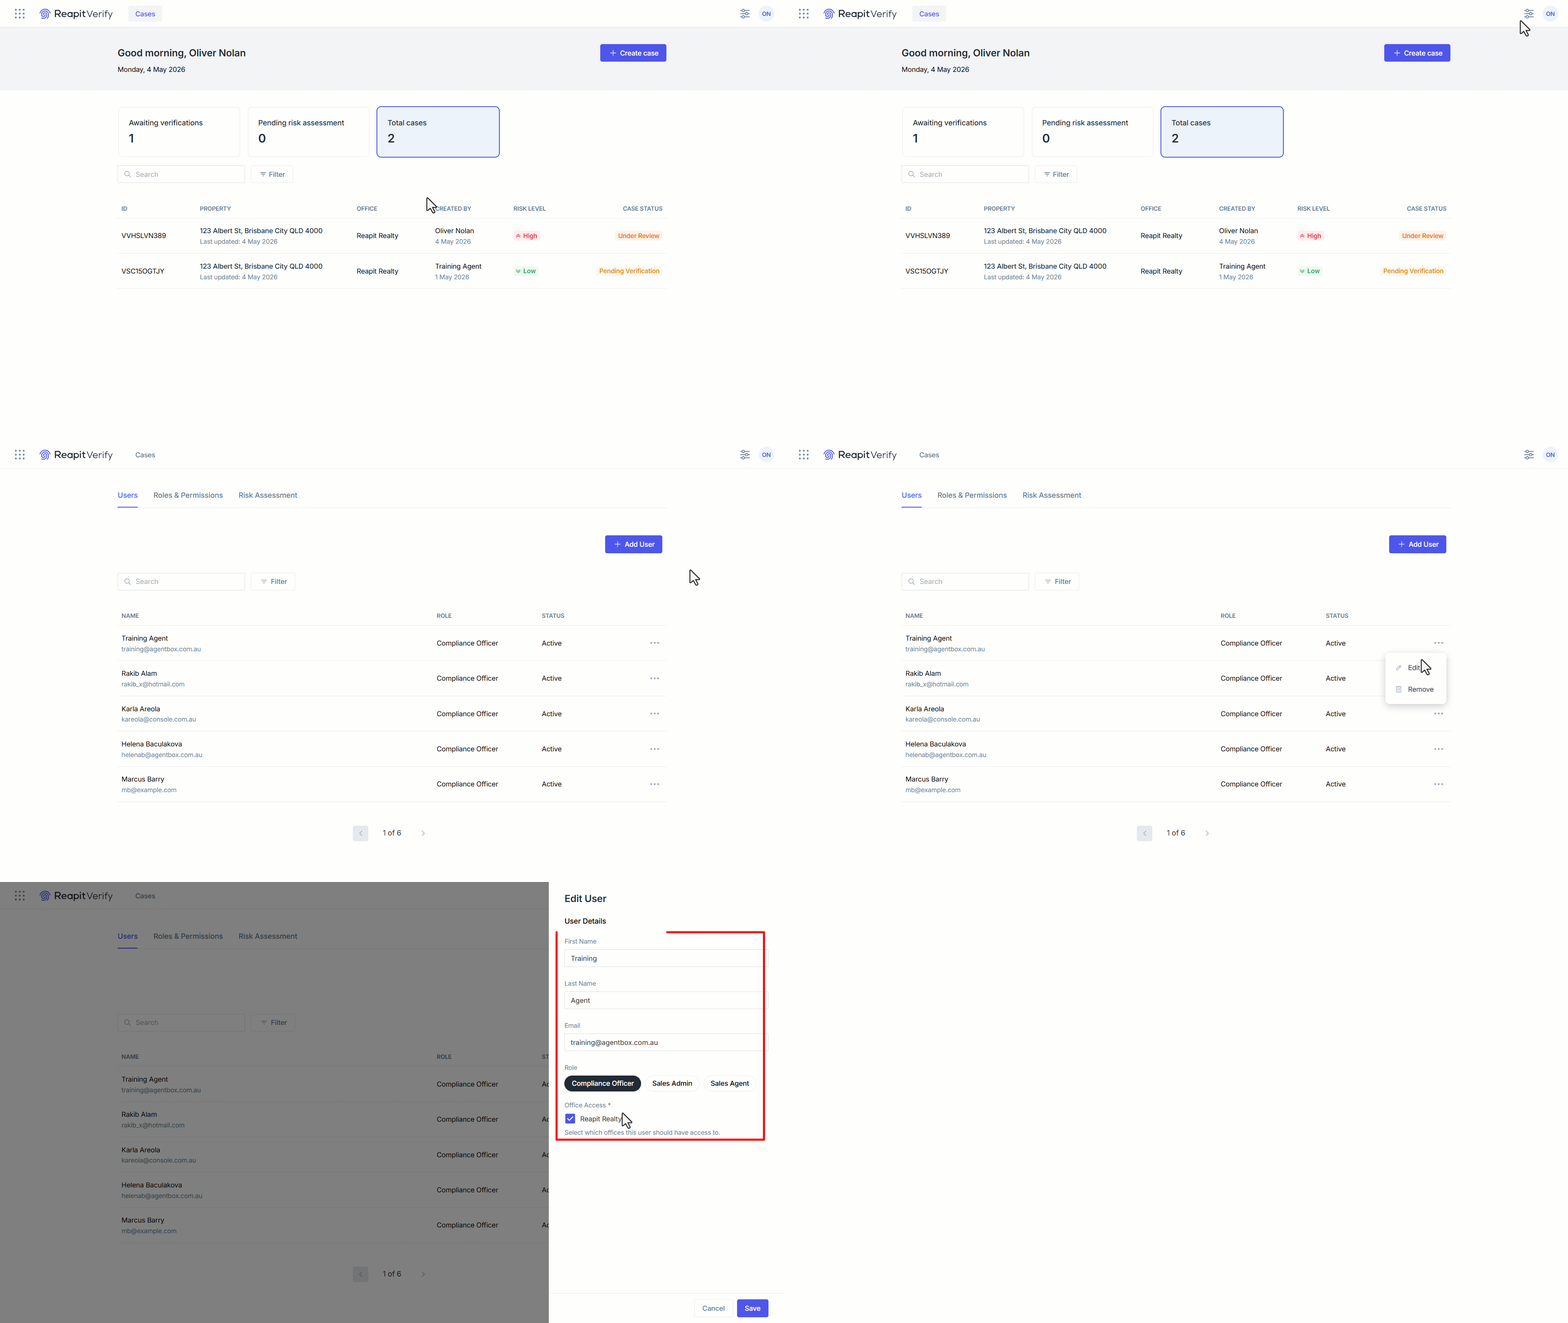
- To edit an existing user, select the Users tab:
- Search and select the User.
- Select the 3-dot Action button.
- Select Edit.
- Update the user’s name and/or email address.
- Update the user’s role if required.
- Select Save.
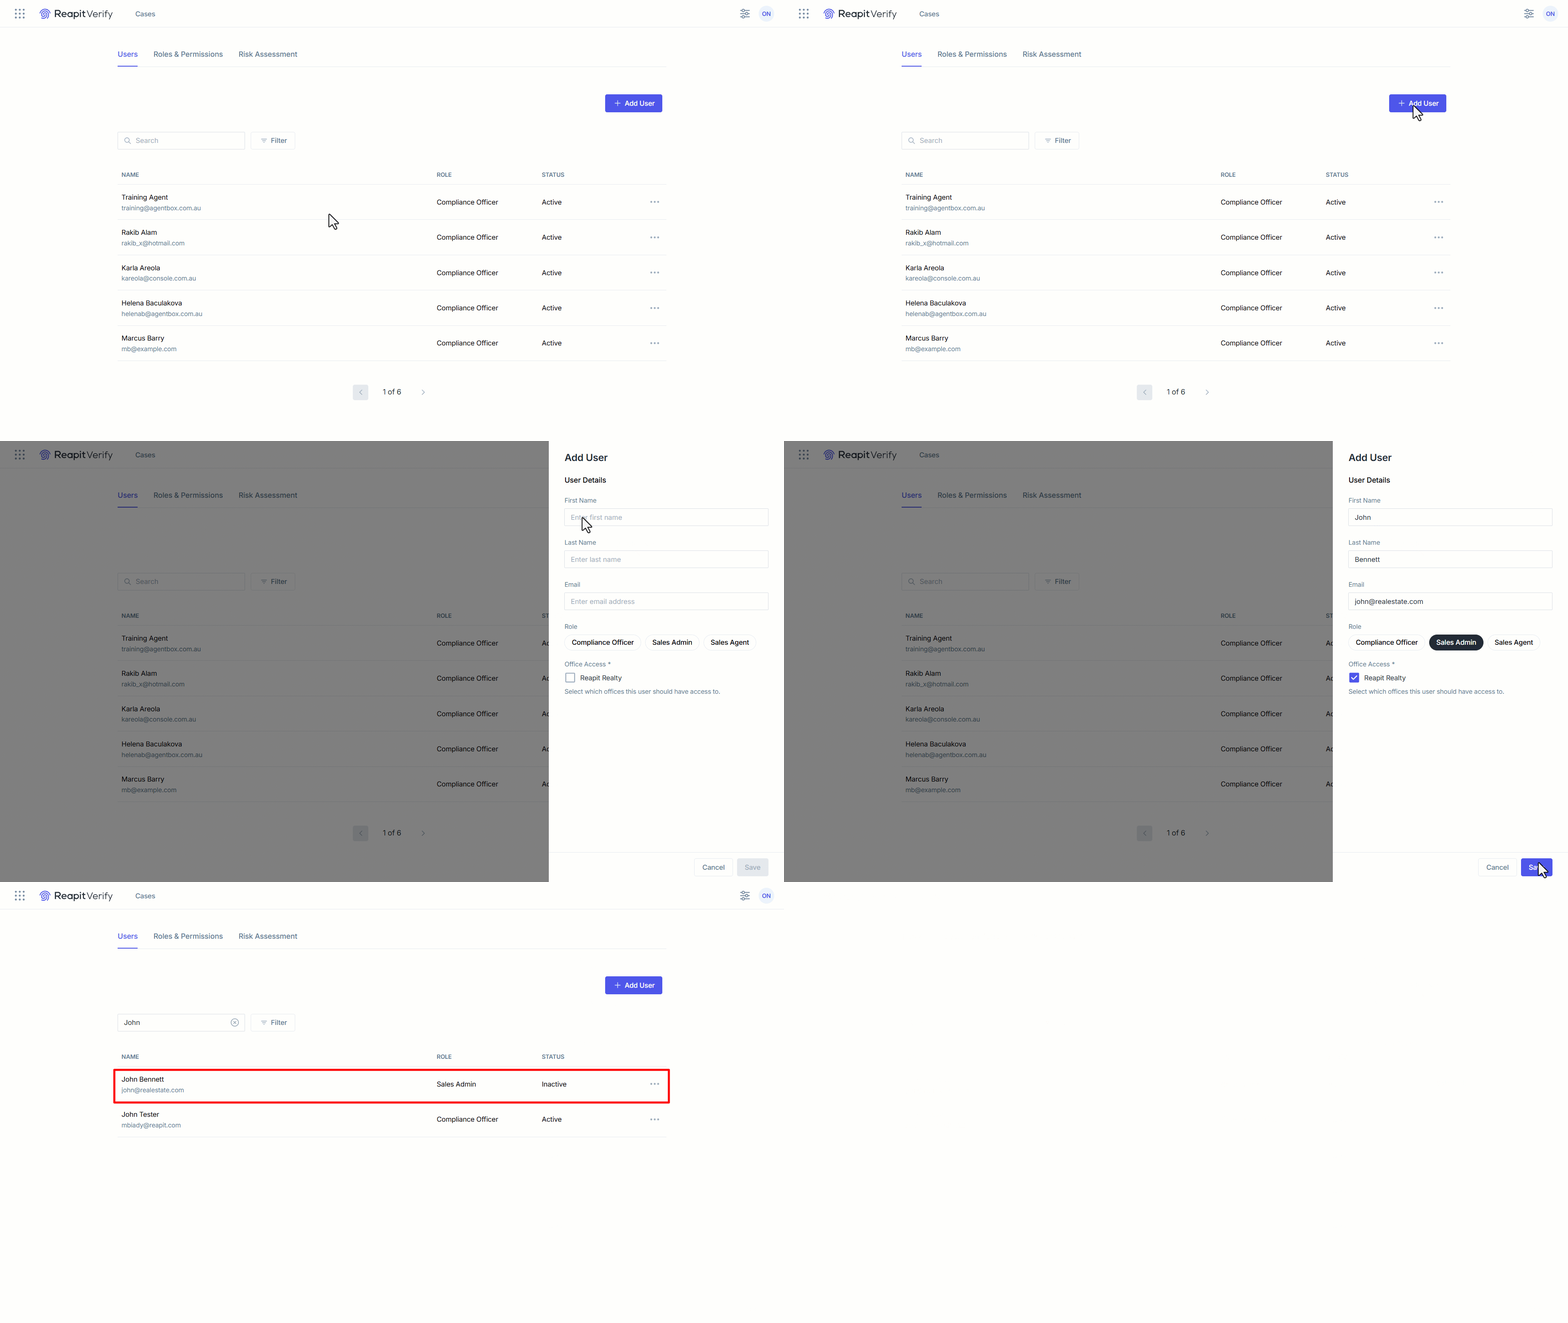
- To add a new user, select the Users tab:
- Select Add user.
- Enter the user’s first & last name and email address.
- Select the required Role.
- Select Save.
- The new user will receive an email invitation with instructions to sign in.
Note: Select the Roles & Permissions Tab to view Roles & Permissions summary.
Organisation Settings
Navigate to Settings.
Click Organisation.
The following can be changed from this screen:
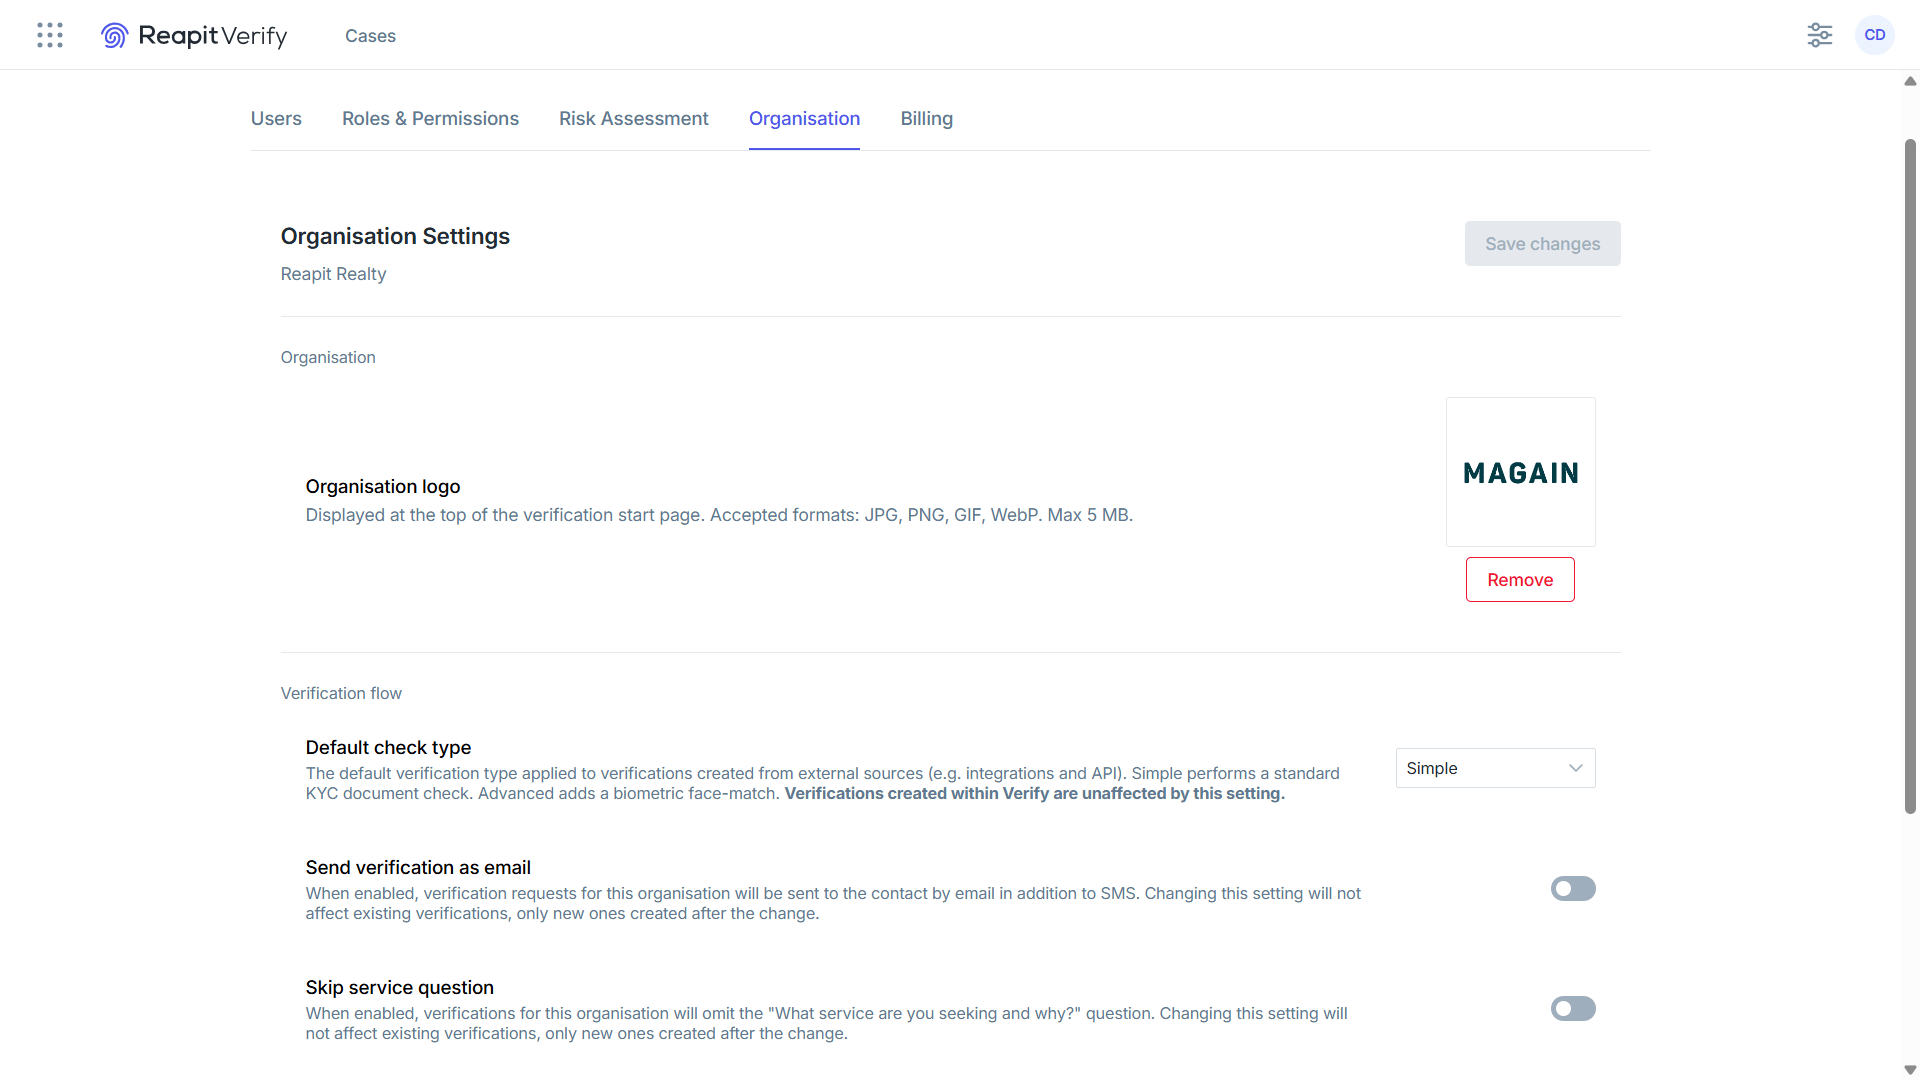
- Organisation Logo - A copy of your organisation's logo will appear at the top of the verification start page.
- Default check type - The default verification type applied to verifications created from external sources (e.g. integrations and API). Simple performs a standard KYC document check. Advanced adds a biometric face-match.
- Send verification as email - When enabled, verification requests for this organisation will be sent to the contact by email in addition to SMS. Changing this setting will not affect existing verifications, only new ones created after the change.
- Skip service question - When enabled, verifications for this organisation will omit the "What service are you seeking and why?" question. Changing this setting will not affect existing verifications, only new ones created after the change.
- Skip mortgage question (Buyer only) - When enabled, verifications for this organisation will omit the "Will you be purchasing the property with a mortgage?" question. Changing this setting will not affect existing verifications, only new ones created after the change.
- Skip non-profit organisation (NPO) relation question - When enabled, verifications for this organisation will omit the "To meet our regulatory obligations, please confirm whether you or any related party, operate or are you associated with a charity or other non-profit organisation (NPO)?" question. Changing this setting will not affect existing verifications, only new ones created after the change.
- Click Save changes.
Billing Settings
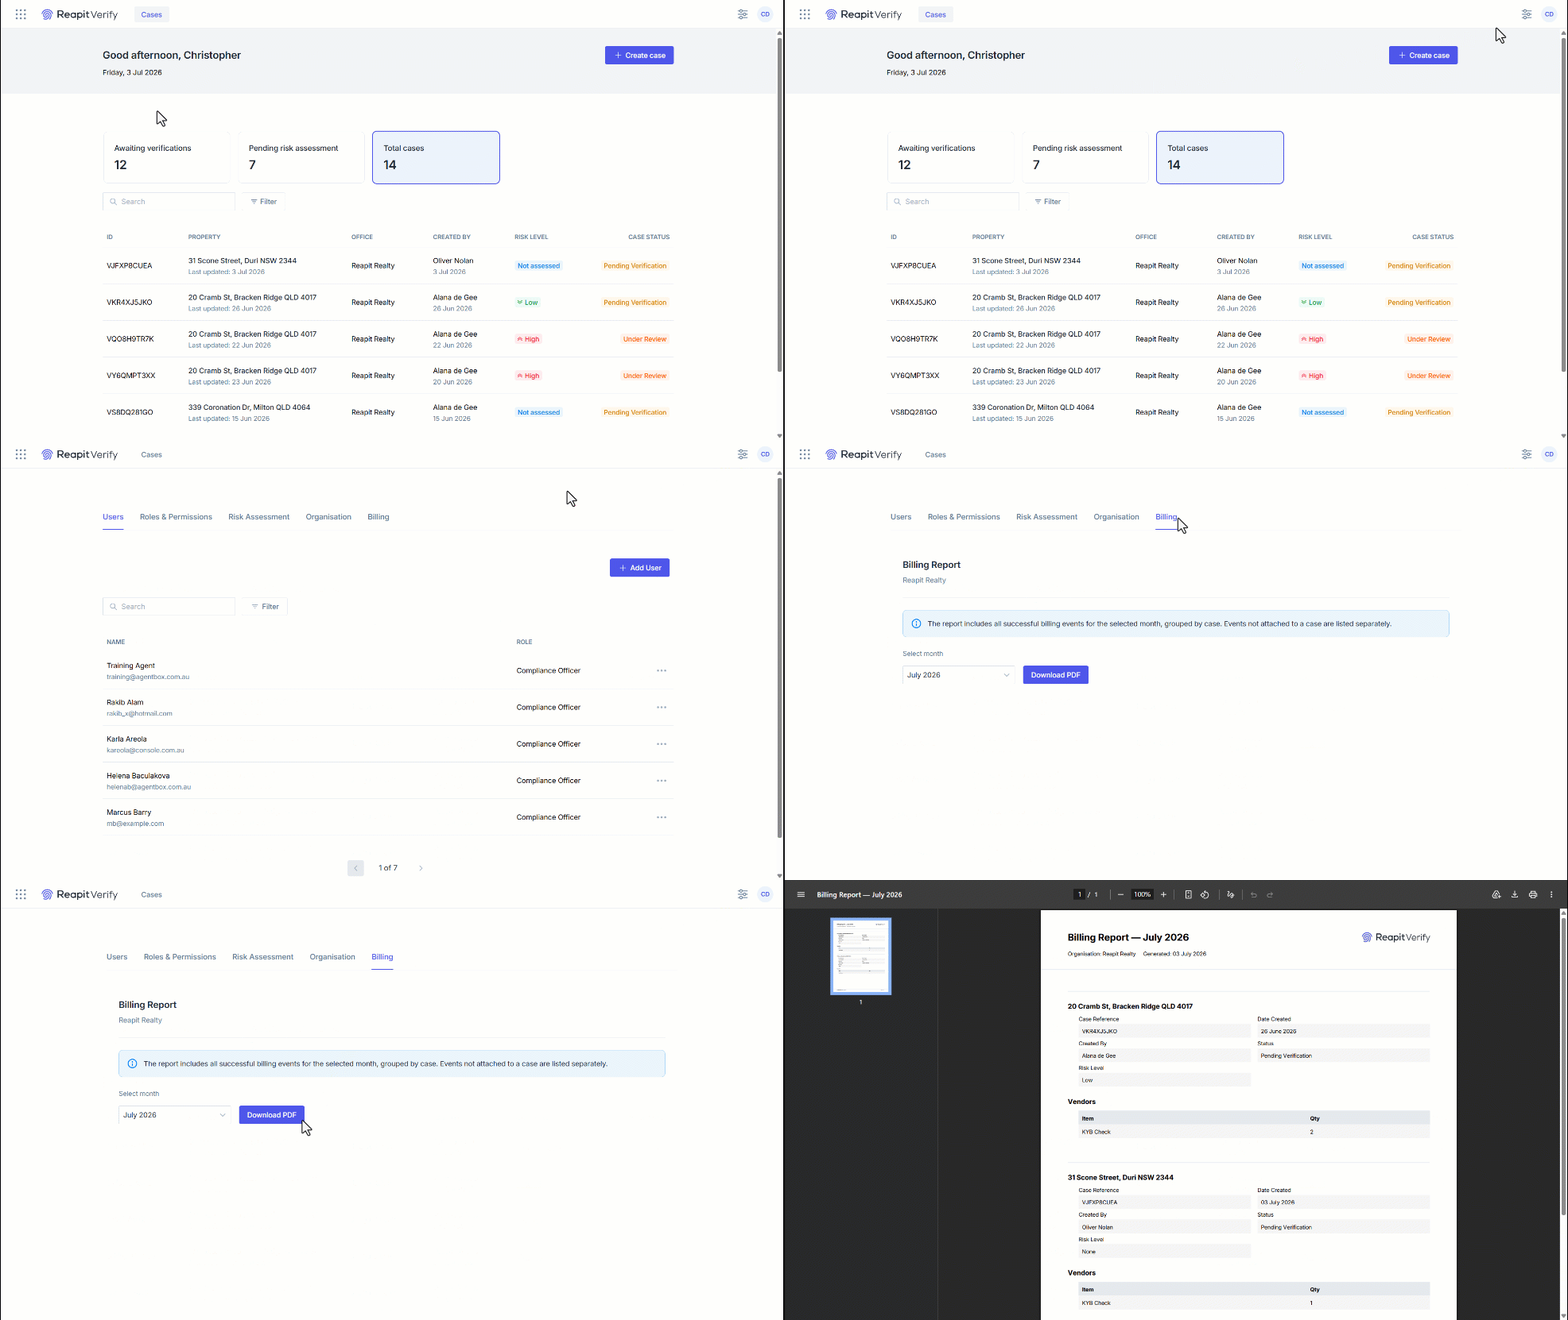
- Navigate to Settings.
- Click Billing.
- Billing allows you to produce a billing report to see what charges to raise.
- Select the month.
- Click Download PDF.
- A copy of the PDF will download and display the address and number of checks triggered against the case.
Note: You can also see the checks triggered from within the case by clicking on the 3-dots and selecting View billing.