How to Complete a Risk Assessment from Reapit Verify
This process explains how to complete (and later update) a case risk assessment in Reapit Verify. The answers you record determine the case risk level and help ensure the case is escalated for review when required.
Note: If you are accessing the Risk Assessment from within Reapit Sales, steps 4-13 apply. To view the full process of how to complete a Risk Assessment from Reapit Sales, read: Reapit Verify in Reapit Sales.
- In Reapit Verify, select the relevant case to open.
- Navigate to the Risk Assessment section.
- Select Start Assessment.
- Answer all risk assessment questions.
- Click on Next.
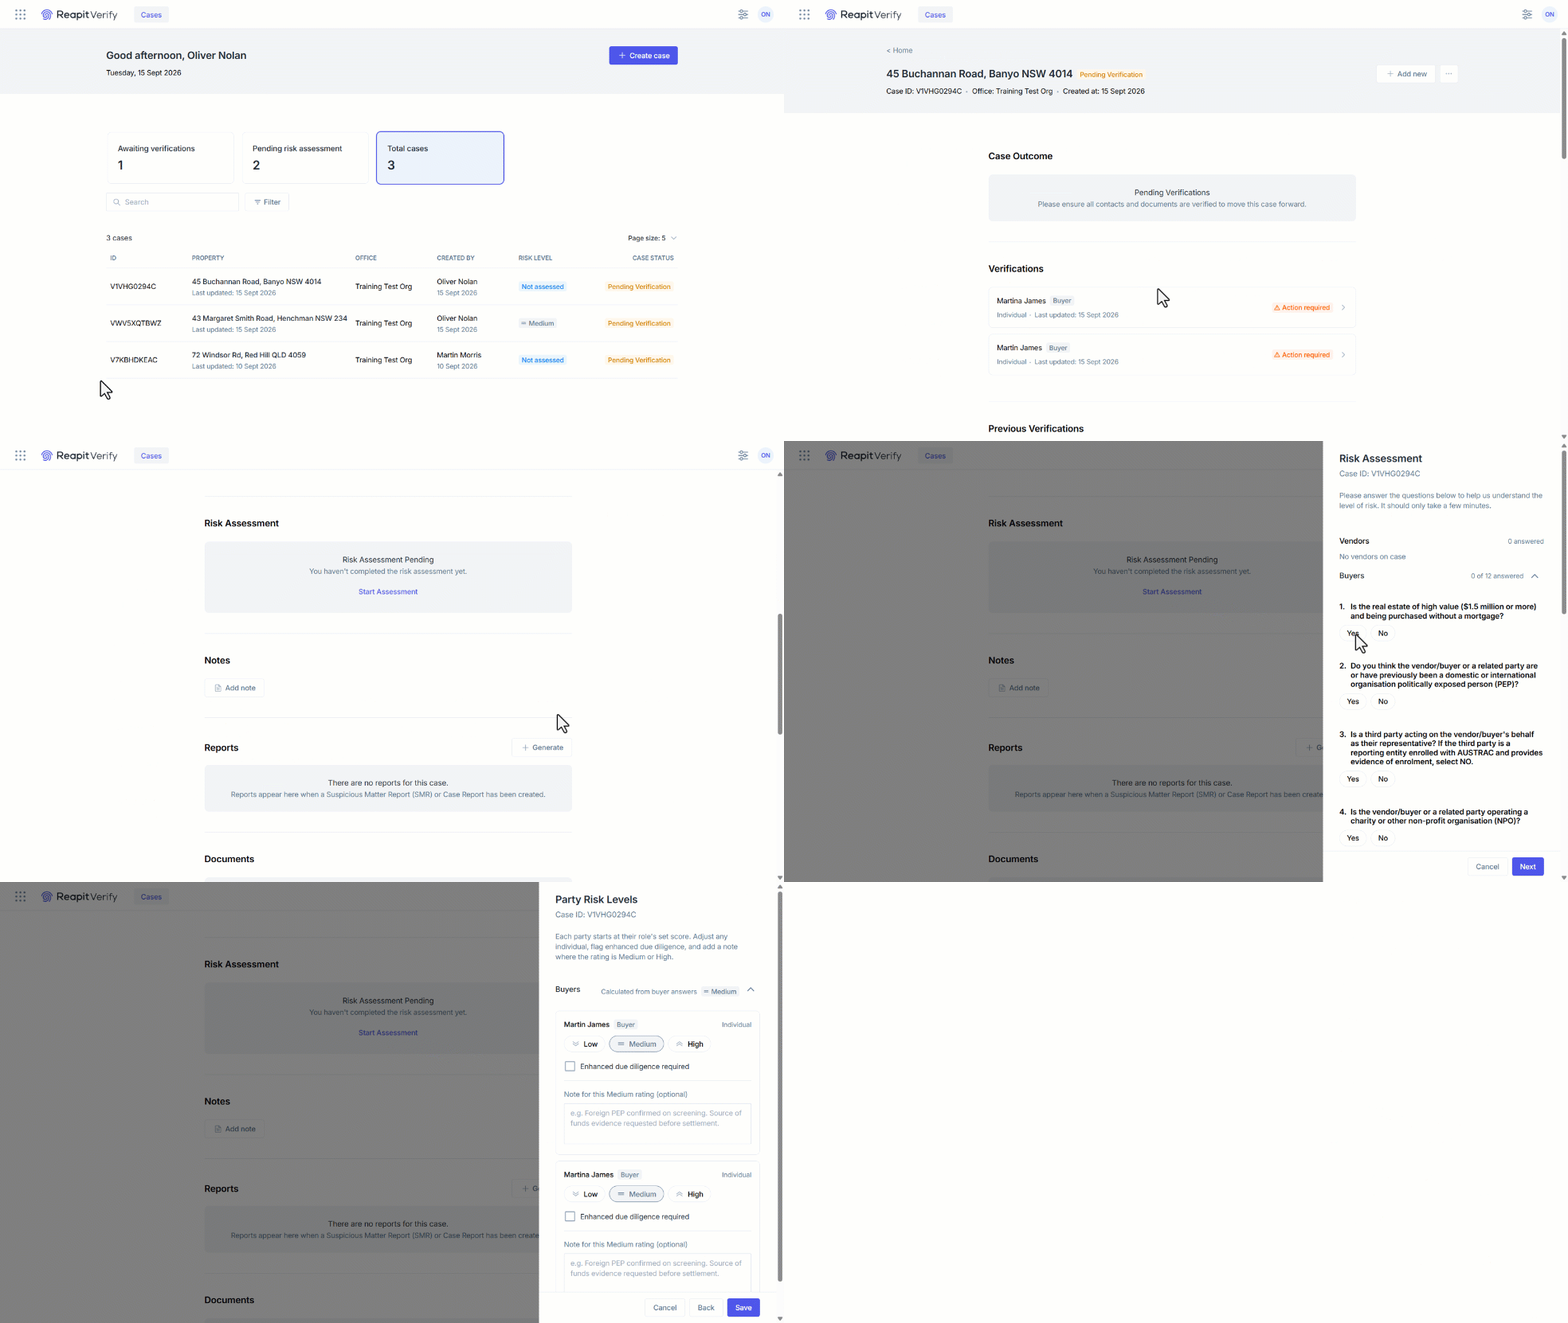
- Review the parties listed within the case.
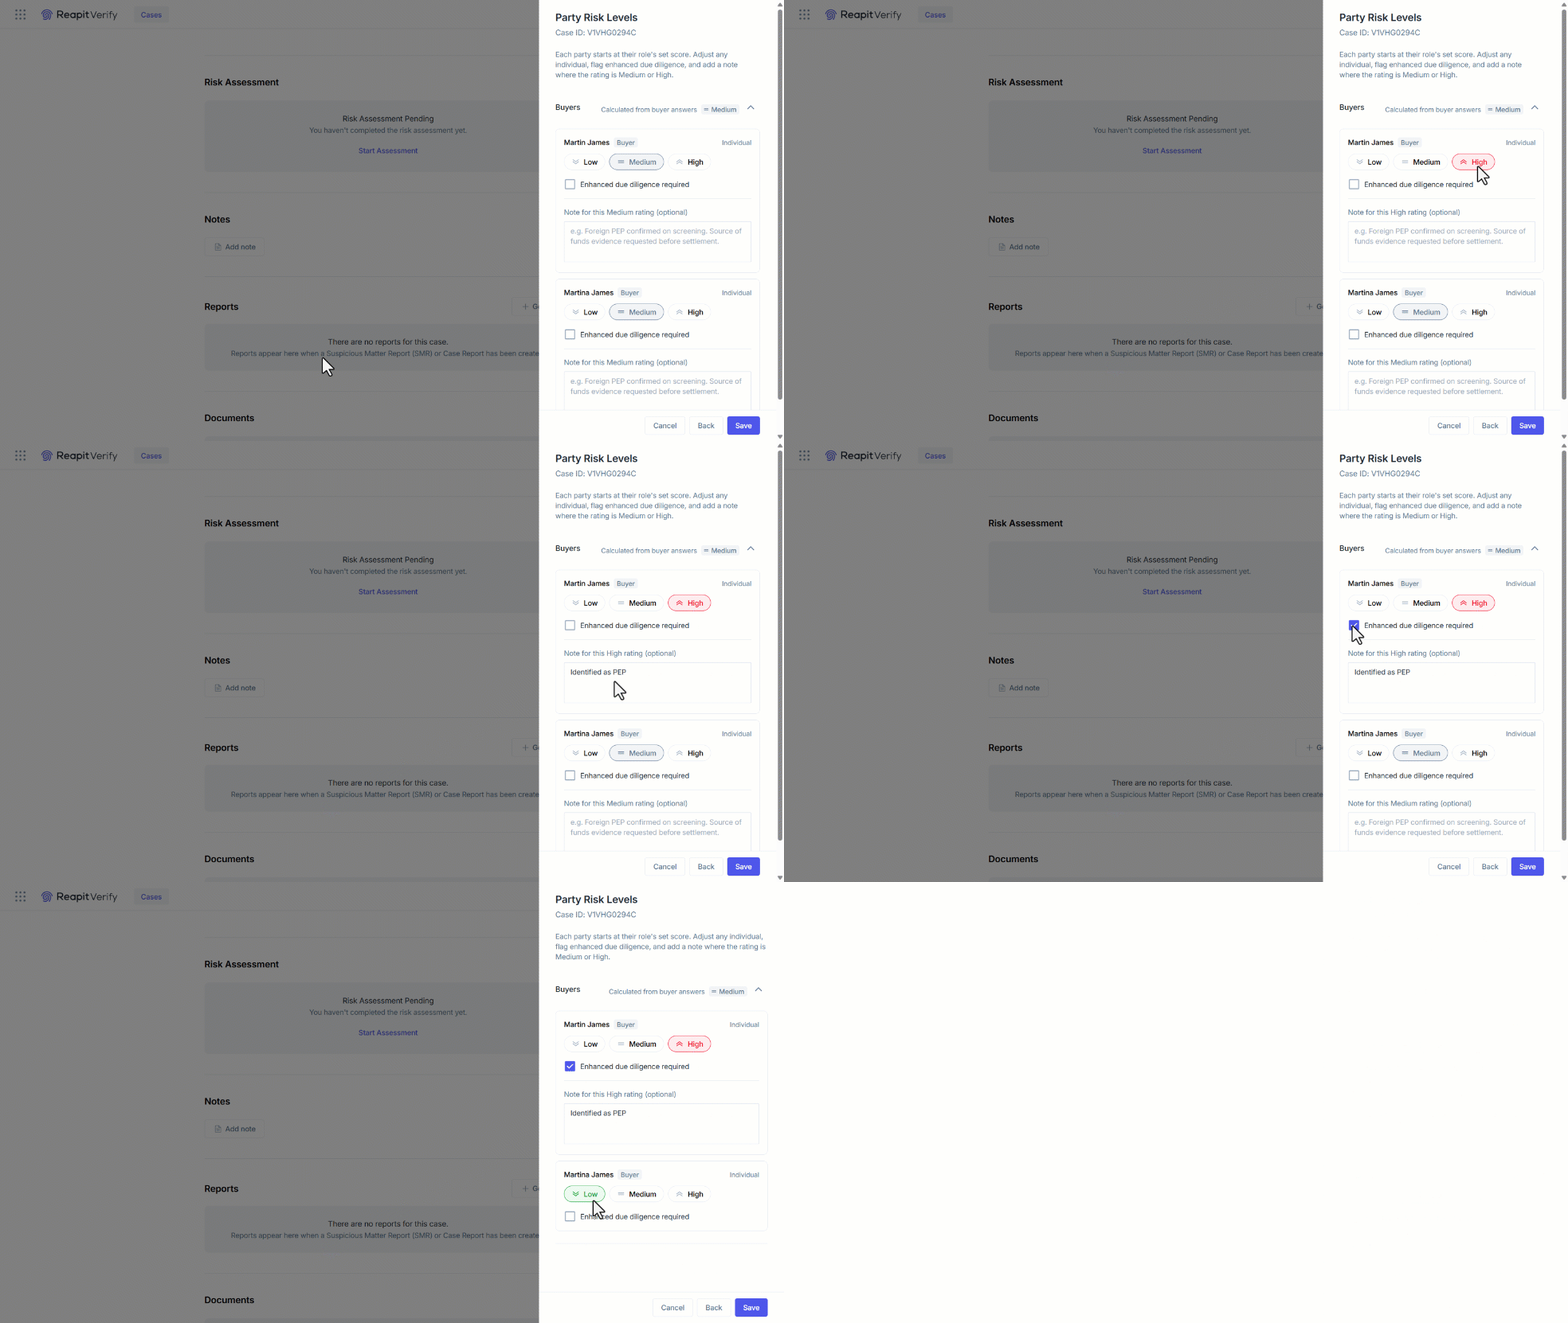
- Confirm the automatically selected risk level for each party.
Note: The initial risk level is determined by the answers provided during the risk assessment.
- For each party, update the risk level as required:
- Low
- Medium
- High
- If a party is assessed as High Risk, enter a supporting note explaining the reason for the rating.
Example: "Flagged as a Politically Exposed Person (PEP)."
Note: If you change a party's risk rating to Low Risk, the notes field is removed as it is no longer required.
- Select the Enhanced Due Diligence Required checkbox where applicable.
Note: This setting records that Enhanced Due Diligence is required but does not currently trigger any additional workflow in Reapit Verify.
- Repeat this process for all parties in the case.
- Select Save.
- To update a completed Risk Assessment, click on Update Buyer / Vendor Risk Assessment in the Buyers or Vendors section.