
Getting Started in Reapit Forms
This article will cover the important areas for getting started in Reapit Forms.
The processes in this article include:
Set Up Your Profile
Configure Office Settings (Important for Administrators)
Configuring Office Defaults (Important for Administrators)
Enable Additional Users
Before creating your first form, we recommend completing the following steps below. Taking a few minutes to configure your account correctly will help ensure forms work as expected avoiding potential issues later.
Note: Only Admin Users can manage users, configure office settings, and customise office defaults. It you're not an administrator, please speak with your office administrator for assistance.
Set Up Your Profile
After your Reapit Forms access has been enabled and you sign in for the first time, you'll be prompted to complete your profile.
Things to complete will include:
First Name
Last Name
Reply-to Email
Mobile Number
By default, your name will be used as your digital signature until a handwritten signature is added. This can be added through the user profile screen.
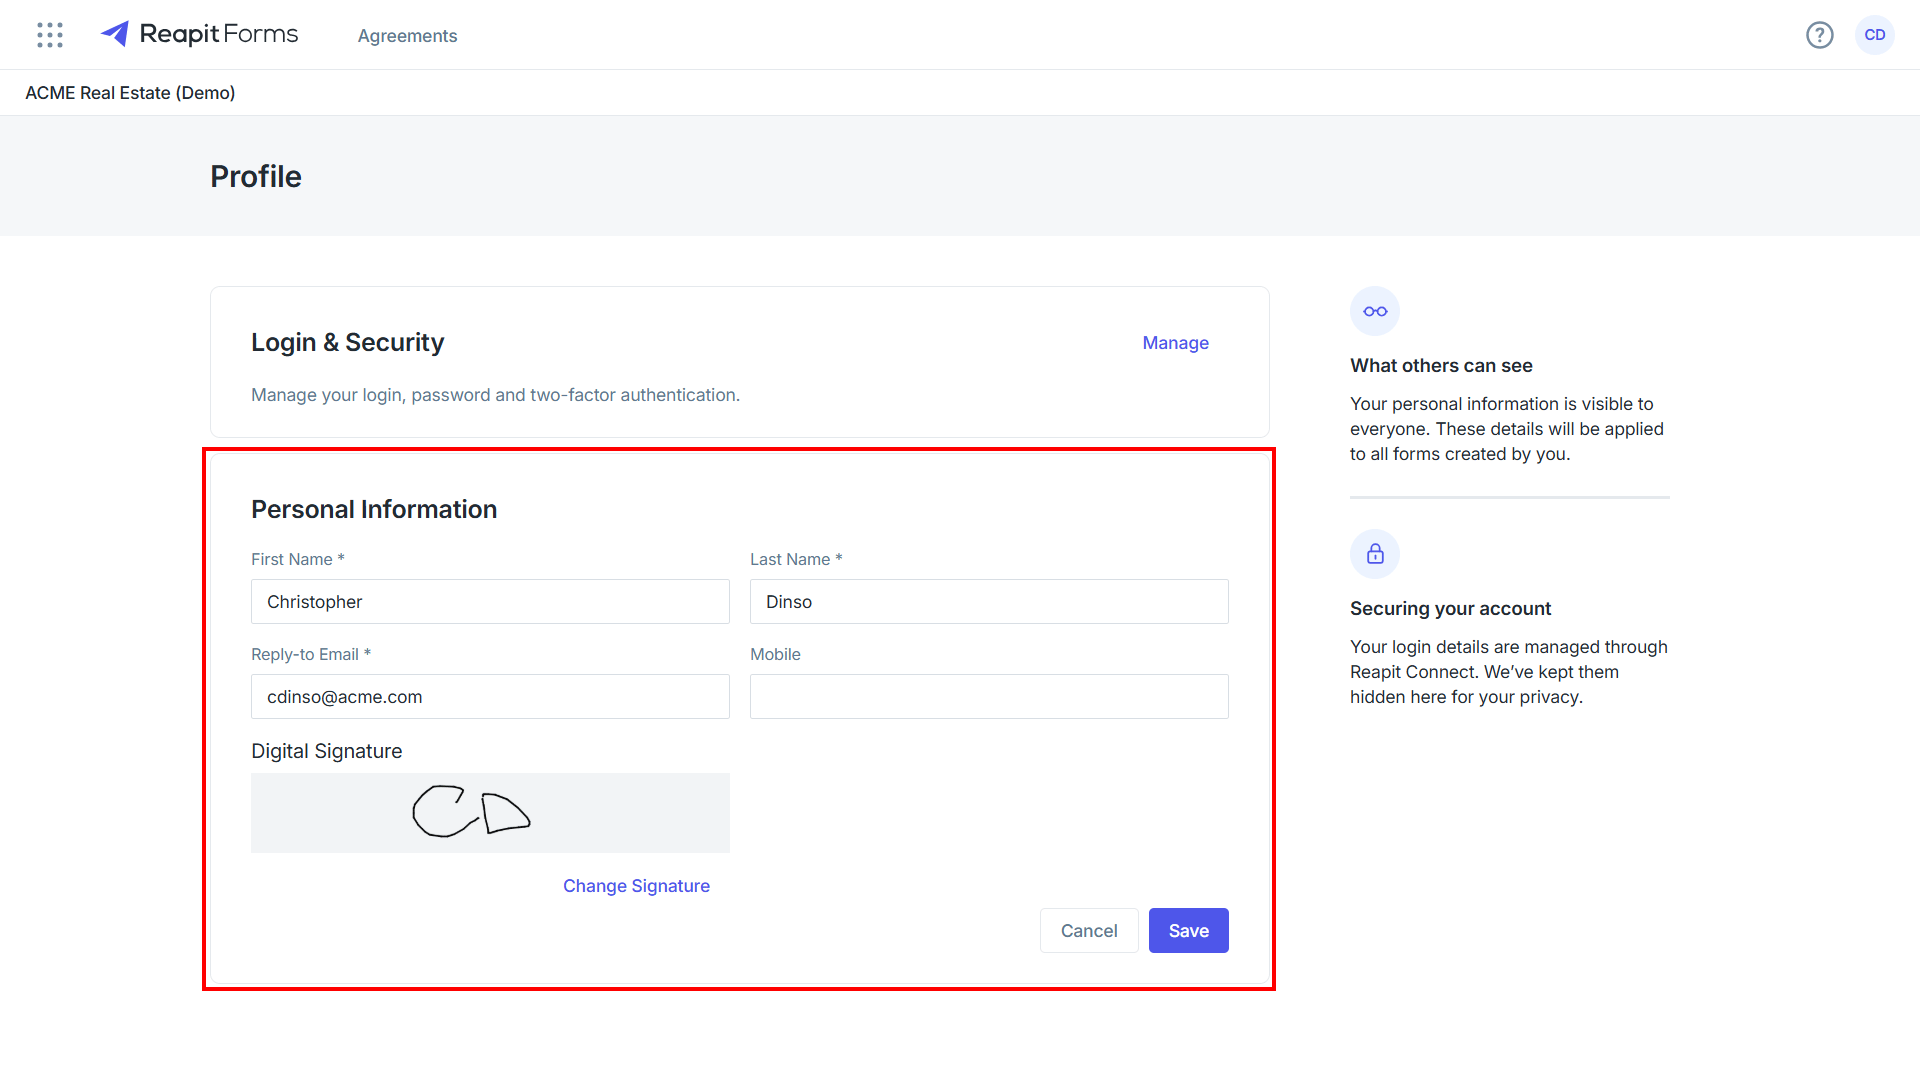
For more information on setting up your profile, please see: https://help.reapit.com.au/s/article/Setting-Up-Your-Profile-in-Reapit-Forms
Configure Office Settings
IMPORTANT! PLEASE NOTE: You will be unable to complete an agreement if Payment Methods are not configured in your account. To ensure that you can create and send an agreement, you must follow the steps for adding a payment method.
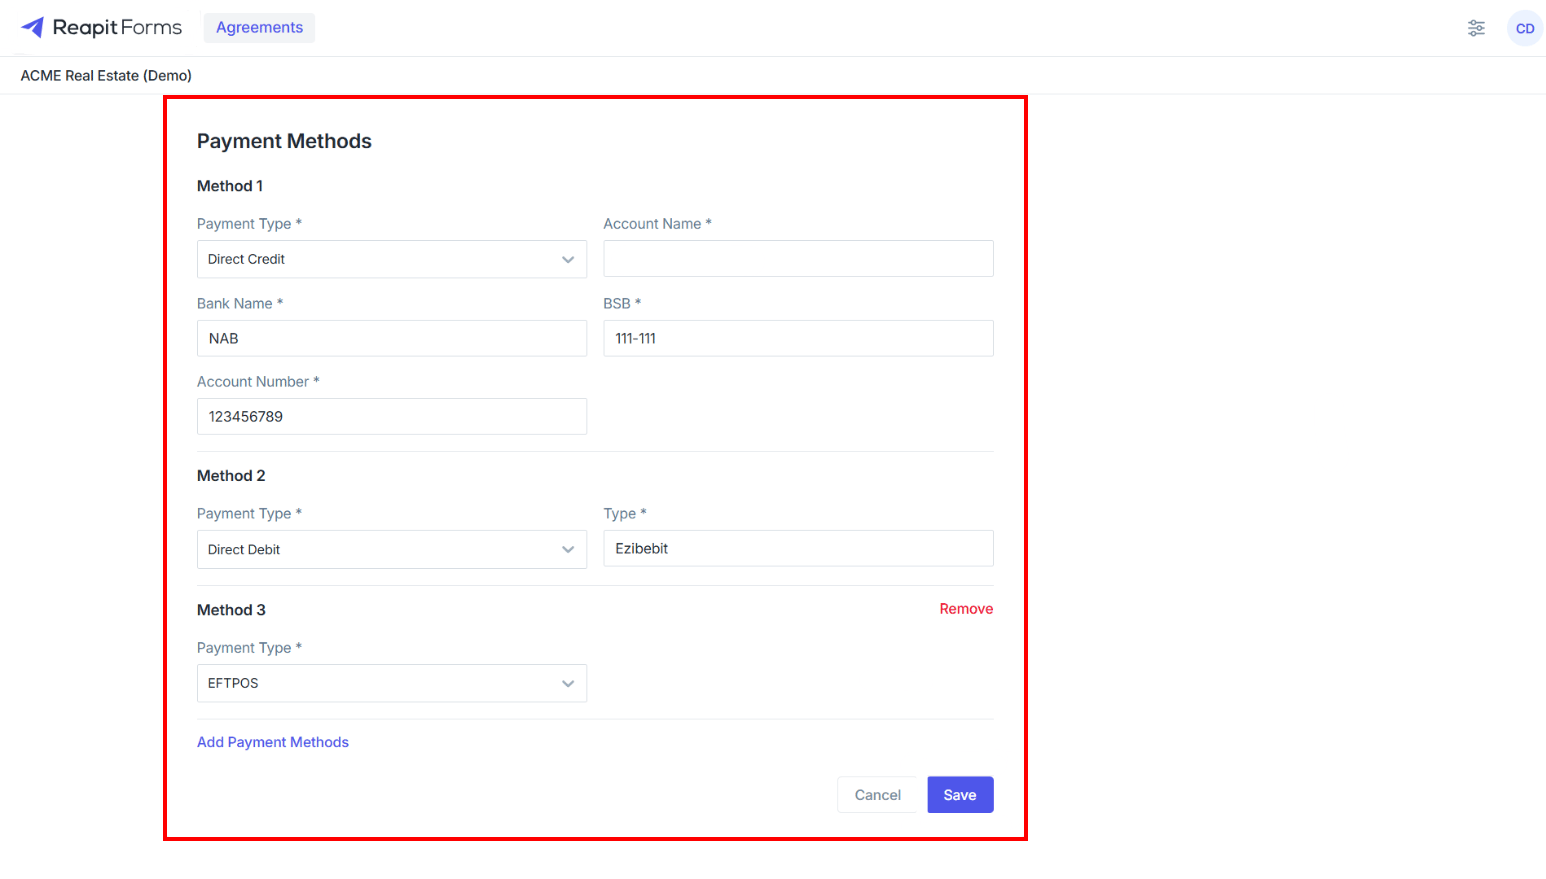
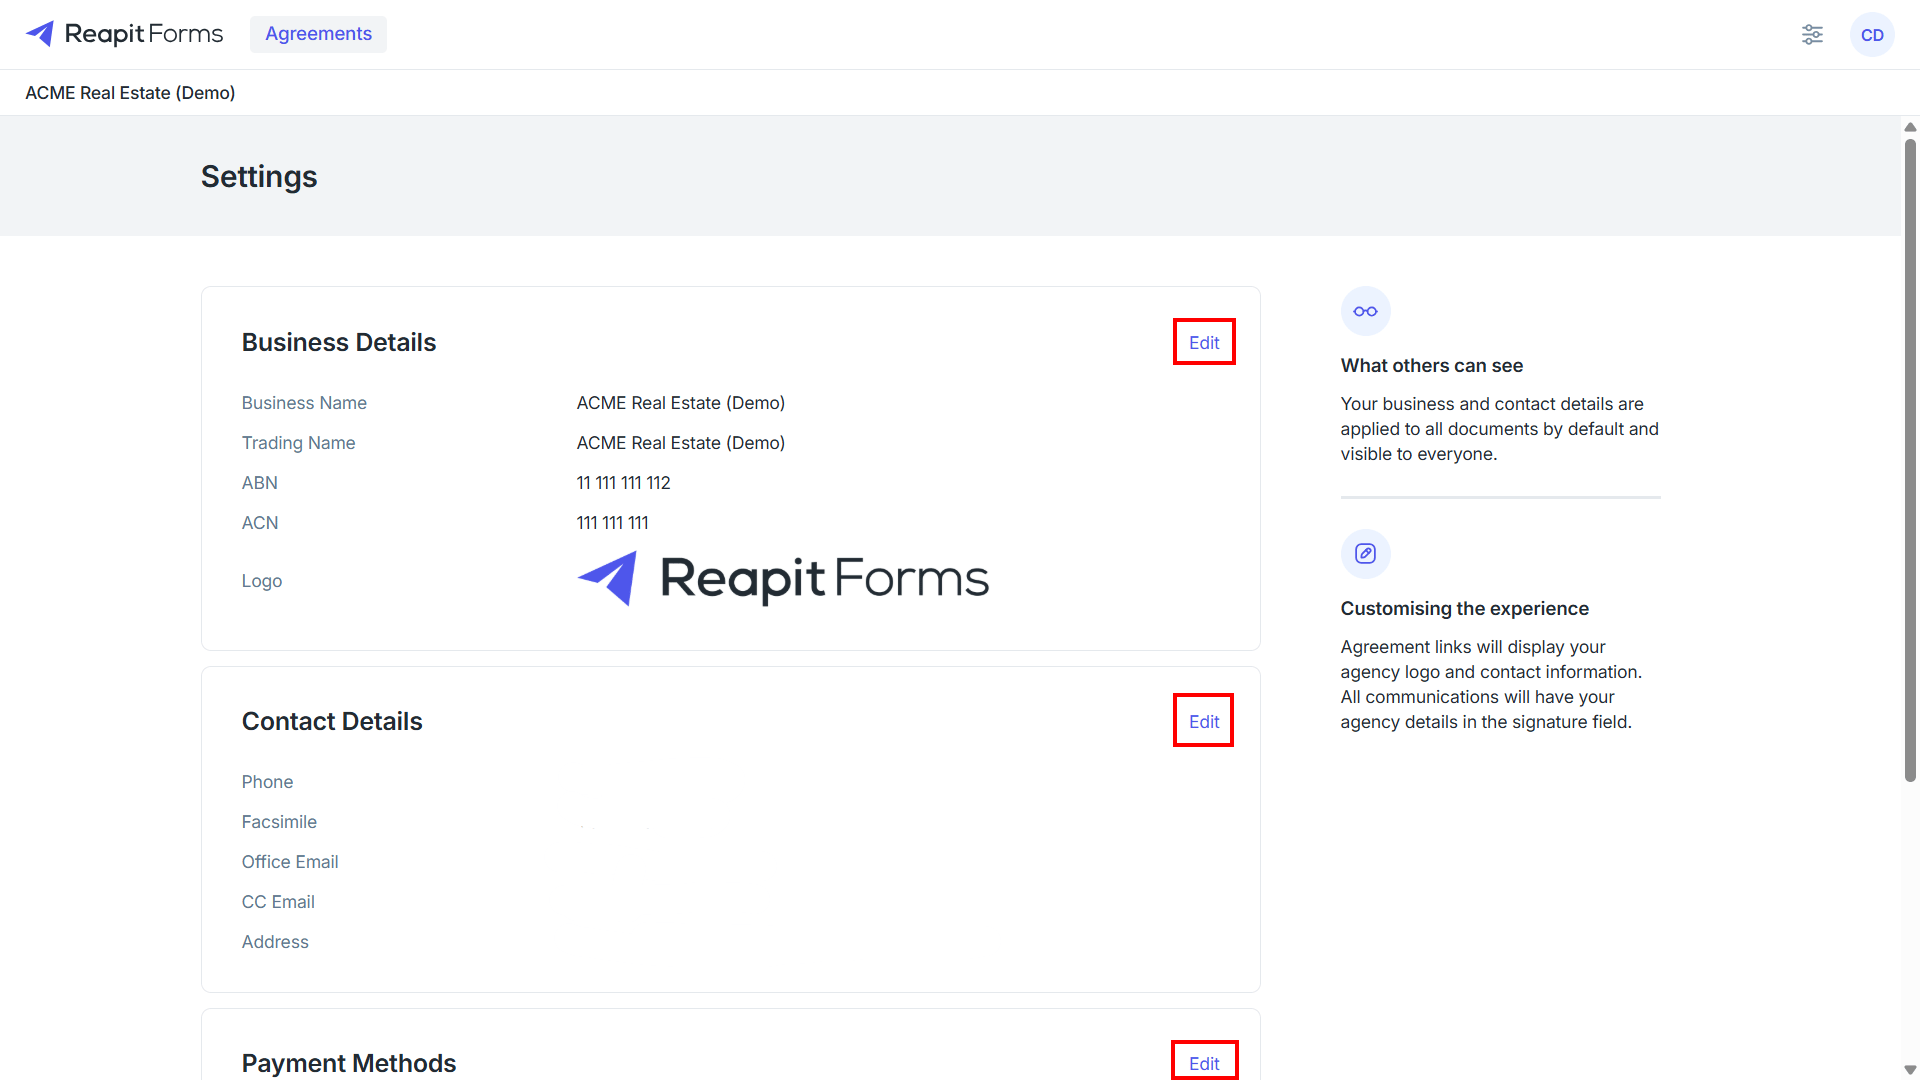
Before enabling users or creating forms, administrators should review and complete the office settings.
Key things to ensure are entered before using forms include:
Business Details are complete
Contact Details are correct
At least one payment method has been configured (See Important Note)
Bank account details are accurate.
Once the settings have been configured, administrators can proceed to the Users screen to provide access to other staff in Reapit Forms.
For more information on configuring office settings, please see: https://help.reapit.com.au/s/article/How-to-Set-Up-Edit-Office-Settings-in-Reapit-Forms
Configuring Office Defaults
Office Defaults streamline agreement creation by automatically including commonly used documents, clauses, links and contacts.
Before creating agreements, we strongly recommend reviewing and setting up your Special Conditions.
Special Conditions allow you to create predefined clauses for tenancy agreements and choose whether they are automatically included by default or added only when required. Configuring these upfront can save time, reduce manual data entry and help ensure important clauses are consistently included across agreements.
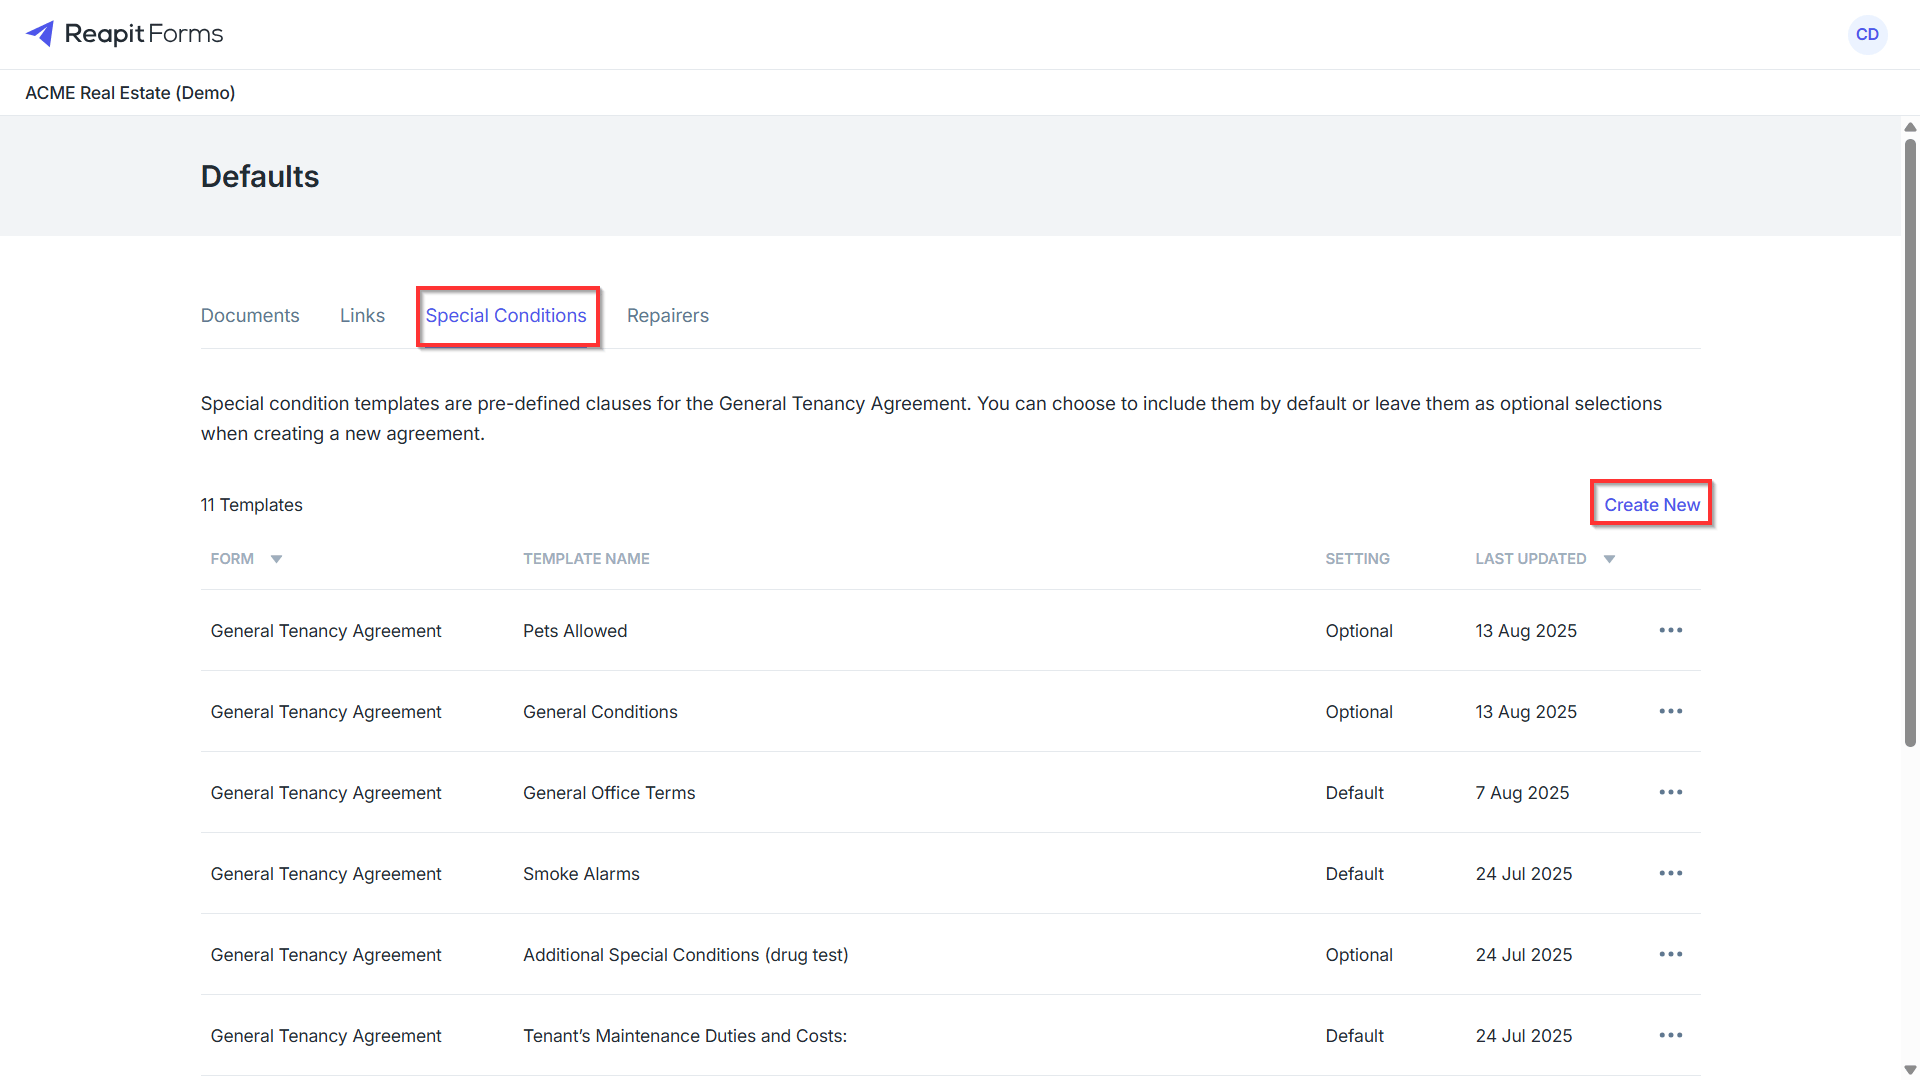
You can also configure additional defaults to further streamline the agreement process:
Documents – Attach commonly used files to agreements.
Links – include helpful URLs in agreement emails sent to recipients.
Repairers - Set preferred maintenance contacts to be available when creating agreements.
For more information on agency defaults, please see: https://help.reapit.com.au/s/article/Setting-up-Agency-Defaults-in-Reapit-Forms
Enable Additional Users
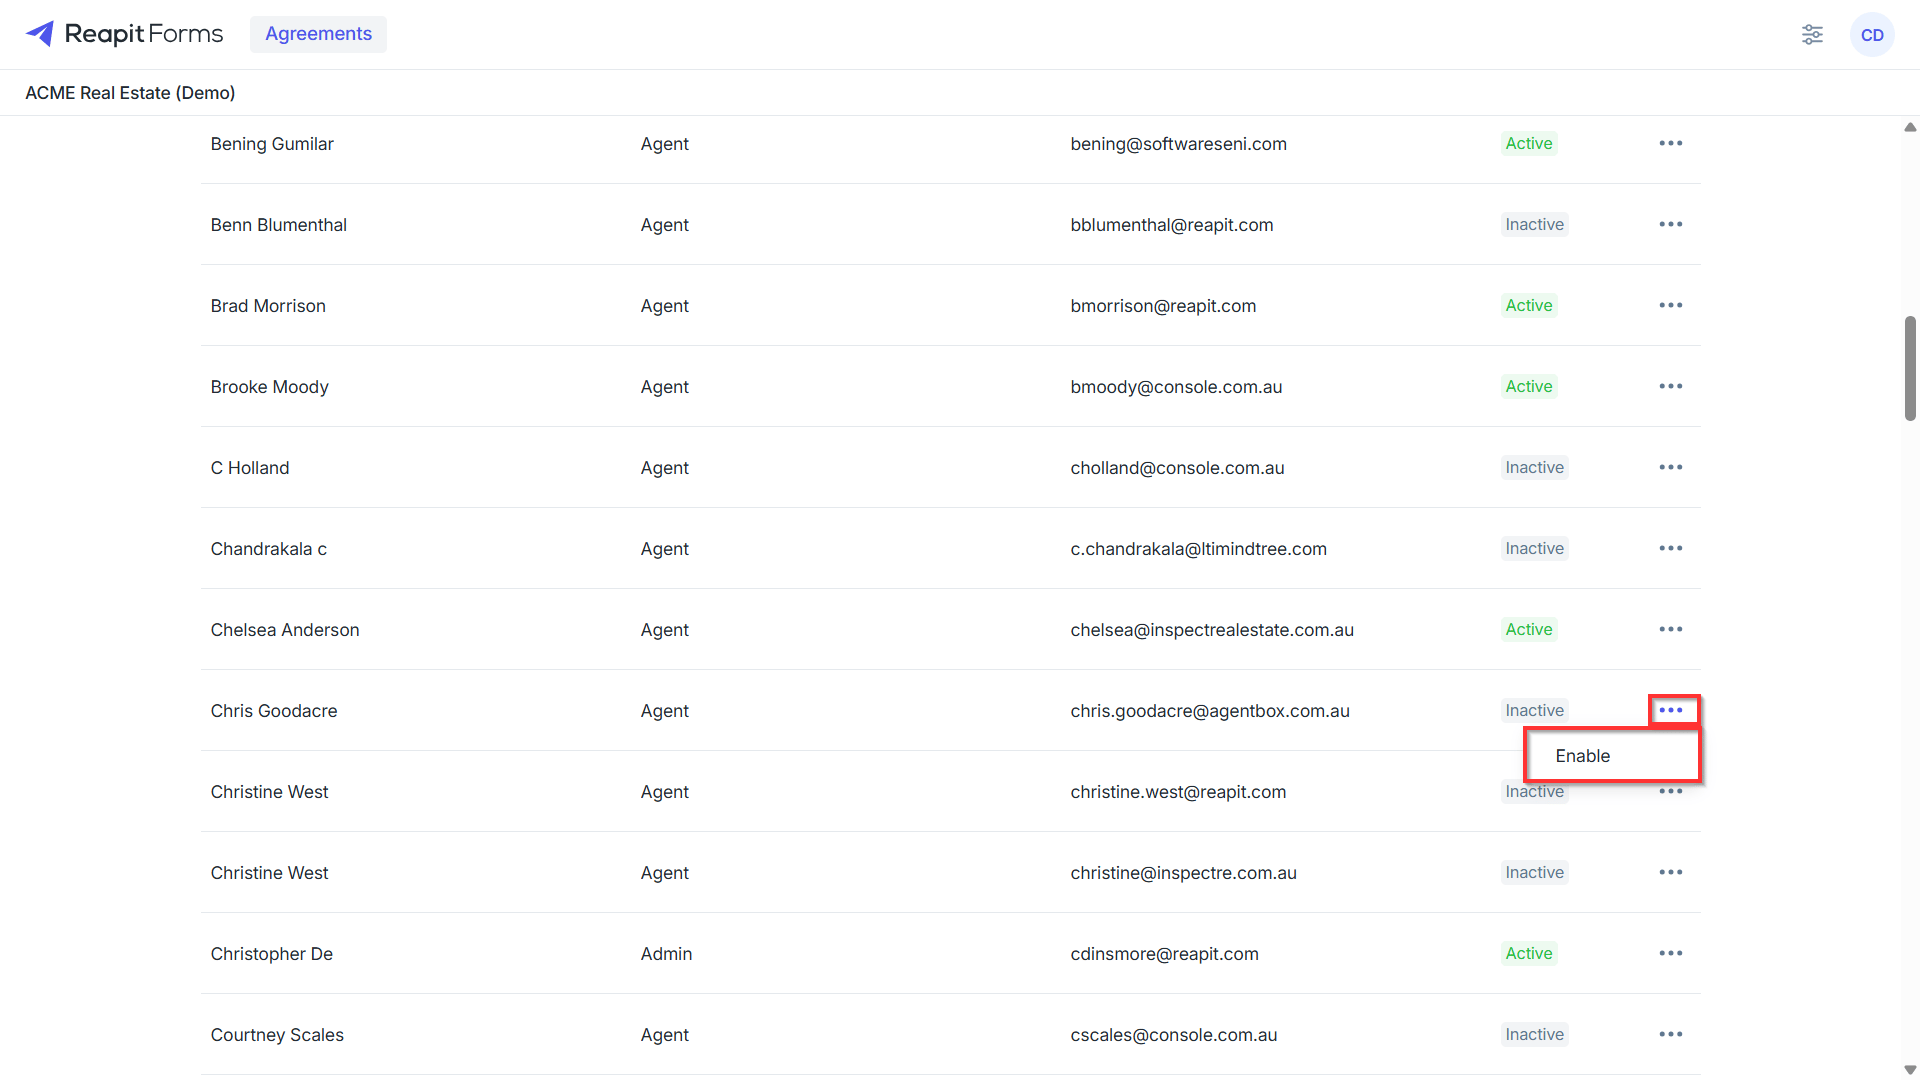
Enabling additional users can be done through the Users menu. The available user list is automatically synchronised from Reapit PM. Click the three dots next to the required user and choose Enable. The user will then receive a welcome email containing instructions to set up their profile. Profile setup must be completed before the user can access Reapit Forms and perform any actions within the platform.
For more information on enabling users, please see - https://help.reapit.com.au/s/article/How-to-Set-Up-Edit-Office-Settings-in-Reapit-Forms