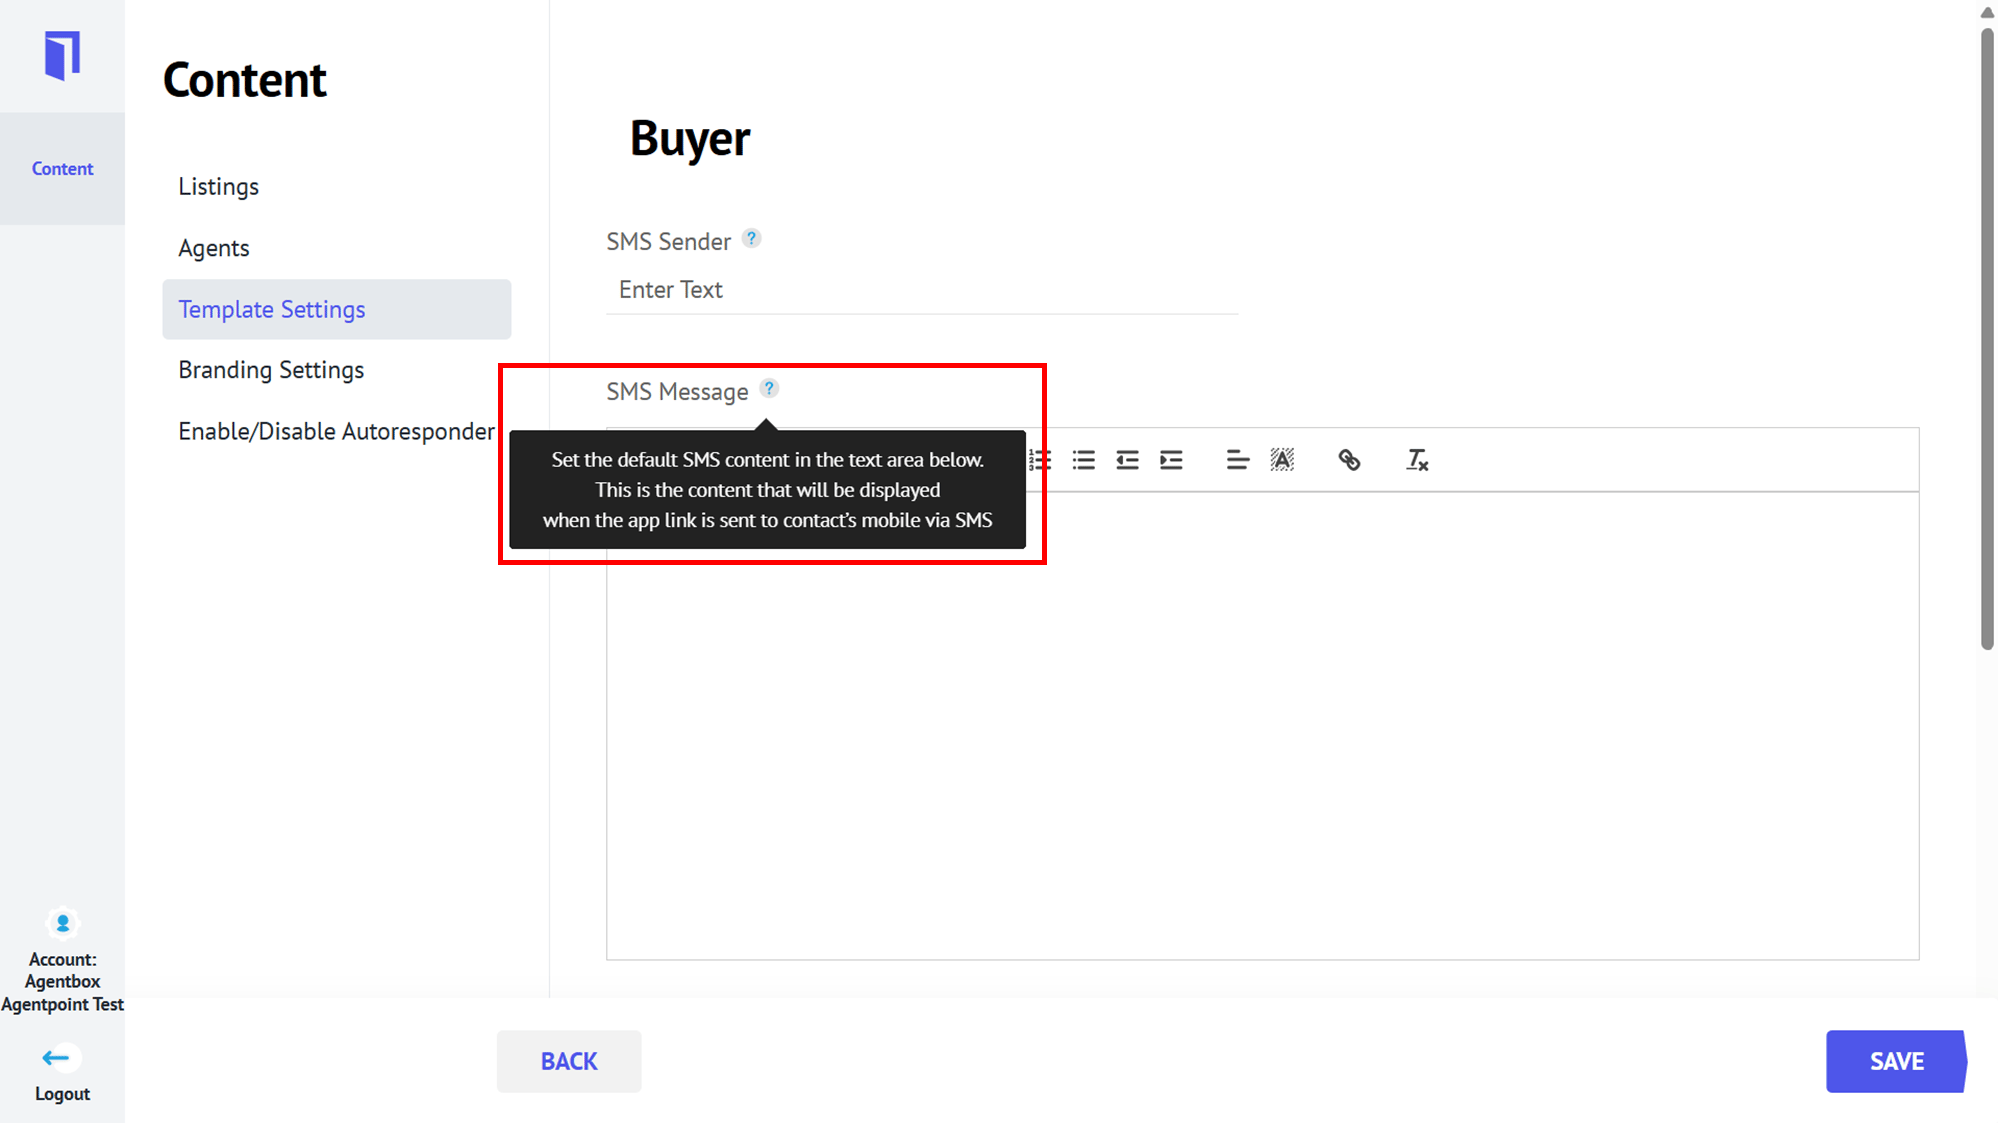
Template Settings
This article will show you how to edit Buyer's and/ or Tenant's Auto Response
Autoresponder Template Settings
Note: Admin users only.
The process in this article include:
- Editing Buyer's and/ or Tenant's Auto Response
Editing Buyer's and / or Tenants Auto Response
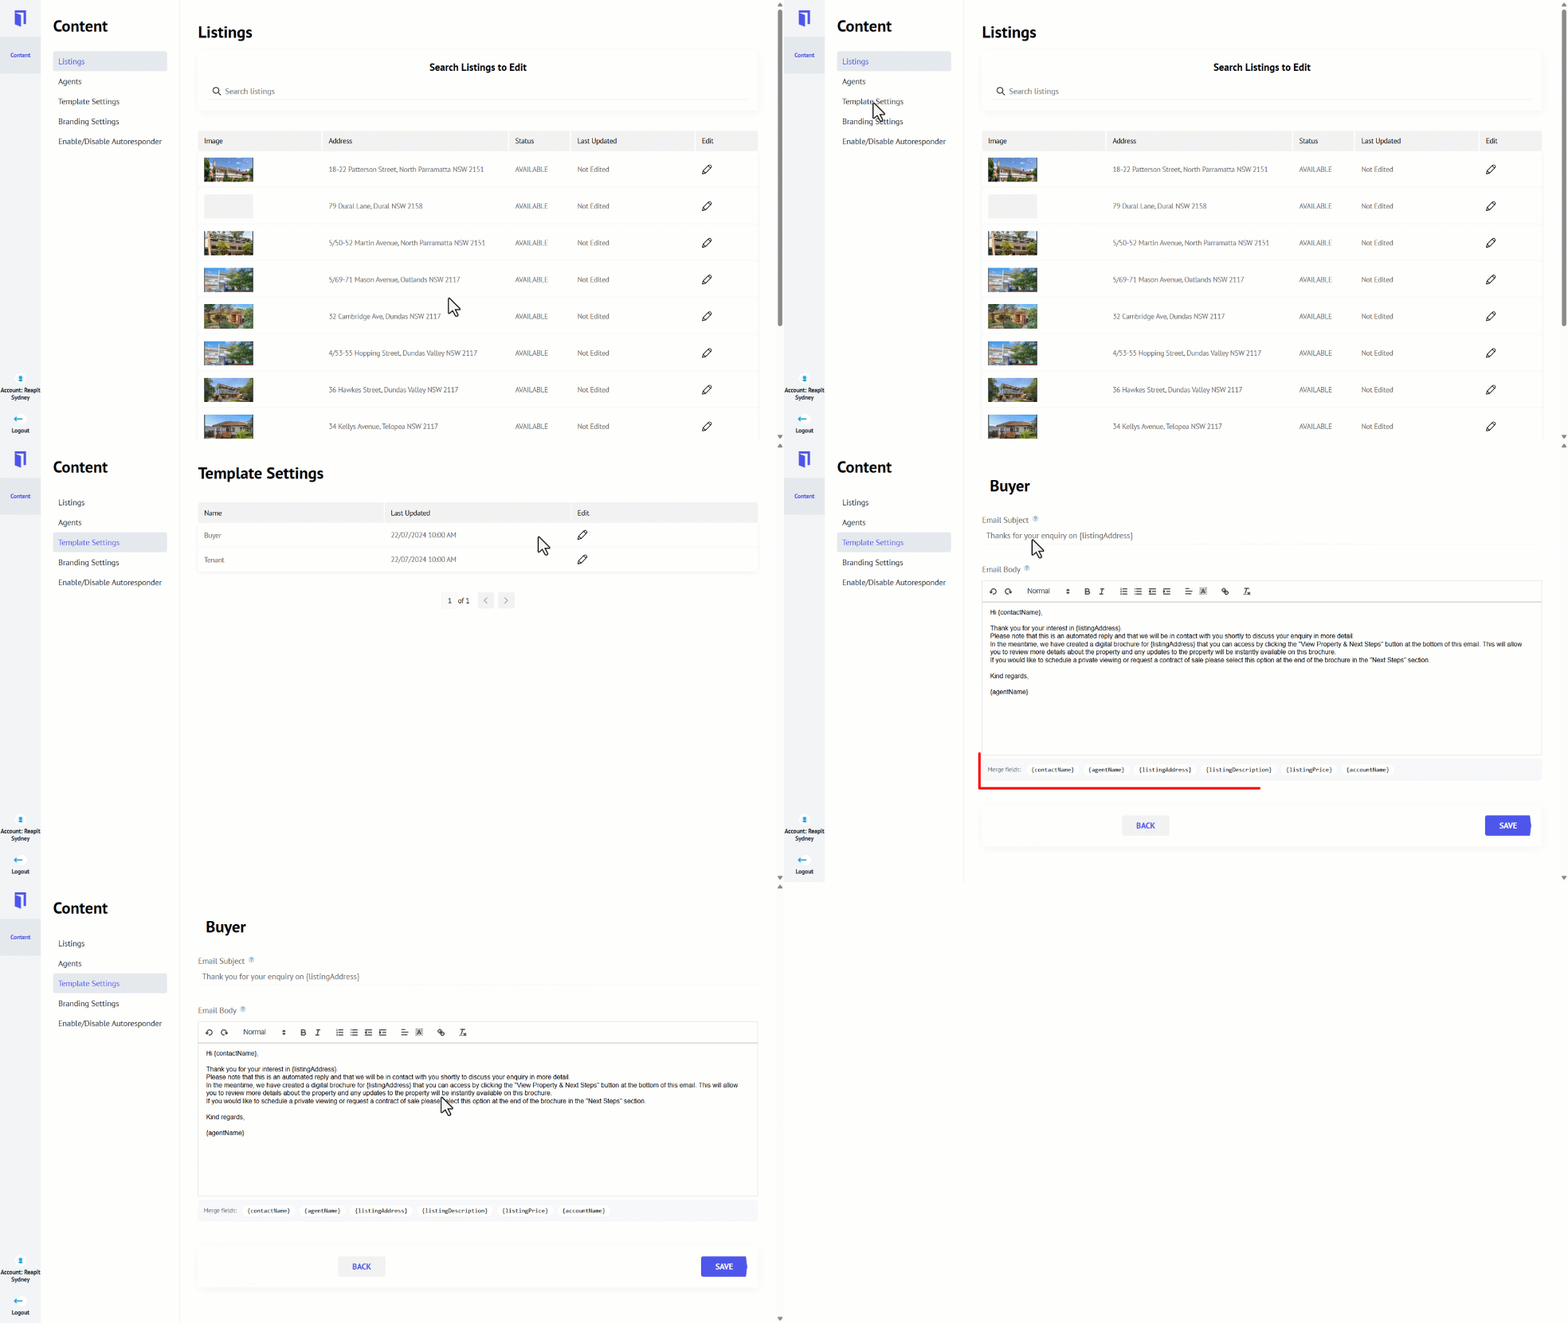
- Click on Content.
- Click on Template Settings.
- Choose either the Tenant or Buyer Pencil Icon.
- Modify the default message and subject line according to your business needs.
- Confirm the use of merge fields is correct. They include:
- {contactName}
- {listingAddress}
- {agentName}
- {lisingDescription}
- {listingPrice}
- {accountName}
- Add a link to the email body by right-clicking, selecting the link icon popup, or using the Ctrl+K shortcut as required.
- To finalise, click Save to confirm your autoresponder content.
Note: By navigating to the question mark next to each line item, you will find a description of that particular section functionality.