Reapit Connect Multi-Factor-Authenticator (MFA) User Guide
This article outlines the steps to setup a MFA app and MFA access to your Reapit Connect account.
Important: Before you begin, you will need an authenticator app. Either an app on your phone or a browser-based authenticator. You should check with your IT Department if they have a preferred Authenticator app for your organisation. If you do not have a preferred app, please see a list below of commonly used apps.
Please note: Reapit do not support third party authenticators.
- Microsoft Authenticator App for IOS or Android
- Google Authenticator for IOS or Android
- A password manager like 1Password
- Browser-based Authenticator
Microsoft Authenticator App
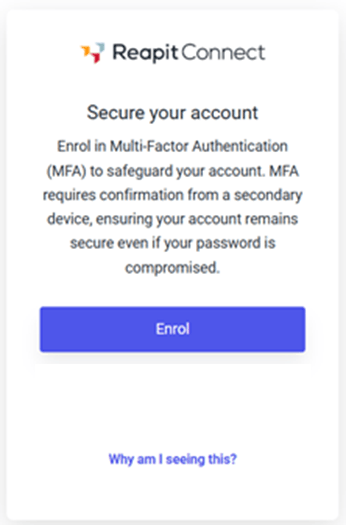
- When presented with the following screen, select Enrol.
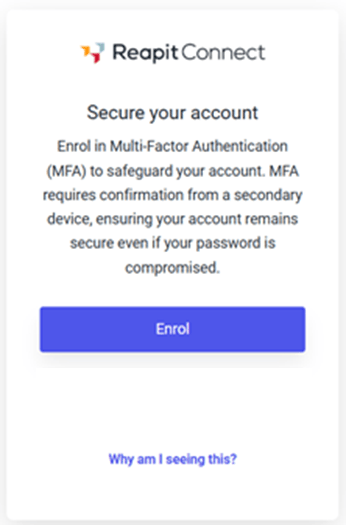
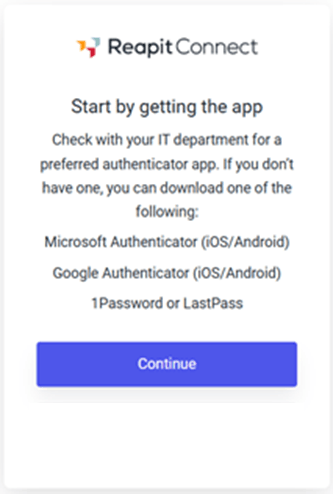
- Select Continue on the Start by getting the app screen.
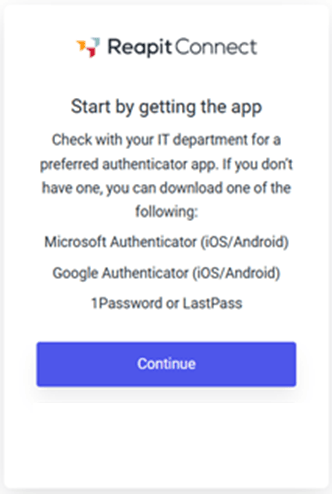
- You will be presented with a QR code.

- Open your Microsoft Authenticator app and select the QR Icon (or +).

- Scan the code provided by Reapit Connect.
The Microsoft Authenticator App will read and register the QR code and setup an account under Reapit Connect.
Example showing Reapit Connect has been successfully registered:
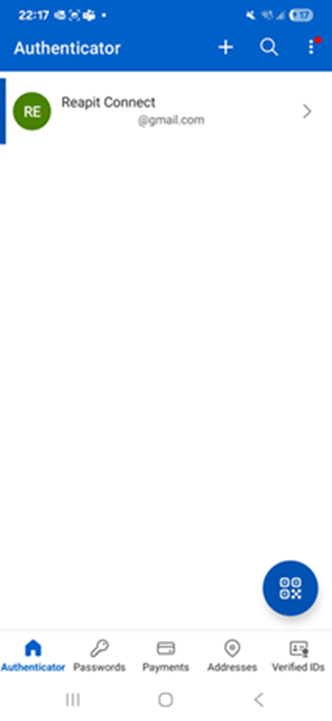
- Select the account and enter the One-time password code into Reapit Connect
One-time password code example in Microsoft Authenticator App:
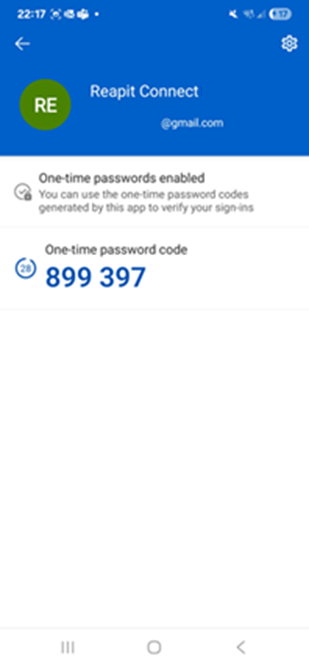
- After entering the One-time passcode into the Reapit Connect window, Click Continue to successfully enrol your Reapit Connect account into MFA.

Logging in
The next time you log into Reapit Connect, you will be prompted to provide a passcode from your authenticator app, before you can continue.
Example screen when a Reapit Connect account has enrolled in MFA:

Authenticator (Google Chrome browser-based extension)
- Add the Authenticator chrome extension by clicking here, and select Add to Chrome.
- Login to Reapit Connect and when presented with the Secure your account screen, select Enrol.
- Select Continue on the Start by getting the app screen.
- You will be presented with a QR code.
- Select the Authenticator icon from your browser toolbar.
Note: If the authenticator app doesn't appear in your toolbar, please follow the instructions at the bottom of this page for pinning to your toolbar.

- Click on the Scan QR Code icon.

- Scan the code provided by Reapit Connect.
The Authenticator app will read and register the QR code and setup an account under Reapit Connect
Example showing Reapit Connect has been successfully registered:
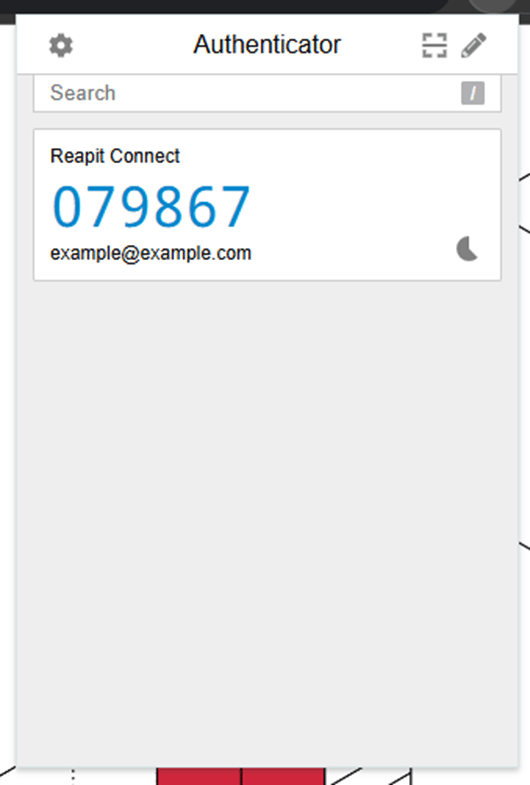
- Copy the code and enter in Reapit Connect.
- Click Continue to successfully enrol your Reapit Connect account into MFA.

Logging In
The next time you log into Reapit Connect, you will be prompted to provide a passcode from your authenticator app, simply click on the authenticator app to obtain the code to continue.
Example screen when a Reapit Connect account has enrolled in MFA:
How to pin the Authenticator app to your toolbar
- Select the settings icon in Chrome (three dots located on the top right-hand side).
- Click on Extensions > Manage Extensions.
- Click Details on Authenticator.

- Change the toggle on Pin to toolbar.
